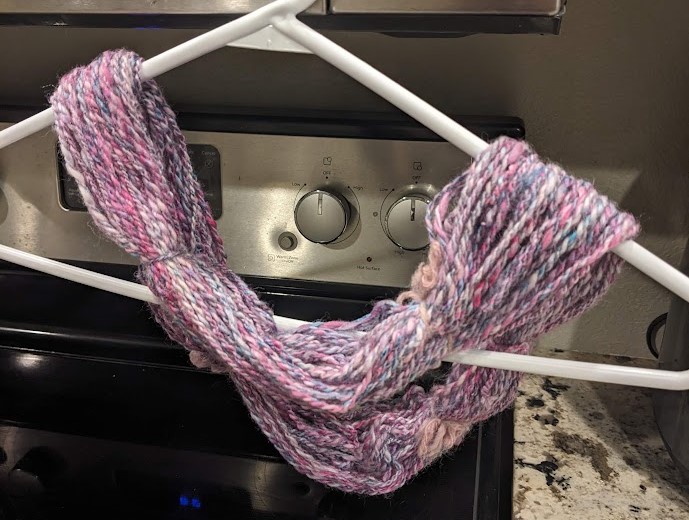
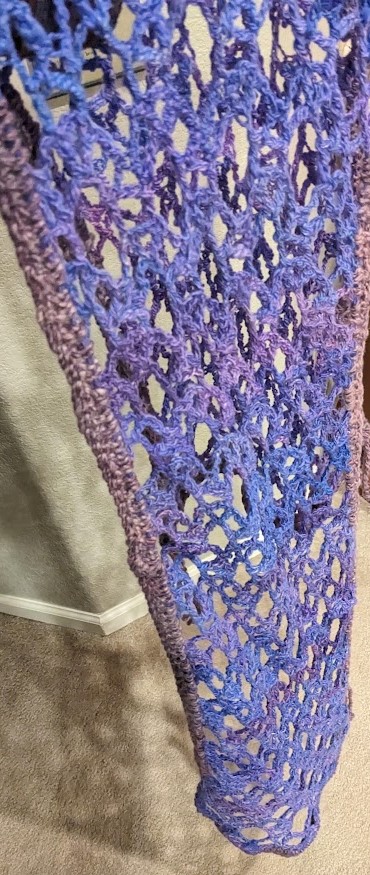
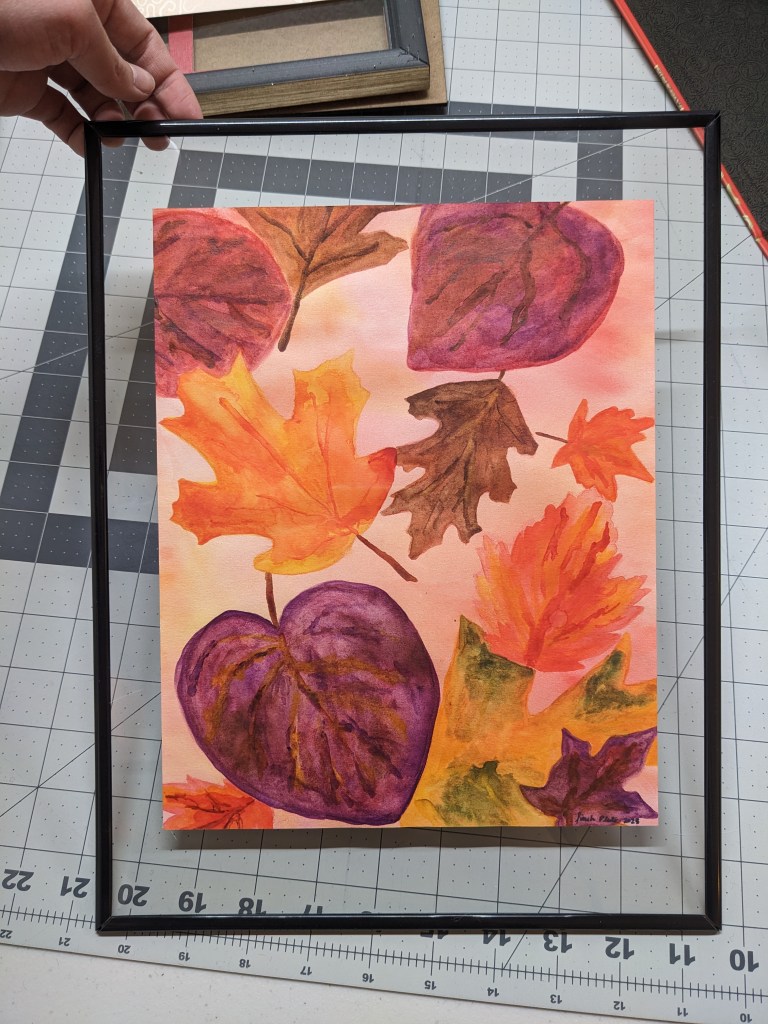
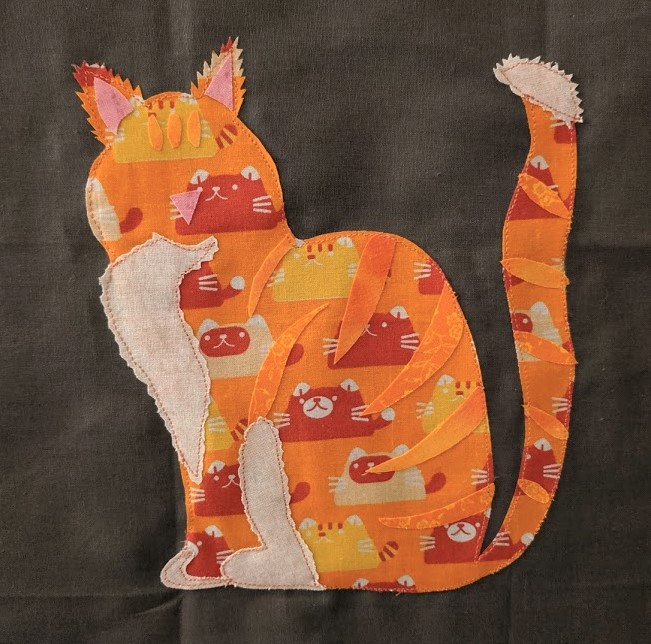
I’ve mainly been working on New Years gifts recently, so here are some sneak peeks:
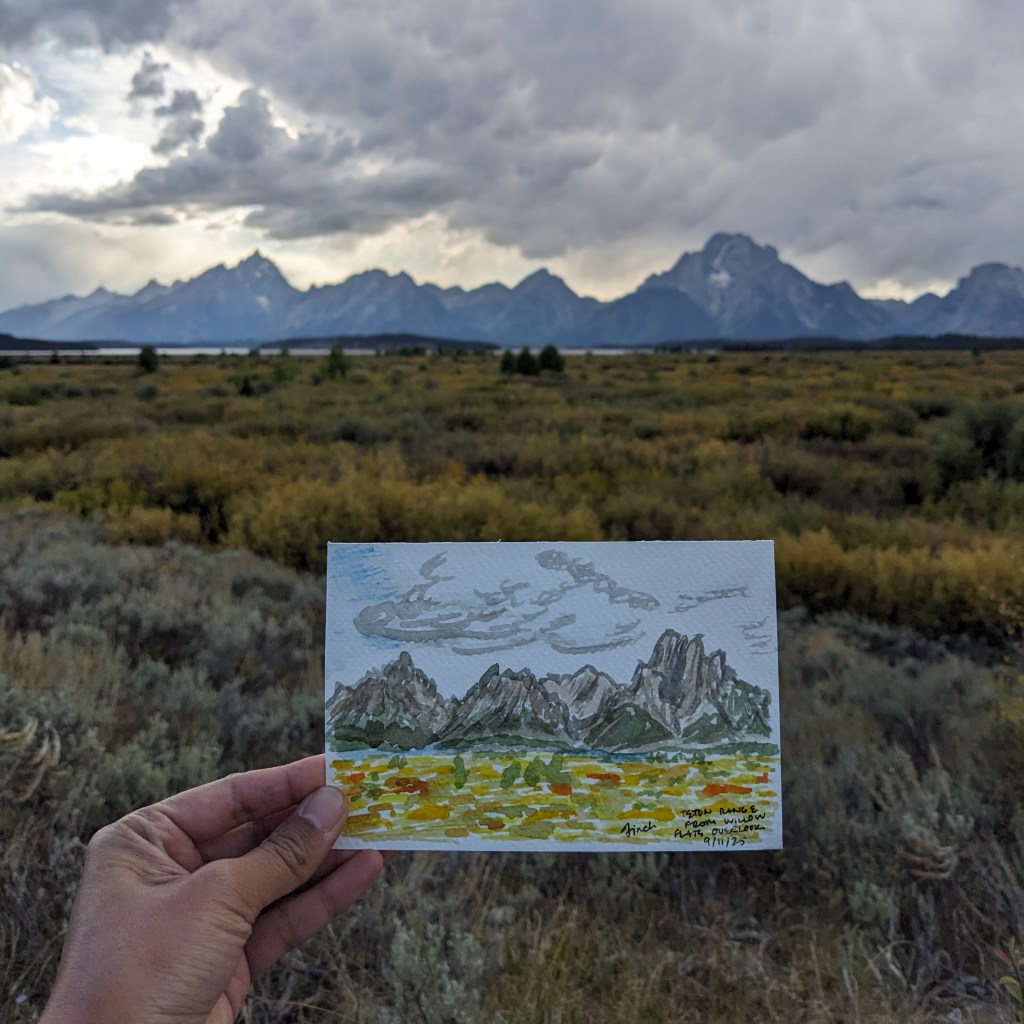
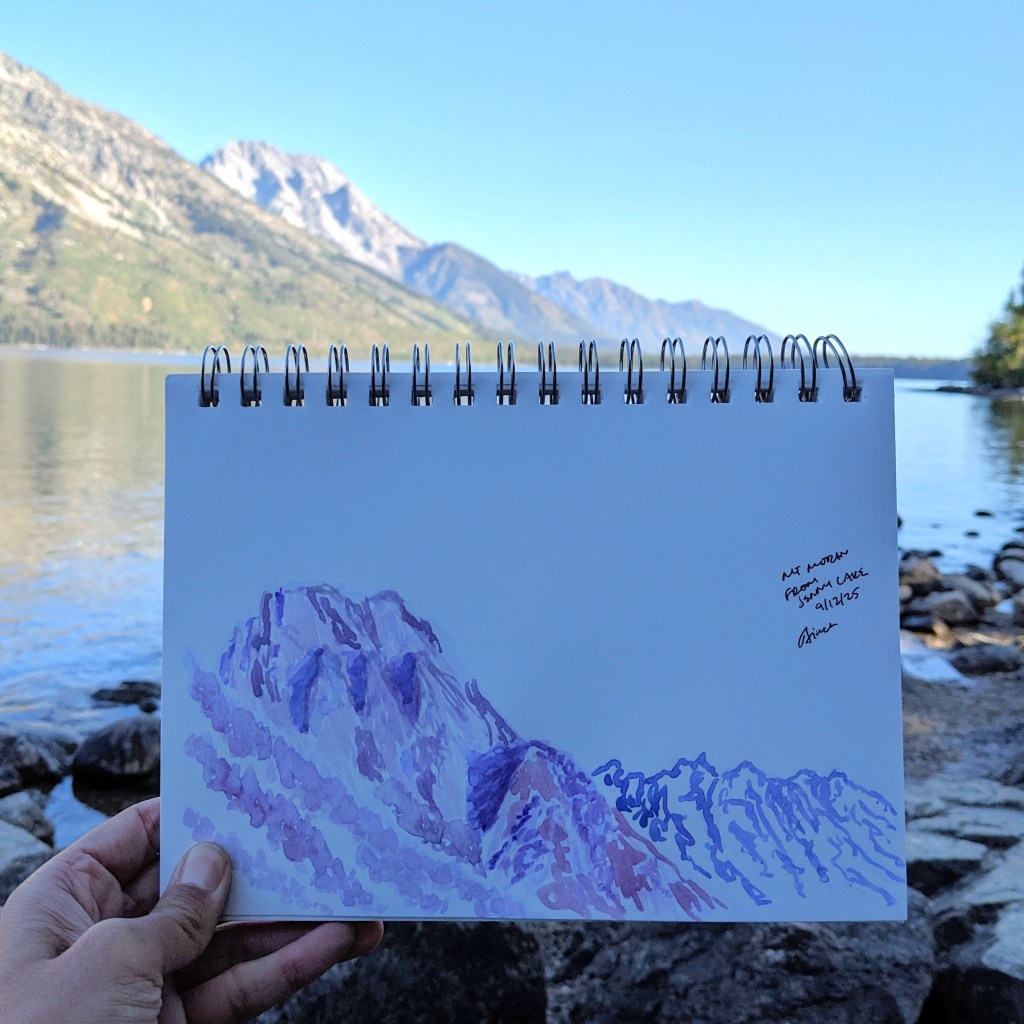
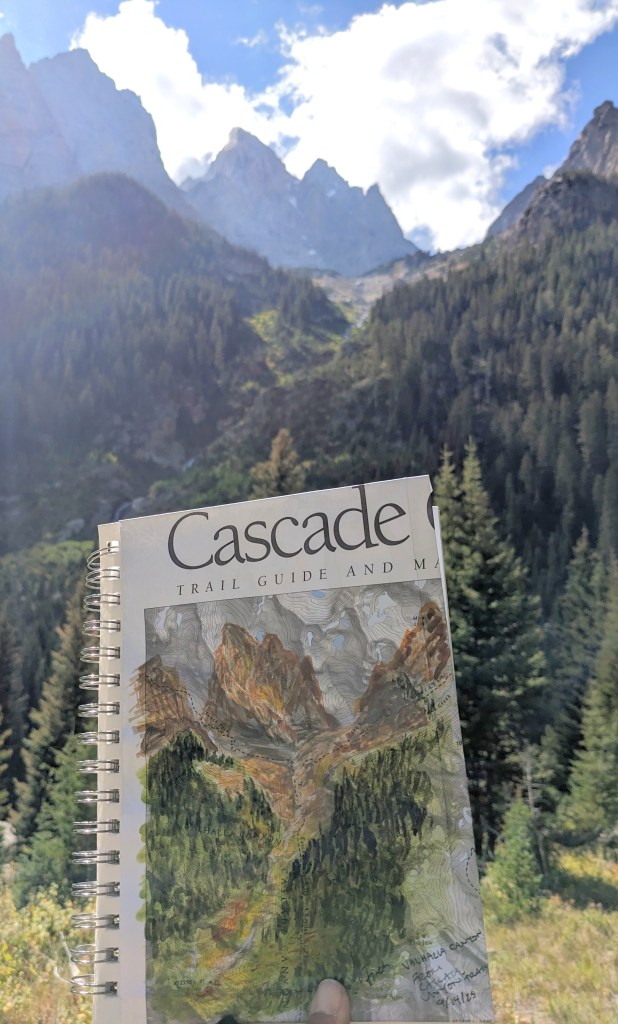
I jumped at the chance to go to the Grand Tetons again with family and did some fun watercolor:
from Willow Flats OverlookMt. Moran from Jenny LakeValhalla Canyon from Cascade Canyon Trail, LOVED painting on my map
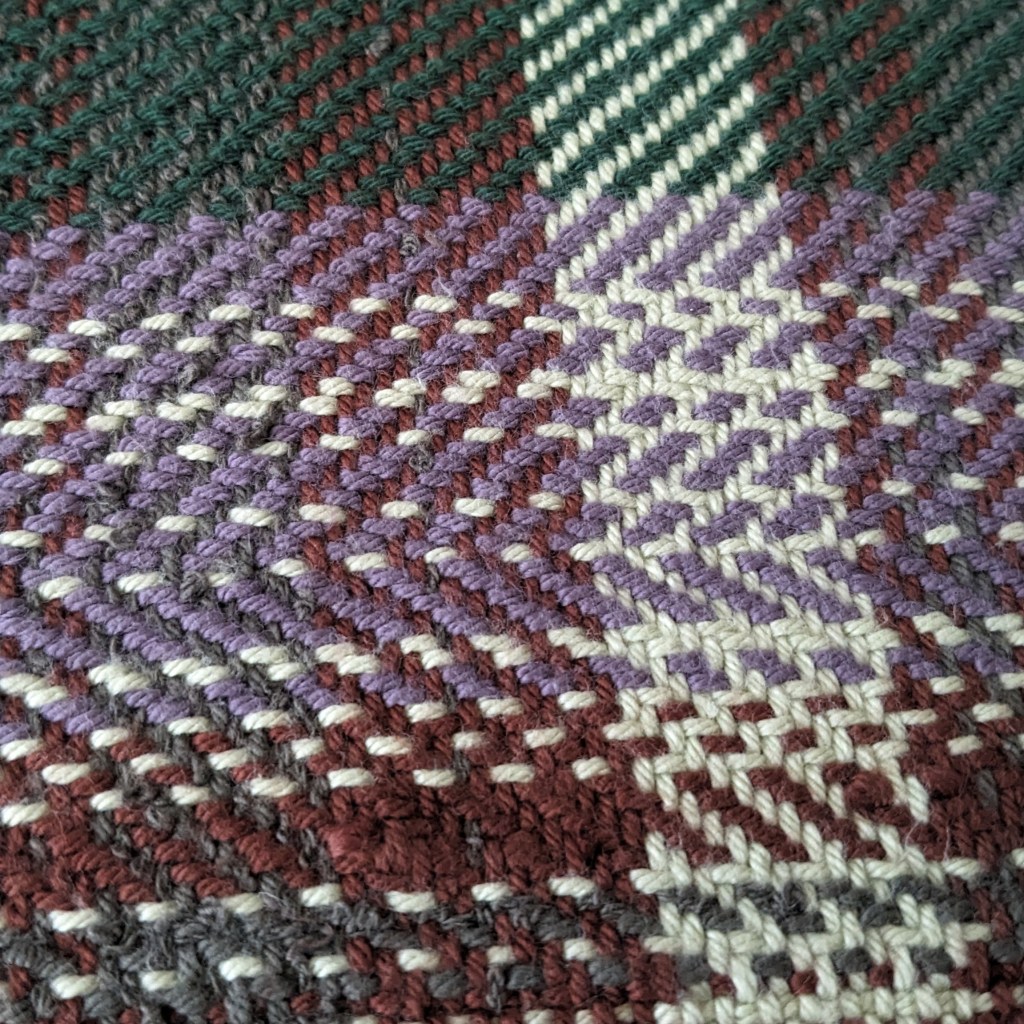
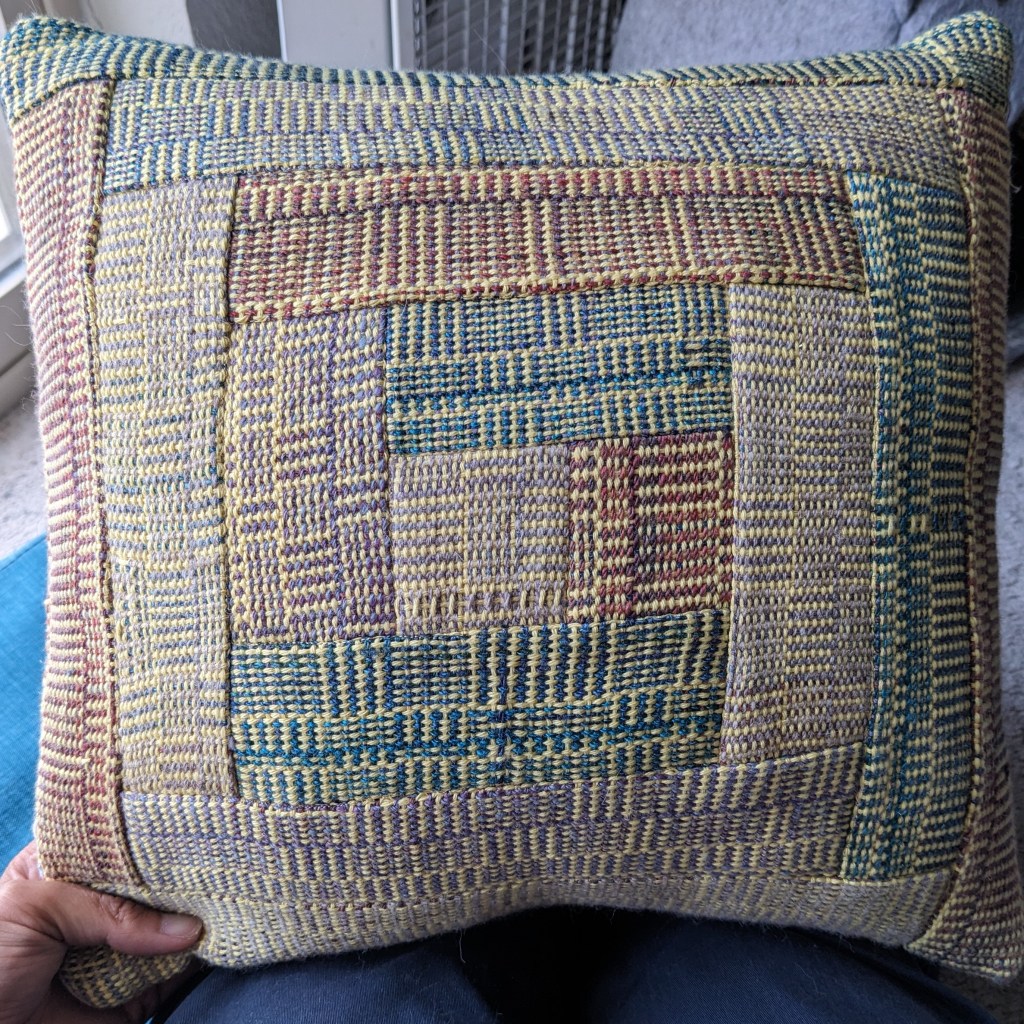
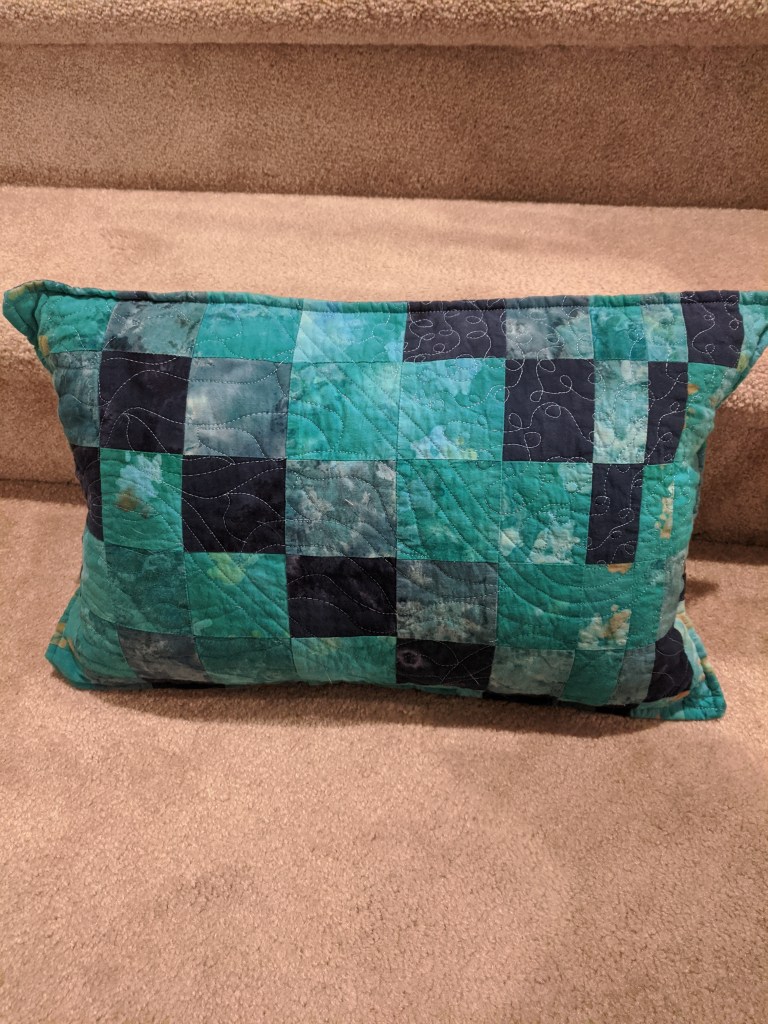
I wove my first “log cabin” pattern using handspun accent yarn and yellow commercial cotton, bravely cut it into strips, and quilted it using the “log cabin” block 🙂 so it’s my log cabin of log cabins pillow now.
I didn’t make my blocks even, it was much more fun to switch the pattern improvisationallyI could do with a little more contrast between the yellow and the other yarns, but I like it 🙂
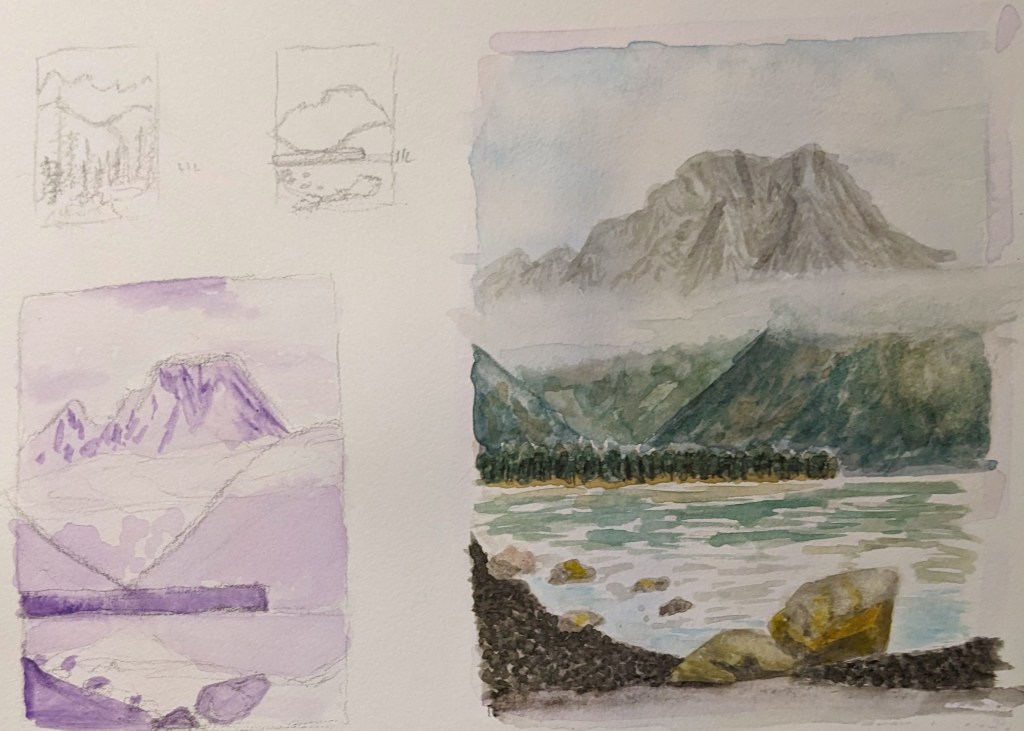
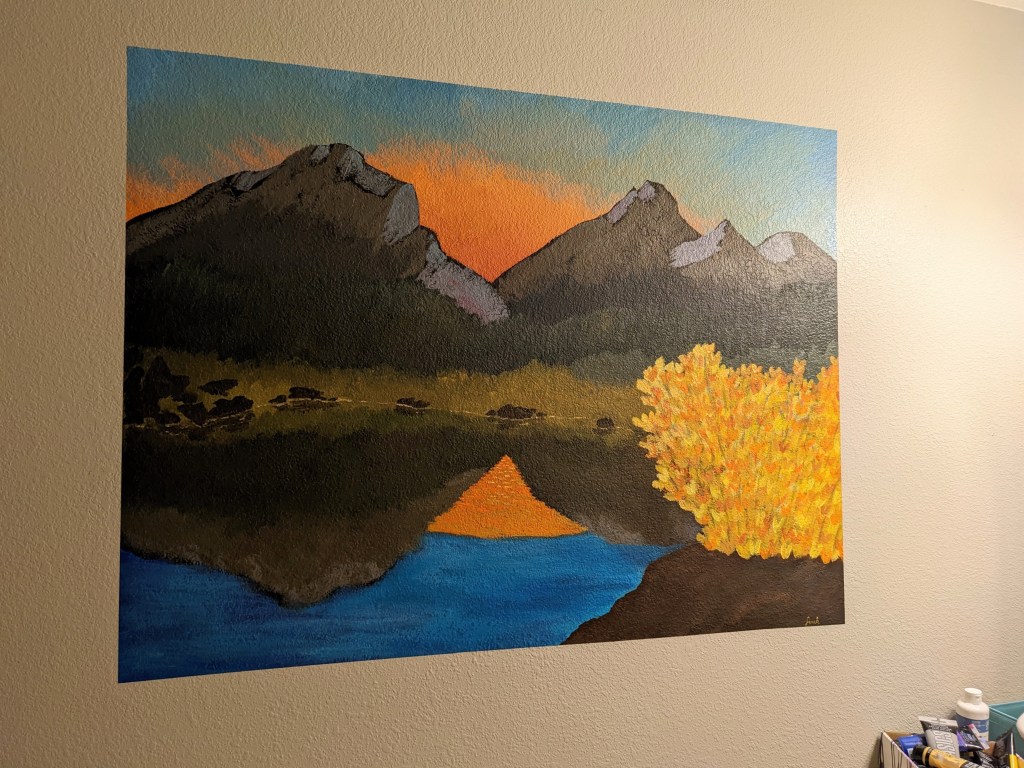
I attended a landscape watercolor class at my local art museum, which was SUPER helpful and taught me a lot of new techniques. I think one of my main takeaways is that planning a piece *does* help, and makes sure you’re capturing the things you find important. This includes planning the contrasts, and where your dark and light colors will be. I have been mainly preoccupied with shadows, but have ignored the contrast between back/mid/foreground, which helps guide the eye across the work as a whole. As I looked back through my field book, I found that I tend to ignore the mid and foregrounds, opting to simply look into the distance and draw the mountains I see. But… adding context adds depth and interest to the piece, so I’m now looking with new considerations in mind 🙂
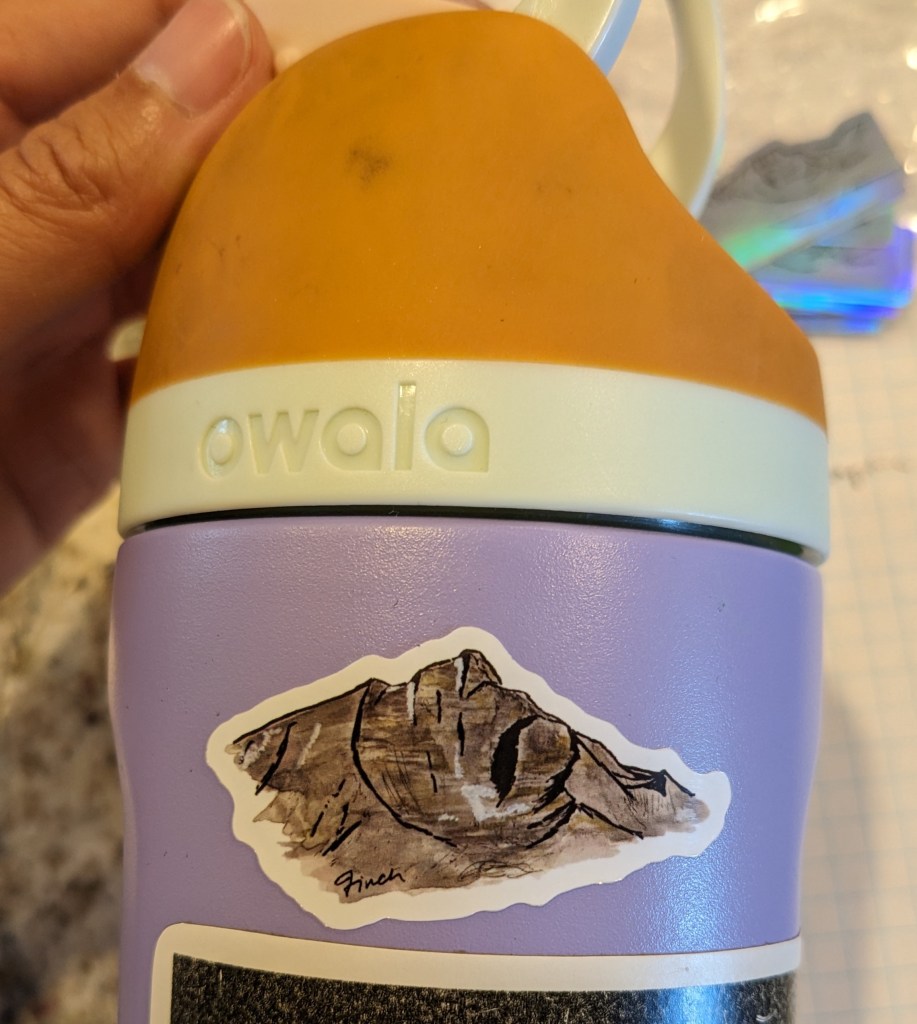
I’m actually quite impressed with myself for this little piece… now to bring these skills outside
I also made some stickers of my art! Which is so fun!
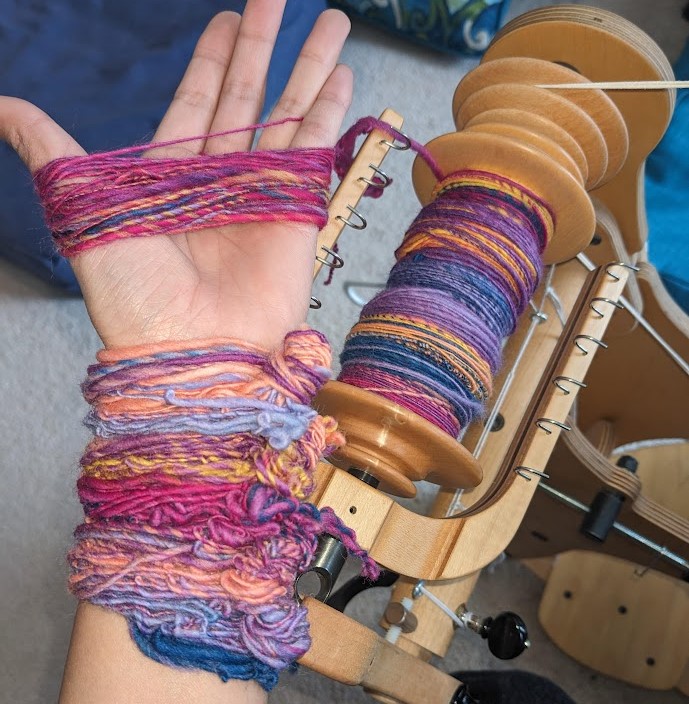
The yarns for this project were inspired by Sky Loom, a Native North American poem set to music by Jean Ford Belmont.
Oh our Mother the Earth, weave for us. Oh our Father the Sky, Weave for us a garment of brightness; May the warp be the white light of morning, May the weft be the red light of evening, May the fringes be the falling rain, May the border be the standing rainbow. Weave for us, our Mother the Earth, That we may walk fittingly where birds sing. Weave, oh our Father the Sky, That we may walk fittingly where grass is green. Oh our Mother the Earth, Oh our Father the Sky, Your children are we, and with tired backs We bring you gifts, We bring you the gifts that you love.
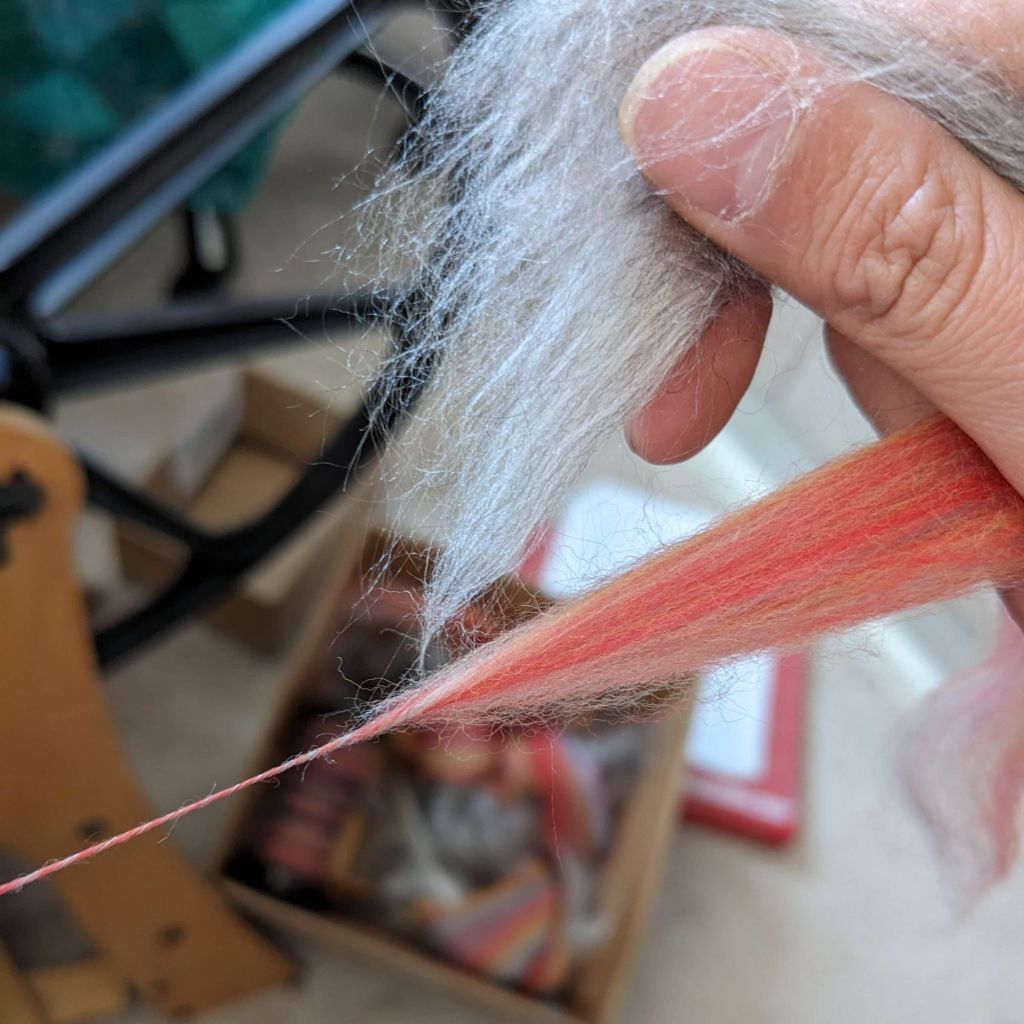
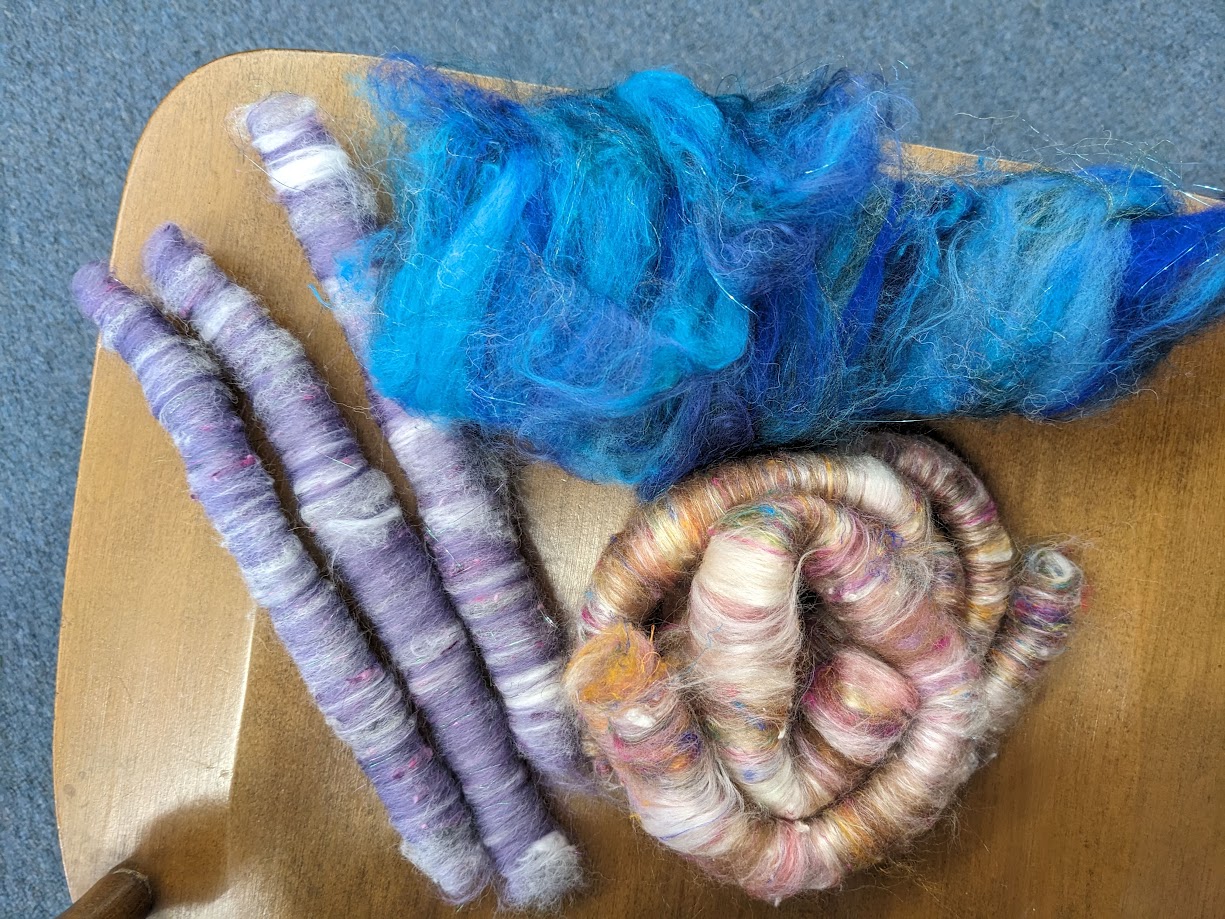
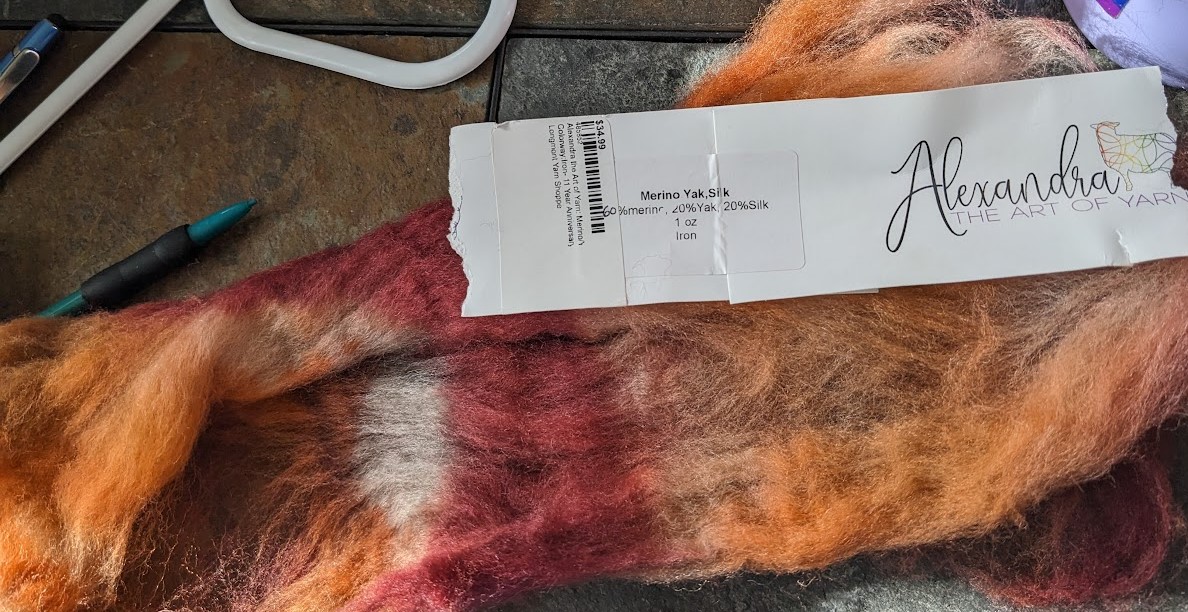
As a new weaver and less-than-fully-confident spinner, I bought commercial mercerized cotton warp for the white light of morning; it is strong and beautifully shiny. All the other yarns in this piece are handspun. 🙂 I used pre-blended and dyed wool and silk for the red light of evening, mixing light and dark gray with the dyed wool to introduce clouds and variation.
I “double held” the fiber to randomly blend the shiny into the mix
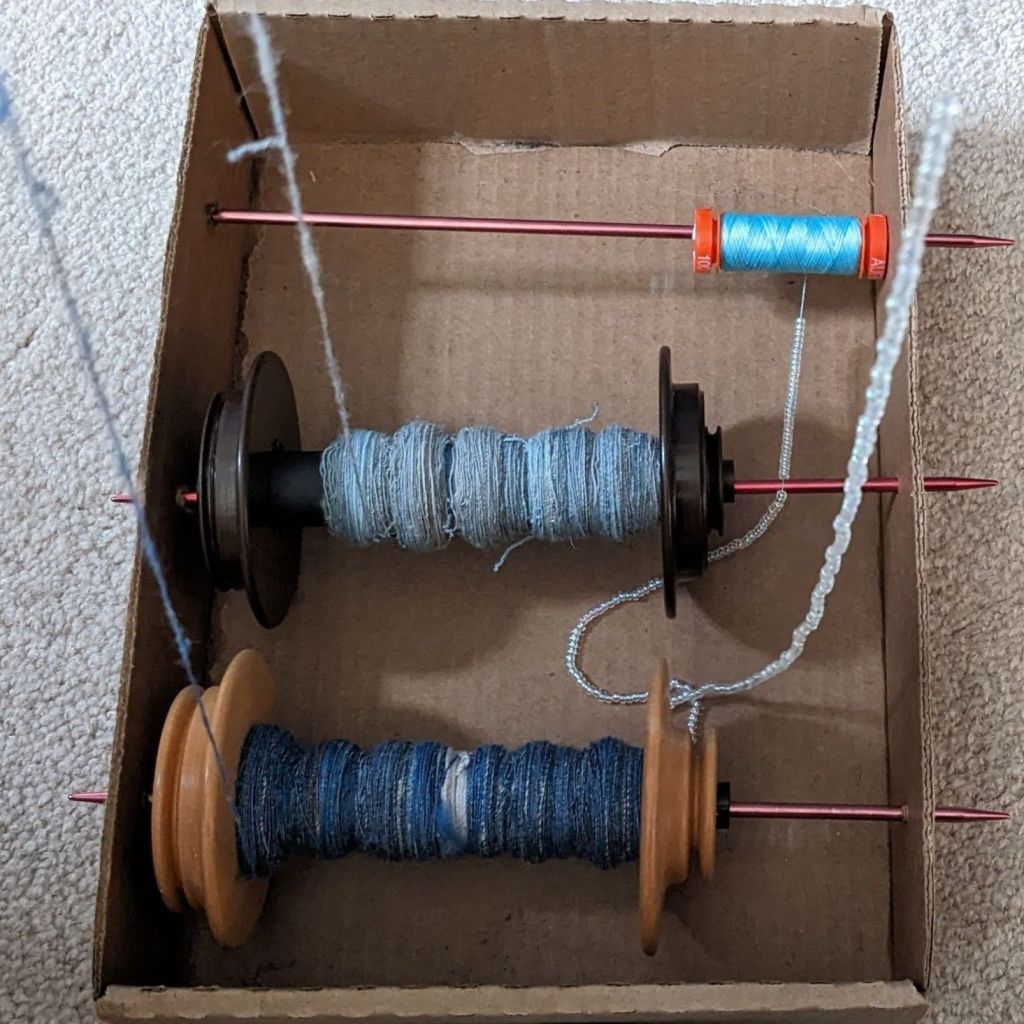
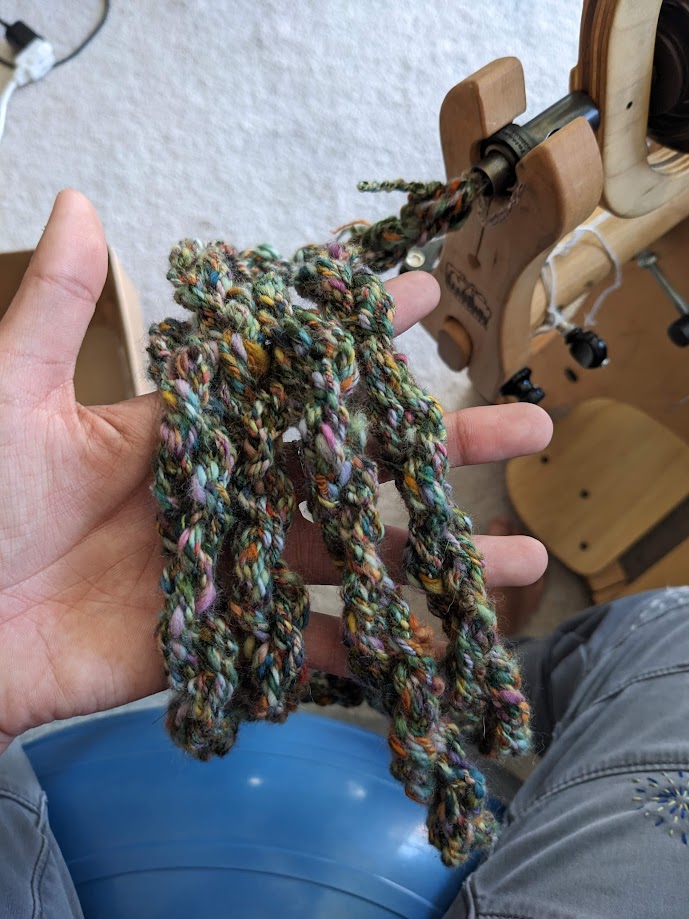
I had some extra gray silk and some random scraps of blue fiber, so I blended those together and spun a light blue and a dark blue ply on my drop spindle. I added a blue thread with shiny clear beads, and plied all three together for the falling rain.
Plying setup with two wool/silk/random singles and the beaded thread.
I usually buy fiber online, but I really needed to match the standing rainbow to these other color blends, and I knew that had to happen in person. I went to a local fiber fair and found what I needed at the first booth I went to. 🙂 dark enough to stand out against the red light of evening, bright enough to really be a rainbow. I specifically spun the standing rainbow to be thicker than the red light of evening, so that it would be puffier and stand out as a pattern yarn. I also chatted with some other spinners, who helped me figure out a more ergonomic way to spin at my wheel, which has really improved my experience.
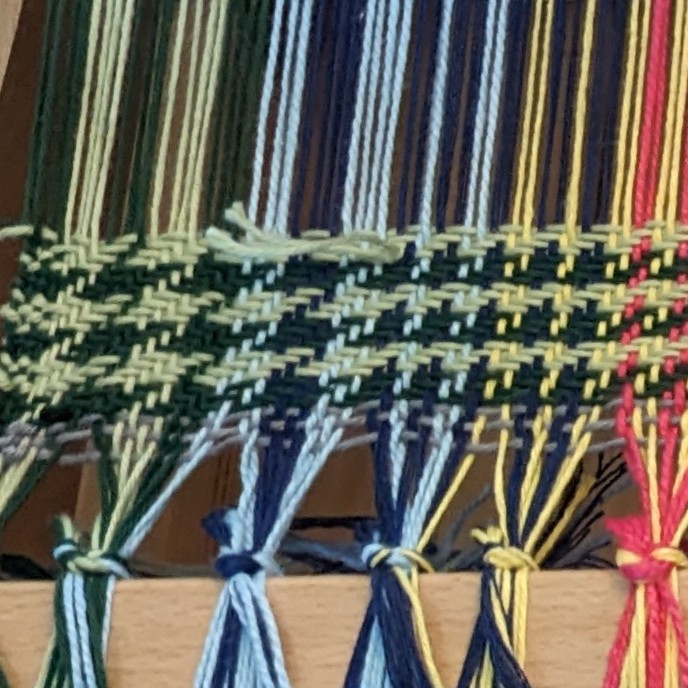
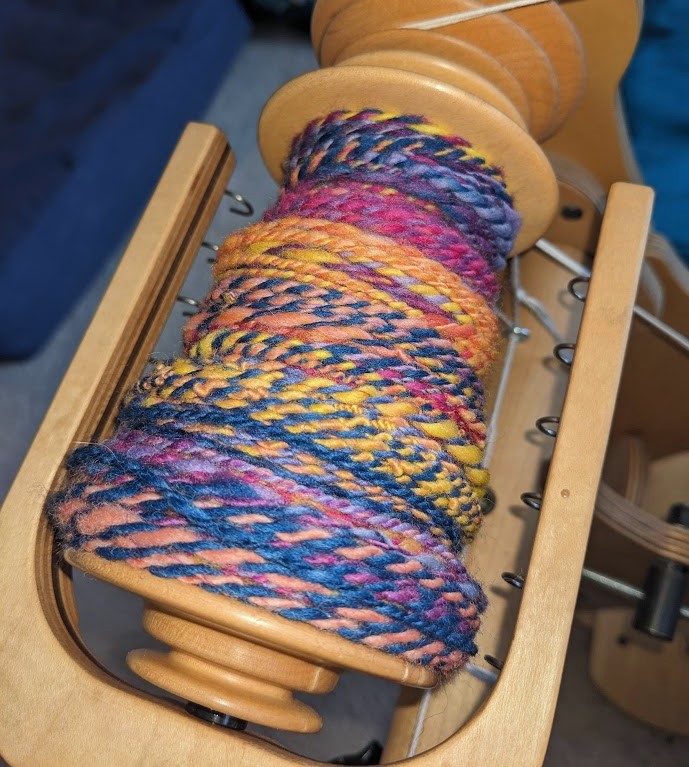
I wanted the pattern border of the standing rainbow to somehow depict the notes in The Road Home. I’ve performed this song multiple times now, and each time it’s a bit different, I have a different conception of home and what it means to me. I know more and more the “beauty of where you belong” and where I find it. I went back and forth a lot about *how* to execute the pattern. I thought about using my 8 shaft loom as a way of depicting the 8 note scale, a 24 to 30 pattern thread section like a patterned band, something with chord progressions… I wanted to have an item that could function like a piece of sheet music, that depicted the way the notes are arrayed on the page, and then in the voice, in pitch and time. Since the border was going to be a fun pattern, I decided on plain weave (over under, under over) for the red light of evening weft to make it easier to weave, visually consistent, and structurally sound.
I struggled with the format for this project for a while, debating what I wanted and how it would need to be executed while I spun all my yarn. Sky Loom is about a garment, but I didn’t want to make a garment in these colors, and I knew it would end up being delicate and/or non-machine washable due to the uneven fiber shrinkage (wool vs cotton) and possible pattern floats (where yarn is free and not woven in). I talked it over with a friend and they suggested a table runner! This was the perfect solution and I was immediately invigorated.
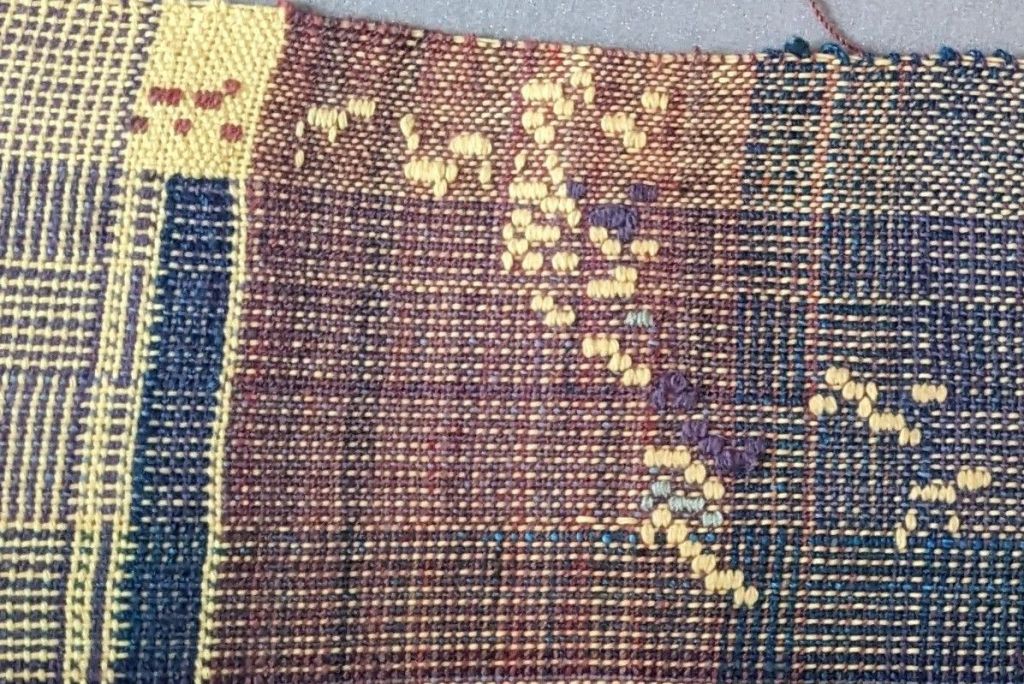
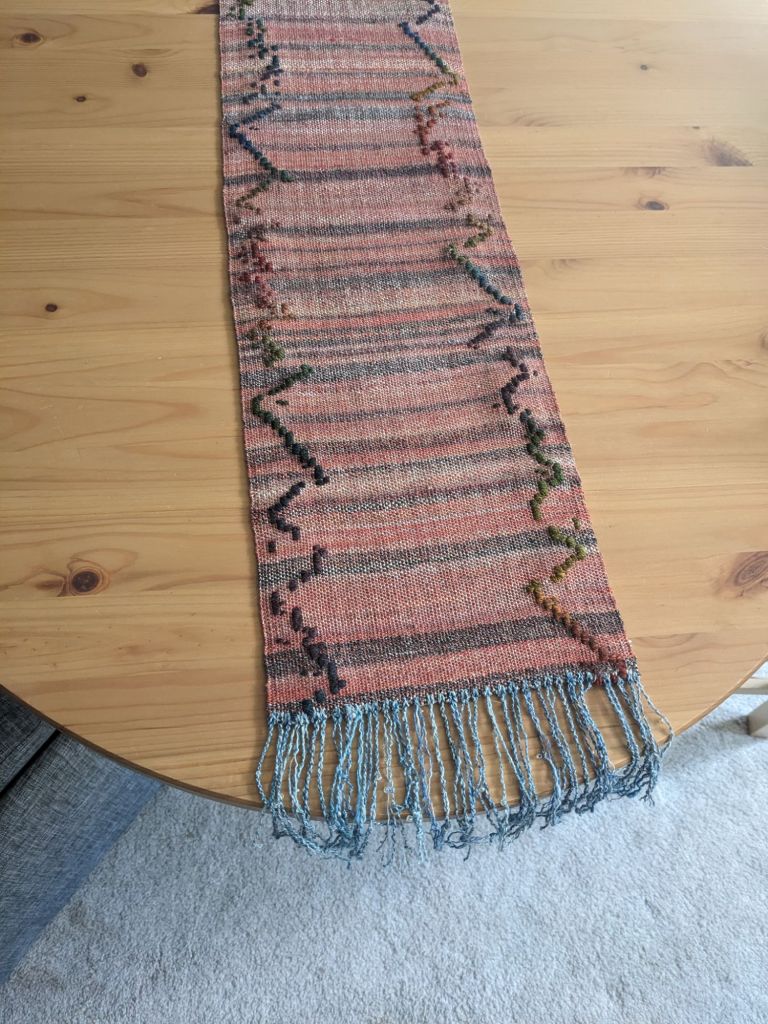
By choosing a table runner, I could have long floats if necessary, since the piece wouldn’t be undergoing much wear and tear. It also defined the dimensions and proportional border width. I decided to be responsible and weave a sample to test out some different techniques and arrangements for the pattern. I quickly realized that weaving a pattern with all the voice parts on the same row was visually overwhelming. I think it might have been easier on the eyes if I had kept going and the ratio of the width to length was different… But I switched to doing one part at a time. Also, most of the parts have at least some undulation up and down their range, so it actually looks more like a standing rainbow, or wiggling rainbow, as it were. The bass part, the lowest voice part in the choir, has the most clear up/down pattern, so I alternated it with the other voice parts that are less visually clear to have more continuity. I used a weft inlay that wraps around two warp threads; the position of the inlay represents the pitch, and each row is an eighth note in the piece. So, looking from the side of the table runner, with a starting pitch, one could use the border as a depiction of what to sing.
Two sections with all five parts next to each other; even using different colors it was way too busy
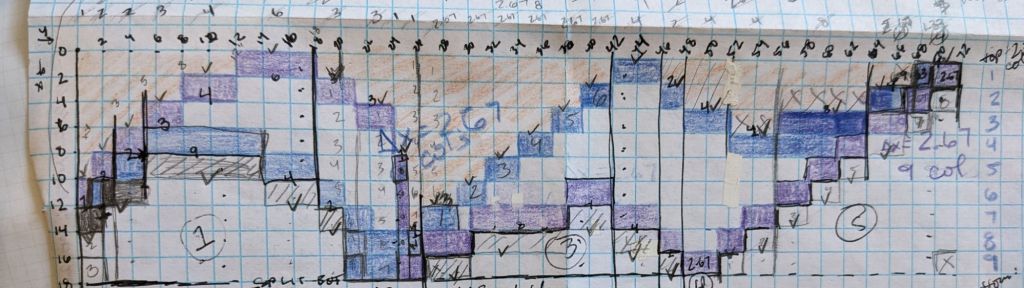
From weaving the sample, I knew I needed a special “paper pattern holder” to help me keep track of what line I was weaving – the third verse was 122 rows of non-repeating pattern. I used some scrap binder dividers that were translucent and cut and folded them so that I could see 2 rows at a time through a little window. The translucent quality let me verify what I’d just woven if I needed.
Then I just pulled the paper down, two rows at a time
I was able to weave it much faster than I thought! Each verse, the 122 rows, took a little less than an hour – here’s a 1.5 minute video weaving a few rows. I used up all the weft I spun, though I did have to cut the finished piece down to size so I suppose I had extra weft. As always, weaving in all the ends from the rainbow and the cut ends of the warp was super annoying, but necessary. The finishing touch was the falling rain fringe, which I attached using cow hitch knots. I twisted some of them into tassels, left some loose as individual strands, and un-plied some so the fiber would expand and fluff out 🙂
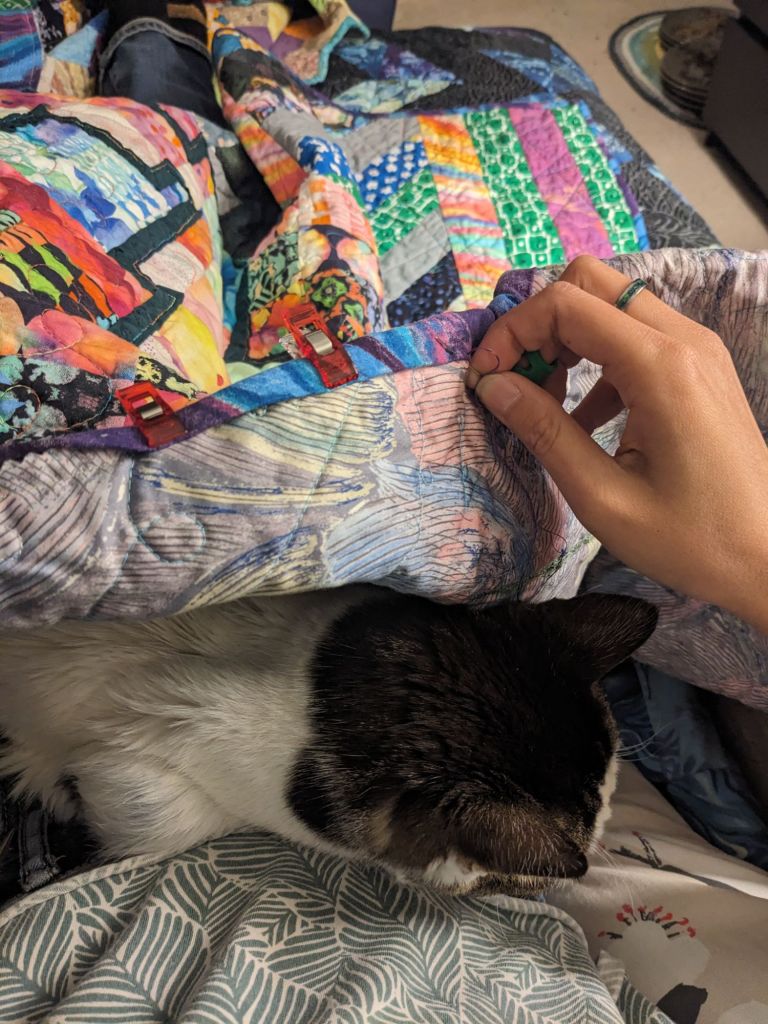
My front door is not completely airtight. I tried getting some foam strips to put inside the doorframe, but then I couldn’t close the door. I thought about, and started, a crochet tube that I could hang on the hinges to block the most air from getting in…
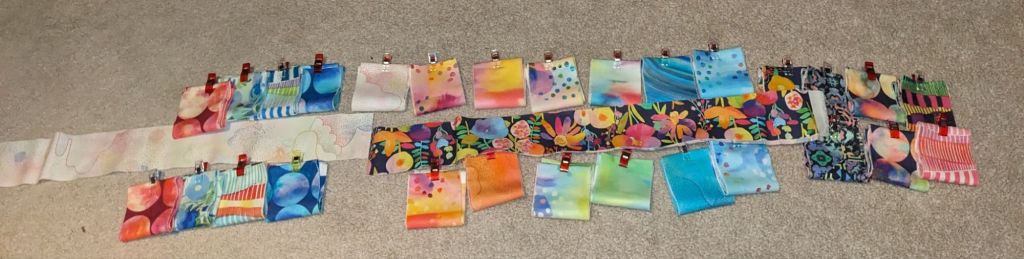
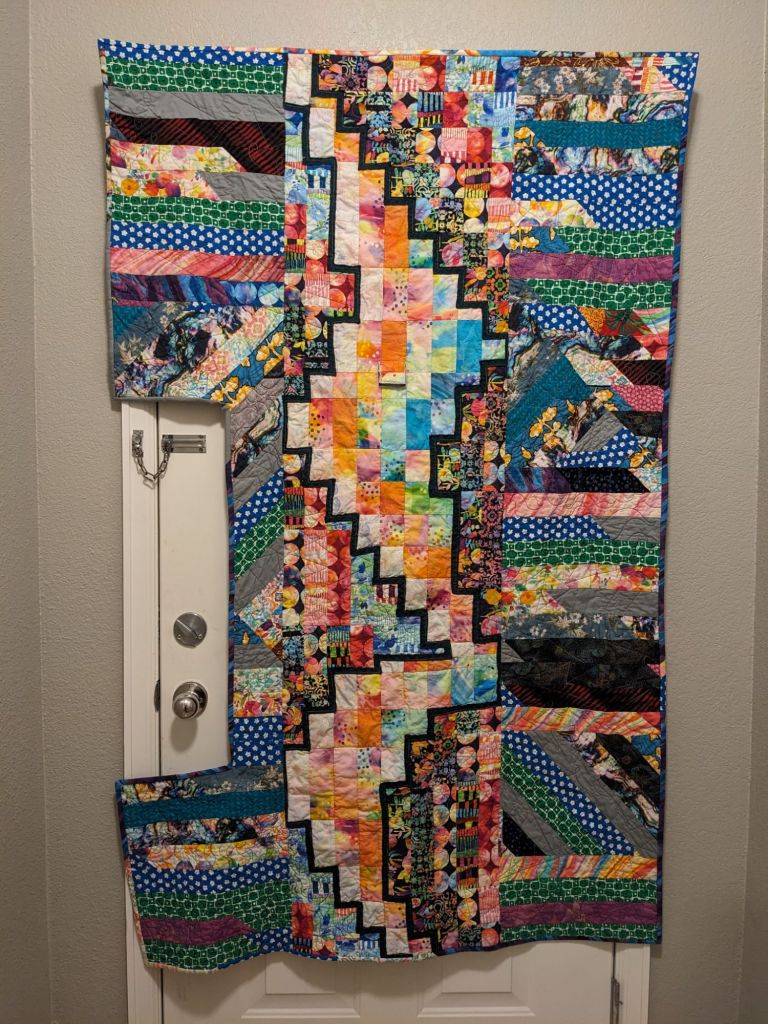
But in the end, I decided a quilt that could cover most of the frame/door gap would be the most effective, most fun, and most aesthetically pleasing. I had a jelly roll from Moda Fabrics and decided to do a bargello-ish quilt. I wanted to depict a quarter rest, since I am a musician and I want my home to be a place of rest. A place between all the noise and chaos and effort-giving to rest, restore, relax.
I sketched out the shape on graph paper and determined the widths of the strip sets. I used two “leading edges”, one for the left side of the rest (white) and one for the left side of the background that bounds the rest (dark flowers). I used lighter and less busy prints for inside the rest, and the darker and busy prints for the background.
The blue and purple edges are the rest, so the top edge in the picture is the left edge of the rest, and the gray blocks below the bottom edge are the background stripsRest fabric in the middle, with the busy background fabrics to both sides
As with a normal bargello, I assembled the strip sets and then cut them to the corresponding widths. The jelly roll didn’t have duplicates of all the fabrics, so I alternated the ones that didn’t have exact matches. Then I pressed the seams to alternate, and sewed the strip sets back together.
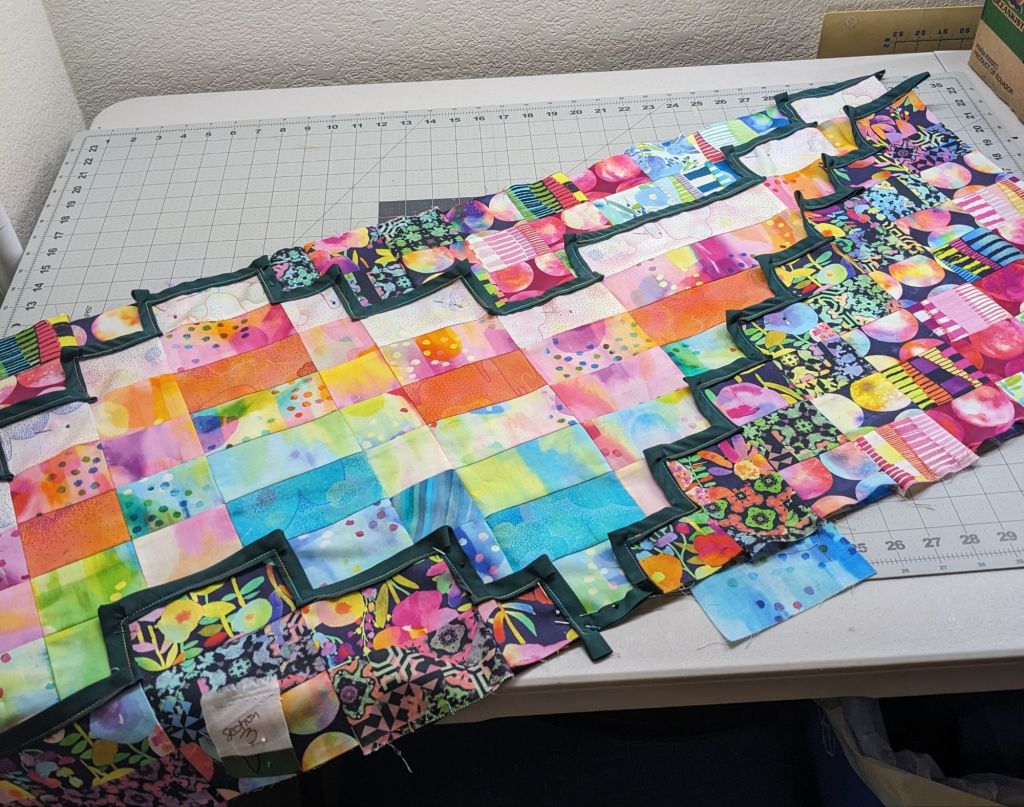
After some consideration, especially using a black and white filter on my camera, I decided the edges of the rest needed a tiny border to really make it stand out. I attached a strip of dark green as if it was bias tape, sealing the raw edges of the strip sets inside. Then I appliqued the background onto the right side of the rest, ripped off the unneeded background, and appliqued the rest into the extra background.
Pinned and ready to be appliqued – I used dark green thread and went right over the dark green stripsYou can see the excess strips from the “rest” bargello portion sticking out on the right side
So that was the rest part, the middle part, done. I still needed two sides to make the quilt large enough. I cut a bunch of 2.5″ strips out of scraps and did a “jelly roll race” type of construction to make a big panel of stripes. Seeing as this area was meant to be busy and chaotic, I cut the panel and re-sewed it together on an angle a couple times. Then I split the panel in two for the two sides, and sewed them onto the middle rest panel.
Then it was time to quilt! I did my most confident free motion motifs: loops, “toothpaste”, and abstract geometric, and switched thread throughout. I liked just doing some freeform, unstructured quilting and filling the space with whatever I wanted. For the rest, I did free motion stitch in the ditch because I needed to change angles often and didn’t want to deal with moving the whole quilt 90 degrees every few inches.
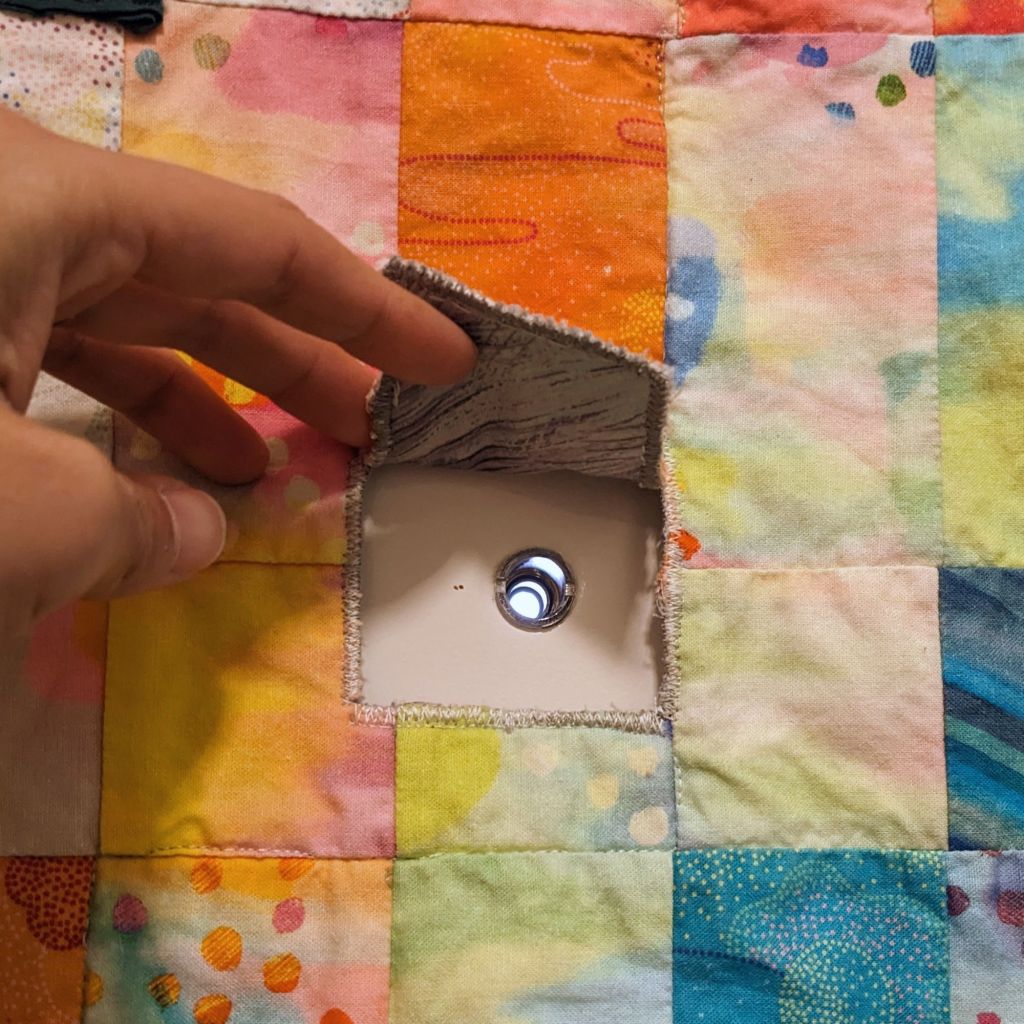
I had to do two nerve wracking cutouts – one for the door handle and chain, and another for the peephole. I measured multiple times and then bravely cut once. 🙂
Peephole cutout 🙂 so strange to take the scissors to a finished quiltHand sewing the binding to the back with the friendly helper
To affix the quilt to the door, I made a little frame out of wooden yardsticks (my quilt hanging devices of choice) and screwed it into the door. I used fabric loops to hang the quilt on the frame. And thus, it was done, ready for the tail end of this winter and many winters to come.
Late 2023 I was in a yarn store with a friend, and they had “learn to spin” kits with a drop spindle on a table display. She gestured to me and said “look, you could learn how to spin!” and I said, immediately, “I DON’T NEED ANOTHER CRAFT!!!!”
Yeah so I have four spindles, a spinning wheel, and I’ve completed whole projects with my handspun yarn ❤
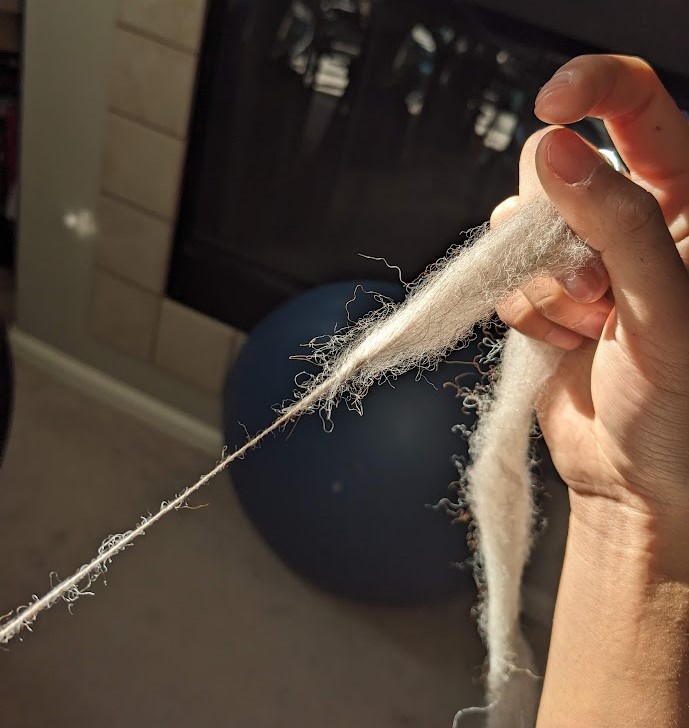
Spinning yarn is simply… simple. It’s putting twist in some strands of fiber, and holding that twist “energy” in the yarn. And it’s ancient. We’ve been spinning as long as there have been nets to hold and trap things, clothes to wear, and bags to weave. I find spinning with the spindle to be the ultimate, original fidget spinner (literally), and with a bonus that I’ve created something! It’s a great hand activity for podcasts and audio media.
Twist (left) travels up to the fiber (right)
I find the color blending is like doing watercolor “wet on wet” – you can have plans, but the medium itself executes the plan and introduces beautiful randomness that I couldn’t have made myself. This is especially true when doing a two-ply yarn – I spin one long string and (systematically) fold it in half, not knowing what the middle is going to look like at all!
Plus, I can make a lot of different textures – wiry, fluffy, thick, thin, varied, consistent… just a lot of experimentation and fun.
Fluffy yarn from my early spinning days
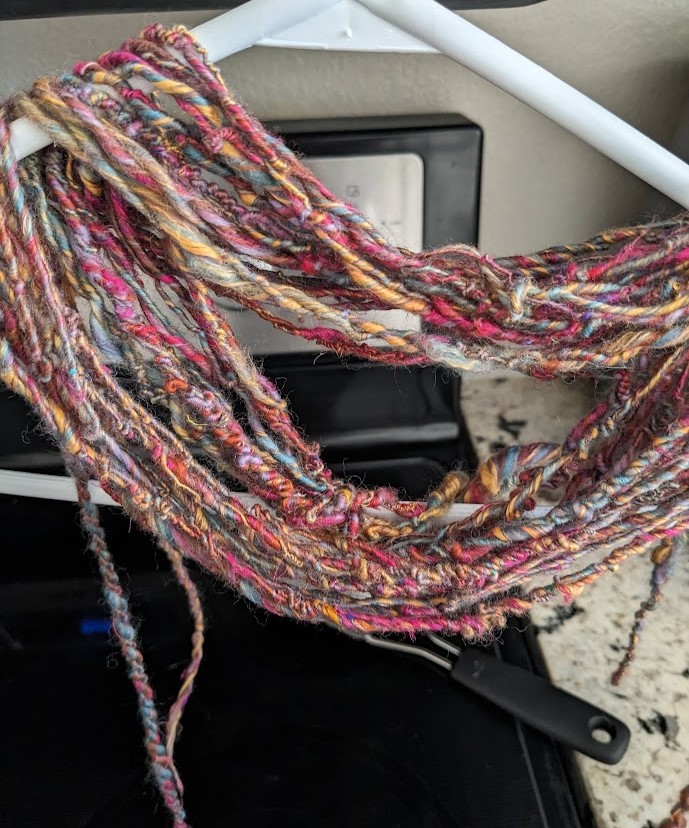
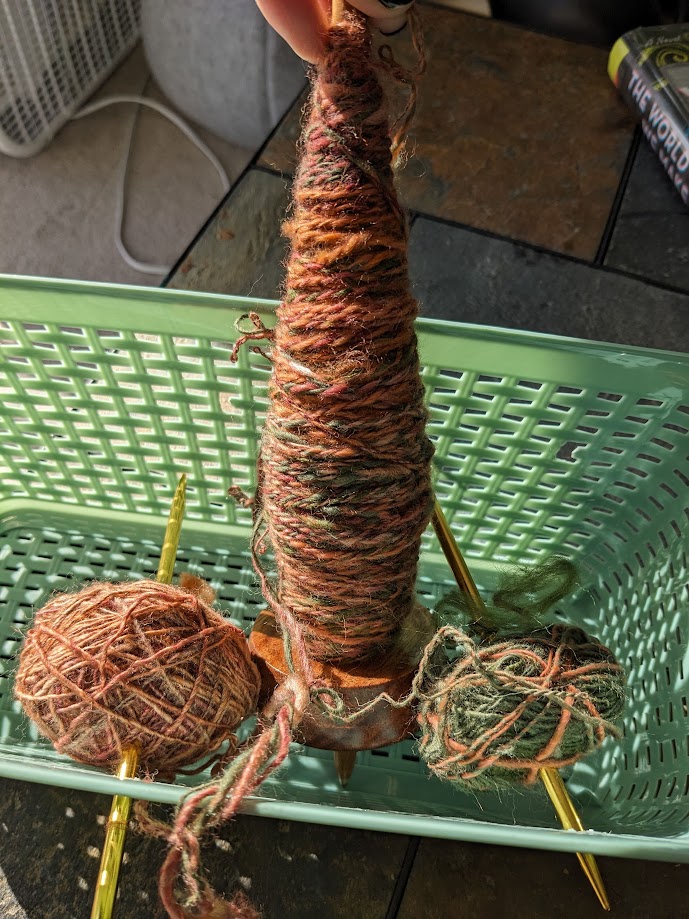
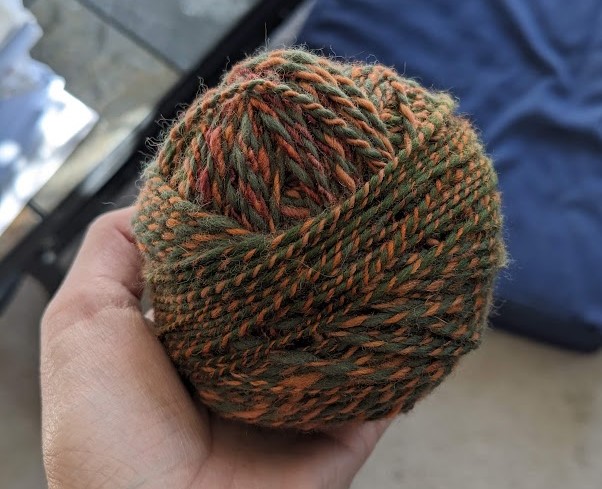
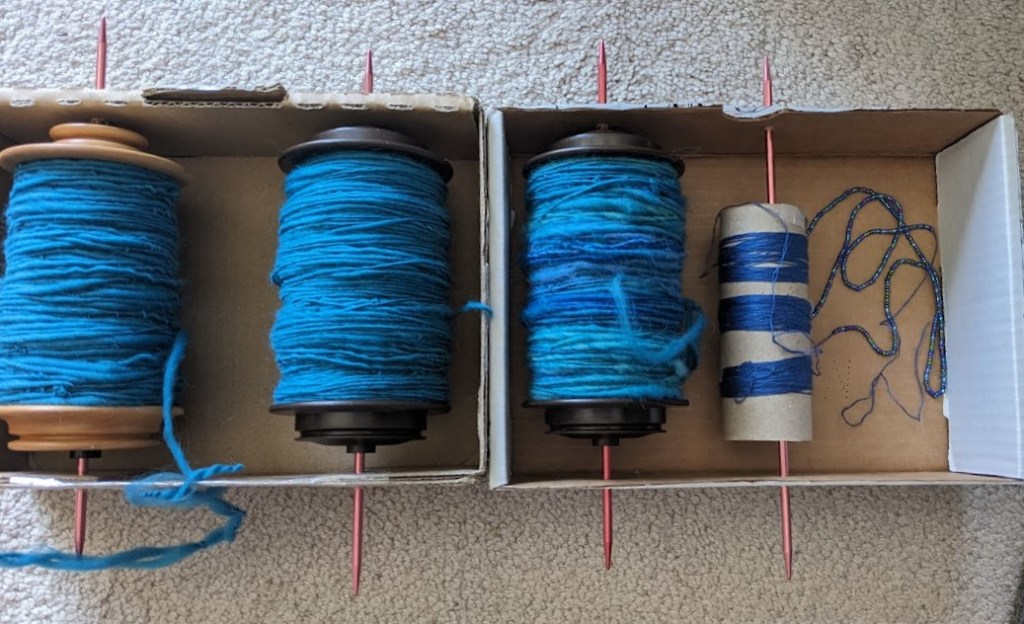
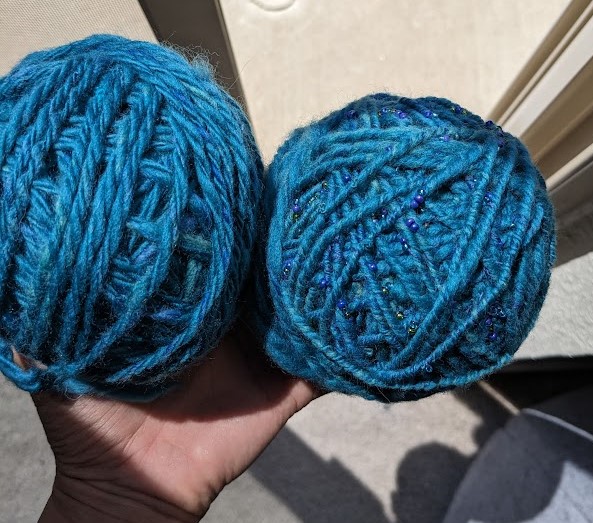
I plied this yarn a bunch of times to make a strap for a bag 🙂 It was some leftover fiber from my Tetons Extravaganza and it was just so colorful and green/flowery that I wanted to use it in a different way.
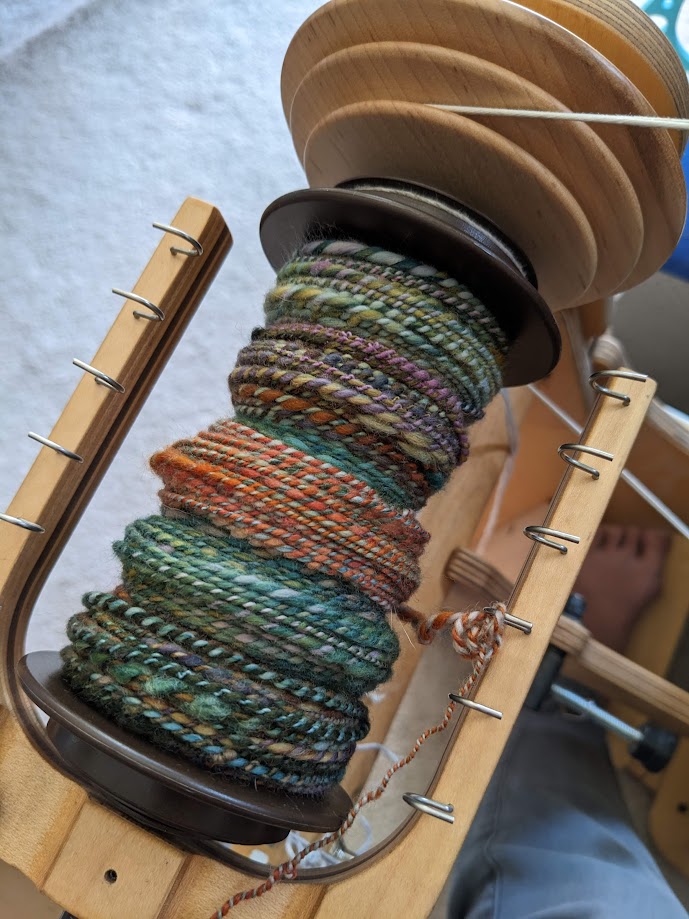
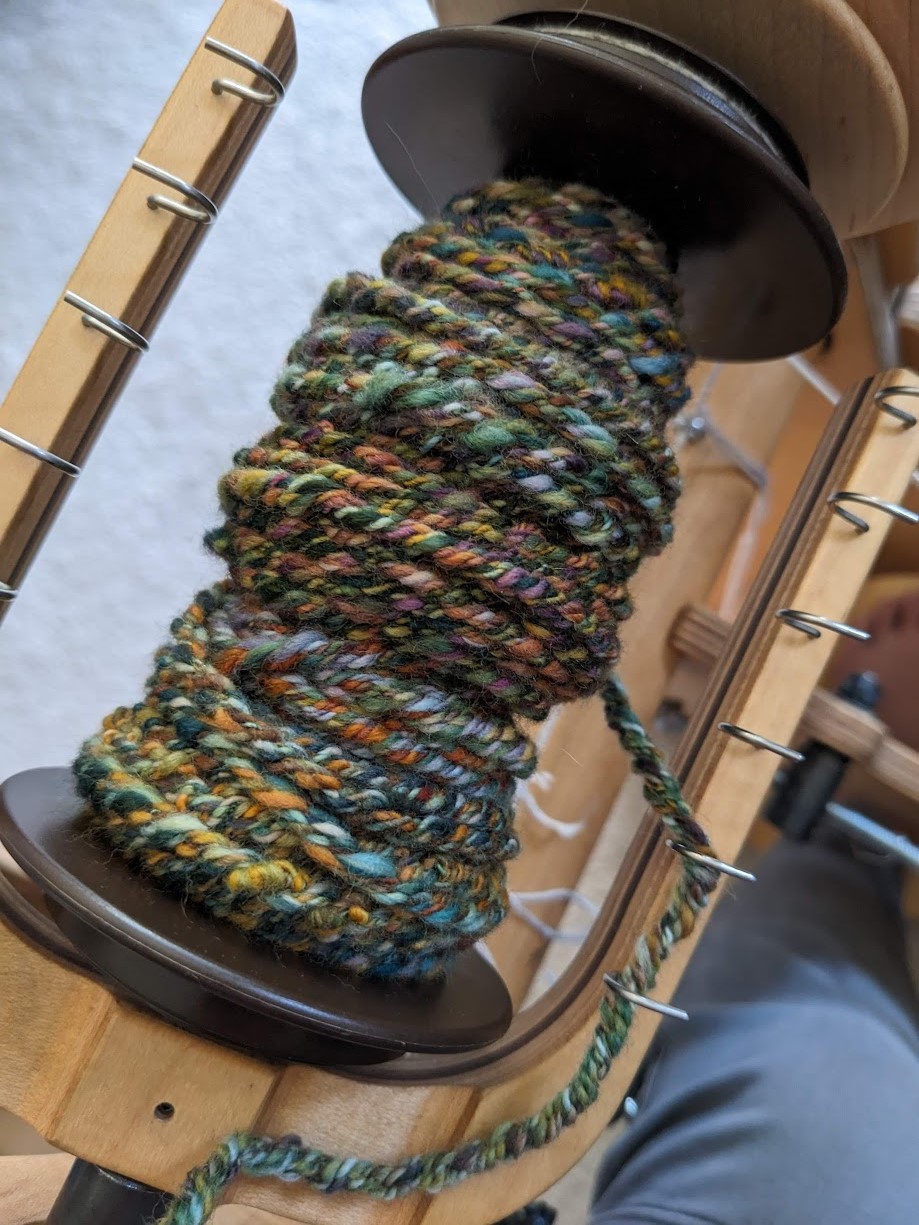
And then I got crazy and started adding beads!! 🙂 So shiny and fun. It was kind of annoying putting all the beads on the thread, but super worth it.
Plying setup with three normal plies and beads!
And of course, making things with the yarn I make. 🙂 crochet, weaving, I have even spun yarn thin enough to embroider with.
I’m figuring out how to walk around my house and spin, and my next data metric is figuring out how much yarn I can get from a given weight of fiber – which is a test of consistency, and makes the final fabric more even and less lumpy.
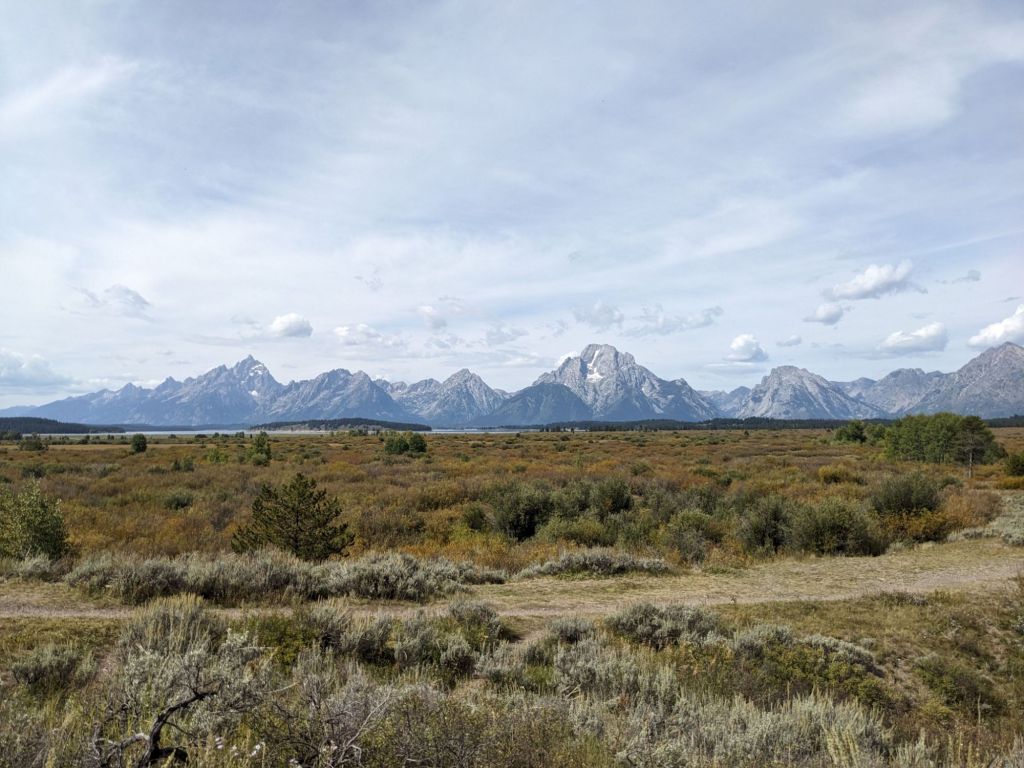
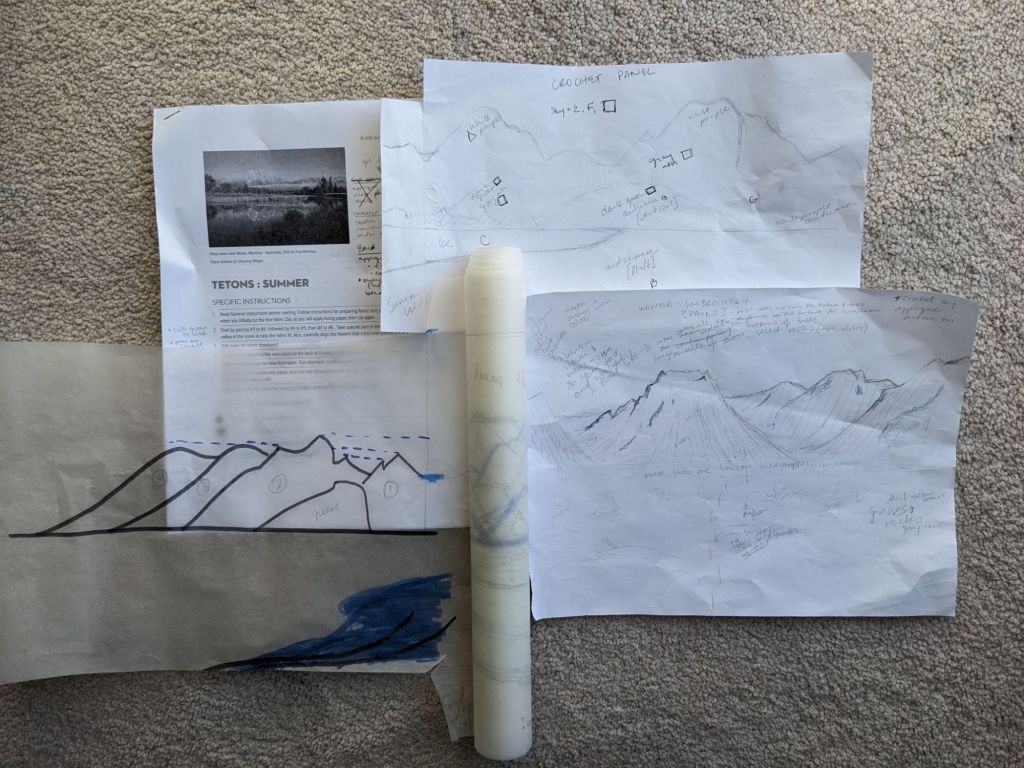
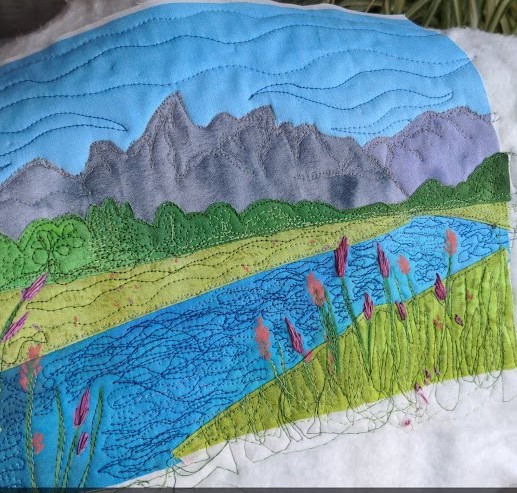
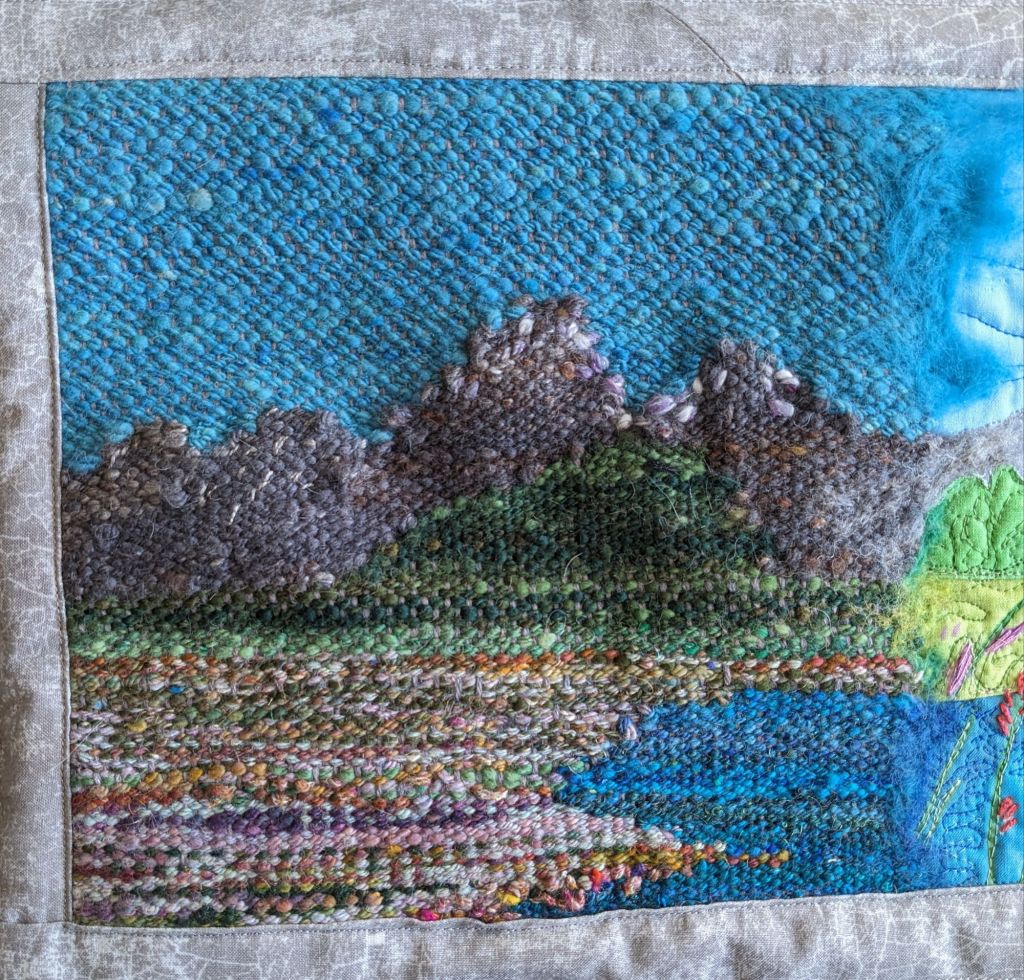
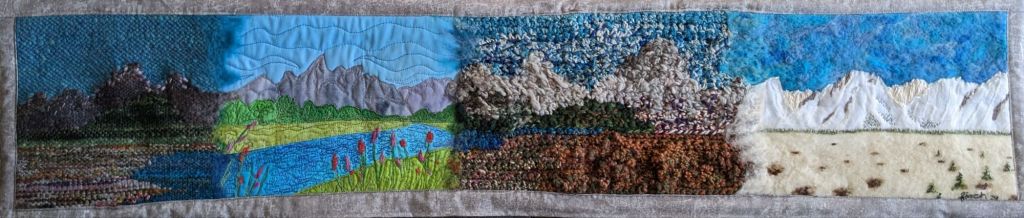
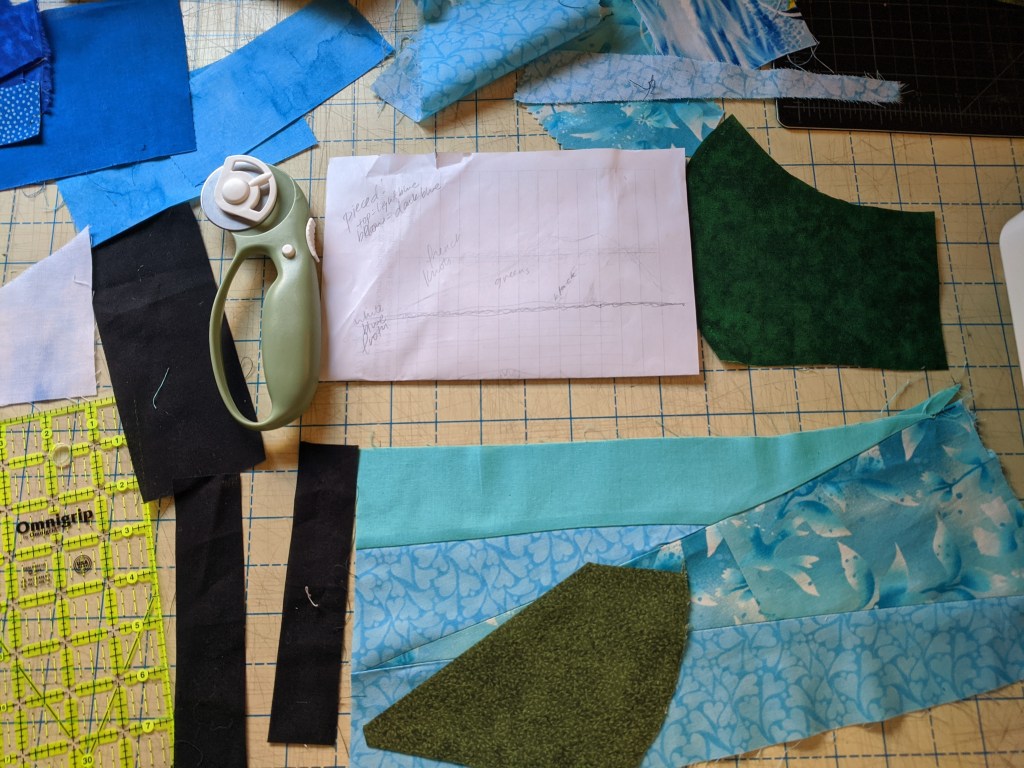
So I’ve collected a lot of skills 🙂 and after picking up a “summer” quilting kit from the Grand Tetons last year, I wanted to expand that project into a Whole Big Thing. The kit references the possibility of doing the same scene but with different fabrics for different seasons, but I wanted to do a full panorama with different peaks, depicting as much as I could of the Teton Range. I used some tracing paper to plan out panels for each of the four seasons, scaled so they’d match up with the quilted panel. My main reference photo is from Willow Flats Overlook when I visited in 2023. The perspective of the quilt is a bit different, but I kind of… made it work.
Main reference photo from Willow Flats OverlookPlans! The tracing paper rolls out into the whole panorama but having individual pieces was better while I worked.
I started off with the applique quilting kit and added some free motion quilting for details. It was really fun to work on things on a smaller canvas and be able to do details without getting overwhelmed. I also added some hand embroidery for the flowers because I wanted them to pop out 🙂
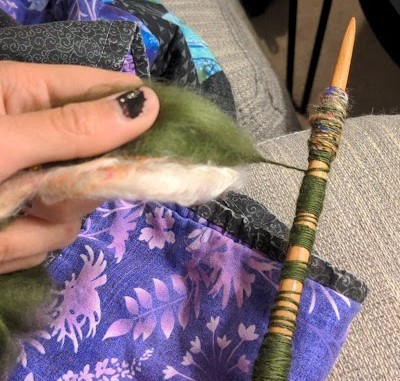
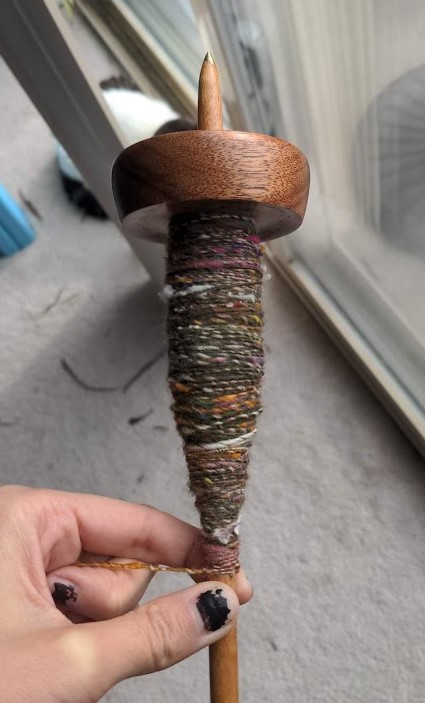
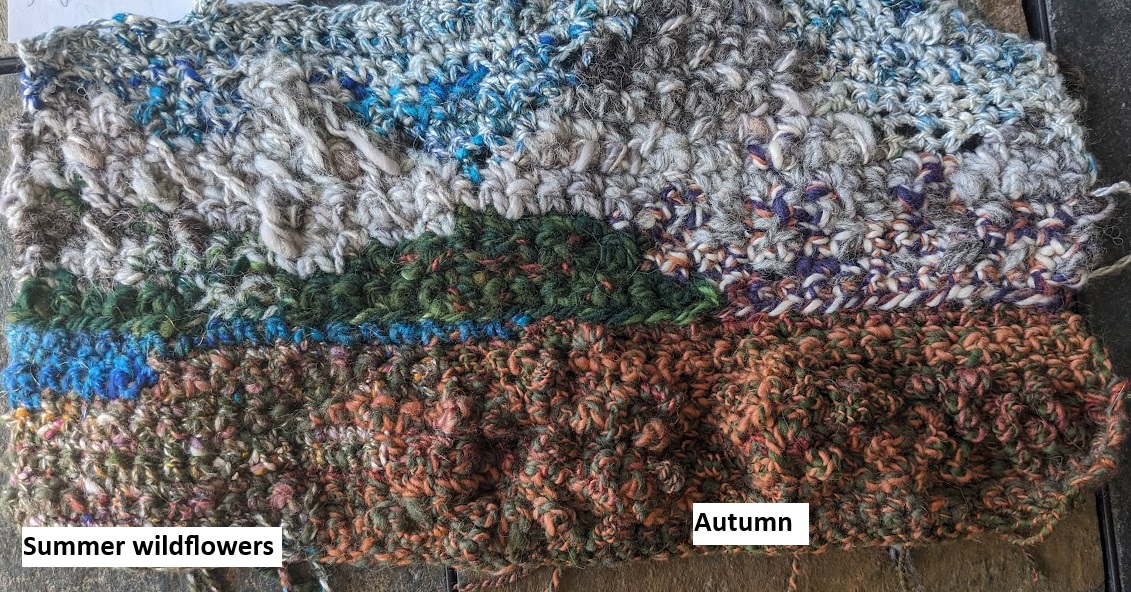
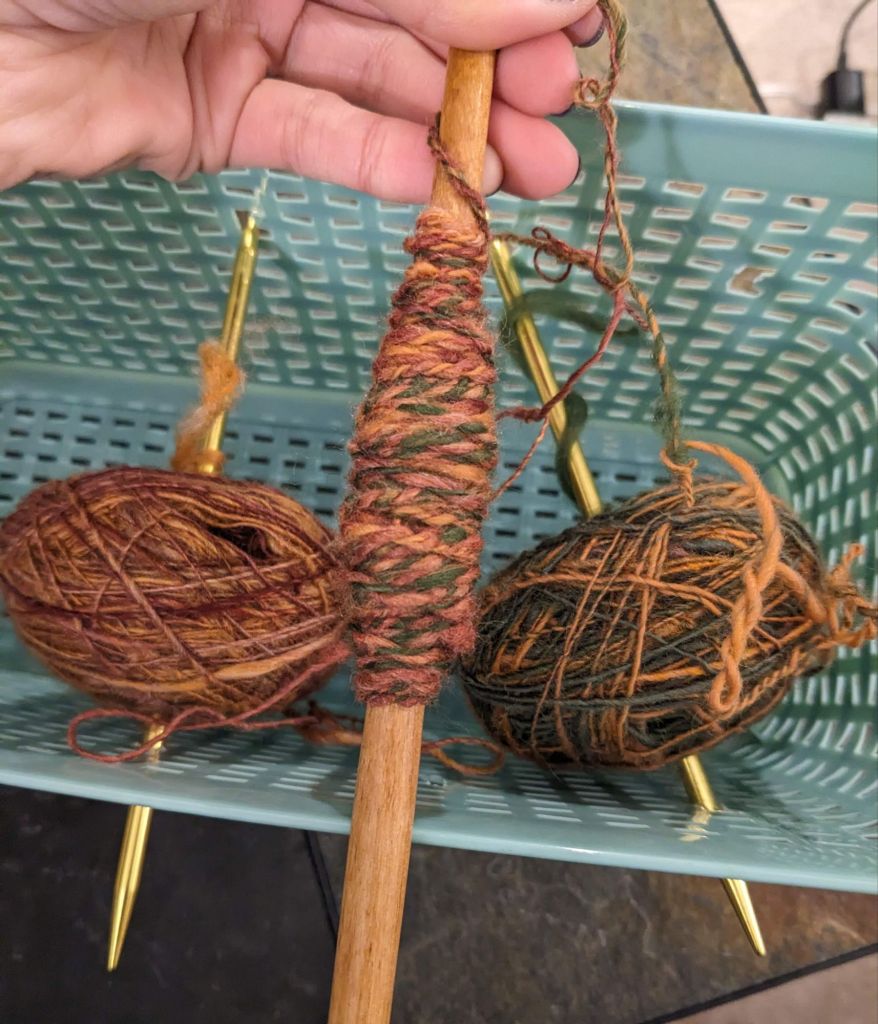
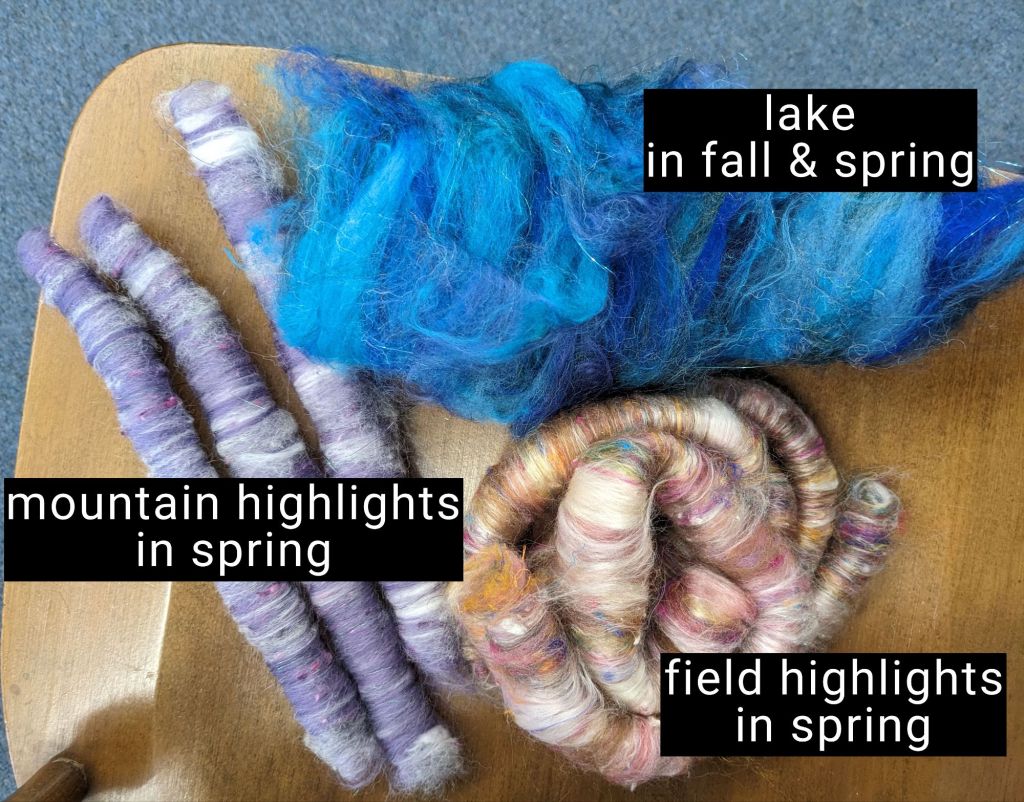
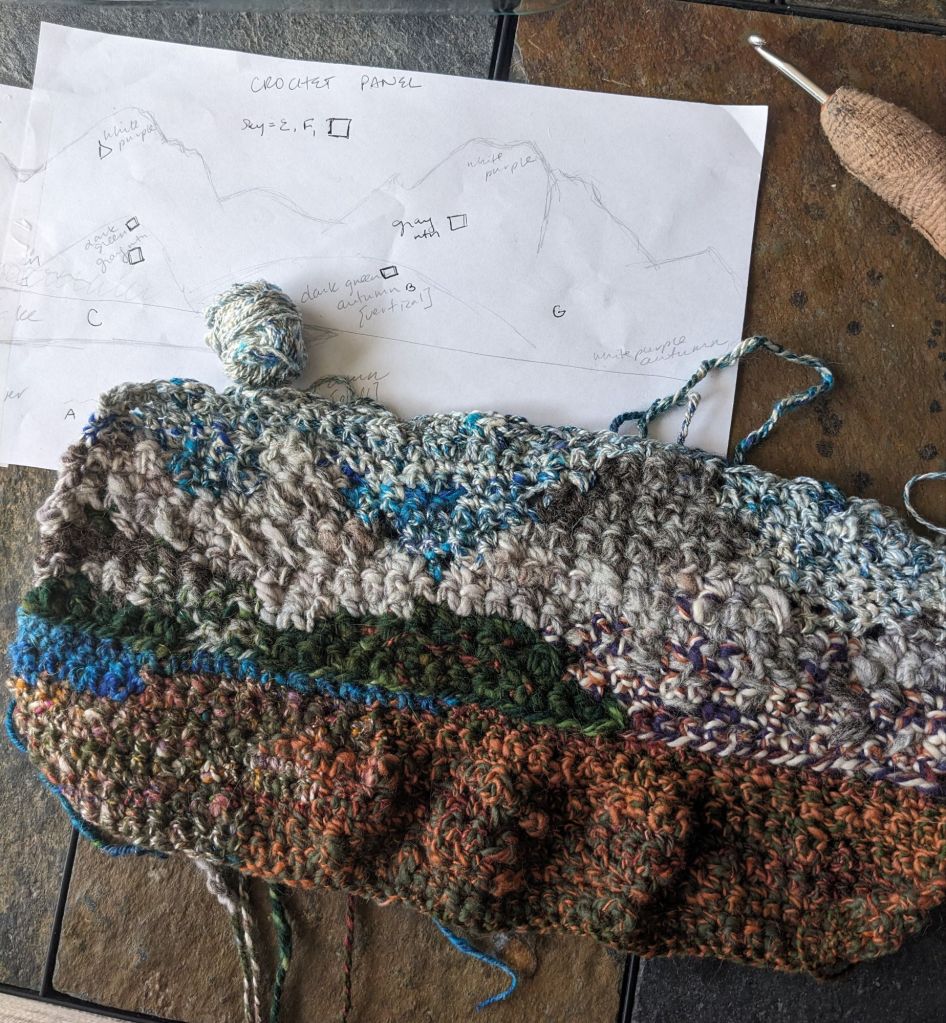
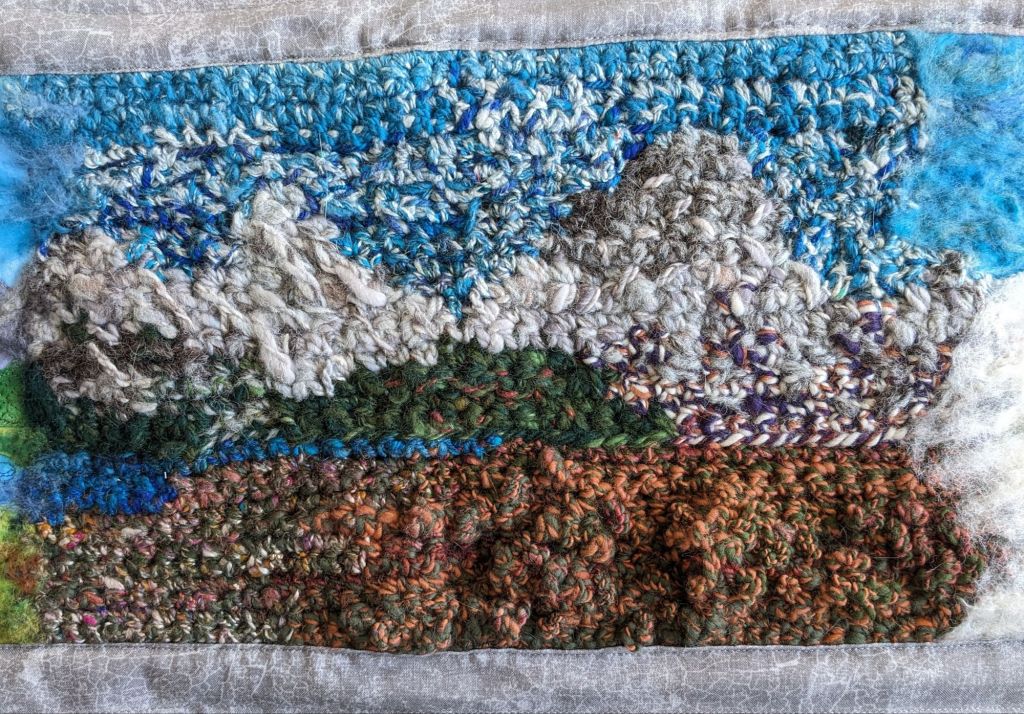
My first instinct for the next panel was to use crochet, using some funky colorwork and textured stitches. I spun up yarn for each of the different sections: sky, lake, mountains of various white and gray mixes, and autumn-y colors for the sagebrush.
a yarn I called “Autumn” 🙂
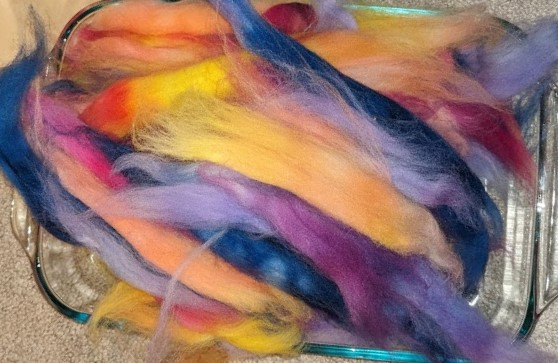
fiber blends I made at a workshop
I added some weird bumpy parts and extra stitches in the foreground to mimic the fluffy sagebrush 🙂
I struggled with getting enough contrast between the gray of the mountains and the blue of the sky, so I took a black and white picture and spun up some darker blue that I could blend into the existing sky.
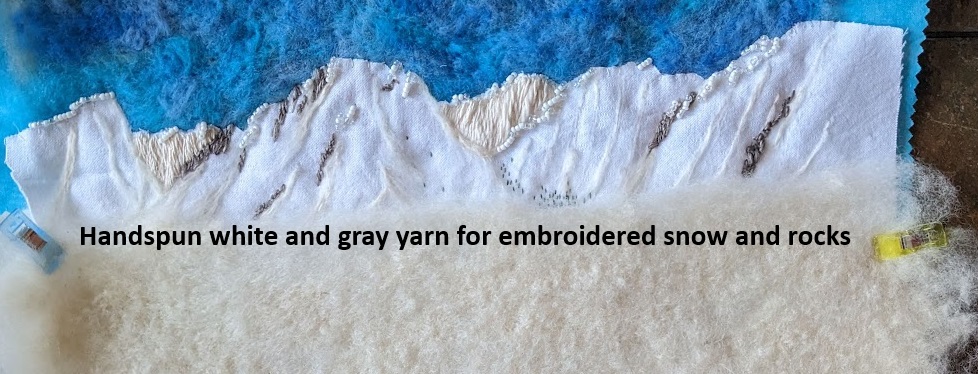
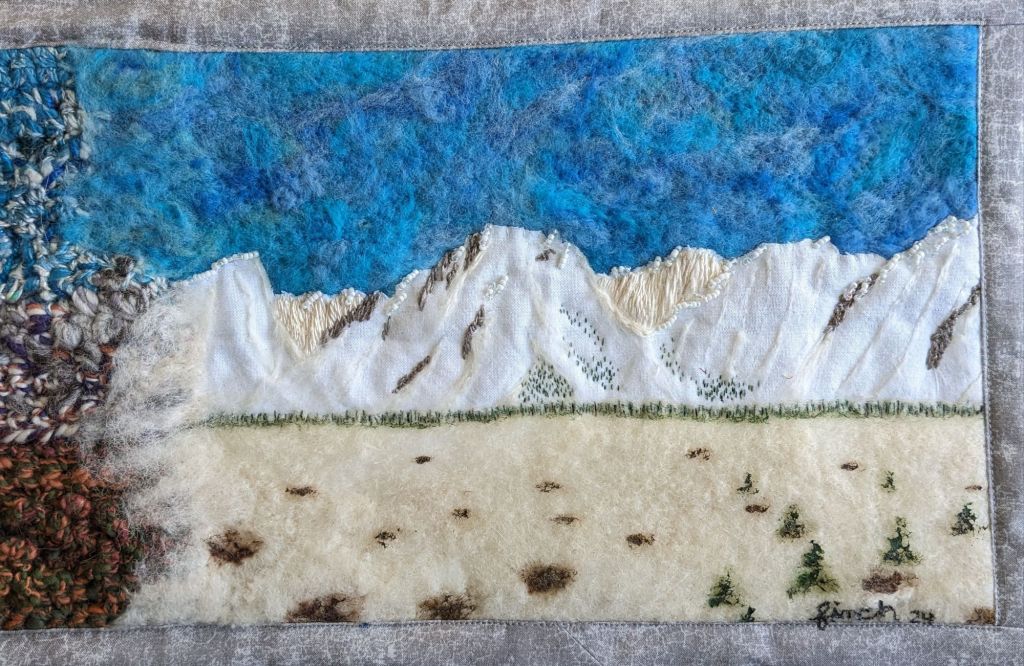
After I had summer and autumn, I struggled with what to do next. I knew I wanted an embroidery panel and a woven panel, but I wasn’t sure which should be spring and which should be winter. I talked it over with a friend and we decided that the crochet shouldn’t be next to the weaving, since they have similar textures and detail resolution. So winter was embroidery! I started by needle felting the background sky and foreground, to automatically add texture that I didn’t need to stitch. I spun some thin yarns of cream/white and rock gray, which was a fun challenge to spin thin enough and consistently enough that I could use it with a normal sized needle. I also thought some beads would be fun for the shininess of the snow 🙂
Winter embroidery in progress
I was planning to do the winter foreground details with embroidery, but I realized I wanted to incorporate paint into this project, so I used acrylic paint to add trees, bushes, and rocks. It was difficult to paint onto the felted surface because the brush strokes pick up fibers from the felt, but it was doable.
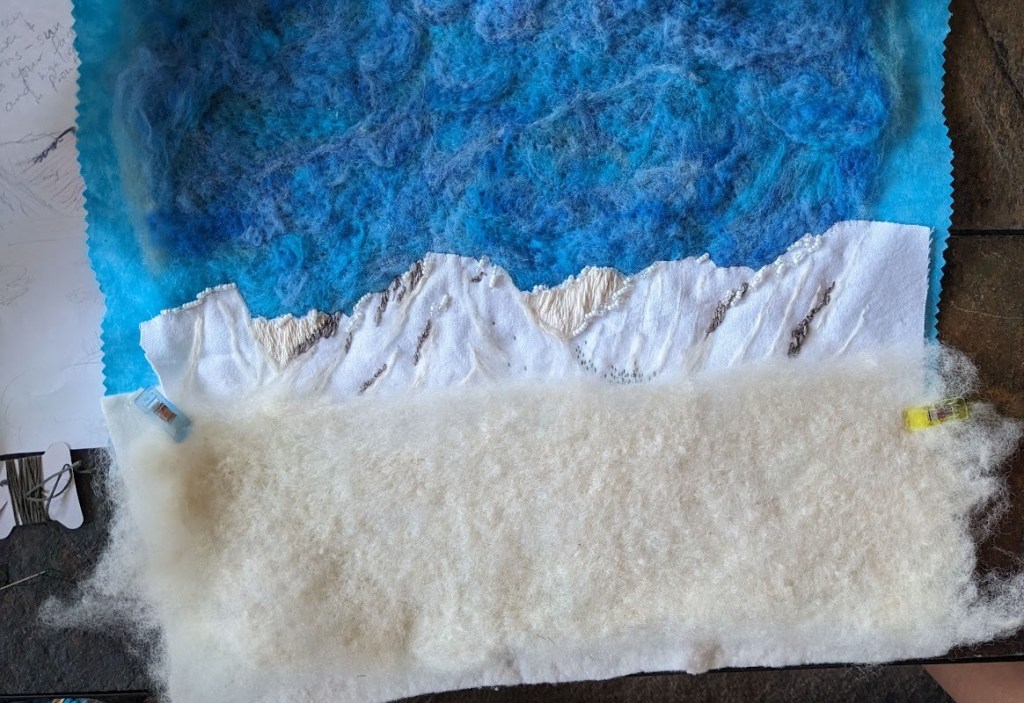
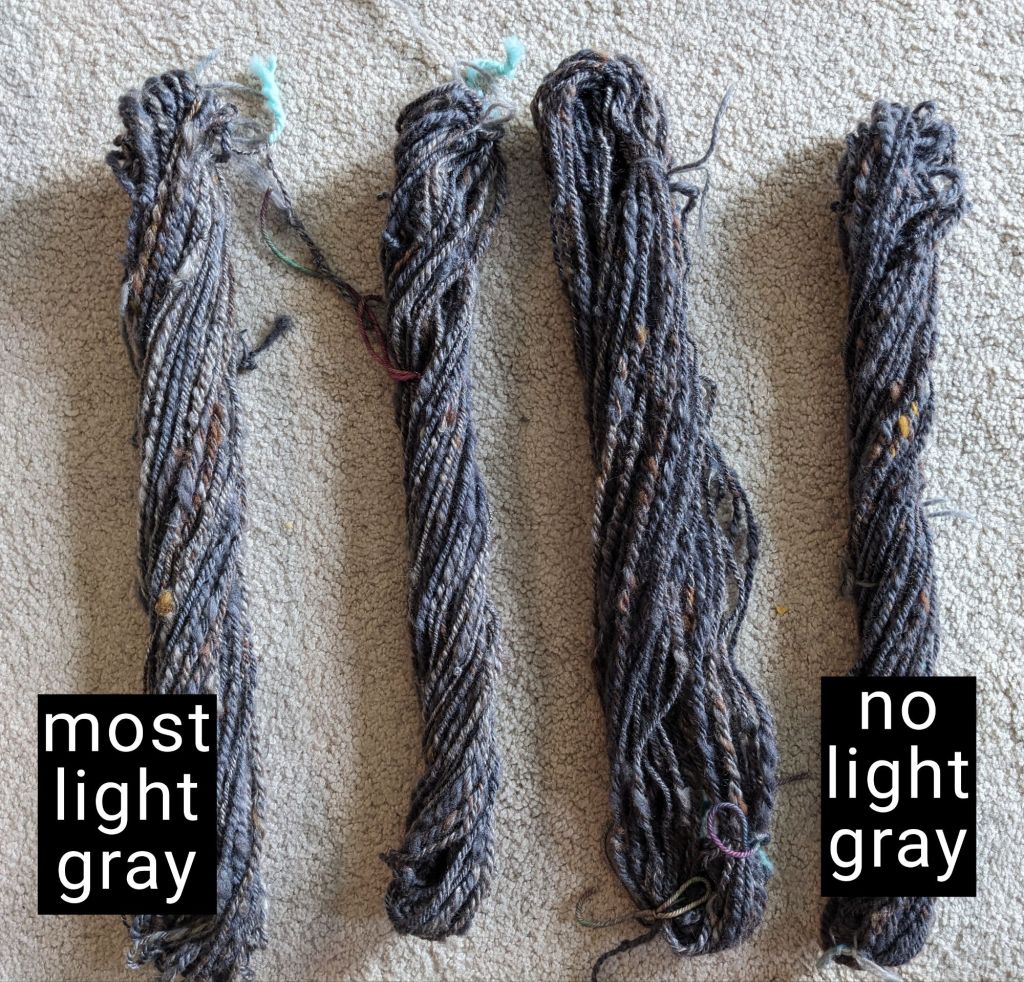
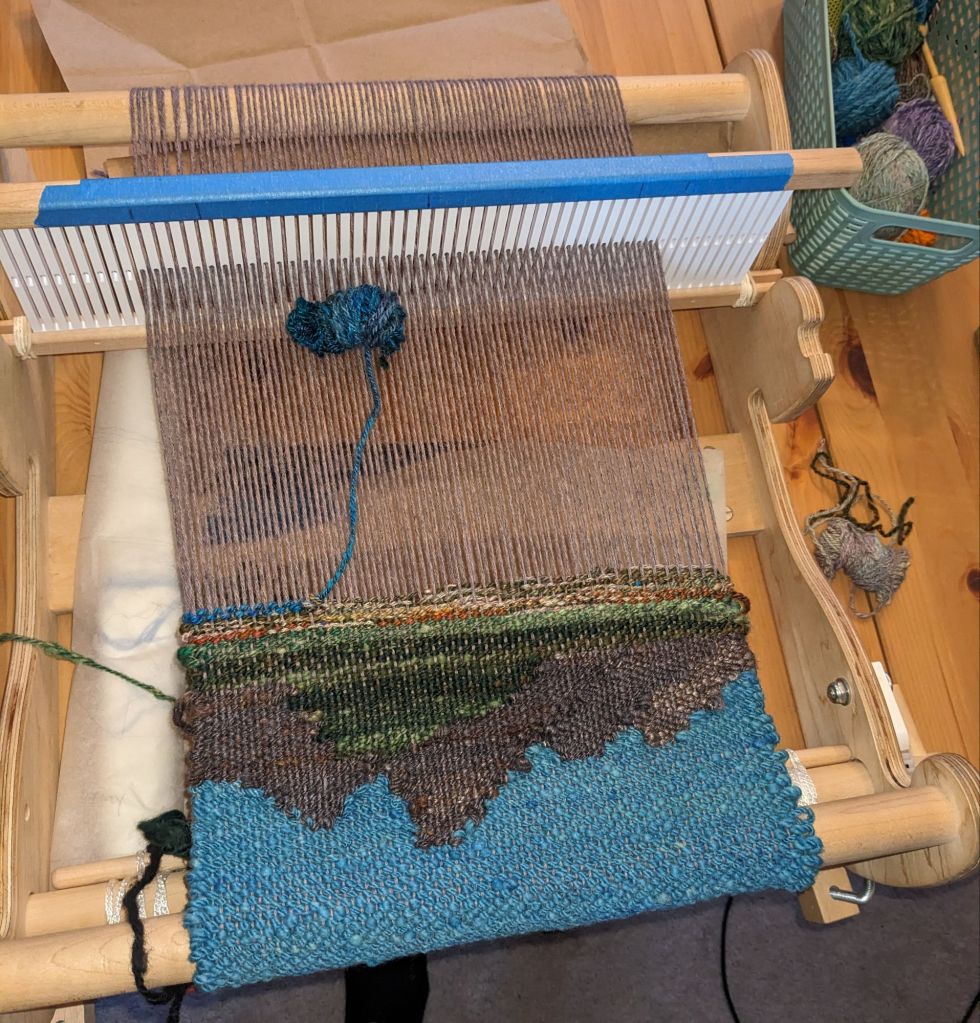
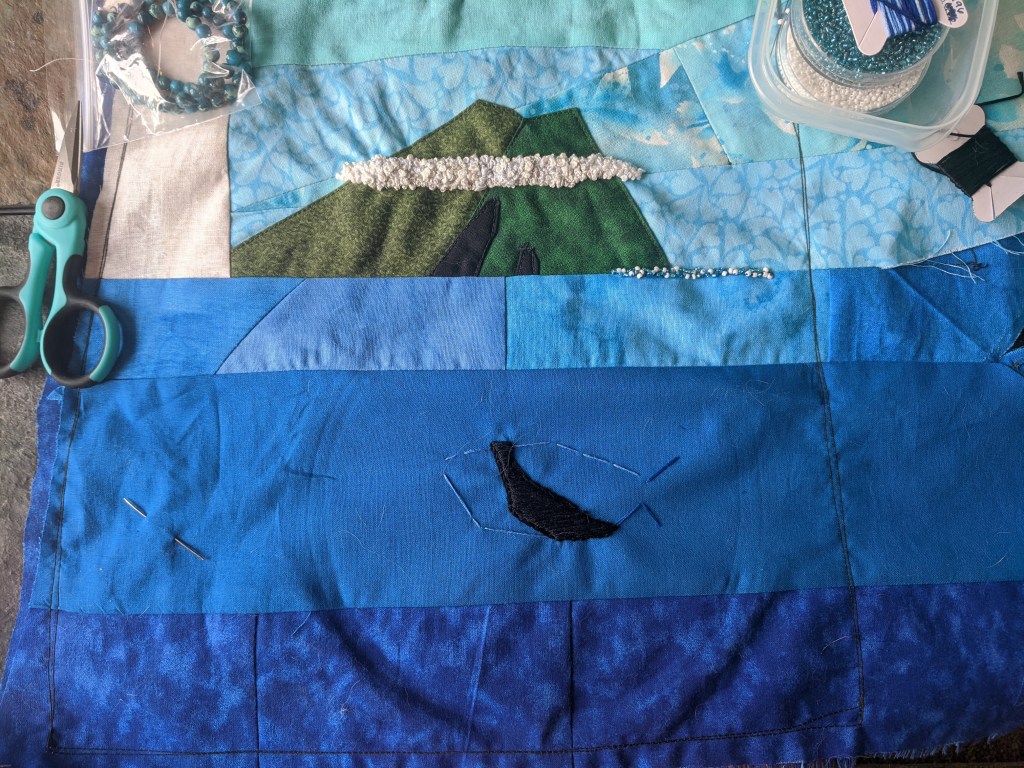
Then I needed a tapestry weaving for spring. Just like with the crochet, I only used yarns I’ve spun, and spun up a few more just for this. I had four different mountain-y layers that I wanted to represent, so I spun four different grays with graduated levels of light gray. In hindsight, I made WAY TOO MUCH, but it was fun. And now I have more mountain gray for later.
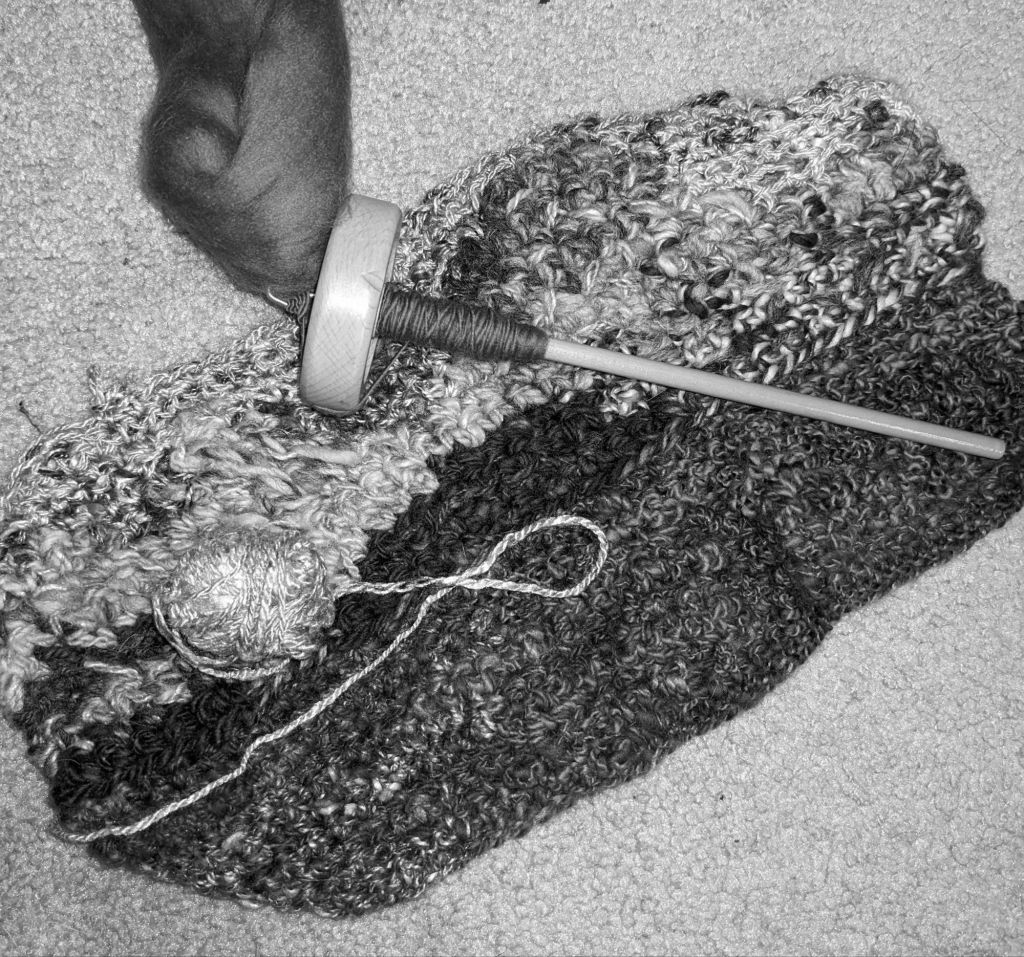
I took a weaving class where we were able to take the loom home for a week, and capitalized on this moment to (a) finish this project, and (b) see if this type of loom is useful for tapestry weaving (that’s not its primary use). It was a successful proof of concept for using this type of loom for tapestry, but I think I’m going to pursue purchasing a different kind of loom for some more flexibility and growth potential.
upside down on the loom! I wove the sky first because I knew it would be a solid weaving instead of doing a bunch of color changes… and weaving upside down made me less stressed about getting it perfect
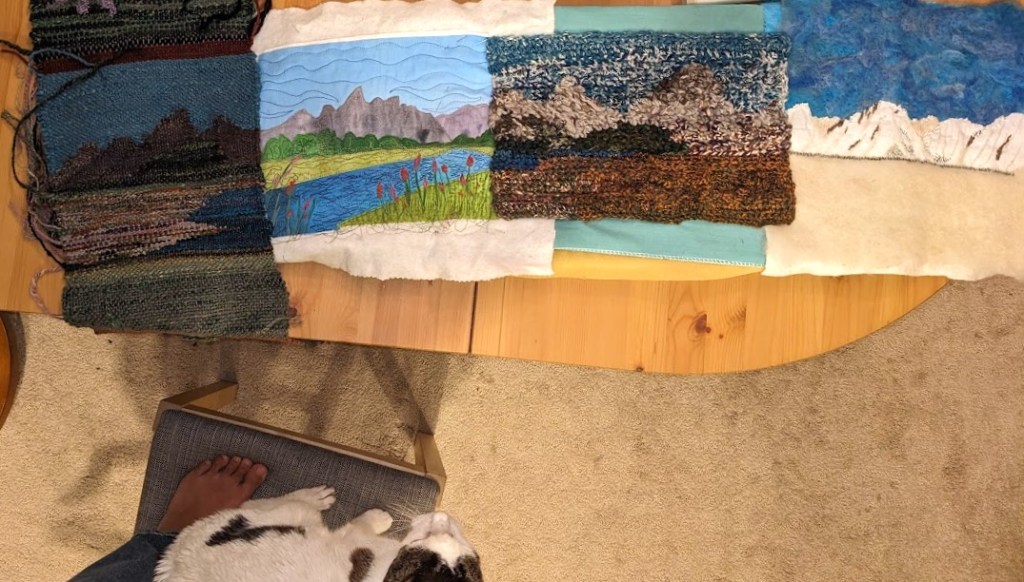
this is the first time I saw all four panels together, they’re pinned to a mini ironing board 🙂
I used some extra fiber to needle felt over the seams between the panels, and then did a border to secure everything together.
My main challenge in finishing this up was getting the crochet to sit the way I wanted it to. I ended up gluing it to some stiff scrap fabric to stabilize it, which went well…. Until I started sewing the fabric frame on. Hot glue and sewing machine needle is not a good pair. 🙂 But I took my time, learned my lesson, and got it done.
Spring! My favorite part to make was the field in the foreground, I improvised all of the color changes and just had a good timeSummer 🙂 so glad I bought this and kicked off this project. I really like the wavy lake quilting with variegated threadAutumn! I really enjoyed spinning all this yarn, and I have a lot left over for future projects. I’m pretty happy with the shading on Mt. Moran (on the right) and the weird bumpy texture of the sagebrush in the foreground Winter! I really like the contrast between the line-y-ness of the embroidery and the fuzzy needle felting, and I proved to myself that I can spin yarn to embroider with🙂 finished
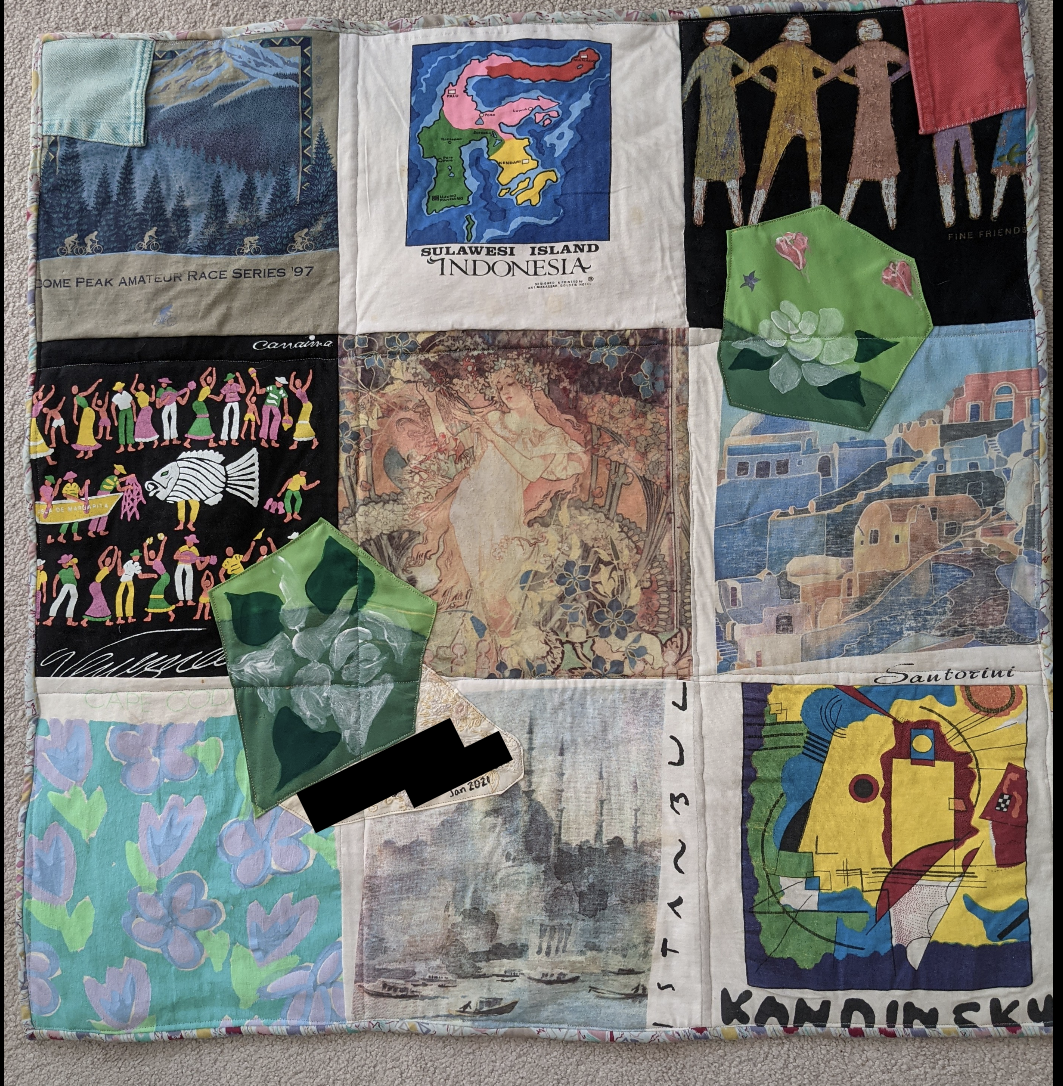
Been making a lot of different kinds of things! I’m reaching into multimedia and experimenting with new materials and techniques. 🙂
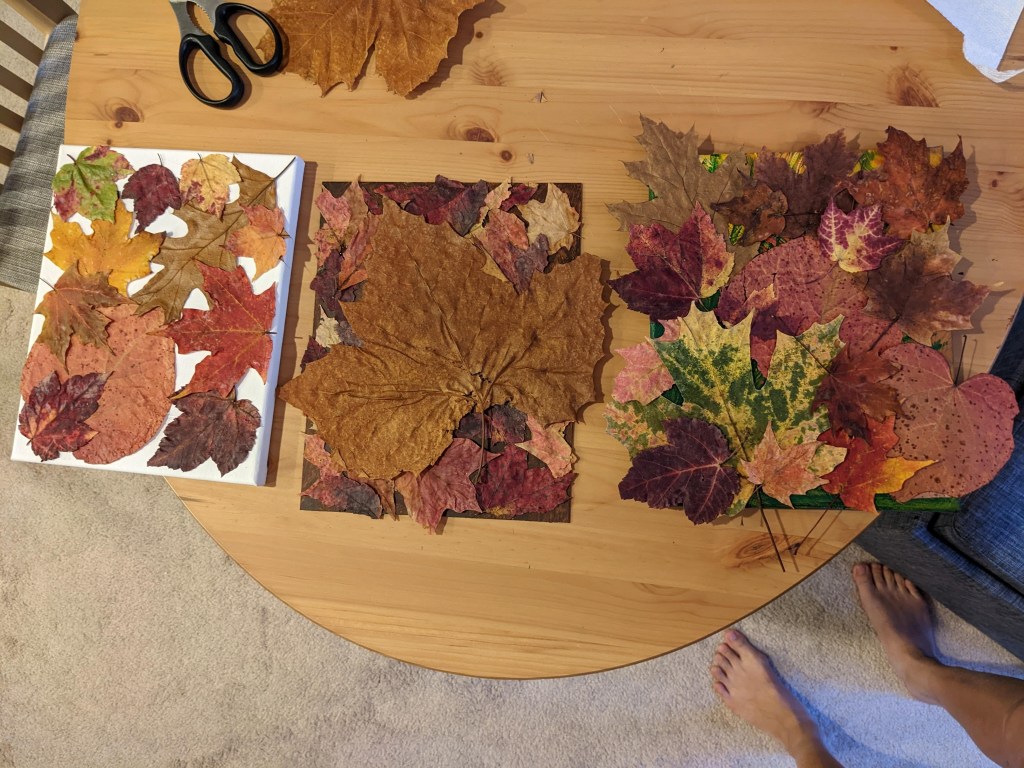
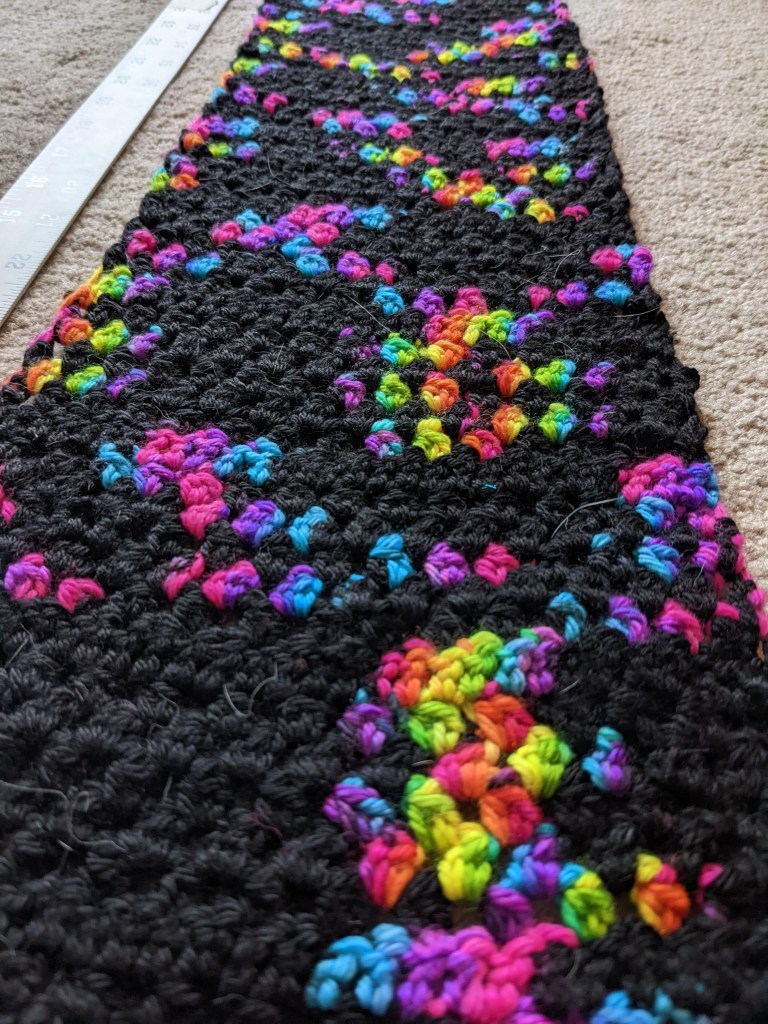
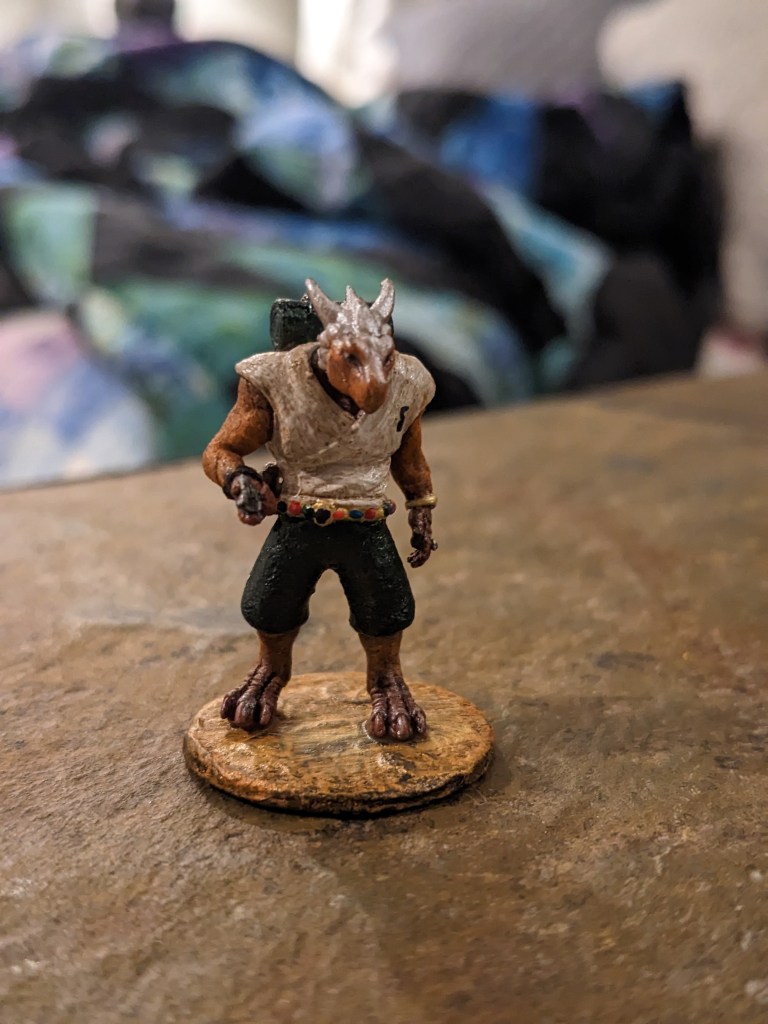
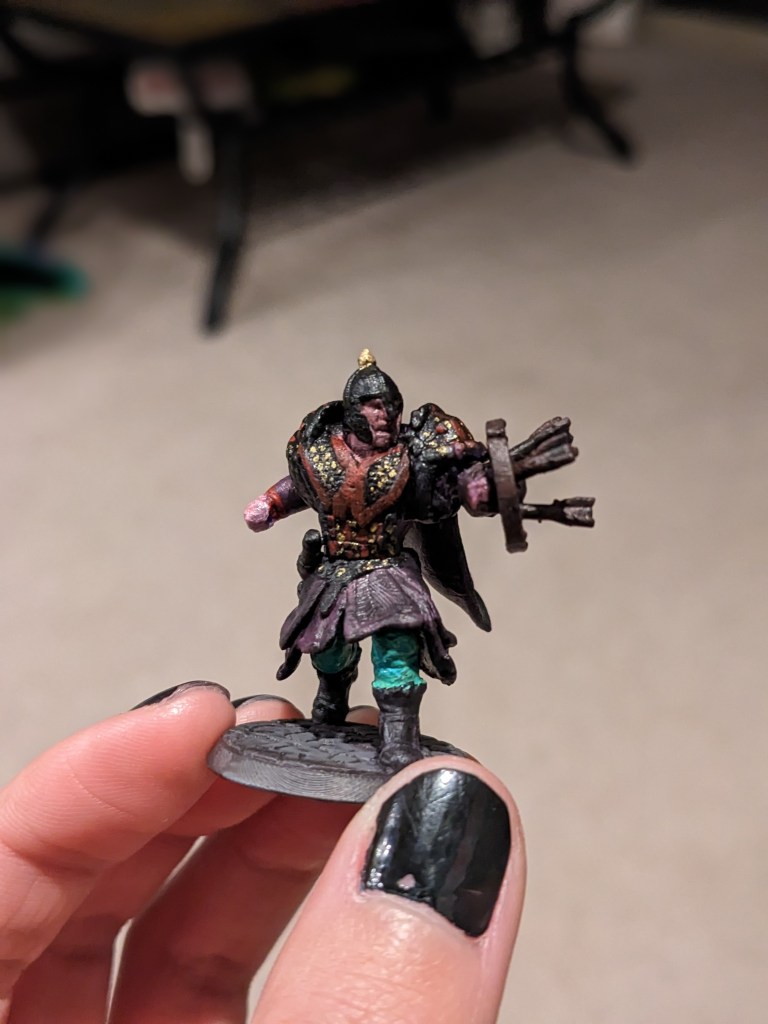
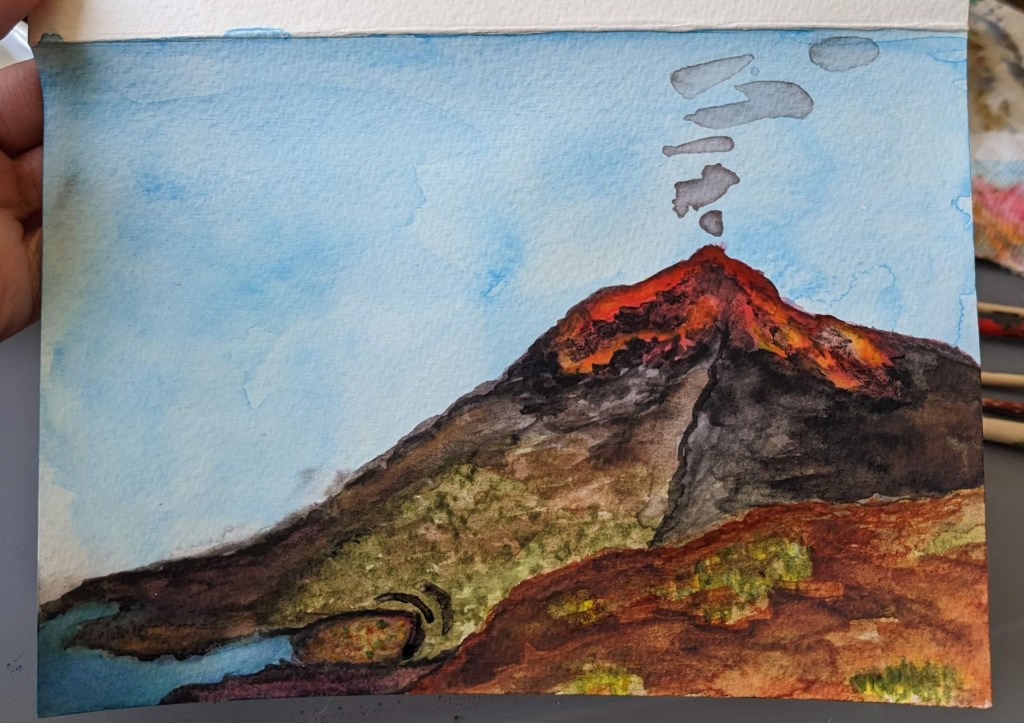
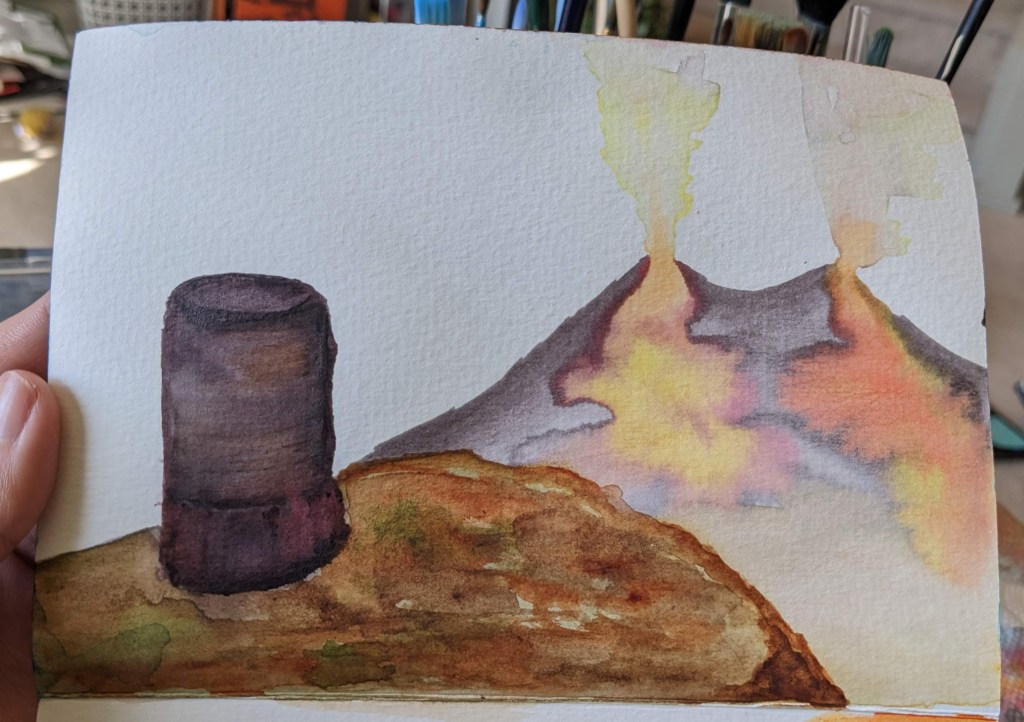
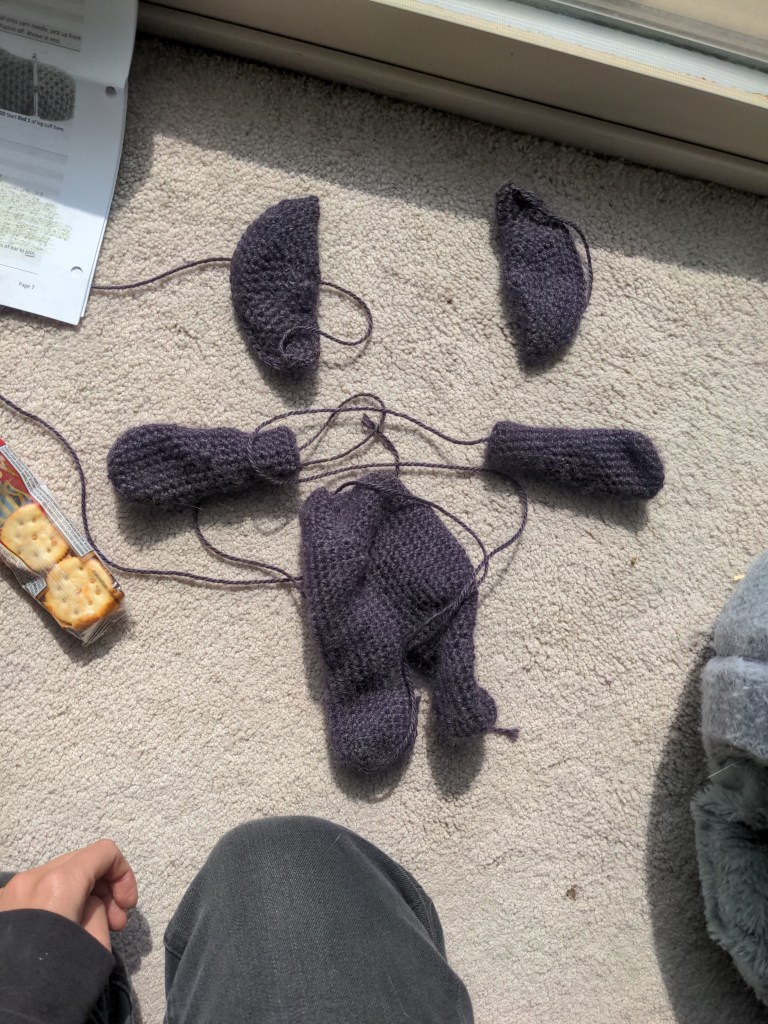
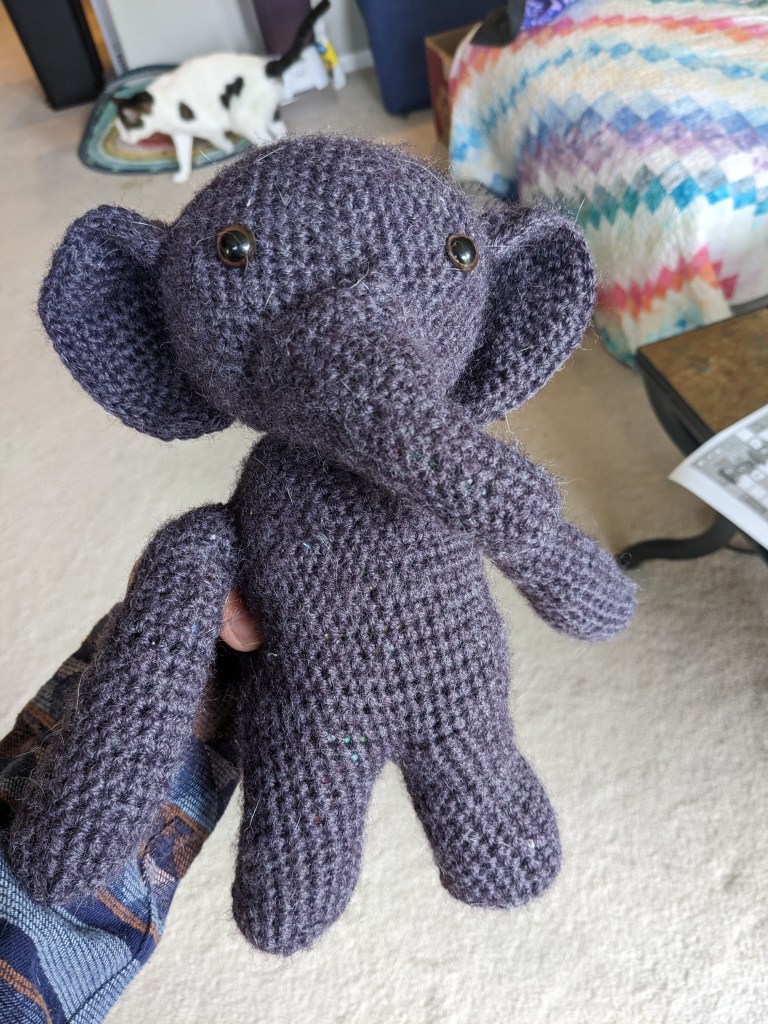
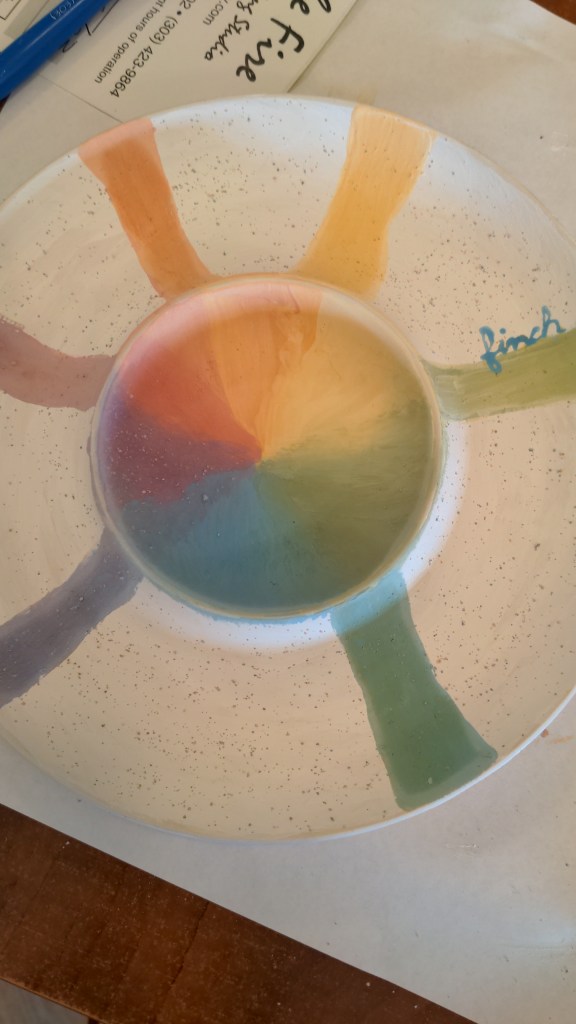
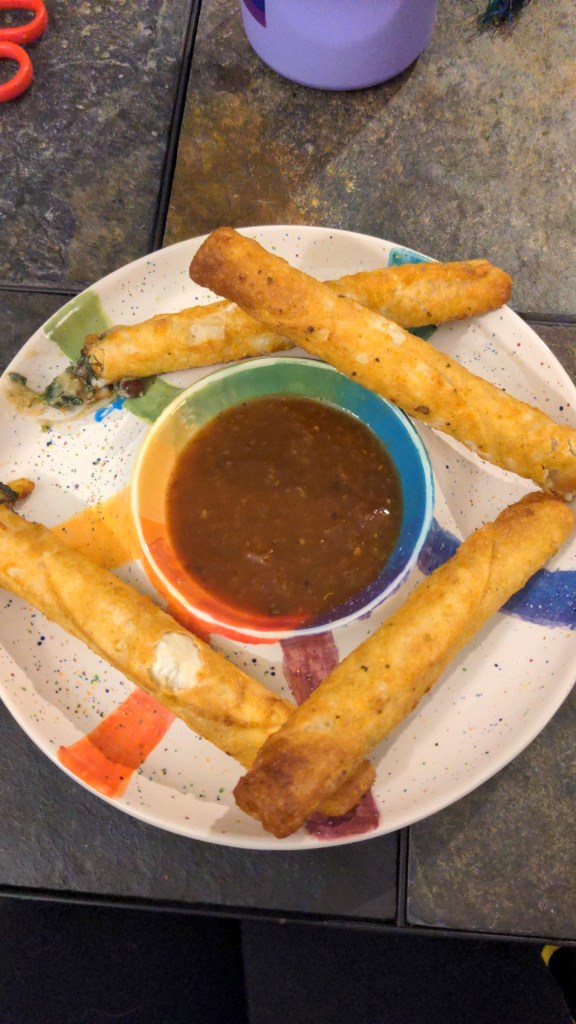
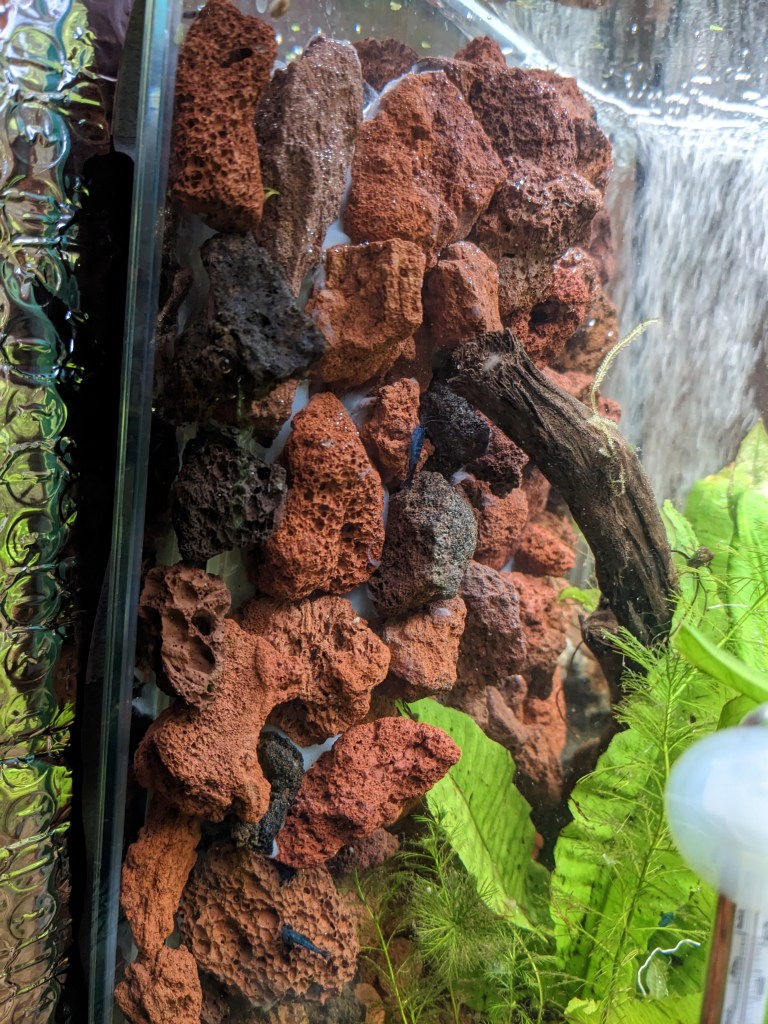
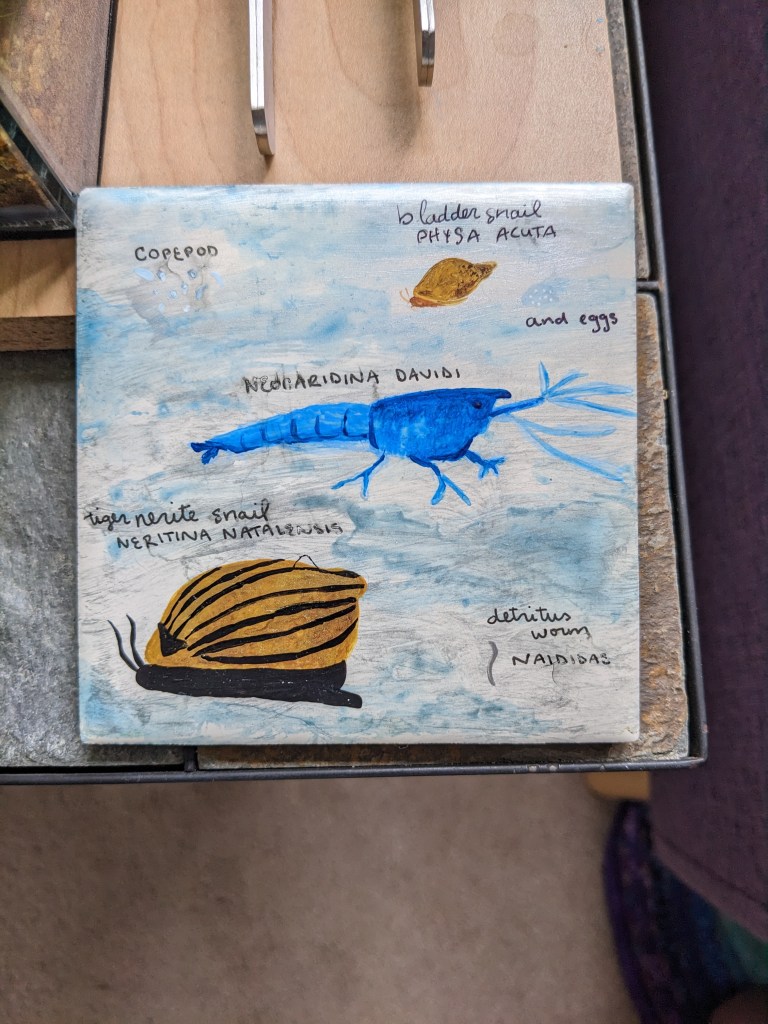
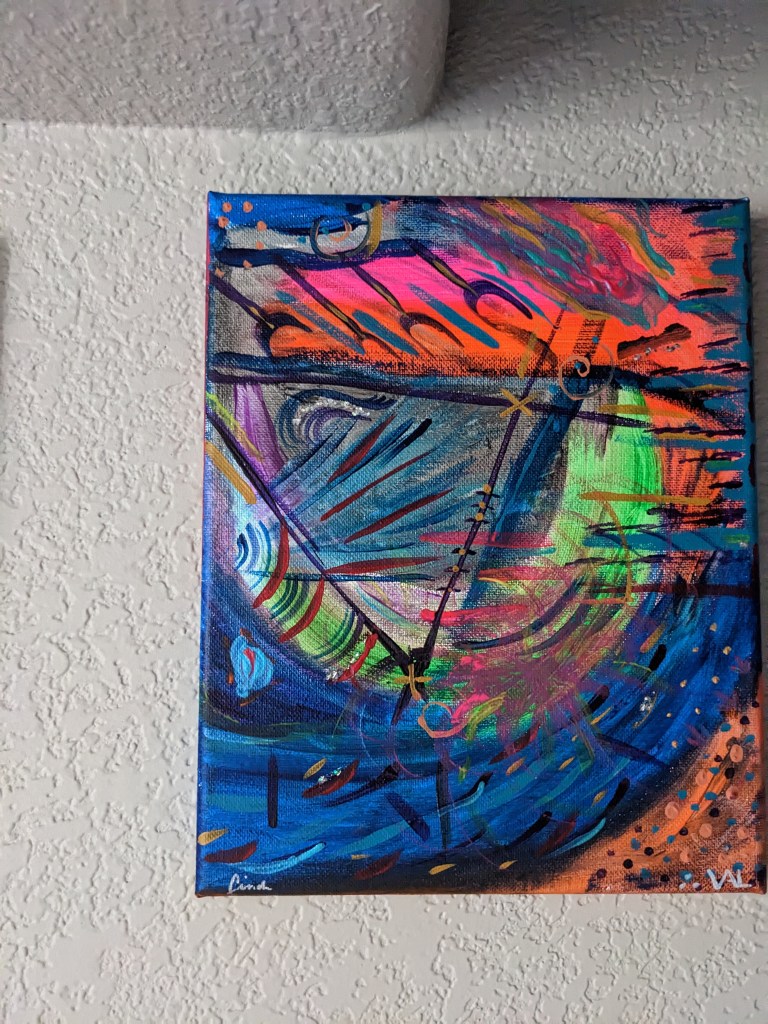
Leaf collages with my cousinLeaf watercolor for my auntAdded the reflection to this muralRainbow crochet scarf for my friendPainted the mini for my character in Dungeons & Dragons (dragonborn sorcerer named Taro)Company sent me this mini on accident, painted it to look like a solider from the Xi’an terracotta excavationBaby quilt for my friendsBaby quilt for my friendsVolcano for a D&D settingVolcanoes and observatory for D&D settingCrochet elephant partsCrochet elephantPottery painting beforeAnd after, featuring taquitosLava rock wall for my shrimp tankSpecies sign for my shrimp tankAcrylic paint collab with my friendAcrylic paint collab with my friend
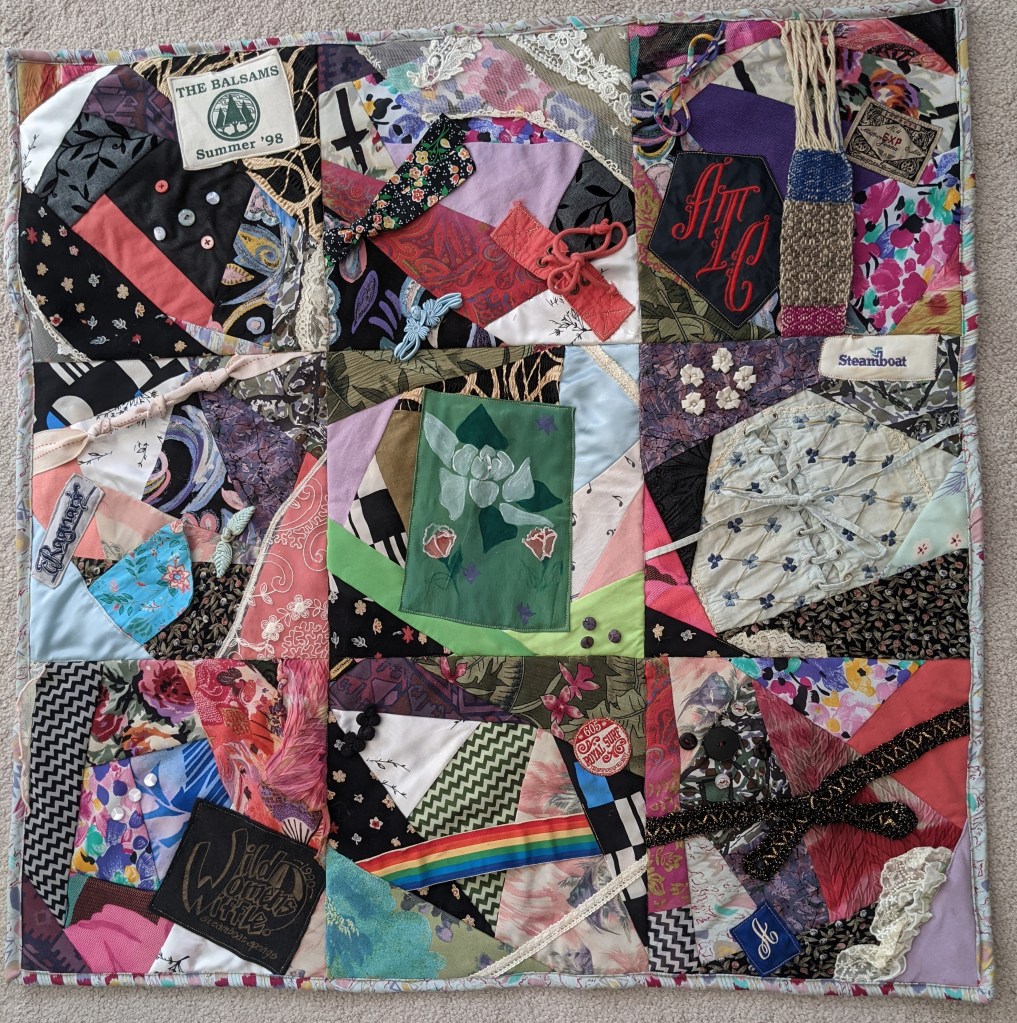
This memory quilt for my cousin was my other big project of 2020, finished in this first month of 2021. My cousin provided her mother’s clothes, which are incredibly fun and colorful. I knew I wanted to do a crazy quilt for my cousin, since she didn’t want something too big, and her mom’s clothes are truly too fun to do something simple with.
First, I inventoried all the fabric and cut off buttons and fasteners and other 3d elements I wanted to include. I chose a 3×3 layout for the back of 9 graphic t-shirts, and figured I’d do the crazy-pieced blocks to match on the front. Through the process, the front blocks ended up a bit smaller but it wasn’t a big deal.
For the piecing, I cut pieces with an uneven number of sides (a tip from the museum employee) for the center piece. Then I added on new fabric to each side, and continued until it was the right size. Since a lot of the fabric was stretchy and textured itself, I used some scrap fabric behind the block to stabilize everything.
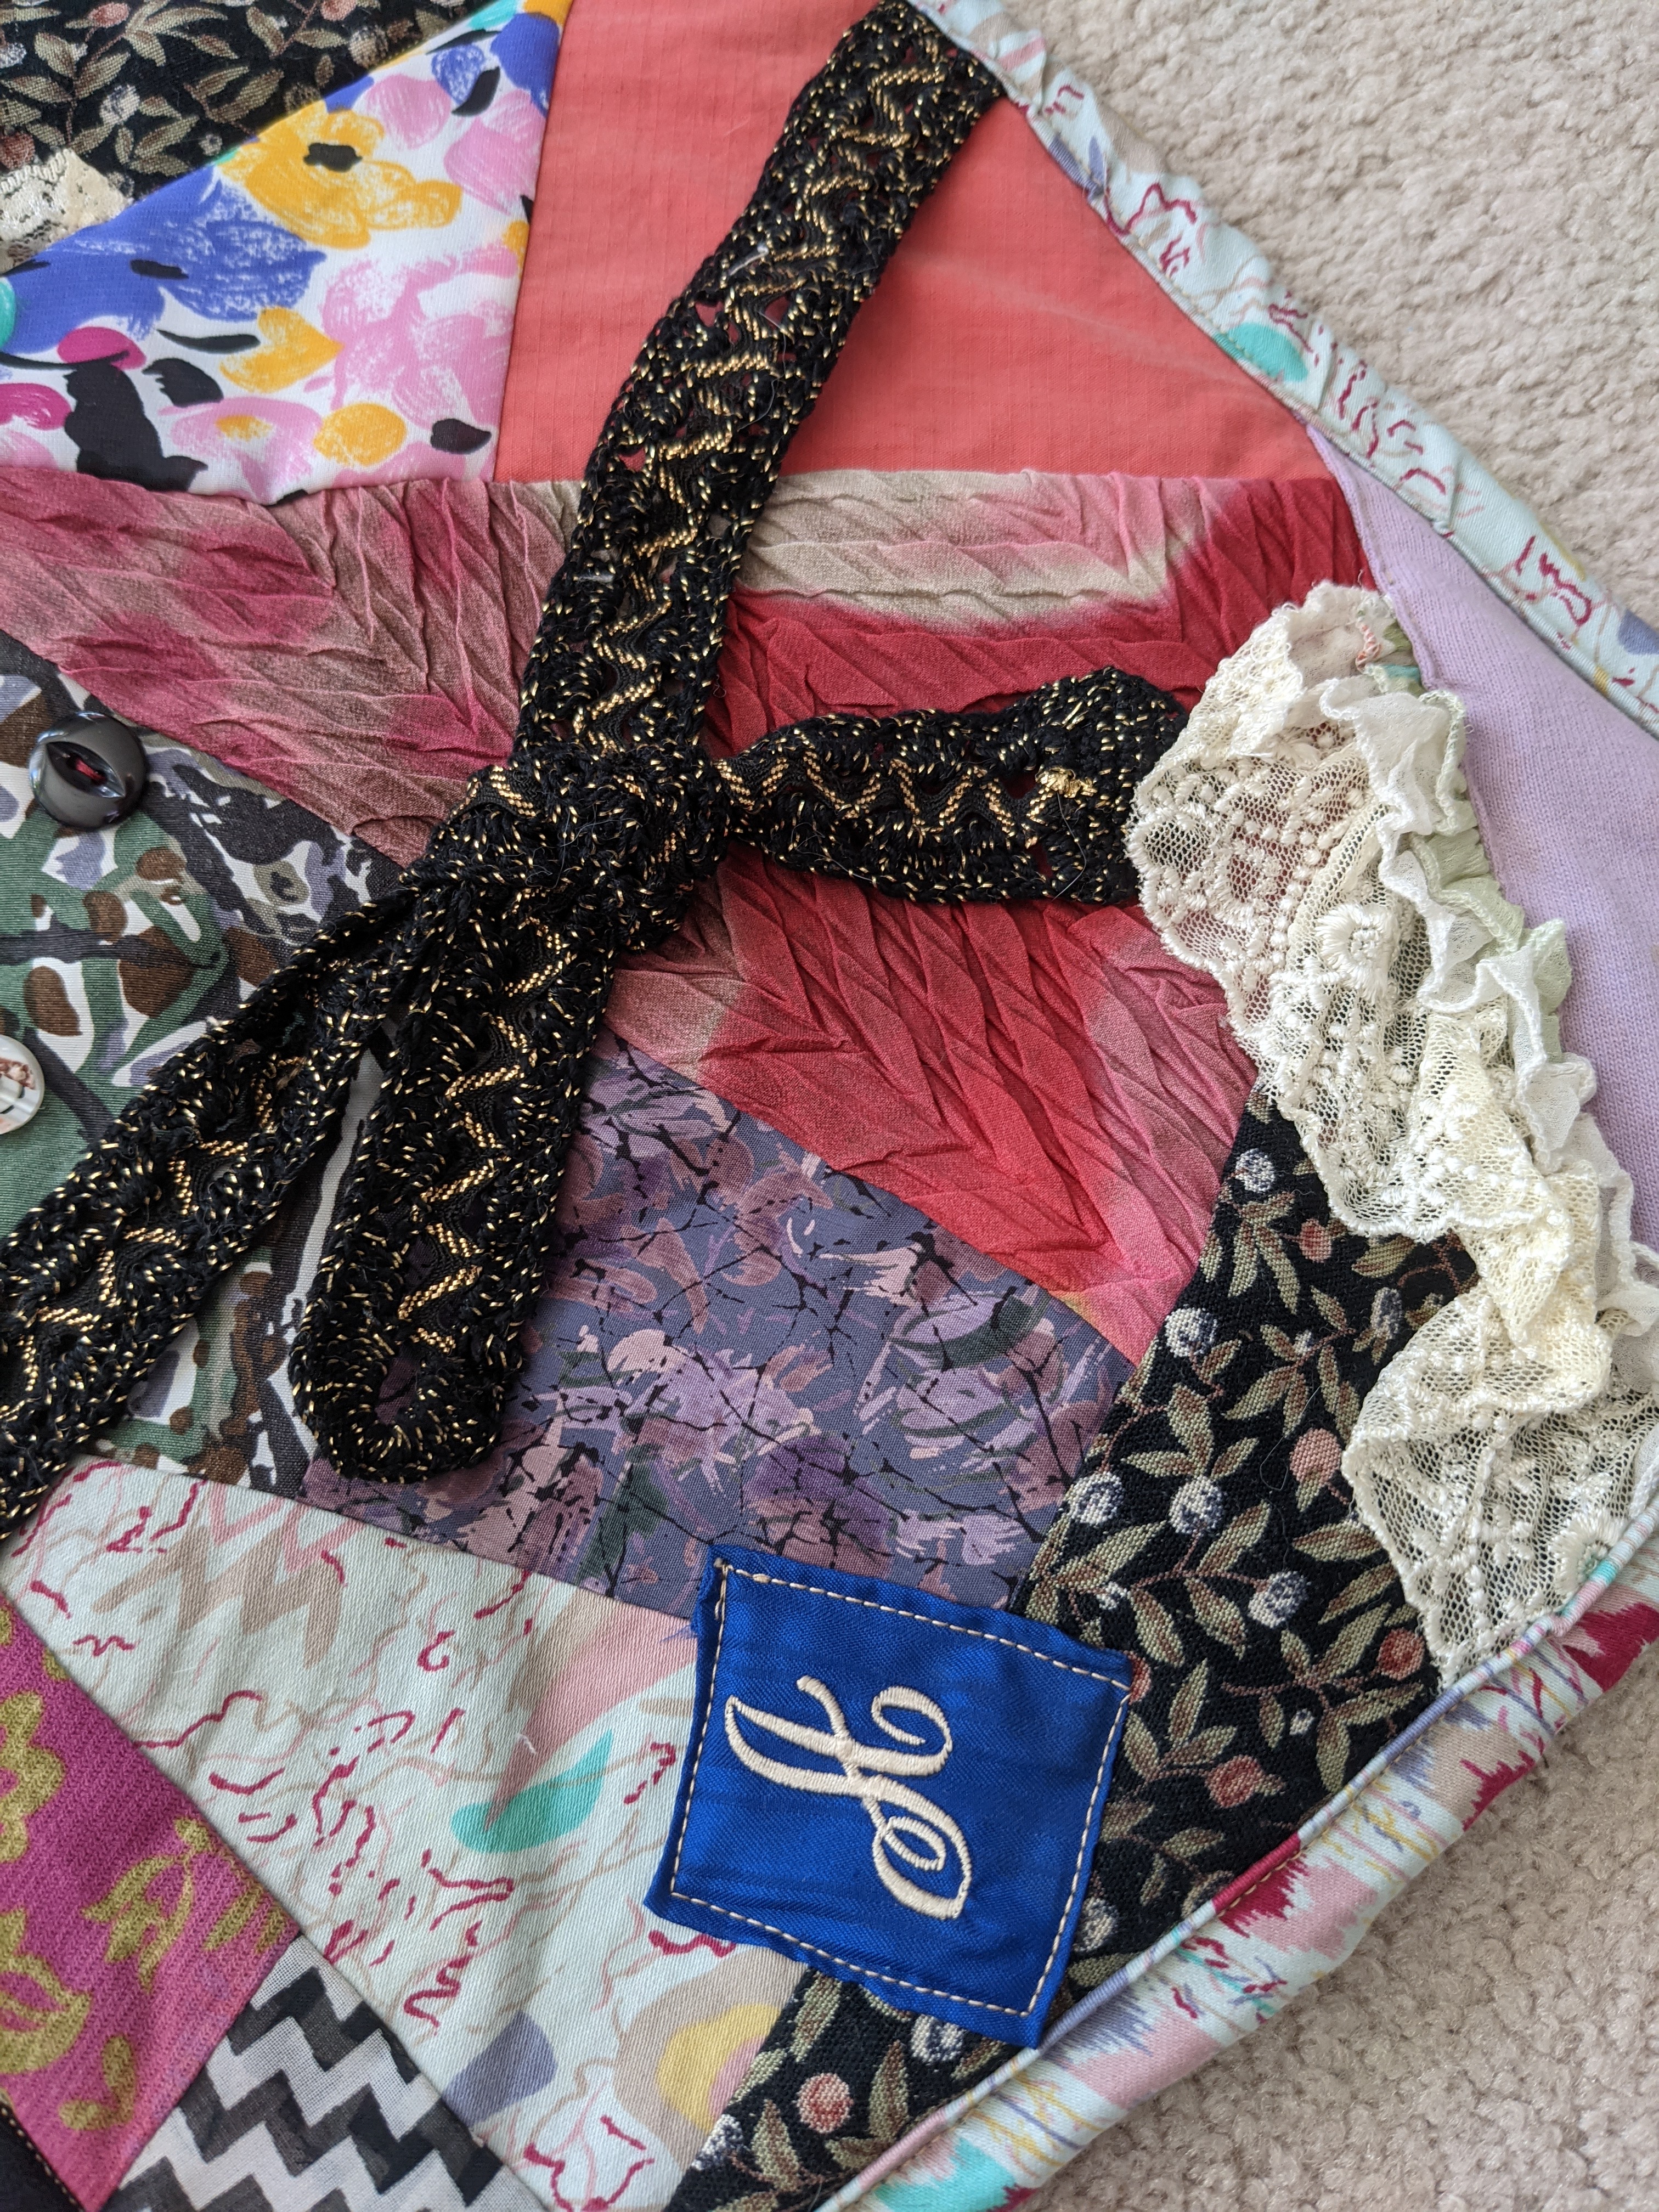
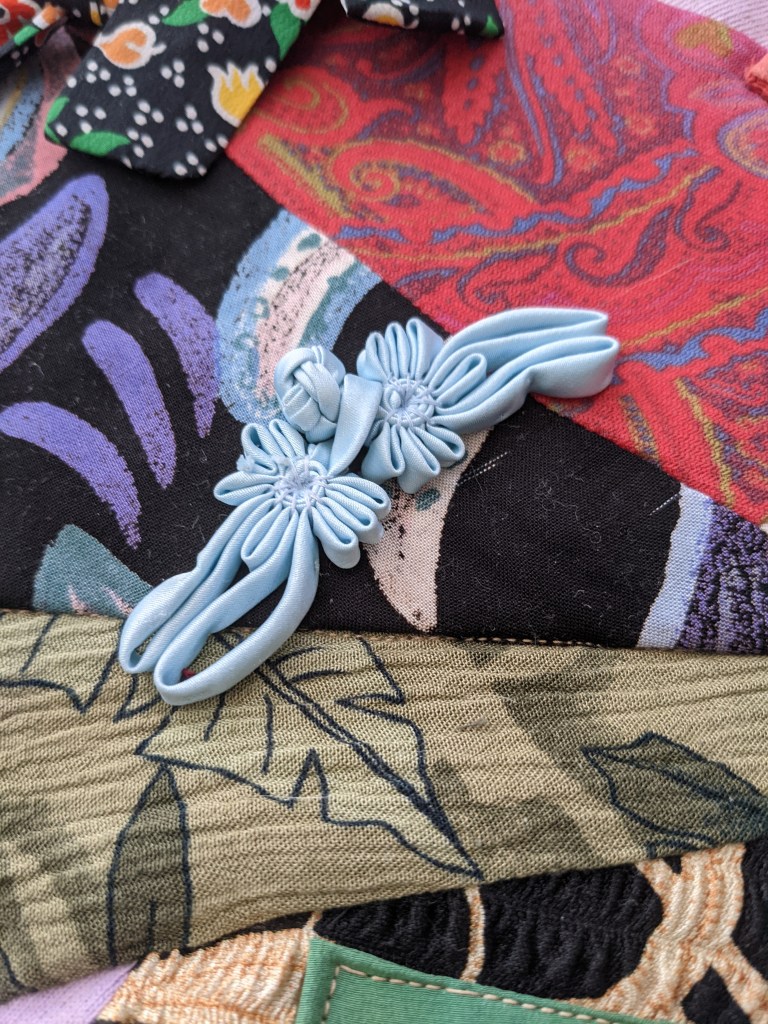
I chose some logos to applique, just like my other memory quilt. I appliqued them on the blocks, prior to piecing the 9 blocks together. At this point I also added some lace, belts/scarves, and other ties by machine.
Black and gold belt, some lace, and appliqued logo
Then I pieced it together because I wanted to add the buttons and fasteners between some blocks. I added the buttons and such by hand, since they’re a bit fiddly on the machine.
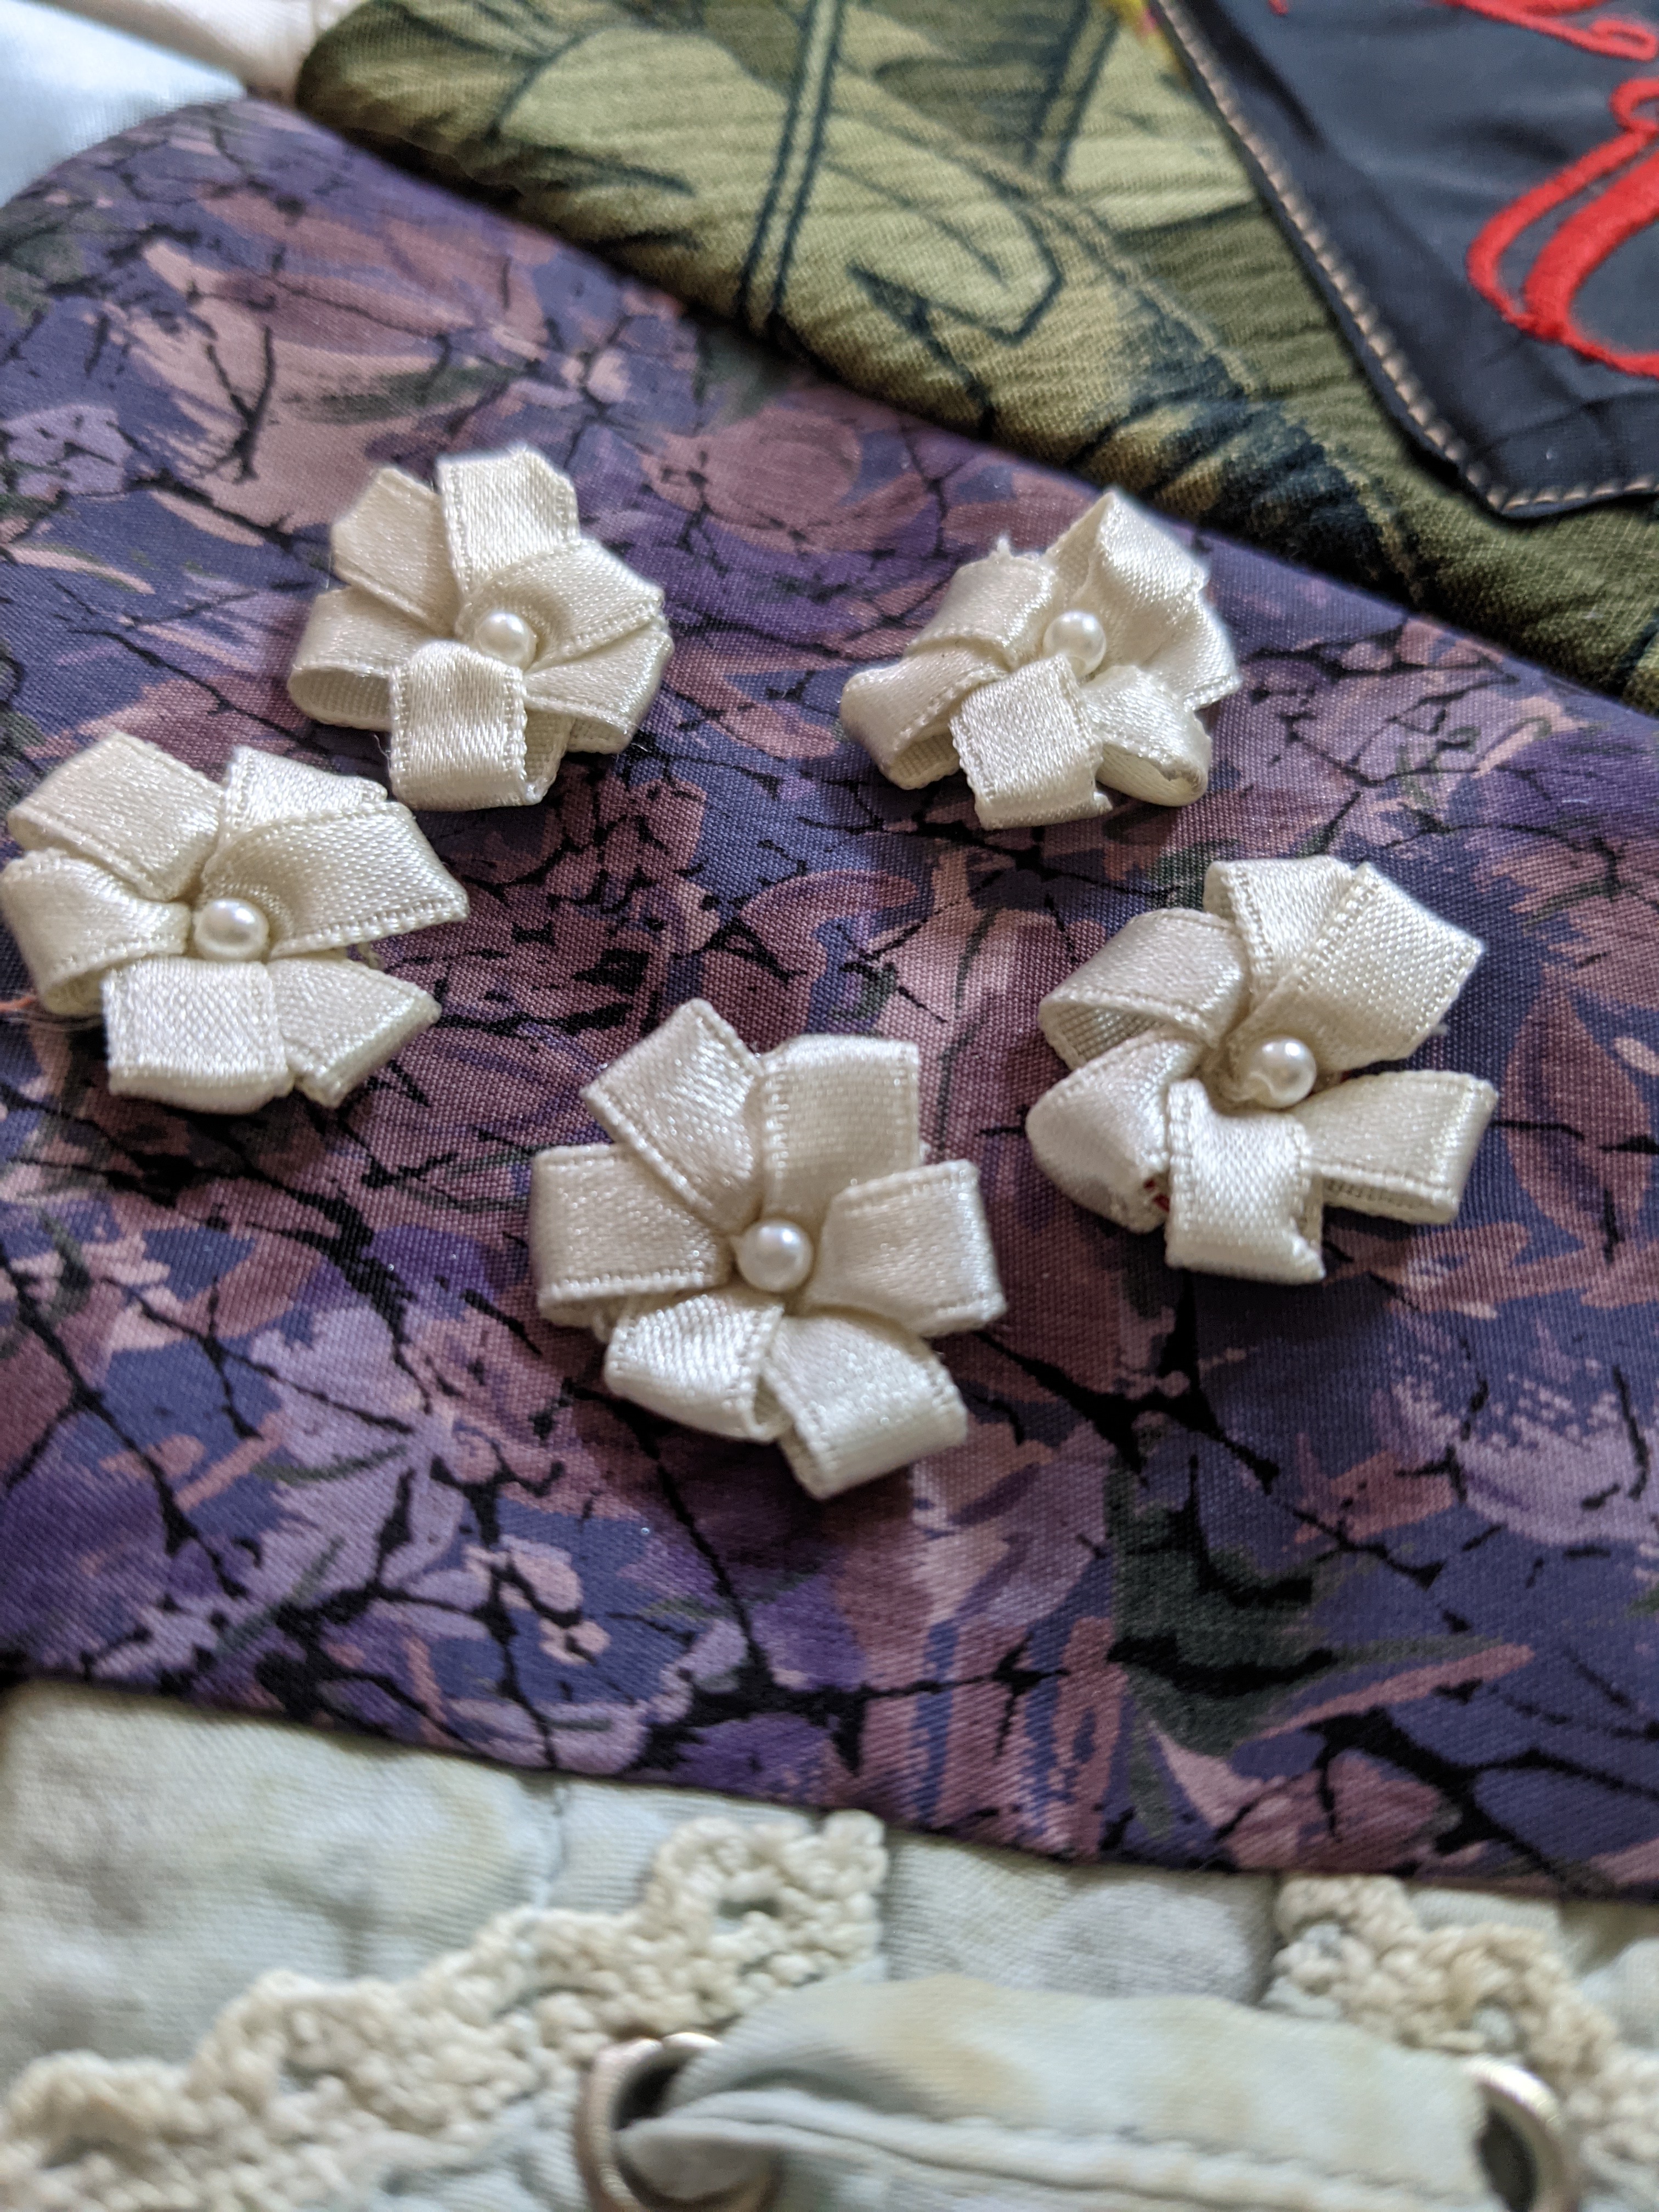
These were the buttons of the shirt seen in the background of the picture below 🙂These ribbon flowers were already part of a sweater, so I extracted them from the sweater and sewed them on! Cute little fastener from the leg of pajama pants
My cousin wanted to feature her mom’s beautifully hand painted wedding dress, so I appliqued one of the main flowers on the middle block and on the back of the quilt. I did simple stitch in the ditch quilting, since the top was already very busy.
I used jean pants pockets to allow my cousin to hang up the quilt if she ever chooses.
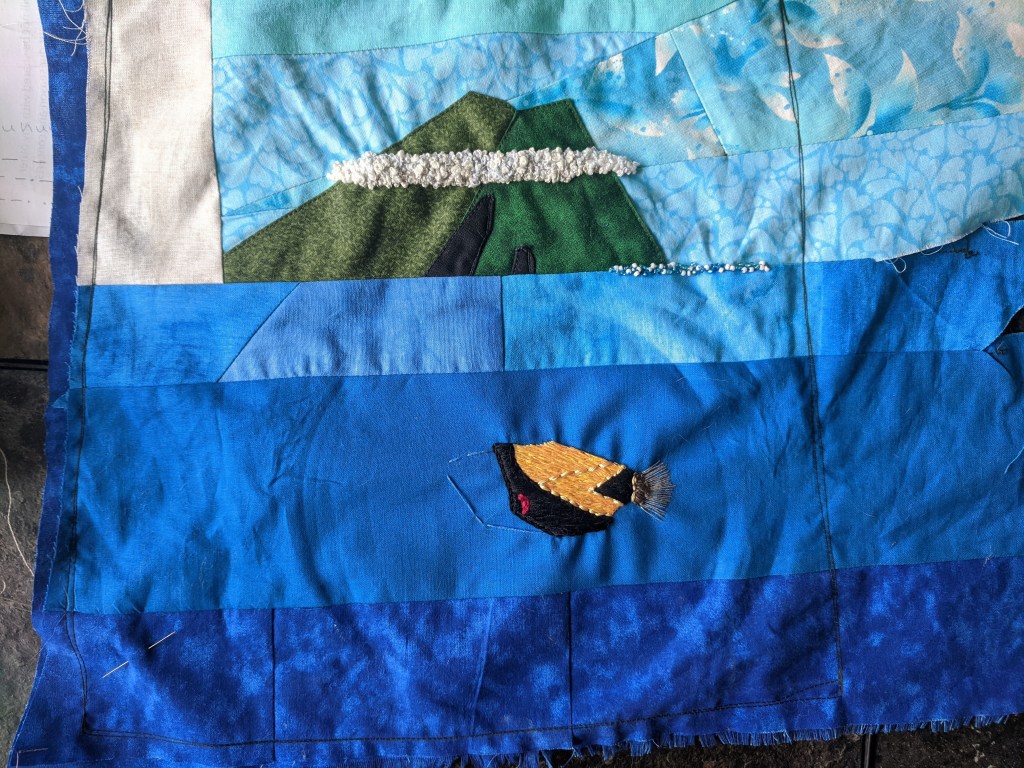
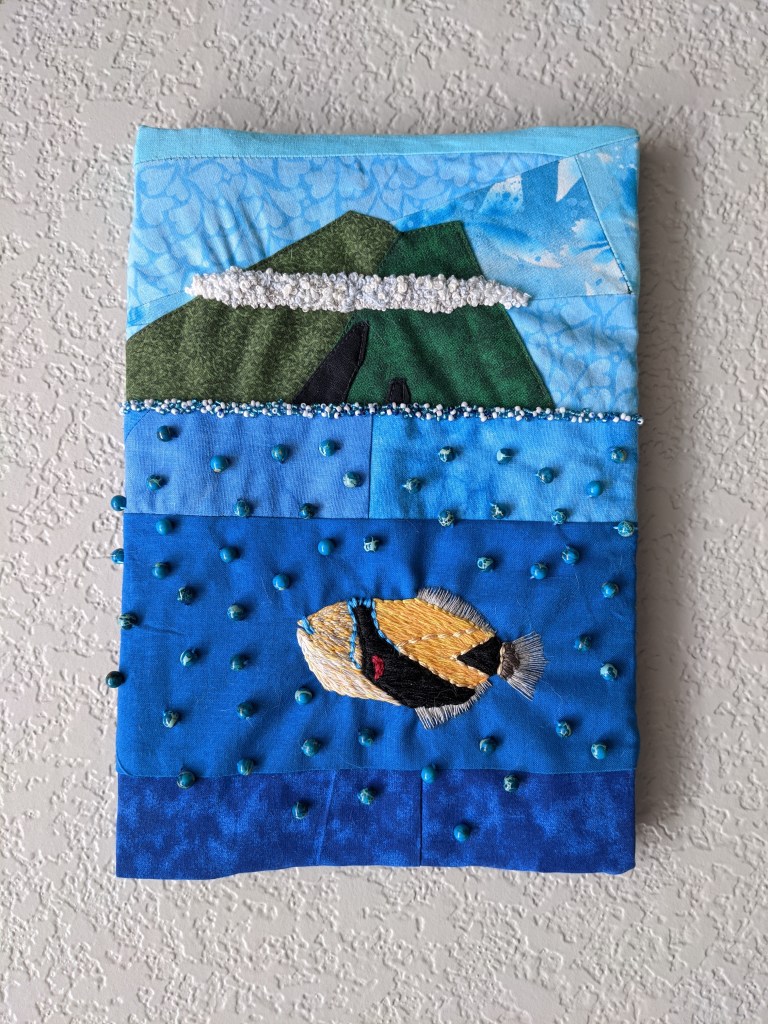
A year ago, some friends and I went to Hawaii and I bought these really cool ocean beads for an embroidery project. I wanted to have a humuhumunukunukuapua’a with Maui in the background to honor all our snorkeling adventures 🙂
I pieced some scraps together to make the background, and appliqued the black lava flows on. Using lots of layers made the whole thing a bit thick, plus I sewed a backing stabilizing layer onto the back to help with limiting stretch from the embroidery hoop. Luckily I didn’t have to do much embroidery over the thickest parts.
This was my first time doing beadwork, and it was very labor intensive but fun. I used blue and white beads to make seafoam. For whatever reason, I have a stockpile of random beads that’s lived in my craft box forever, so it was nice to use some up. Plus, since I used scraps and thread I already owned, the only cost of this project was the beads themselves.
I used French knots for the ever-present cloud layer around Haleakala, mixing some white and gray threads.
Once upon a time I bought some gradient thread, which finally came in handy for giving the humuhumu texture in the orangey-yellow portions.
And then I added all my ocean/bubble beads! I tried to be as random as possible and the back of this looks like complete chaos 🙂 I cut some yardsticks to size and glued them into a frame. Embroidery often gets displayed in a circle hoop, but I knew from the beginning this piece was meant to be a rectangle. It sits next to my bird embroidery on my stairwell 🙂
Project completed September 2020.
This is what the back looks like! Thread tie offs, criss crosses, and chaos 🙂
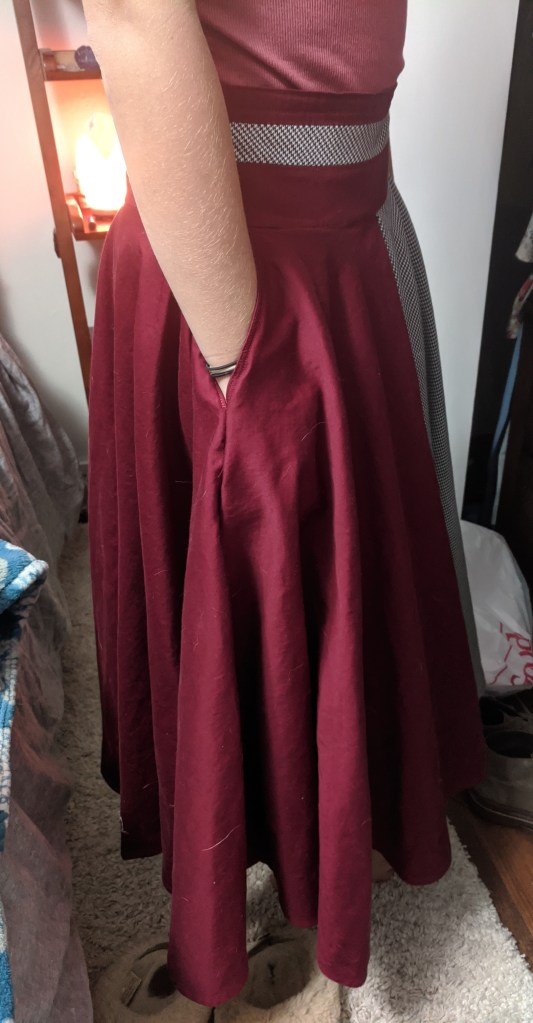
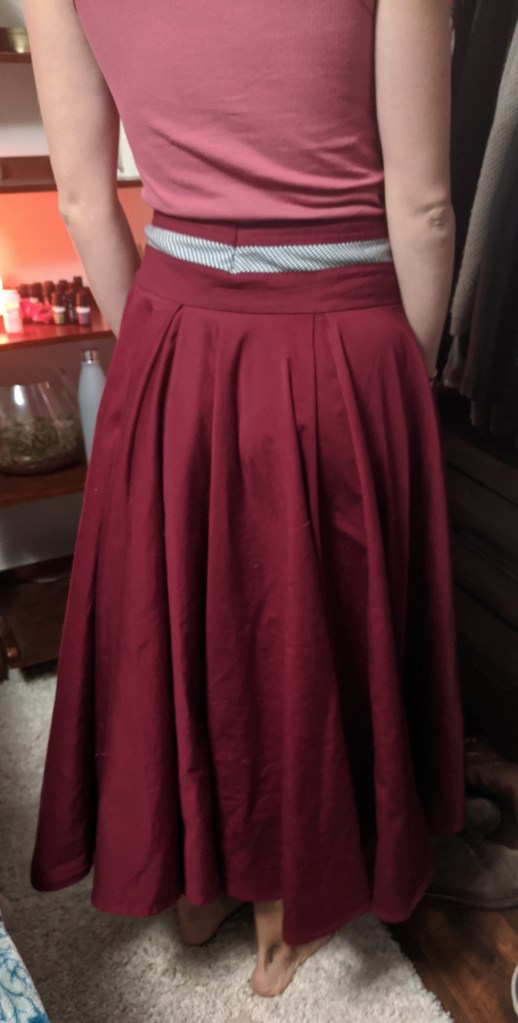
This was my first clothing project for someone besides myself! The same friend who I made the bird backpack for asked me to make a swishy, flowy skirt for her. We went to Joann’s together and picked out the main fabric and the accent fabric.
Since she wanted it to be swishy, I decided I’d make a pleated circle skirt, including even more fabric than a regular circle skirt. And including the waistband and pockets, I used up almost all of the main fabric we purchased, which was cool.
I used the accent fabric for a panel about 1/4 to 1/3 of the total skirt, and included a stripe of it in the waistband.
I know that pockets make any skirt at least 10 times better, so I included two huge pockets 🙂 I used a long zipper for the closure and did a double turn hem. I considered doing a lining, but I used so much of the main fabric that it was already a heavy and warm skirt, so any lining would make it a little leg-oven. This way, it can be worn by itself in the fall and with tights in winter. 🙂 I did include a lining in the waistband for additional structure and making sure the seams and raw edges weren’t itchy.
We did a first fitting where we found out the waist was almost perfect… without the seam allowances for the zipper. I inserted a small triangular panel and at the second fitting we got the waistband circumference right and added some small darts so the waistband is flat to her body. Then she graciously made me dinner and I sewed the last seam up afterwards.
Overall it was a bit unnerving to make a piece of clothing without being able to make sure it fit continuously along the way. But it was a good challenge and it turned out great! As usual I used the machine for most of the construction, with hand sewing for the zipper and the last seam. I like having a bit of hand sewing in each of my projects for a bit of an imperfect element.
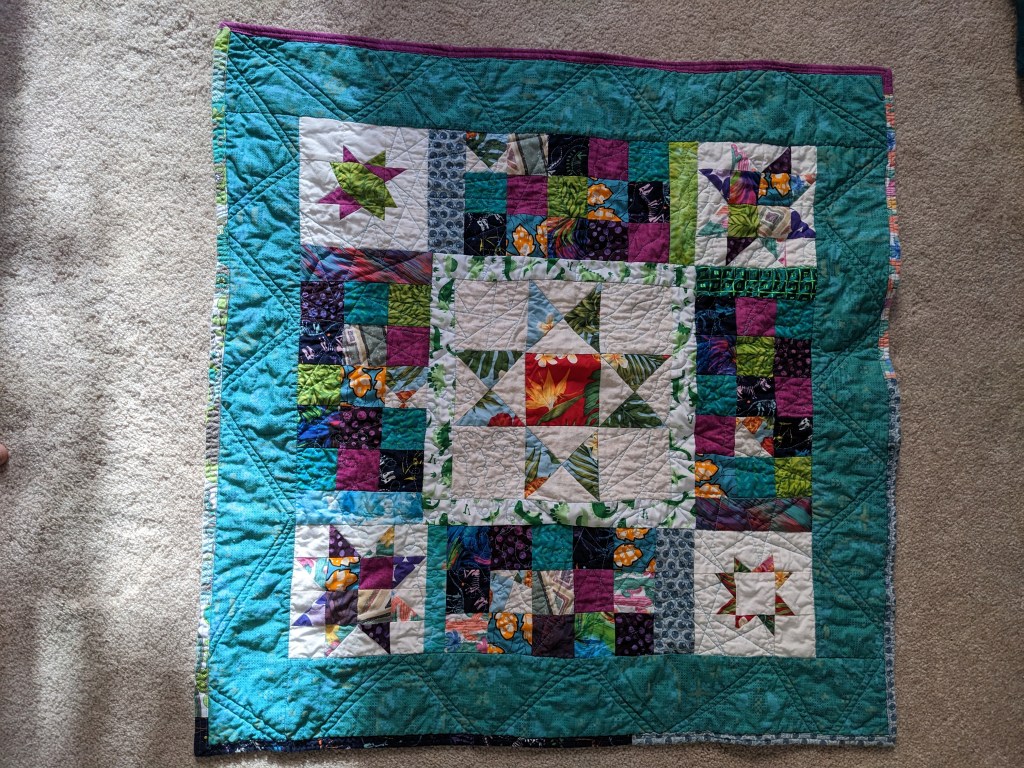
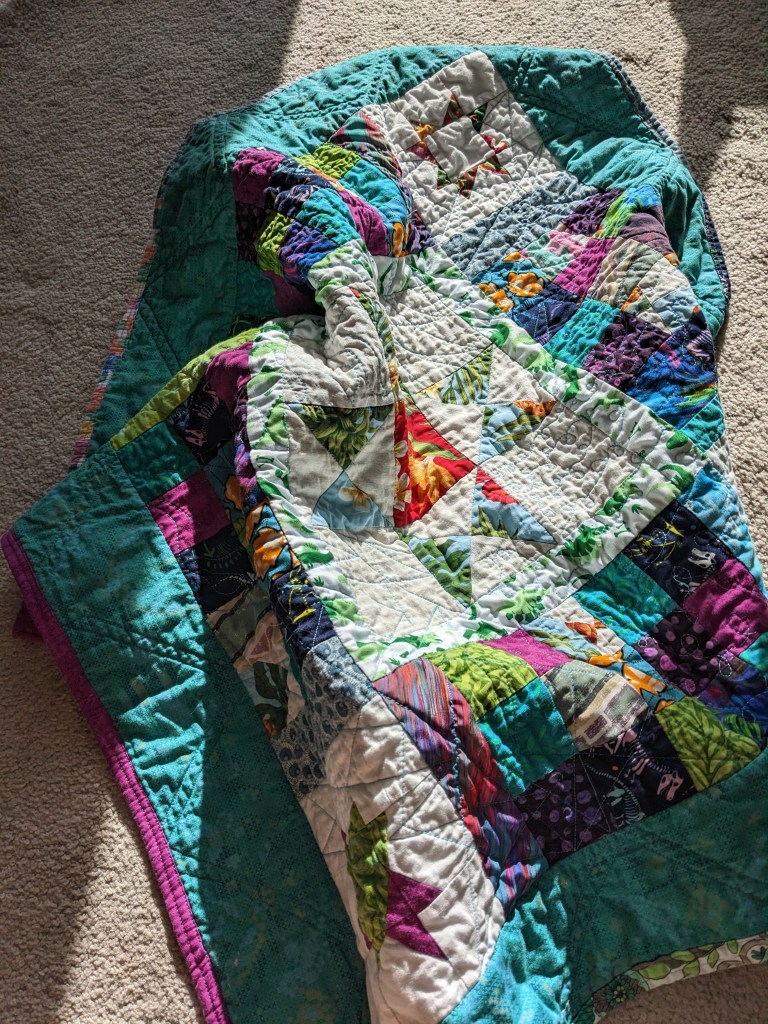
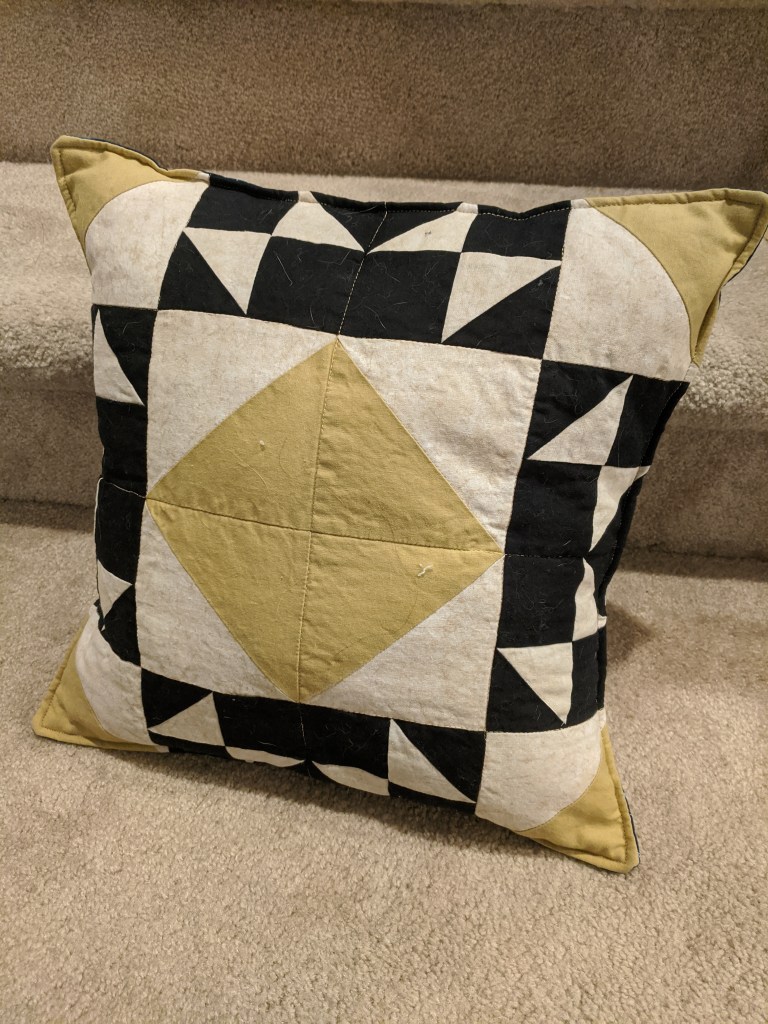
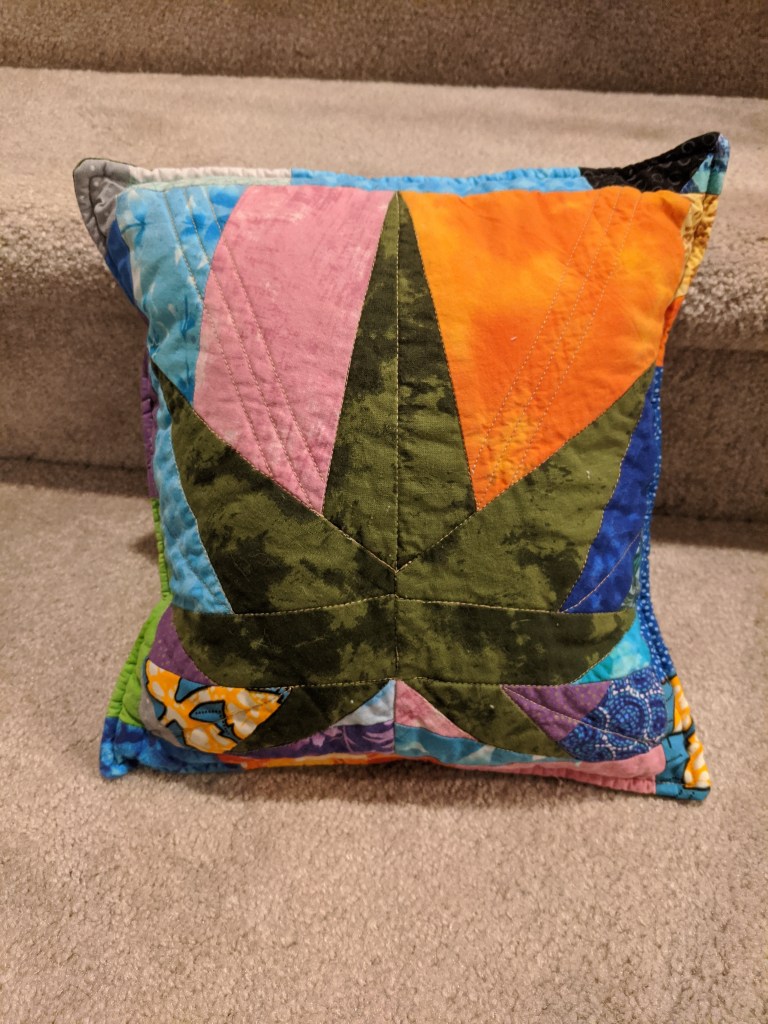
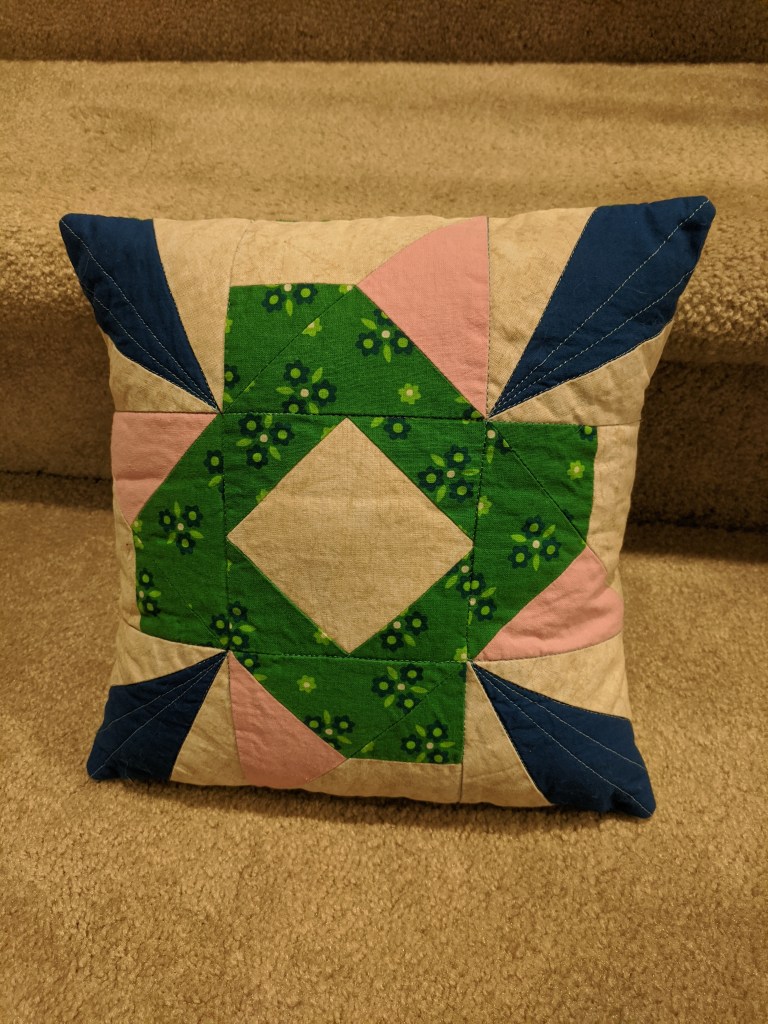
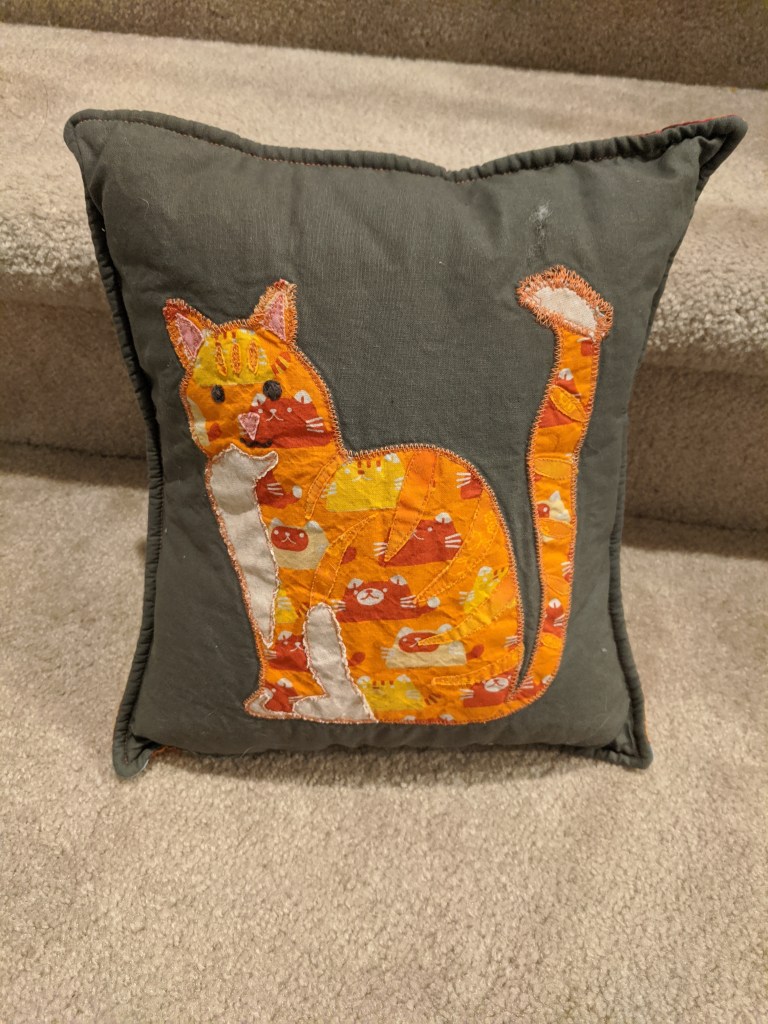
This year I did a bunch of little pillow projects for my friends and family 🙂 I got to learn some different techniques like fusible applique and paper piecing. I used lots of different fat quarters from Joann and scraps from previous projects. I generally used envelope backs and a little label to keep them closed. I stuffed them with some extra stuffing I had from pillows I’d bought previously, unfortunately none of them finished at a normal pillow form size.