Tag Archives: watercolor

Autumn Projects

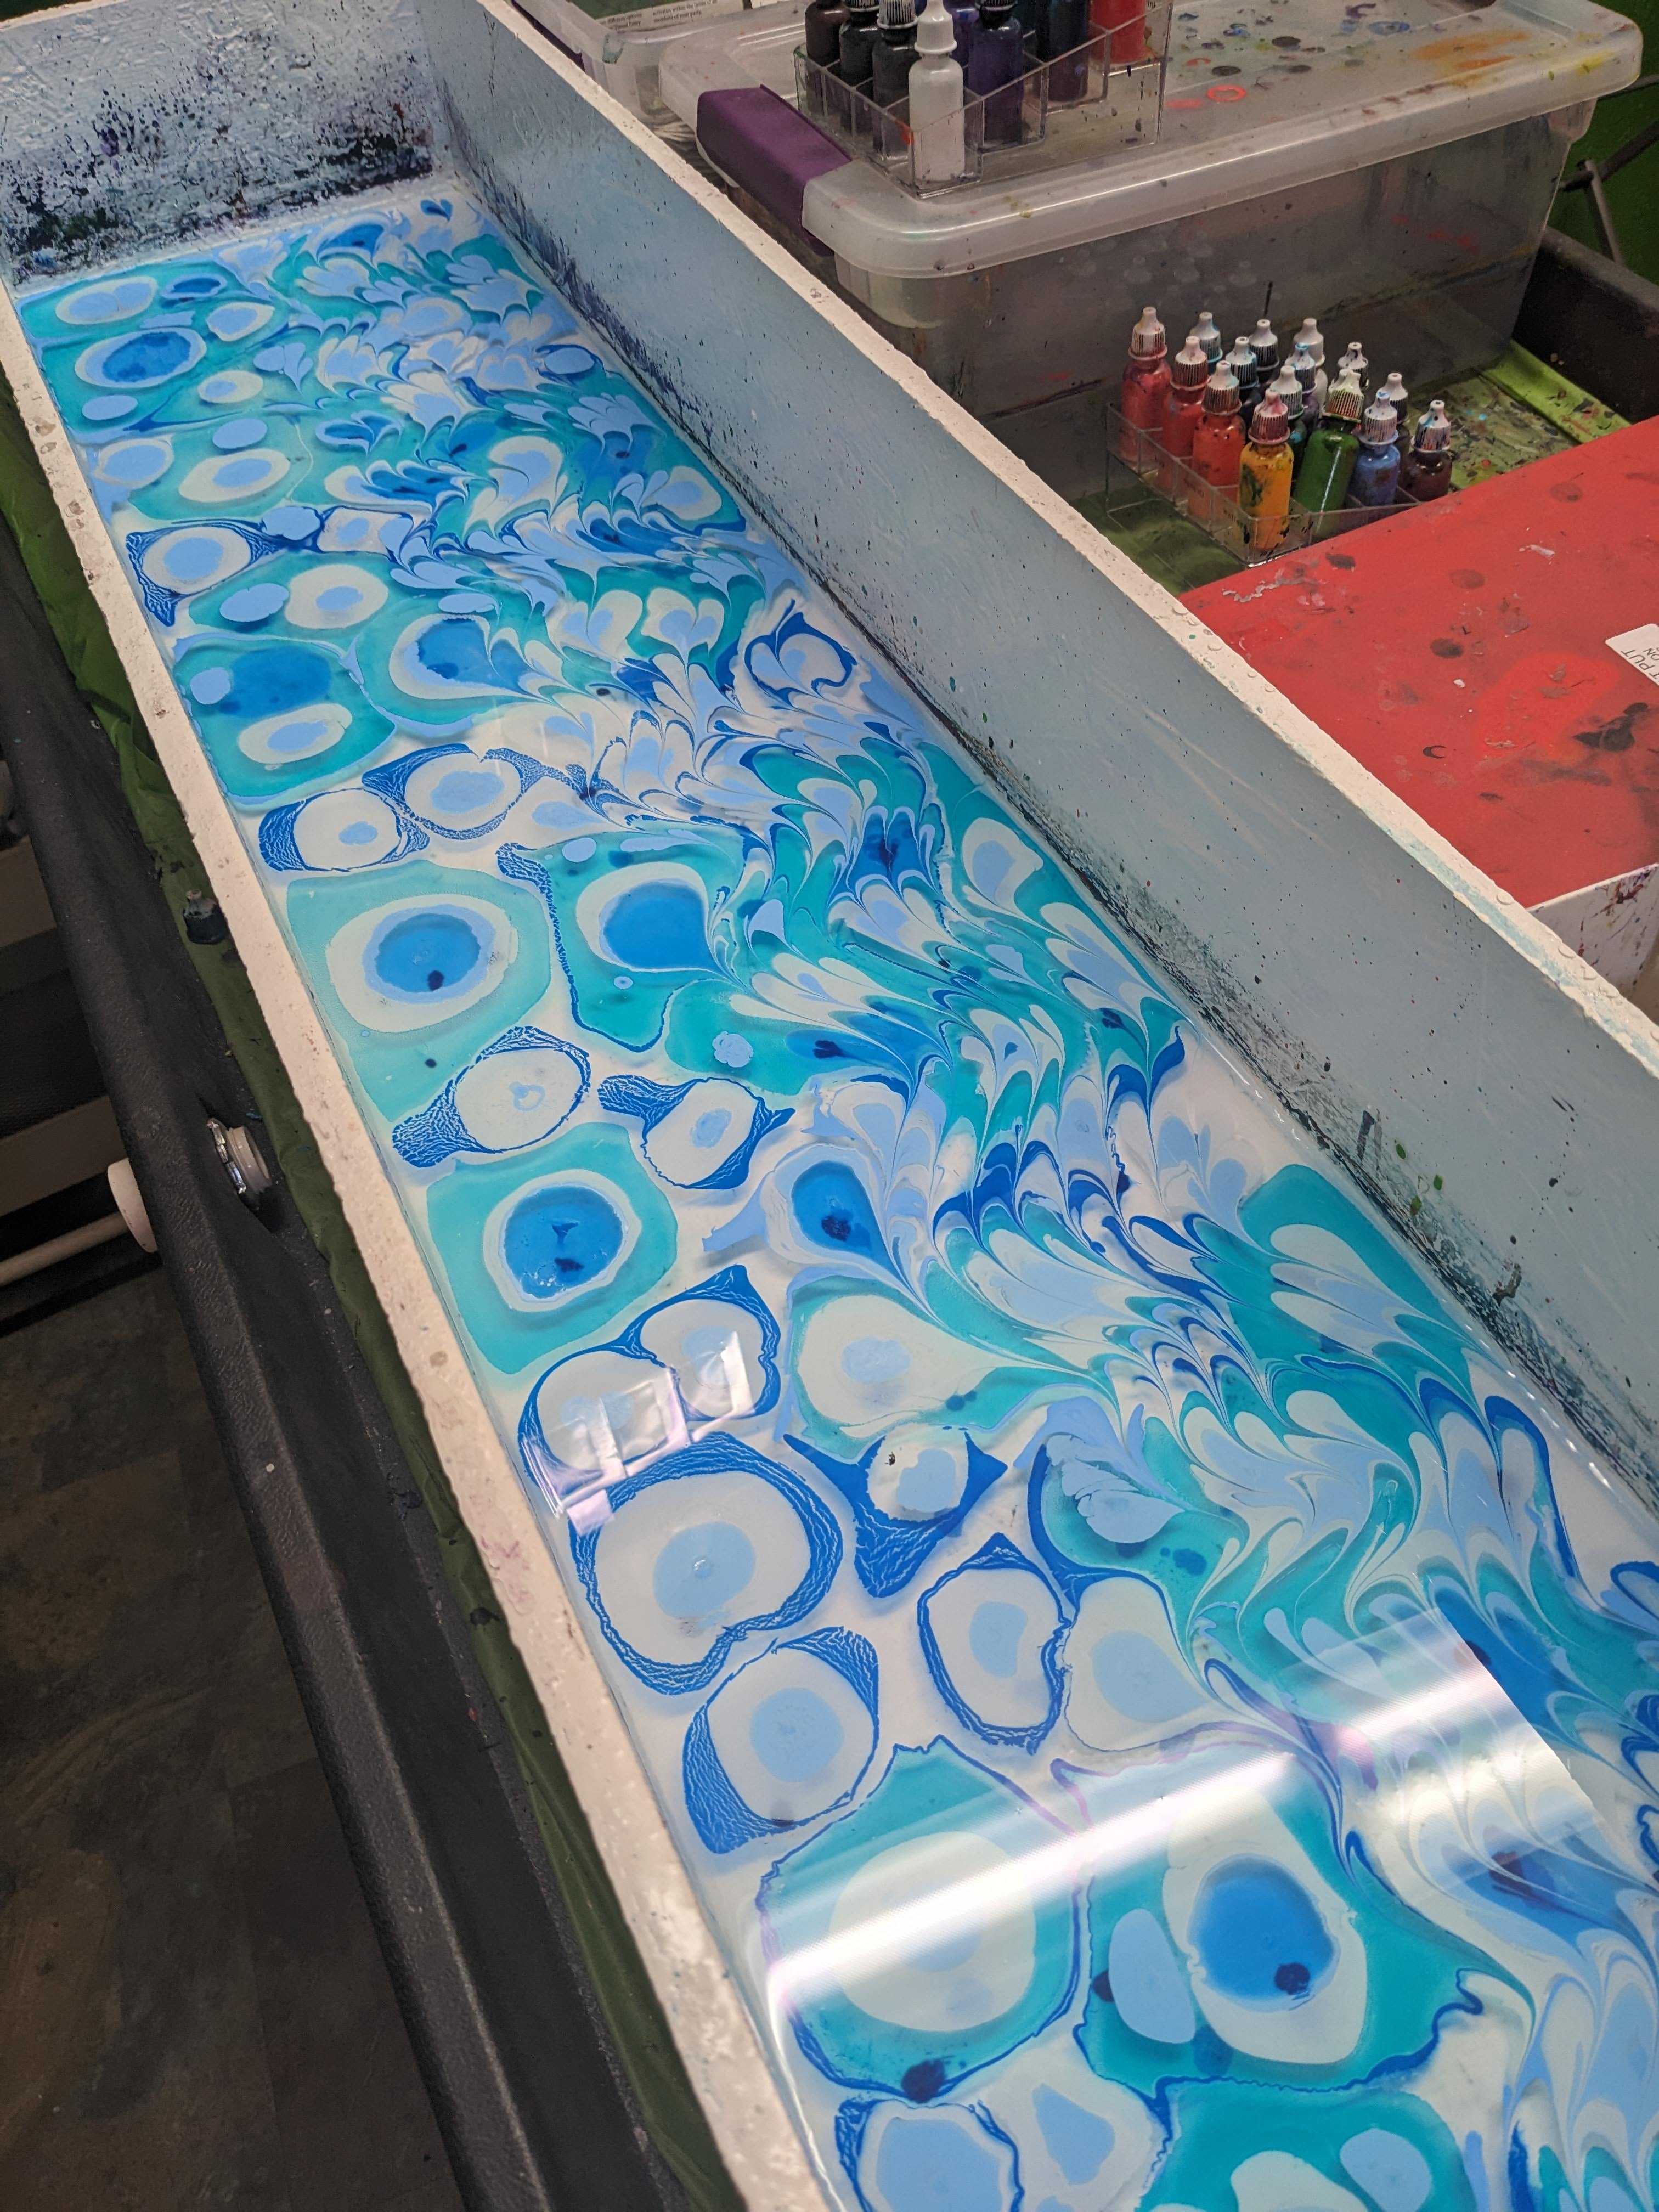
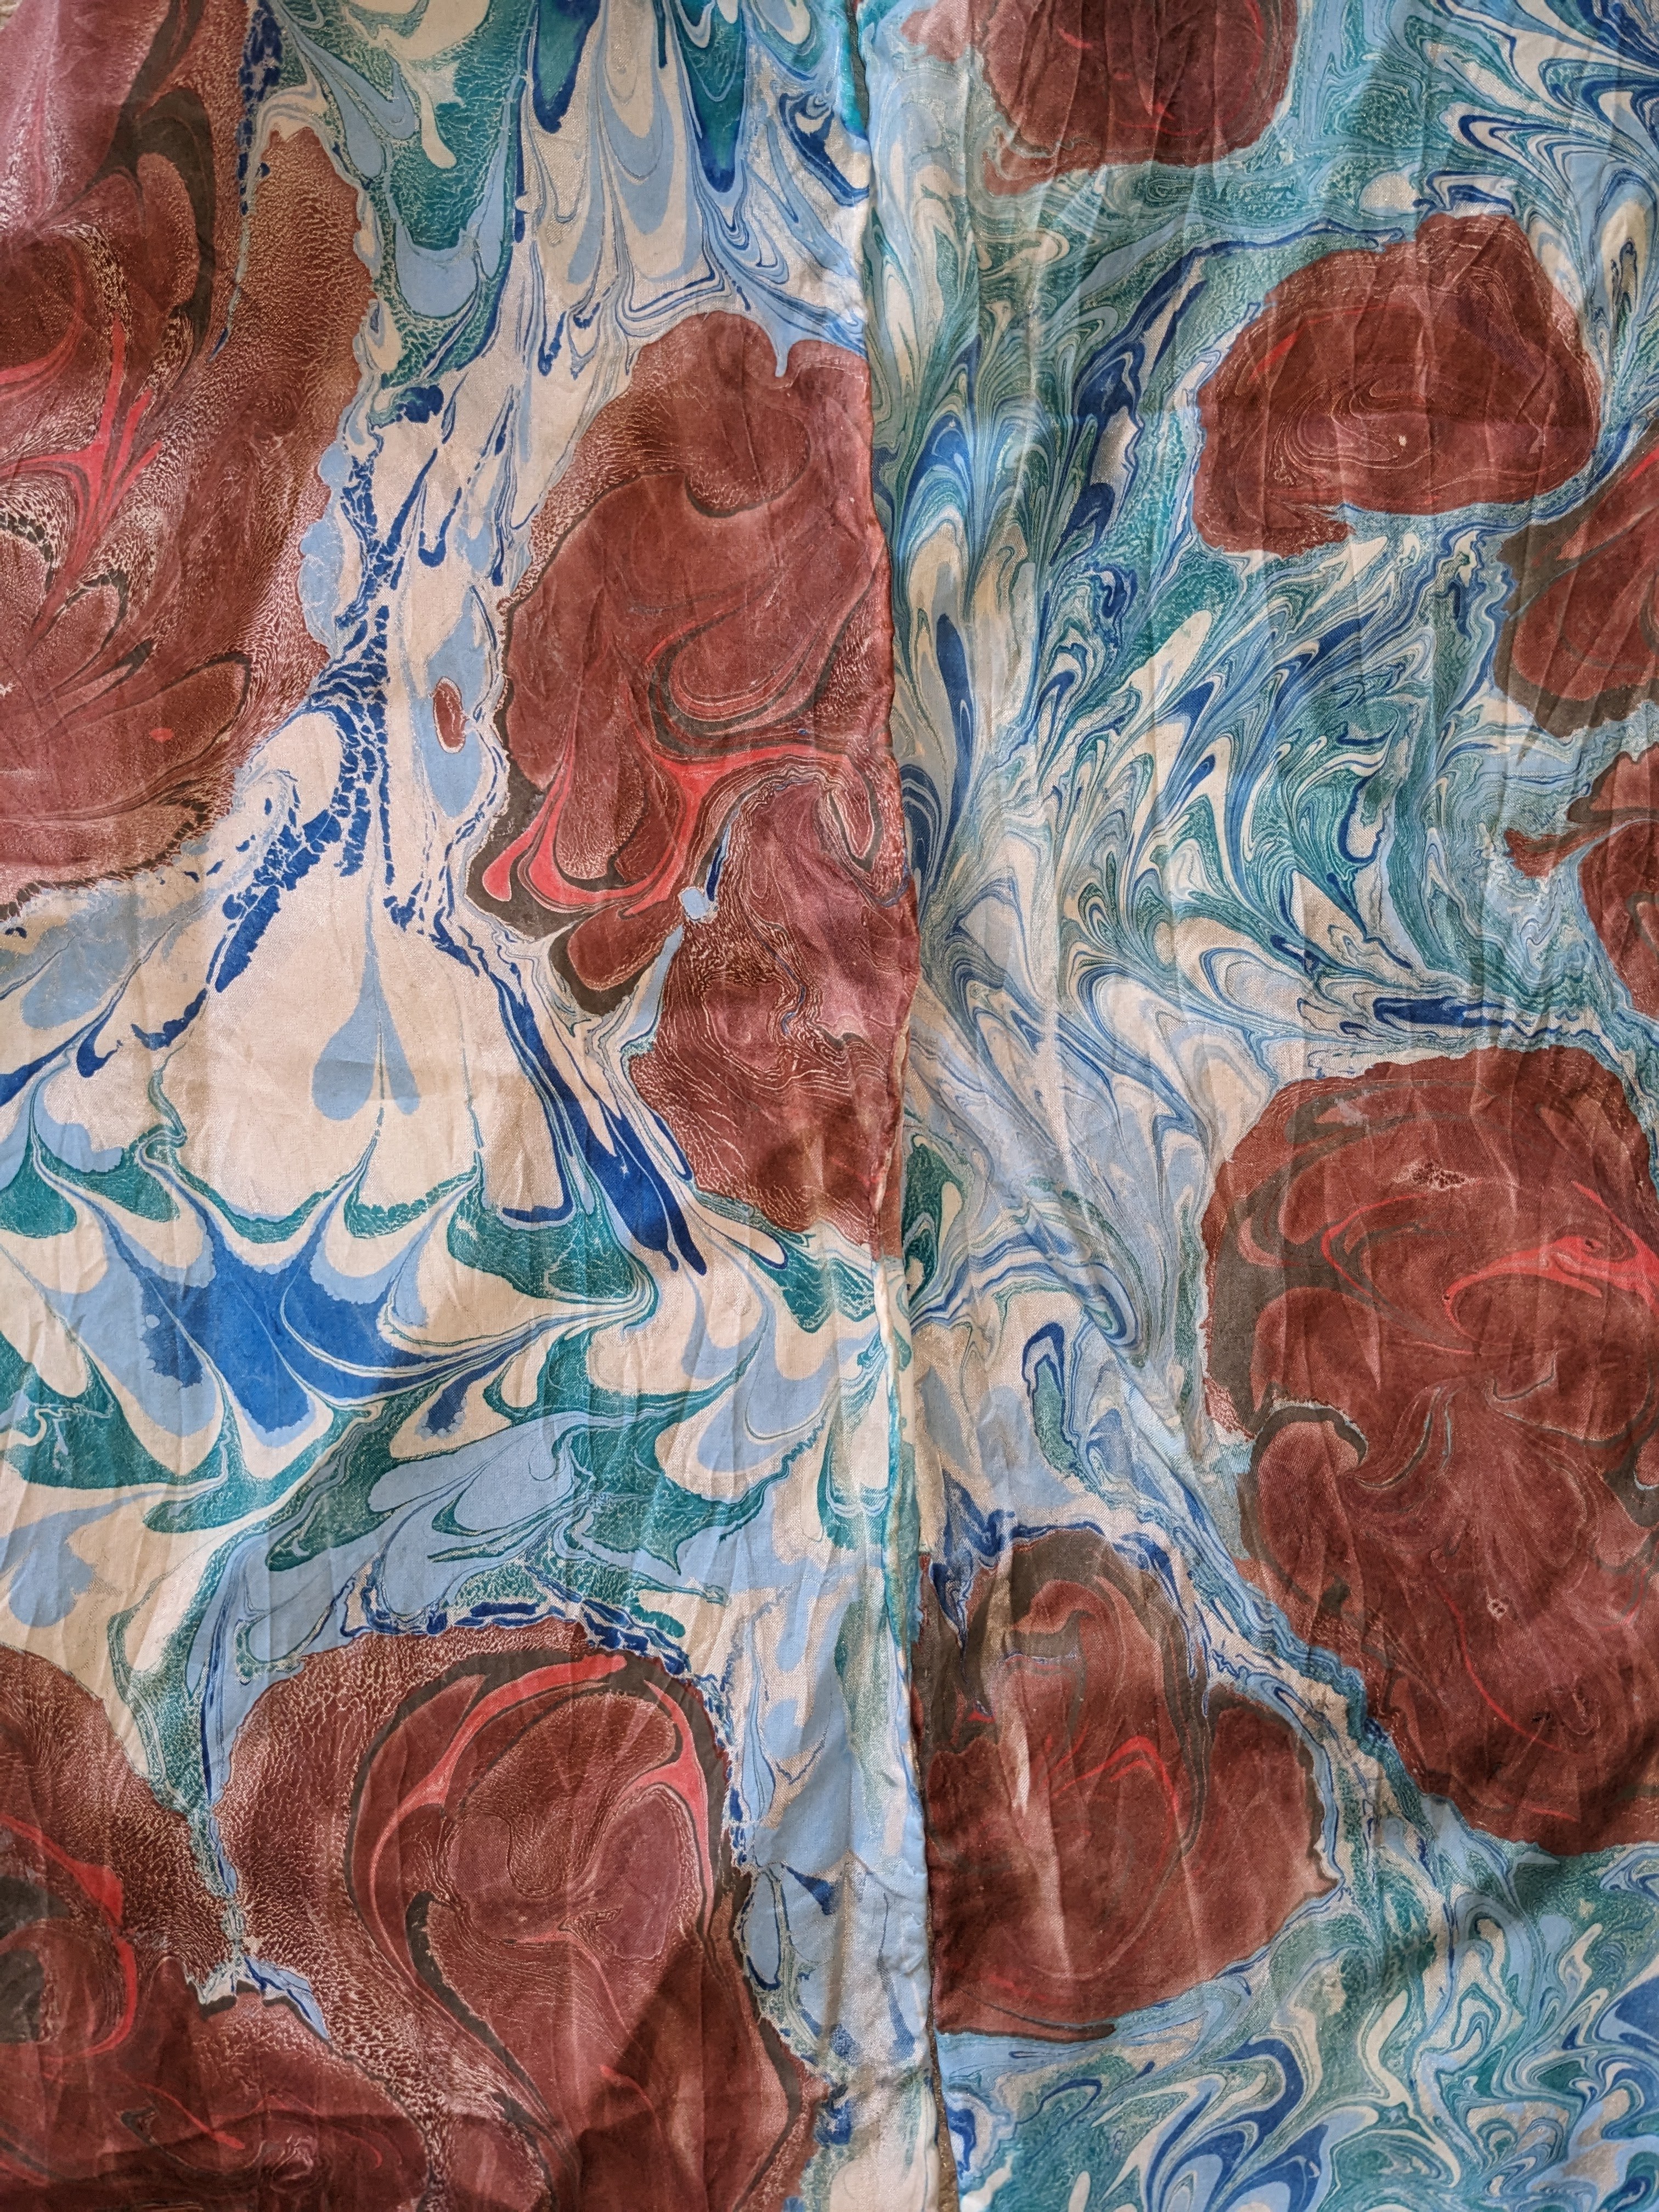
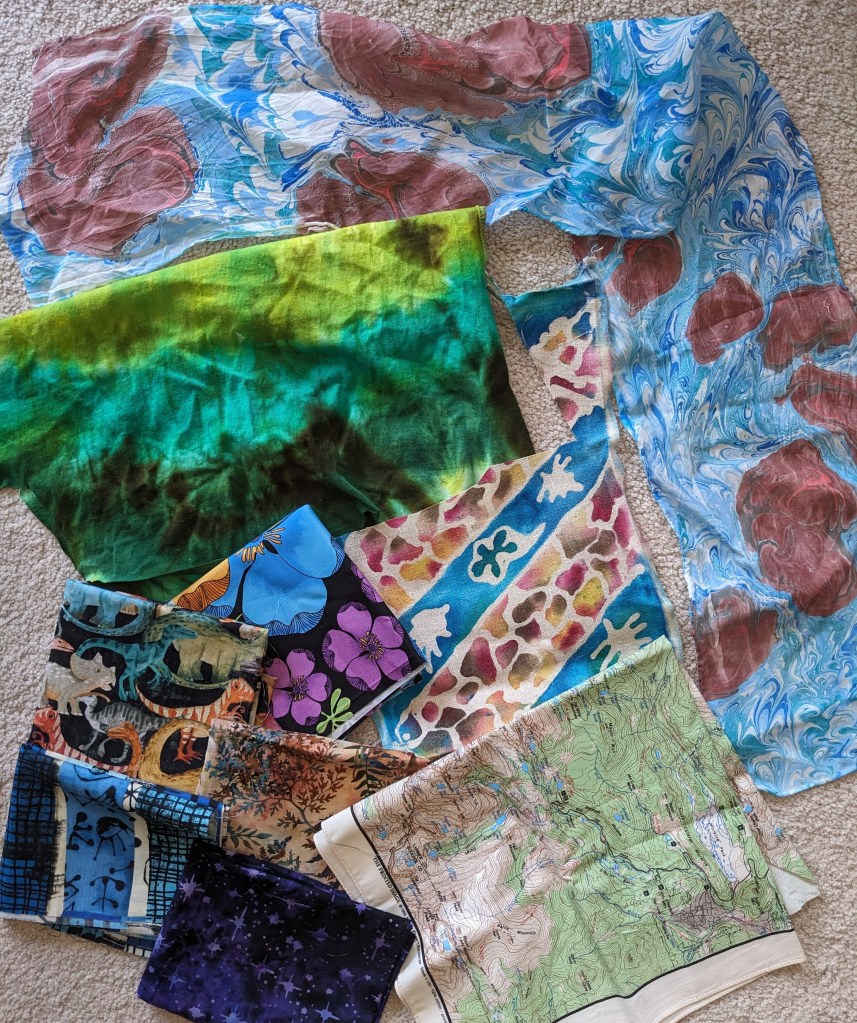
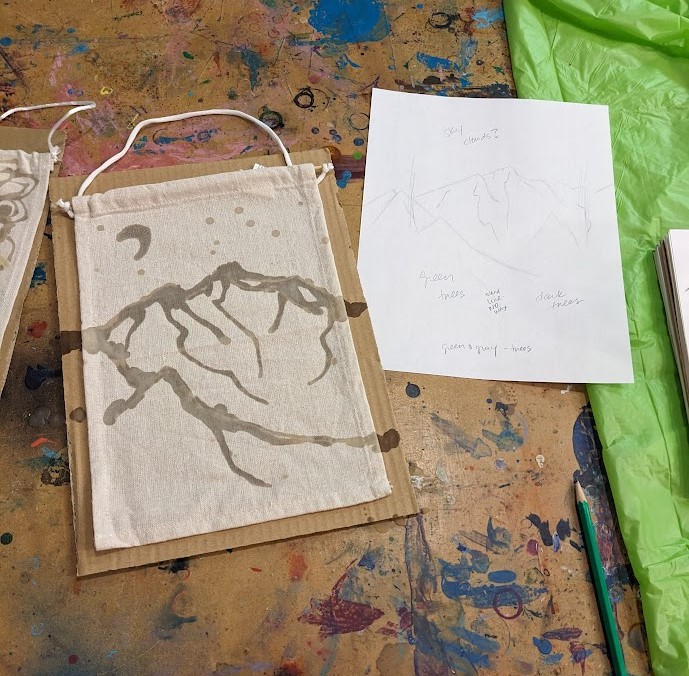
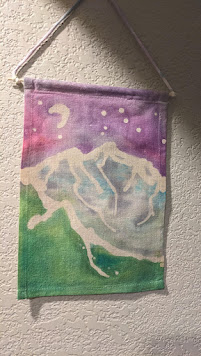
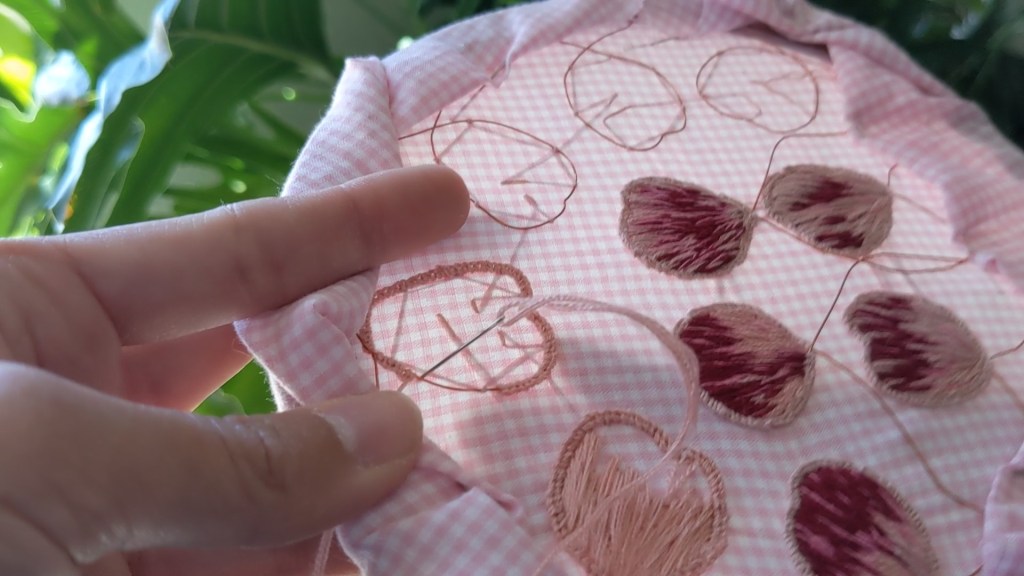
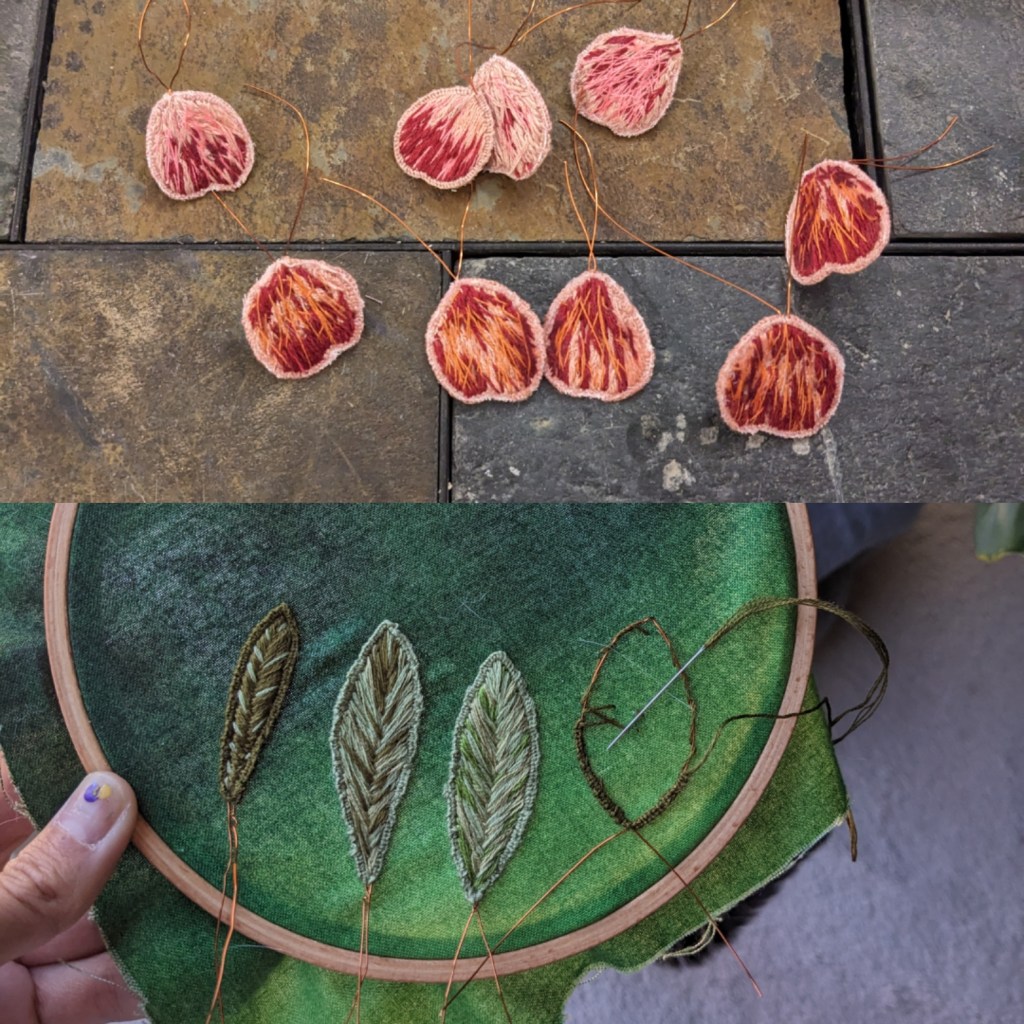
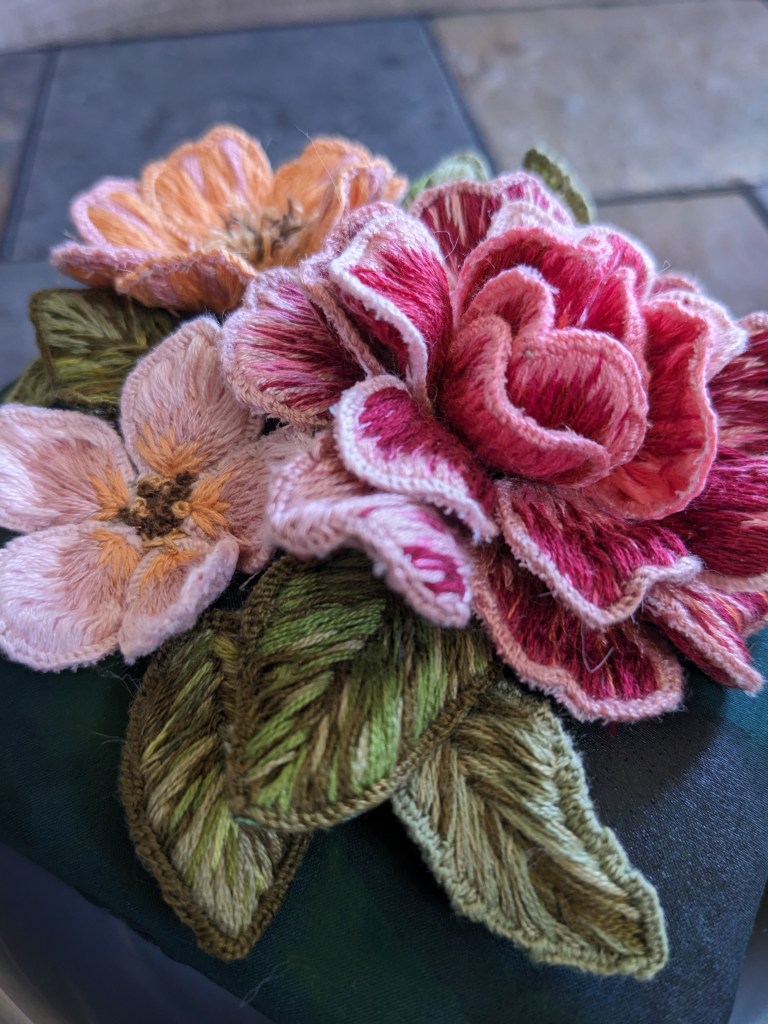
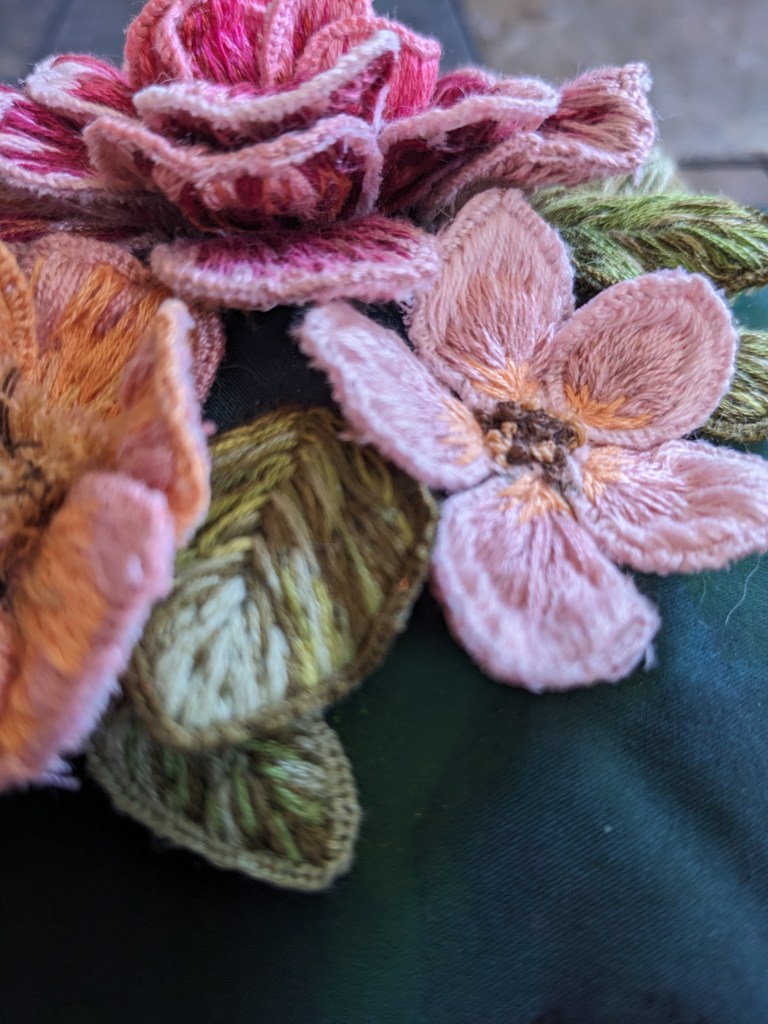
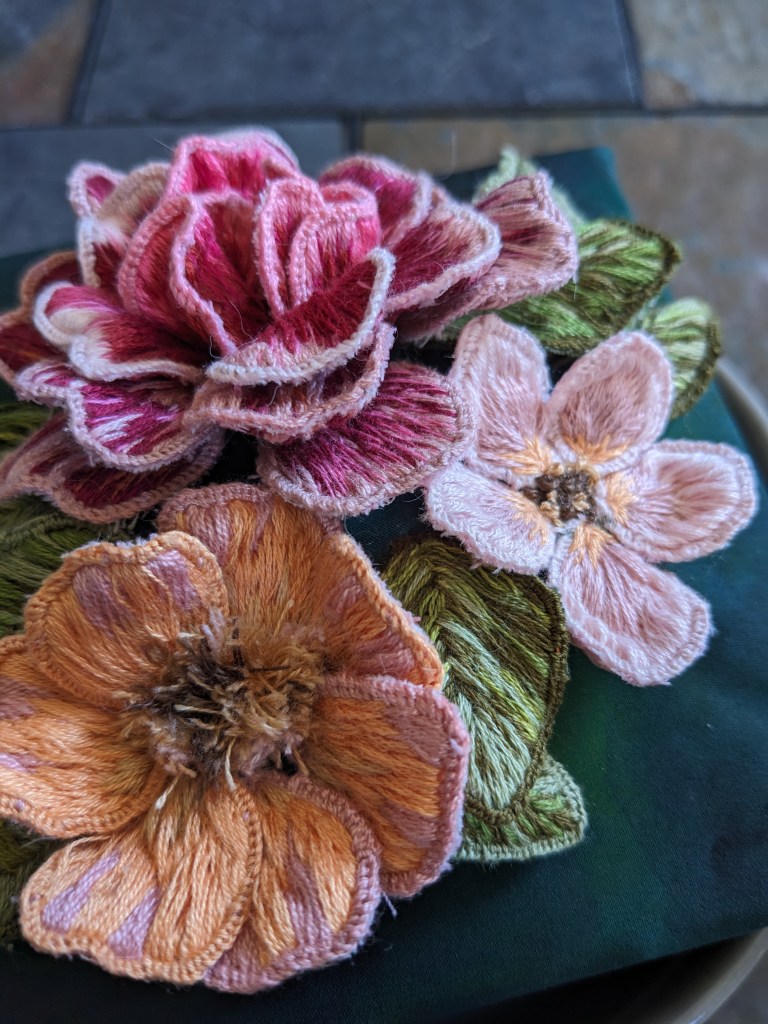
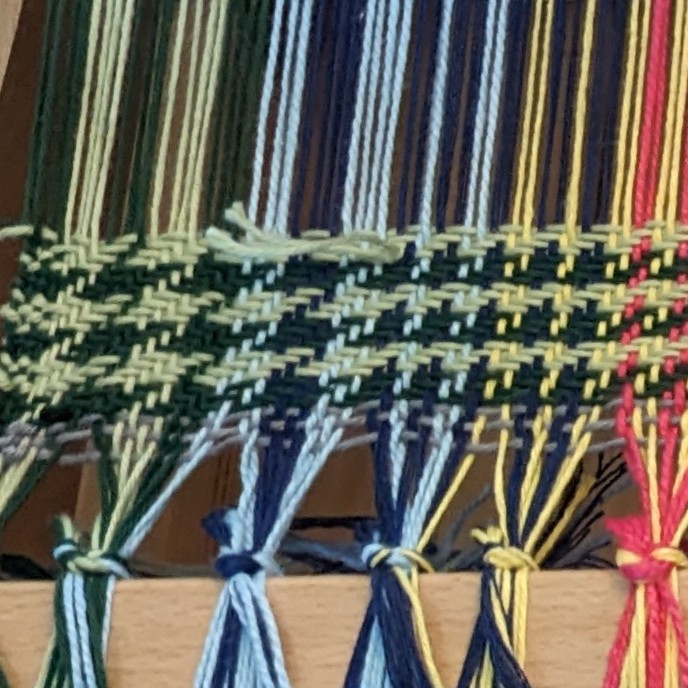
I’ve mainly been working on New Years gifts recently, so here are some sneak peeks:

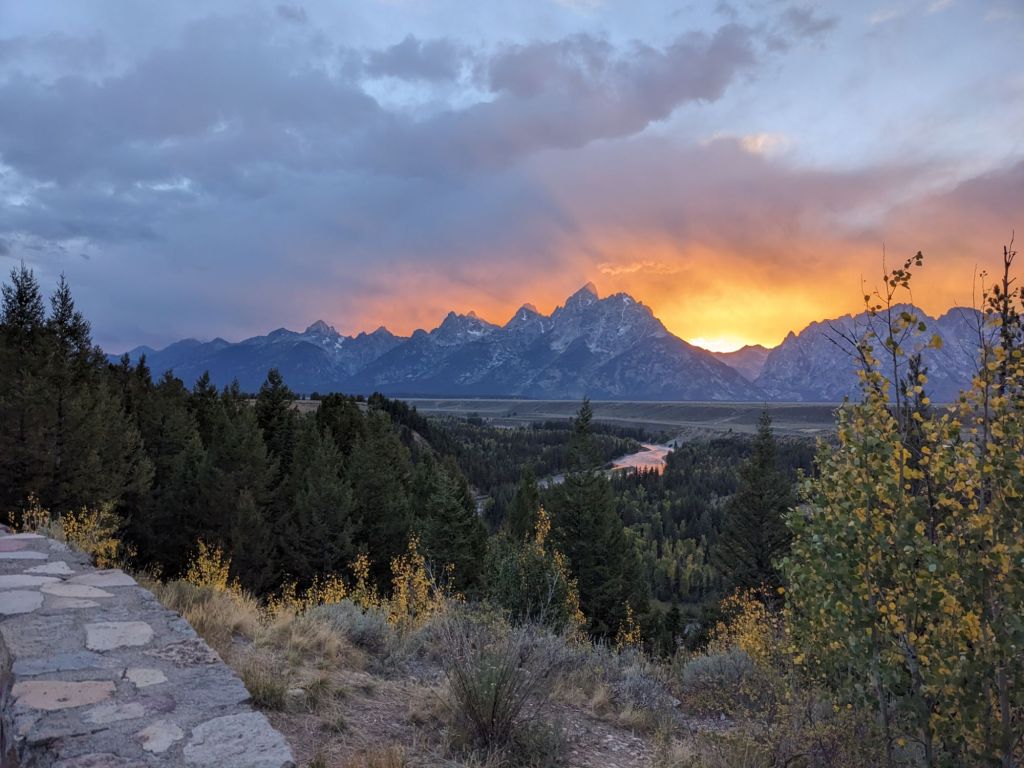
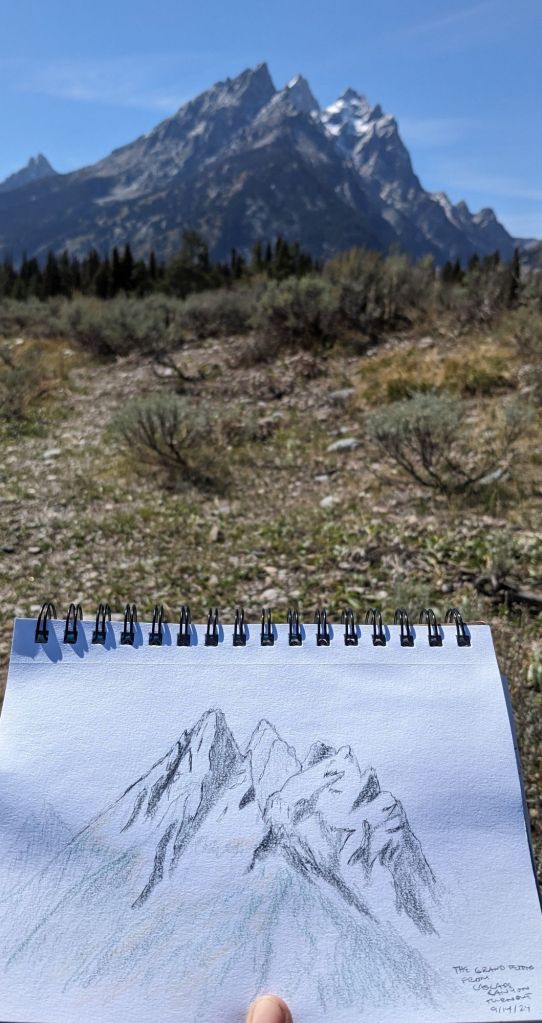
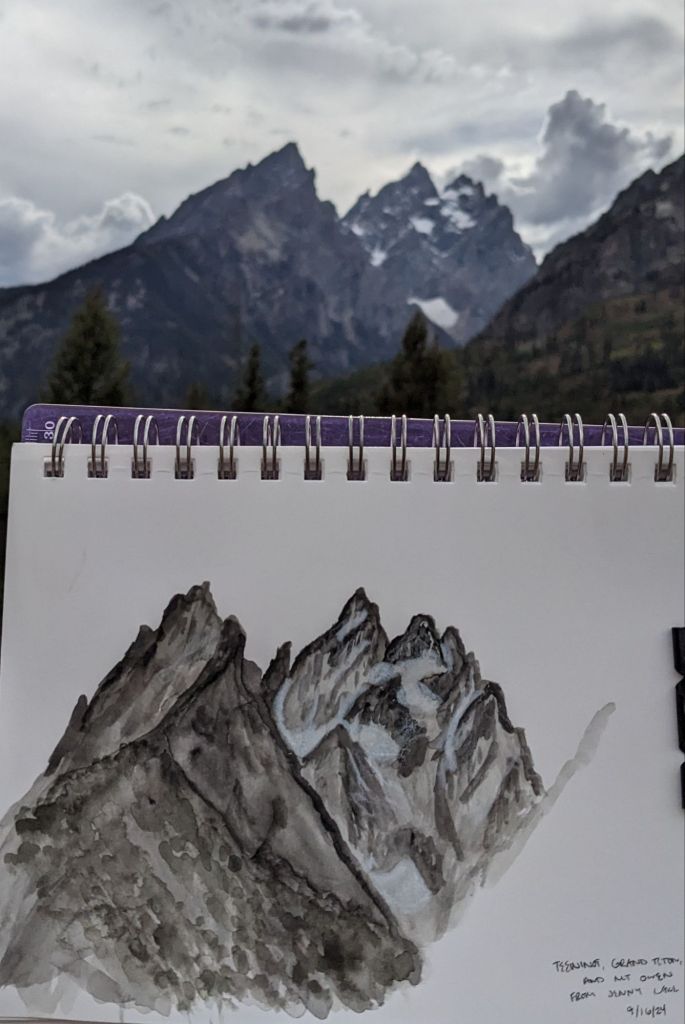
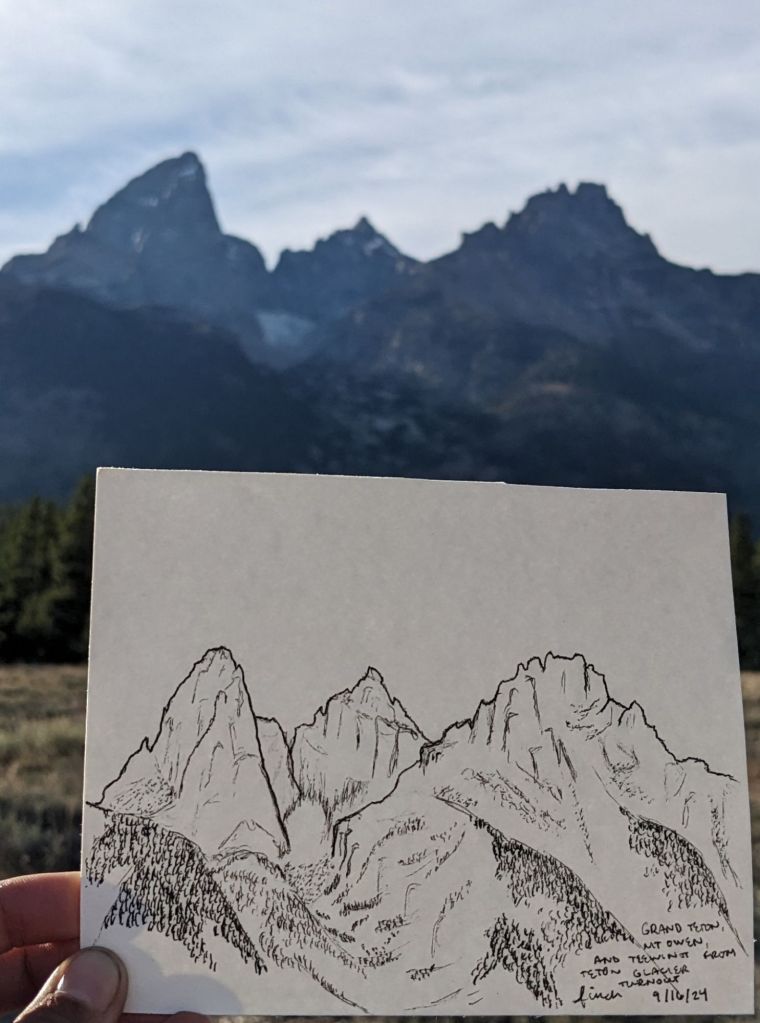
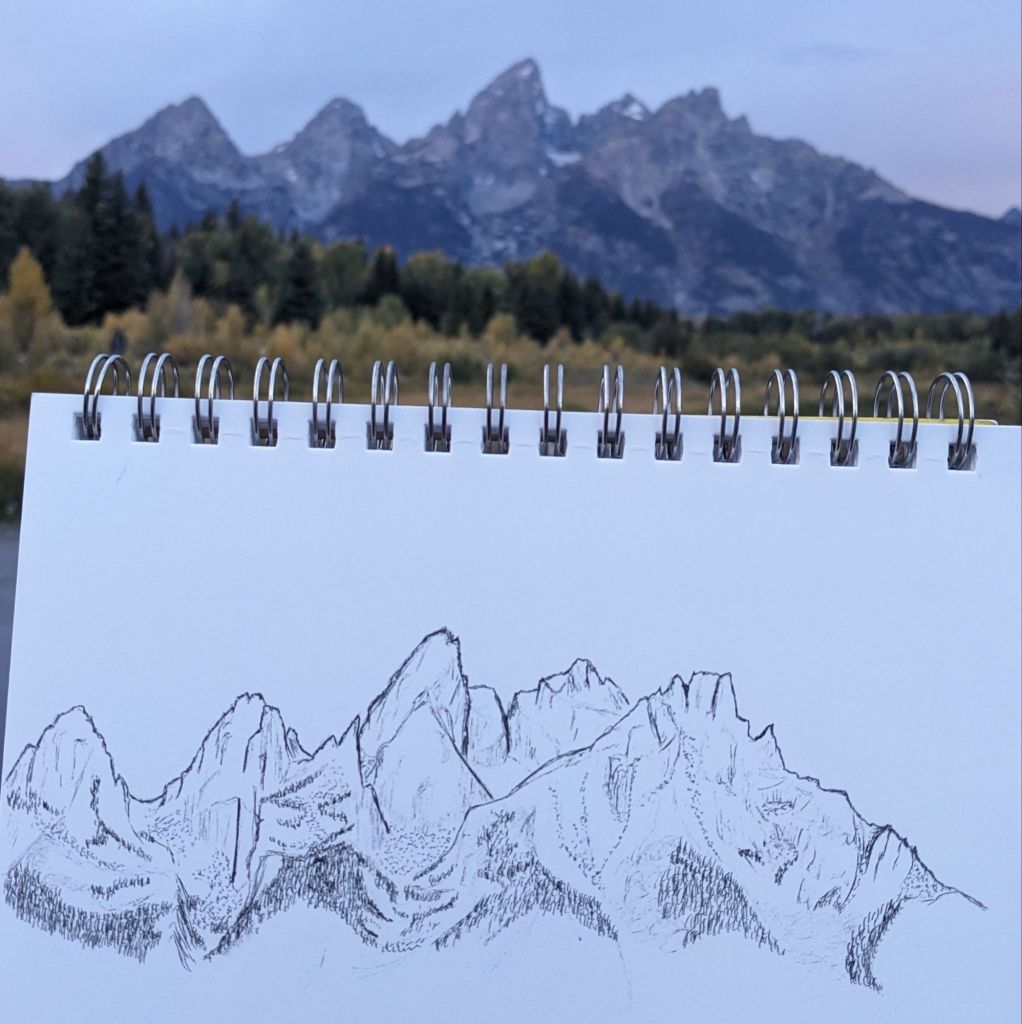
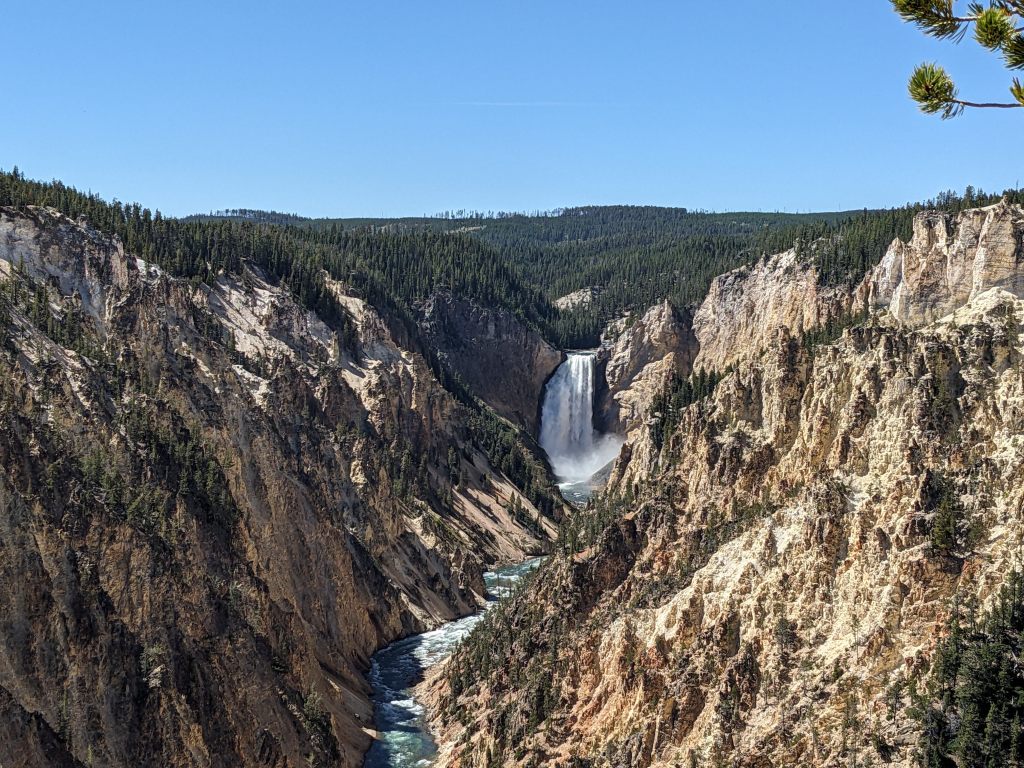
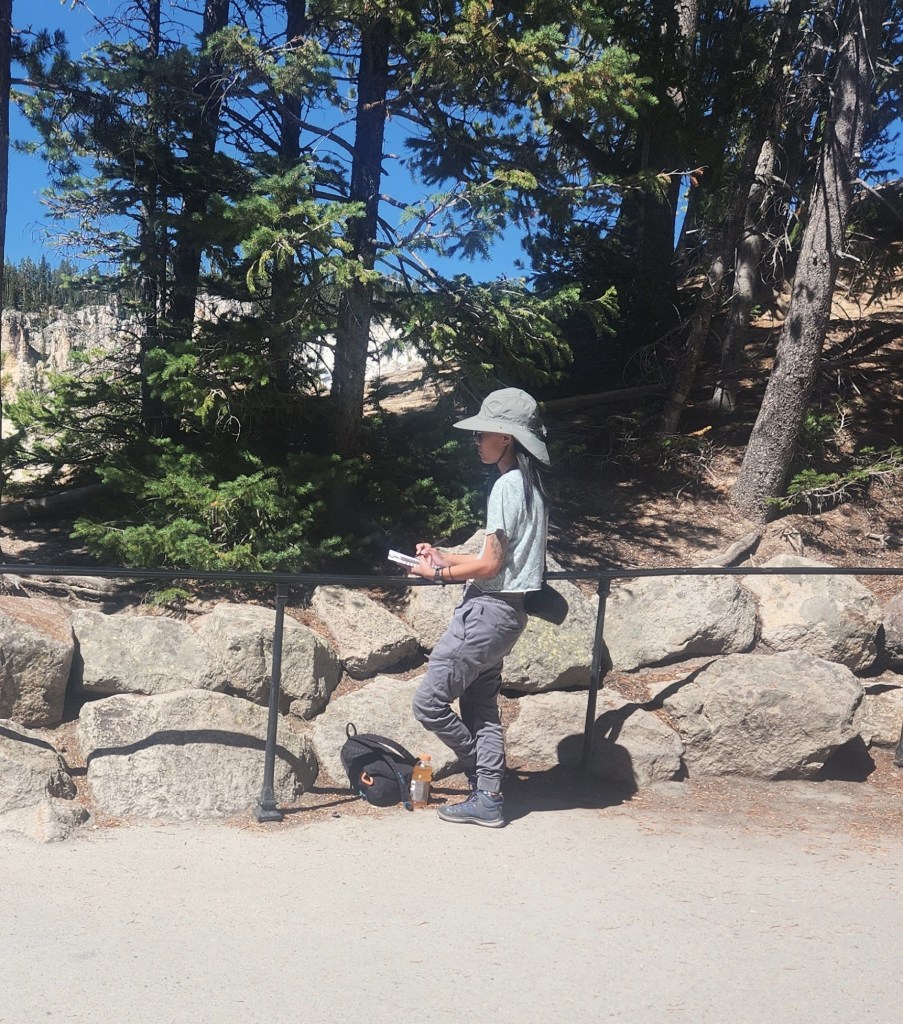
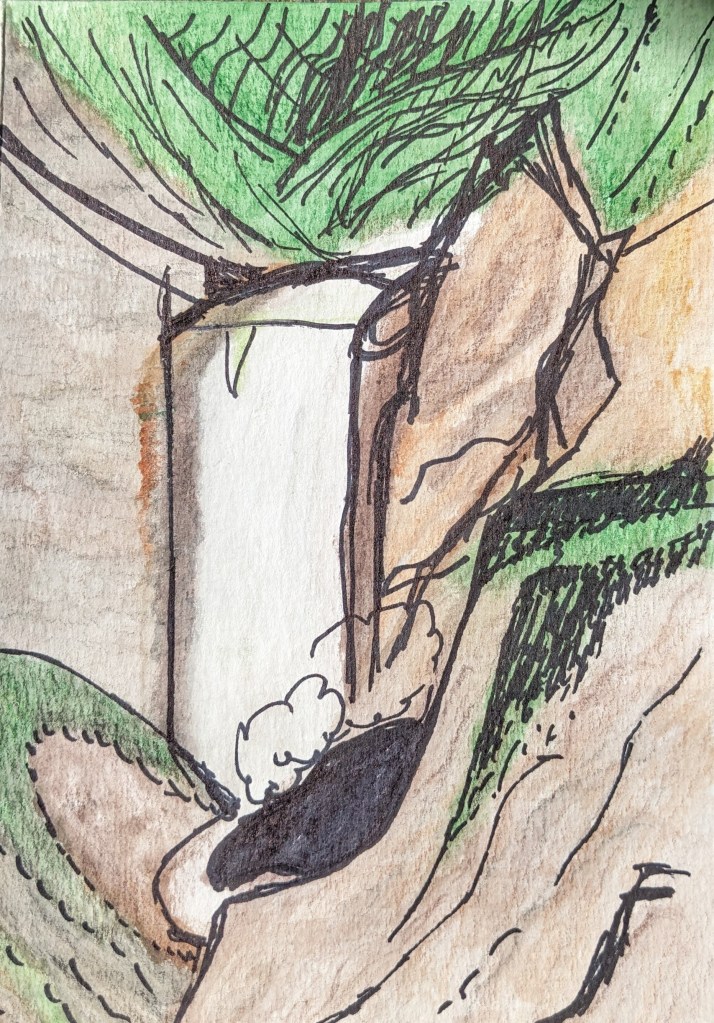
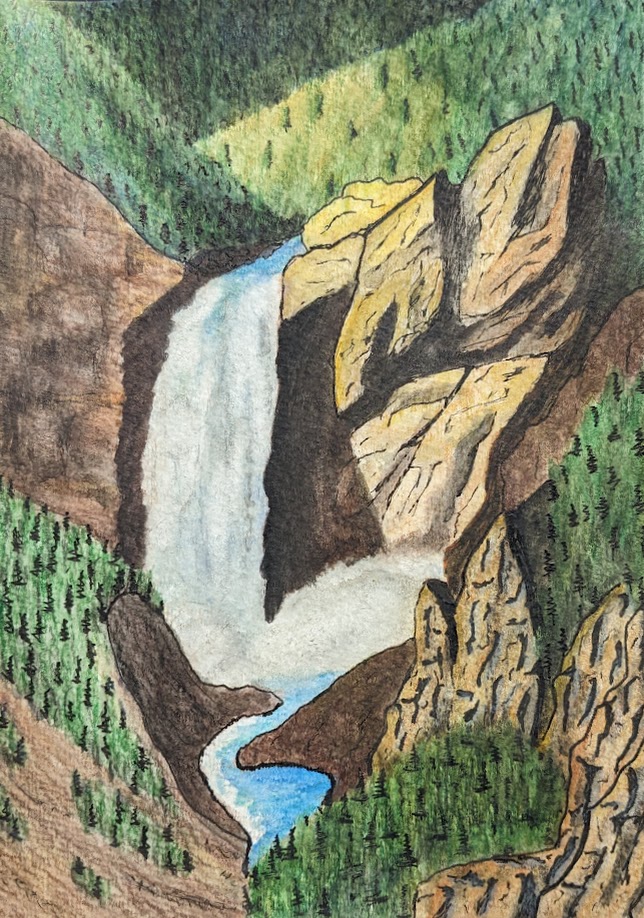
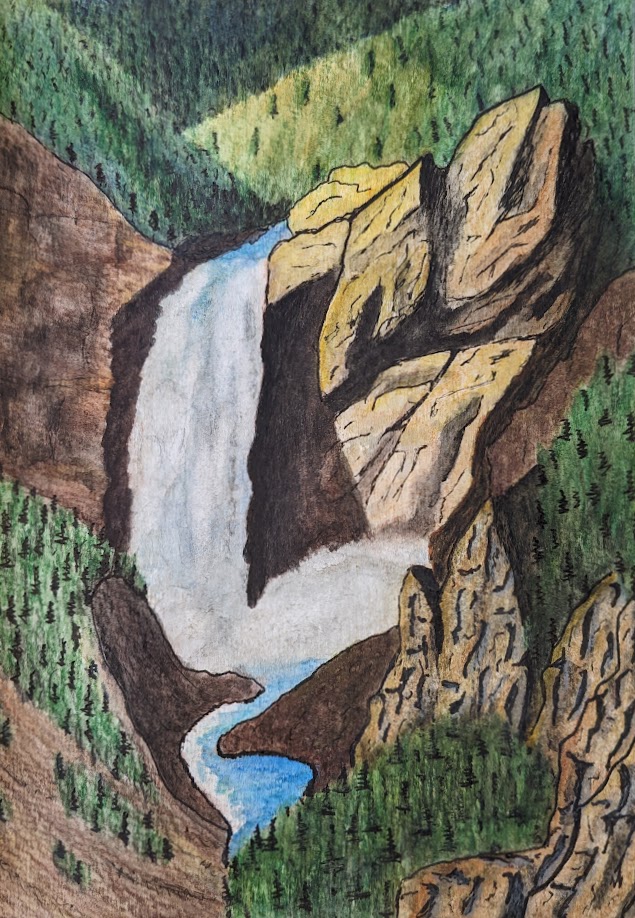
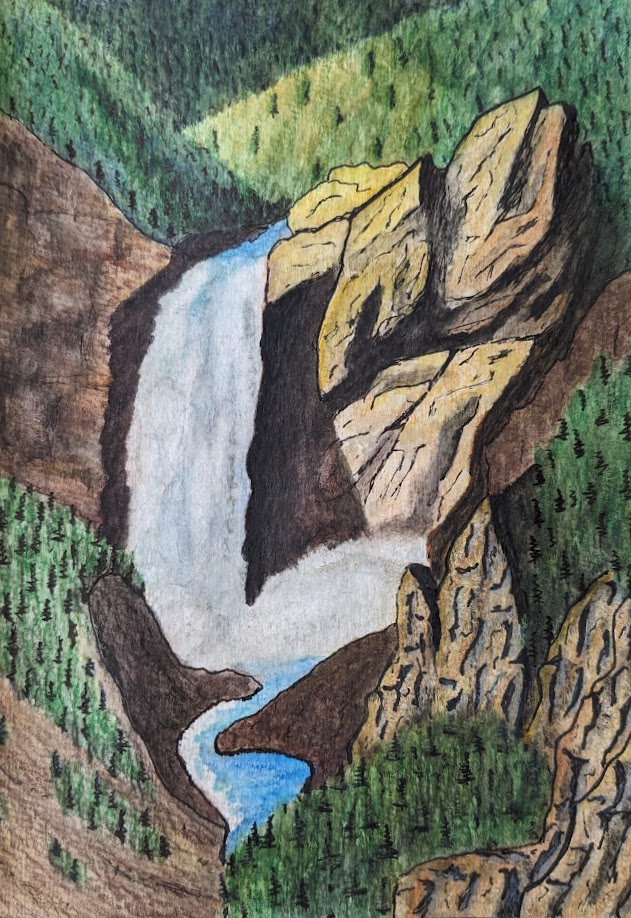
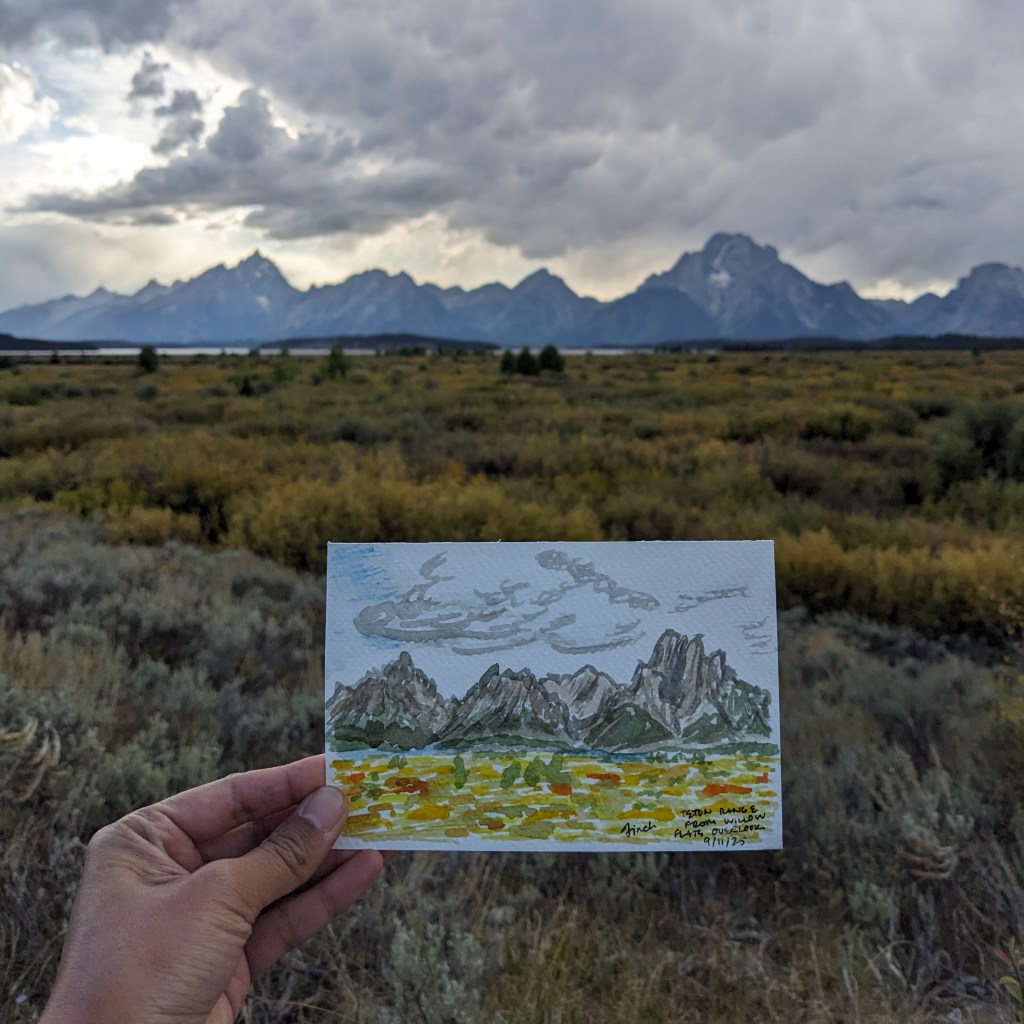
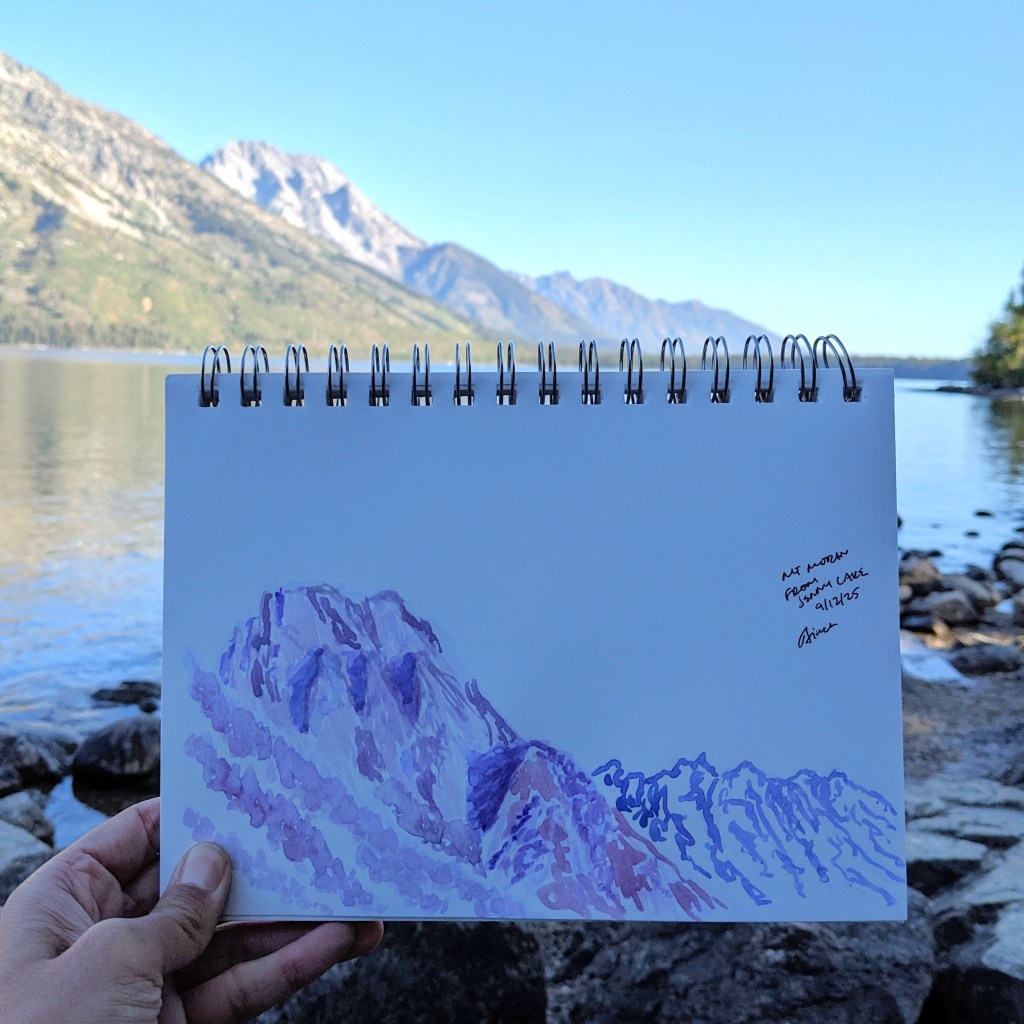
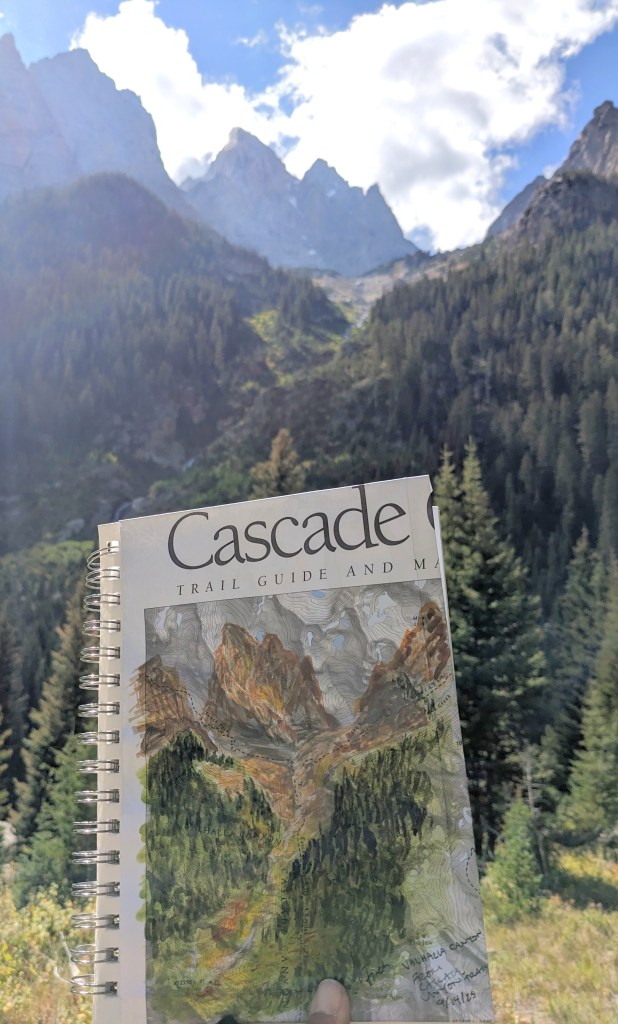
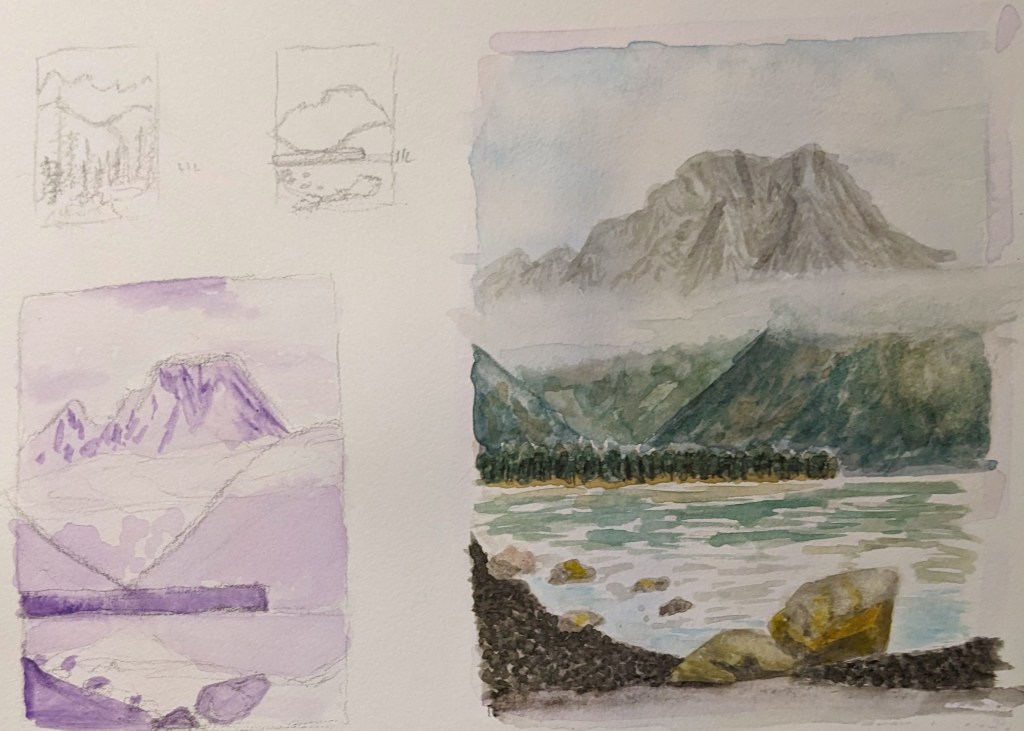
I jumped at the chance to go to the Grand Tetons again with family and did some fun watercolor:

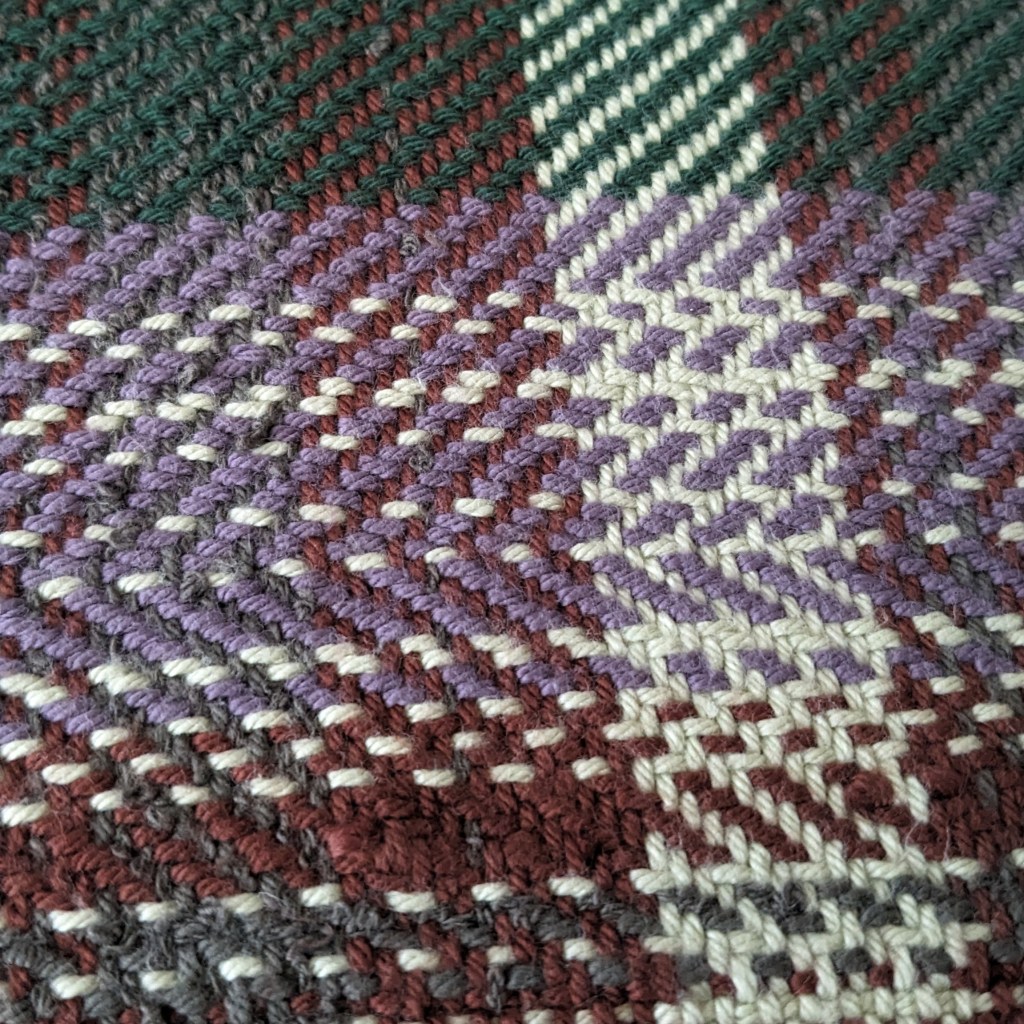
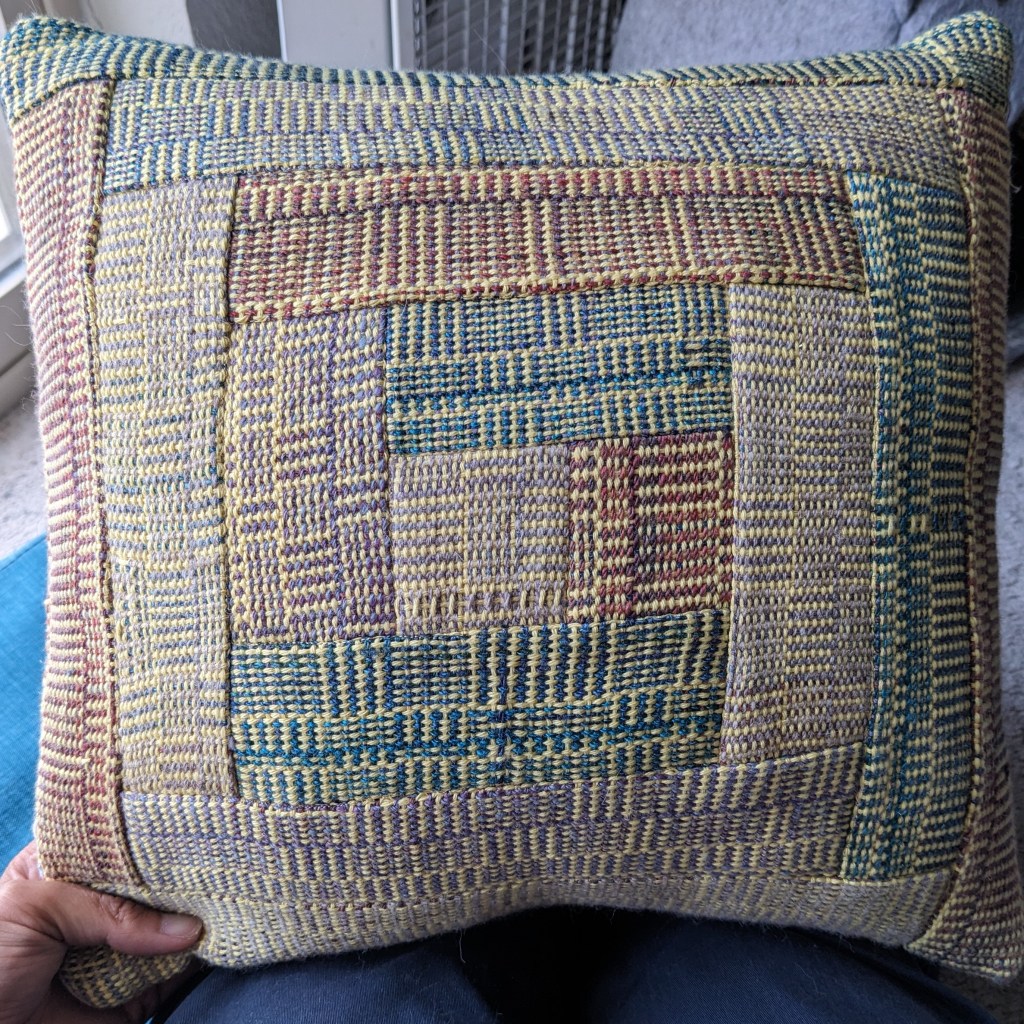
I wove my first “log cabin” pattern using handspun accent yarn and yellow commercial cotton, bravely cut it into strips, and quilted it using the “log cabin” block 🙂 so it’s my log cabin of log cabins pillow now.

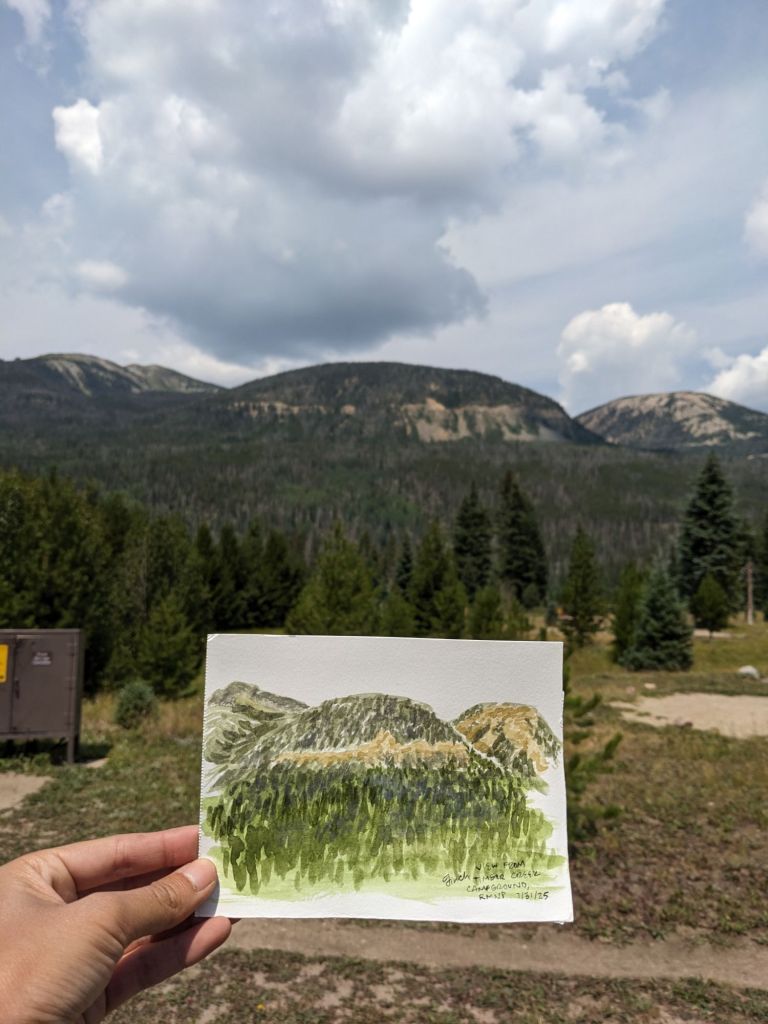
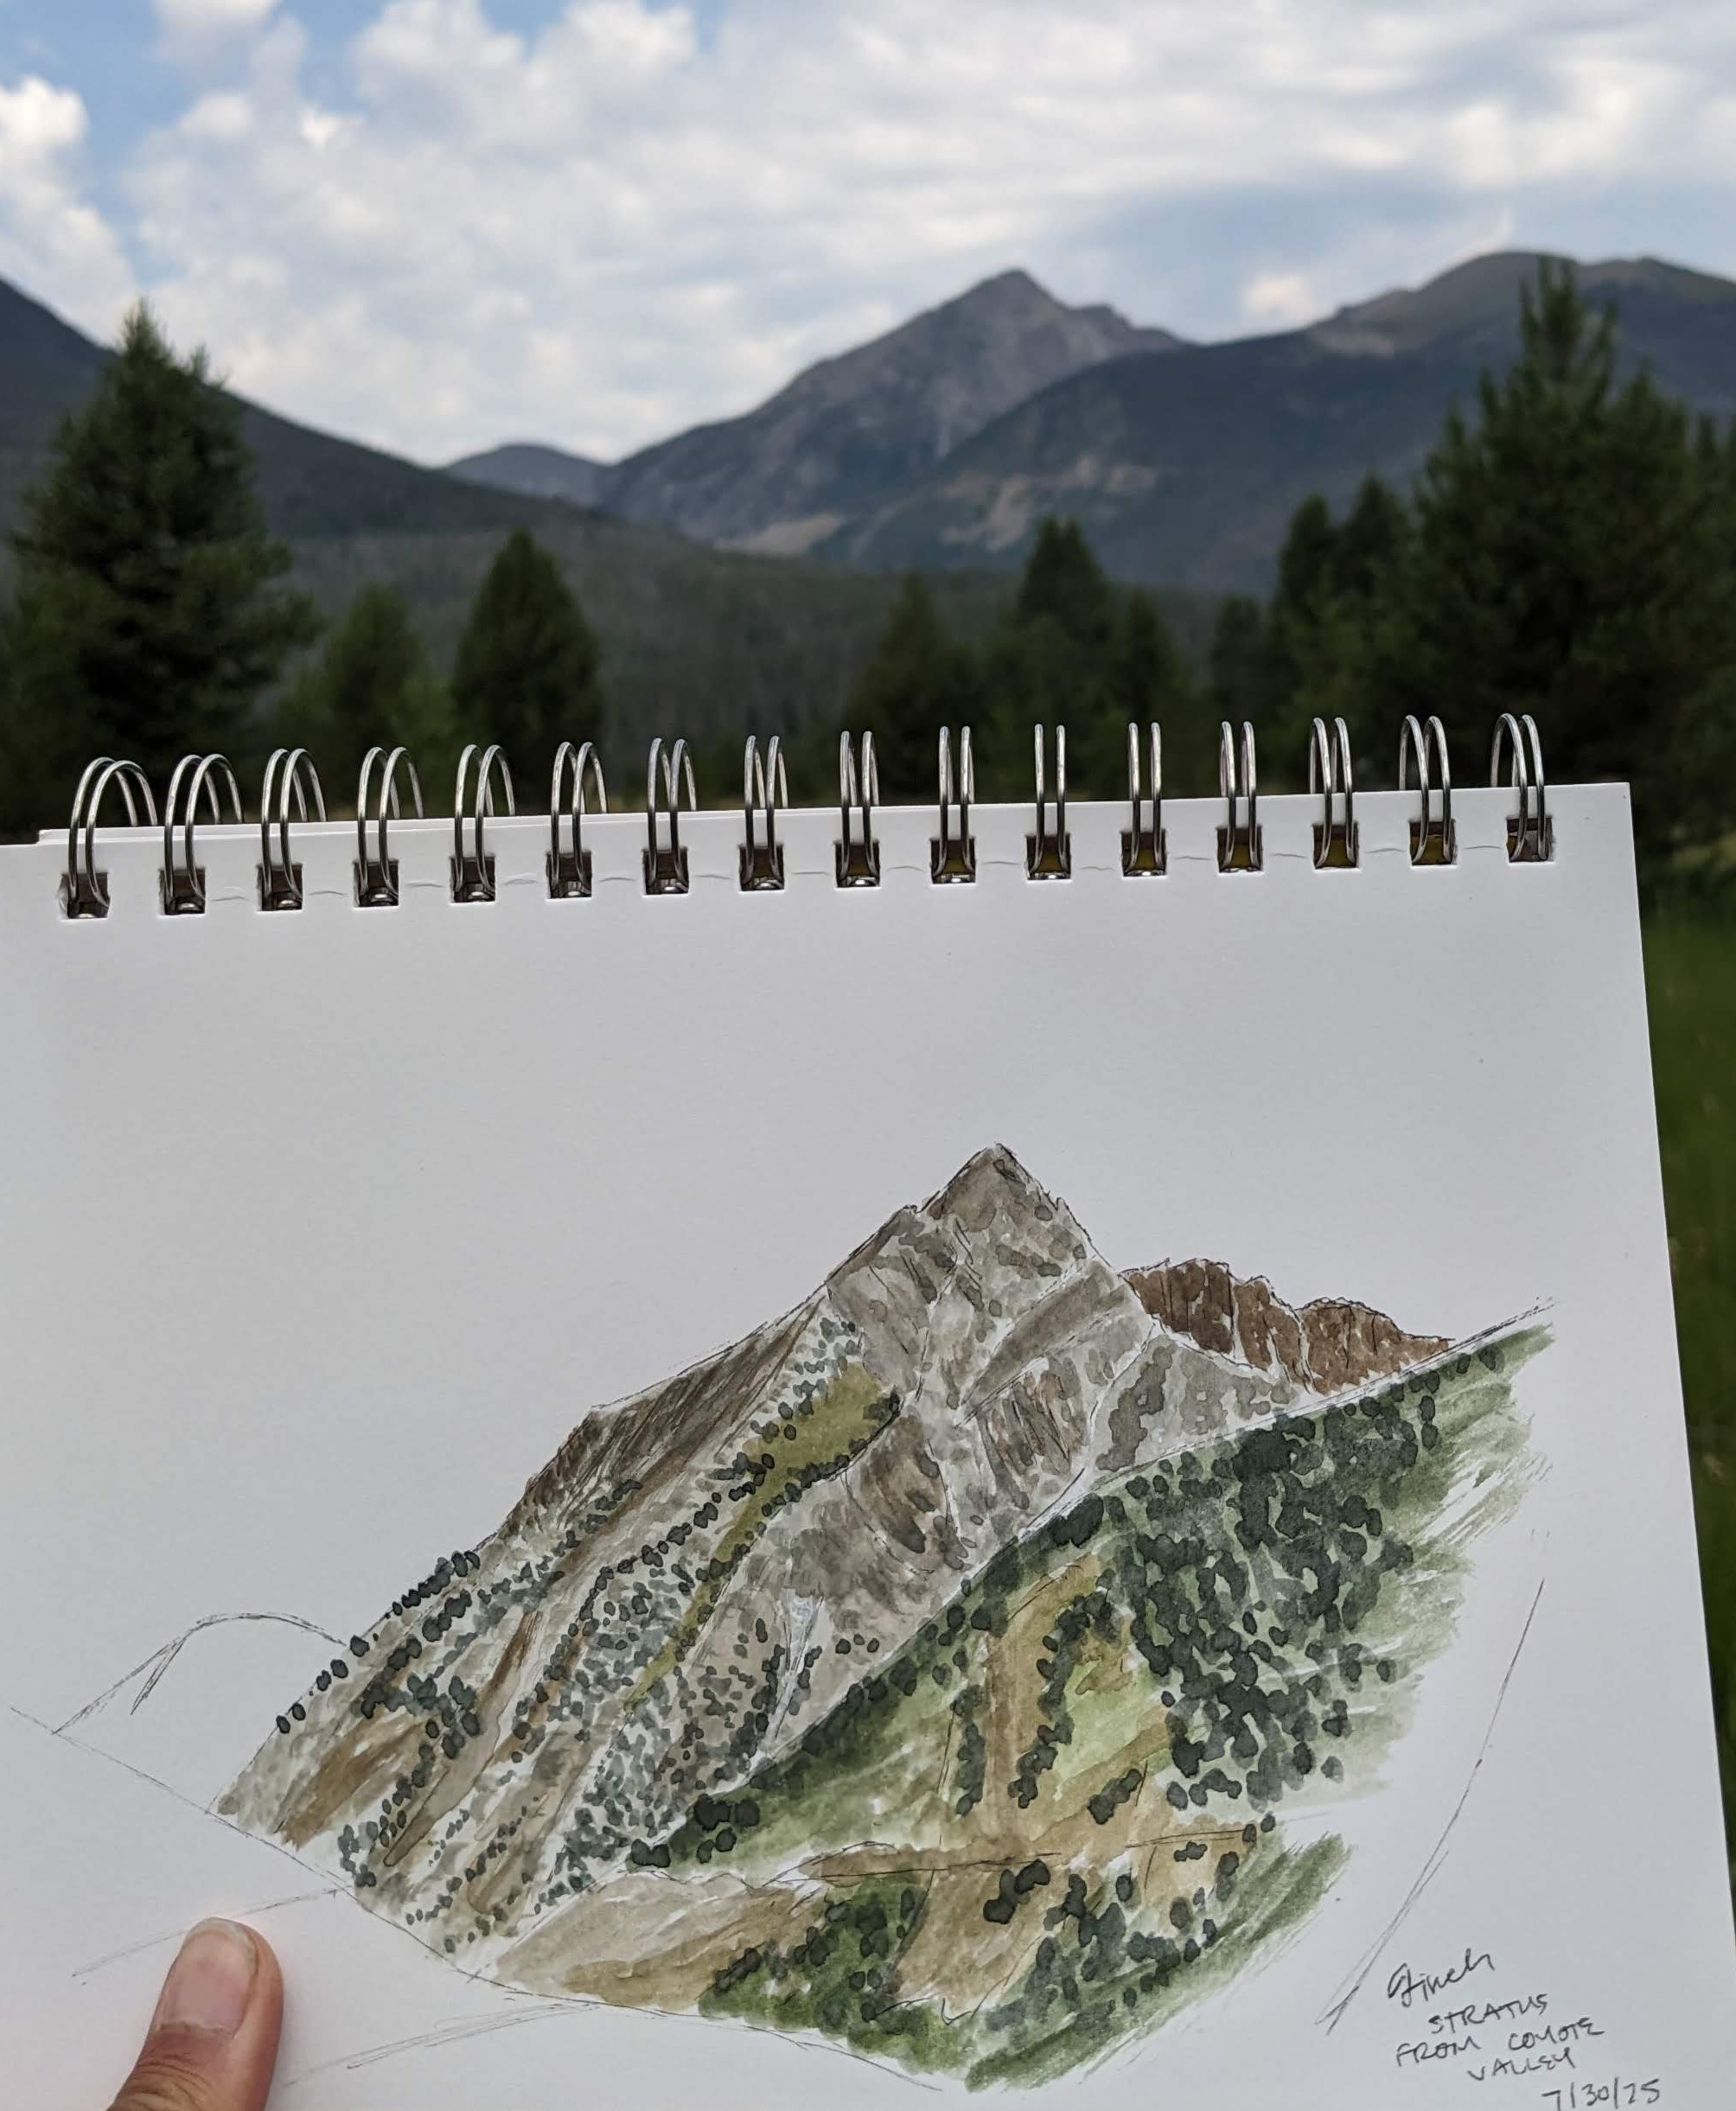
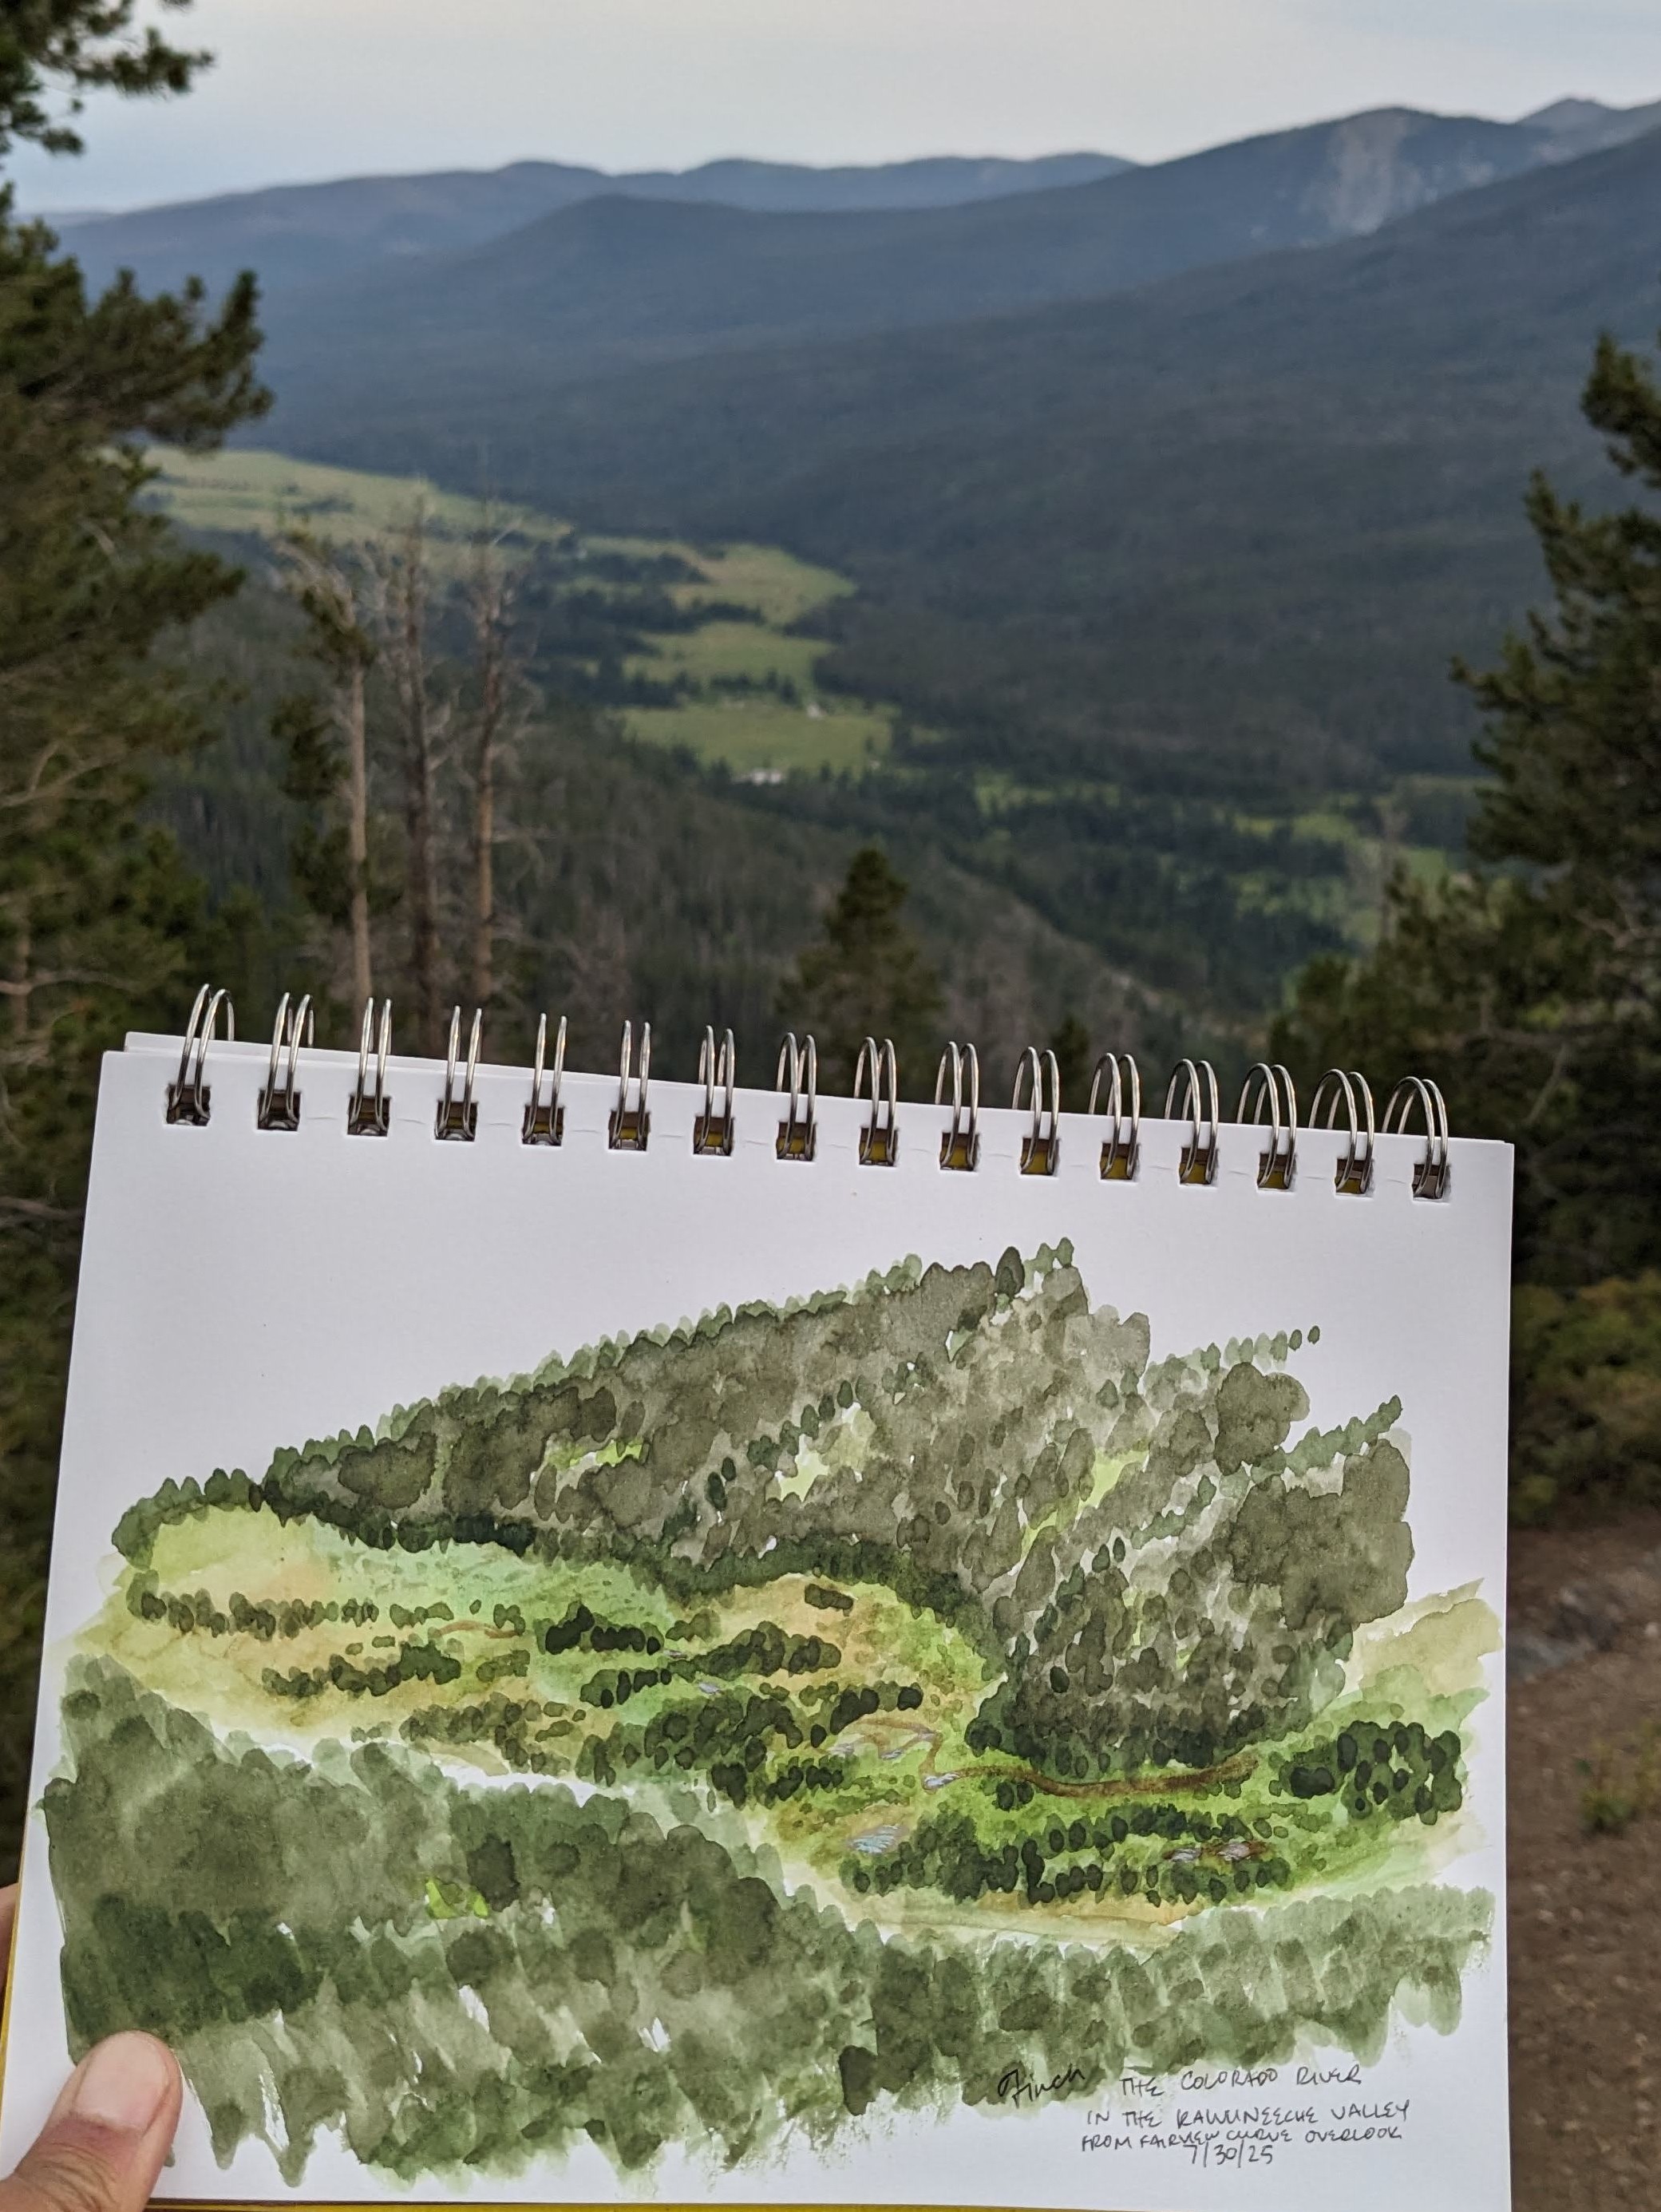
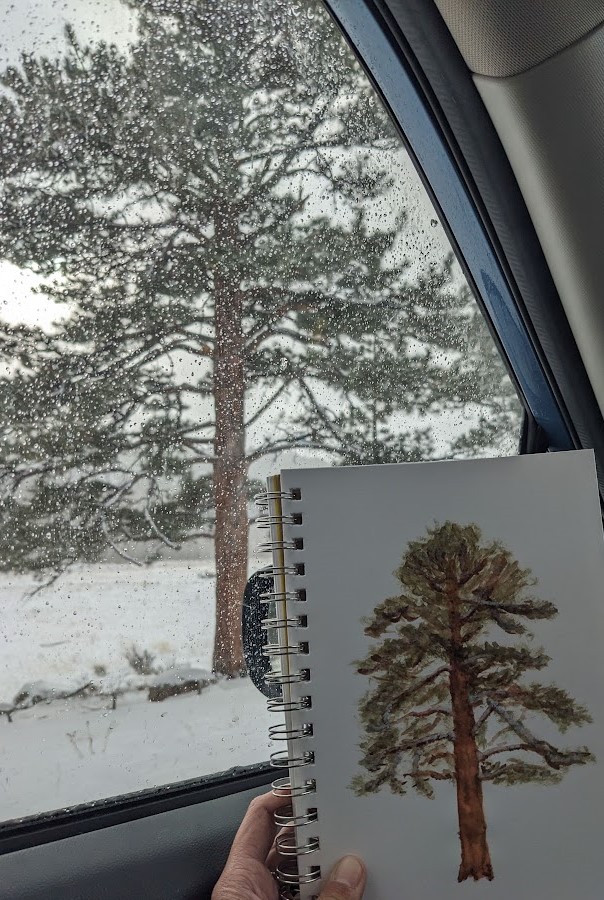
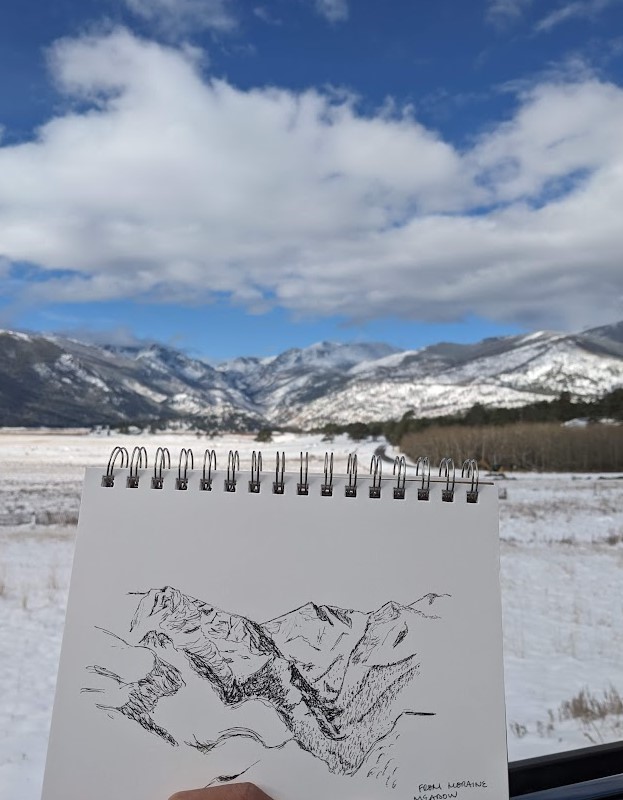
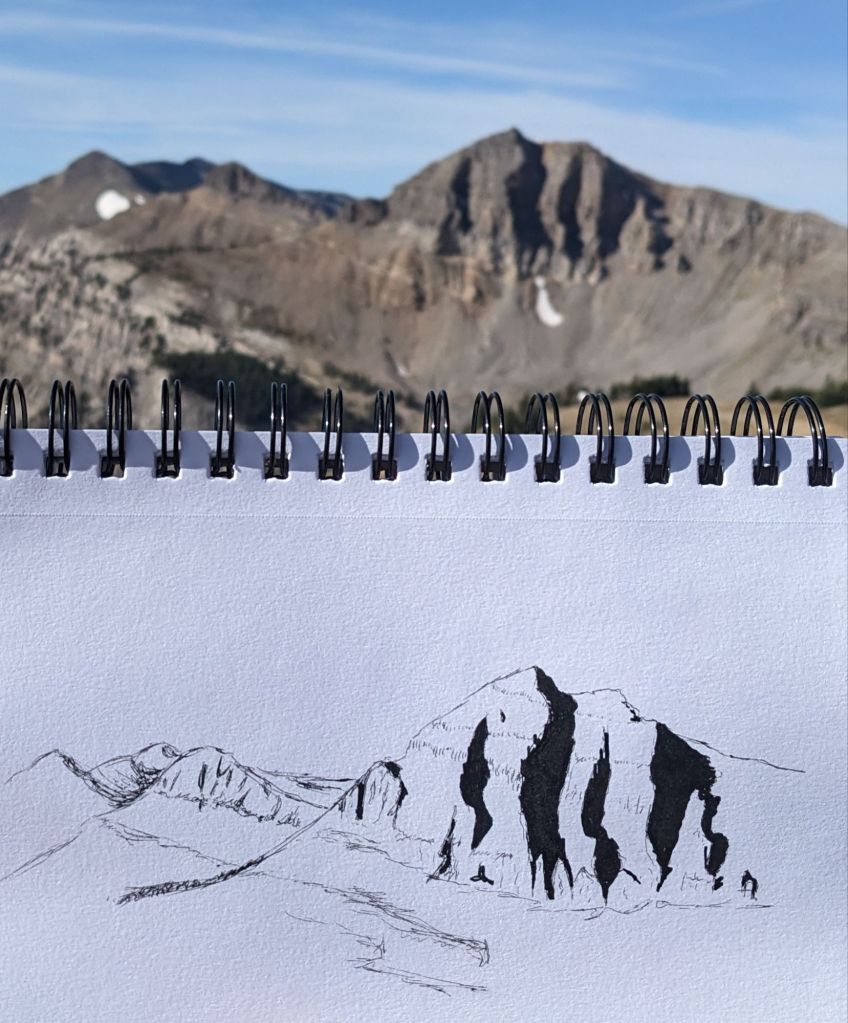
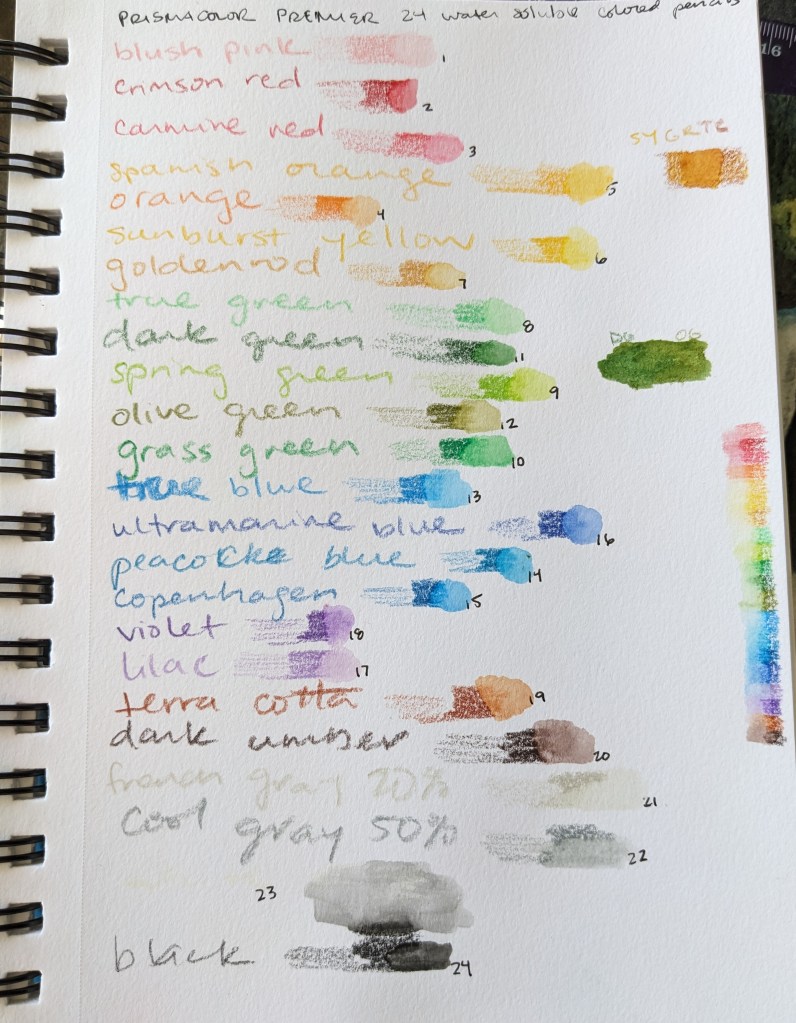
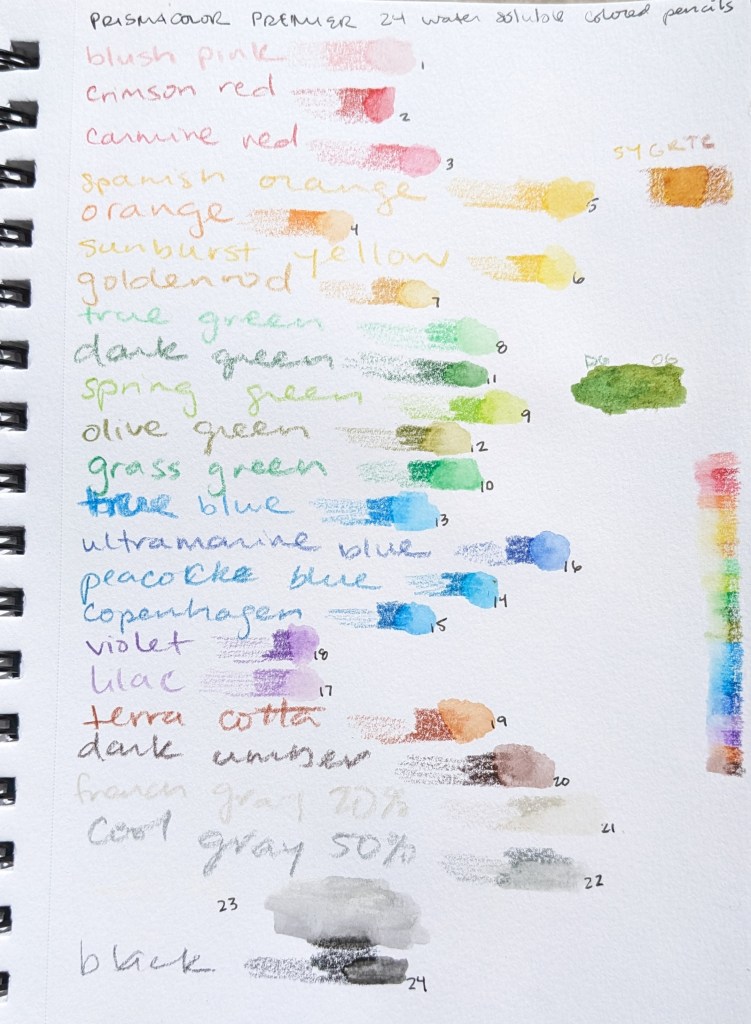
I attended a landscape watercolor class at my local art museum, which was SUPER helpful and taught me a lot of new techniques. I think one of my main takeaways is that planning a piece *does* help, and makes sure you’re capturing the things you find important. This includes planning the contrasts, and where your dark and light colors will be. I have been mainly preoccupied with shadows, but have ignored the contrast between back/mid/foreground, which helps guide the eye across the work as a whole. As I looked back through my field book, I found that I tend to ignore the mid and foregrounds, opting to simply look into the distance and draw the mountains I see. But… adding context adds depth and interest to the piece, so I’m now looking with new considerations in mind 🙂

I’m actually quite impressed with myself for this little piece… now to bring these skills outside

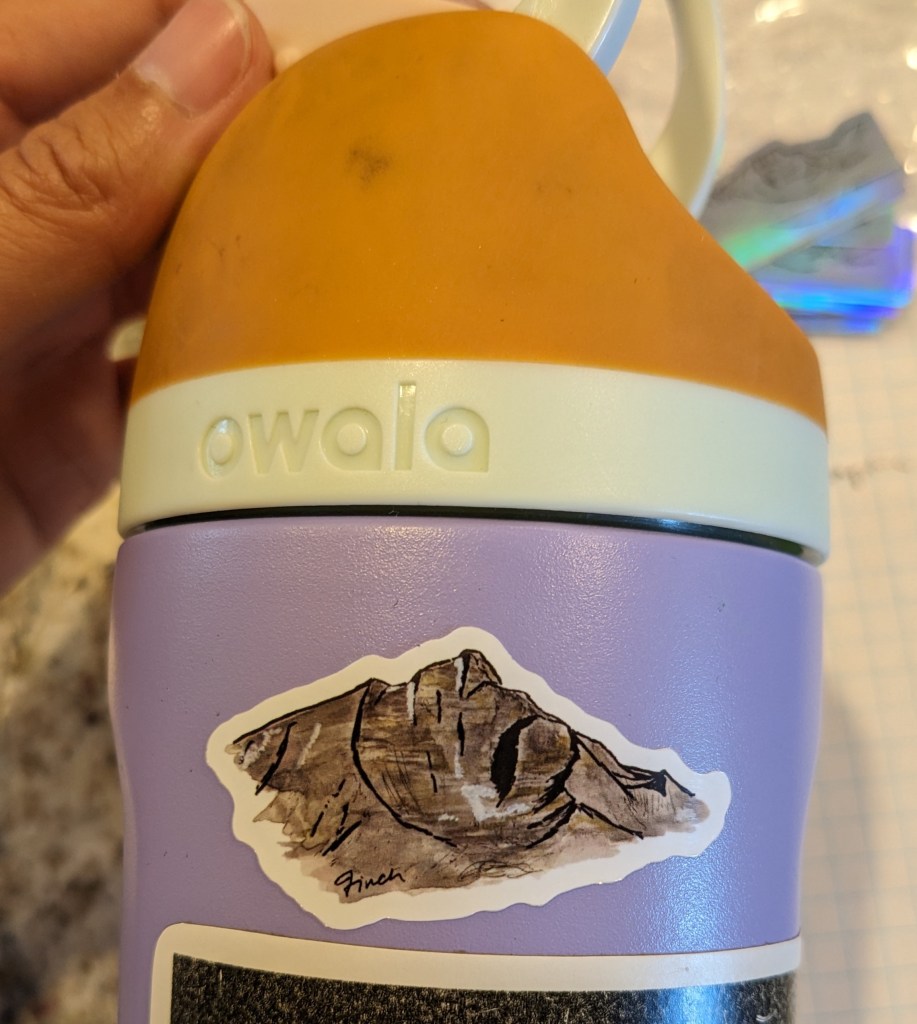
I also made some stickers of my art! Which is so fun!

Colorado River Art Retreat

Watercolor of hills held in front of the hills; horizontal line of tan on the hills and watercolor represents the Grand Ditch

This lil postcard features the Grand Ditch, a water diversion structure that takes water from the tops of the Never Summer Mountains on the *west* side of the Continental Divide and ports it to the Cache la Poudre River, leading to the South Platte River. Part of this trip was dedicated to feeling some civil-engineering-and-climate-change-related feelings about the Colorado River and the development of Colorado. The Grand Ditch and Colorado-Big Thompson project enabled and continue to supply water for agriculture, industry, and municipalities on the *east* side of the Continental Divide, and these diversions have significant impacts on the Colorado River watershed by reducing the flow that would have been there.

On the left, I did the pen sketch first, and then the watercolor – I kind of like the differences between the paintings I do with pen and without, the pen ones end up more… tiny and detailed? But somehow feel restrained, or constrained? On the right I did a watercolor sketch underneath the color, and it ends up bold, and colorful, and not quite “accurate”, I focus more on color zones instead of lines.

I wanted to do a painting that had less detail and focused on big blocks of color to minimize all the painting of trees (my least favorite and least satisfying step). From the initial marker drawing (top right), it took me 2 minutes to add the pen details, and then 16 minutes to add the watercolor.

After visiting the quilt store in Grand Lake and picking up some fabric, I decided my trip to Inspired Art Experiences in Estes would be a fabric acquisition trip as well! I chose to do a batik again, silk marbling, and tie dye.

Sign with quote: the artist is not a special kind of person; rather each person is a special kind of artist. -Ananda Coomaraswamy
I loved this sign they have in their back room.

The silk marbling was incredibly meditative and calming, just dropping in the colors and swirling them together. I was going for a “river rocks” type of design and I think I really got it.

Many different fabrics
Finished river rocks marbling on the top and right, sleeve of the tie dyed shirt on the left, batik inspired by the Grand Ditch in the middle, fabric from Grand Lake on the bottom left, and the RMNP map bandana on the bottom right.

And I added my new fabric into my current project, an English Paper Piecing quilt of trapezoids for my bathroom 🙂 which now, of course, vaguely smells like campfire, but that’ll fade.

Hexagon made of trapezoids of many different fabrics, it is colorful and mismatched. Some fabrics are repeated but not next to each other.

This is the painting I went to do, and I hiked a new trail to do it! Adding the color to the sketch from the left took 40 minutes 🙂 And a few people stopped to comment and talk to me, which I usually appreciate as long as they are respectful and treat me like a person instead of content.

Rocky Mountain Art Retreat

The Teewinot art retreat went so well, I decided to do another more local to me. And I think I’ll keep doing these. I stayed at the YMCA in Estes Park and spent a long weekend drawing, painting, doing crafts 🙂

The YMCA has a whole craft center and you can make glass items! I broke up pieces of glass and put them in this mold, and then they put it in the kiln for me. It was fun! And shiny! And breaking the glass wasn’t as scary as I thought. They had a tool that was like pliers, and I was working with really small pieces, so there weren’t any crazy explosions of pieces. Once I got home, I made my pendant into a bolo tie.

And I found a quilt in the Visitor Center! This is “Friends” by Darcy Love, 2003.

I did a lot of drawing from my car, because it was very cold and my hands wouldn’t work outside.

Since it was so cold, I decided to see if I there were any art activities in Estes Park, like galleries or something. And I found Inspired Art Experiences! They have a bunch of different crafts you can learn, much like a sip-and-paint but for lots of different things. I did an alcohol ink lightbox as a gift for my friends, a batik, and woodburning!

The alcohol ink was a bit stressful since I was trying to depict an actual figure, their bird, and the ink moves very quickly. I think it would have been less stressful if I was just trying to make a cool background or fun color blending thing.

The batik was also a bit stressful, the wax came out really fast onto the fabric, so I had to move quickly. But it was fun! I did a batik at an art camp back in elementary school, so this was a fun callback. The teacher described it as making a coloring page for yourself, which it was – the wax separated the different zones, and then she showed me how to “color” it in with fabric dye. I enjoyed that part much more, just playing with color blending, almost exactly like watercolor “wet on wet” technique. And now it hangs in my kitchen, I’m quite pleased.

Then I did woodburning! This was very slow and meditative, and smelled amazing. It was essentially slow drawing. The tool was just a fat pen with a HOT tip on the end, and I liked finding the different pressures and speeds to do the shading and hard lines. I was also very happy that the teacher came back and was like “oh I like your Long’s Peak” – always satisfying to have people see the thing I’m trying to depict. 🙂

Overall, 10/10, will art retreat again.

Teewinot Art Retreat

Last year, I spent one day in Grand Teton National Park, most of it yelling and pointing at the mountains… So I had to go back, specifically to sit and enjoy and look and make art 🙂

Teewinot is the original Shoshone name for this range and translates to many pinnacles, which I find much more fitting than the French name.

I had vague plans, but let my art heart lead and followed the rising and setting sun. It was stunning. I felt a little like Thomas Moran, walking about doing artwork, though I had the luxury of a car and like… A nice, developed campsite. I also saw two bears and a double rainbow, so it was a very good weekend.

From the Jackson Hole Aerial Tram, which was a bit underwhelming and extremely windy, but there was a great view of the whole valley and I got to see Corbett’s Couloir (the one the pros do backflips off) and I was stunned. It’s much bigger than in videos.
From Snake River Overlook, where Ansel Adams took his famous picture. The drama of this sunset lasted about thirty minutes and each moment was just as beautiful as the last. I liked the idea of using watercolor pencils and then maybe going back later with water, but I kind of like it just in pencil. This is also my first piece in my second sketchbook, since I finished the first one I bought in 2021! Not pictured: the lineup of photographers with fancy tripods that I was sitting next to.
Bonus: sunset from Snake River Overlook.
This one I tried using my watercolor pencils and then going back with pen. I liked it, though my pen didn’t mark over the pencil so well. Maybe the pigment is a bit hydrophobic?
Little black and black-green watercolor from Jenny Lake. Plus some white watercolor pencil for the permanent snowfields. I liked the bold style of the watercolors without pen, but it was a bit nerve-wracking to put down so much color at once.
One of my favorites of the trip, drawn as a postcard for a friend from Teton Glacier Turnout. I need to figure out how to draw trees in a way that doesn’t hurt my hand though. So. Many. Little. Lines. Not pictured: the couple that got engaged on the other side of the parking lot while I was doing this.
From Schwabacher Landing. I kind of knew this as I was starting this piece, but this is the piece I set out to draw, and I spent the weekend working up to it. It took me about an hour as I waited for the sunset, which was pretty but not as dramatic as the other one. Not pictured: the couple who sat and chatted with me as we waited for the sunset.

The Grand Canyon of the Yellowstone

This watercolor piece was inspired by my recent trip to Yellowstone and my newfound love for Thomas Moran. The man truly was an activist artist and helped convince Congress to make this area the first national park in the world – which happened on March 1, 1872. Also… Congress bought his 7 x 8.6 FOOT oil painting (below) for $10,000 ($251,660 in today’s dollars).

I did this painting for my aunt, using my late uncle’s watercolor pencils 🙂 It was so fun to discover how to use the pencils and bring out the colors of the canyon. I probably should have swatched the colors first, but I did it eventually and it was very helpful.

But… Thomas Moran himself said that the colors of the Grand Canyon of the Yellowstone “were beyond the reach of human art”, so I didn’t stress too much 🙂

I’m so used to black and white pen only drawings that I had to put some ink back on this piece – I wanted those deep, dark shadows and to bring details to the trees and rocks that I couldn’t finesse with the watercolors.

Time lapse of adding some pen and more watercolor layers

I used a lot of color layering, alternating around between pen and watercolor, scraping off paper with the wet brush, letting things dry and coming back.. and eventually decided it was finished. Final piece under different lighting below:

Project completed September 2023

Wedding Flowers :)

I made these for my friend and her husband, based on their “Save the Date” stationery 🙂 it was super fun to revisit the wired slips technique and bring these flowers to the third dimension.

My reference! I was originally planning to do all the flowers here, plus one from the front of the invitation, but I decided to invest my time in doing three flowers well and being patient with the color blending.

I made three different flowers; one with 5 petals (the one on the right), one with 7 petals (in the middle), and one with 20 petals (bottom left). I wanted to have different colors and textures across the flowers, and different petal shapes. The 5-petal flower has teardrop petals that come to a point, the 7-petal flower has petals with flat tops, and the 20-petal flower has rectangular heart shaped petals.

Working around the border of a petal with buttonhole stitch
Top: back of petals that are cut out and ready; Bottom: leaves still on the hoop

I poked the petals into one layer of fabric and folded the ends up, then embroidered the center stamens and pistils onto the fabric and anchored the petals to the fabric. Then I added in the leaves and made tiny stitches between petals and leaves and into the base fabric to secure all the elements together. I added another layer of fabric underneath the base fabric for some structural stability, and glued the entire assembly to a square canvas. The plain background ended up too plain, so I added some watercolor to the background to spruce it up and give it the idea of more leaves in the distance.

Project completed September 2023.