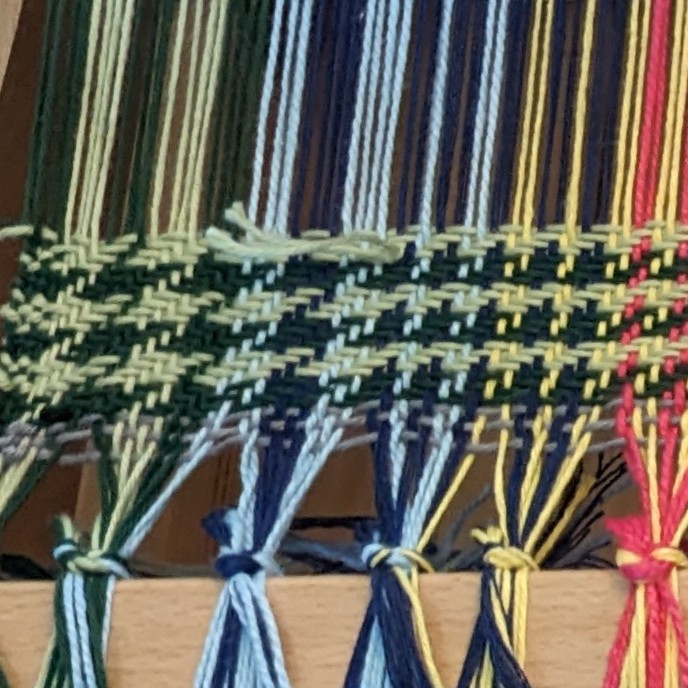
I’ve mainly been working on New Years gifts recently, so here are some sneak peeks:
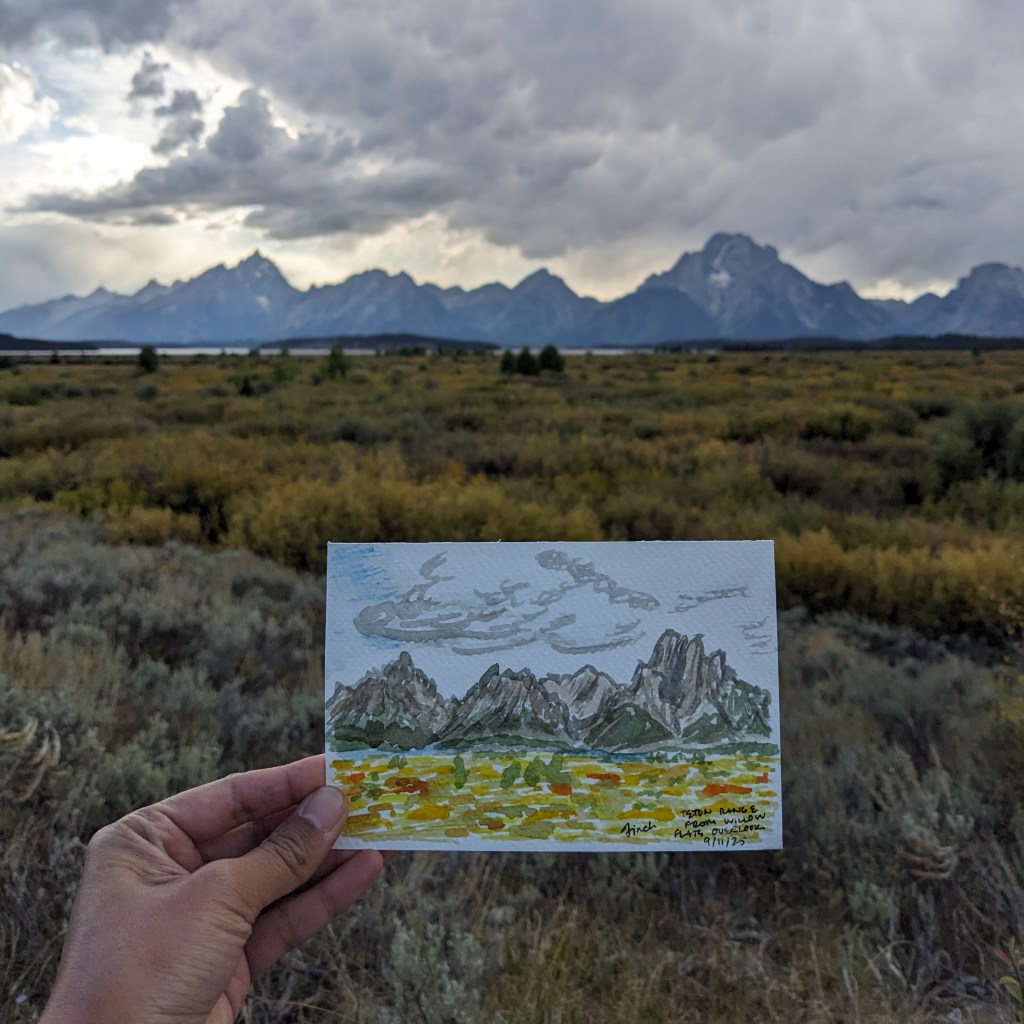
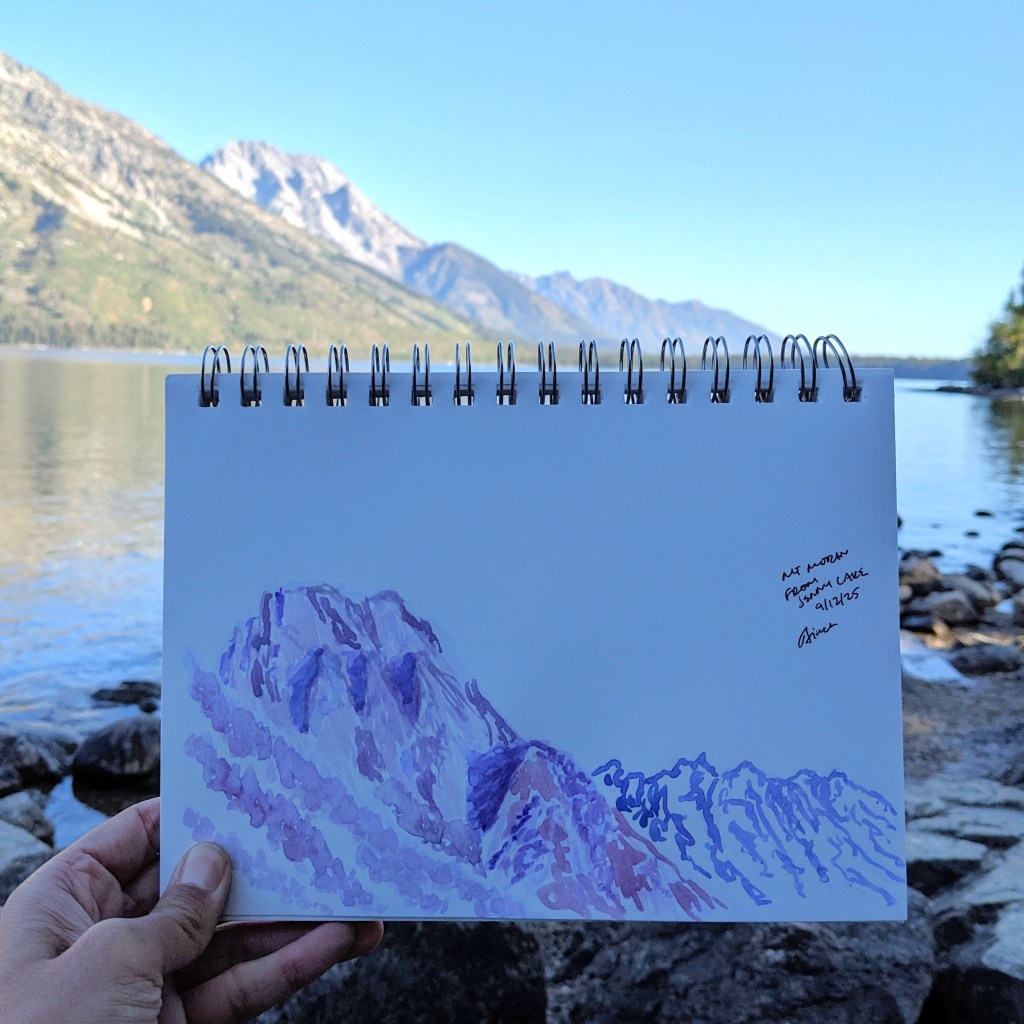
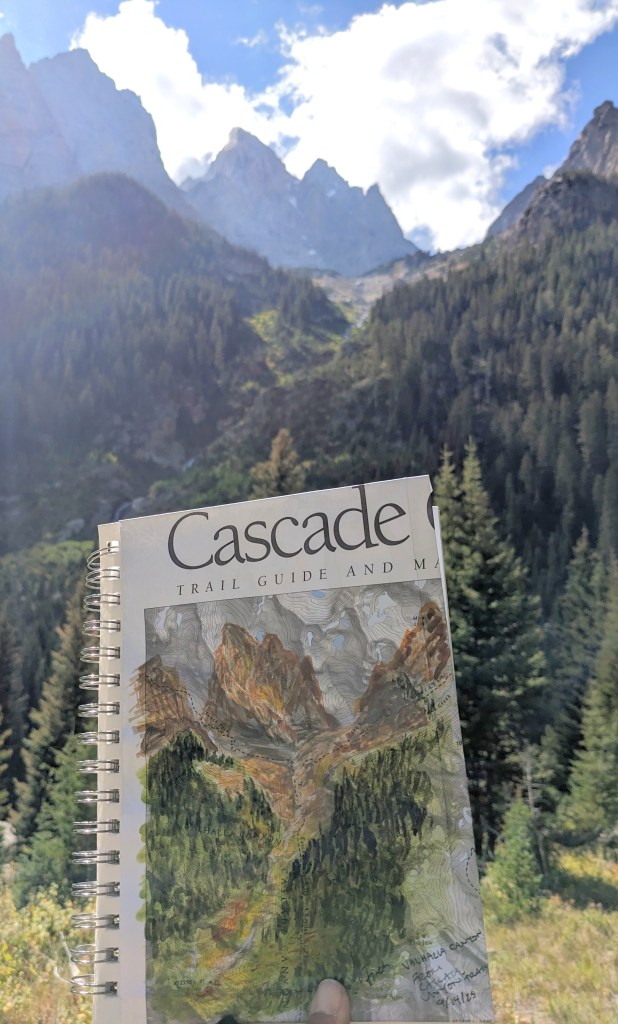
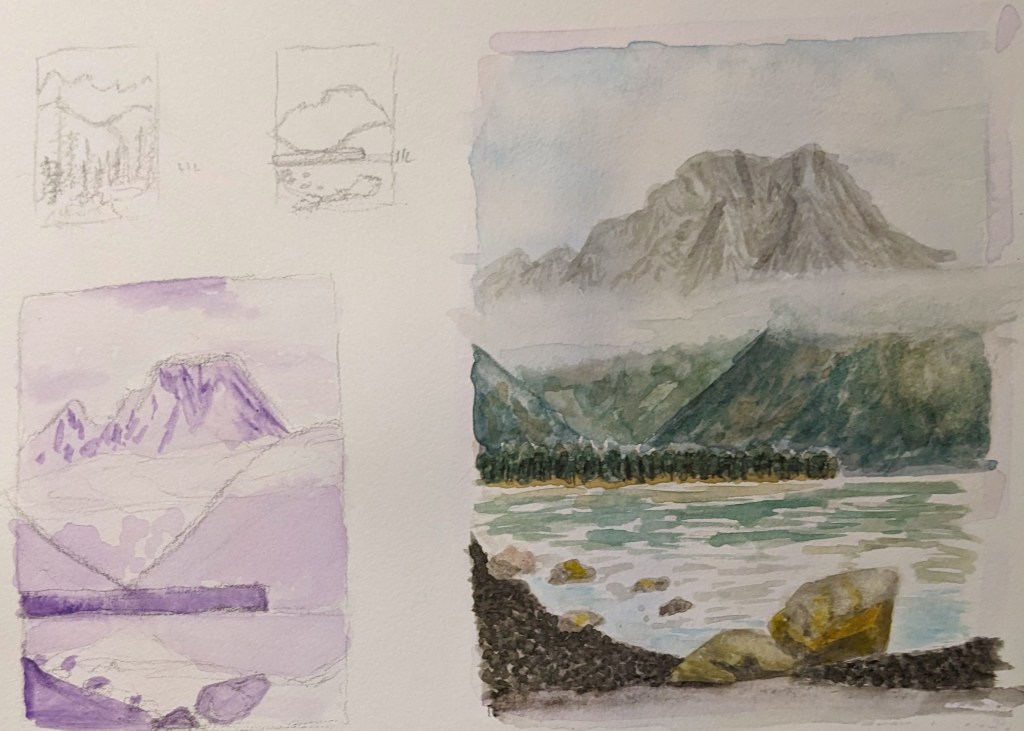
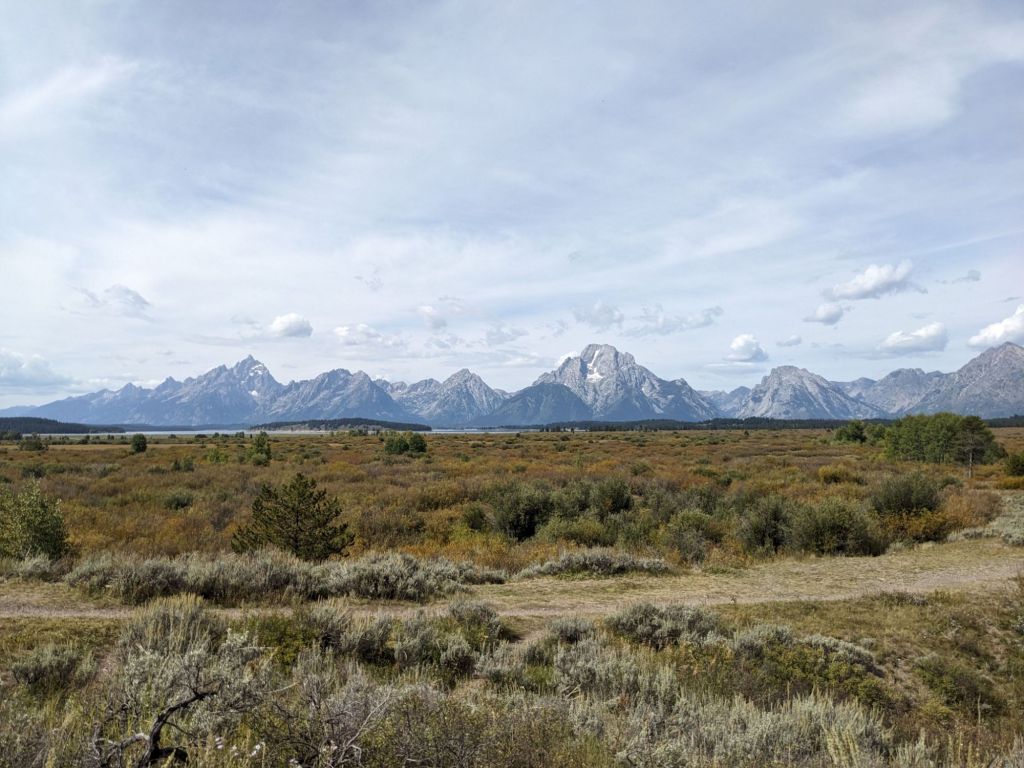
I jumped at the chance to go to the Grand Tetons again with family and did some fun watercolor:
from Willow Flats OverlookMt. Moran from Jenny LakeValhalla Canyon from Cascade Canyon Trail, LOVED painting on my map
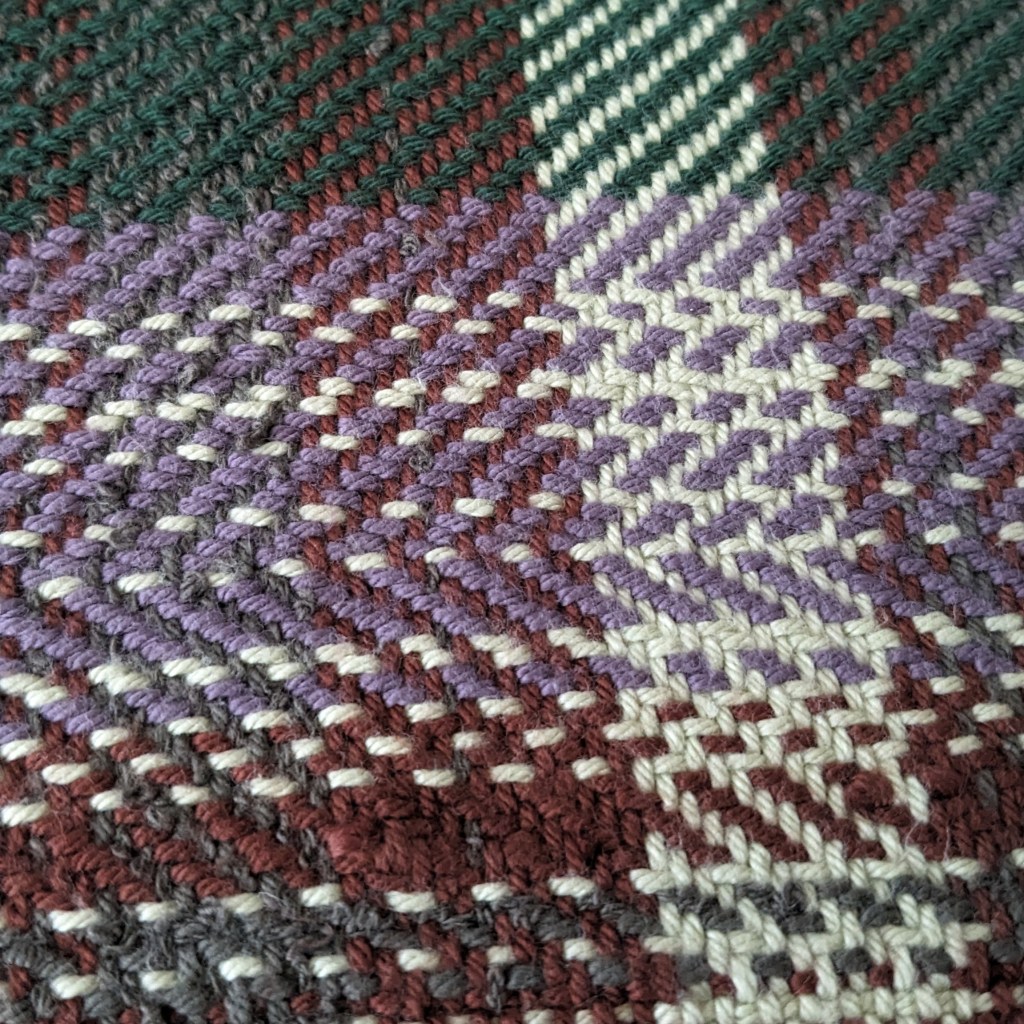
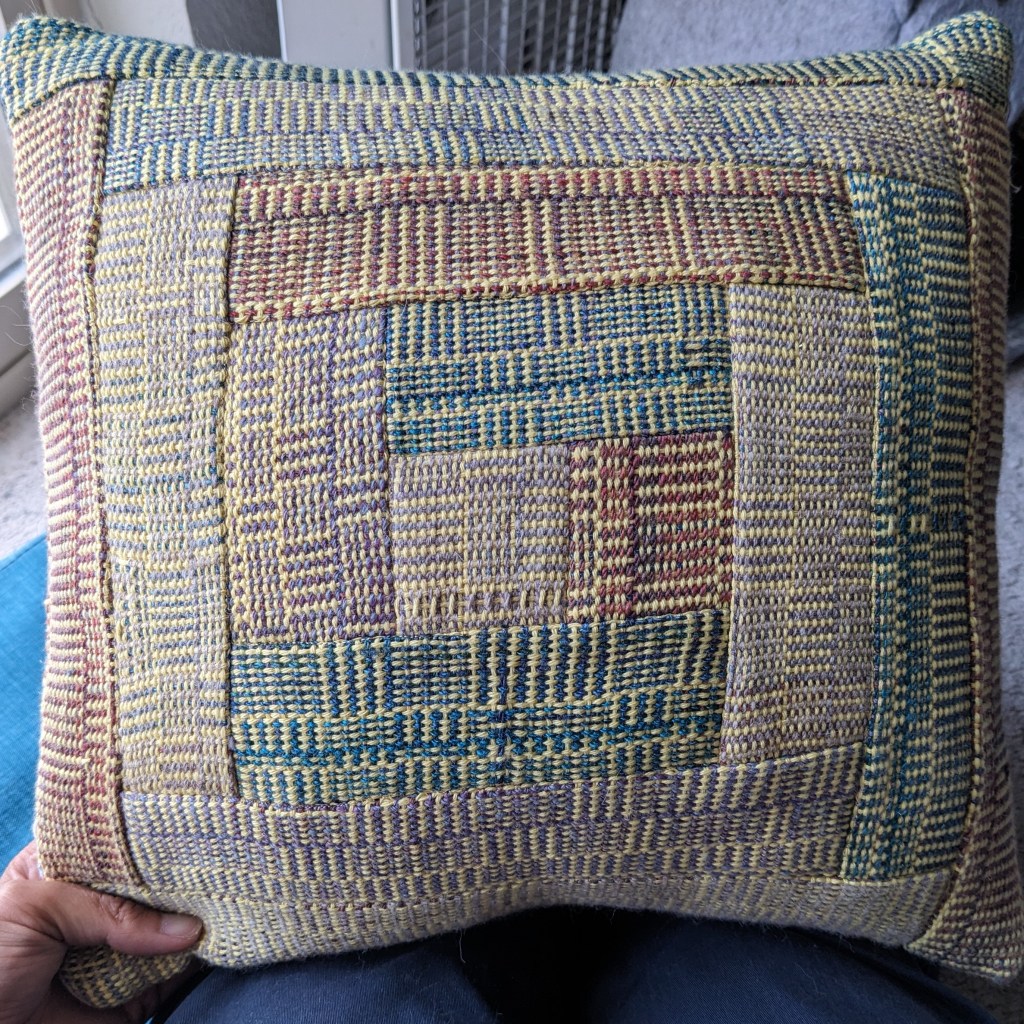
I wove my first “log cabin” pattern using handspun accent yarn and yellow commercial cotton, bravely cut it into strips, and quilted it using the “log cabin” block 🙂 so it’s my log cabin of log cabins pillow now.
I didn’t make my blocks even, it was much more fun to switch the pattern improvisationallyI could do with a little more contrast between the yellow and the other yarns, but I like it 🙂
I attended a landscape watercolor class at my local art museum, which was SUPER helpful and taught me a lot of new techniques. I think one of my main takeaways is that planning a piece *does* help, and makes sure you’re capturing the things you find important. This includes planning the contrasts, and where your dark and light colors will be. I have been mainly preoccupied with shadows, but have ignored the contrast between back/mid/foreground, which helps guide the eye across the work as a whole. As I looked back through my field book, I found that I tend to ignore the mid and foregrounds, opting to simply look into the distance and draw the mountains I see. But… adding context adds depth and interest to the piece, so I’m now looking with new considerations in mind 🙂
I’m actually quite impressed with myself for this little piece… now to bring these skills outside
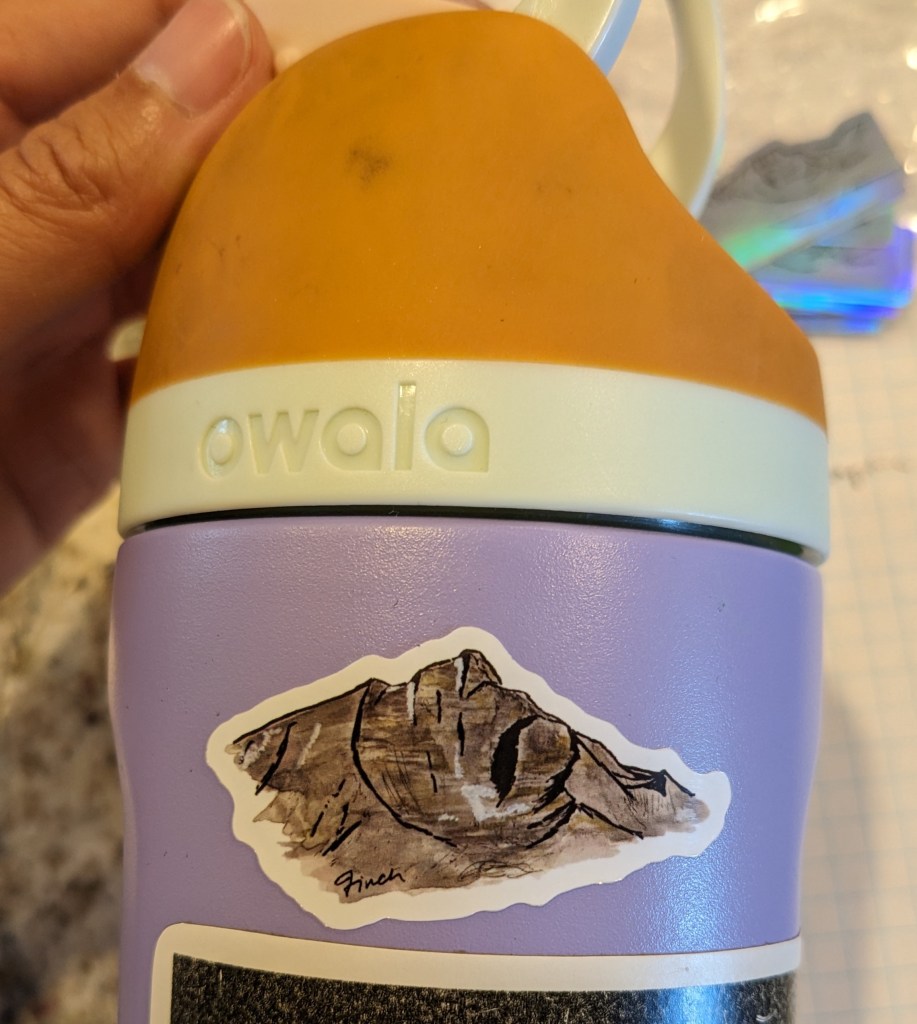
I also made some stickers of my art! Which is so fun!
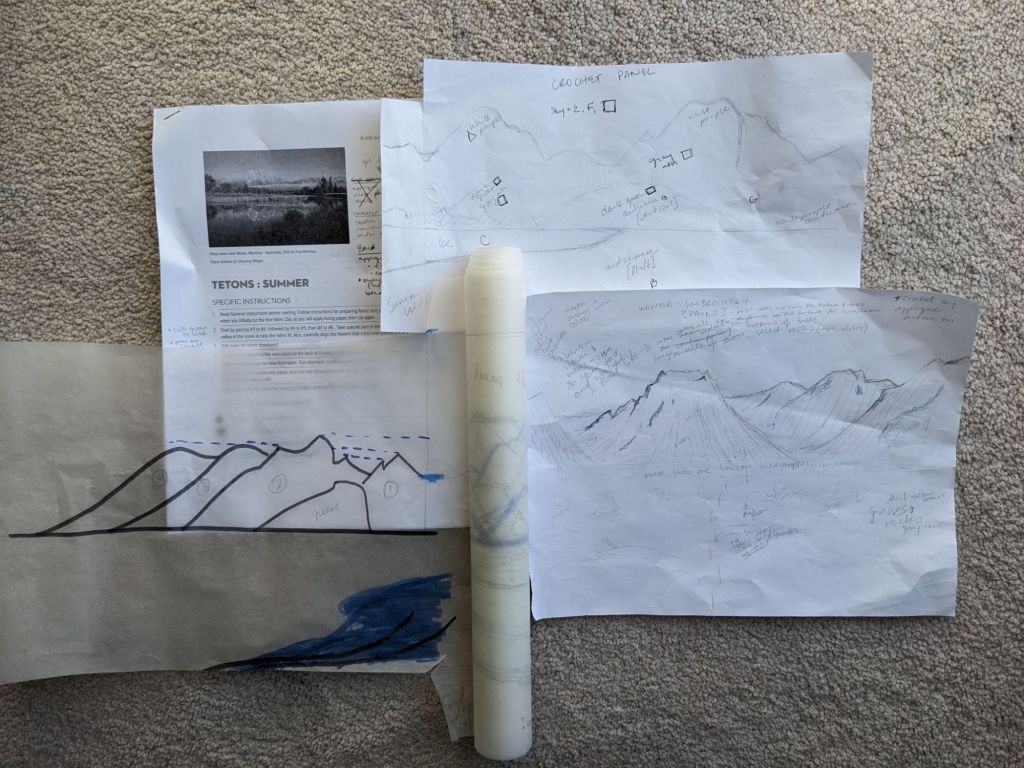
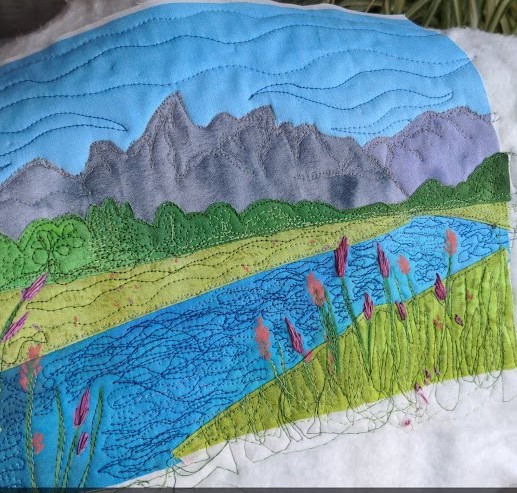
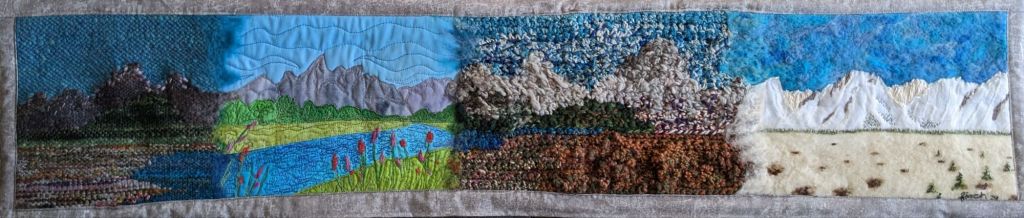
So I’ve collected a lot of skills 🙂 and after picking up a “summer” quilting kit from the Grand Tetons last year, I wanted to expand that project into a Whole Big Thing. The kit references the possibility of doing the same scene but with different fabrics for different seasons, but I wanted to do a full panorama with different peaks, depicting as much as I could of the Teton Range. I used some tracing paper to plan out panels for each of the four seasons, scaled so they’d match up with the quilted panel. My main reference photo is from Willow Flats Overlook when I visited in 2023. The perspective of the quilt is a bit different, but I kind of… made it work.
Main reference photo from Willow Flats OverlookPlans! The tracing paper rolls out into the whole panorama but having individual pieces was better while I worked.
I started off with the applique quilting kit and added some free motion quilting for details. It was really fun to work on things on a smaller canvas and be able to do details without getting overwhelmed. I also added some hand embroidery for the flowers because I wanted them to pop out 🙂
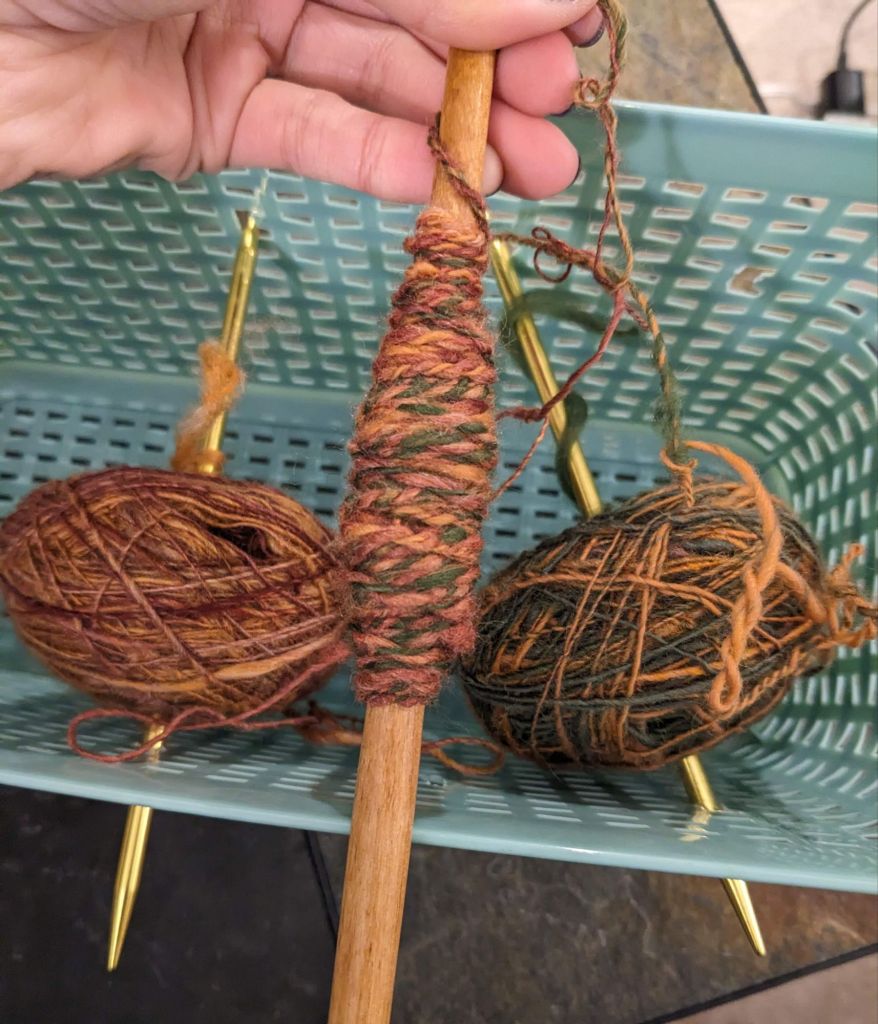
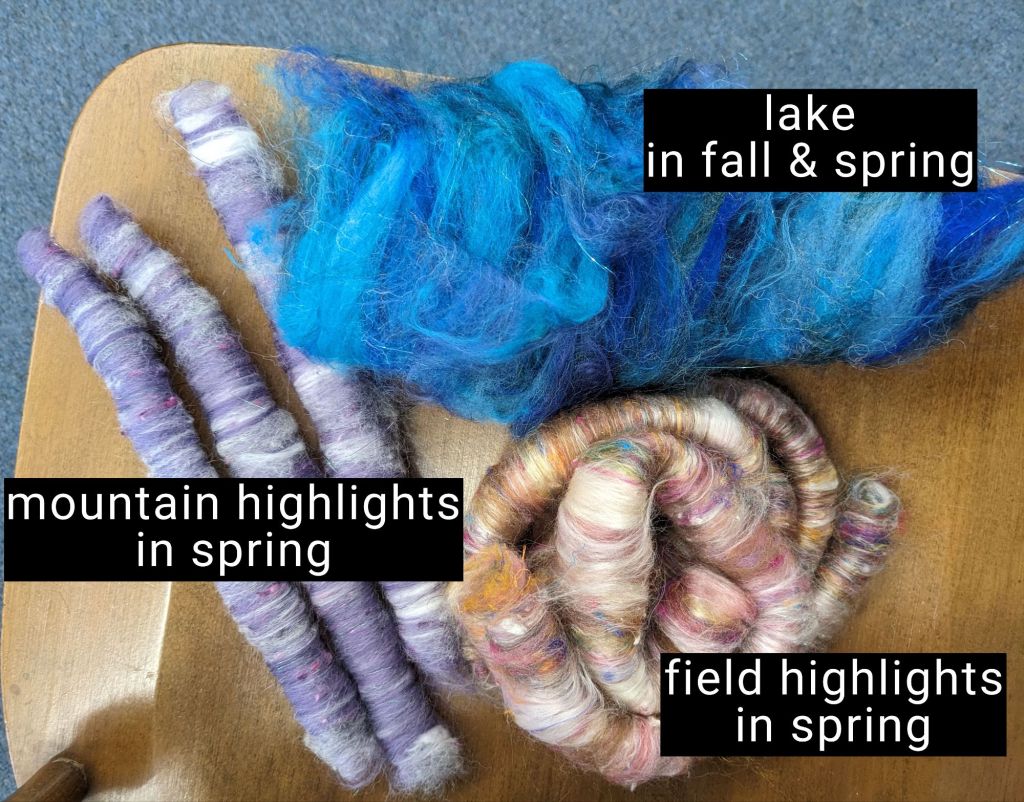
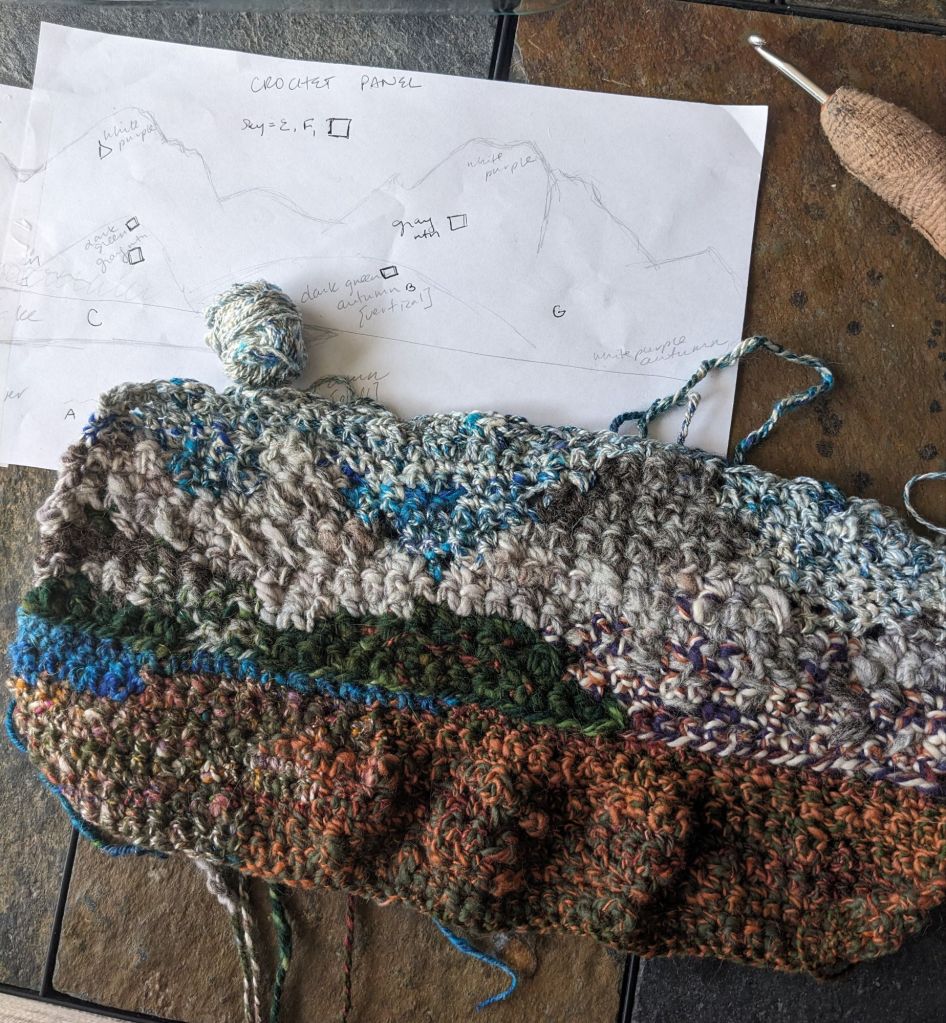
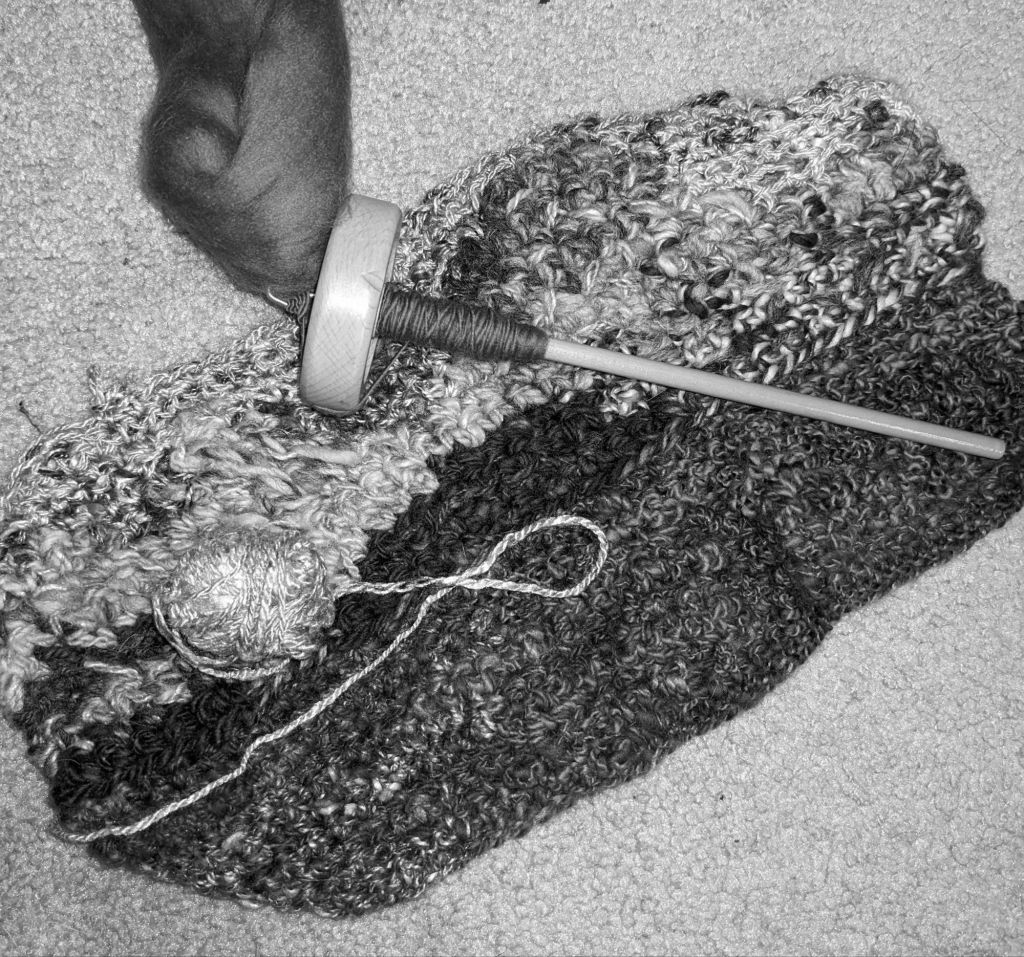
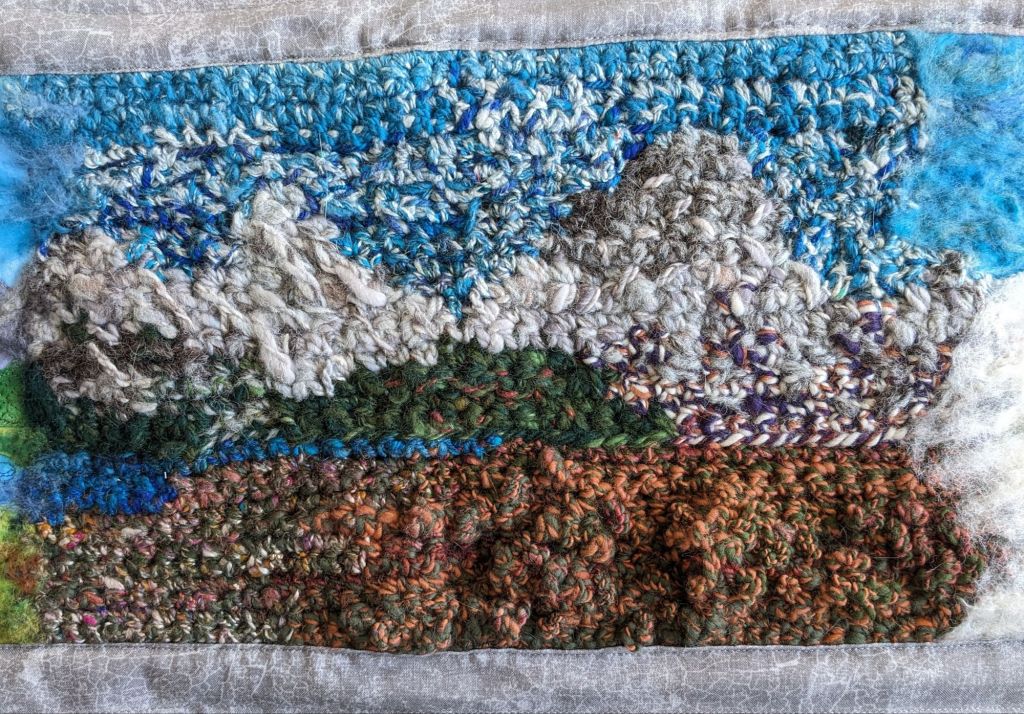
My first instinct for the next panel was to use crochet, using some funky colorwork and textured stitches. I spun up yarn for each of the different sections: sky, lake, mountains of various white and gray mixes, and autumn-y colors for the sagebrush.
a yarn I called “Autumn” 🙂
fiber blends I made at a workshop
I added some weird bumpy parts and extra stitches in the foreground to mimic the fluffy sagebrush 🙂
I struggled with getting enough contrast between the gray of the mountains and the blue of the sky, so I took a black and white picture and spun up some darker blue that I could blend into the existing sky.
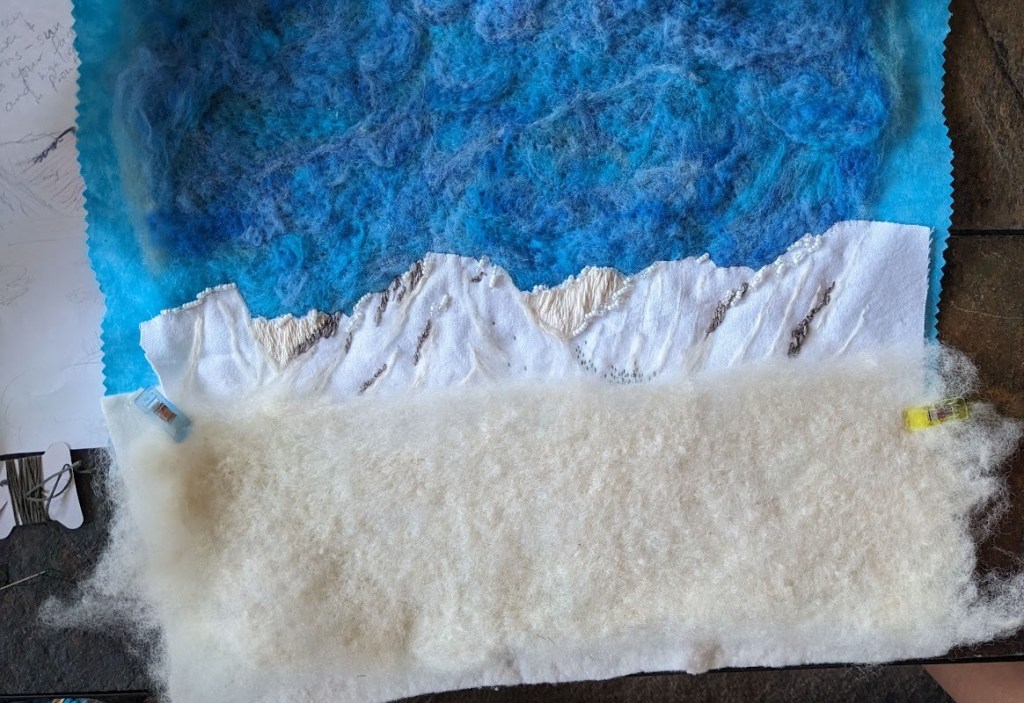
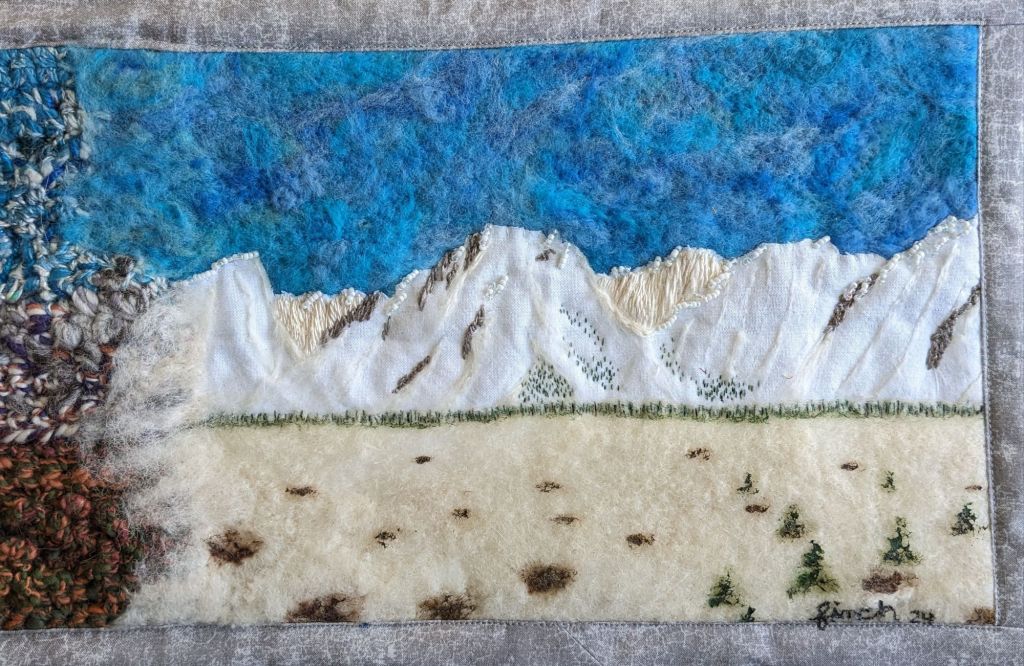
After I had summer and autumn, I struggled with what to do next. I knew I wanted an embroidery panel and a woven panel, but I wasn’t sure which should be spring and which should be winter. I talked it over with a friend and we decided that the crochet shouldn’t be next to the weaving, since they have similar textures and detail resolution. So winter was embroidery! I started by needle felting the background sky and foreground, to automatically add texture that I didn’t need to stitch. I spun some thin yarns of cream/white and rock gray, which was a fun challenge to spin thin enough and consistently enough that I could use it with a normal sized needle. I also thought some beads would be fun for the shininess of the snow 🙂
Winter embroidery in progress
I was planning to do the winter foreground details with embroidery, but I realized I wanted to incorporate paint into this project, so I used acrylic paint to add trees, bushes, and rocks. It was difficult to paint onto the felted surface because the brush strokes pick up fibers from the felt, but it was doable.
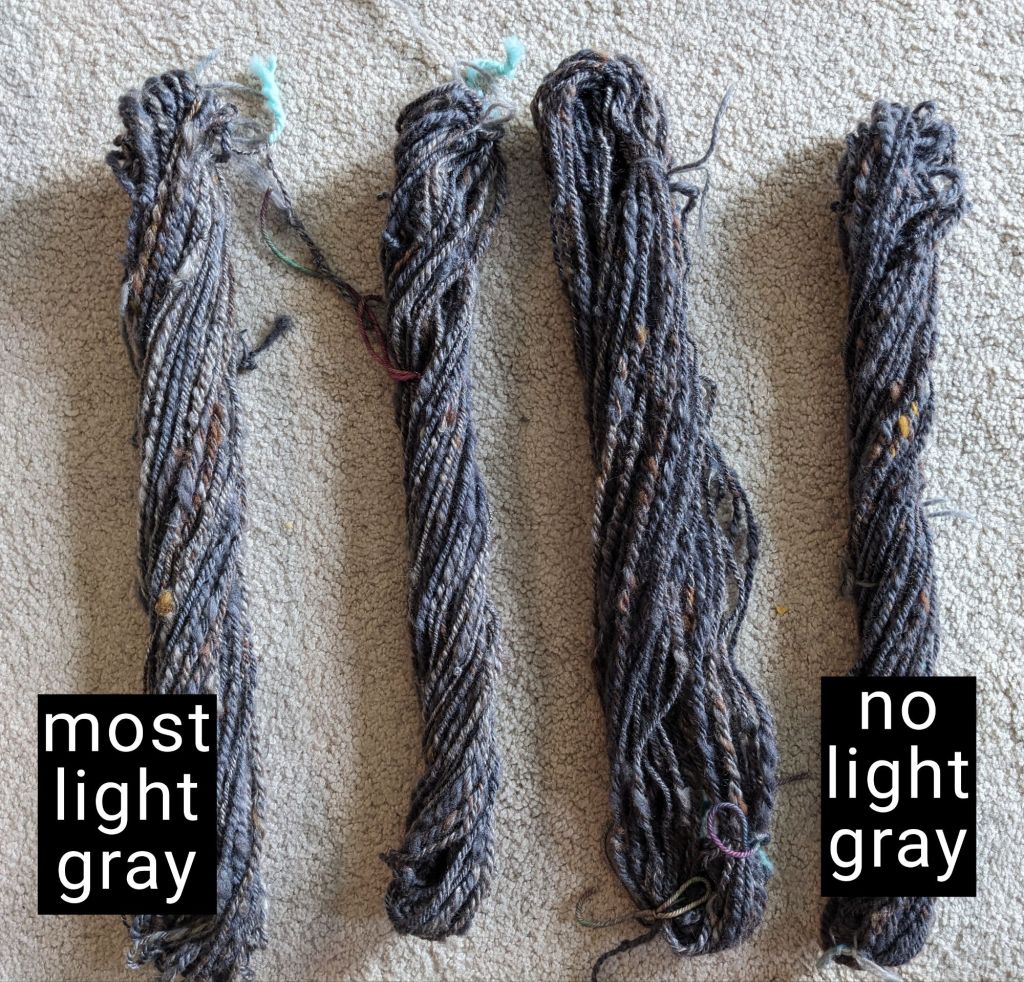
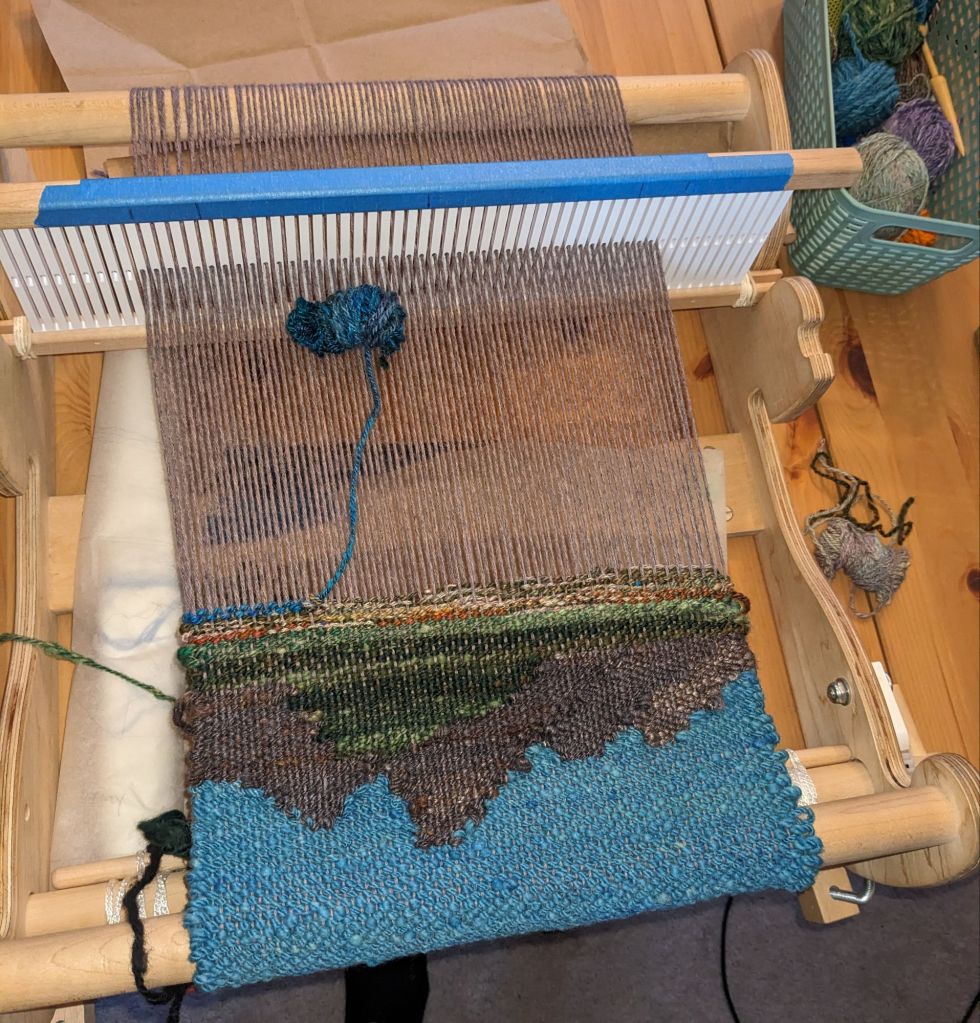
Then I needed a tapestry weaving for spring. Just like with the crochet, I only used yarns I’ve spun, and spun up a few more just for this. I had four different mountain-y layers that I wanted to represent, so I spun four different grays with graduated levels of light gray. In hindsight, I made WAY TOO MUCH, but it was fun. And now I have more mountain gray for later.
I took a weaving class where we were able to take the loom home for a week, and capitalized on this moment to (a) finish this project, and (b) see if this type of loom is useful for tapestry weaving (that’s not its primary use). It was a successful proof of concept for using this type of loom for tapestry, but I think I’m going to pursue purchasing a different kind of loom for some more flexibility and growth potential.
upside down on the loom! I wove the sky first because I knew it would be a solid weaving instead of doing a bunch of color changes… and weaving upside down made me less stressed about getting it perfect
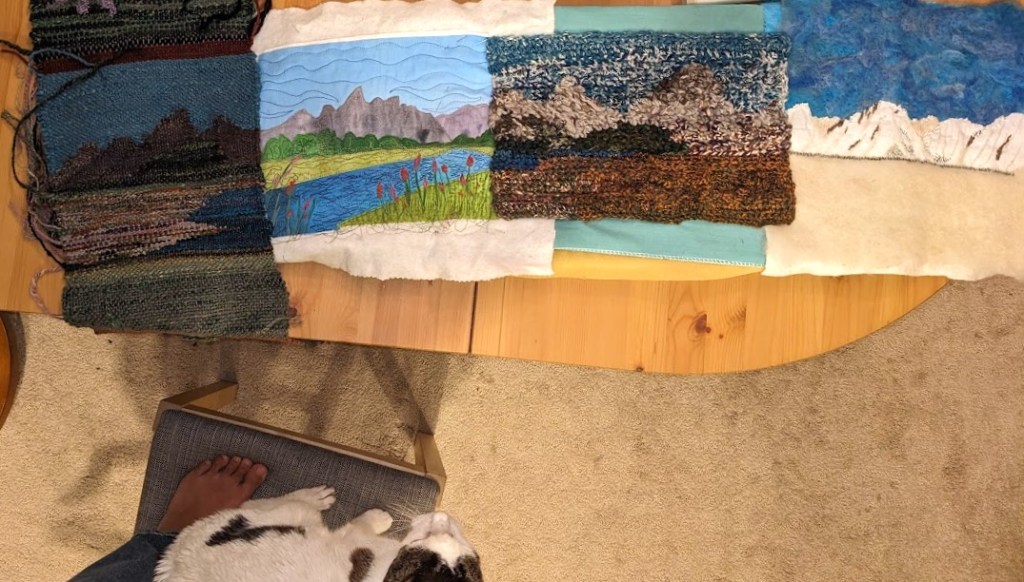
this is the first time I saw all four panels together, they’re pinned to a mini ironing board 🙂
I used some extra fiber to needle felt over the seams between the panels, and then did a border to secure everything together.
My main challenge in finishing this up was getting the crochet to sit the way I wanted it to. I ended up gluing it to some stiff scrap fabric to stabilize it, which went well…. Until I started sewing the fabric frame on. Hot glue and sewing machine needle is not a good pair. 🙂 But I took my time, learned my lesson, and got it done.
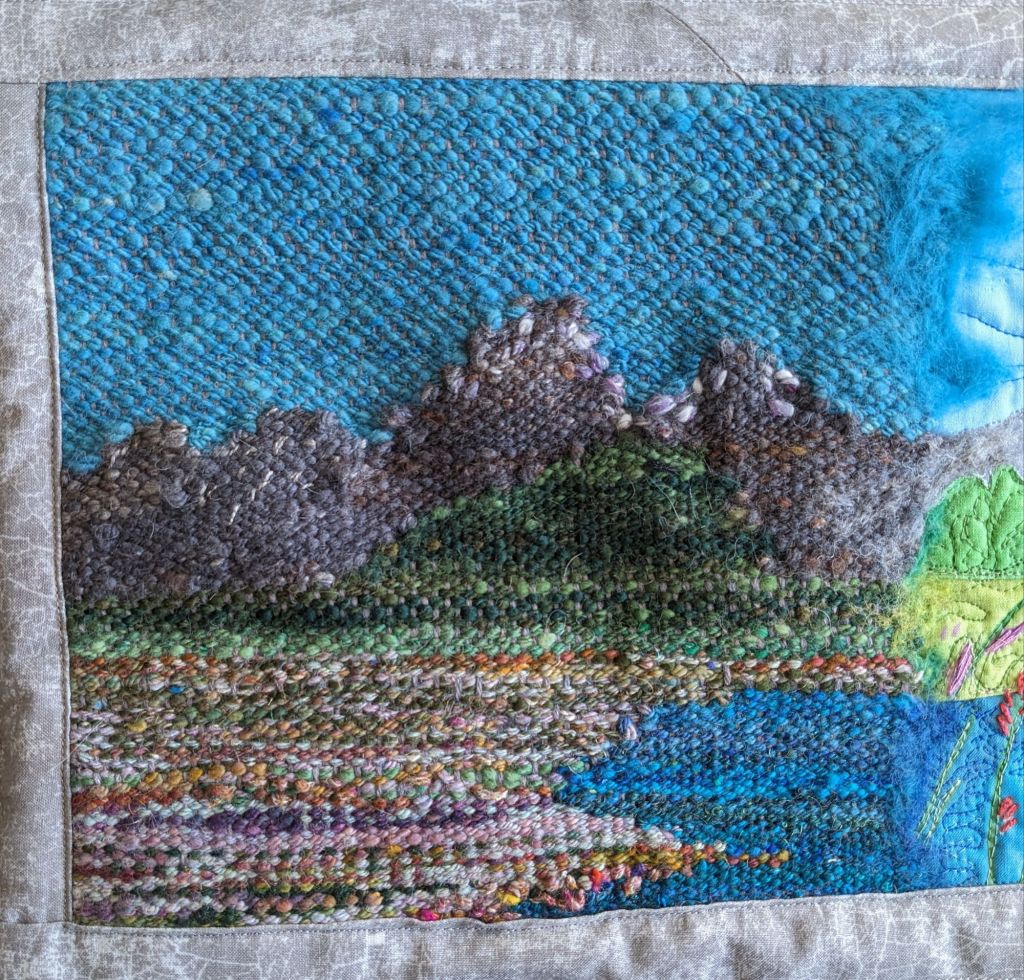
Spring! My favorite part to make was the field in the foreground, I improvised all of the color changes and just had a good timeSummer 🙂 so glad I bought this and kicked off this project. I really like the wavy lake quilting with variegated threadAutumn! I really enjoyed spinning all this yarn, and I have a lot left over for future projects. I’m pretty happy with the shading on Mt. Moran (on the right) and the weird bumpy texture of the sagebrush in the foreground Winter! I really like the contrast between the line-y-ness of the embroidery and the fuzzy needle felting, and I proved to myself that I can spin yarn to embroider with🙂 finished
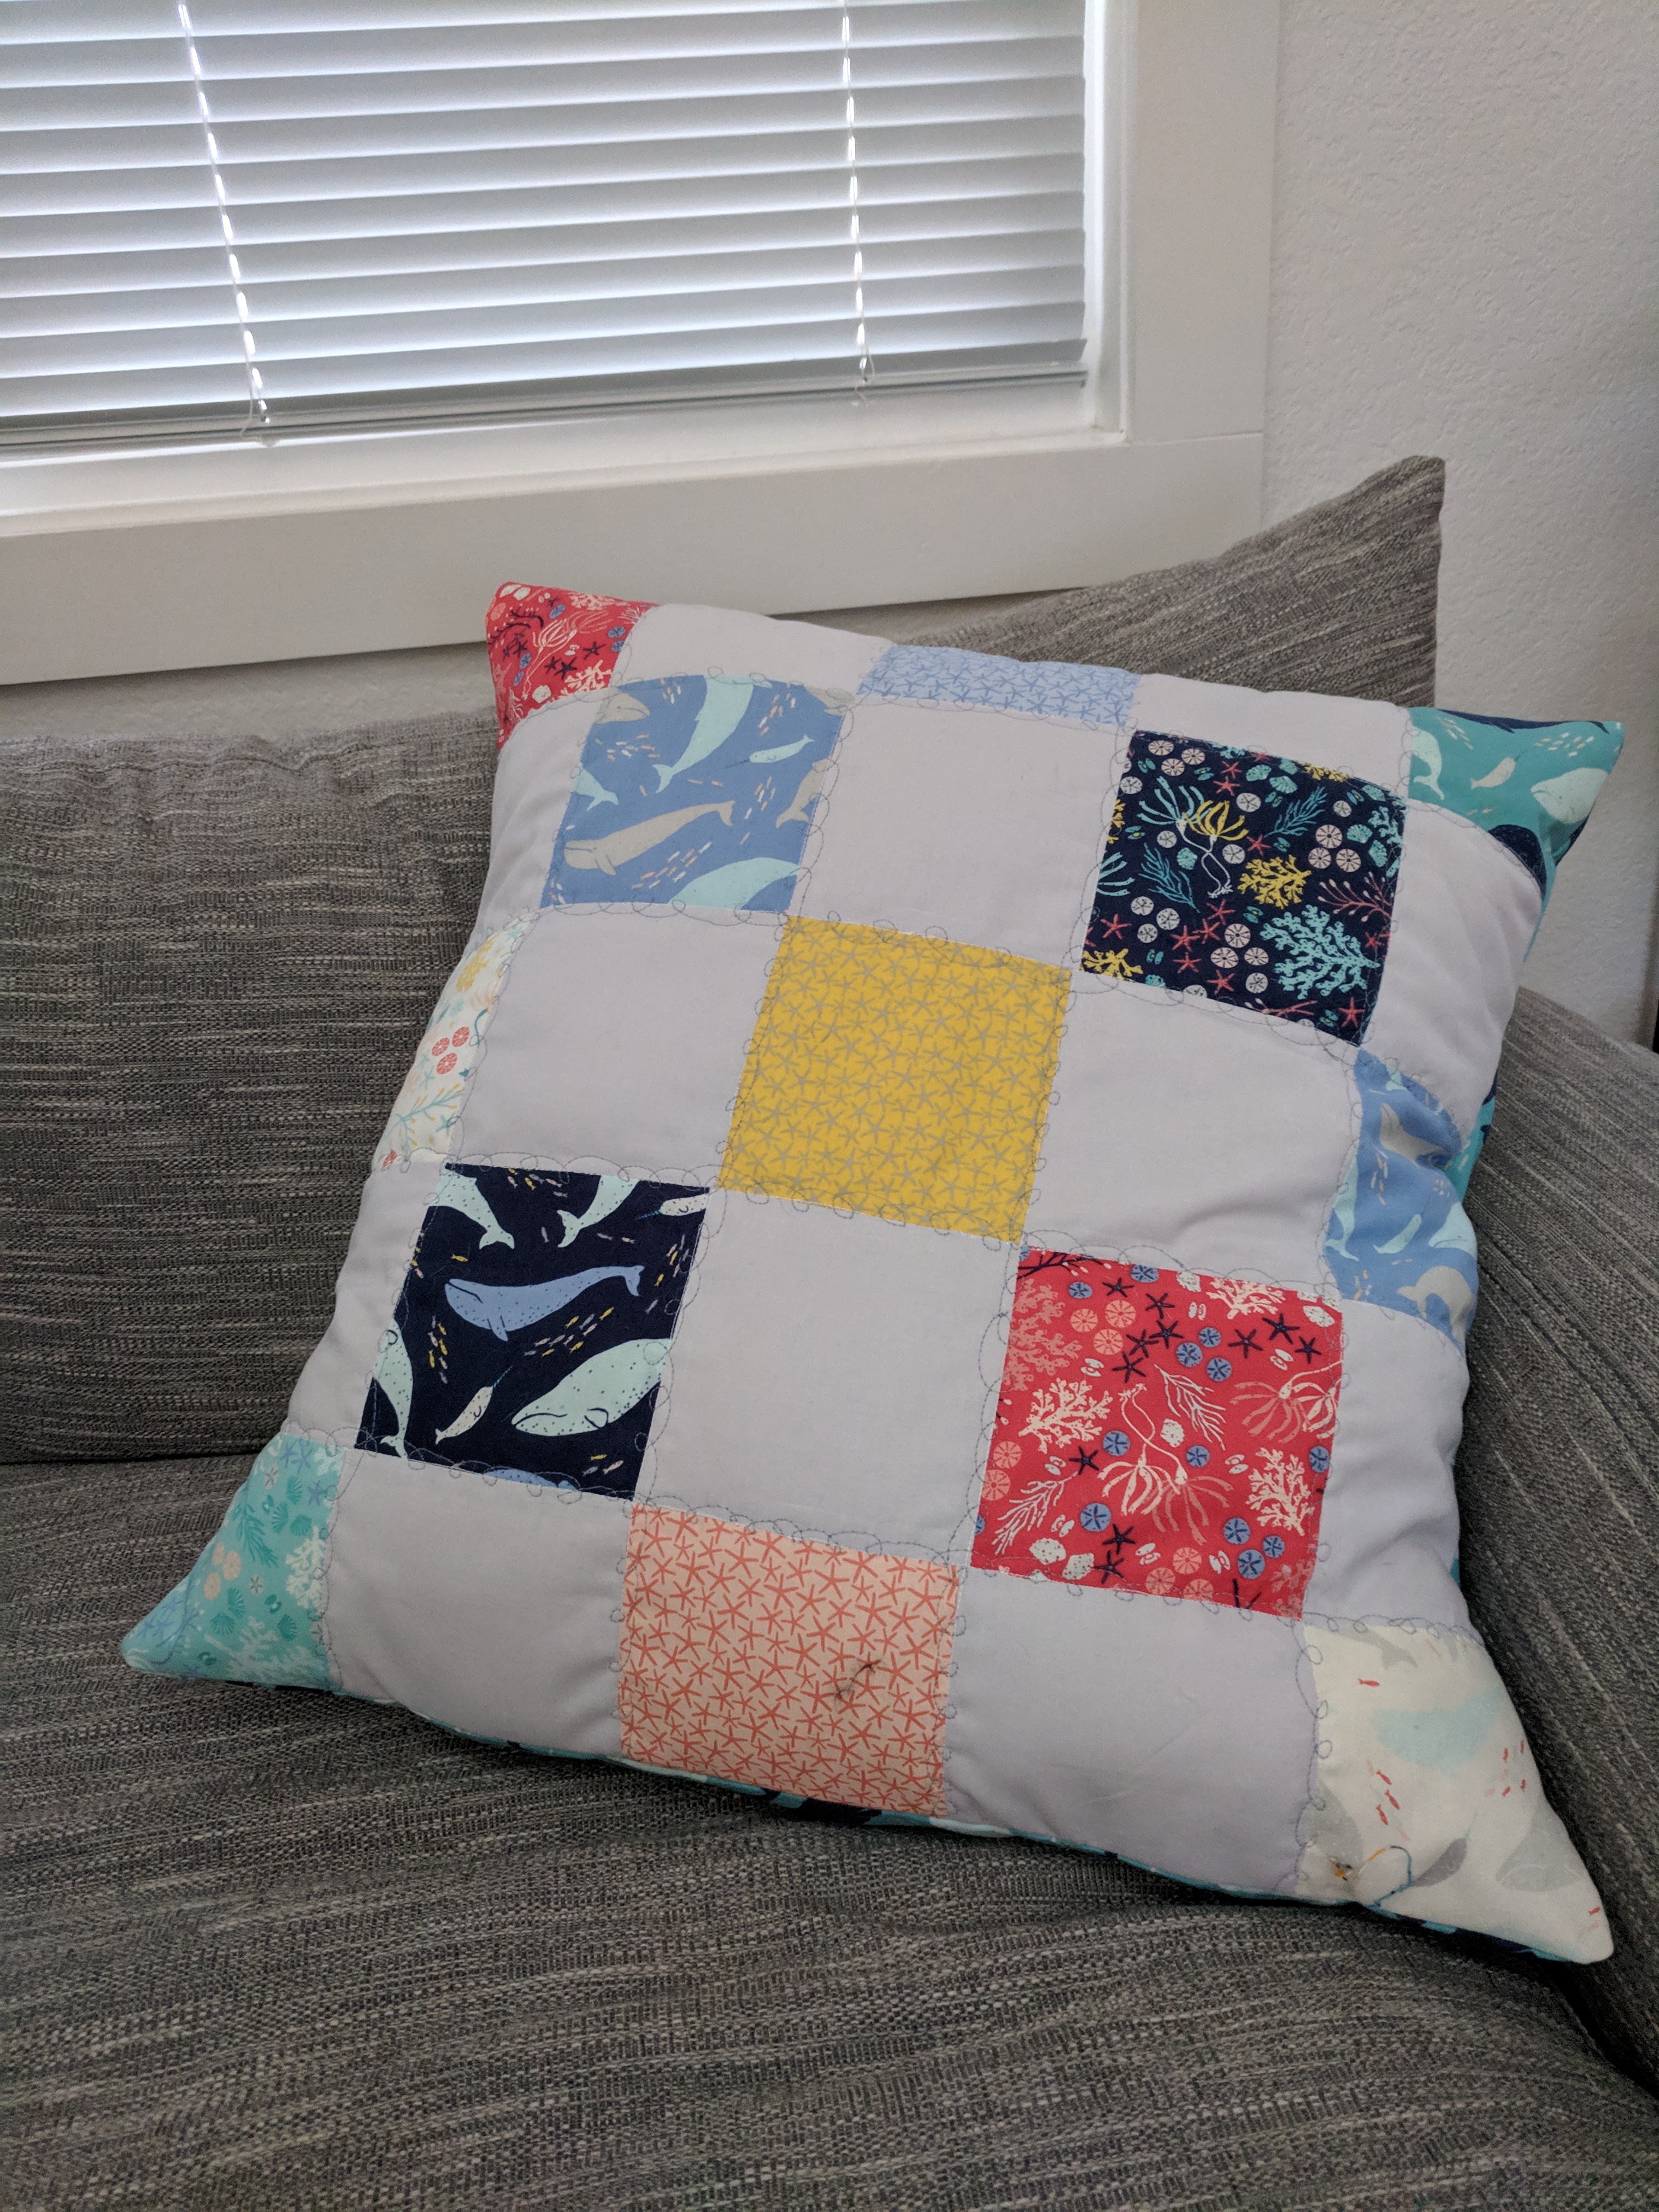
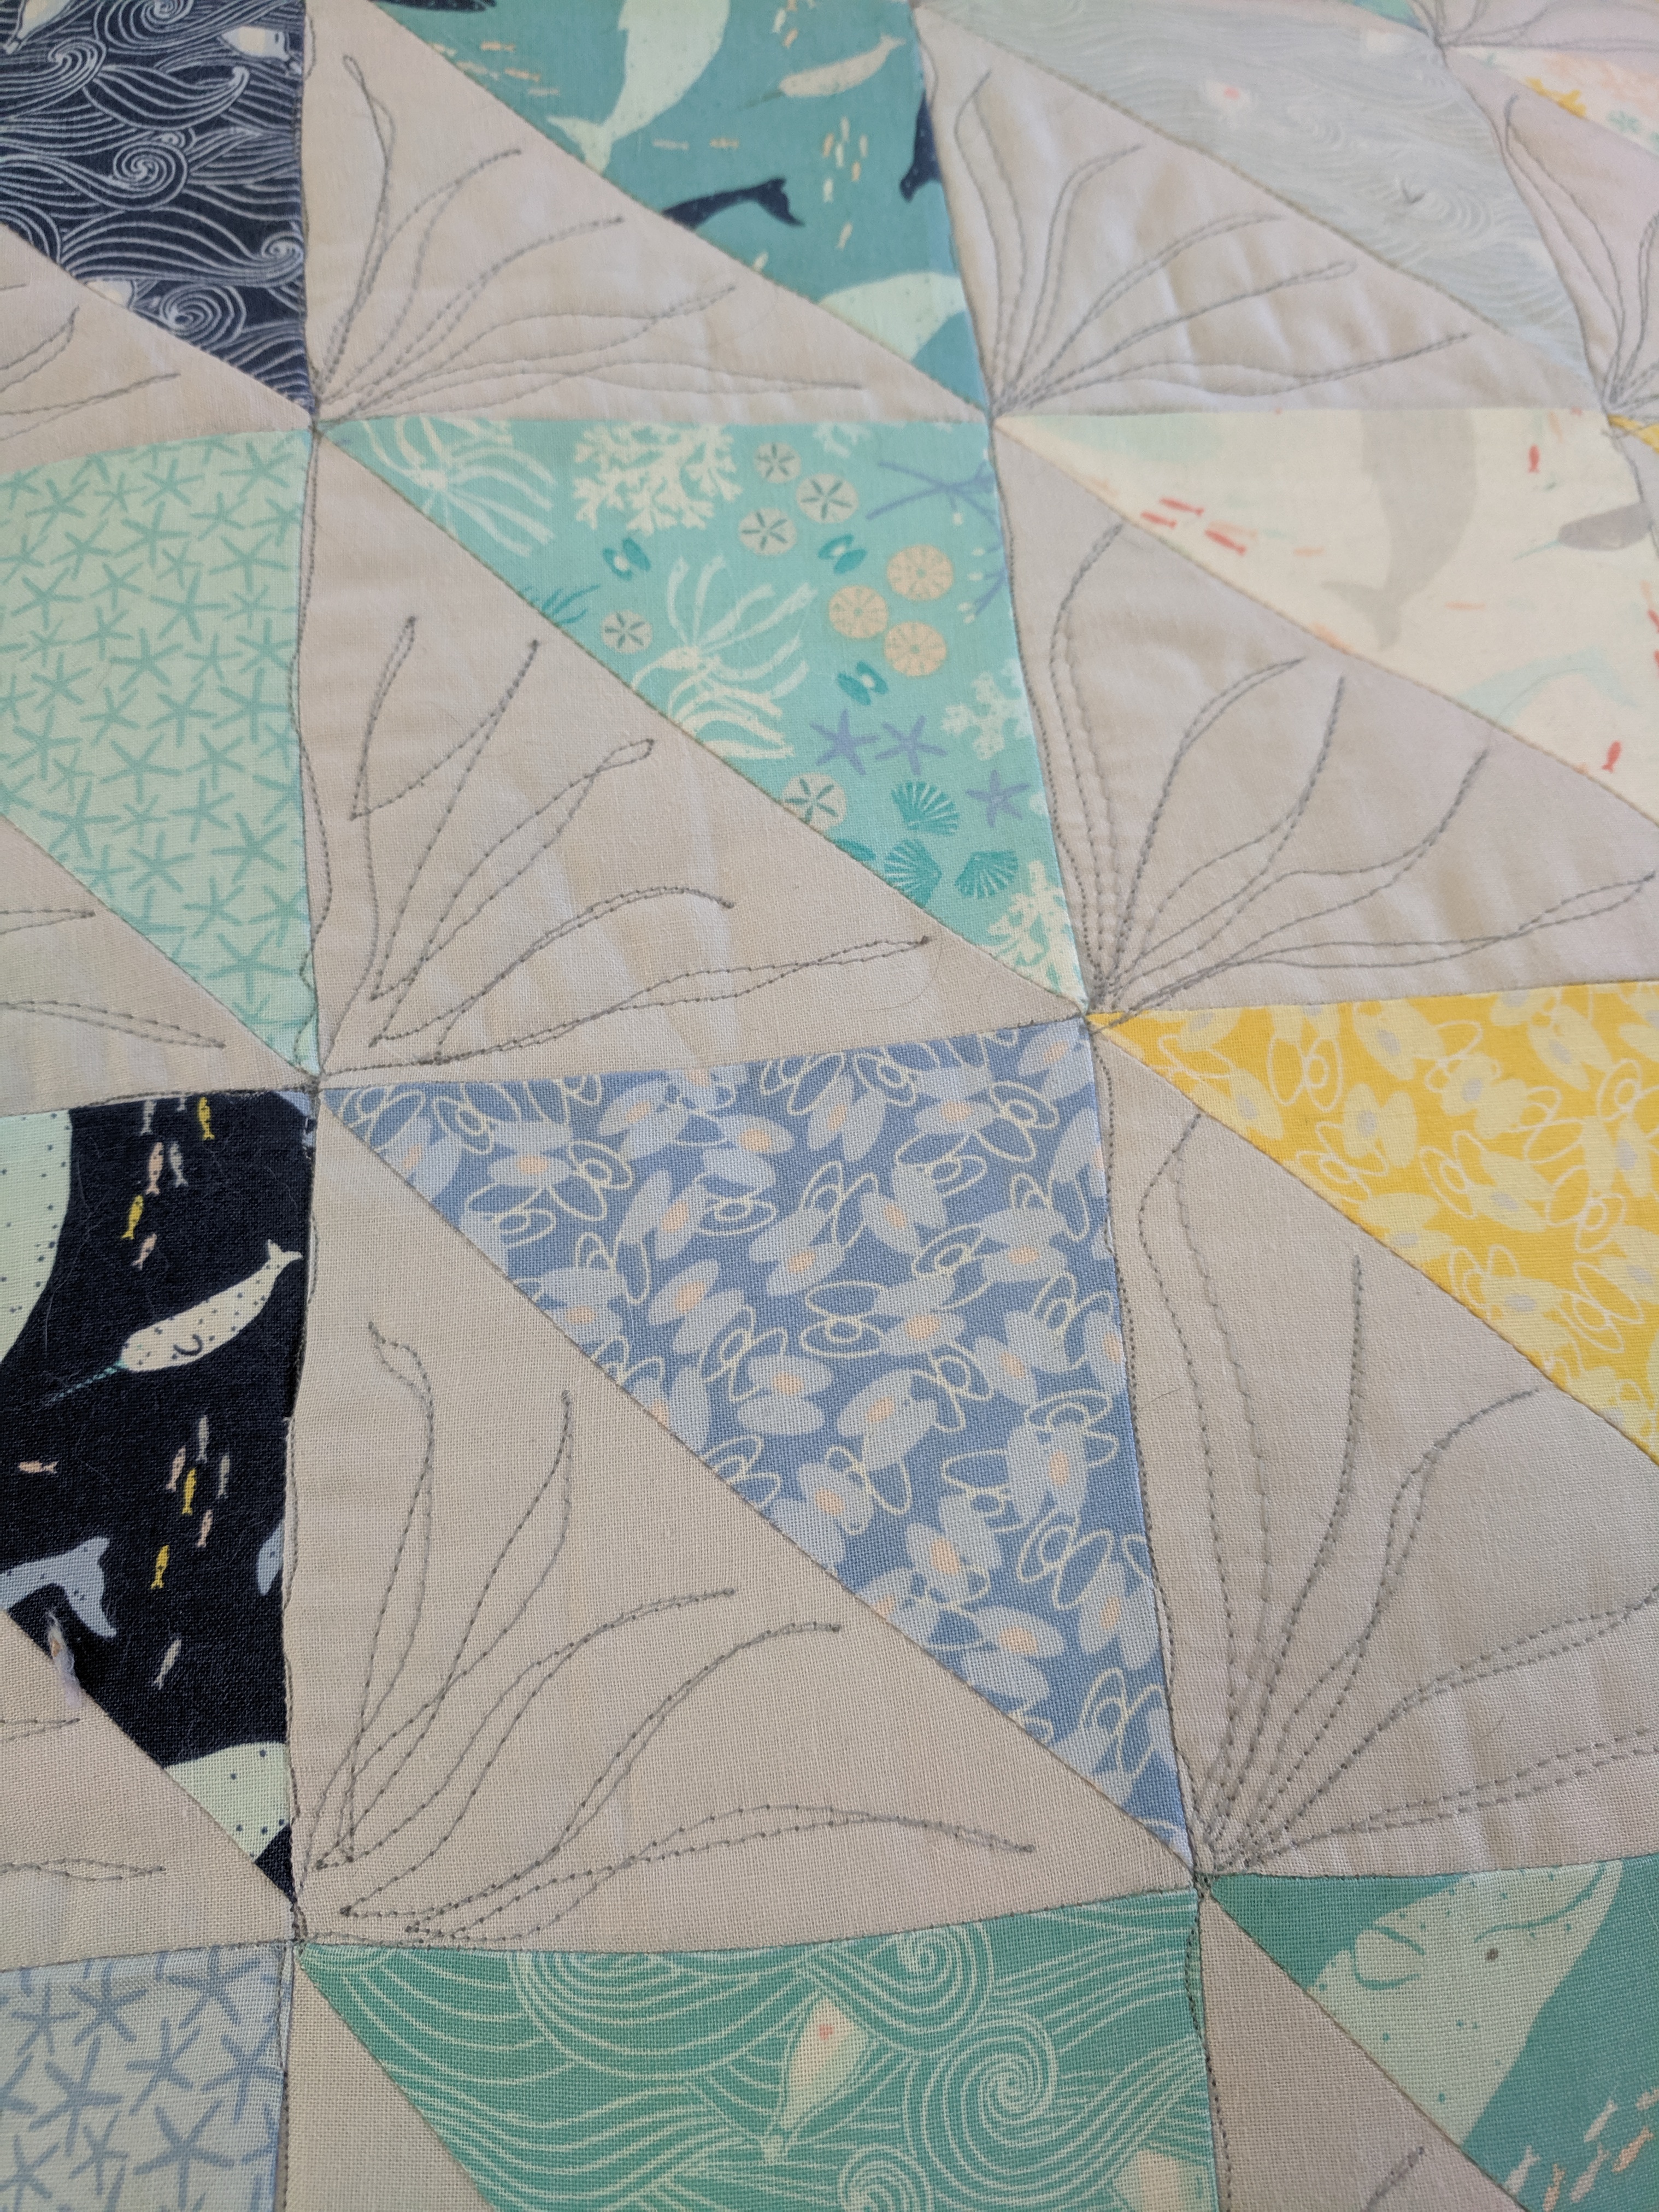
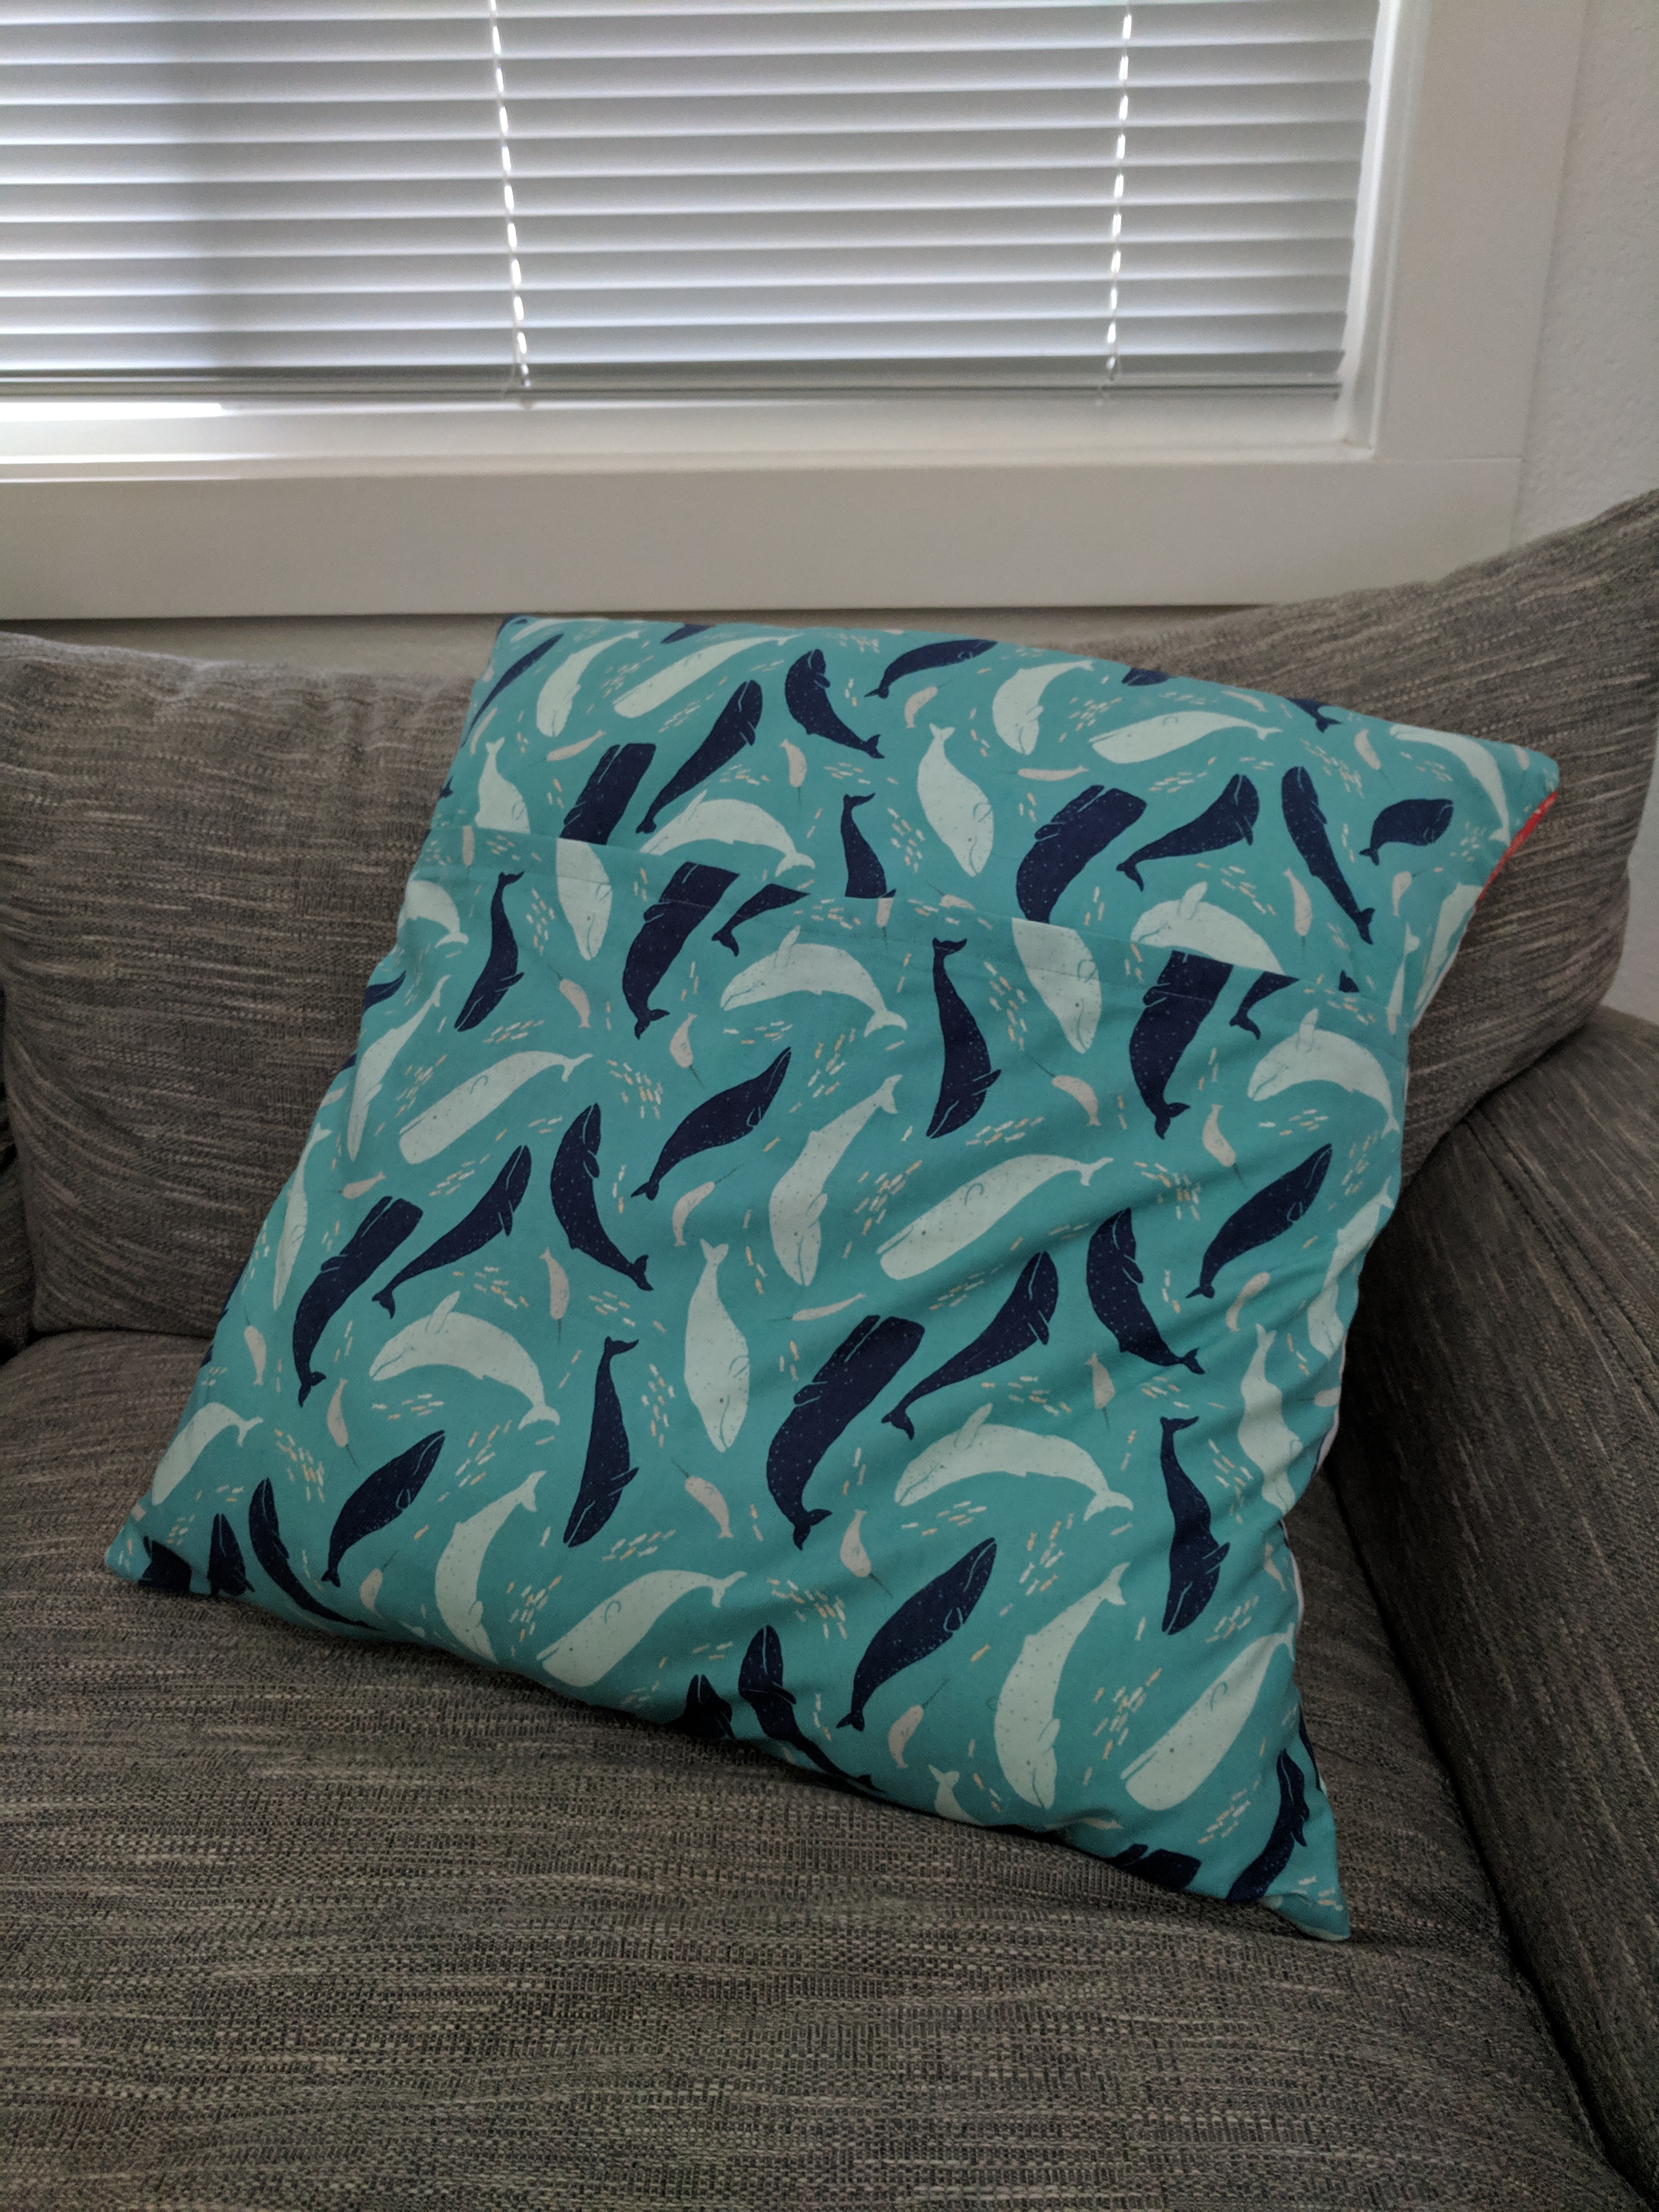
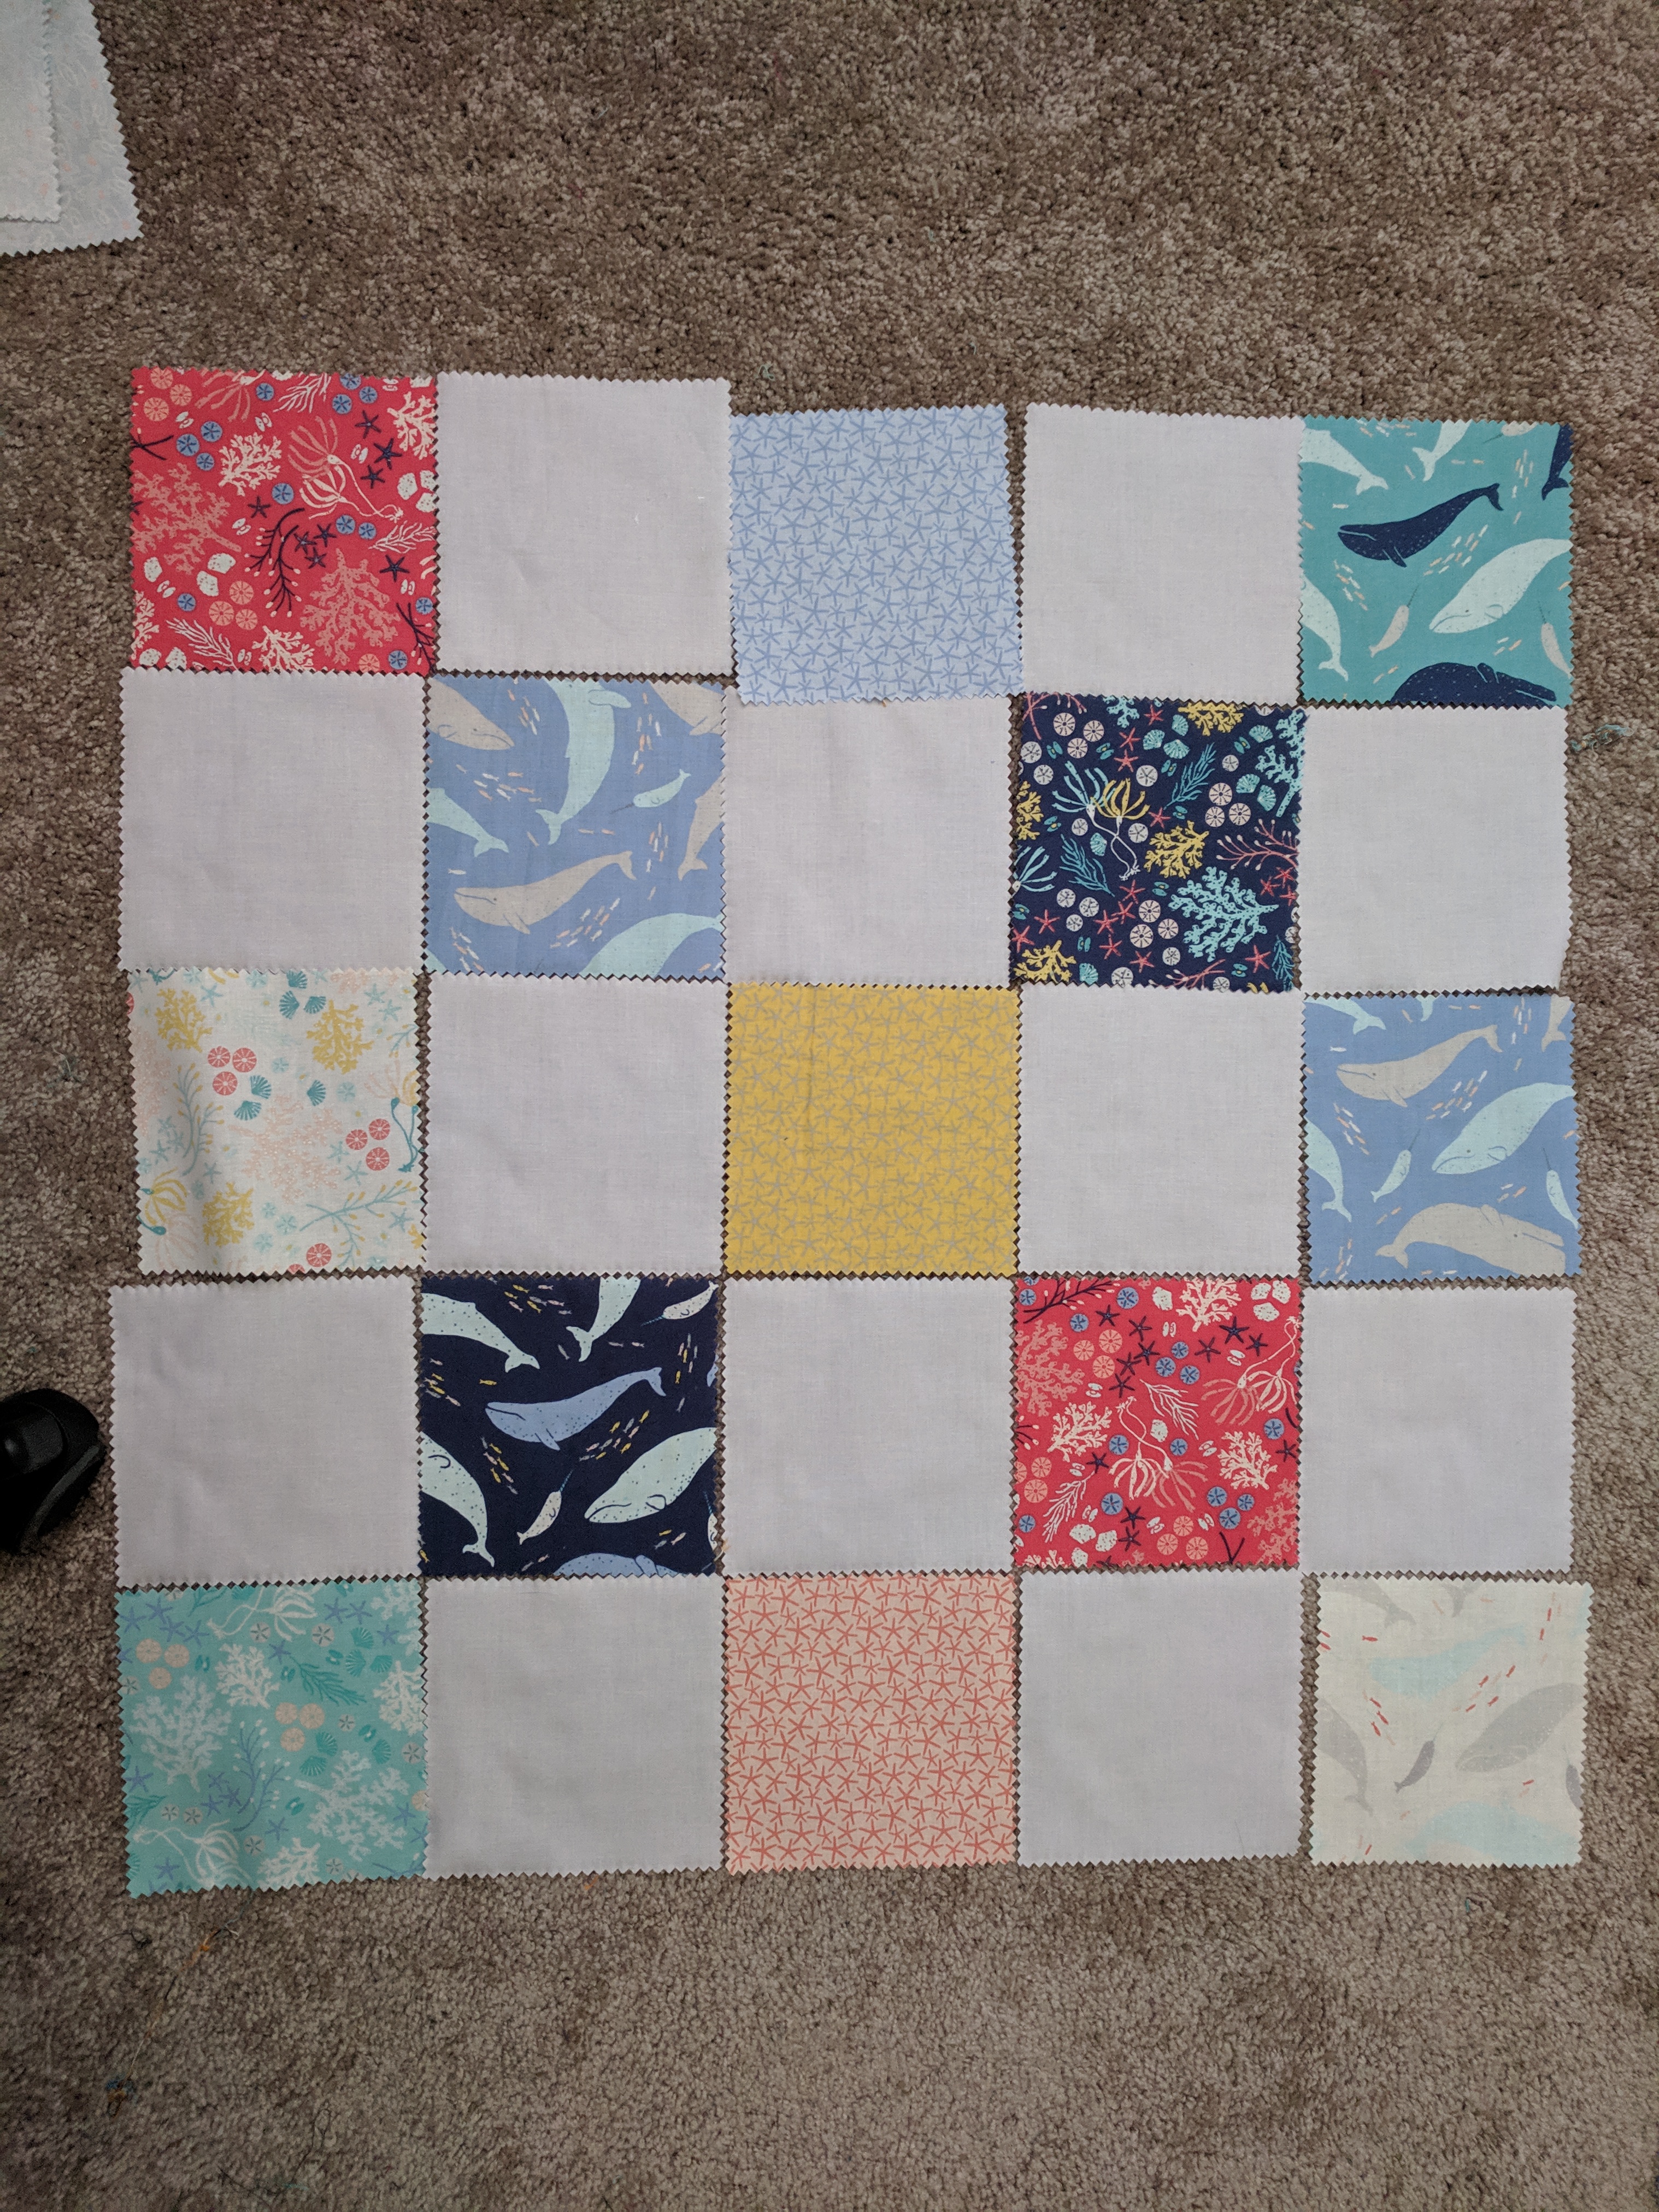
These pillows were my first foray into quilting! I got the High Seas 5″ squares on sale and paired them with a light gray background fabric.
I did a simple loopy free motion design on the 5″ square layout, and some coral-like wavy shapes on the half square triangle layout. This was me figuring out how to do free motion quilting effectively, including wrangling the excess fabric, what speed to move at, and how to control the whole situation. More about free motion quilting next week! 🙂
The backs for both the pillows are this adorable whale fabric, and I’m planning on making a shirt out of the leftovers. 🙂
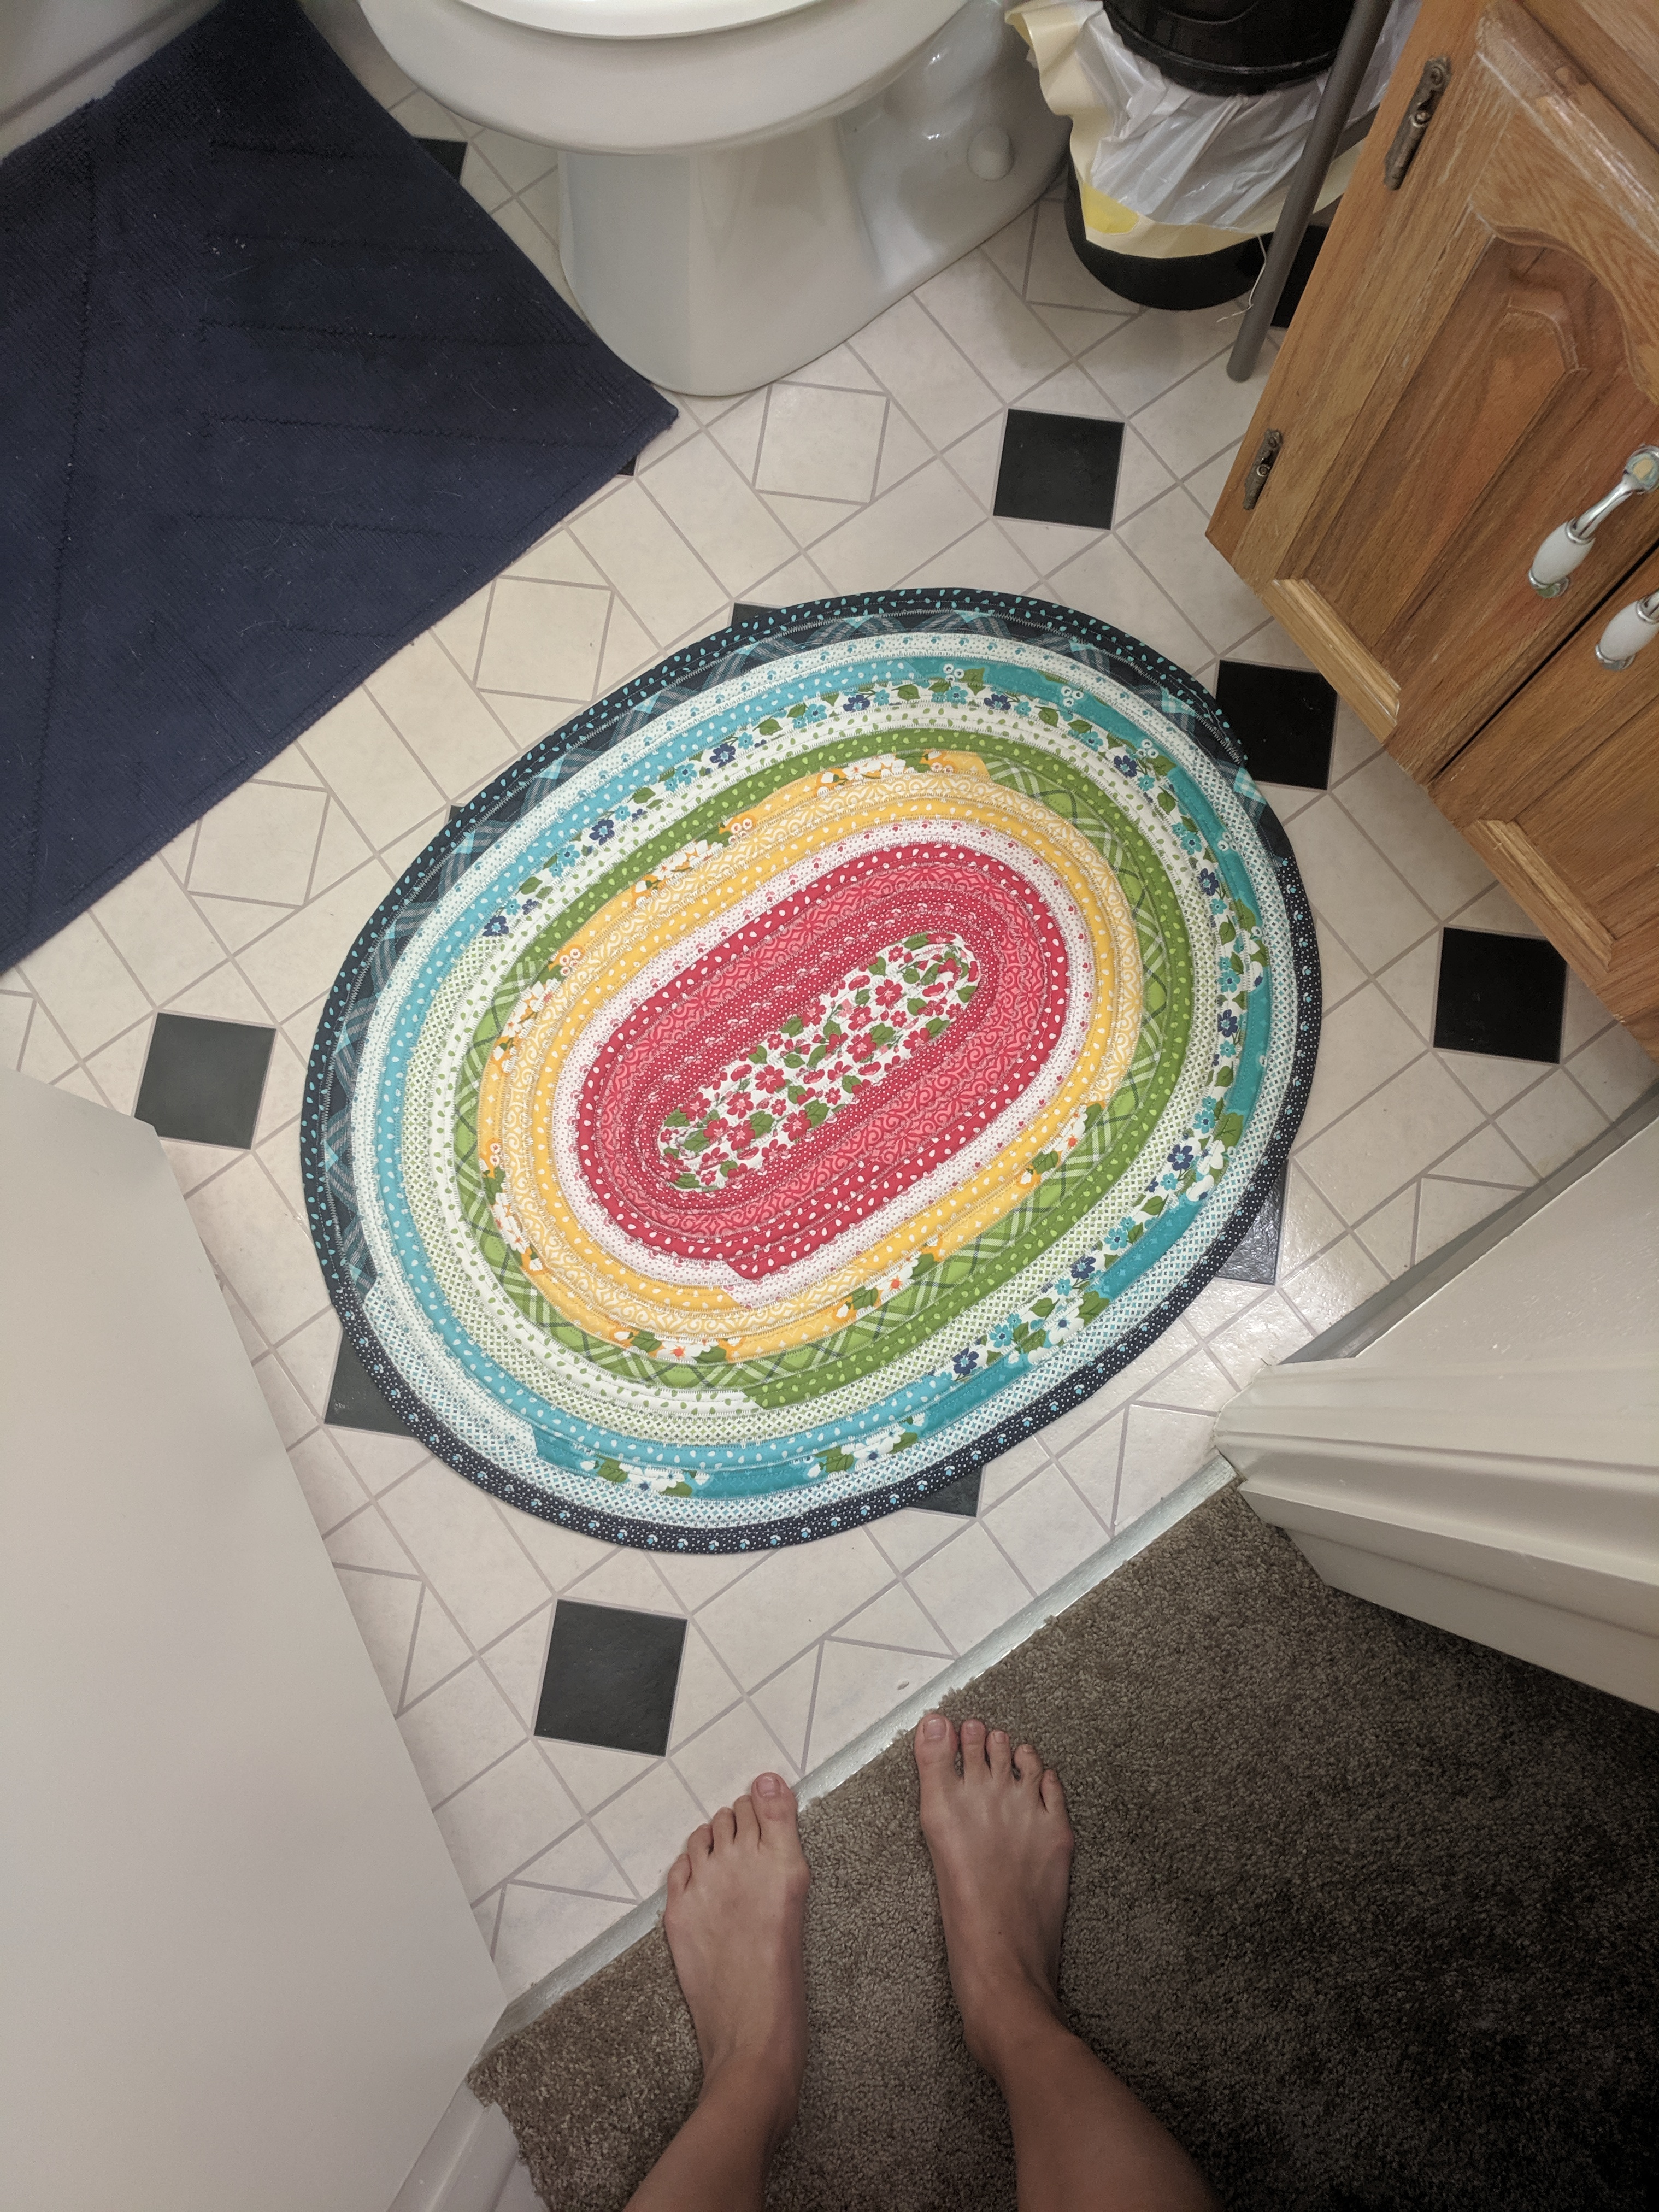
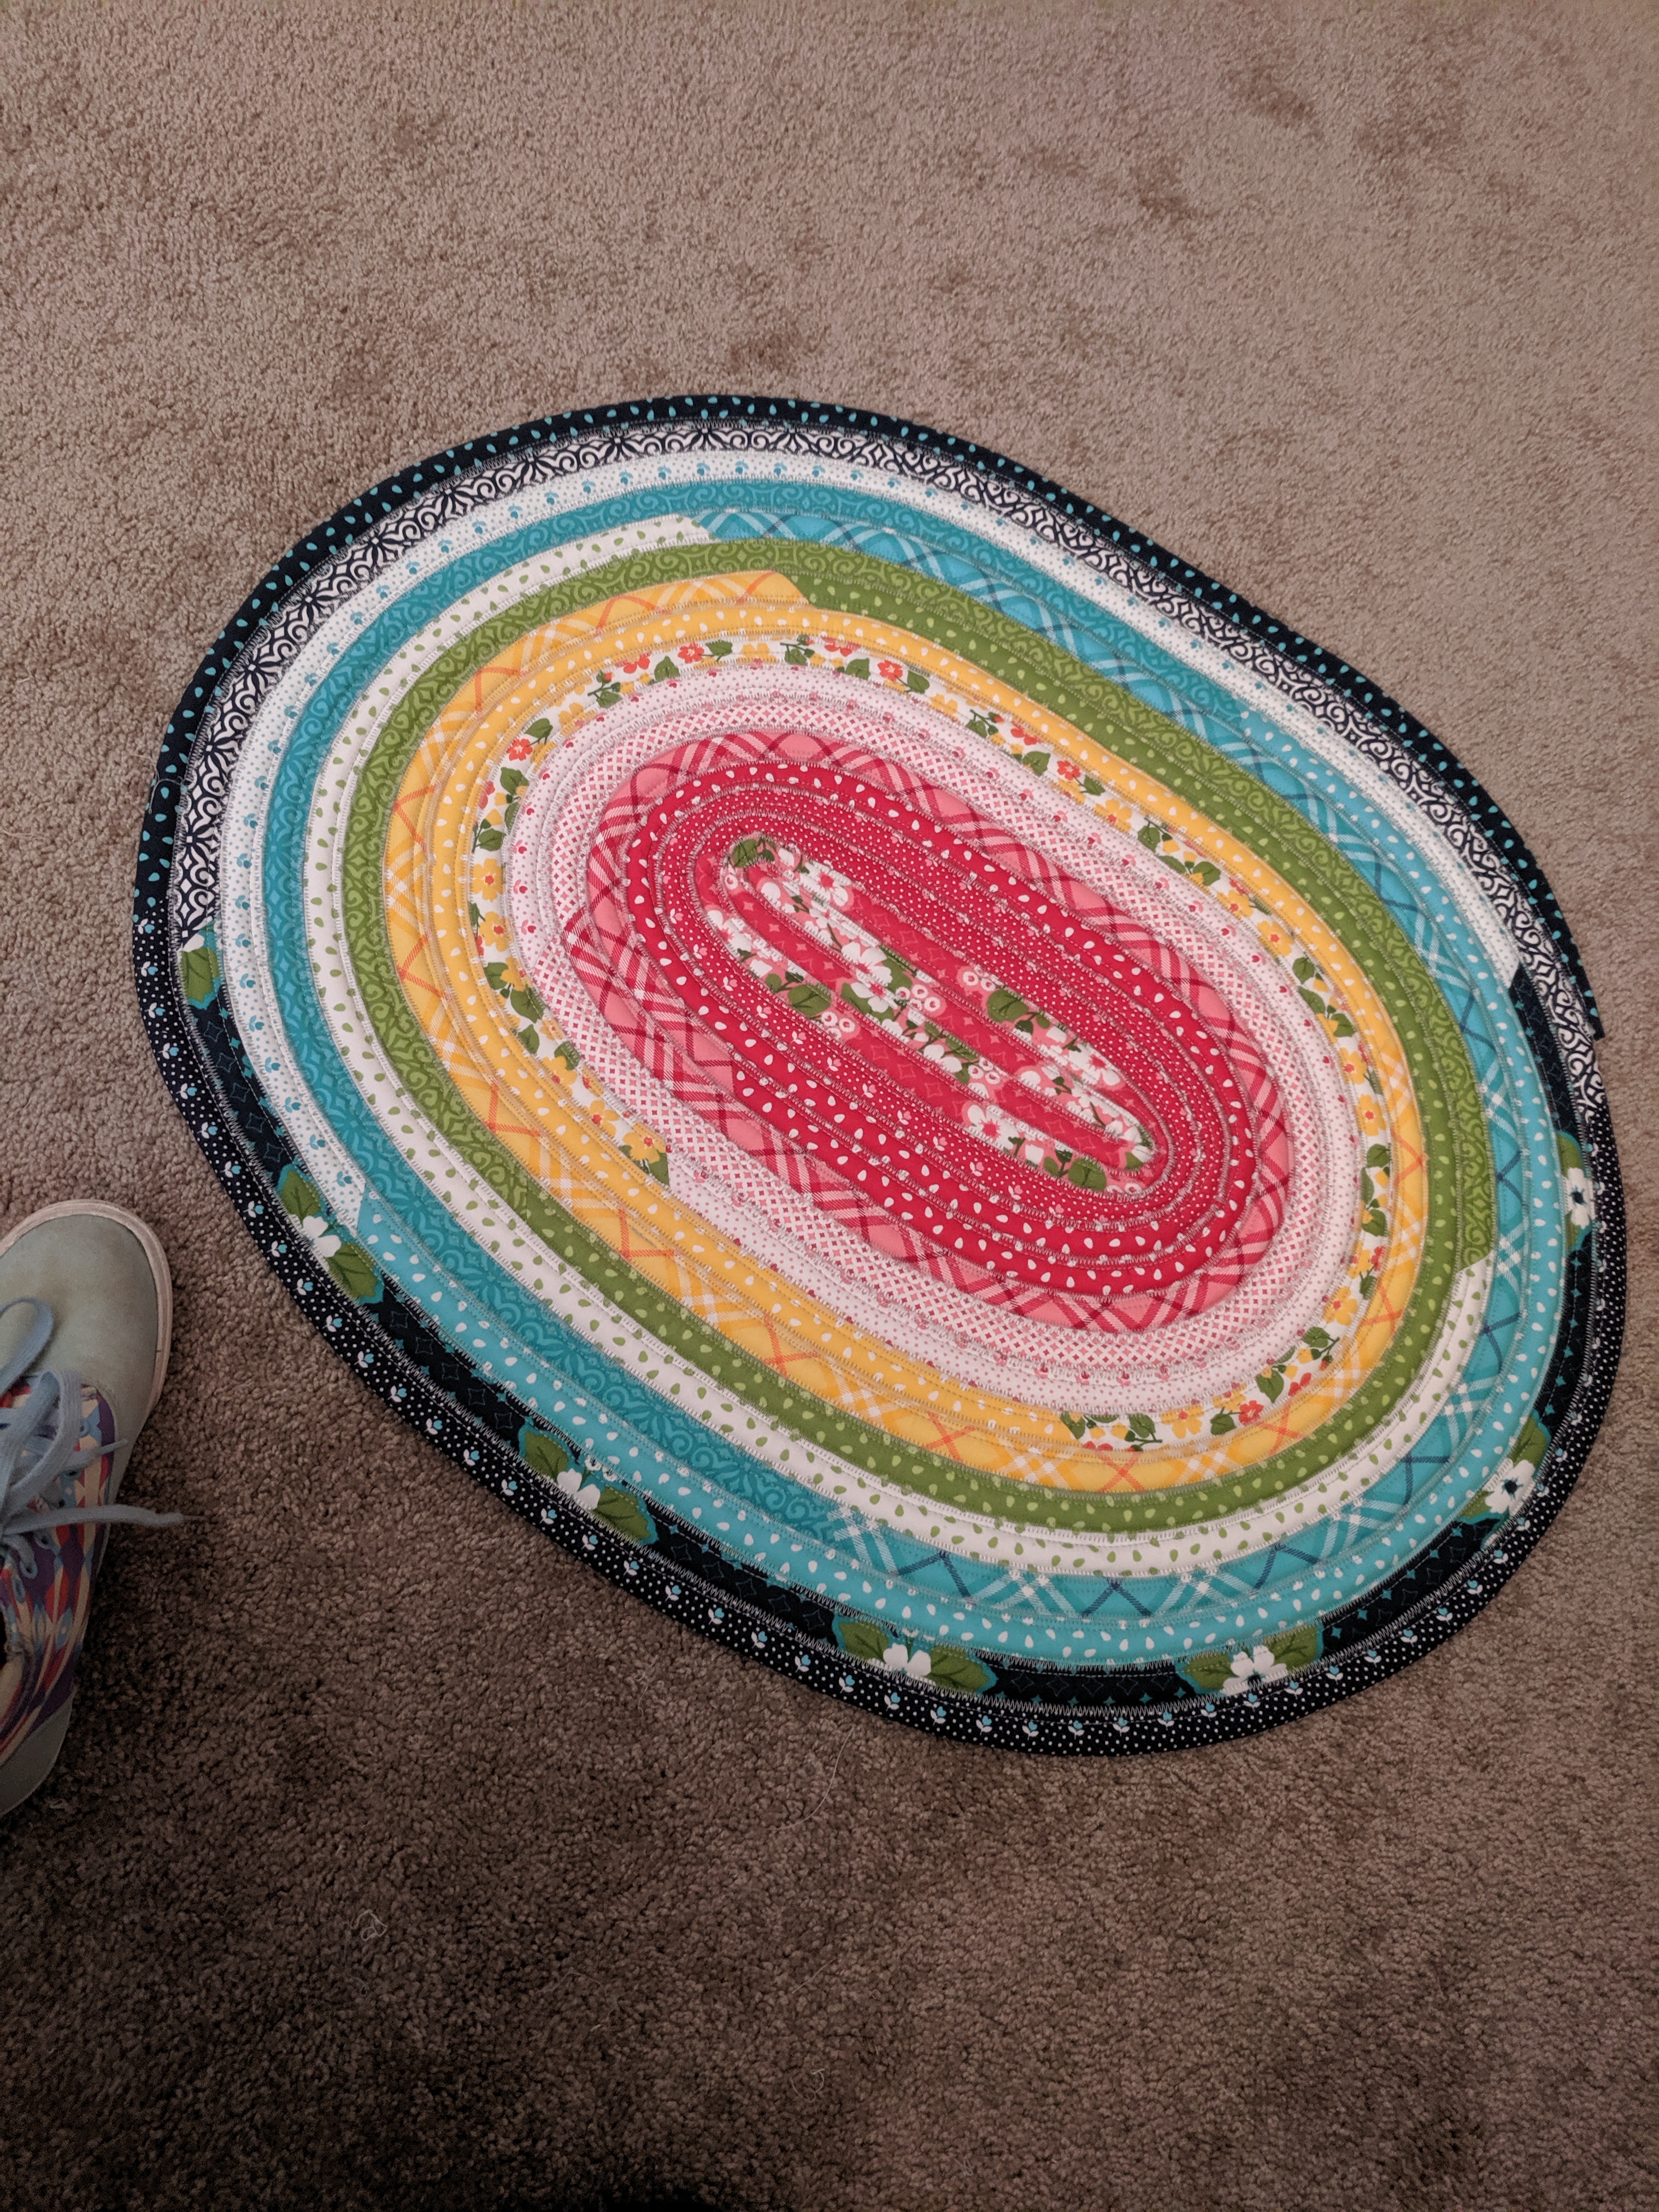
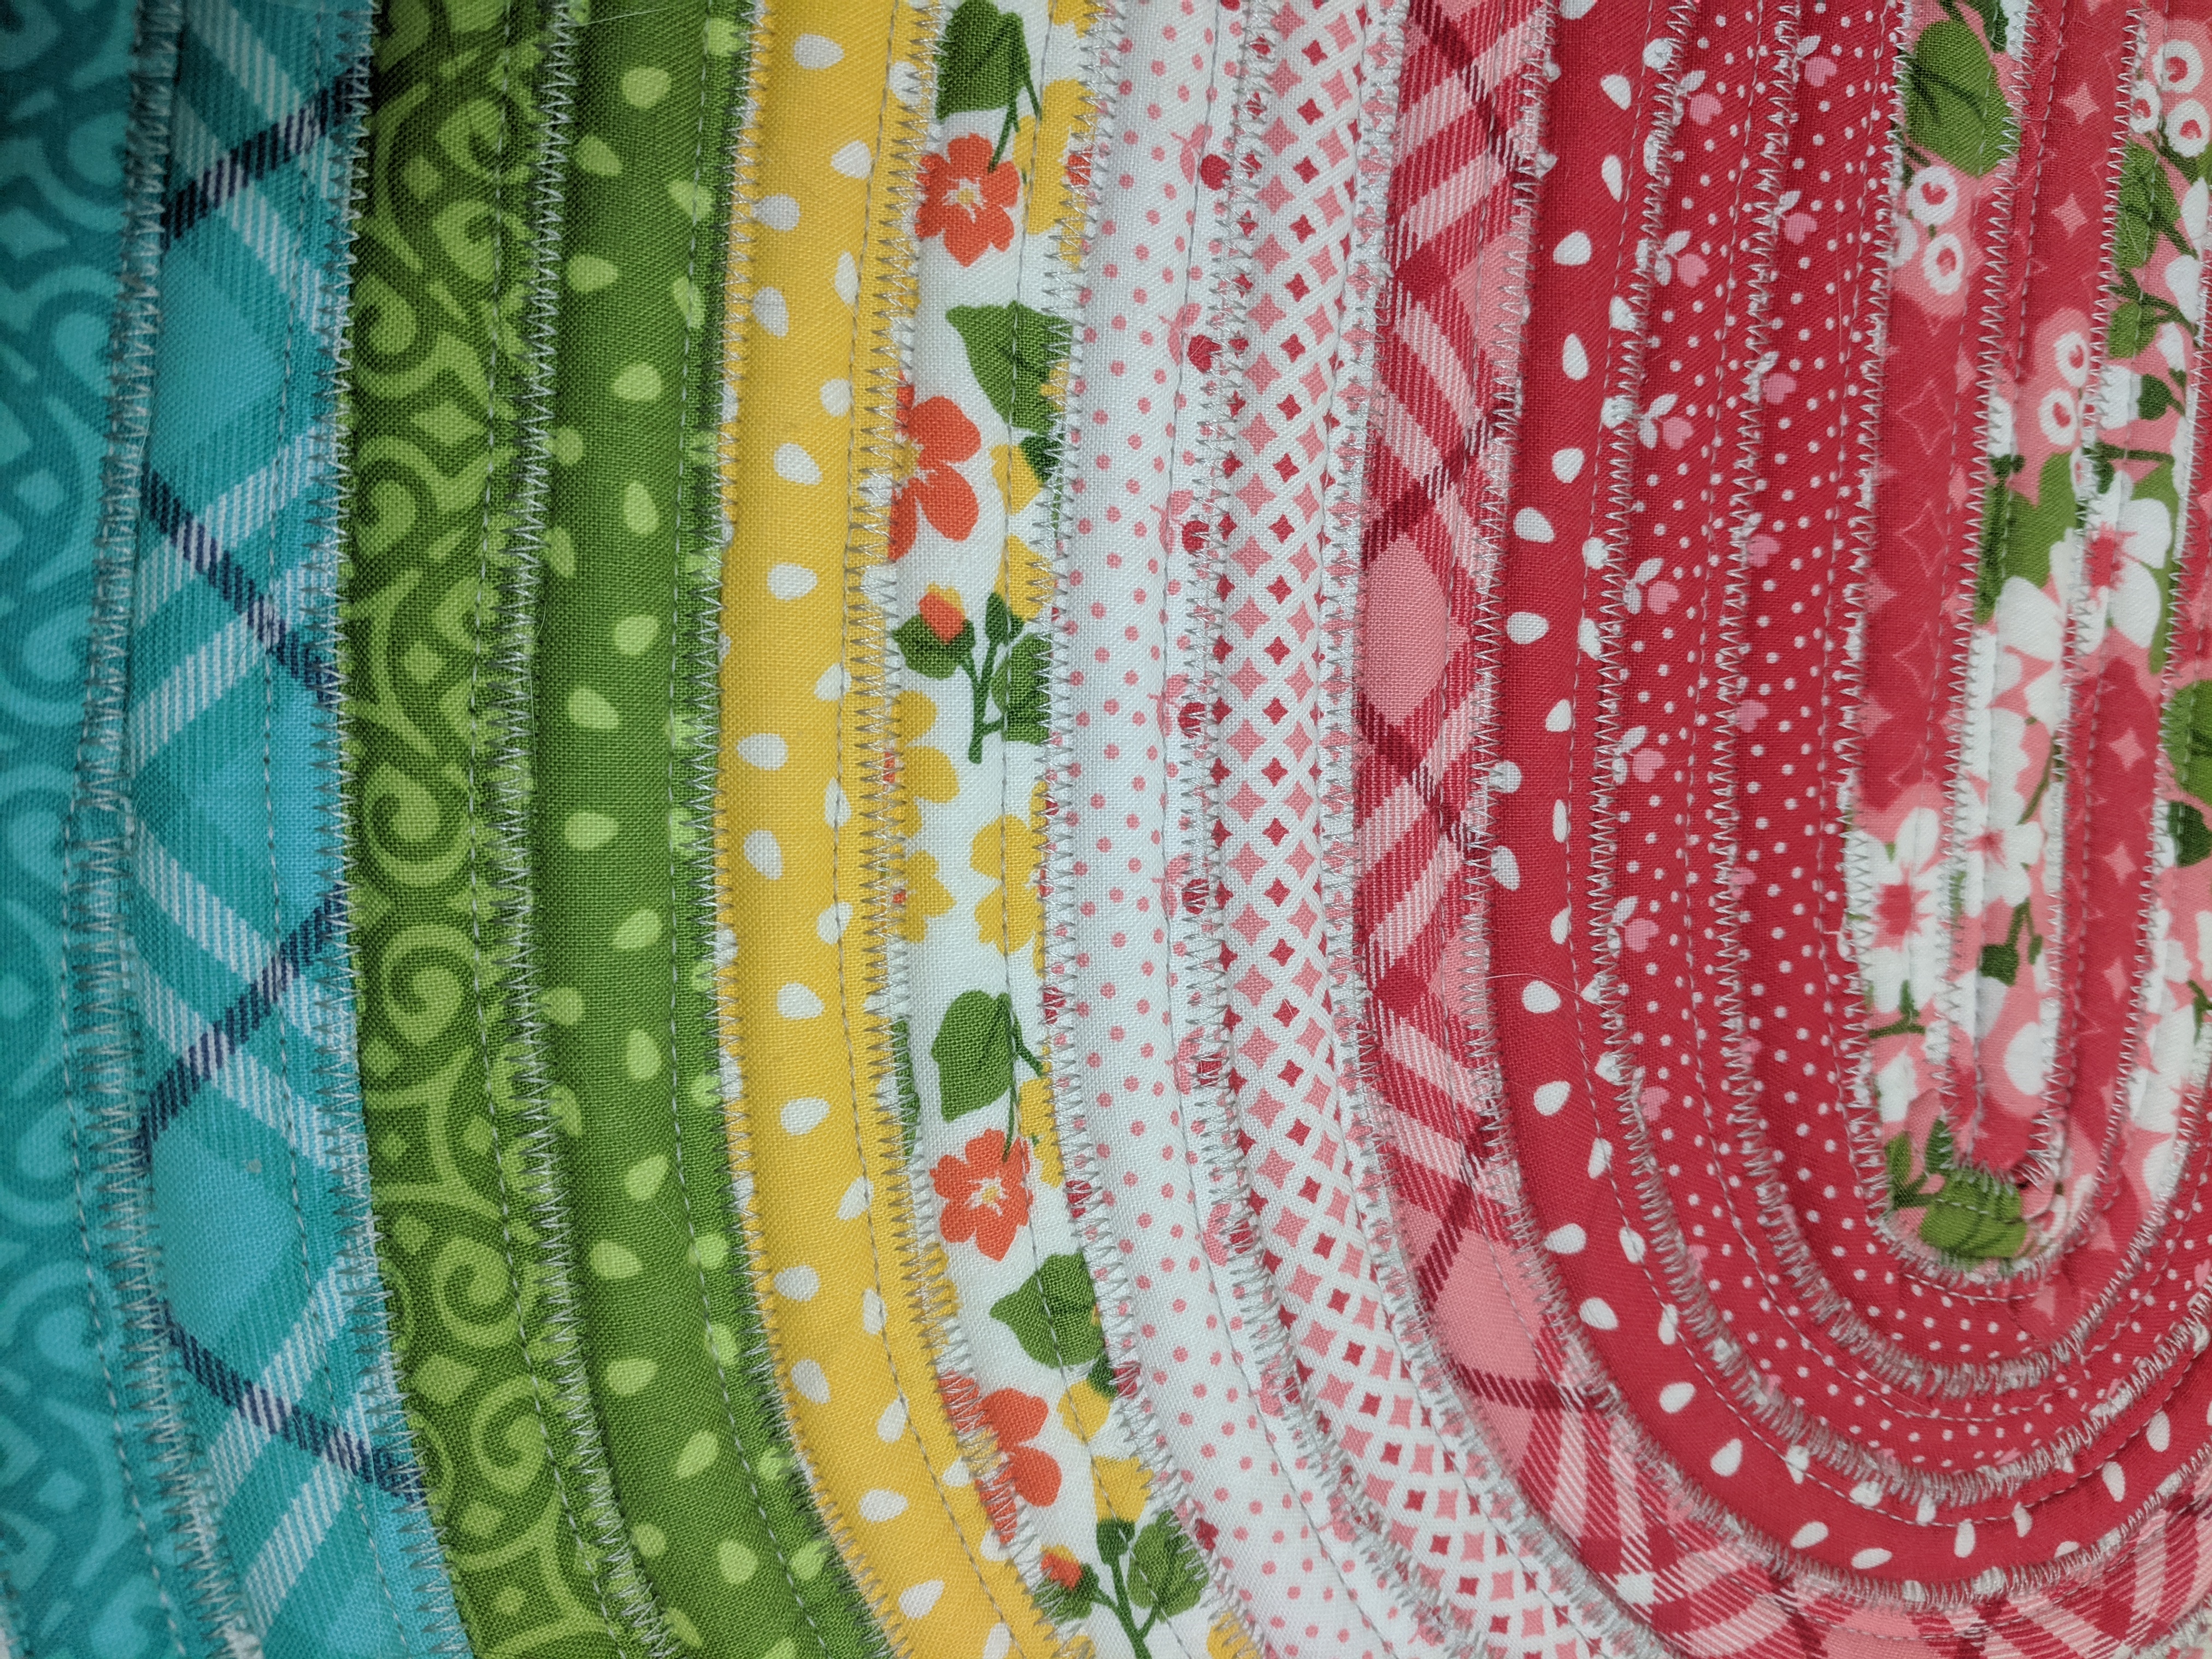
These are some mini jelly roll rugs 🙂 A jelly roll (technically trademarked by Moda Fabrics) is a roll of 2.5″ x 44″ strips of a fabric collection, and usually has 40-ish strips. I modified the RJ Designs Jelly Roll Rug pattern to use 20 strips for each rug so they’d turn out to be doorway-ish-sized. The assembly is super easy, all the strips are sewn together, and then you fold and sew precut batting strips into the long strip of fabric. So then you have a long strip of fabric folded around batting, and swirl that around itself to make the rug. It was a bit fiddly but I used my walking foot on the machine to help guide the fabric through evenly. Apparently if you use the whole roll, or even two rolls, for one rug you can get a supersized jelly roll rug, which I might make for my living room.
The fabric line I used is called All Weather Friend by Moda Fabrics. I gave one to a couple for their wedding, and “all weather friend” describes marriage perfectly! 🙂