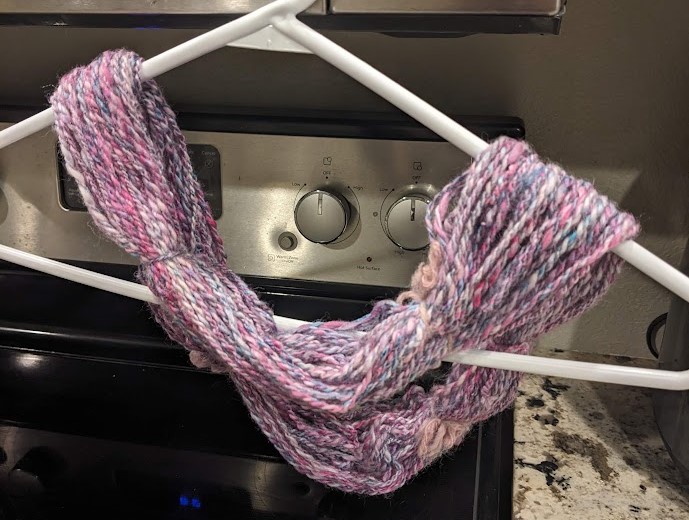
I’ve mainly been working on New Years gifts recently, so here are some sneak peeks:
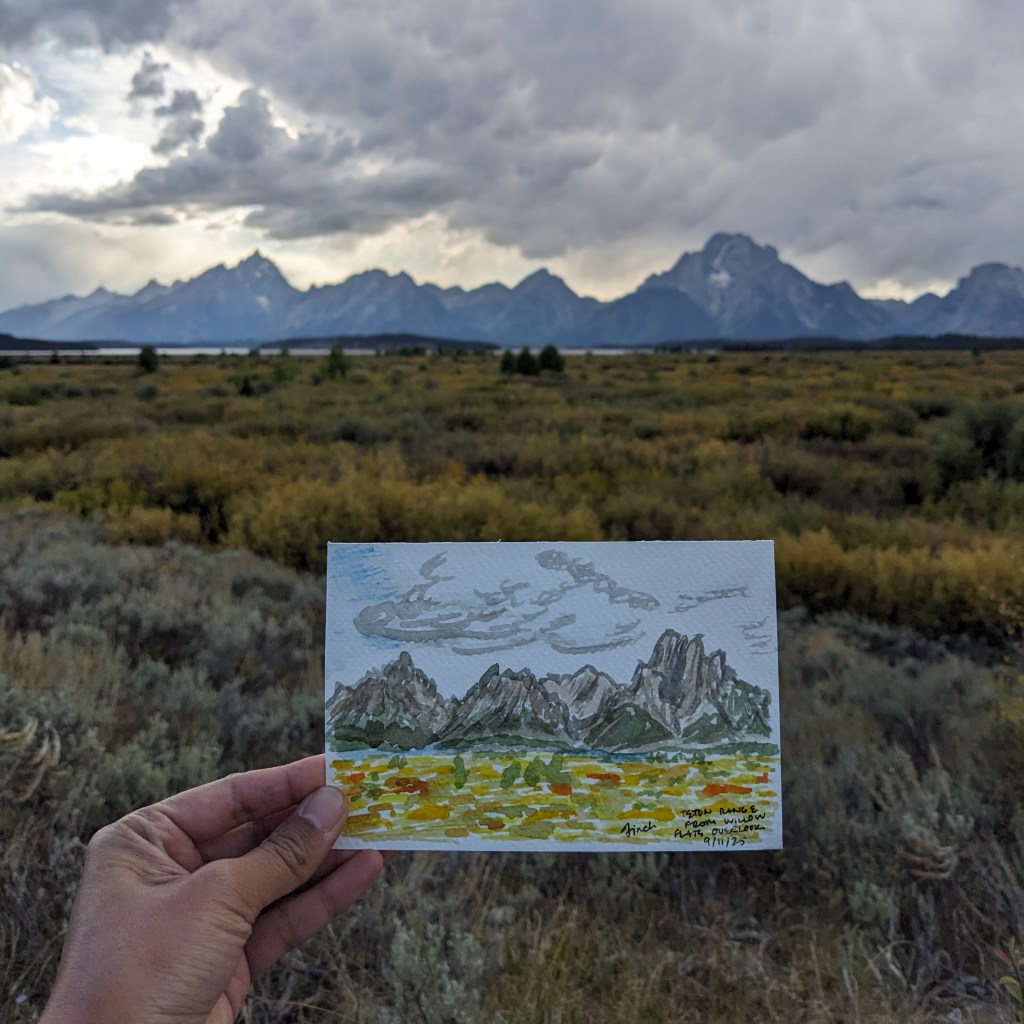
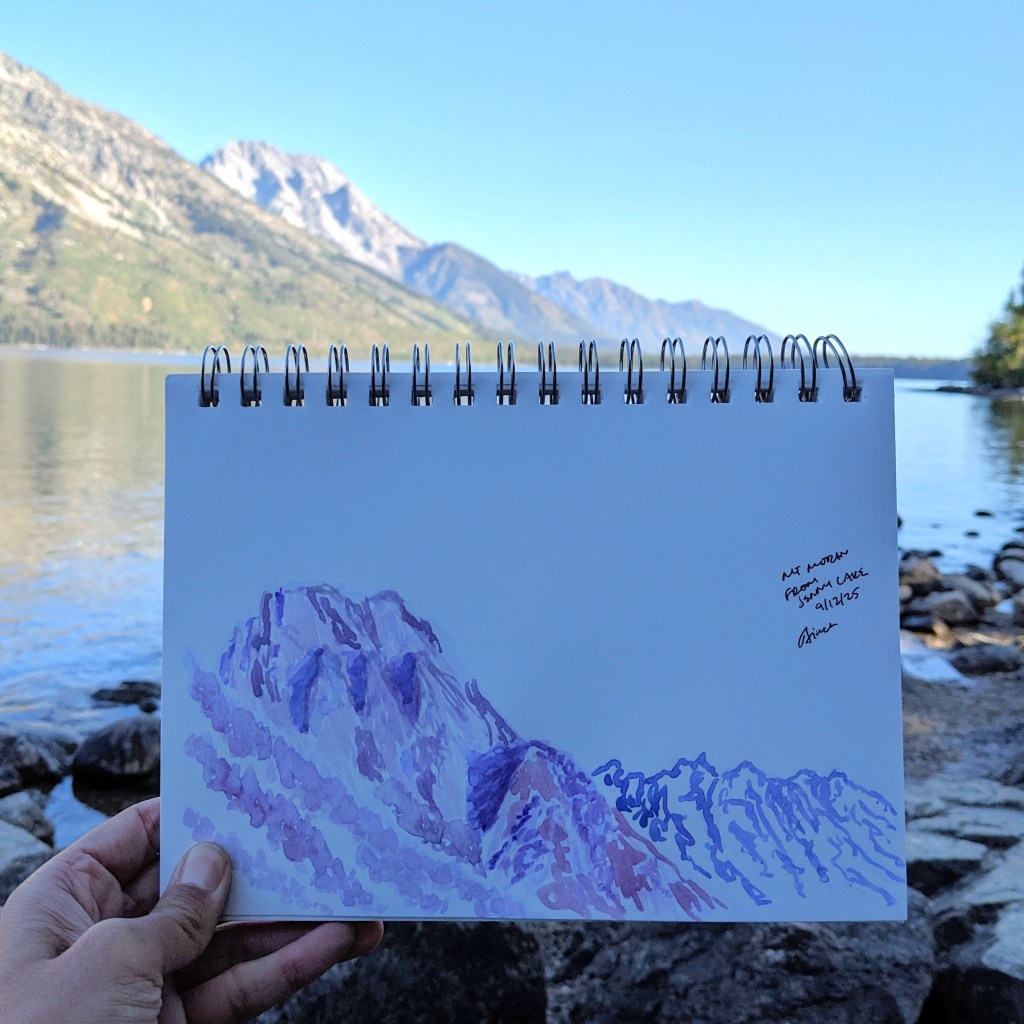
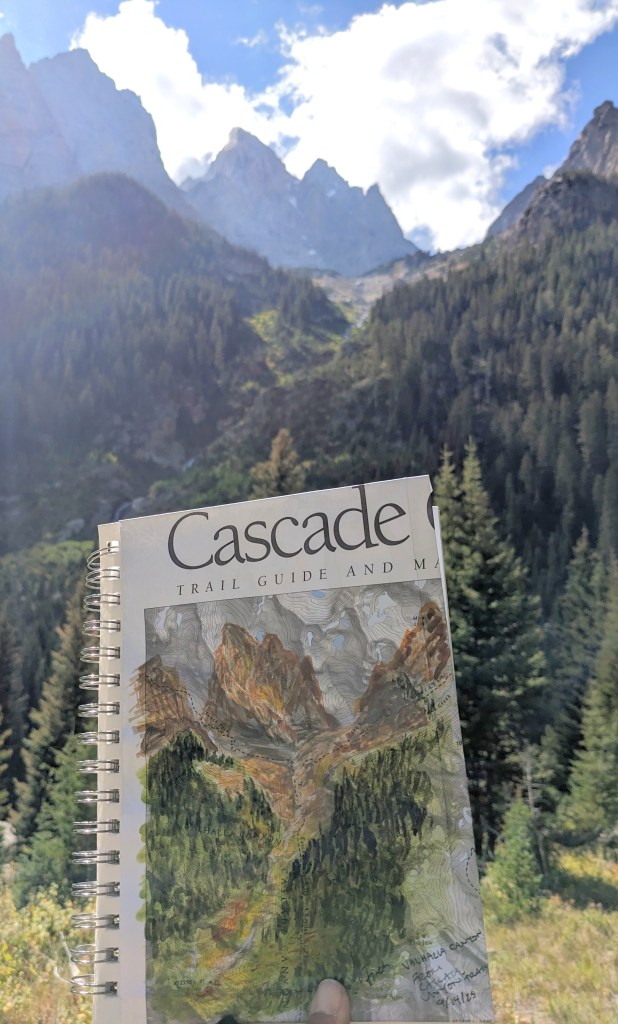
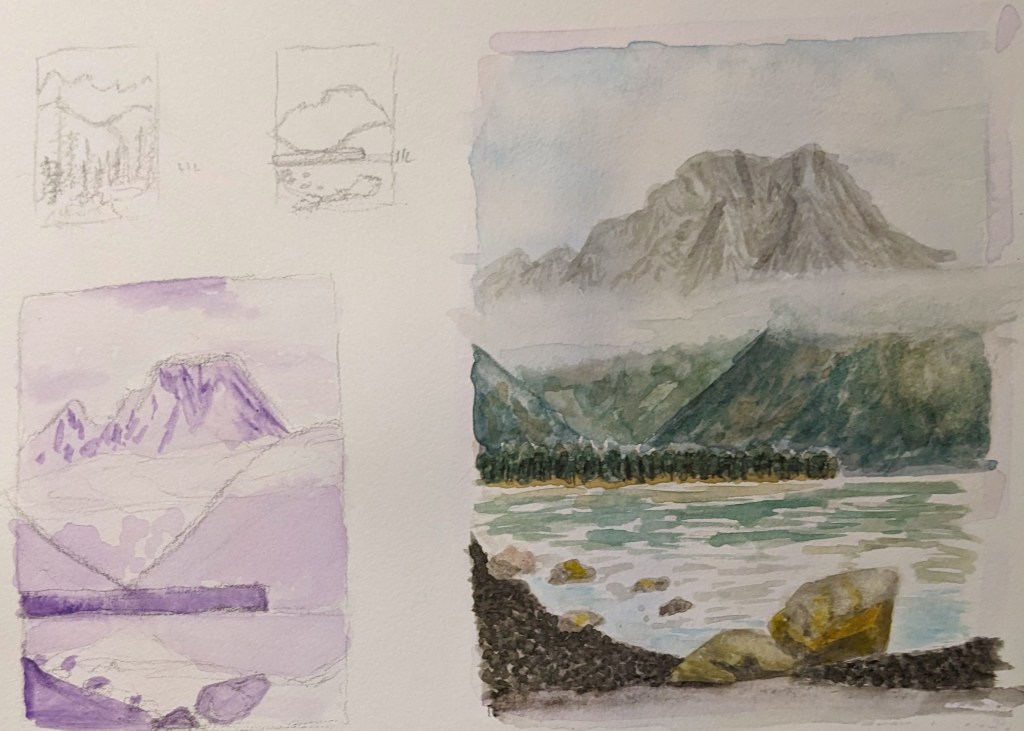
I jumped at the chance to go to the Grand Tetons again with family and did some fun watercolor:
from Willow Flats OverlookMt. Moran from Jenny LakeValhalla Canyon from Cascade Canyon Trail, LOVED painting on my map
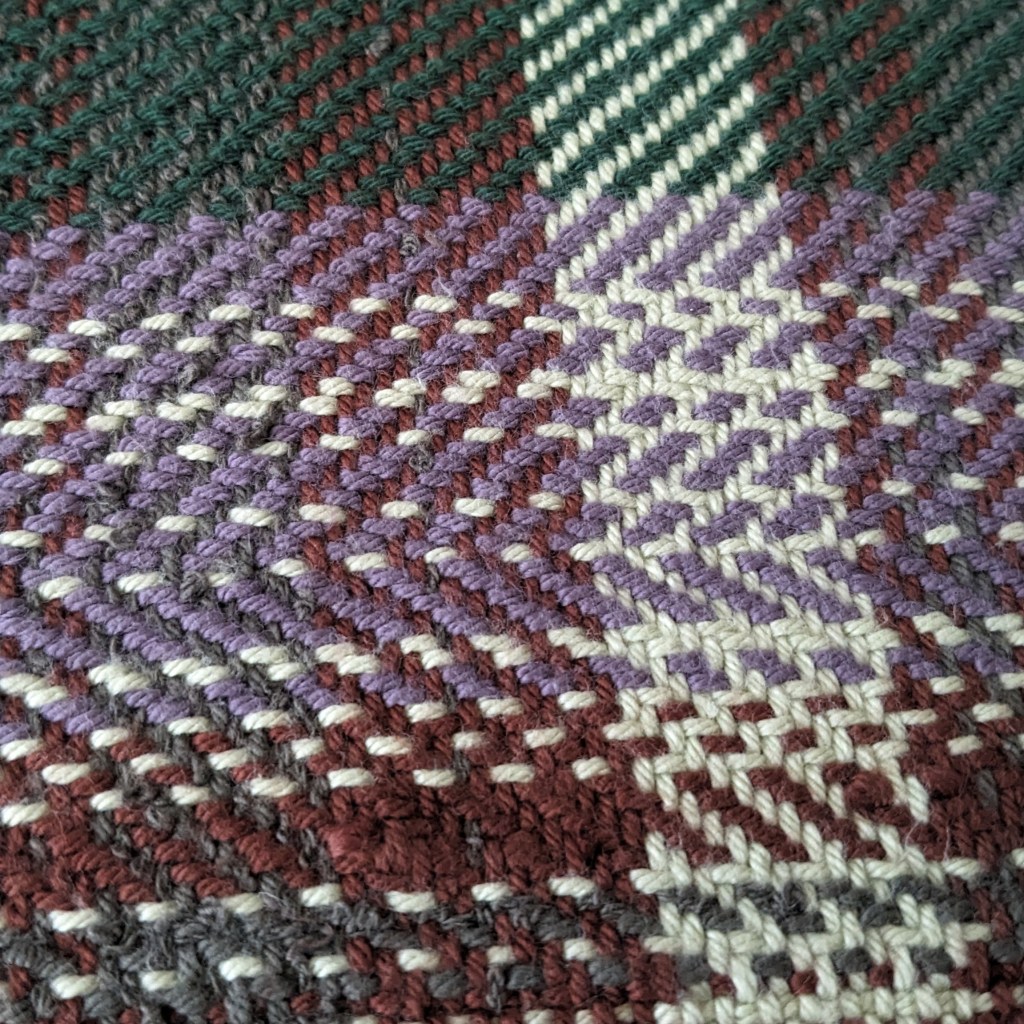
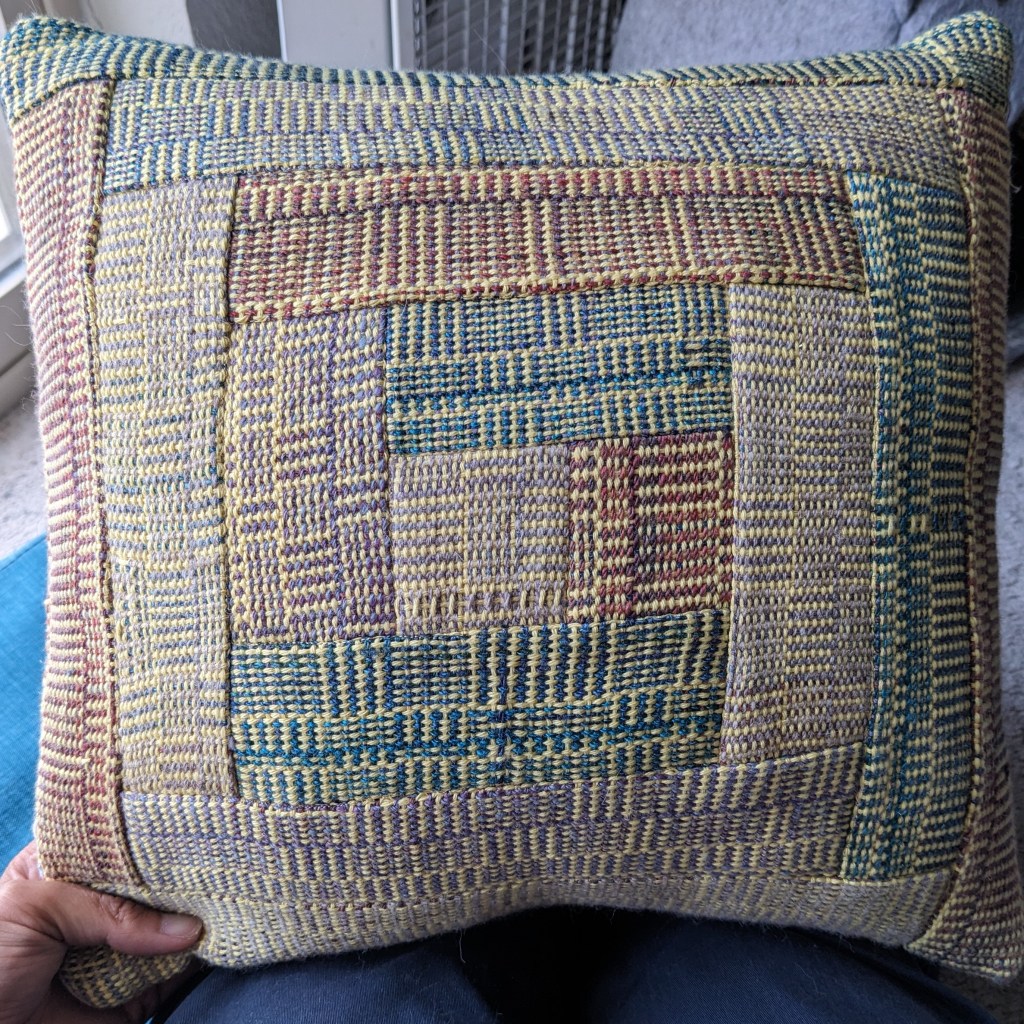
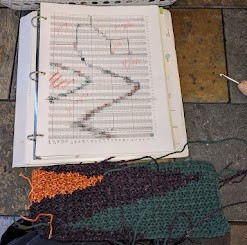
I wove my first “log cabin” pattern using handspun accent yarn and yellow commercial cotton, bravely cut it into strips, and quilted it using the “log cabin” block 🙂 so it’s my log cabin of log cabins pillow now.
I didn’t make my blocks even, it was much more fun to switch the pattern improvisationallyI could do with a little more contrast between the yellow and the other yarns, but I like it 🙂
I attended a landscape watercolor class at my local art museum, which was SUPER helpful and taught me a lot of new techniques. I think one of my main takeaways is that planning a piece *does* help, and makes sure you’re capturing the things you find important. This includes planning the contrasts, and where your dark and light colors will be. I have been mainly preoccupied with shadows, but have ignored the contrast between back/mid/foreground, which helps guide the eye across the work as a whole. As I looked back through my field book, I found that I tend to ignore the mid and foregrounds, opting to simply look into the distance and draw the mountains I see. But… adding context adds depth and interest to the piece, so I’m now looking with new considerations in mind 🙂
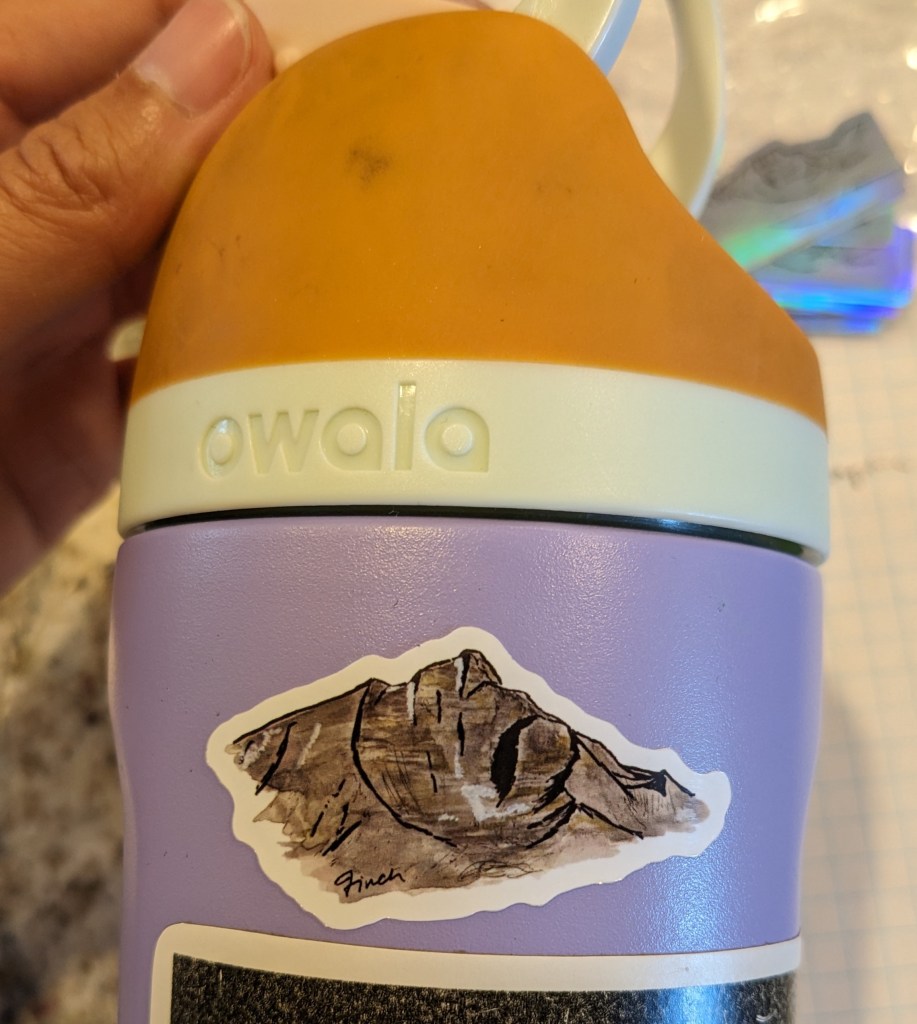
I’m actually quite impressed with myself for this little piece… now to bring these skills outside
I also made some stickers of my art! Which is so fun!
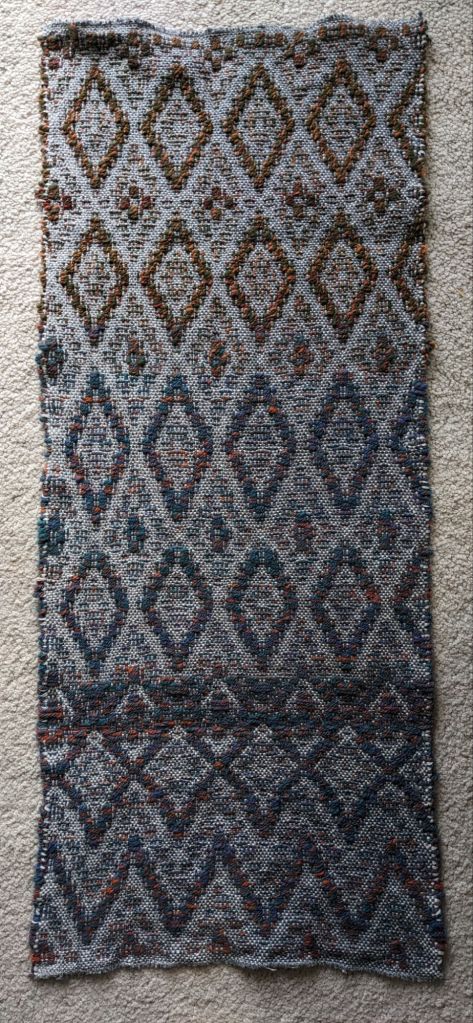
The yarns for this project were inspired by Sky Loom, a Native North American poem set to music by Jean Ford Belmont.
Oh our Mother the Earth, weave for us. Oh our Father the Sky, Weave for us a garment of brightness; May the warp be the white light of morning, May the weft be the red light of evening, May the fringes be the falling rain, May the border be the standing rainbow. Weave for us, our Mother the Earth, That we may walk fittingly where birds sing. Weave, oh our Father the Sky, That we may walk fittingly where grass is green. Oh our Mother the Earth, Oh our Father the Sky, Your children are we, and with tired backs We bring you gifts, We bring you the gifts that you love.
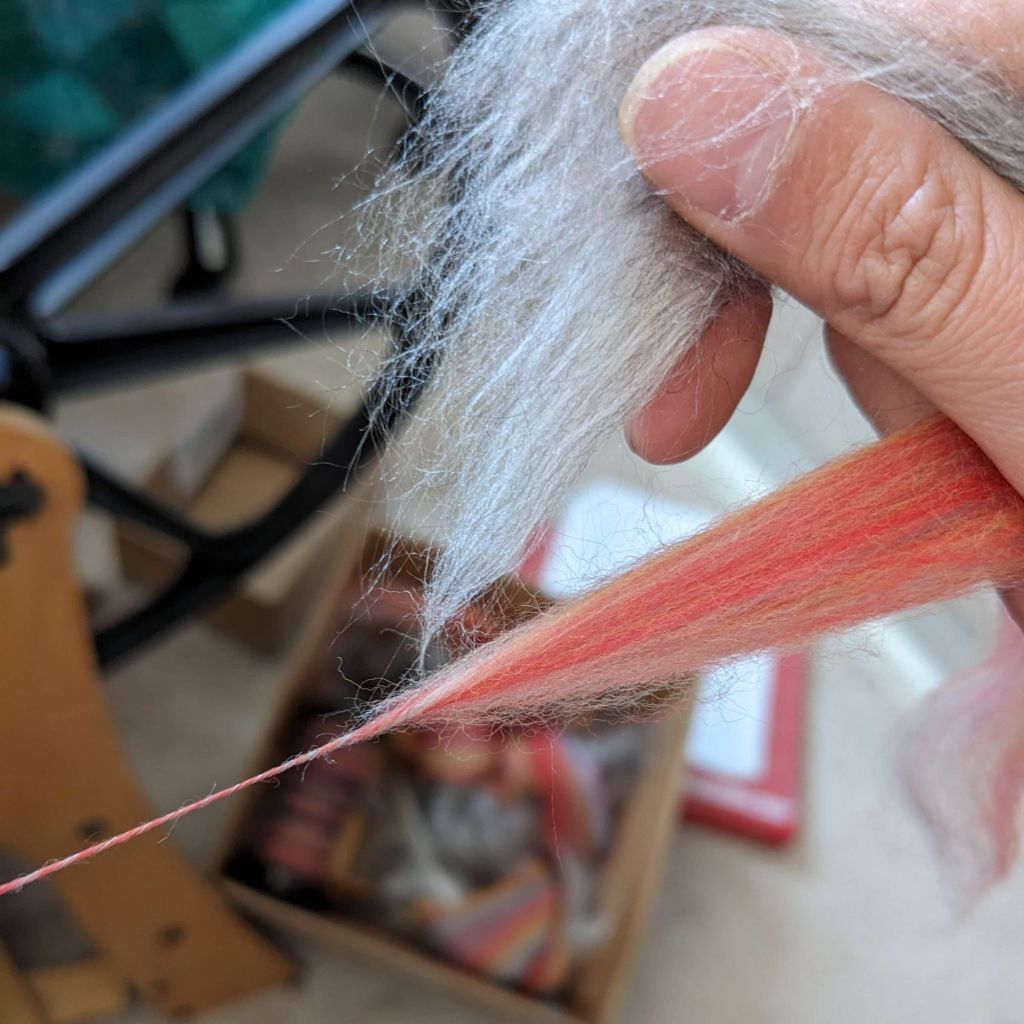
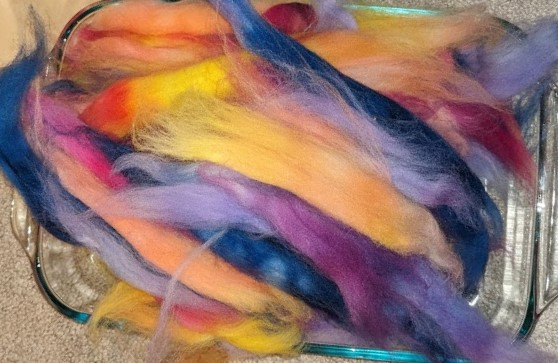
As a new weaver and less-than-fully-confident spinner, I bought commercial mercerized cotton warp for the white light of morning; it is strong and beautifully shiny. All the other yarns in this piece are handspun. 🙂 I used pre-blended and dyed wool and silk for the red light of evening, mixing light and dark gray with the dyed wool to introduce clouds and variation.
I “double held” the fiber to randomly blend the shiny into the mix
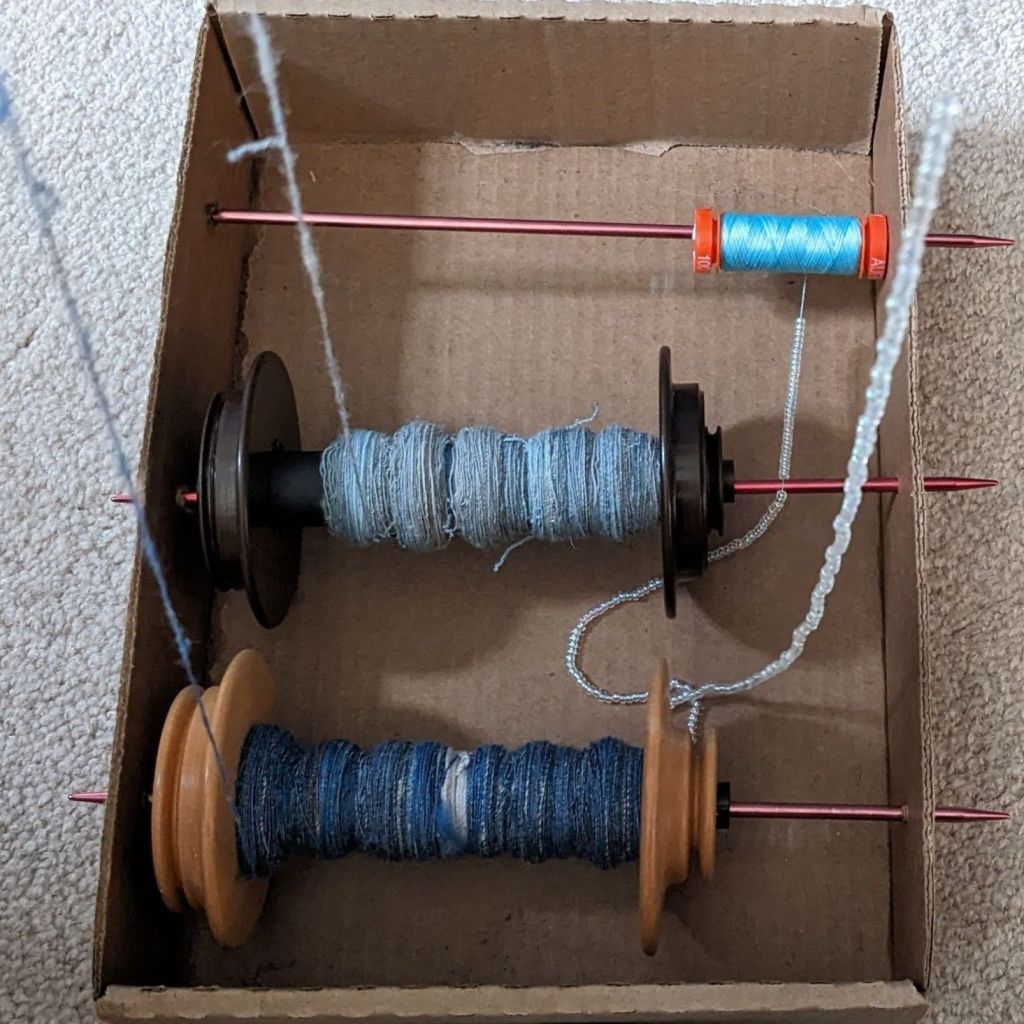
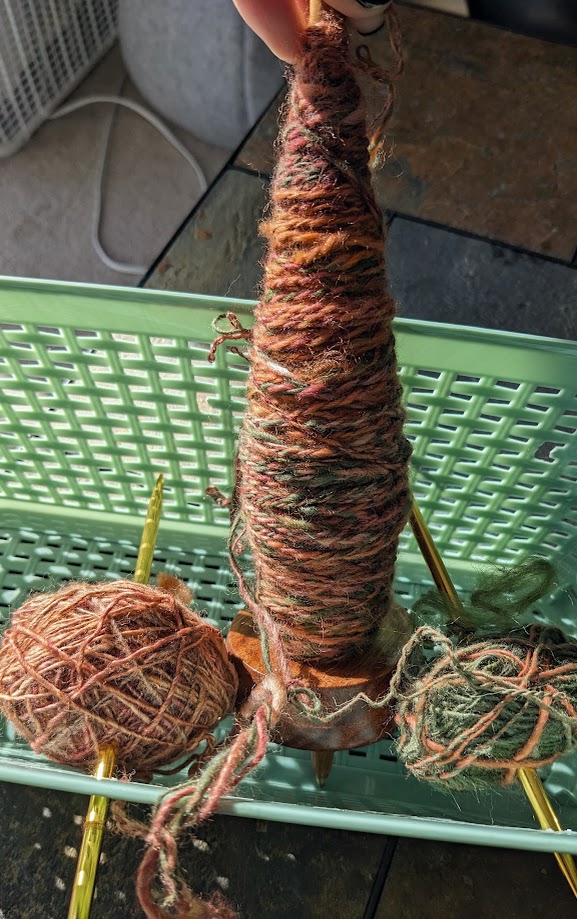
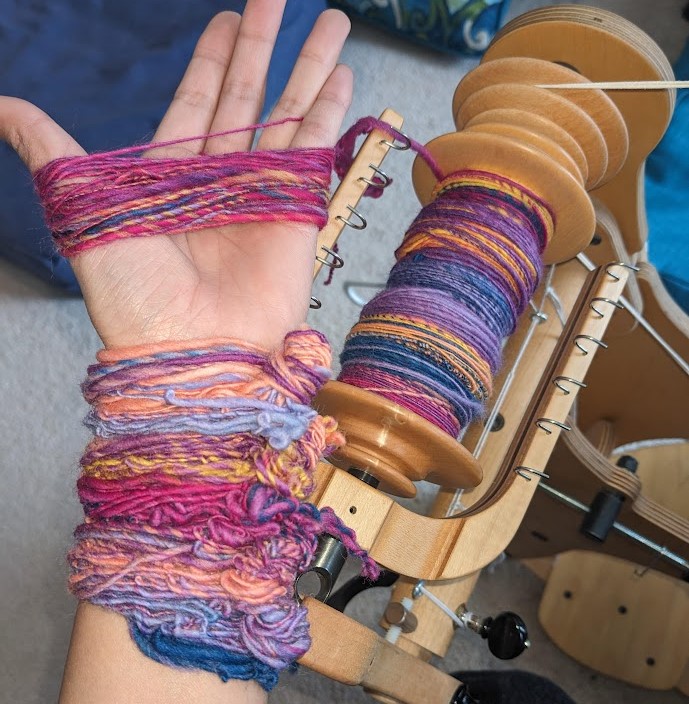
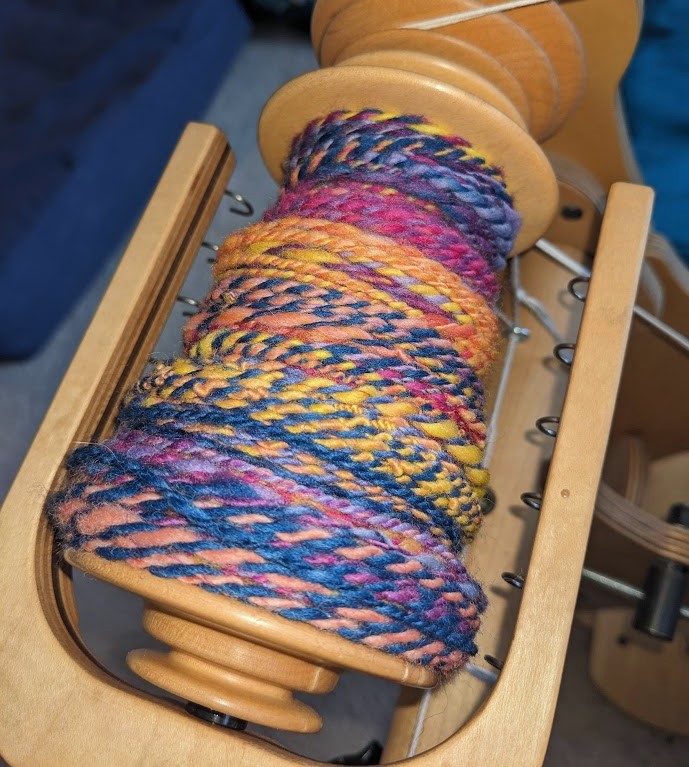
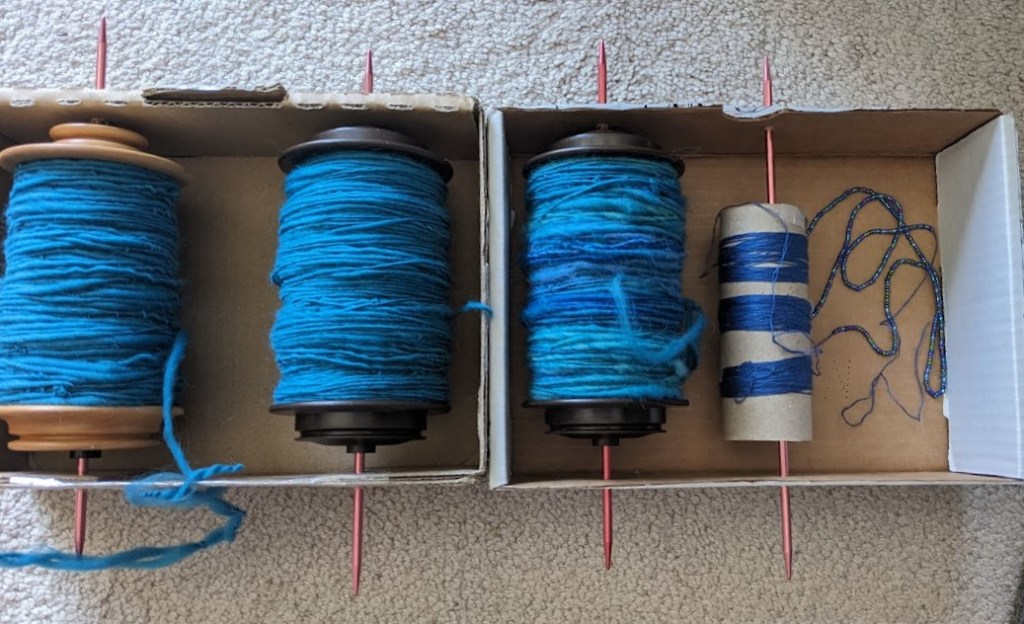
I had some extra gray silk and some random scraps of blue fiber, so I blended those together and spun a light blue and a dark blue ply on my drop spindle. I added a blue thread with shiny clear beads, and plied all three together for the falling rain.
Plying setup with two wool/silk/random singles and the beaded thread.
I usually buy fiber online, but I really needed to match the standing rainbow to these other color blends, and I knew that had to happen in person. I went to a local fiber fair and found what I needed at the first booth I went to. 🙂 dark enough to stand out against the red light of evening, bright enough to really be a rainbow. I specifically spun the standing rainbow to be thicker than the red light of evening, so that it would be puffier and stand out as a pattern yarn. I also chatted with some other spinners, who helped me figure out a more ergonomic way to spin at my wheel, which has really improved my experience.
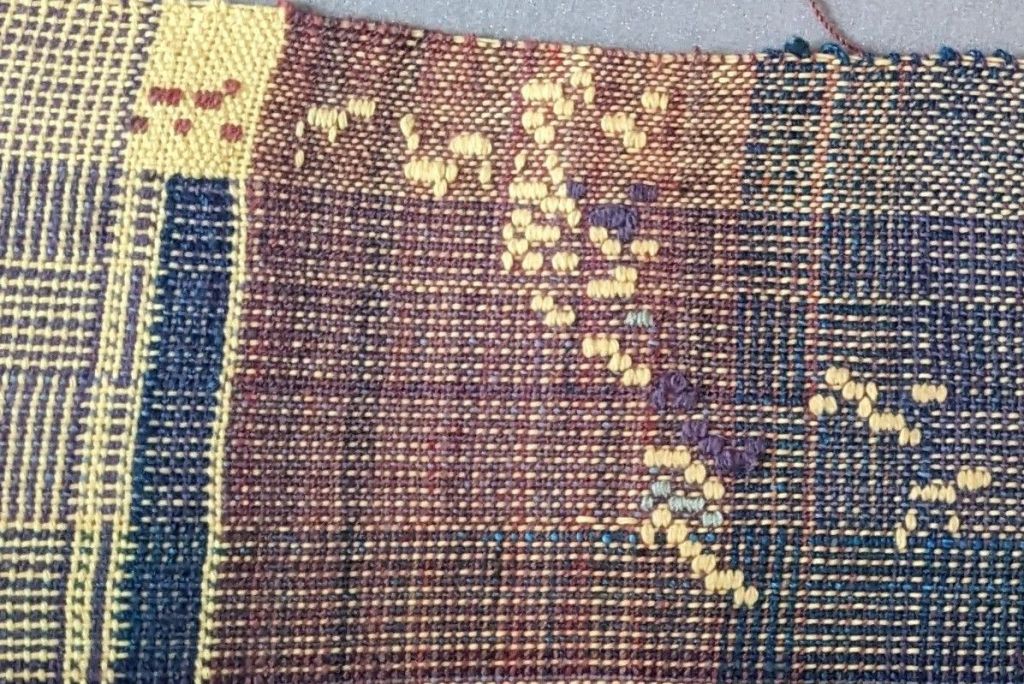
I wanted the pattern border of the standing rainbow to somehow depict the notes in The Road Home. I’ve performed this song multiple times now, and each time it’s a bit different, I have a different conception of home and what it means to me. I know more and more the “beauty of where you belong” and where I find it. I went back and forth a lot about *how* to execute the pattern. I thought about using my 8 shaft loom as a way of depicting the 8 note scale, a 24 to 30 pattern thread section like a patterned band, something with chord progressions… I wanted to have an item that could function like a piece of sheet music, that depicted the way the notes are arrayed on the page, and then in the voice, in pitch and time. Since the border was going to be a fun pattern, I decided on plain weave (over under, under over) for the red light of evening weft to make it easier to weave, visually consistent, and structurally sound.
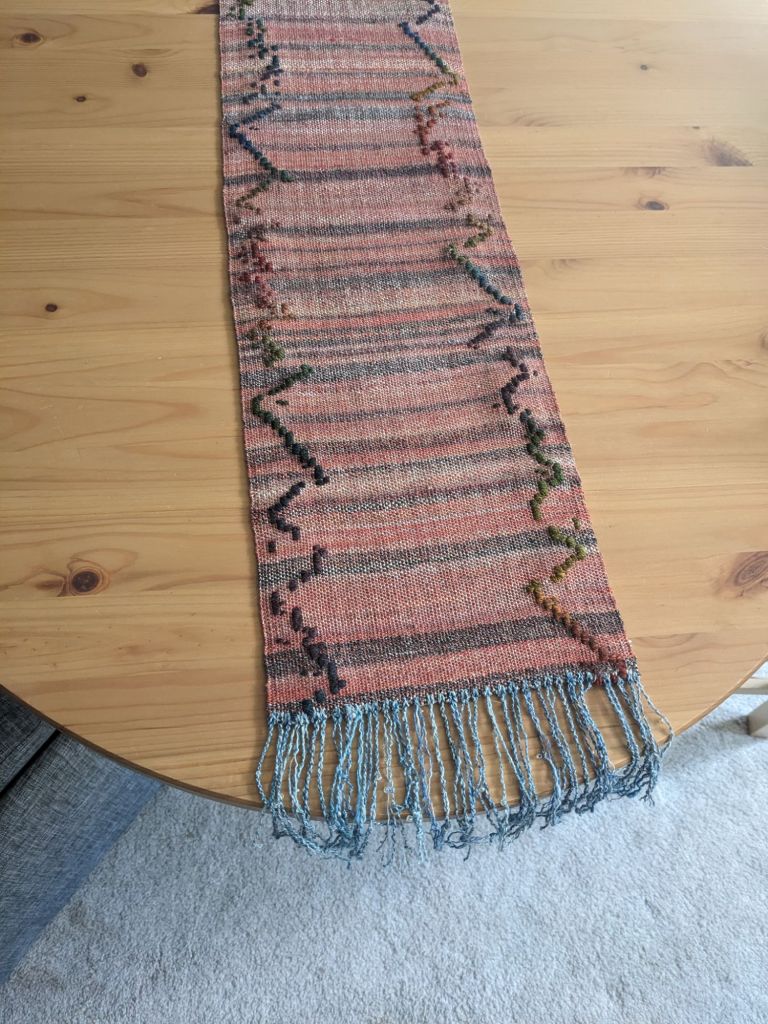
I struggled with the format for this project for a while, debating what I wanted and how it would need to be executed while I spun all my yarn. Sky Loom is about a garment, but I didn’t want to make a garment in these colors, and I knew it would end up being delicate and/or non-machine washable due to the uneven fiber shrinkage (wool vs cotton) and possible pattern floats (where yarn is free and not woven in). I talked it over with a friend and they suggested a table runner! This was the perfect solution and I was immediately invigorated.
By choosing a table runner, I could have long floats if necessary, since the piece wouldn’t be undergoing much wear and tear. It also defined the dimensions and proportional border width. I decided to be responsible and weave a sample to test out some different techniques and arrangements for the pattern. I quickly realized that weaving a pattern with all the voice parts on the same row was visually overwhelming. I think it might have been easier on the eyes if I had kept going and the ratio of the width to length was different… But I switched to doing one part at a time. Also, most of the parts have at least some undulation up and down their range, so it actually looks more like a standing rainbow, or wiggling rainbow, as it were. The bass part, the lowest voice part in the choir, has the most clear up/down pattern, so I alternated it with the other voice parts that are less visually clear to have more continuity. I used a weft inlay that wraps around two warp threads; the position of the inlay represents the pitch, and each row is an eighth note in the piece. So, looking from the side of the table runner, with a starting pitch, one could use the border as a depiction of what to sing.
Two sections with all five parts next to each other; even using different colors it was way too busy
From weaving the sample, I knew I needed a special “paper pattern holder” to help me keep track of what line I was weaving – the third verse was 122 rows of non-repeating pattern. I used some scrap binder dividers that were translucent and cut and folded them so that I could see 2 rows at a time through a little window. The translucent quality let me verify what I’d just woven if I needed.
Then I just pulled the paper down, two rows at a time
I was able to weave it much faster than I thought! Each verse, the 122 rows, took a little less than an hour – here’s a 1.5 minute video weaving a few rows. I used up all the weft I spun, though I did have to cut the finished piece down to size so I suppose I had extra weft. As always, weaving in all the ends from the rainbow and the cut ends of the warp was super annoying, but necessary. The finishing touch was the falling rain fringe, which I attached using cow hitch knots. I twisted some of them into tassels, left some loose as individual strands, and un-plied some so the fiber would expand and fluff out 🙂
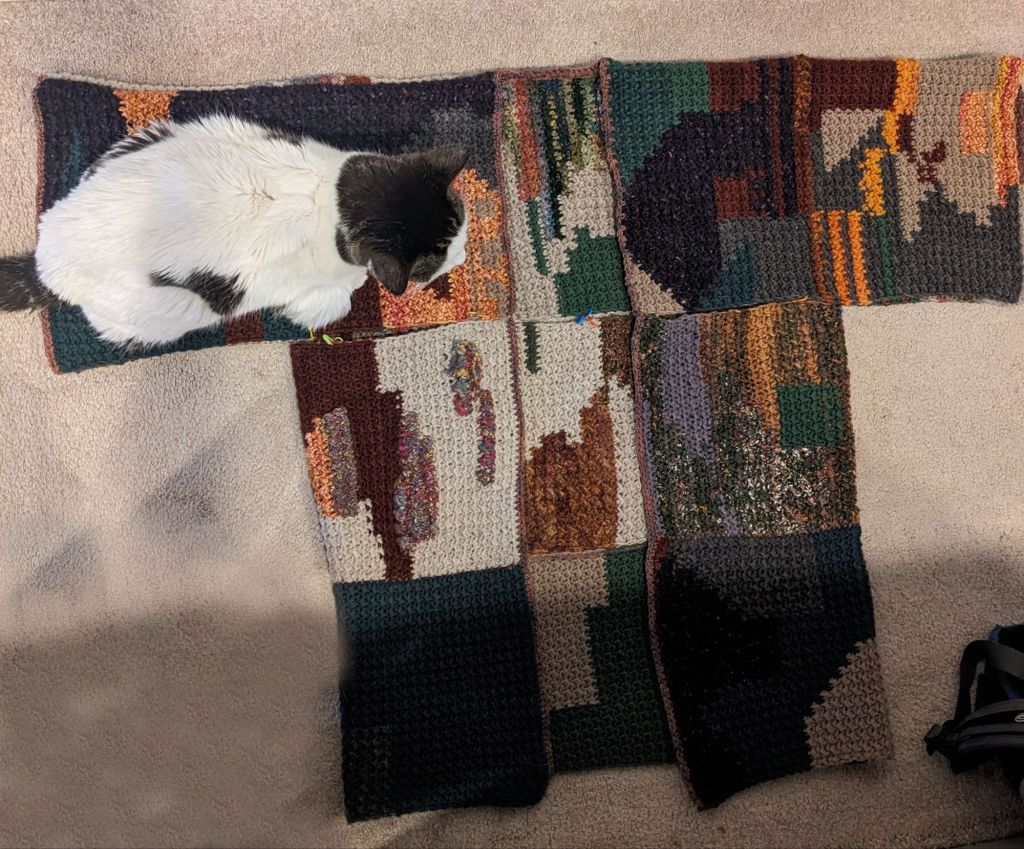
I started this project in the spring of 2023 as a way of using up scrap yarn and having a simple, easy hand-project for nights on the couch and zoom calls. I wanted to play with changing colors and having interesting color work while keeping the texture (crochet stitches) constant throughout. I did a simple (half double crochet, slip stitch) pattern and crocheted four panels of approximately the same size.
I think I miscounted the number of stitches when I started the second panel because one panel is ~50 stitches, one is ~42, and I had to make the other two match.
Sometimes I had plans. But as I grew in confidence, I let the plans go and just played with the yarn in hand.
It also served as a great place to put some of my first experiments in hand spinning, and transition into spinning yarn specifically to match the diameter of the commercial yarn so it would fit together well. I like how the final product showcases my first ever handspun (lumpy, bumpy, plied the wrong way) with my most recent handspun (consistent, soft, and so thin I had to double it to match the diameter of the rest of the yarn). I suppose it is a display of my crochet skill over two years and my handspinning skill over one and a half. 🙂
I planned on using these panels in a vertical layout as a long vest, but once I half-assembled it, I realized it was somehow simultaneously too long and too short for what I wanted. So I pivoted to making a bog sweater (see below). I love how big the sleeves are, and they’re kind of a perfect length, somewhere between short and long sleeves. I did have to cut apart one panel to make the opening, which was stressful, but I just went slow and hurriedly crocheted a border around it.
I used two panels, folded, for the top/sleeves portion, and two panels for the bottom/body portionBefore sewing the seams, but after cutting apart the opening. Obviously the friendly helper is helping 🙂
I’m very pleased with my final result, despite it not being my plan. It’s warm, but not hot because of the large, open sleeves. I even signed it, with 5 stitches for 2025.
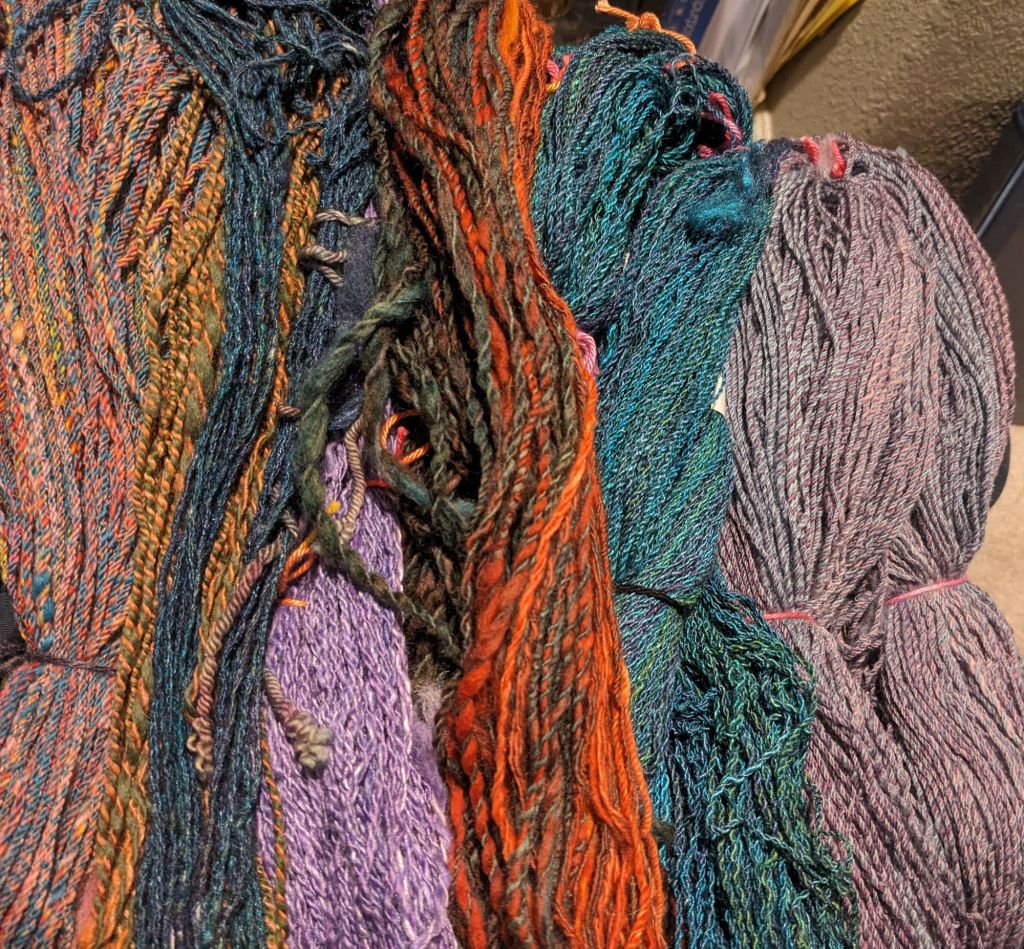
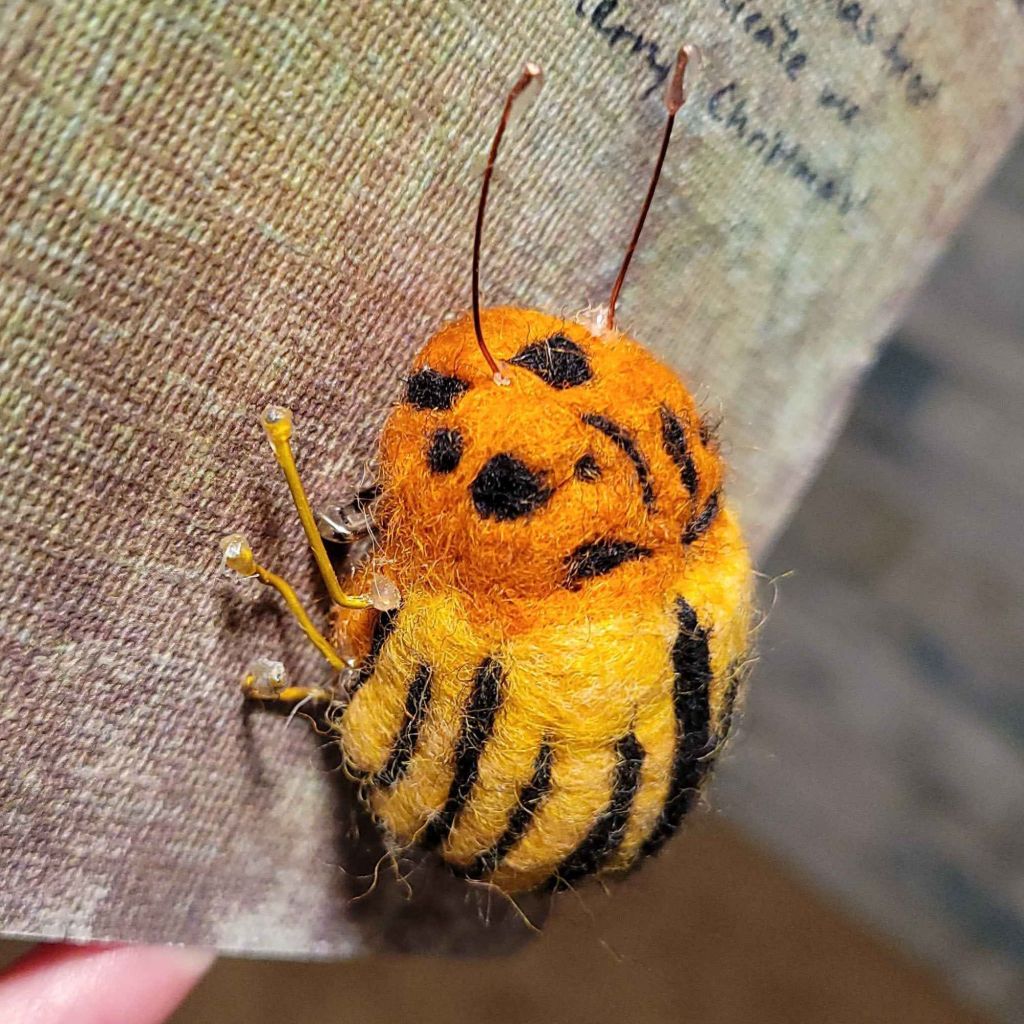
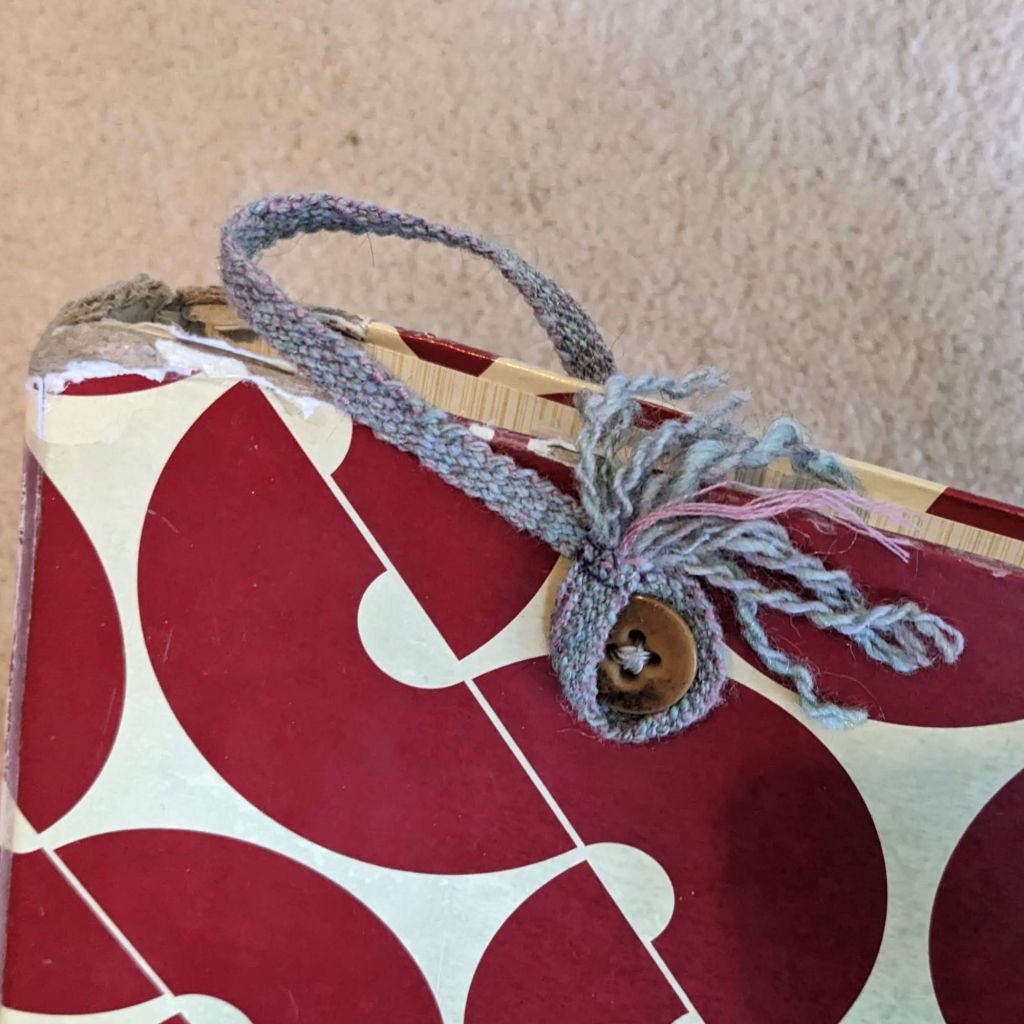
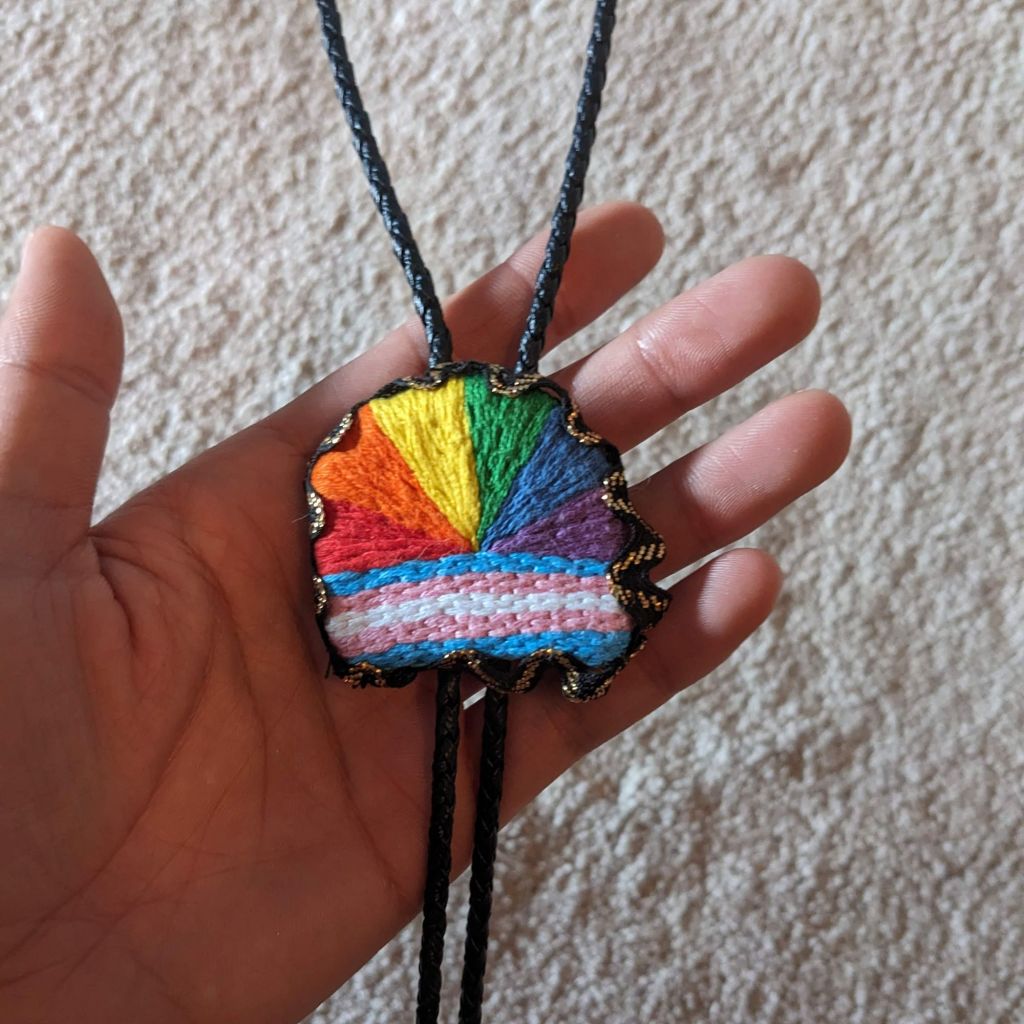
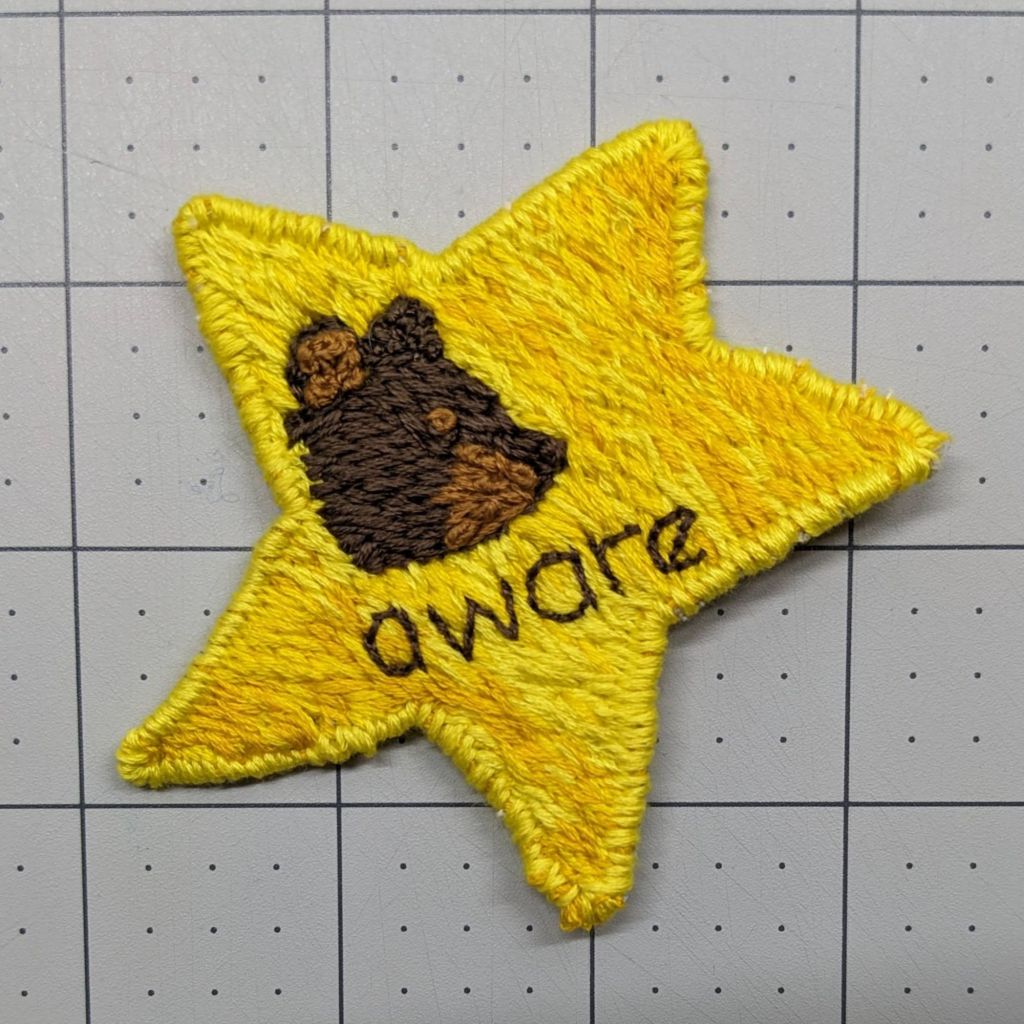
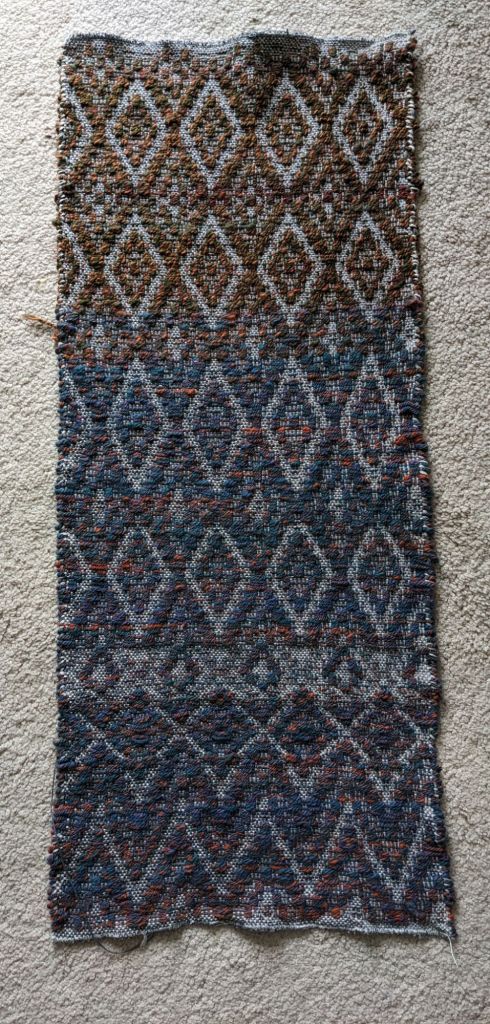
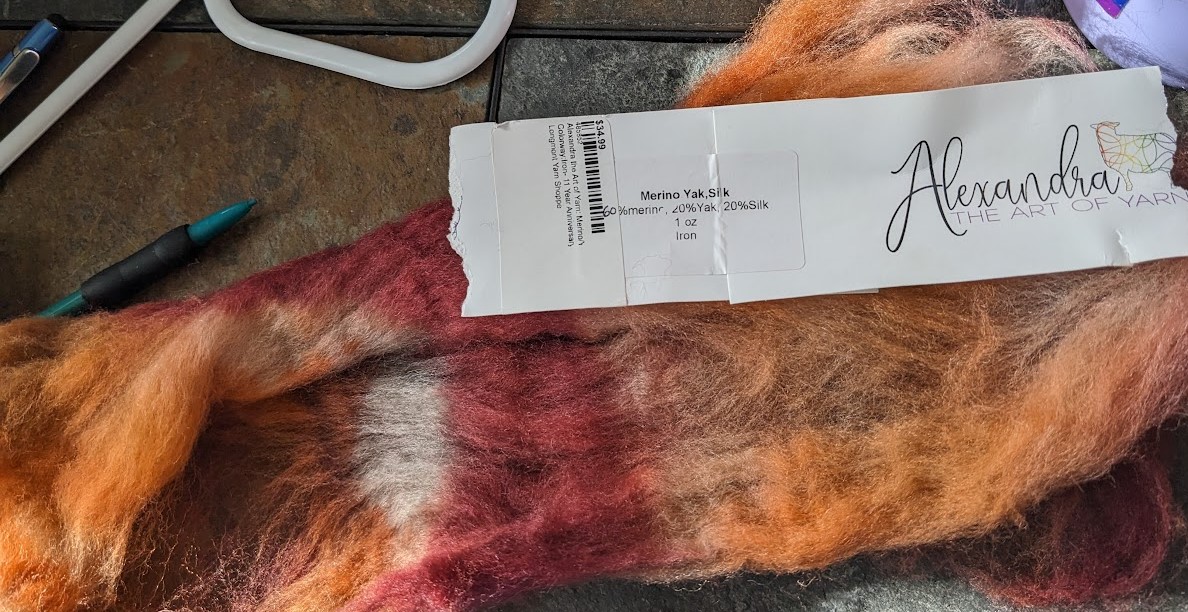
Handspun 🙂 mostly wool, with the occasional silk/wool blend. I find handspinning, whether at the wheel or on the spindle, very meditative and calming. There’s a rhythm, and a sense of creation and accomplishment. It is a wonderful thing to keep my restless hands busy with. Frosting decorations on cookies! Having a single line of design and multiple repeats was EXACTLY THE SAME as quilting 🙂 Needle felted bat pinNeedle felted beetle pinStrap for my choir binder so my hand doesn’t have to do so much work to hold it open. Backstrap loom, handspun wool blendI put together an embroidery kit for a friend, it was so fun to plan an entire project and *not* have to do it 🙂Embroidered gay and trans pride bolo tie pendant 🙂 I made this for an event at the CapitolI do visible mending on my clothes, so I decided to do an embroidered/woven patch inspired by my work in twill 🙂Embroidered bear aware patchMy first ever project on my loom was a twill sampler, which is now a bag strapLearning about twill textures: over 3, under 1; under 3, over 1; over 2, under 2
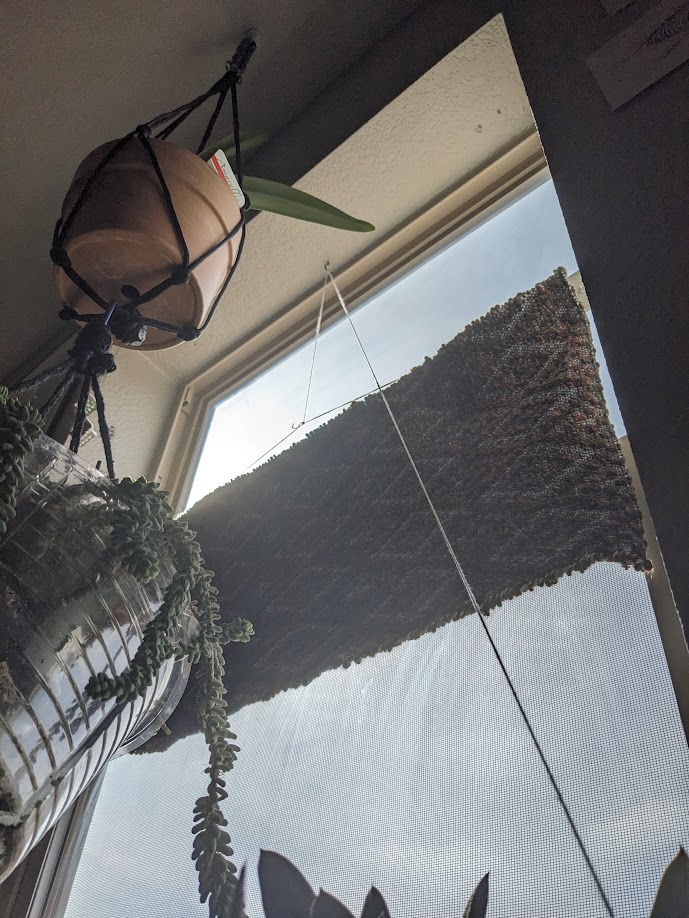
So my desk is under a window, and throughout the day, the sun blinds me. I have a bunch of plants in the window, so I don’t like lowering the entire window shade. I’ve been balancing an umbrella on my windowsill plants and computer monitor… But I needed something better.
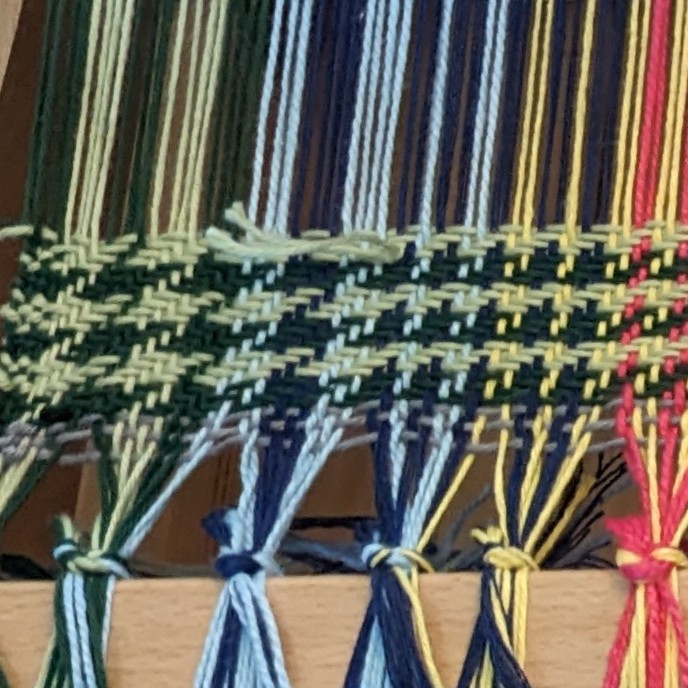
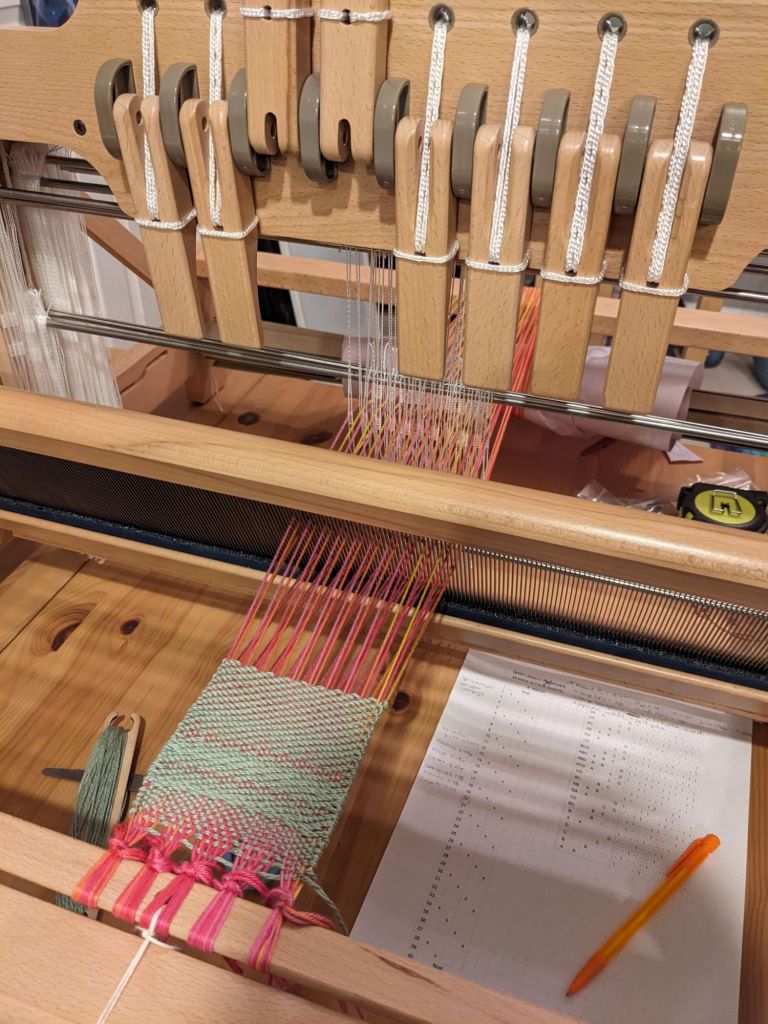
I decided to weave a panel that could move up and down so I could block the sun as it moves across the window. I have been wanting to understand more about overshot weaving, which has two different wefts and makes really interesting blocky patterns. Since this was going to be a small piece, I figured it was a great time to learn an overshot pattern from Strickler’s book.
Overshot is a type of weave structure where you raise adjacent threads to create weft floats (long horizontal lines). And you do the same weft floats multiple times in a row, which creates “blocks” of color. Since you can’t do the same floats back to back, a plain “over under” (tabby) weft pick is put between them to secure the threads.
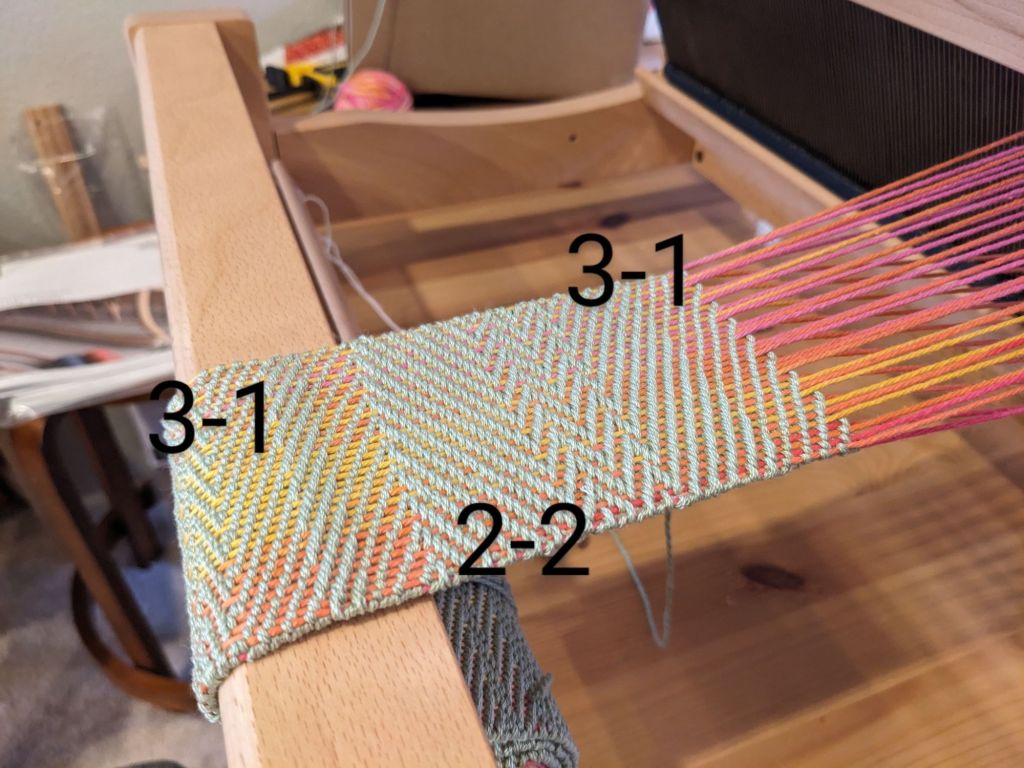
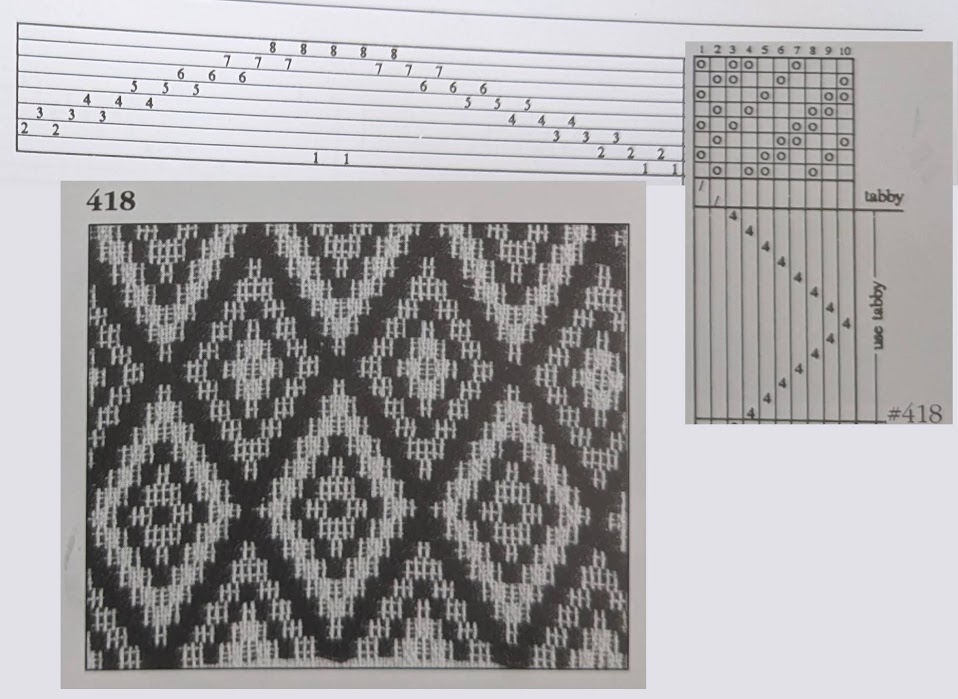
I chose #418 by Ardis Dobrovolny, and “eight-block point repeat twill”, because it’s clearly an overshot version of twill diamonds, which I already love and know about. I had a theoretical understanding of overshot, but didn’t quite understand how the threading diagrams created the pattern I could see – so using a familiar diamond twill helped me compare and contrast overshot with what I already knew.
Despite having the pattern, I did some improvising on the order of the sheds and the number of picks on the same shed. I even did a few rows of the inverse sheds, where the threads meant to be raised are lowered.
FrontBack
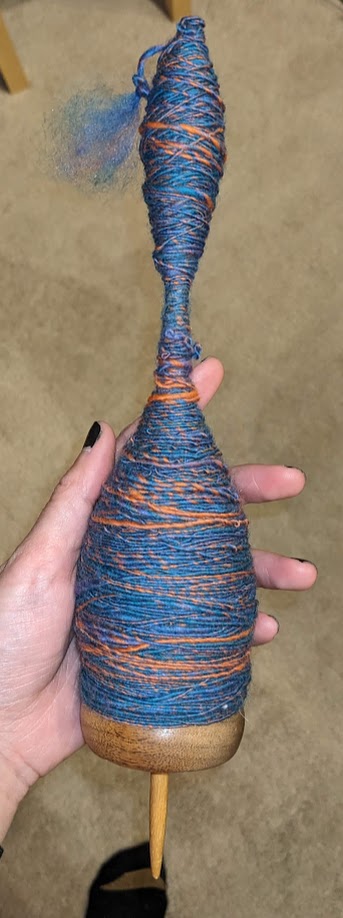
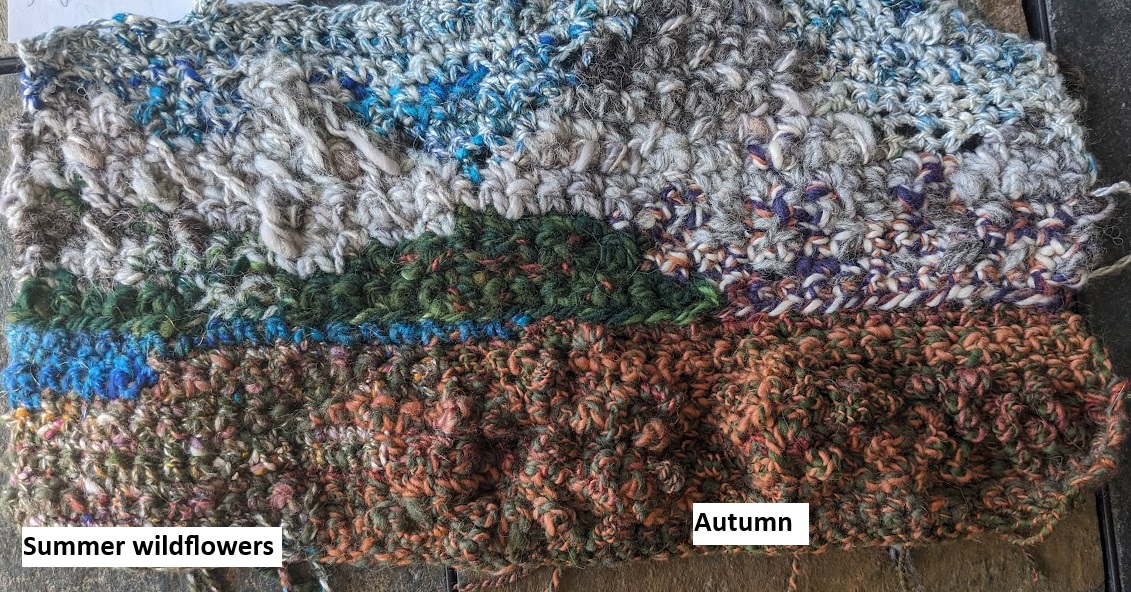
This was also my first time weaving with my own handspun!! I originally tried a different handspun but it didn’t have enough color contrast with the background warp and weft, so I pivoted to this fun blue and orange wool yarn 🙂 I spun this on my bottom whorl drop spindle. Then I ran out of that yarn and added some wool “Autumn”, which I spun on my supported spindle. I used commercial cotton yarn for the warp and tabby weft.
Blue and orangeAutumn
Then I had to do some yardstick-and-hot-glue engineering, and installed it in my window 🙂
Late 2023 I was in a yarn store with a friend, and they had “learn to spin” kits with a drop spindle on a table display. She gestured to me and said “look, you could learn how to spin!” and I said, immediately, “I DON’T NEED ANOTHER CRAFT!!!!”
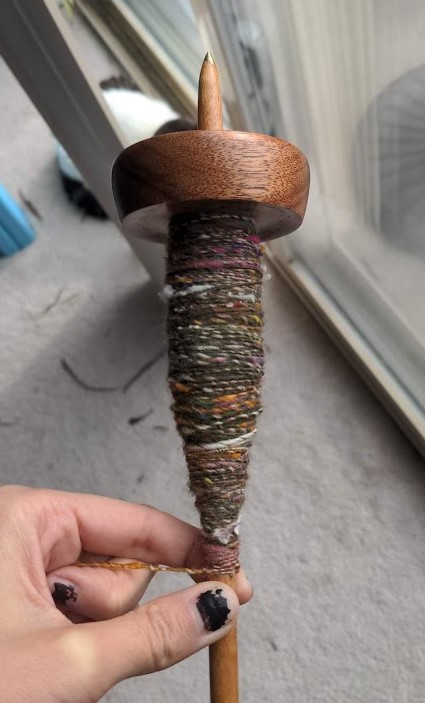
Yeah so I have four spindles, a spinning wheel, and I’ve completed whole projects with my handspun yarn ❤
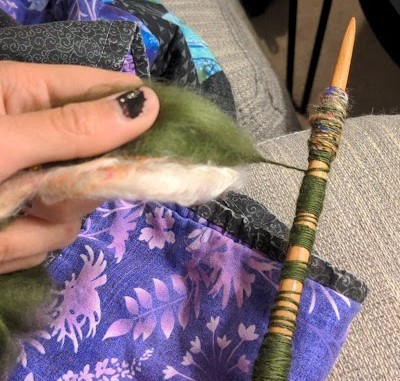
Spinning yarn is simply… simple. It’s putting twist in some strands of fiber, and holding that twist “energy” in the yarn. And it’s ancient. We’ve been spinning as long as there have been nets to hold and trap things, clothes to wear, and bags to weave. I find spinning with the spindle to be the ultimate, original fidget spinner (literally), and with a bonus that I’ve created something! It’s a great hand activity for podcasts and audio media.
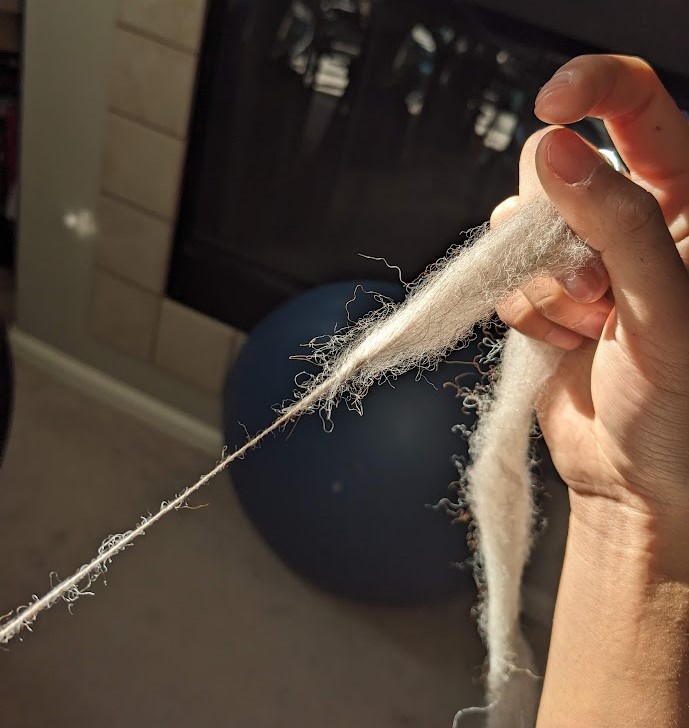
Twist (left) travels up to the fiber (right)
I find the color blending is like doing watercolor “wet on wet” – you can have plans, but the medium itself executes the plan and introduces beautiful randomness that I couldn’t have made myself. This is especially true when doing a two-ply yarn – I spin one long string and (systematically) fold it in half, not knowing what the middle is going to look like at all!
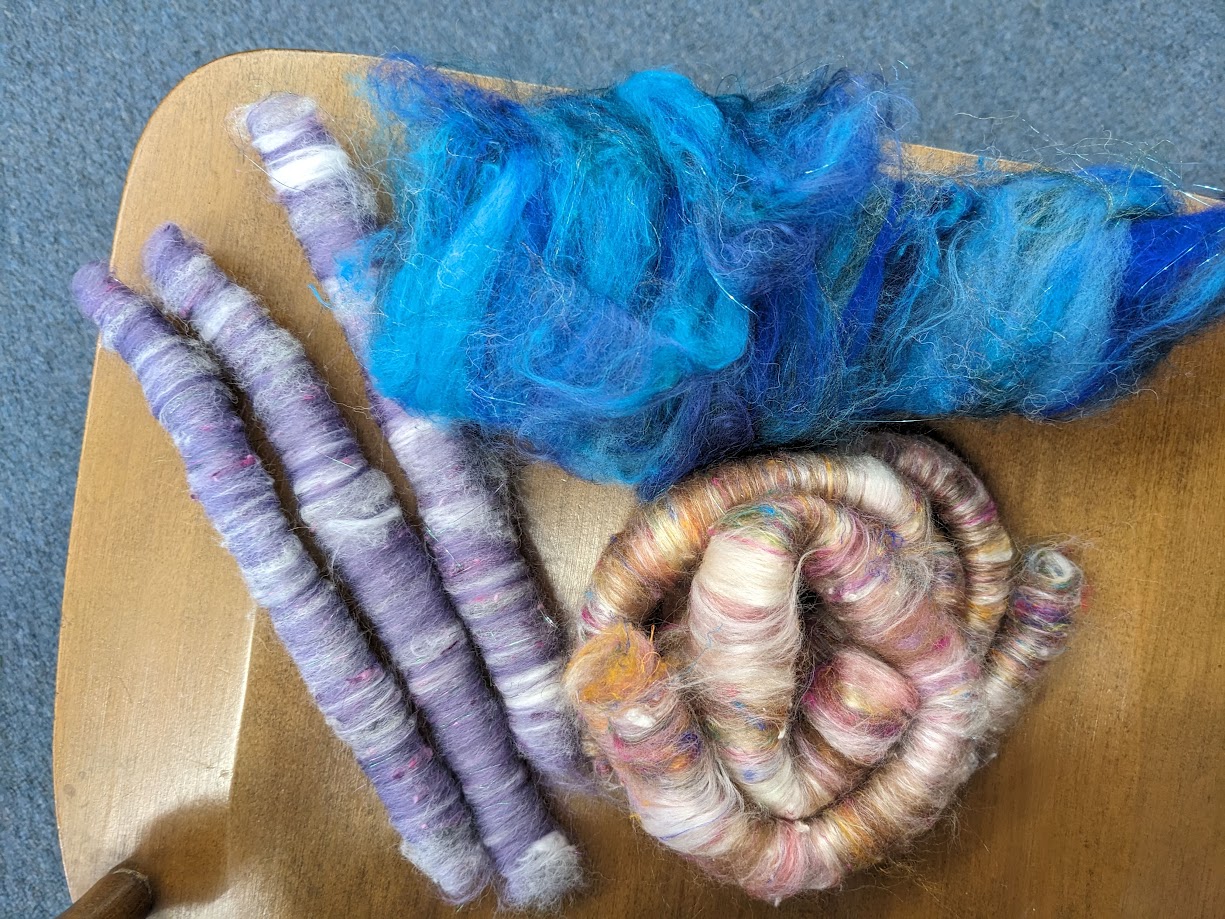
Plus, I can make a lot of different textures – wiry, fluffy, thick, thin, varied, consistent… just a lot of experimentation and fun.
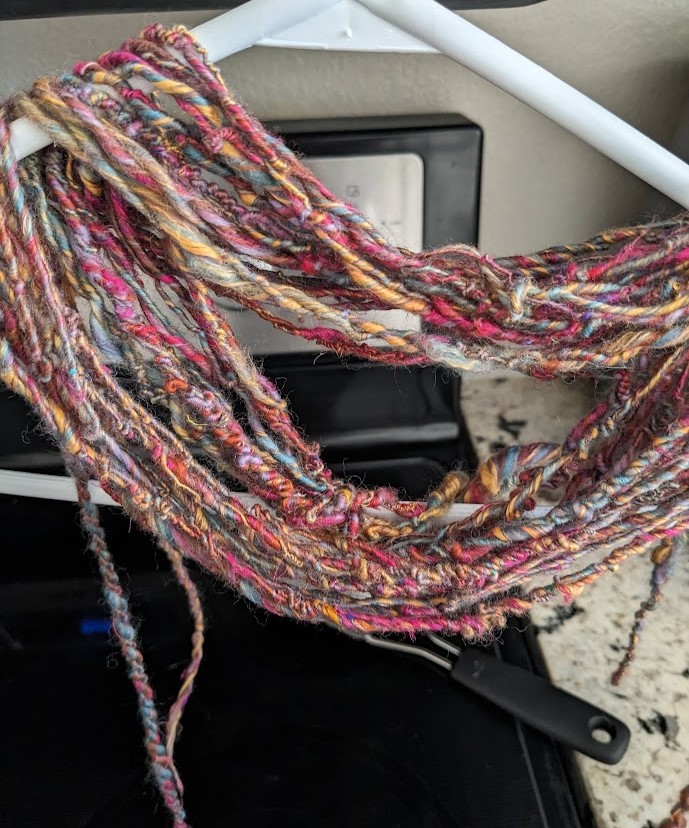
Fluffy yarn from my early spinning days
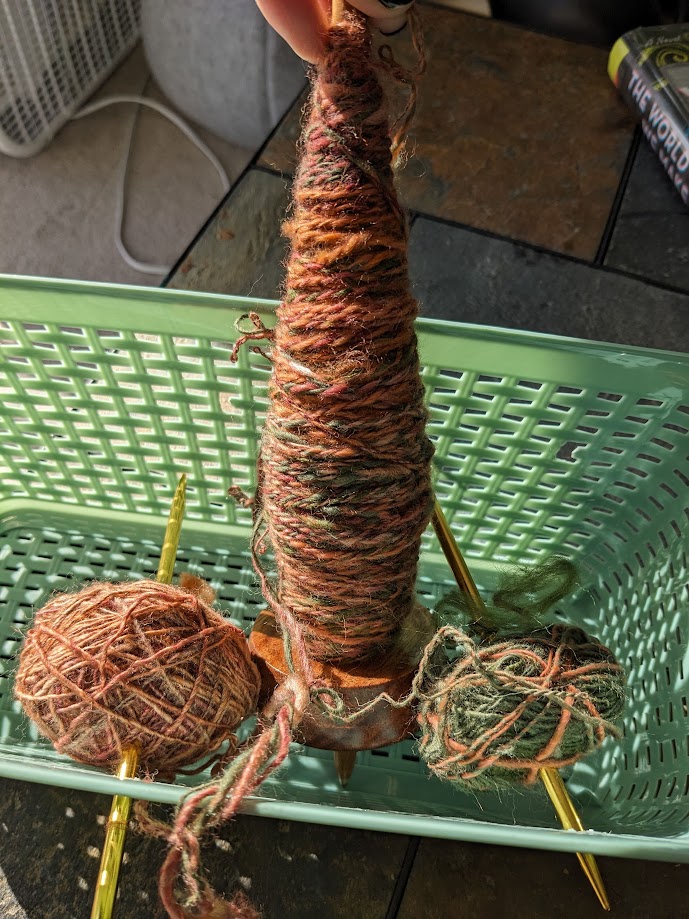
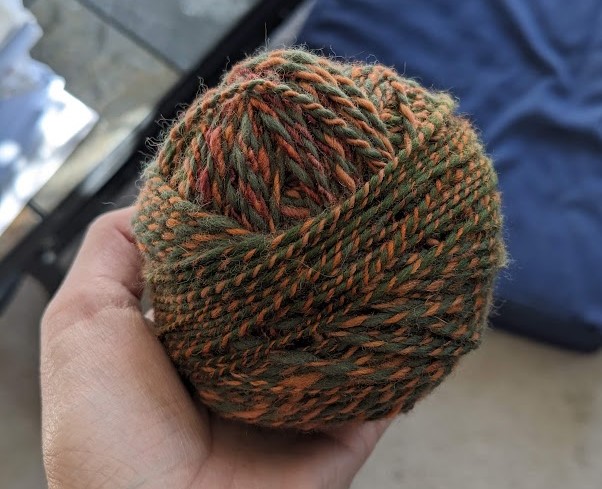
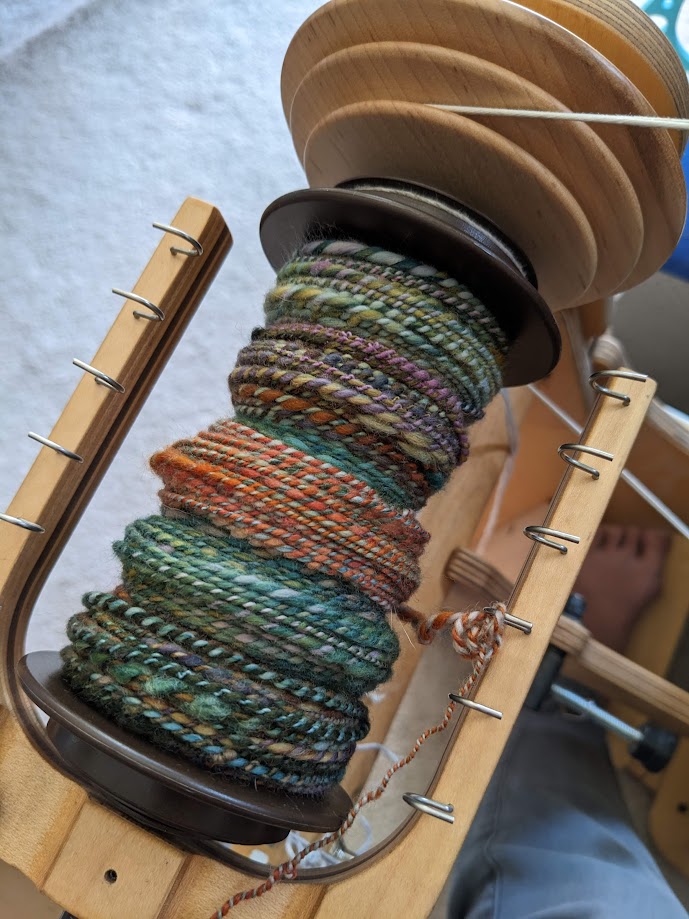
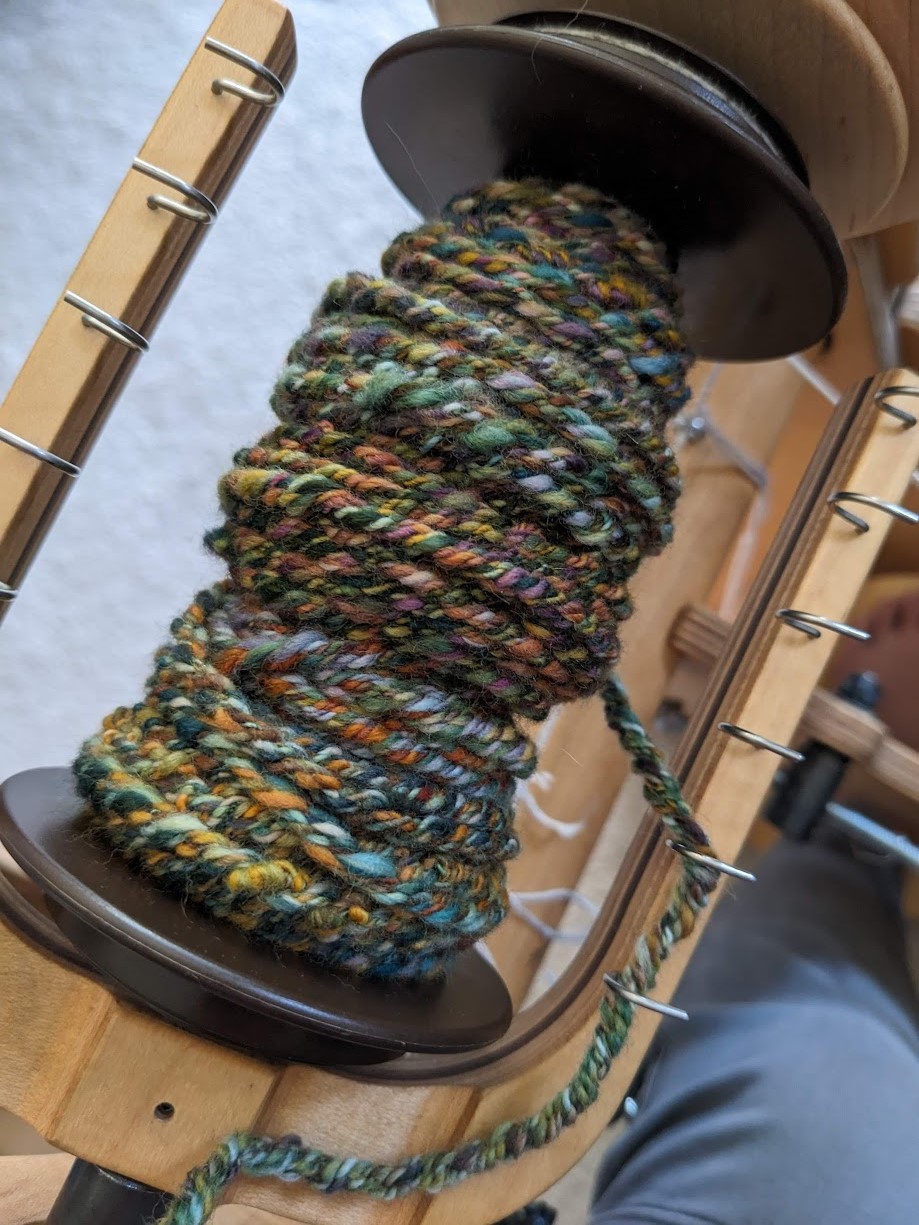
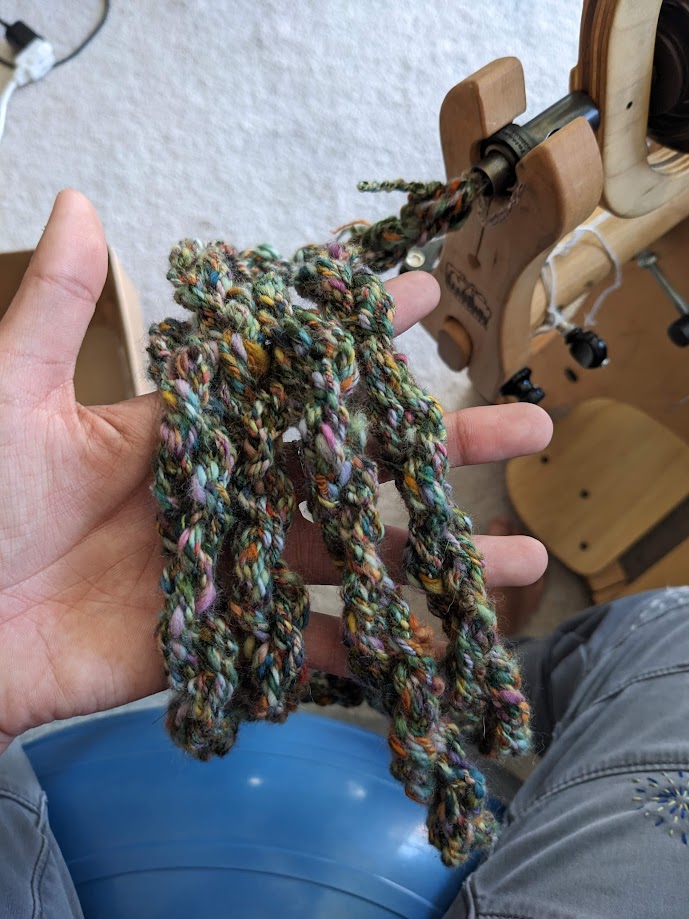
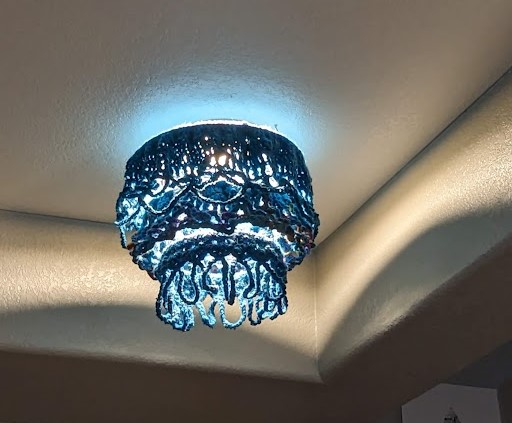
I plied this yarn a bunch of times to make a strap for a bag 🙂 It was some leftover fiber from my Tetons Extravaganza and it was just so colorful and green/flowery that I wanted to use it in a different way.
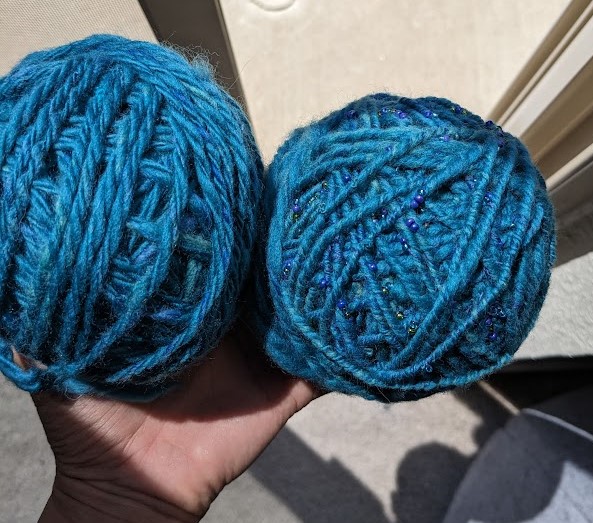
And then I got crazy and started adding beads!! 🙂 So shiny and fun. It was kind of annoying putting all the beads on the thread, but super worth it.
Plying setup with three normal plies and beads!
And of course, making things with the yarn I make. 🙂 crochet, weaving, I have even spun yarn thin enough to embroider with.
I’m figuring out how to walk around my house and spin, and my next data metric is figuring out how much yarn I can get from a given weight of fiber – which is a test of consistency, and makes the final fabric more even and less lumpy.