Tag Archives: garment

Crochet Bog Sweater

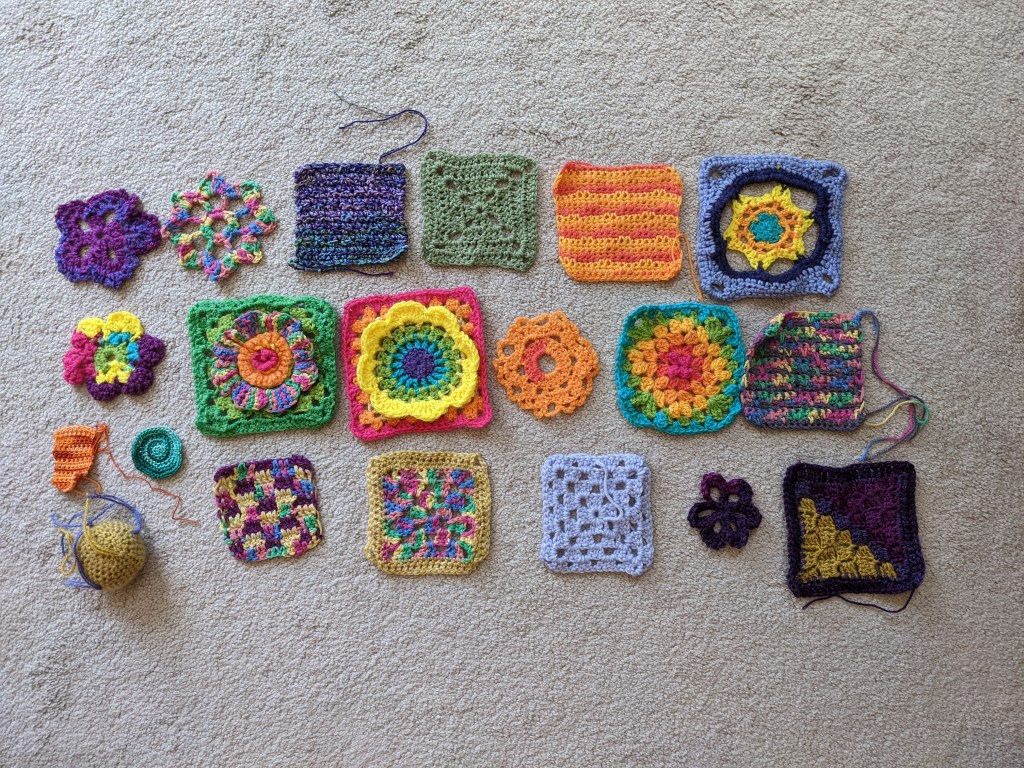
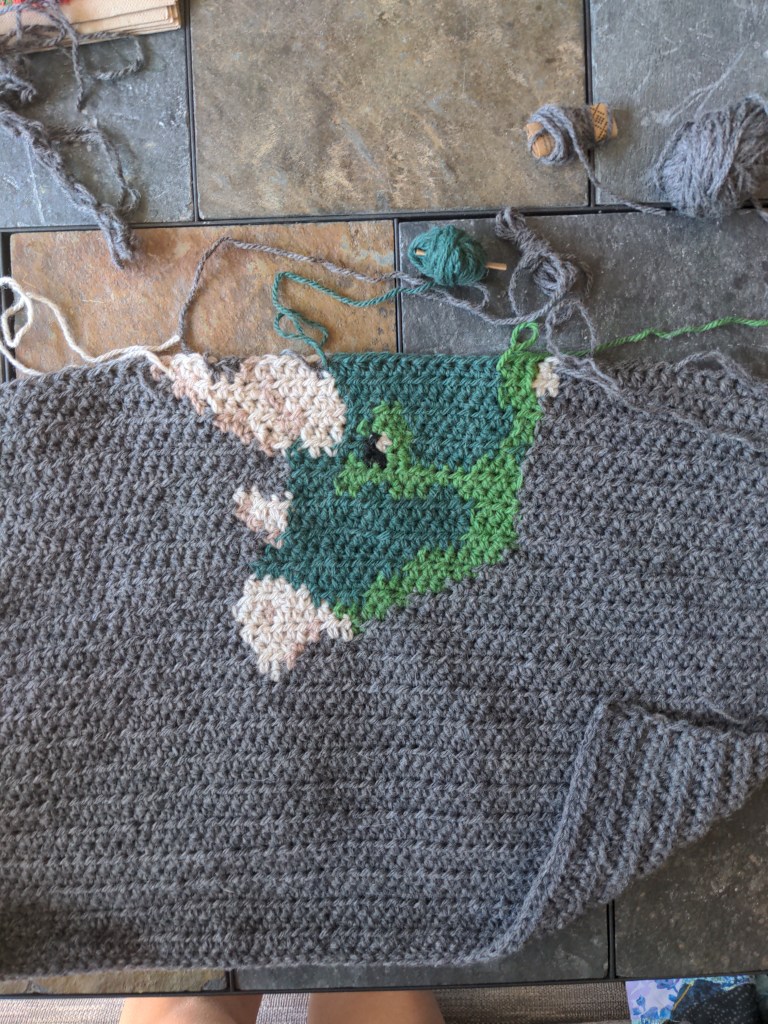
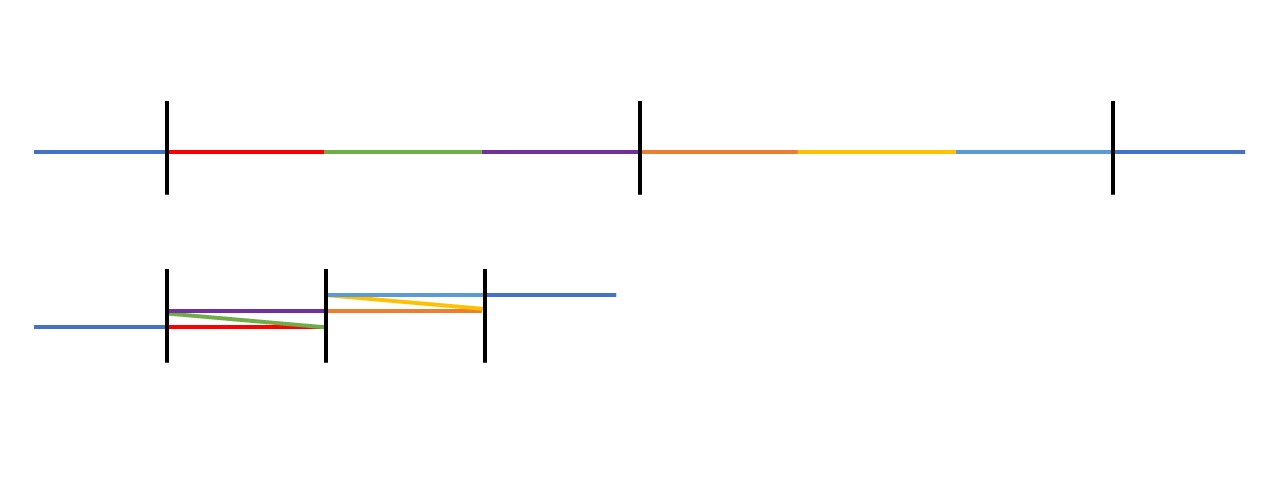
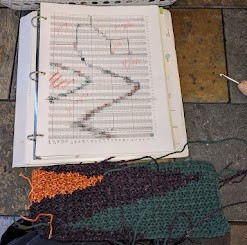
I started this project in the spring of 2023 as a way of using up scrap yarn and having a simple, easy hand-project for nights on the couch and zoom calls. I wanted to play with changing colors and having interesting color work while keeping the texture (crochet stitches) constant throughout. I did a simple (half double crochet, slip stitch) pattern and crocheted four panels of approximately the same size.

I think I miscounted the number of stitches when I started the second panel because one panel is ~50 stitches, one is ~42, and I had to make the other two match.

Sometimes I had plans. But as I grew in confidence, I let the plans go and just played with the yarn in hand.

It also served as a great place to put some of my first experiments in hand spinning, and transition into spinning yarn specifically to match the diameter of the commercial yarn so it would fit together well. I like how the final product showcases my first ever handspun (lumpy, bumpy, plied the wrong way) with my most recent handspun (consistent, soft, and so thin I had to double it to match the diameter of the rest of the yarn). I suppose it is a display of my crochet skill over two years and my handspinning skill over one and a half. 🙂

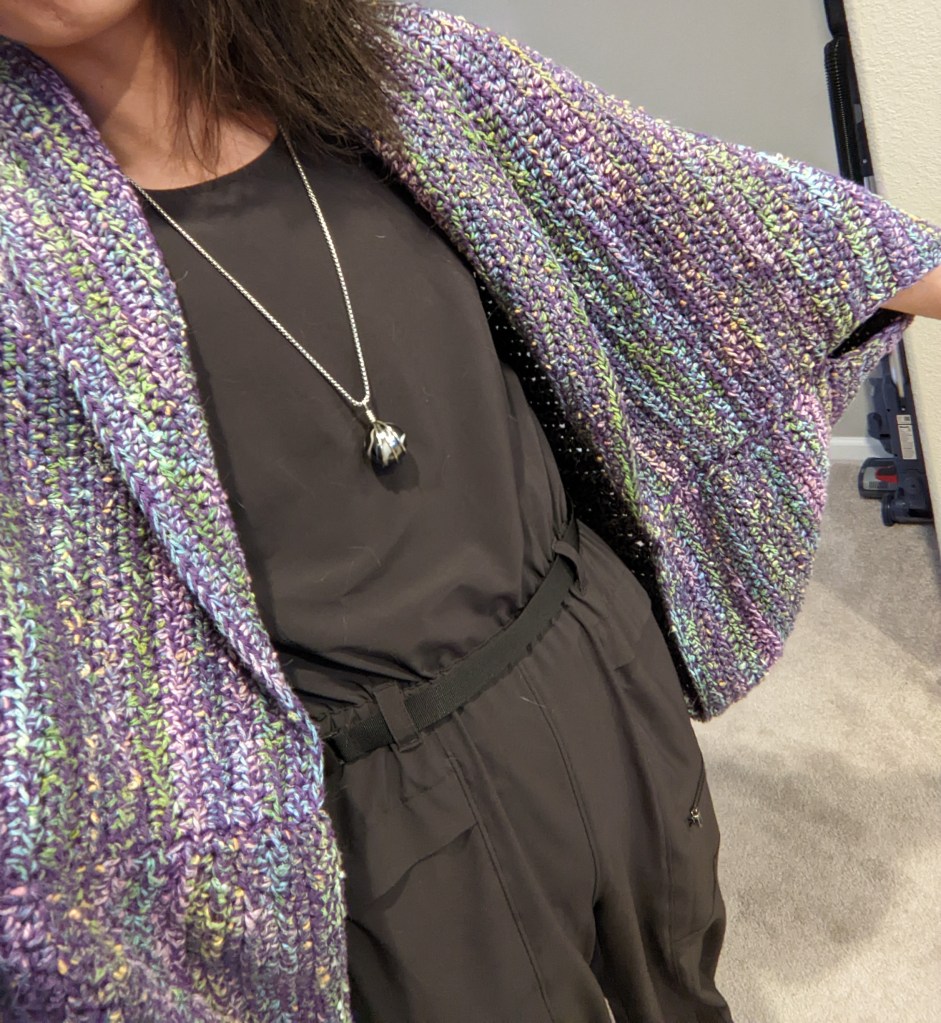
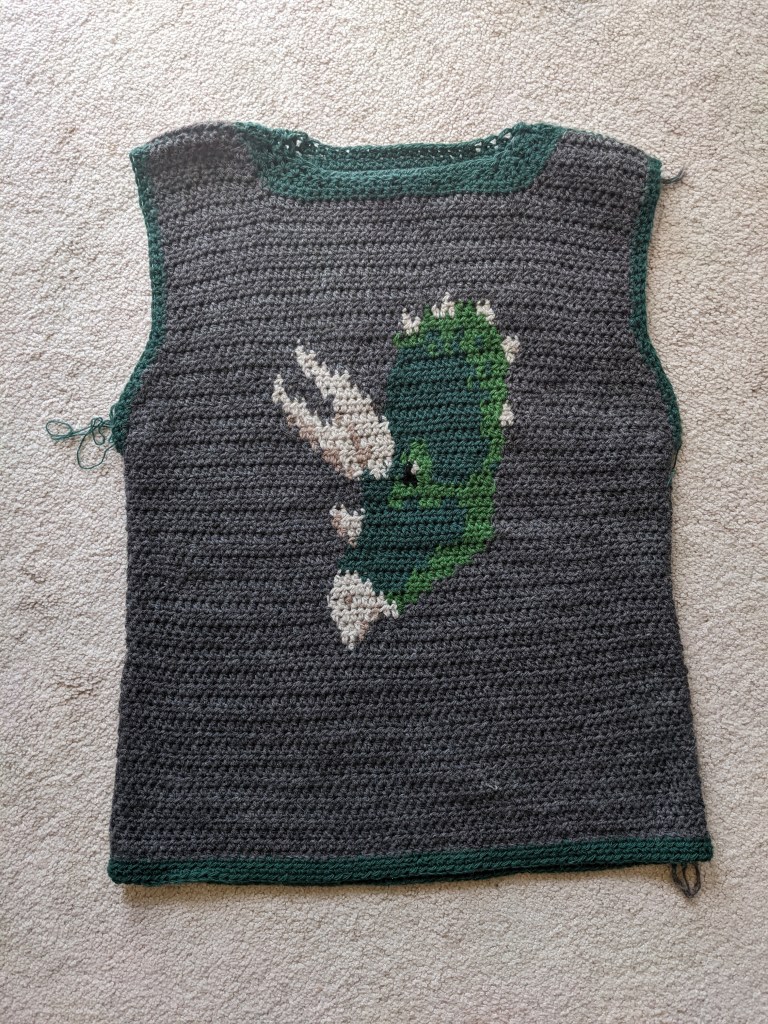
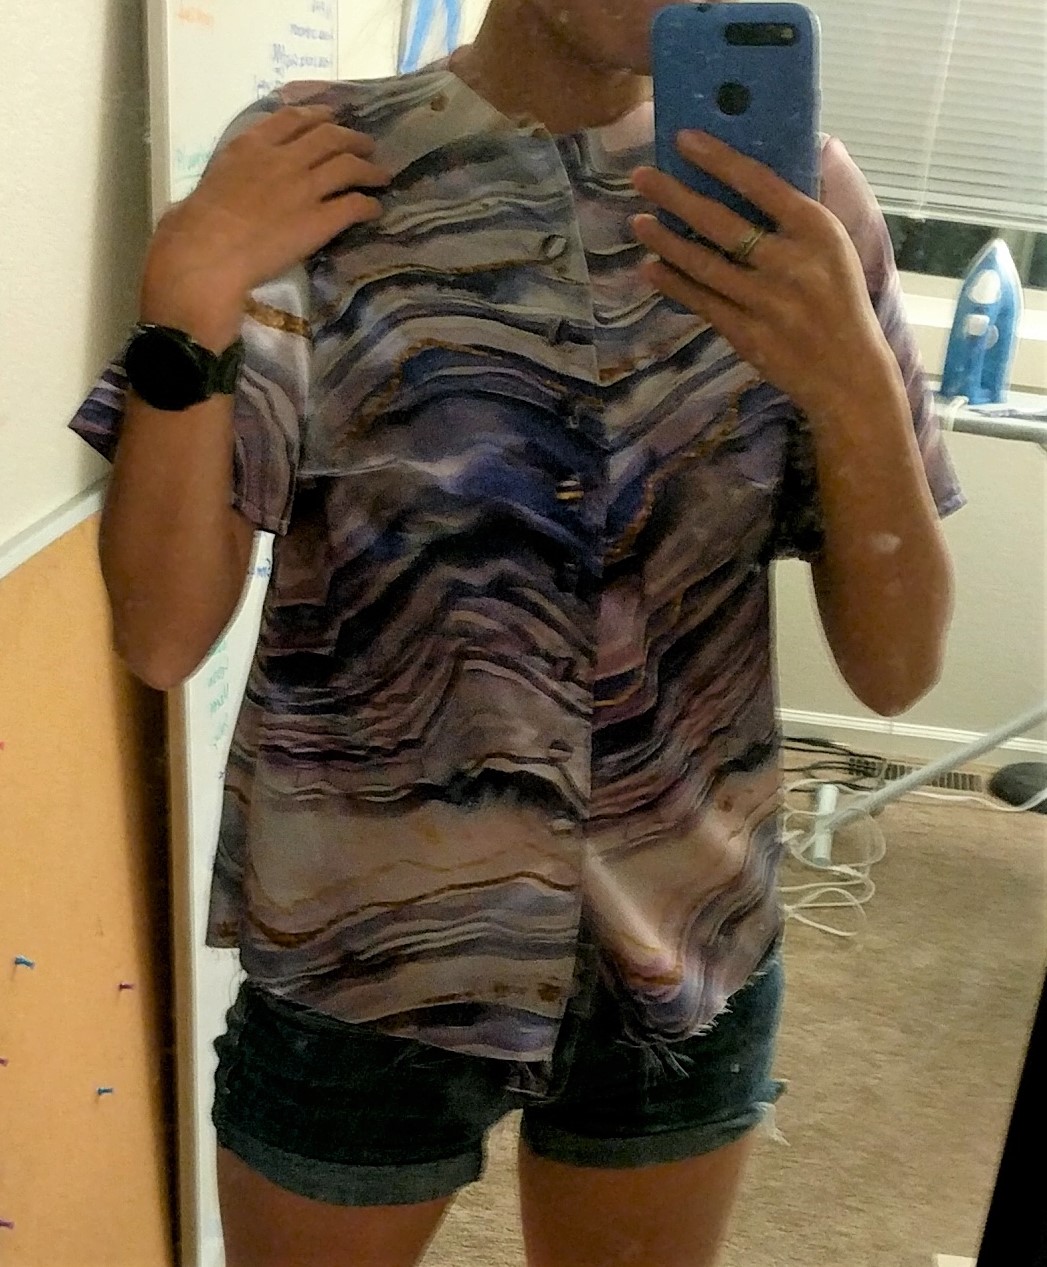
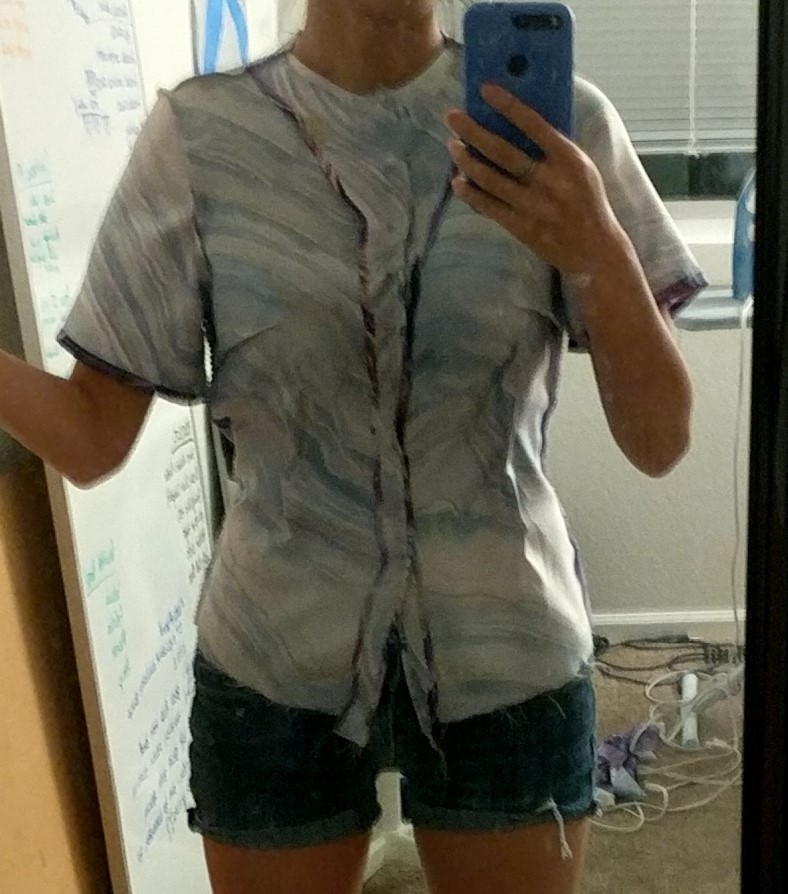
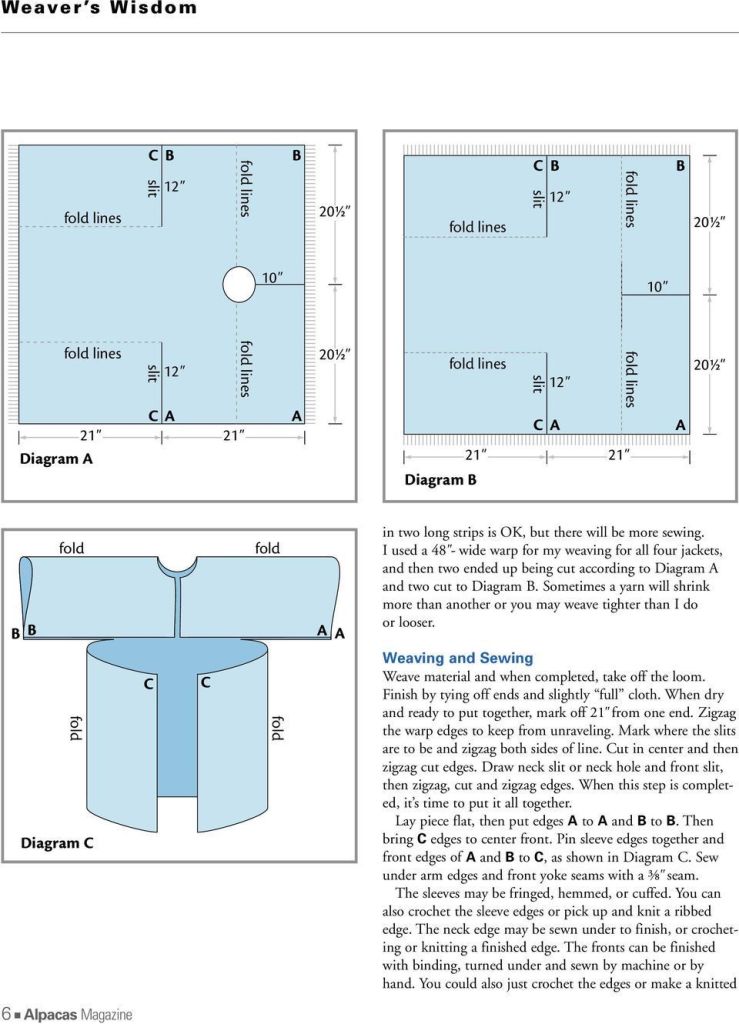
I planned on using these panels in a vertical layout as a long vest, but once I half-assembled it, I realized it was somehow simultaneously too long and too short for what I wanted. So I pivoted to making a bog sweater (see below). I love how big the sleeves are, and they’re kind of a perfect length, somewhere between short and long sleeves. I did have to cut apart one panel to make the opening, which was stressful, but I just went slow and hurriedly crocheted a border around it.

I used two panels, folded, for the top/sleeves portion, and two panels for the bottom/body portion
Before sewing the seams, but after cutting apart the opening. Obviously the friendly helper is helping 🙂

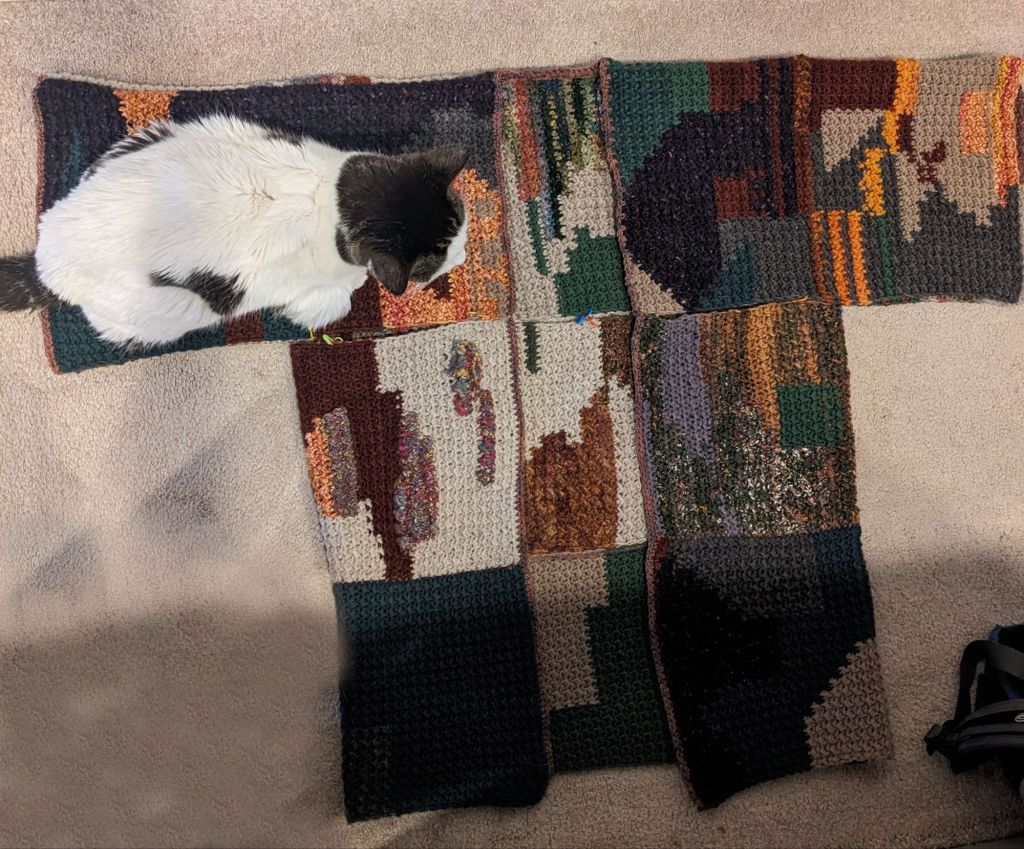
I’m very pleased with my final result, despite it not being my plan. It’s warm, but not hot because of the large, open sleeves. I even signed it, with 5 stitches for 2025.

Signature in the doubled “most recent handspun”

Project completed April 2025

… and then I learned to crochet!

After the most recent quilt I made, I didn’t spend much time in the sewing room for various reasons, and picked up crochet! I’ve been trending towards things that are more “by hand”, like English paper piecing, and embroidery, so it made sense for me to get into crochet or knitting. I chose crochet because it seemed easier to get into and has the capability for making three dimensional objects.

I started off as I usually do, on YouTube and with books from the library, and immediately gave myself tendonitis from crocheting for too long and holding the yarn too tight. Now, I try to cap crochet sessions at two hours, or else I’ll go on crocheting forever and hurt my hands and wrists.

I started off with granny squares and little flower motifs 🙂 and a catnip ball for my friendly helper
The three dimensional granny squares were really fun 🙂

Then I wanted to make a sweater, but a super easy one. This sweater is based off a blanket sweater pattern, which consists of a rectangle with the corners folded in to make sleeves 🙂 I used two yarns at the same time to create a textured/blended effect.

Closeup for the texture 🙂

Then I saw this TikTok and needed to make my own dinosaur sweater, so I did. The pattern was really straightforward, and it’s made to measure instead of a set row/stitch count. I started doing the back and (a) got nervous I would run out of yarn, which I did not and I have a lot left over, and (b) thought it would be fun to do some color changes for the aesthetic and for practice. Practicing the color changes and learning how different techniques (such as tapestry and intarsia) create different looks was very helpful in planning and executing the front. Also, now I know that I can crochet any colored design that can be made with a grid (some artists use crochet to do 8bit art, and a crazy dedicated artist is using crochet to make an early-2000s-wordart piece).

Crochet colorwork like this uses a grid to tell you what colors to use.

The color work wasn’t technically difficult, but required a lot of care to keep the different yarns in their own space and not tangled. I tried to weave in the ends as I went, but then I had to undo some of it because I forgot to adjust for the arm holes, and that didn’t go very well. After that, and in the future, I’ll keep the ends loose until I’m positive that everything is correct and I don’t have to undo anything.

I didn’t do ribbing, because I don’t like it, but I think the green border does add a little something. A finishing touch.

I think crochet has reopened the door to making my own clothes because it’s more forgiving than sewing, especially with non-stretch fabric. There’s much more precision and care necessary for sewing garments, and I enjoy playing with crochet’s many textures. Plus, there’s the “by hand” aspect, which is fun and compelling for me. And I do love a good sweater 🙂

Other crafts I’ve been up to recently:

EPP bag to celebrate my new job (front)
EPP bag (back)

Red Fall Skirt

This was my first clothing project for someone besides myself! The same friend who I made the bird backpack for asked me to make a swishy, flowy skirt for her. We went to Joann’s together and picked out the main fabric and the accent fabric.

Since she wanted it to be swishy, I decided I’d make a pleated circle skirt, including even more fabric than a regular circle skirt. And including the waistband and pockets, I used up almost all of the main fabric we purchased, which was cool.

I used the accent fabric for a panel about 1/4 to 1/3 of the total skirt, and included a stripe of it in the waistband.

I know that pockets make any skirt at least 10 times better, so I included two huge pockets 🙂 I used a long zipper for the closure and did a double turn hem. I considered doing a lining, but I used so much of the main fabric that it was already a heavy and warm skirt, so any lining would make it a little leg-oven. This way, it can be worn by itself in the fall and with tights in winter. 🙂 I did include a lining in the waistband for additional structure and making sure the seams and raw edges weren’t itchy.

We did a first fitting where we found out the waist was almost perfect… without the seam allowances for the zipper. I inserted a small triangular panel and at the second fitting we got the waistband circumference right and added some small darts so the waistband is flat to her body. Then she graciously made me dinner and I sewed the last seam up afterwards.

Overall it was a bit unnerving to make a piece of clothing without being able to make sure it fit continuously along the way. But it was a good challenge and it turned out great! As usual I used the machine for most of the construction, with hand sewing for the zipper and the last seam. I like having a bit of hand sewing in each of my projects for a bit of an imperfect element.

Project completed October 5, 2020.

Black Skirt

This is a make from a while ago! The fabric is a poly chiffon/crepe de chine from Colorado Fabrics, a wonderful (but overwhelmingly large) store. I wanted to make a circle+ skirt, this is close to a circle and a half. It’s sheer, so I usually wear a long black, gray, or short black skirt underneath. I really love the way it moves, it’s so light and flowy. It is a ton of fabric though – I used about 4 yards and picking it up to go up stairs can be a hassle!

The ever important twirl!
Just walking about 🙂

Project completed March 2019.

Rainbow Flight Attendant

This shirt is based on the bodice of the Lekala S4108 pattern. This was my first shirt, and since I almost exclusively wear button downs, I figured I should just start with a button down. This only used 1 yard of fabric (from Joann), which was really cool. It’s kind of a firm satin? Not as slippery as the purple geode, still a bit flowy.

This, of course, was my first foray into collar making. I cut out the collar according to the pattern, but it ended up being so short that it didn’t wrap all the way around the neck opening. I didn’t have enough fabric to make a new, bigger collar, so I decided to go for a tied collar strip thing (I have another shirt like this so I figured it would work). The improv collar worked great and is the basis for the name since they used to wear those little scarves.

It was also my first time doing sleeves! It’s a bit tricky to sew a sphere-ish thing to a.. 2D/circle thing, but I used a lot of pins. I also skipped some directions which, after consultation with a friend, I should have followed. You’re supposed to “stay stitch” around the sleeve curve so it doesn’t get all out of whack and stretched when you’re sewing, which did happen a bit. But the extra bit of shoulder puff isn’t unwelcome and is pretty subtle.

It was not my first foray into buttonholes, but it was the first time I had to measure and space out my buttonholes. I put the shirt on and marked out where it felt natural for buttons to go, and saw a separation of about 2″ is a good distance. The bottom was just a bit over 2″ after the last button but I decided to not install a button so close to the hem.

I wore this on a date and it absolutely passed my wearability test, but that doesn’t mean I didn’t introduce the piece to my roommate as “am I a flight attendant now?”

Project completed March 18, 2019.

Purple Geode Dress Set

I made this top + skirt for a friend’s wedding. I got the fabric from Spoonflower, a site that takes designs and can print them on many different fabrics. I chose a polyester satin that turned out to be a bit slippery. I used tissue paper to stabilize the fabric and ensure it didn’t fall down the hole in the machine where the needle goes through or stretch out. It worked super well, but was kind of annoying since I had to sandwich each seam in tissue paper, sew, then rip the tissue paper off.

I modified the Lekala #5446 Classical Blouse pattern again, and sewed 3 circle skirts together to get the full volume of the skirt. With the blouse, I constructed the entire thing save for the collar, since I wasn’t sure I wanted to go down that road and have it turn out weird (again). I used buttons that I was able to cover with the same fabric as the shirt (they have a separate back and front, you wrap the fabric around the front, stuff it into the “bowl” of the button, and click the back into place, securing the fabric).

I used improv fitting while the shirt was on my body to create darts that (a) flattered me and (b) ensured there wouldn’t be wrinkles when I tucked the shirt into the skirt. I pin inside out so that I can sew the darts directly, which assumes my body is symmetrical, and no one’s body is, but it’s close enough.

The skirt used about 5 yards of fabric. A basic circle skirt is just that – a circle of fabric with a circle cut out for the waist (more of a doughnut, really). I cut out three doughnuts by folding the fabric in half, and in half again, so I only had to cut out a quarter circle. Then I had three doughnuts, and I cut each one on one side so I could have 3 vertical seams on the finished big doughnut. Now, I had planned to have the inner radius be my waist radius, but I forgot to divide by 3 before I cut out the doughnuts… But it just so happens that knife pleats divide the length by 3, so I added pleats all along the waist to bring it back to the right measurement. This also gave it a bit of poof and volume, which was great!

A hopefully effective way to explain pleats – the red-green-purple section turns out to be the length of just the red section aka 1/3 the length

Originally, this project was supposed to be a dress, but I realized that I wanted to wear the skirt separate from the shirt, so I decided to not attach the shirt to the waistband. I installed a zipper with the waistband, and included some elastic after learning from the Skirt of Projects Past. I wore a tulle petticoat underneath to fluff it out even more than the 3 circles and pleats were fluffing it.

The ever important “twirl”

Project completed July 6, 2019.

Of Projects Past

It’s impossible to buy exactly the amount of fabric you need for a project. There will always be scraps, unless you’re making a perfectly rectangular item that uses up all the fabric straight off the bolt. For every other project though, there are bits and pieces of various sizes that aren’t used in the item itself. Or just leftovers because I bought more fabric than necessary.

I decided to use some of these old scraps to make two different projects – the Skirt of Projects Past and the Shirt of Projects Past.

I liked (a) not buying new fabric and just recycling and (b) making something super colorful with weird, wonderful patterns. Most of this fabric I bought a year ago to make ties and neck warmers, and they generally have the same size print. And it was all cotton from Joann, so I wasn’t worried about weird shrinkage or anything.

The skirt is made with strips sewn together, alternating print and black (from the Trapper Keeper). Then I cut out approximate semicircles, which created a front and back. I sewed one side together and installed a zipper on the other side. The waistband isn’t as sturdy as I’d like, in projects after this I used elastic inside the waistband just to hold it closer to the body.

I used a modified Lekala #5446 Classical Blouse pattern for the top. I added a pocket using foundation piecing, adding layer after layer to get a pocket sized piece of fabric. I love the overall look of this top, but the collar opening leaves something to be desired, it’s a bit stiff and falls open strangely when buttoned.

Shirt completed March 30, 2019. Skirt completed Jan 10, 2019.