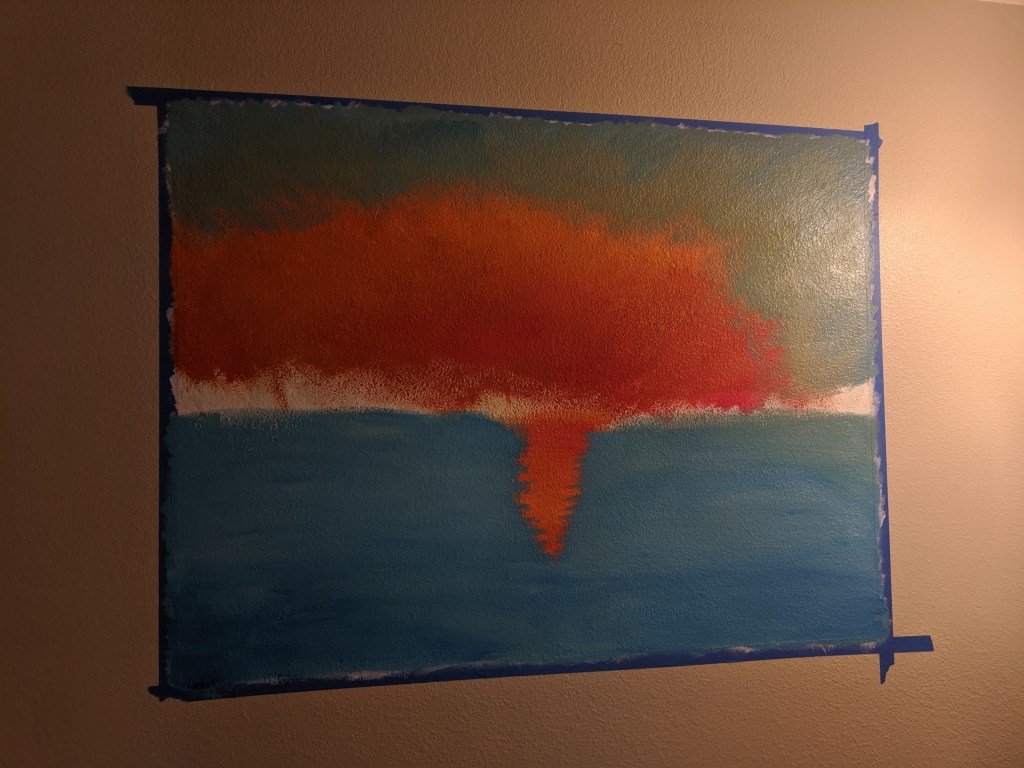
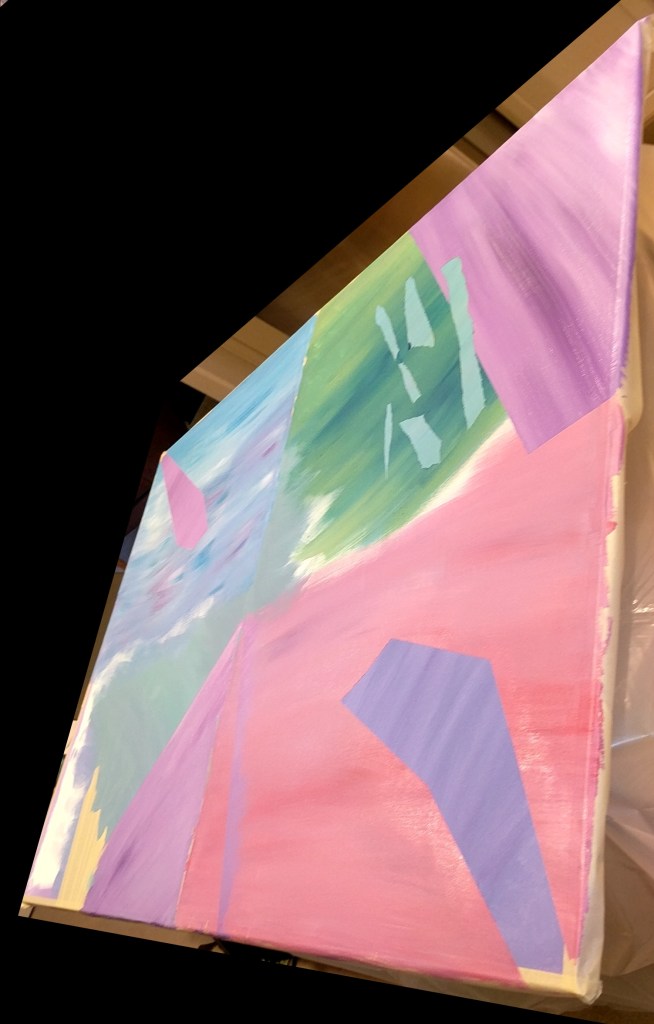
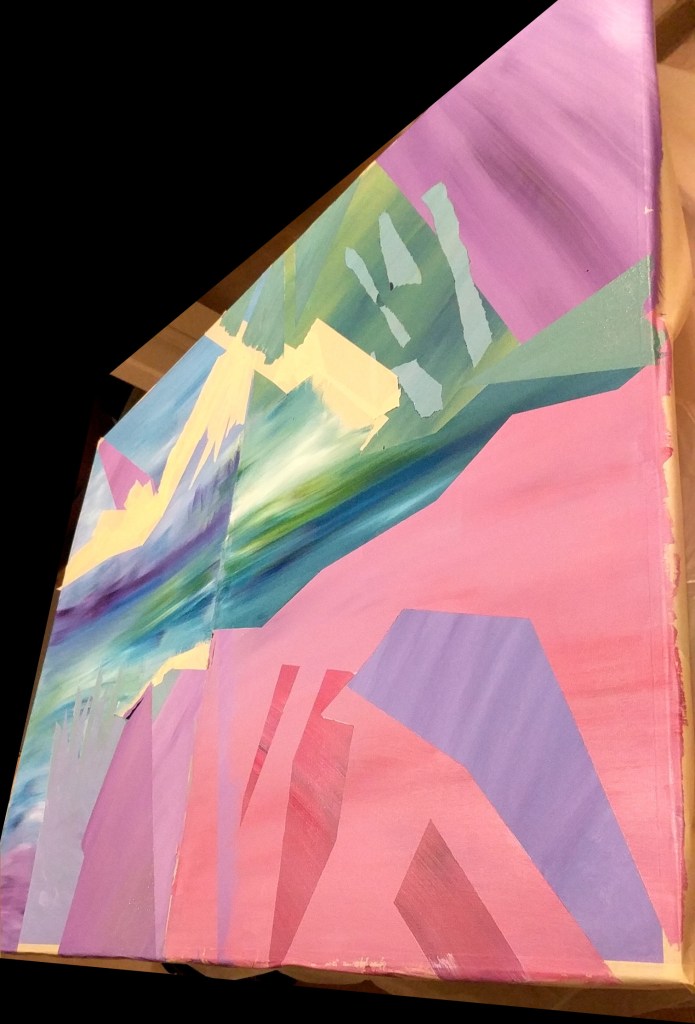
I painted this mural as a combination of a Bob Ross / Rocky Mountain National Park / Glacier National Park homage 🙂 My downstairs bathroom used to be a total gray box and I wanted to fill the space without spending a ton of money. It finished up at about 43″x47″. I used acrylic paint and paintbrushes from Michael’s and some painter’s tape.
I watched a bunch of Bob Ross tutorials before embarking on this painting, and I knew I wanted a mountain and sunset scene.
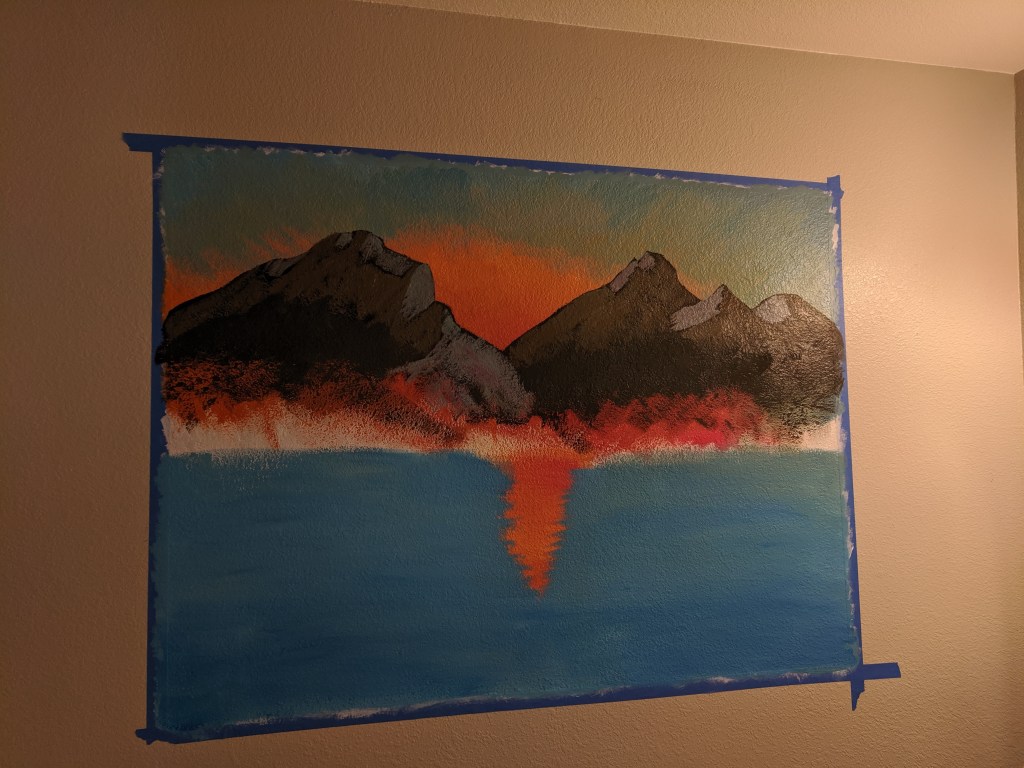
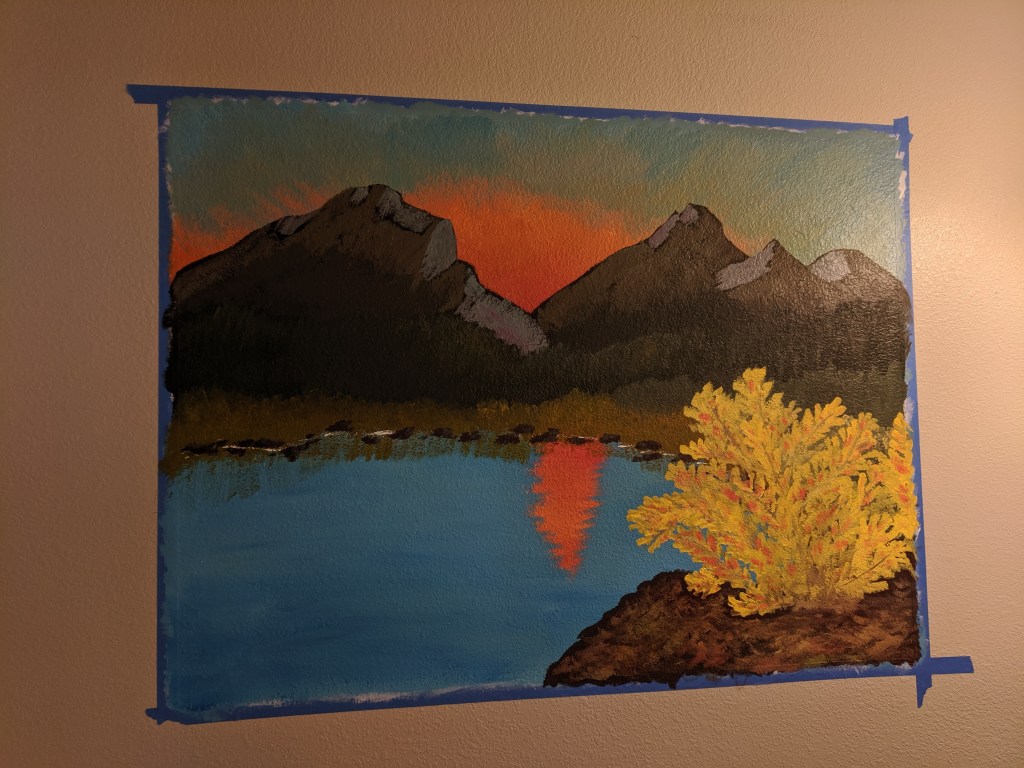
The mountains on the left are a big Glacier NP inspired, and the ones on the right RMNP inspired.I also added this autumnal bush for interest and fun!
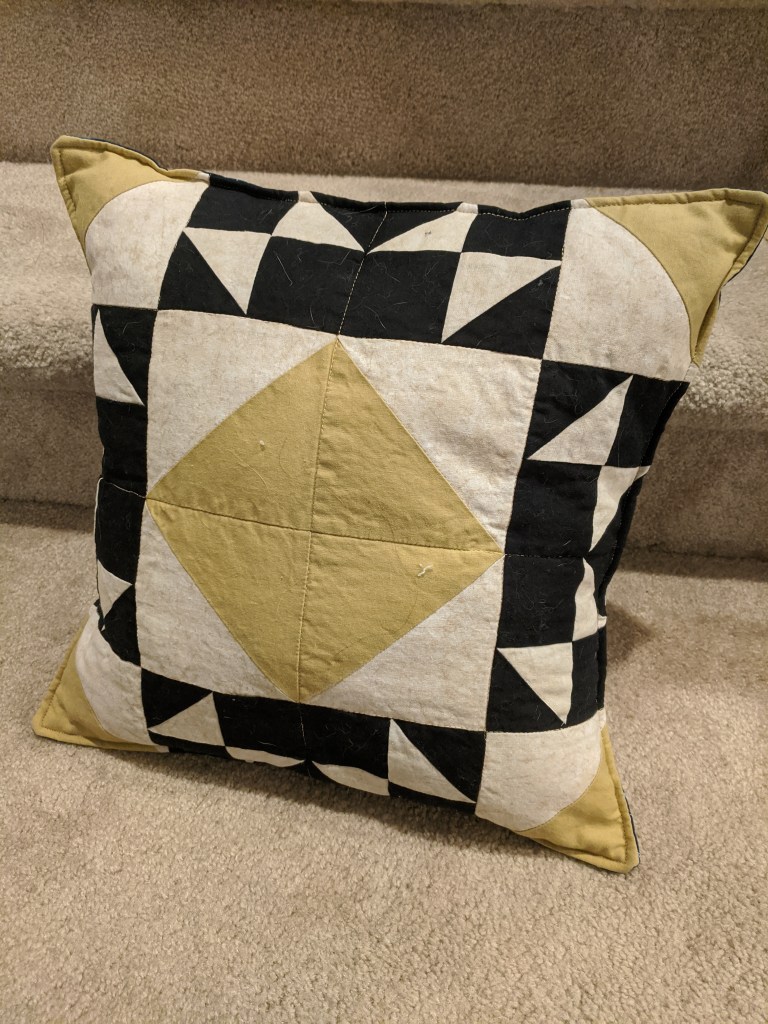
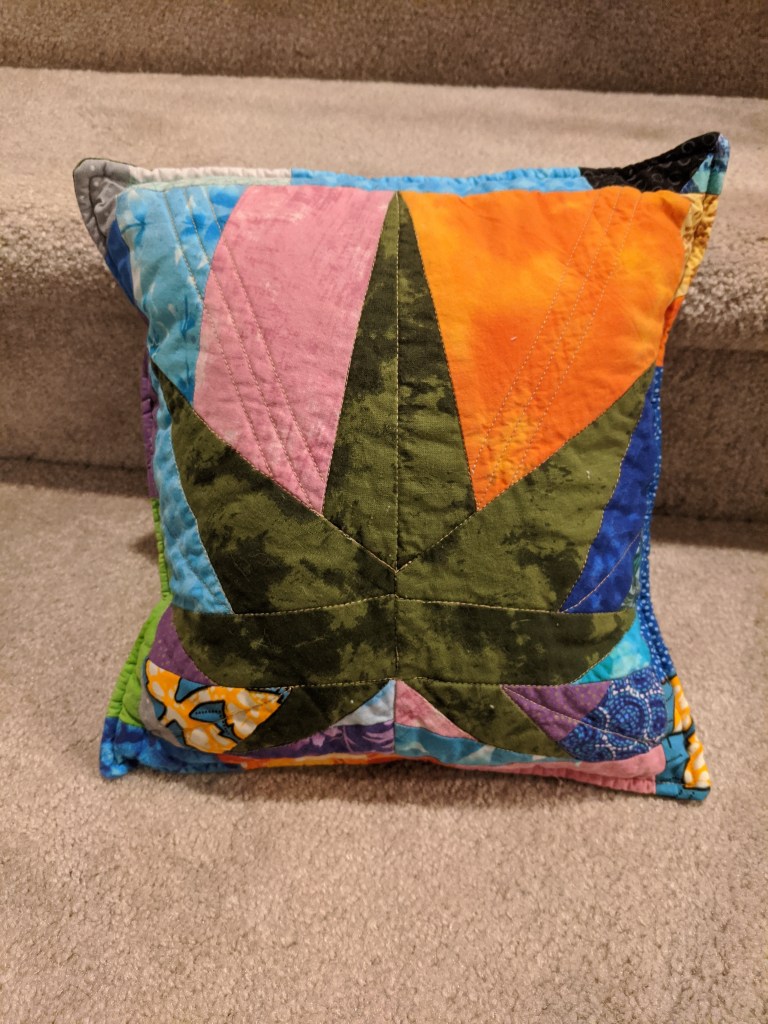
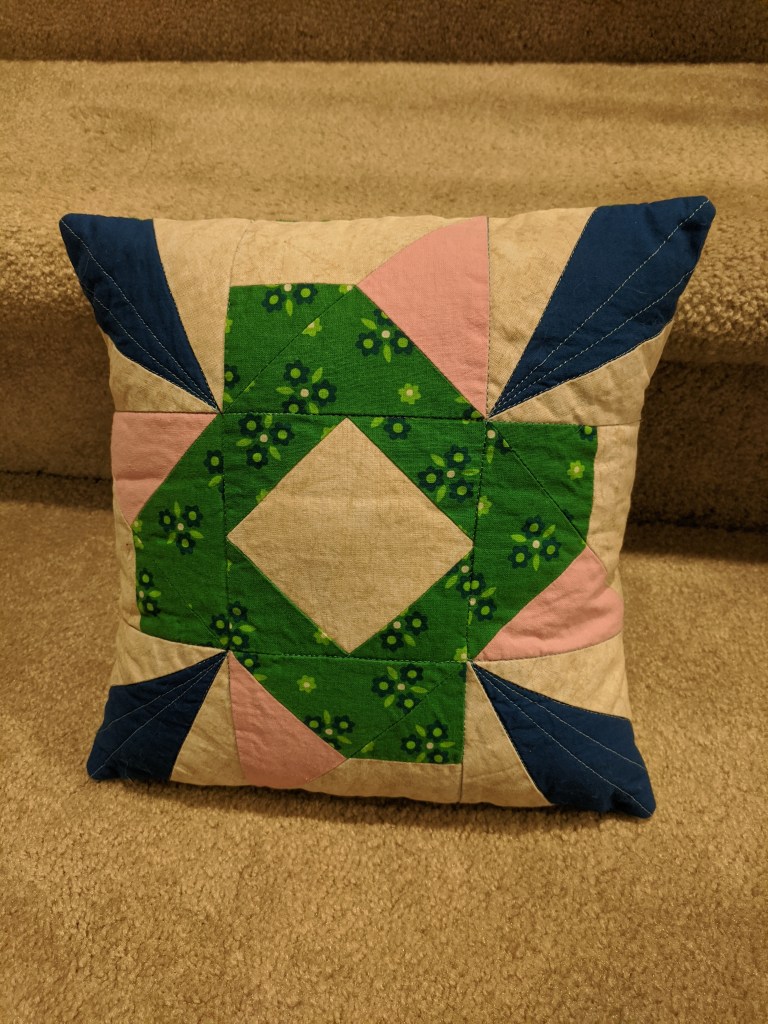
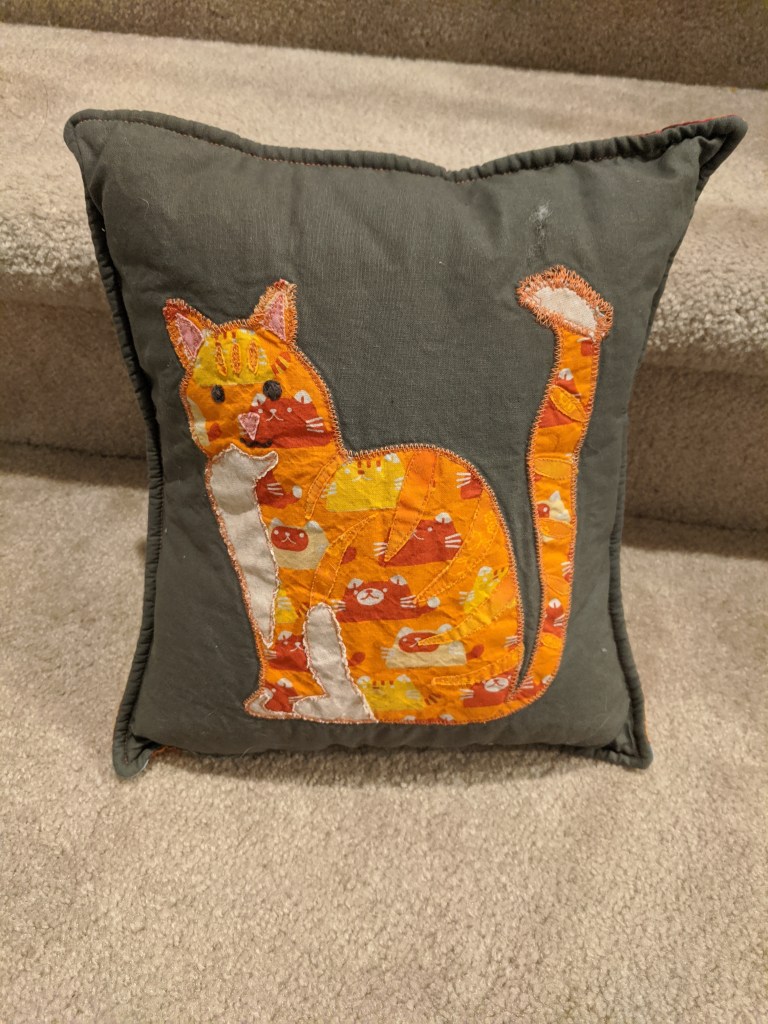
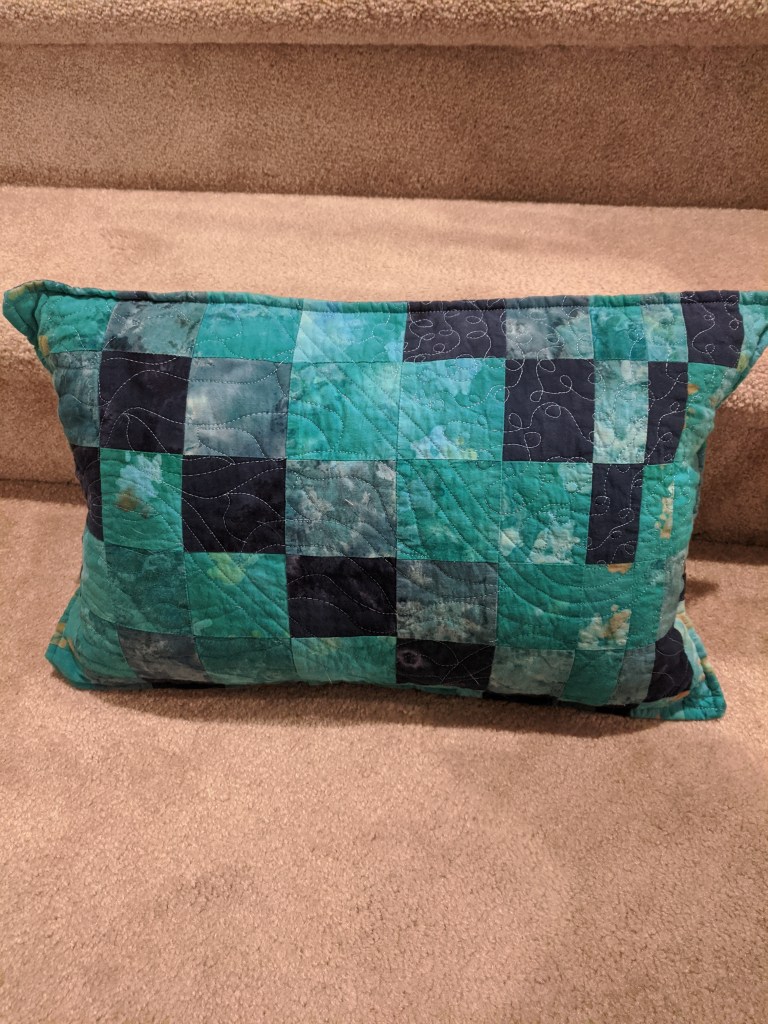
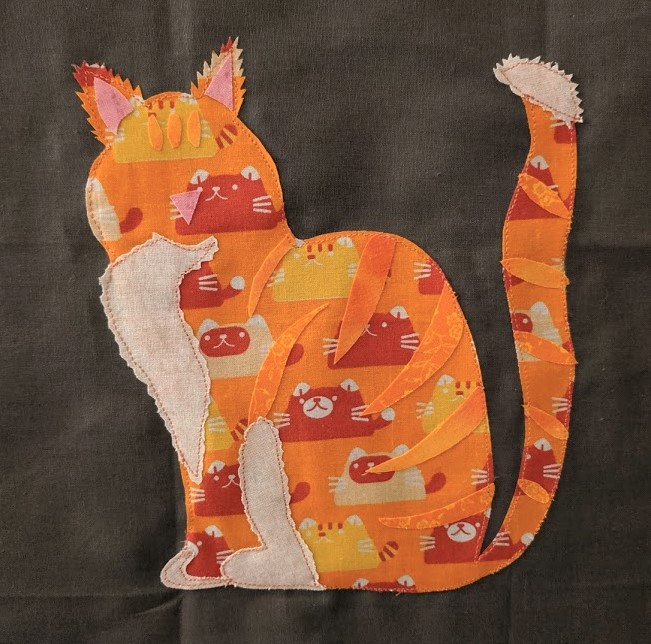
This year I did a bunch of little pillow projects for my friends and family 🙂 I got to learn some different techniques like fusible applique and paper piecing. I used lots of different fat quarters from Joann and scraps from previous projects. I generally used envelope backs and a little label to keep them closed. I stuffed them with some extra stuffing I had from pillows I’d bought previously, unfortunately none of them finished at a normal pillow form size.
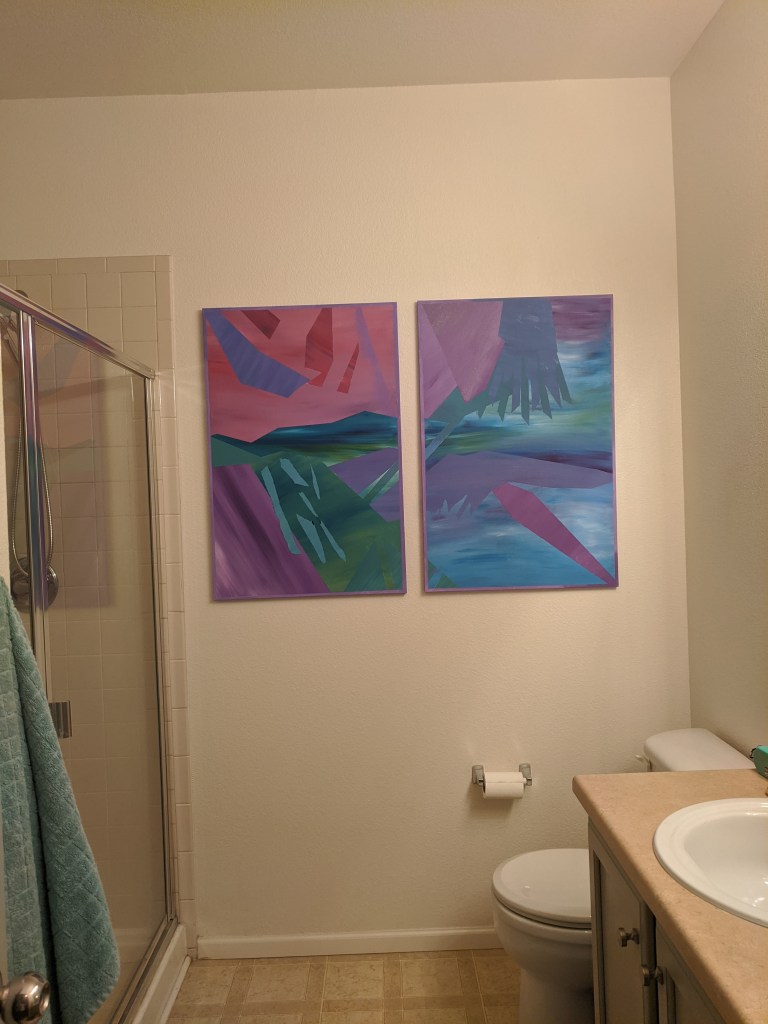
So these started out as a project for my bathroom, since I had a big wall to fill but buying something ~50″ can be expensive. I taped these two canvases together and then used masking tape to create different shapes and straight lines.
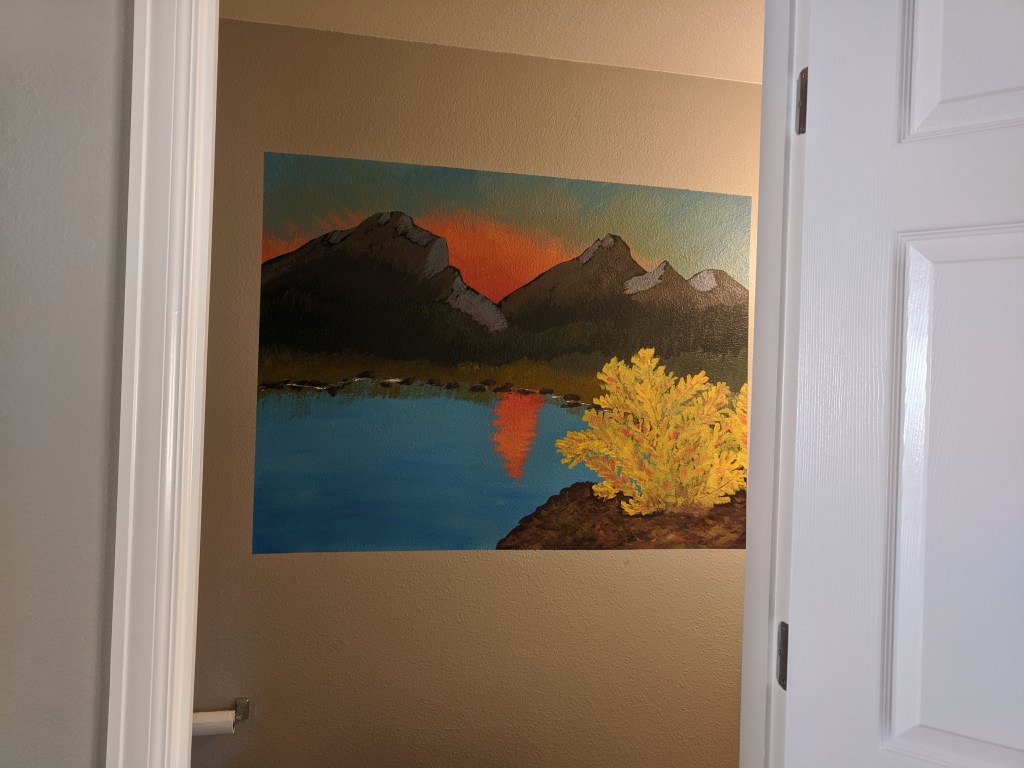
Finished and hung up!
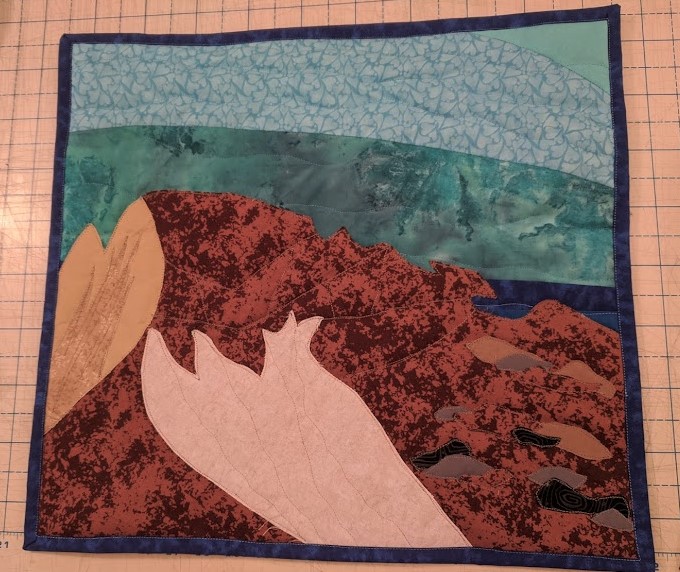
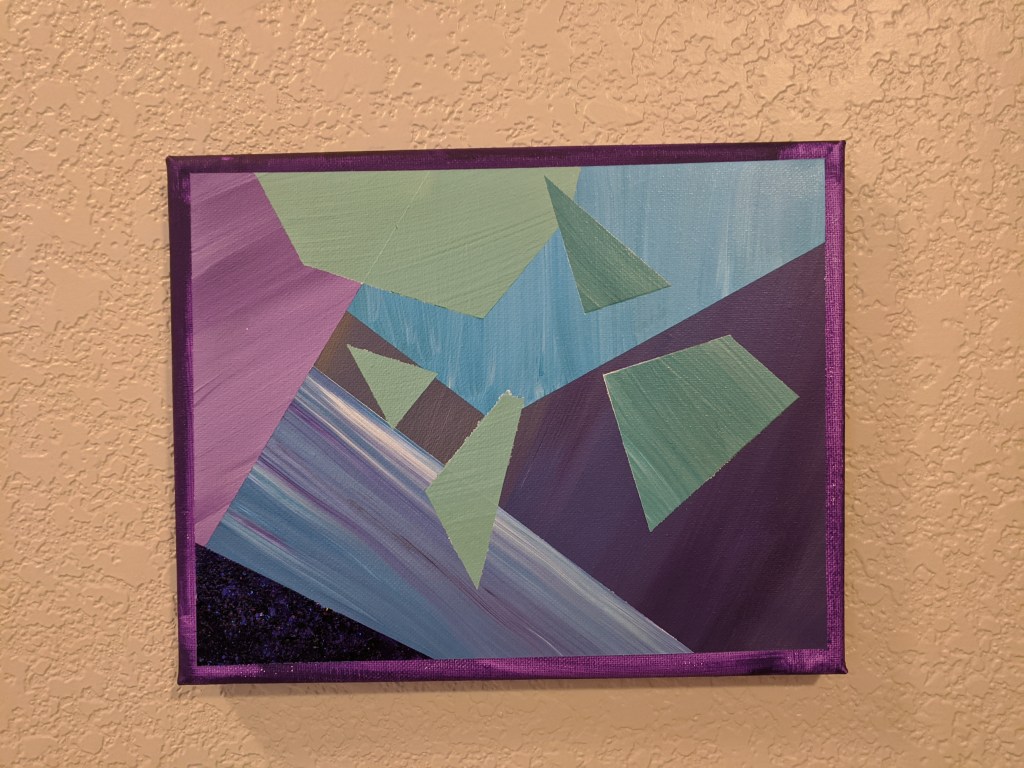
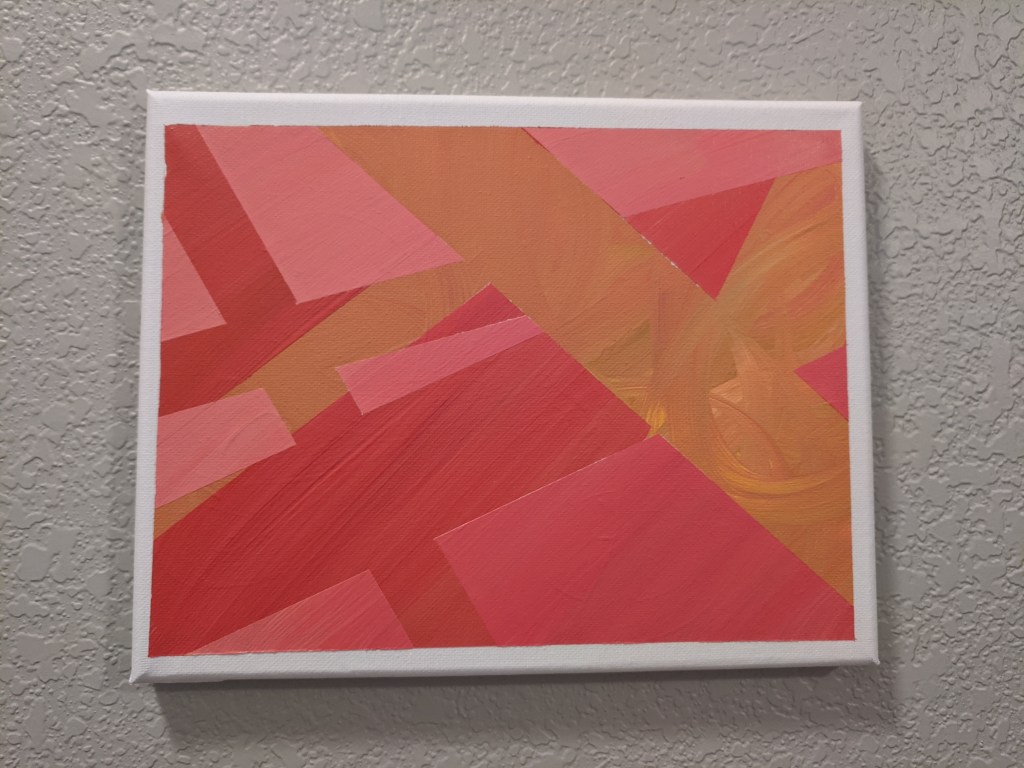
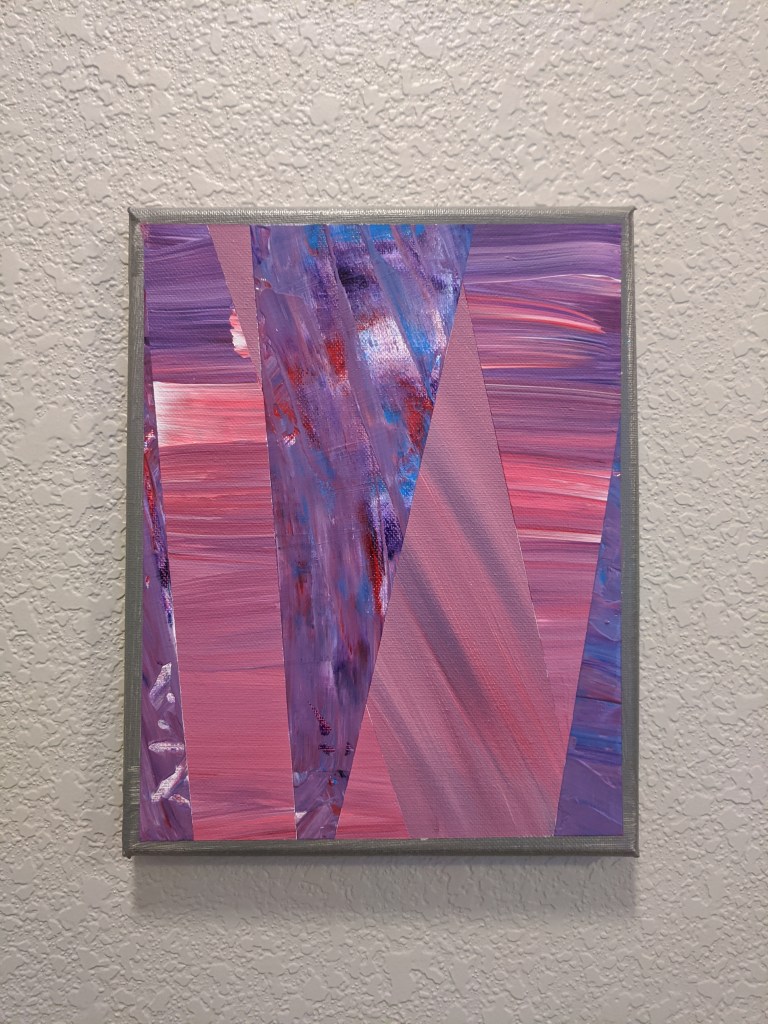
Then, because I had so much fun with those, I bought some small canvasses (8″ x 10″) on clearance and now I’m working on making a little collection that will hang in my entryway.
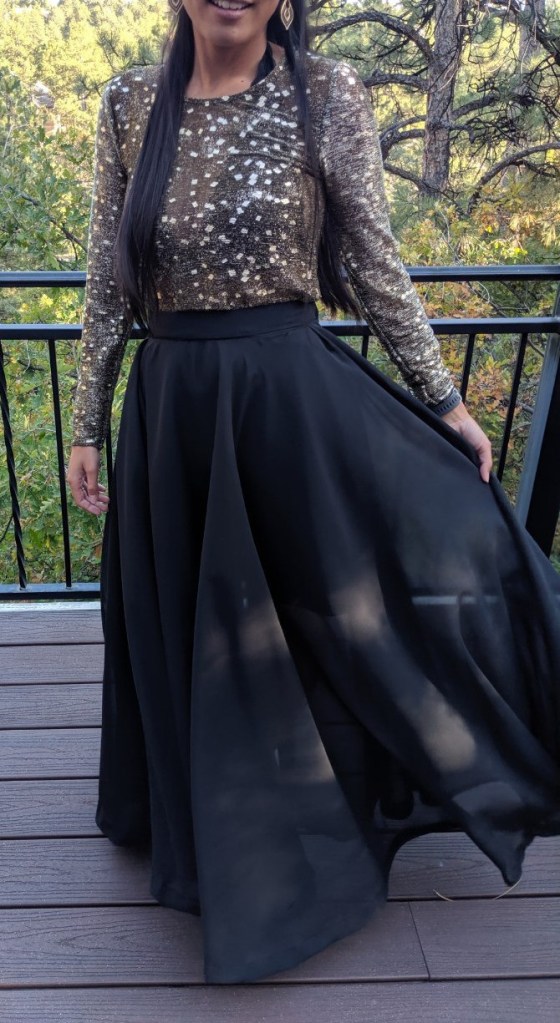
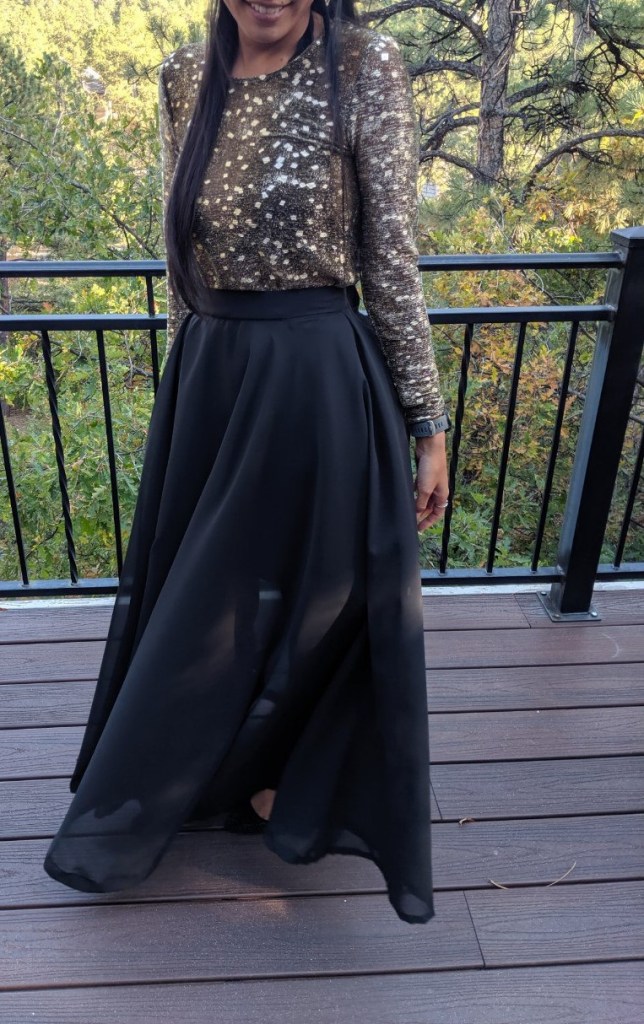
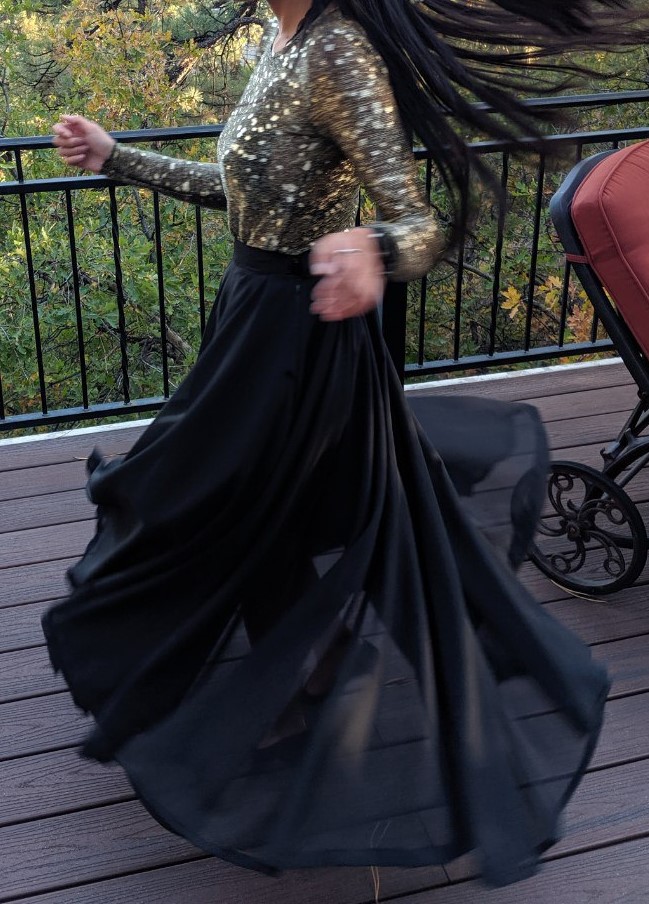
This is a make from a while ago! The fabric is a poly chiffon/crepe de chine from Colorado Fabrics, a wonderful (but overwhelmingly large) store. I wanted to make a circle+ skirt, this is close to a circle and a half. It’s sheer, so I usually wear a long black, gray, or short black skirt underneath. I really love the way it moves, it’s so light and flowy. It is a ton of fabric though – I used about 4 yards and picking it up to go up stairs can be a hassle!
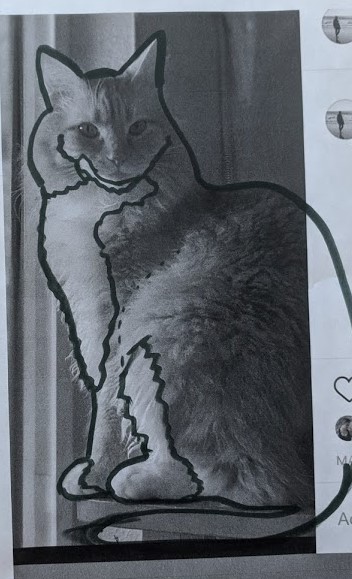
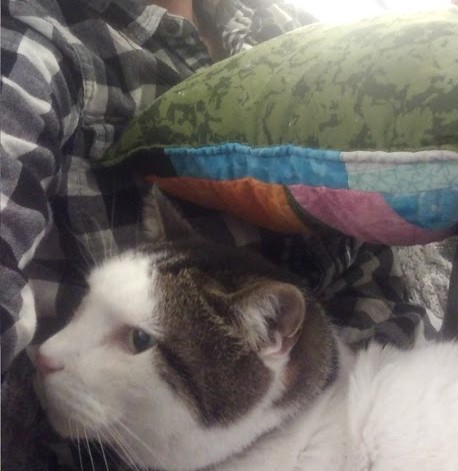
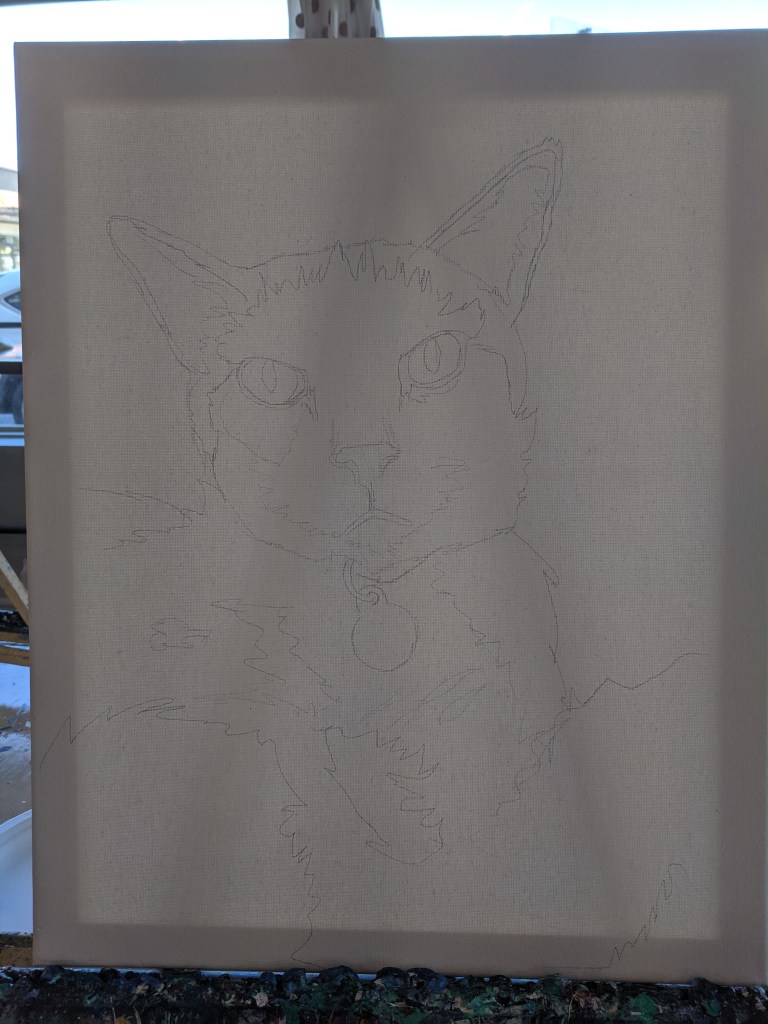
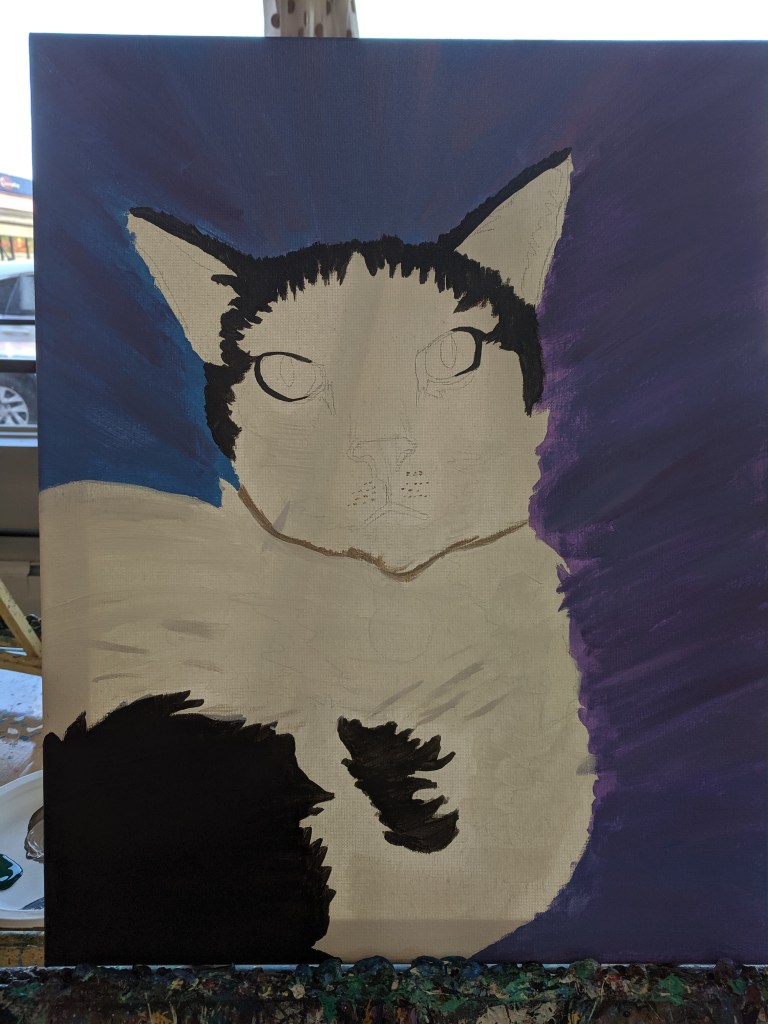
My friend and I went to Sipping N Painting in Denver, one of the pretty standard paint and drink places 🙂 Except they used a photo of our pet to sketch the outline on a canvas for us, and then we filled it in!
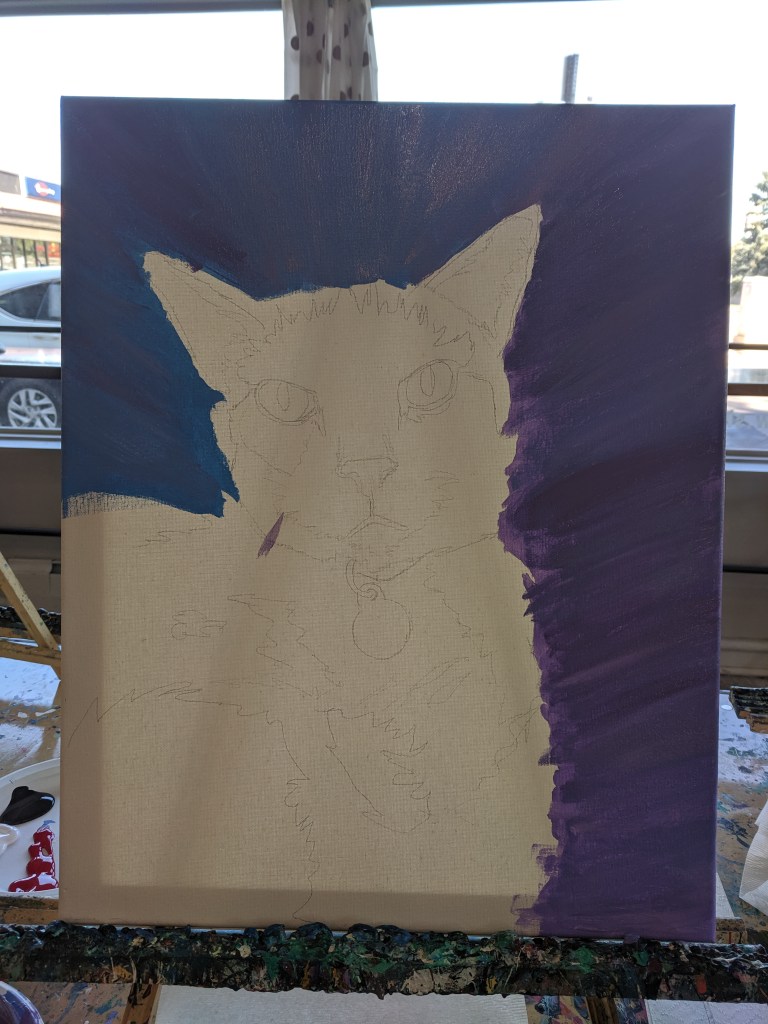
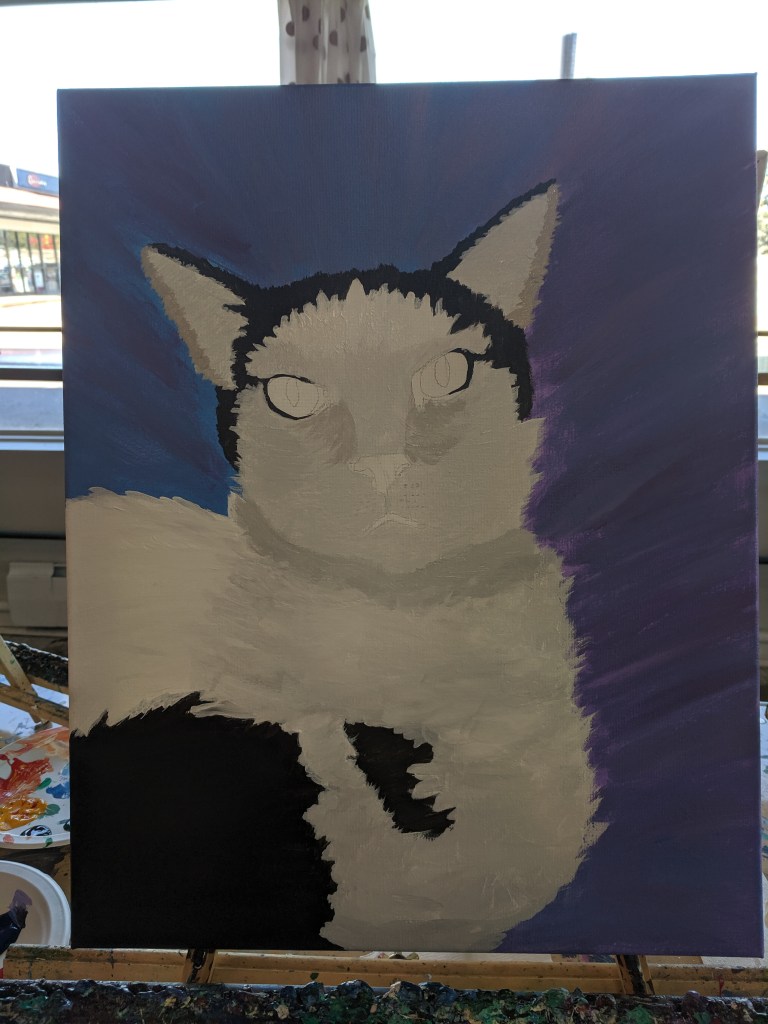
It was originally supposed to be more of an abstract thing using one color in different shades to define highlights and lowlights within the picture, but I decided that I’d do realistic colors (along with the other 3 people in the class) since my cat is just black and white.
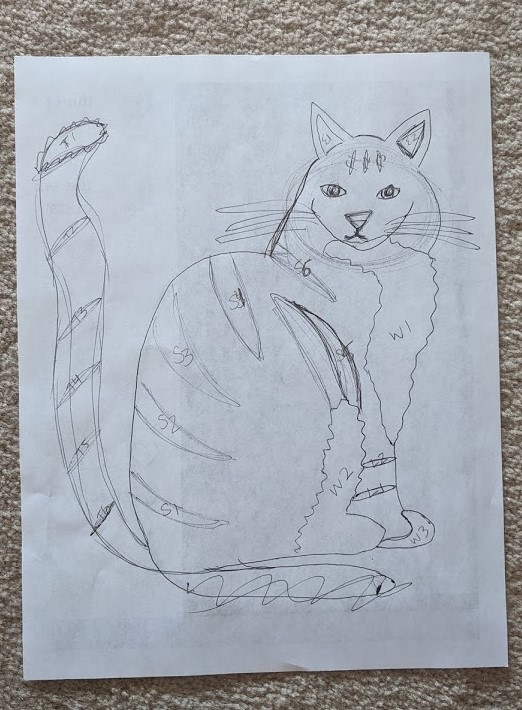
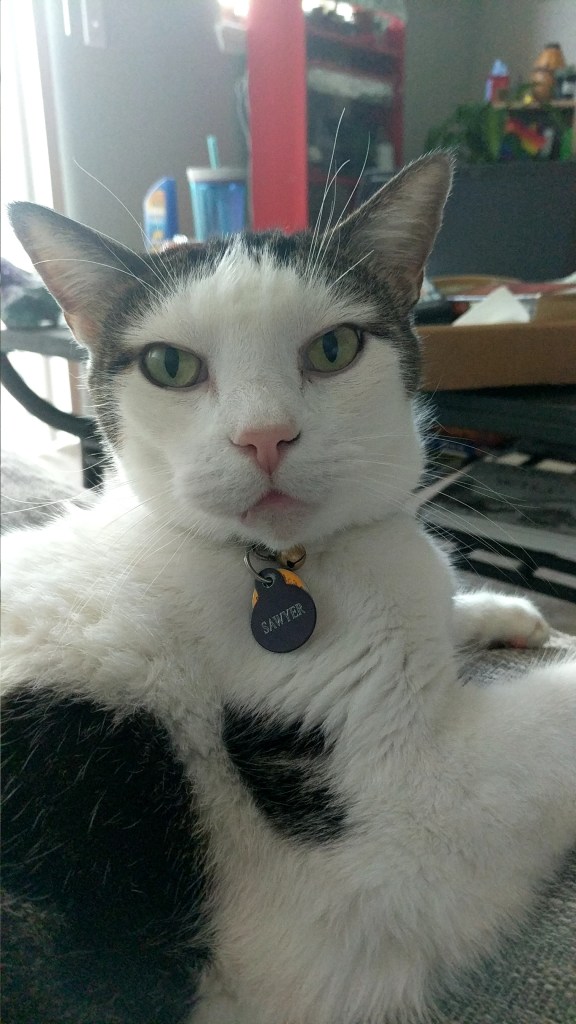
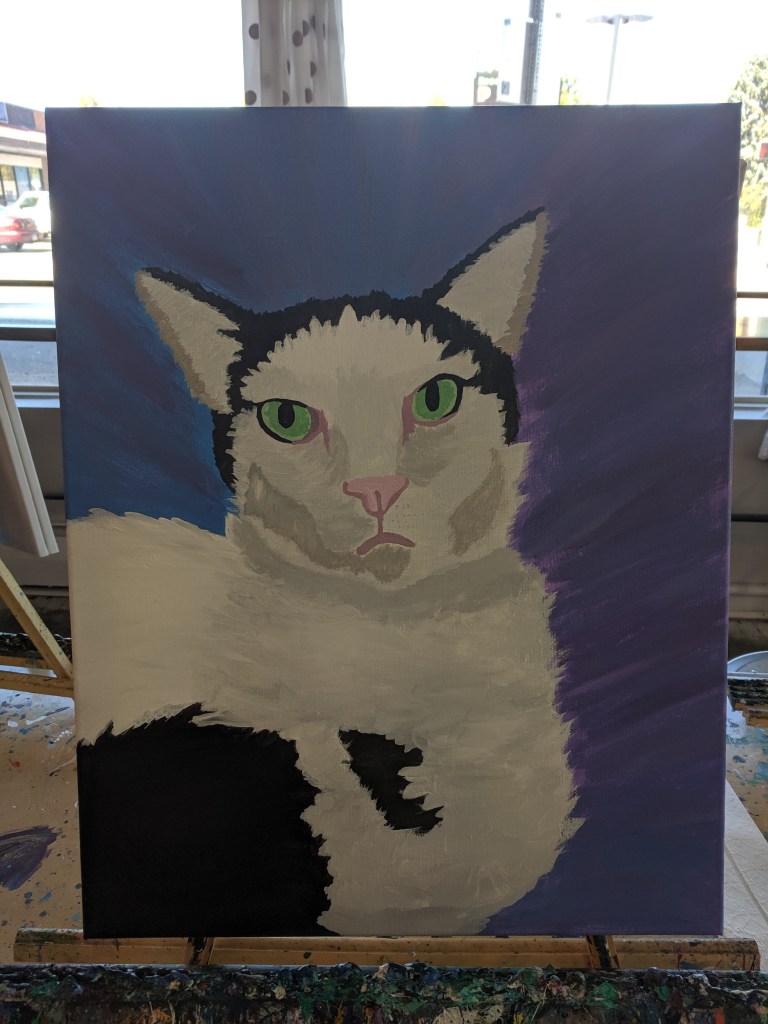
Since it was made off a picture-perfect sketch, the true emotion of his Judgement really comes through, which is a true joy. He looks at me with this face all the time and I’m really glad I captured it in painting form.
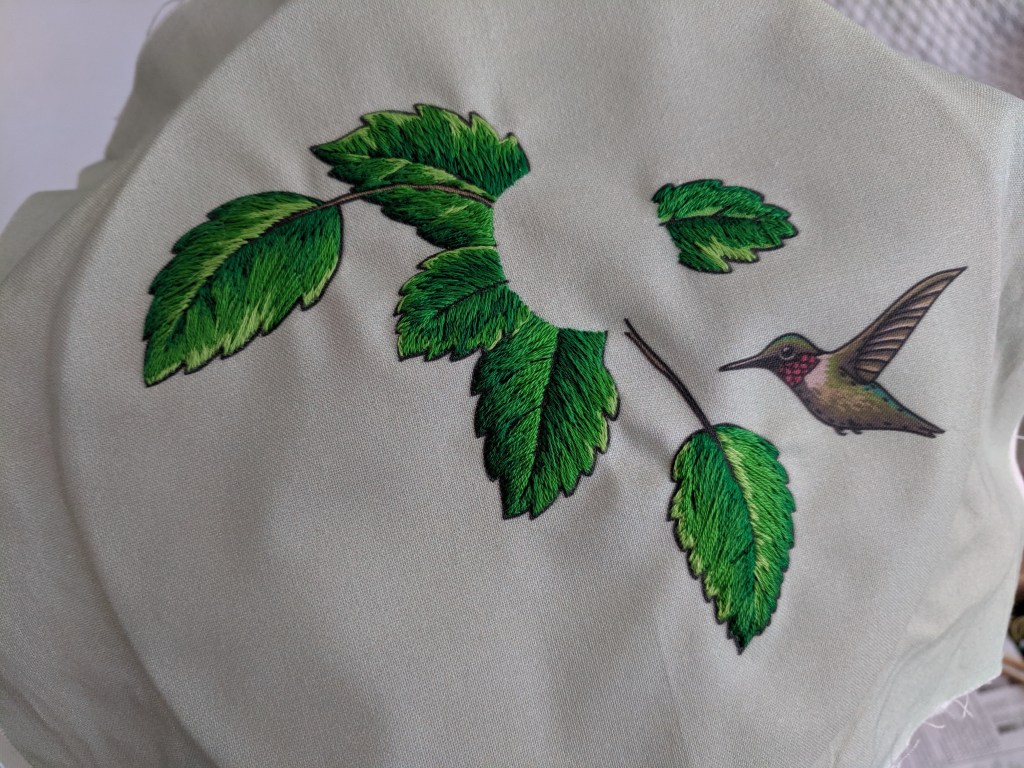
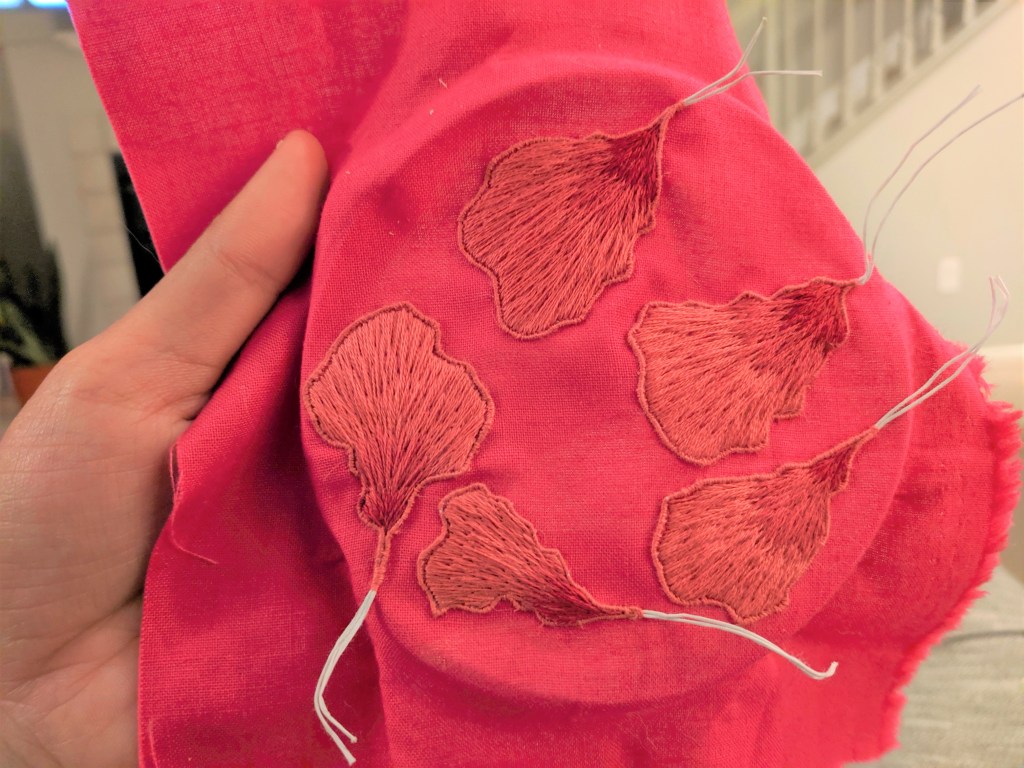
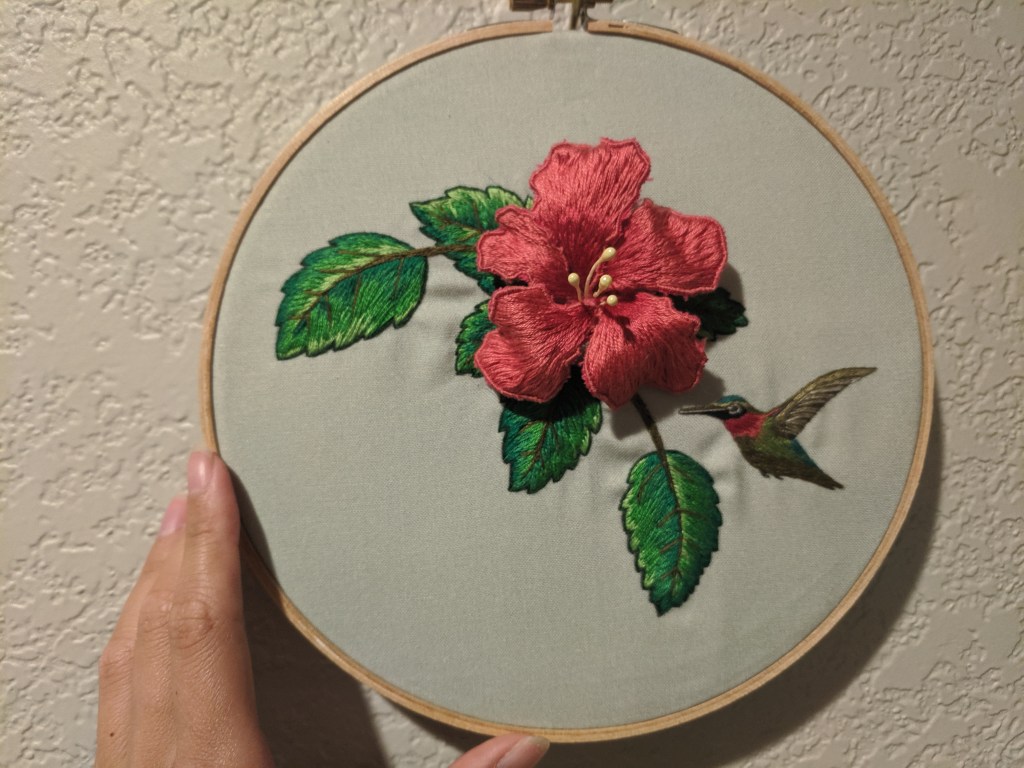
As you know, I get most of my embroidery patterns from Namaste Embroidery. She also has a YouTube channel where she posts long-form videos of her working on the projects. I was inspired by her stumpwork tutorial and had to order the modified Anna embroidery kit. After doing the “Flowers in Her Hair” 1-ply satin stitch, I wasn’t super interested in doing the face, so I ordered the version with just the flower, leaves, and hummingbird. I was transitioning between living spaces and my sewing room wasn’t set up, so coming back to embroidery was a fun “sit in front of the TV and relax” project.
1
2
3
4
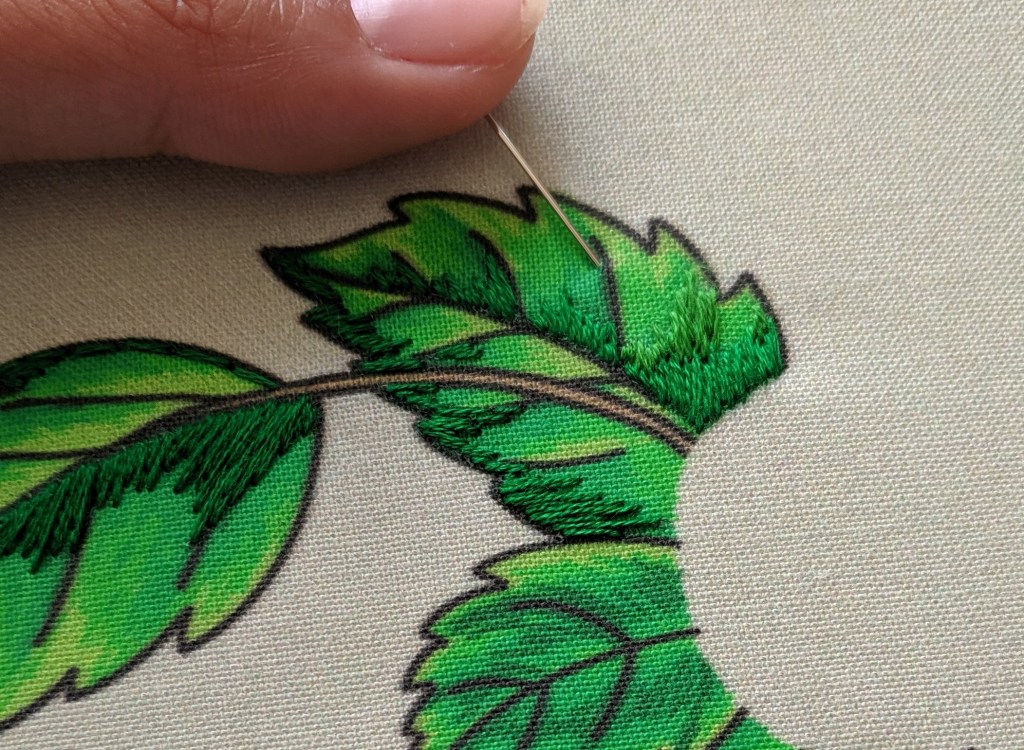
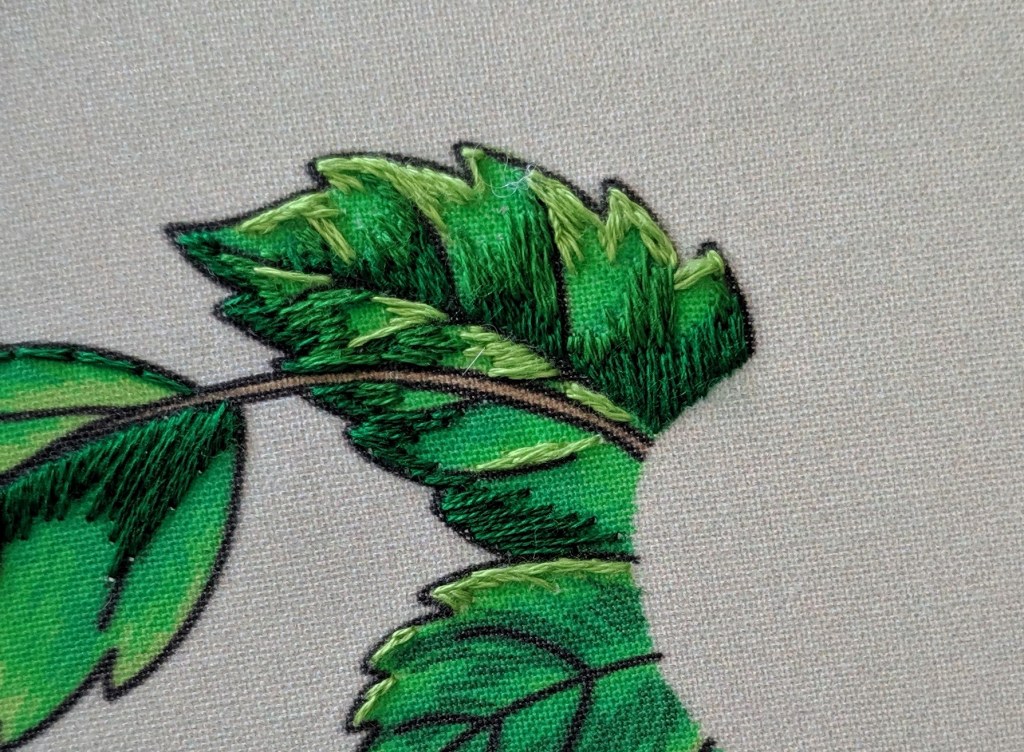
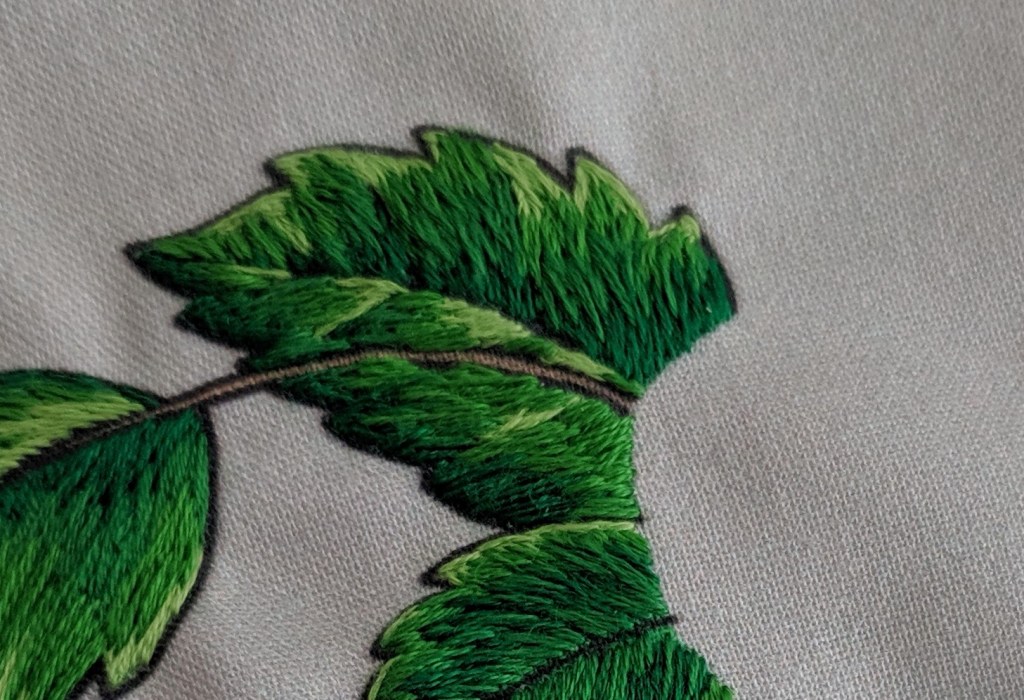
This was my first big project with long and short stitch. I’ve tried it before, but it’s looked weird and awkward, and I wanted a larger project to give me the chance to learn it many times over. Long and short stitch is a technique used to blend colors and do “thread painting”. You use different lengths of stitches with different shades of the same color to create a gradient and blended effect. It requires a bit of preplanning but it’s well worth it. My leaves don’t match, but that’s the nice thing about stitching natural things – they don’t match anyway.
Stumpwork is a type of 3D embroidery where you use wire around the outline of the shape to give it another dimension after stitching. The wire is embedded in the work as it is stitched on a flat piece of fabric, and then the shape is cut out of the fabric. Then you can bend the wire to make it 3D!
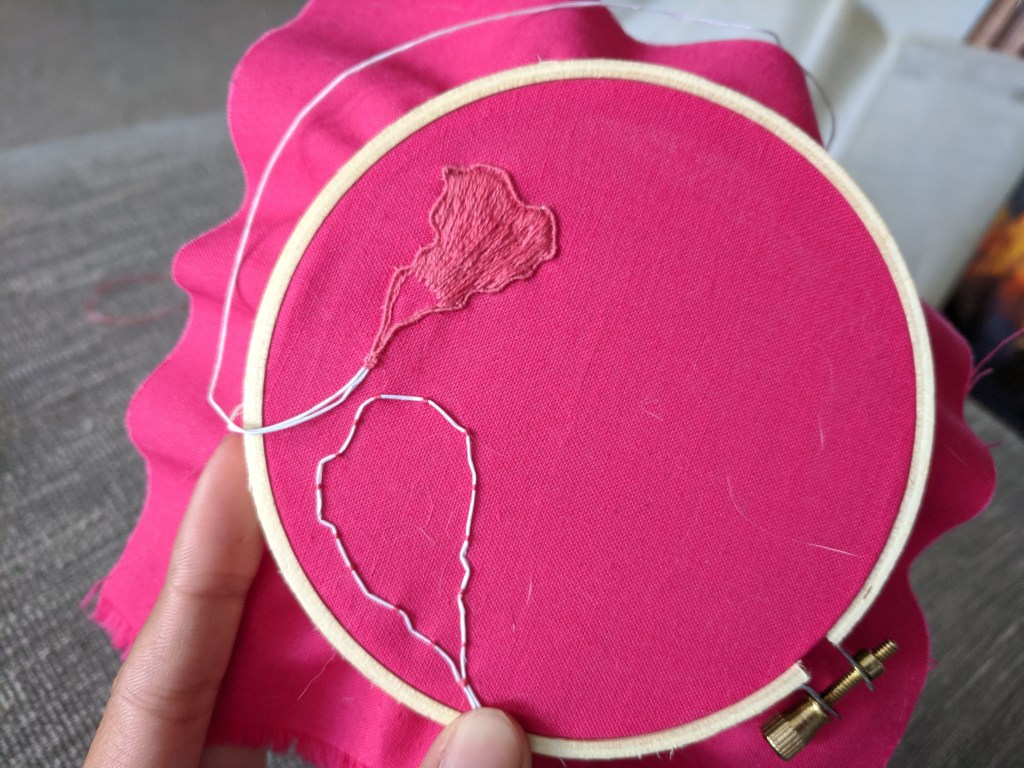
Exposed wire getting tacked down
All petals done
Cut out petals
After stitching the leaves, I started in on the flower petals. I enlarged them a bit because I wanted to cover up some leafy mistakes, and also modified the directions because one of the stitches wasn’t working out for me. I ended up using 2-ply floss to wind around the wire, and then filled with long and short stitch. The hummingbird was more 1-ply long and short stitch work, and he came out quite cute. My petals are a bit large, but so very fun. I have this hung on a wall where you can see it from the front and the side.
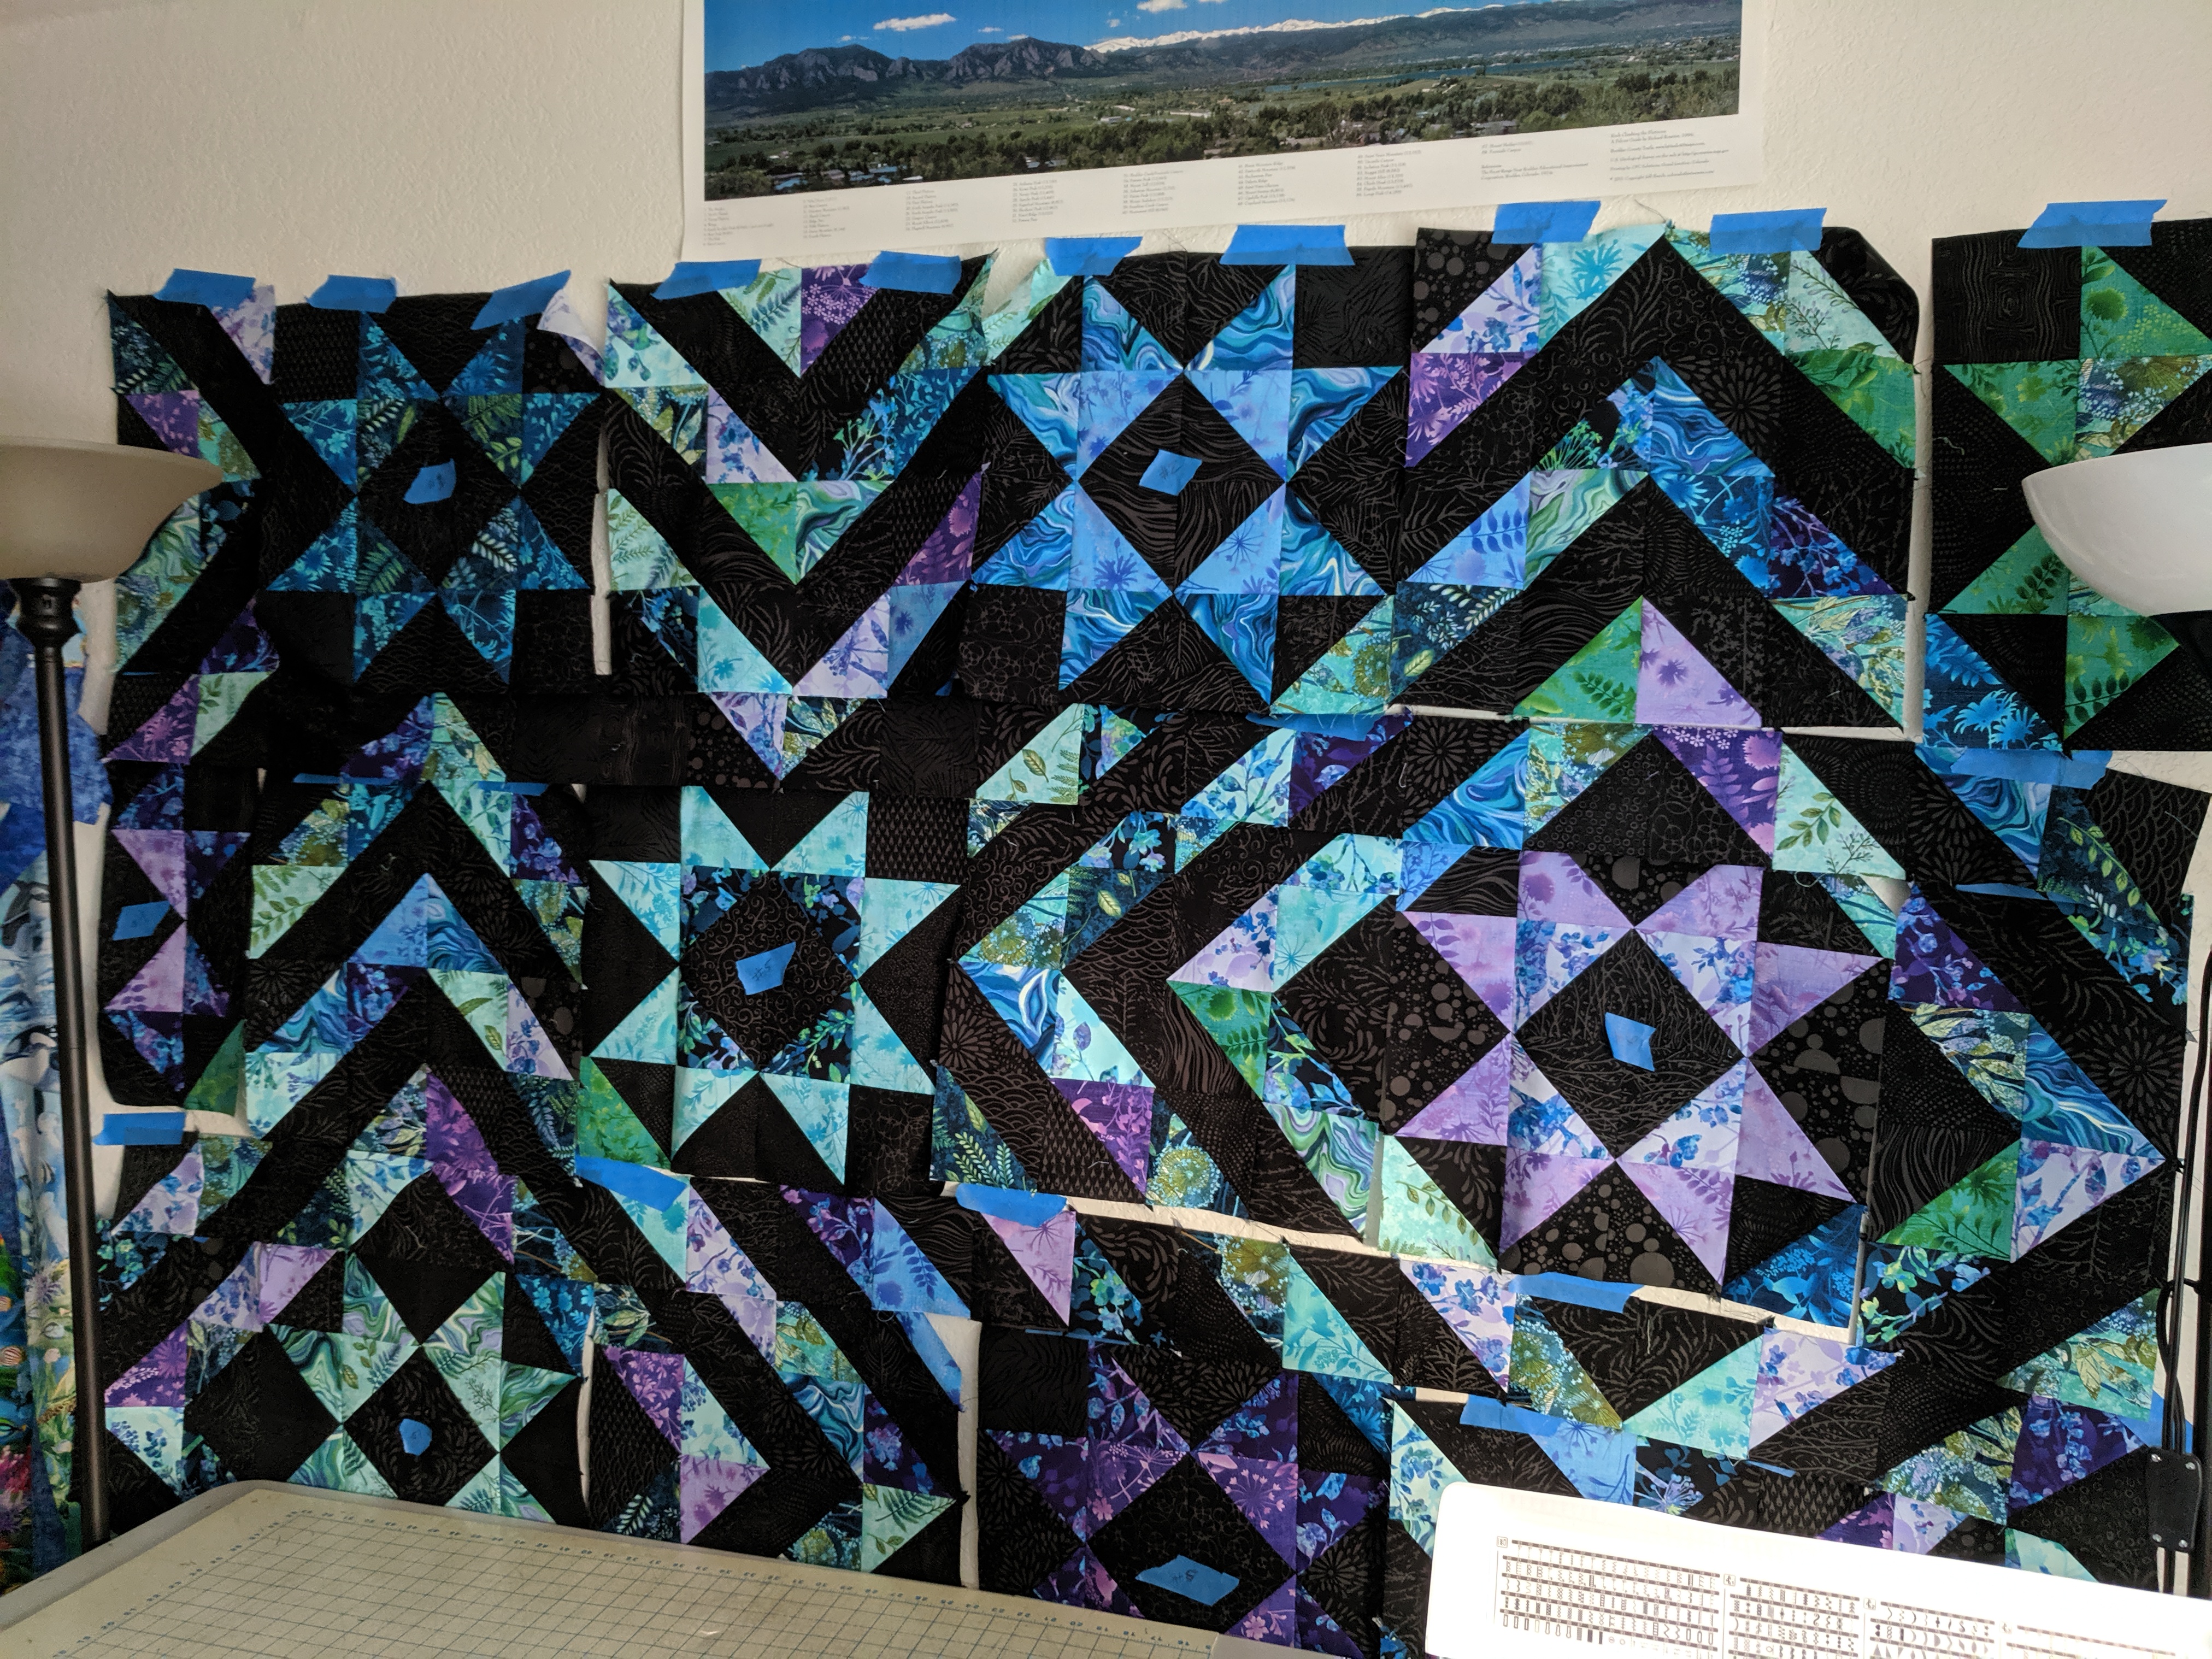
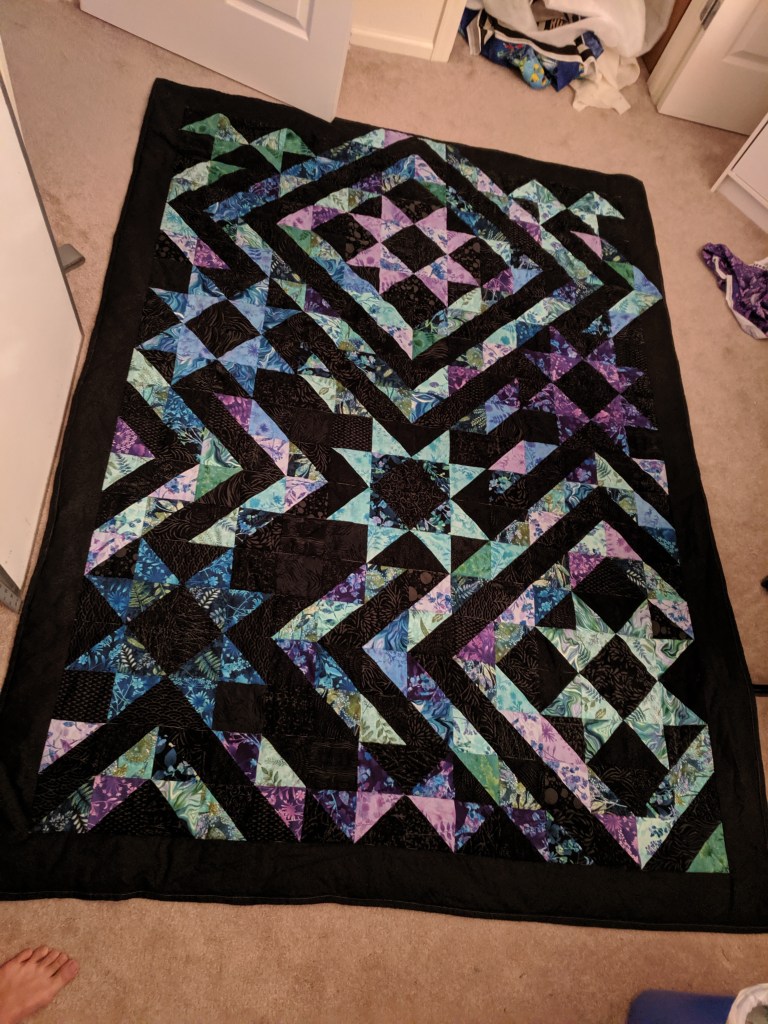
My third big quilt! With the puffy batting I mentioned in the rainbow bargello post. This quilt is based on the MSQC “Night Sky” pattern, but I changed the dimensions a bit to make it rectangular and added more borders.
Taped up and planned on the wall
I bought two layer cakes (10″x10″ squares), one in Black Beauty Batik (hand printed high thread count cotton) and one in this whimsical Feather and Flora line from Studio E, and the backing is the Wildflower Toss Eggplant. I had bought the batiks for a different project that I didn’t end up doing, but I think they look great here. I love the black background to go with the stars 🙂 plus I was able to use the magic 8 method that grants you 8 HSTs from two 10″ squares and I didn’t have to cut as much fabric.
I made all the HSTs and squared them to 4.5″. I decided I wanted the insides of the star to be a different pattern than the outside points, like in the original pattern, and then the borders would be scrappy and random. I made a few stars and then figured out how many I would need to make the quilt big enough for my bed. It didn’t quite work, but I went with a general design that would be close enough and then I could add borders to increase the dimensions.
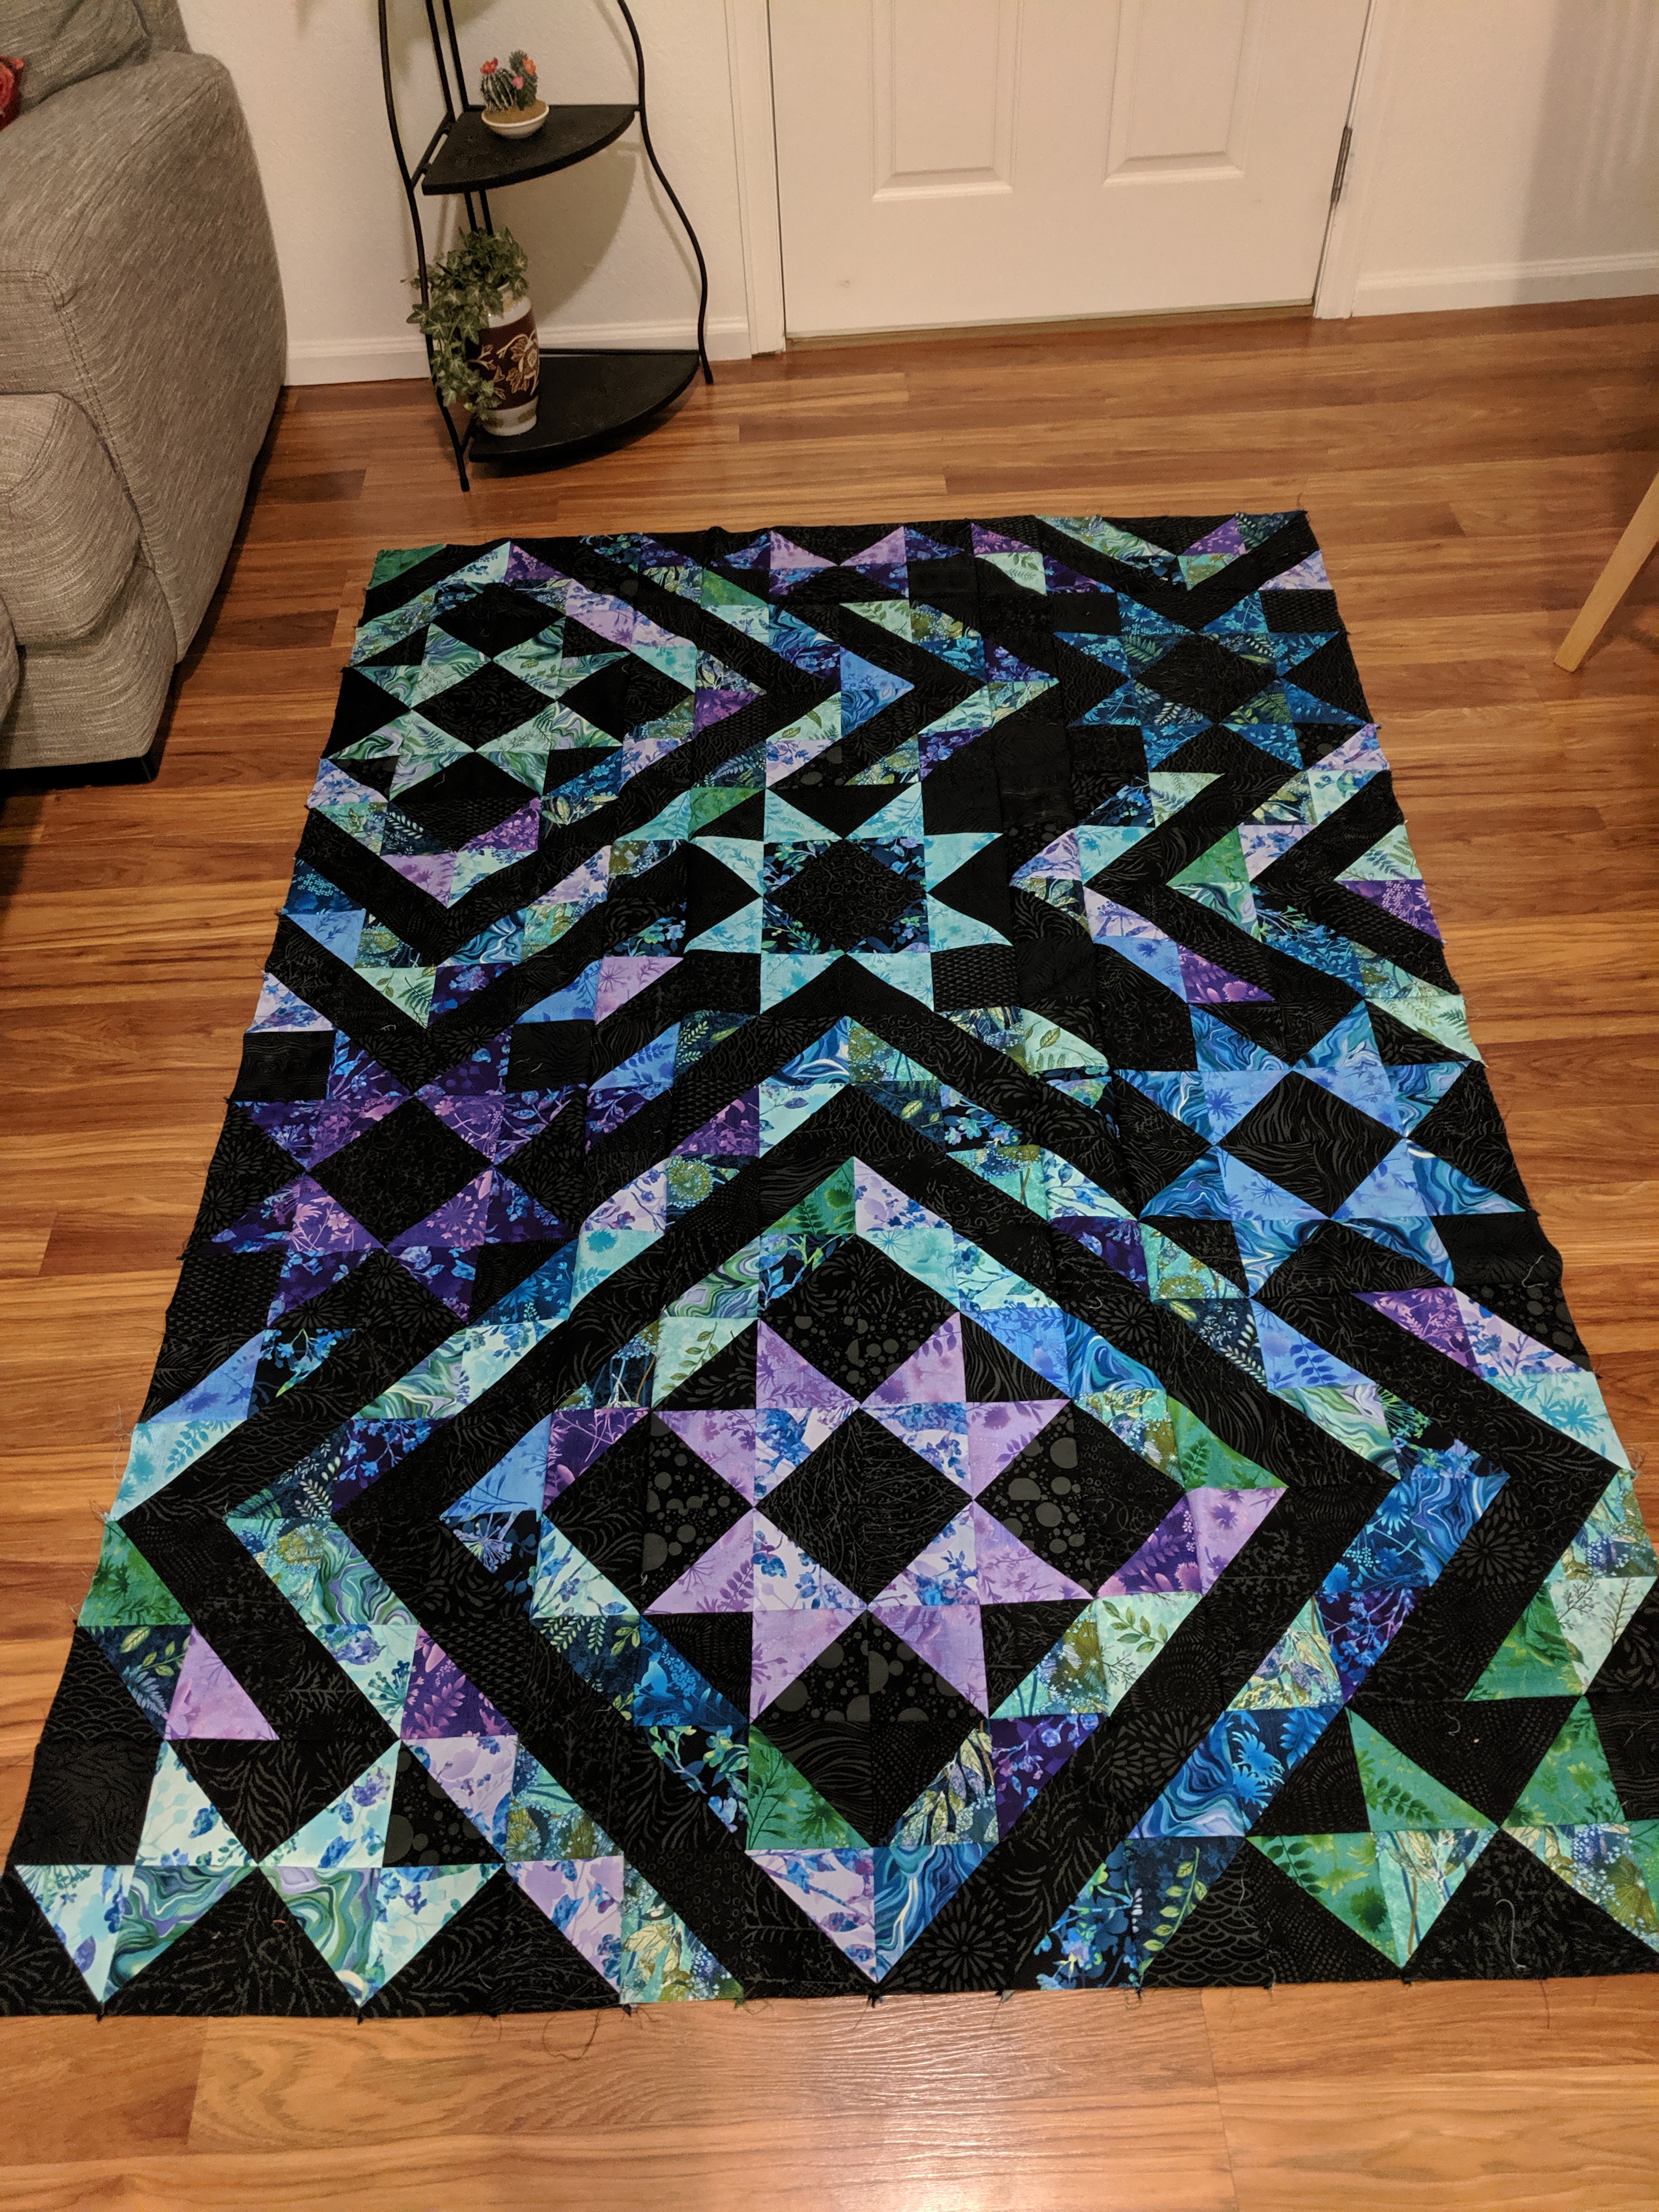
Top without borders – a bit more chaotic than I planned, but I really like it.
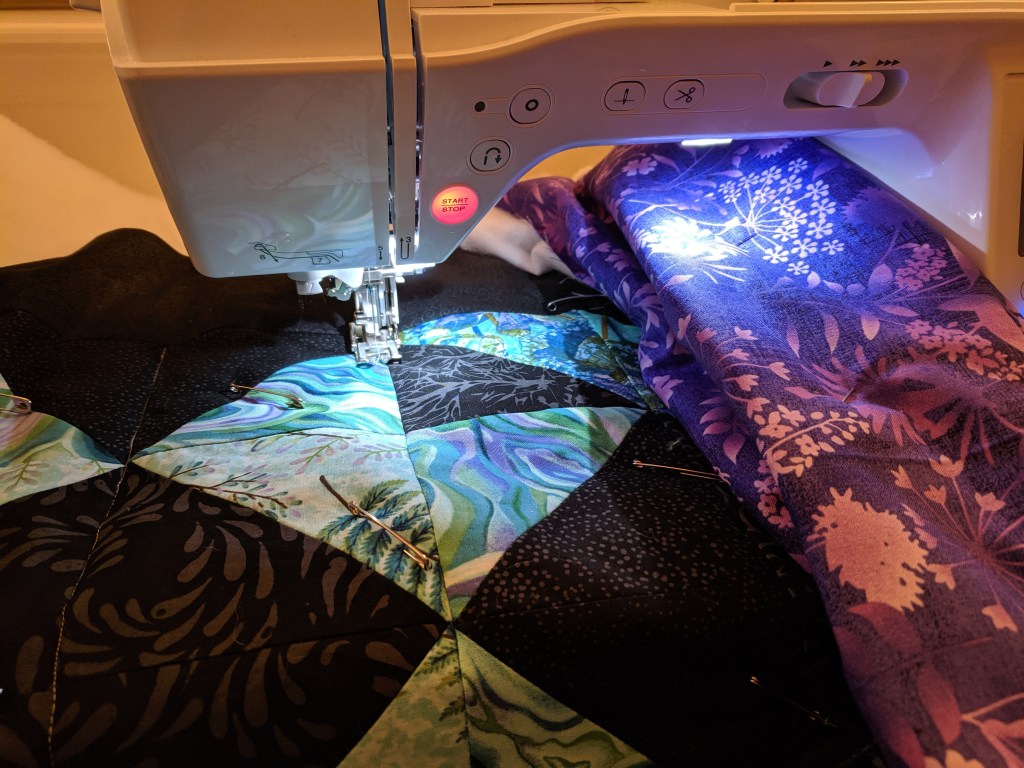
It kind of reminds me of ripples on a smooth pond, if you had dropped the stars in. I really wanted to take advantage of the new puffy batting I got, so I decided to quilt it in horizontal lines with my walking foot, which ended up being stitch in the ditch.
Working on SITD – on the right you see the folded up quilt that I will move to next
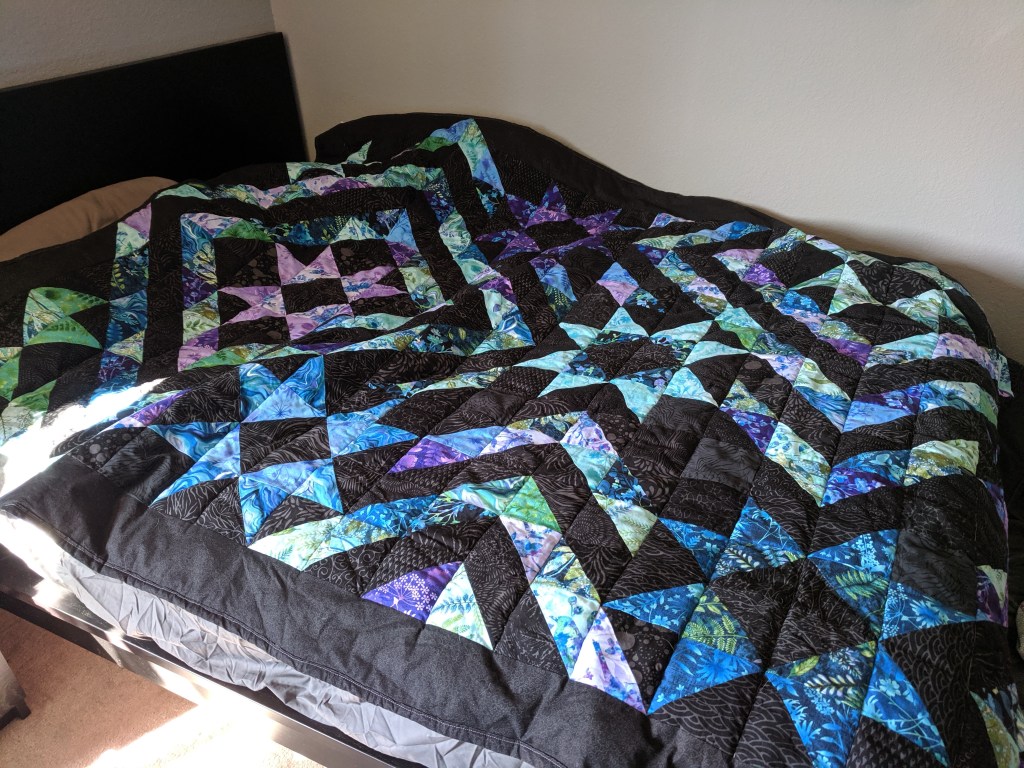
All done! I like it much better with the border
Time check: 5.5 hours to:
Cut fabric for binding (9) 2.5″ strips
Cut fabric for border (6) 4.5″ strips
Sew binding together to make one long strip
Press binding seams open
Iron binding in half hotdog style
Make HSTs for border and sew into border at correct measurements
Sew entire border on
Iron backing fabric
Cut backing fabric and sew middle seam
Iron backing seam and quilt top border seams
Baste quilt sandwich
Stitch in the ditch on all horizontal gridlines using walking foot
Sew binding to back
Sew binding to front
~5min, 16X: laying out quilt sandwich and starting to basteReal time: closing safety pins with Kwik Klip~1min, 4X: stitching in the ditch with walking foot. On the right, see the folded up quilt in the throat.~2min, 8X: putting binding on and turning corner (sealing sandwich together)On the bed 🙂 the rainbow bargello is on the couch now
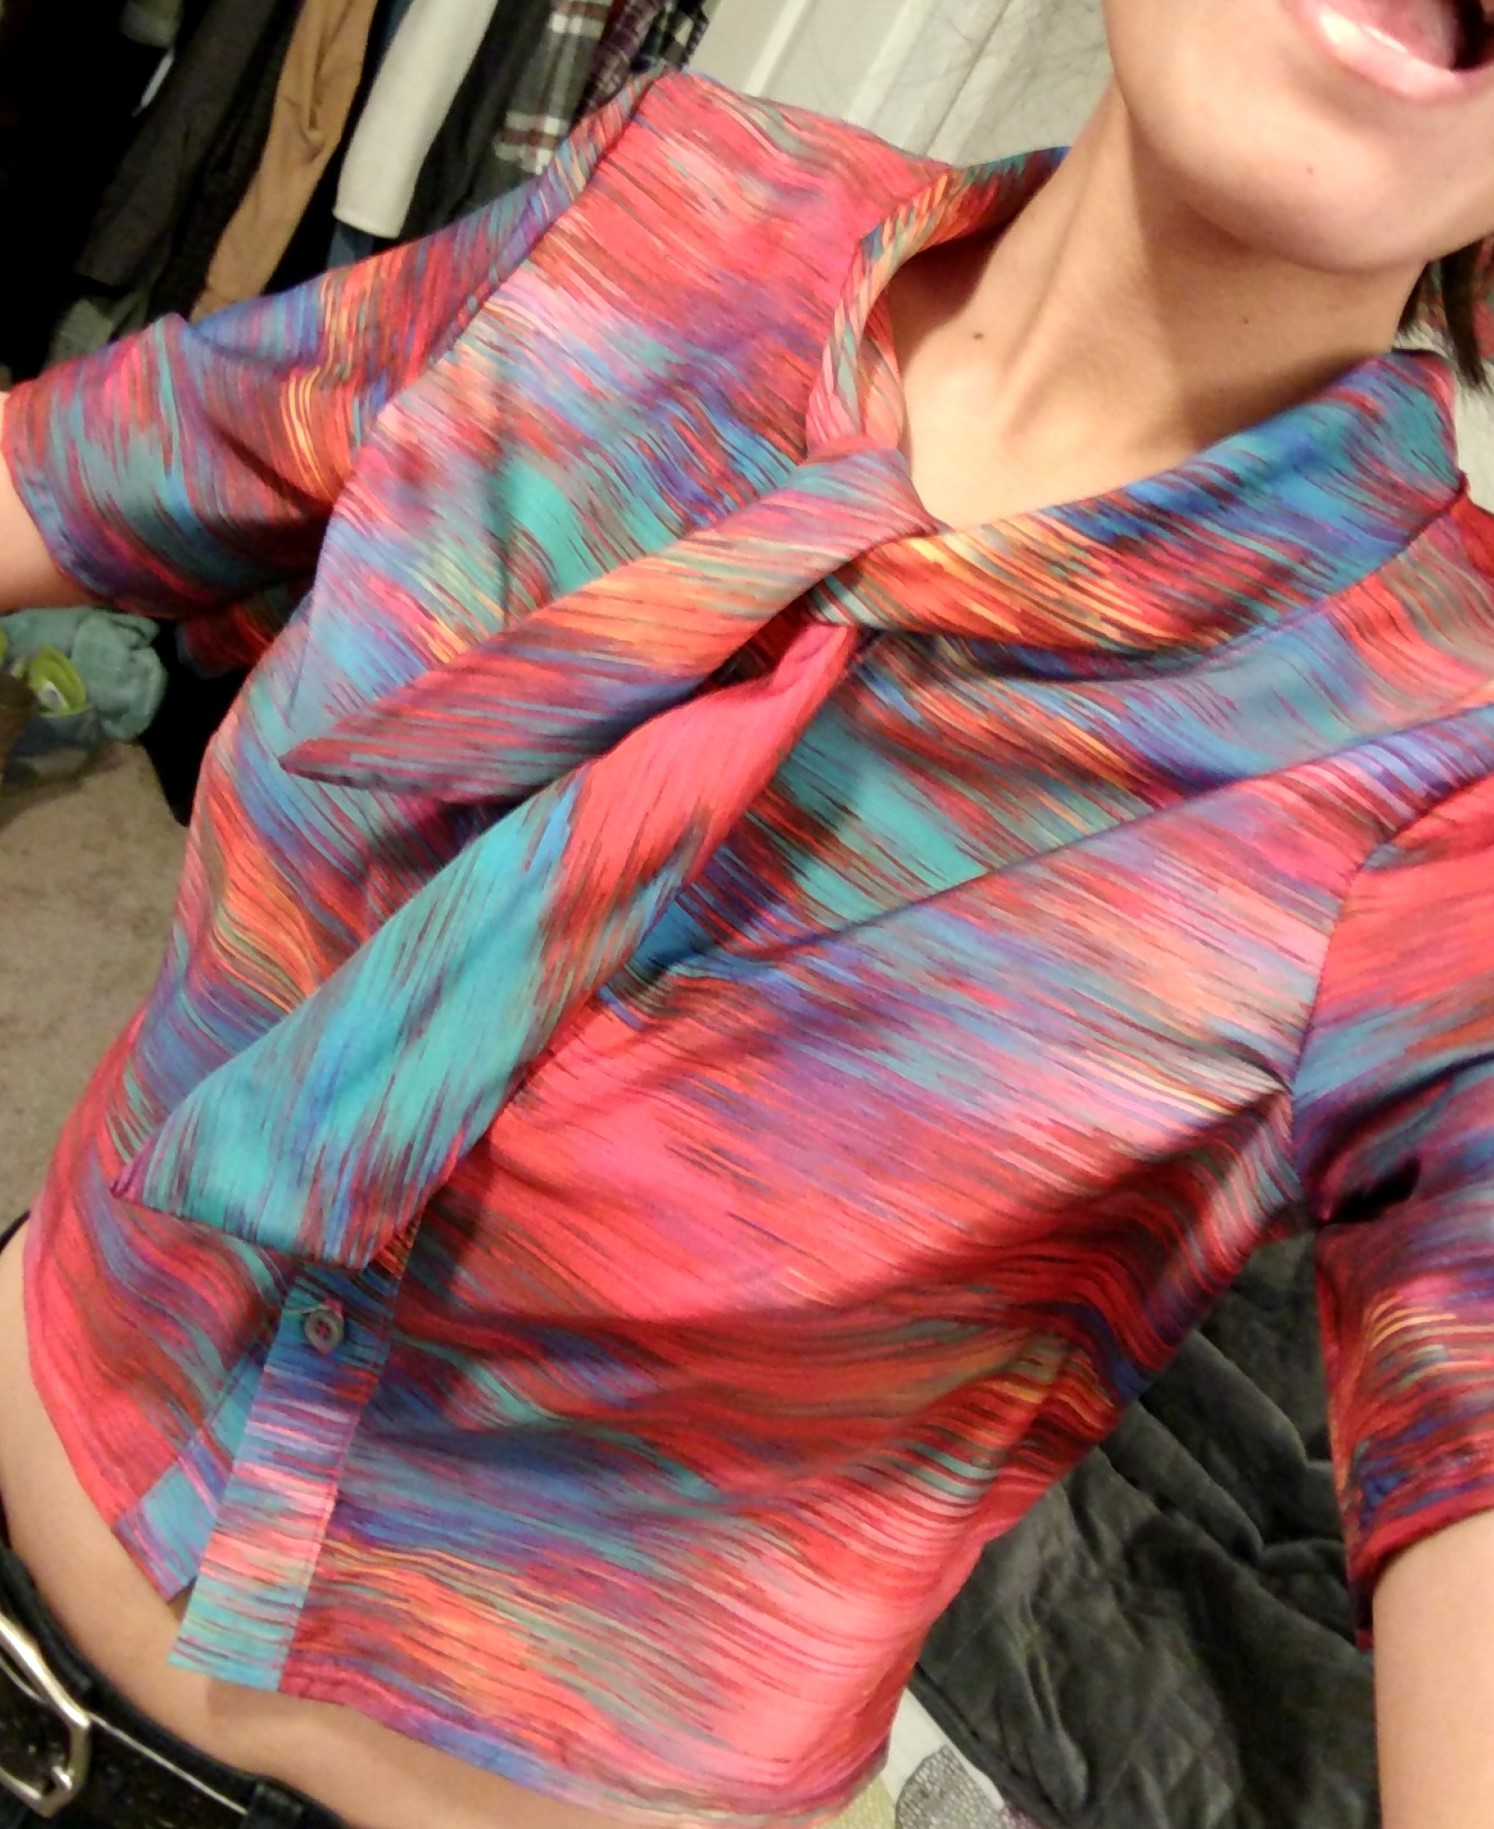
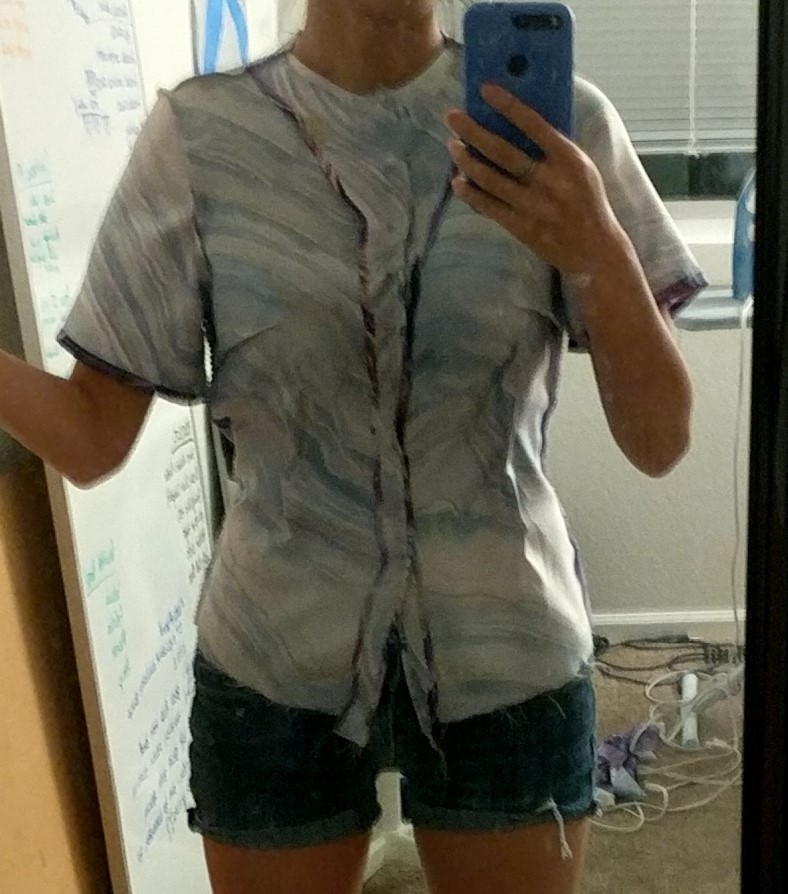
This shirt is based on the bodice of the Lekala S4108 pattern. This was my first shirt, and since I almost exclusively wear button downs, I figured I should just start with a button down. This only used 1 yard of fabric (from Joann), which was really cool. It’s kind of a firm satin? Not as slippery as the purple geode, still a bit flowy.
This, of course, was my first foray into collar making. I cut out the collar according to the pattern, but it ended up being so short that it didn’t wrap all the way around the neck opening. I didn’t have enough fabric to make a new, bigger collar, so I decided to go for a tied collar strip thing (I have another shirt like this so I figured it would work). The improv collar worked great and is the basis for the name since they used to wear those little scarves.
It was also my first time doing sleeves! It’s a bit tricky to sew a sphere-ish thing to a.. 2D/circle thing, but I used a lot of pins. I also skipped some directions which, after consultation with a friend, I should have followed. You’re supposed to “stay stitch” around the sleeve curve so it doesn’t get all out of whack and stretched when you’re sewing, which did happen a bit. But the extra bit of shoulder puff isn’t unwelcome and is pretty subtle.
It was not my first foray into buttonholes, but it was the first time I had to measure and space out my buttonholes. I put the shirt on and marked out where it felt natural for buttons to go, and saw a separation of about 2″ is a good distance. The bottom was just a bit over 2″ after the last button but I decided to not install a button so close to the hem.
I wore this on a date and it absolutely passed my wearability test, but that doesn’t mean I didn’t introduce the piece to my roommate as “am I a flight attendant now?”
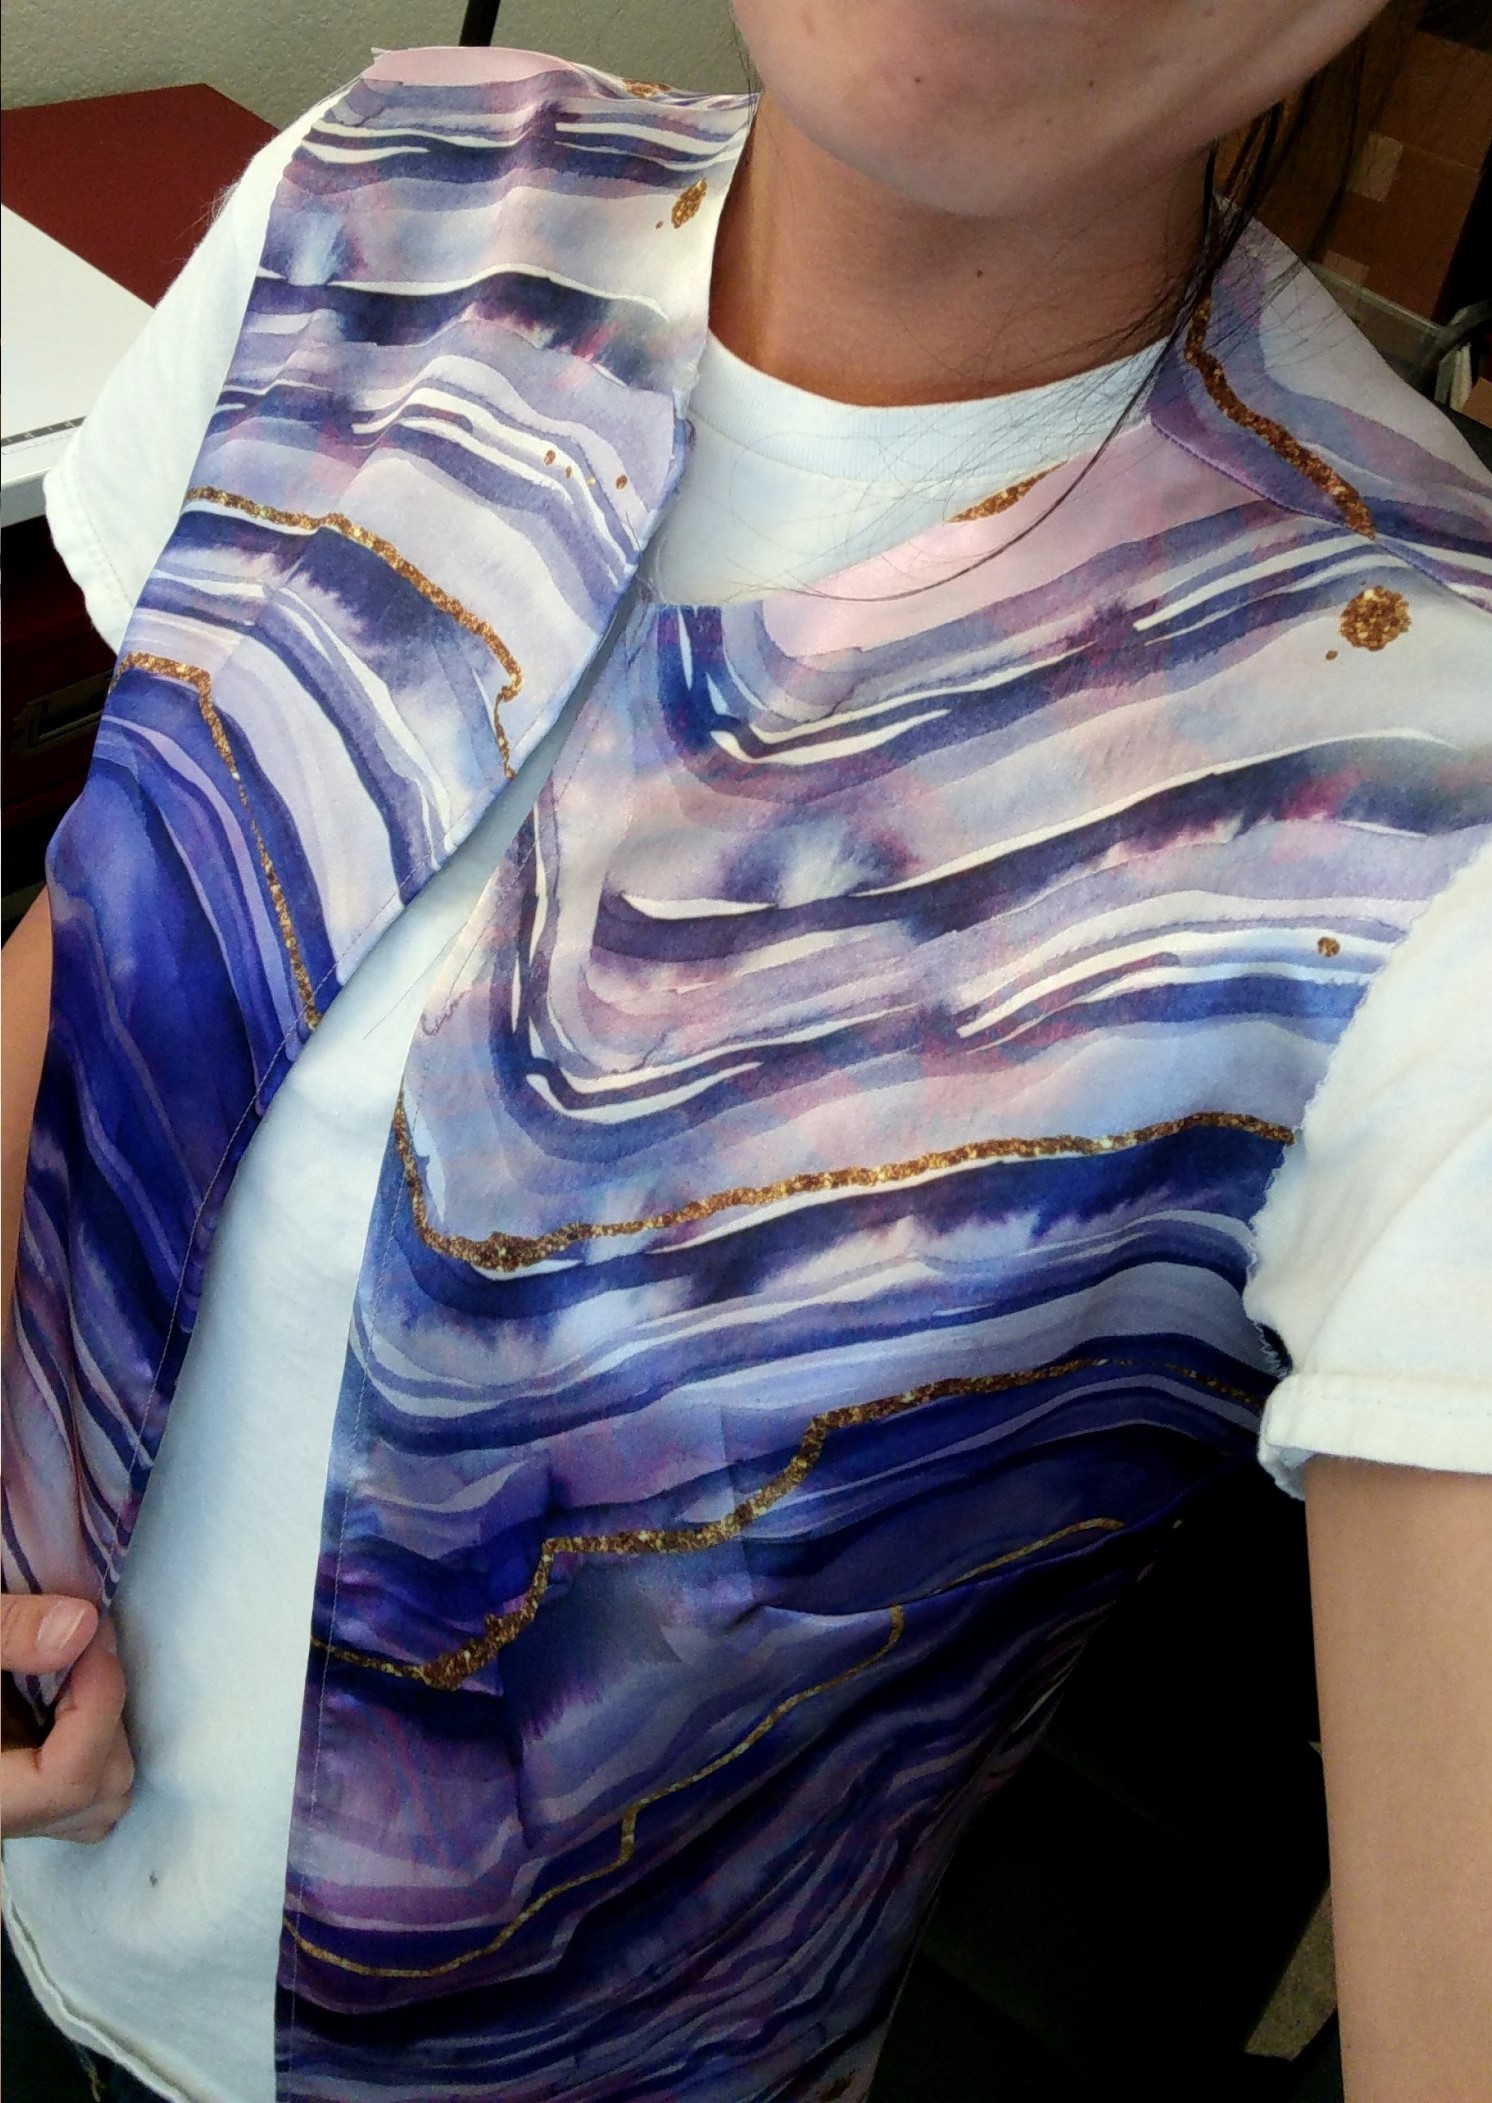
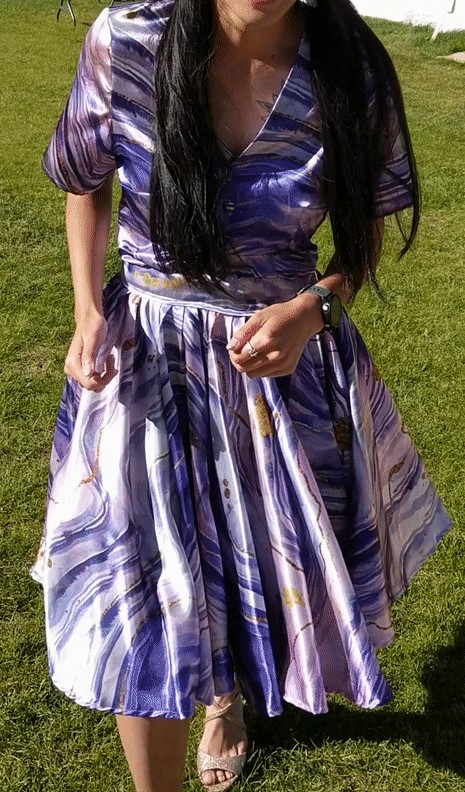
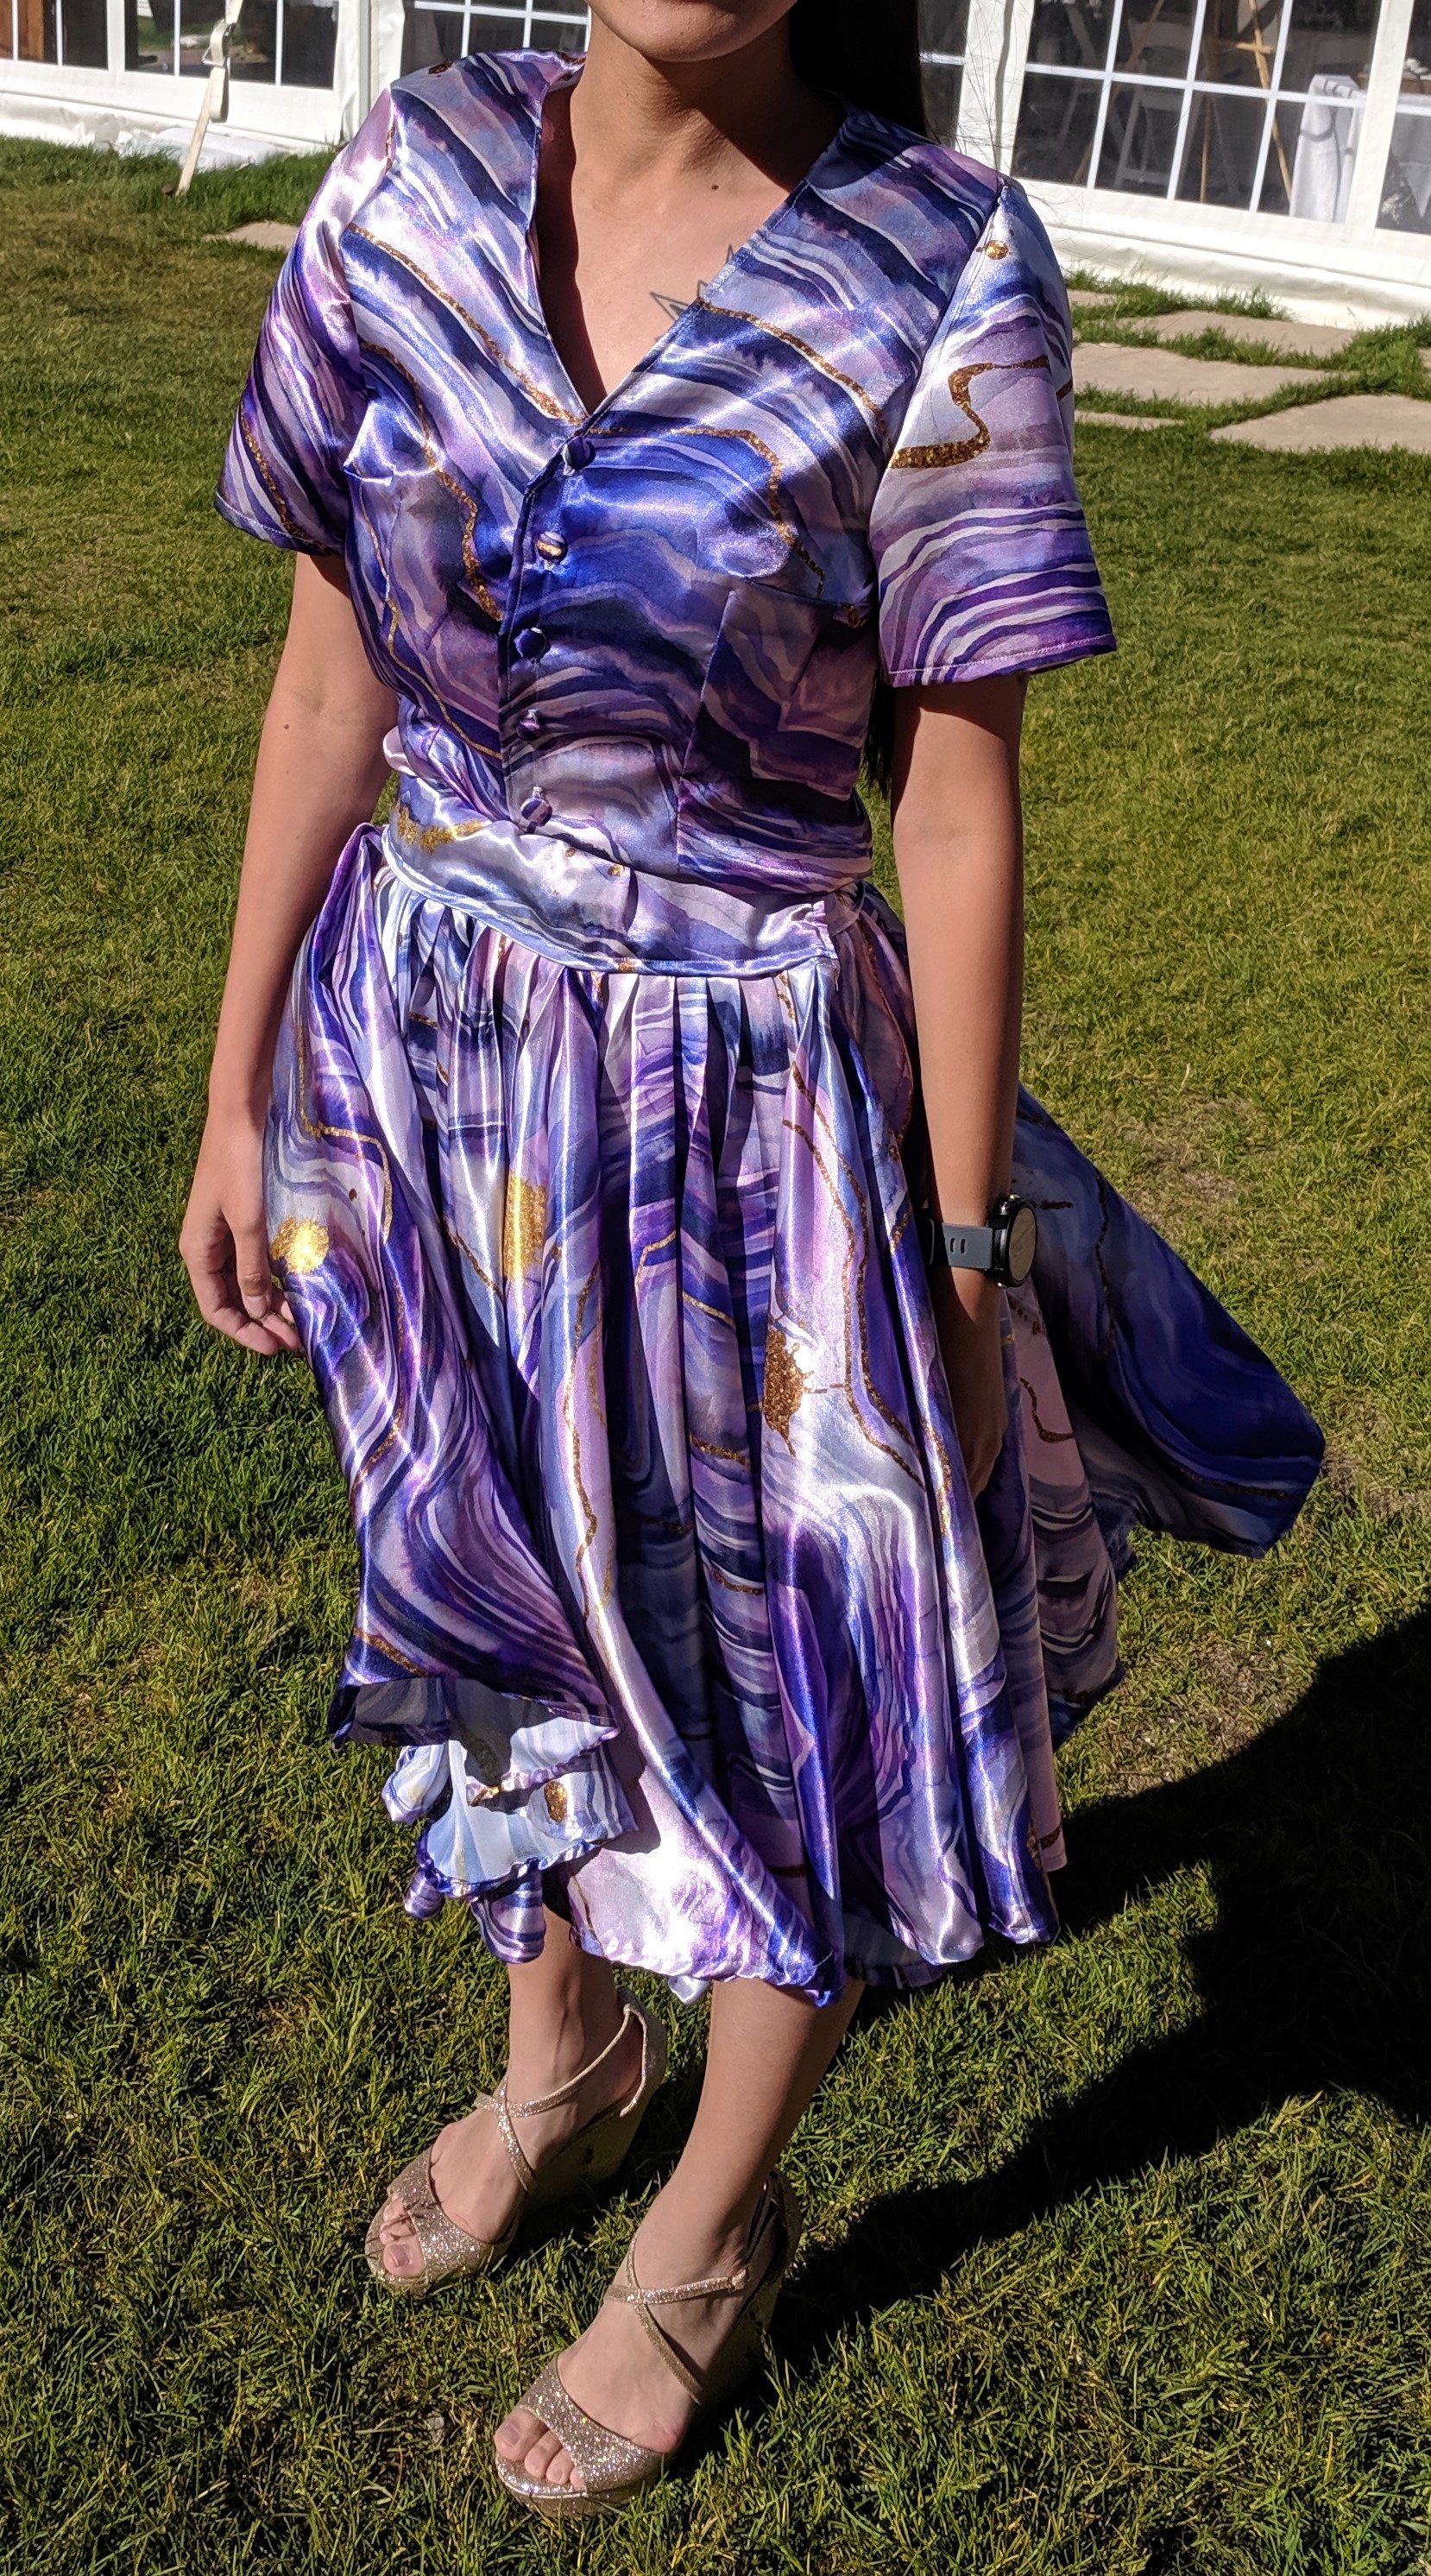
I made this top + skirt for a friend’s wedding. I got the fabric from Spoonflower, a site that takes designs and can print them on many different fabrics. I chose a polyester satin that turned out to be a bit slippery. I used tissue paper to stabilize the fabric and ensure it didn’t fall down the hole in the machine where the needle goes through or stretch out. It worked super well, but was kind of annoying since I had to sandwich each seam in tissue paper, sew, then rip the tissue paper off.
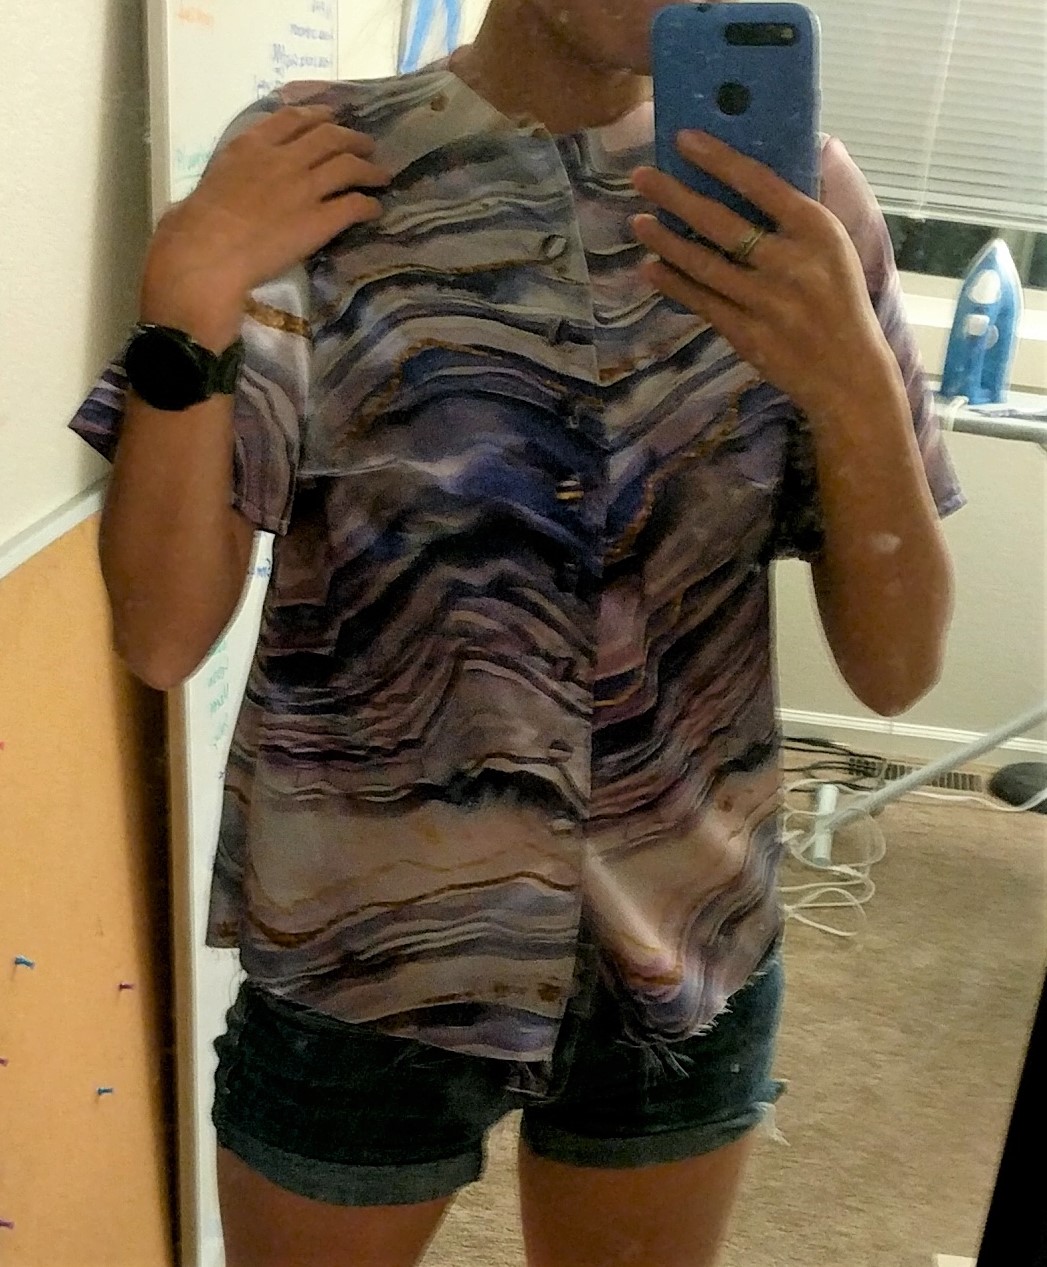
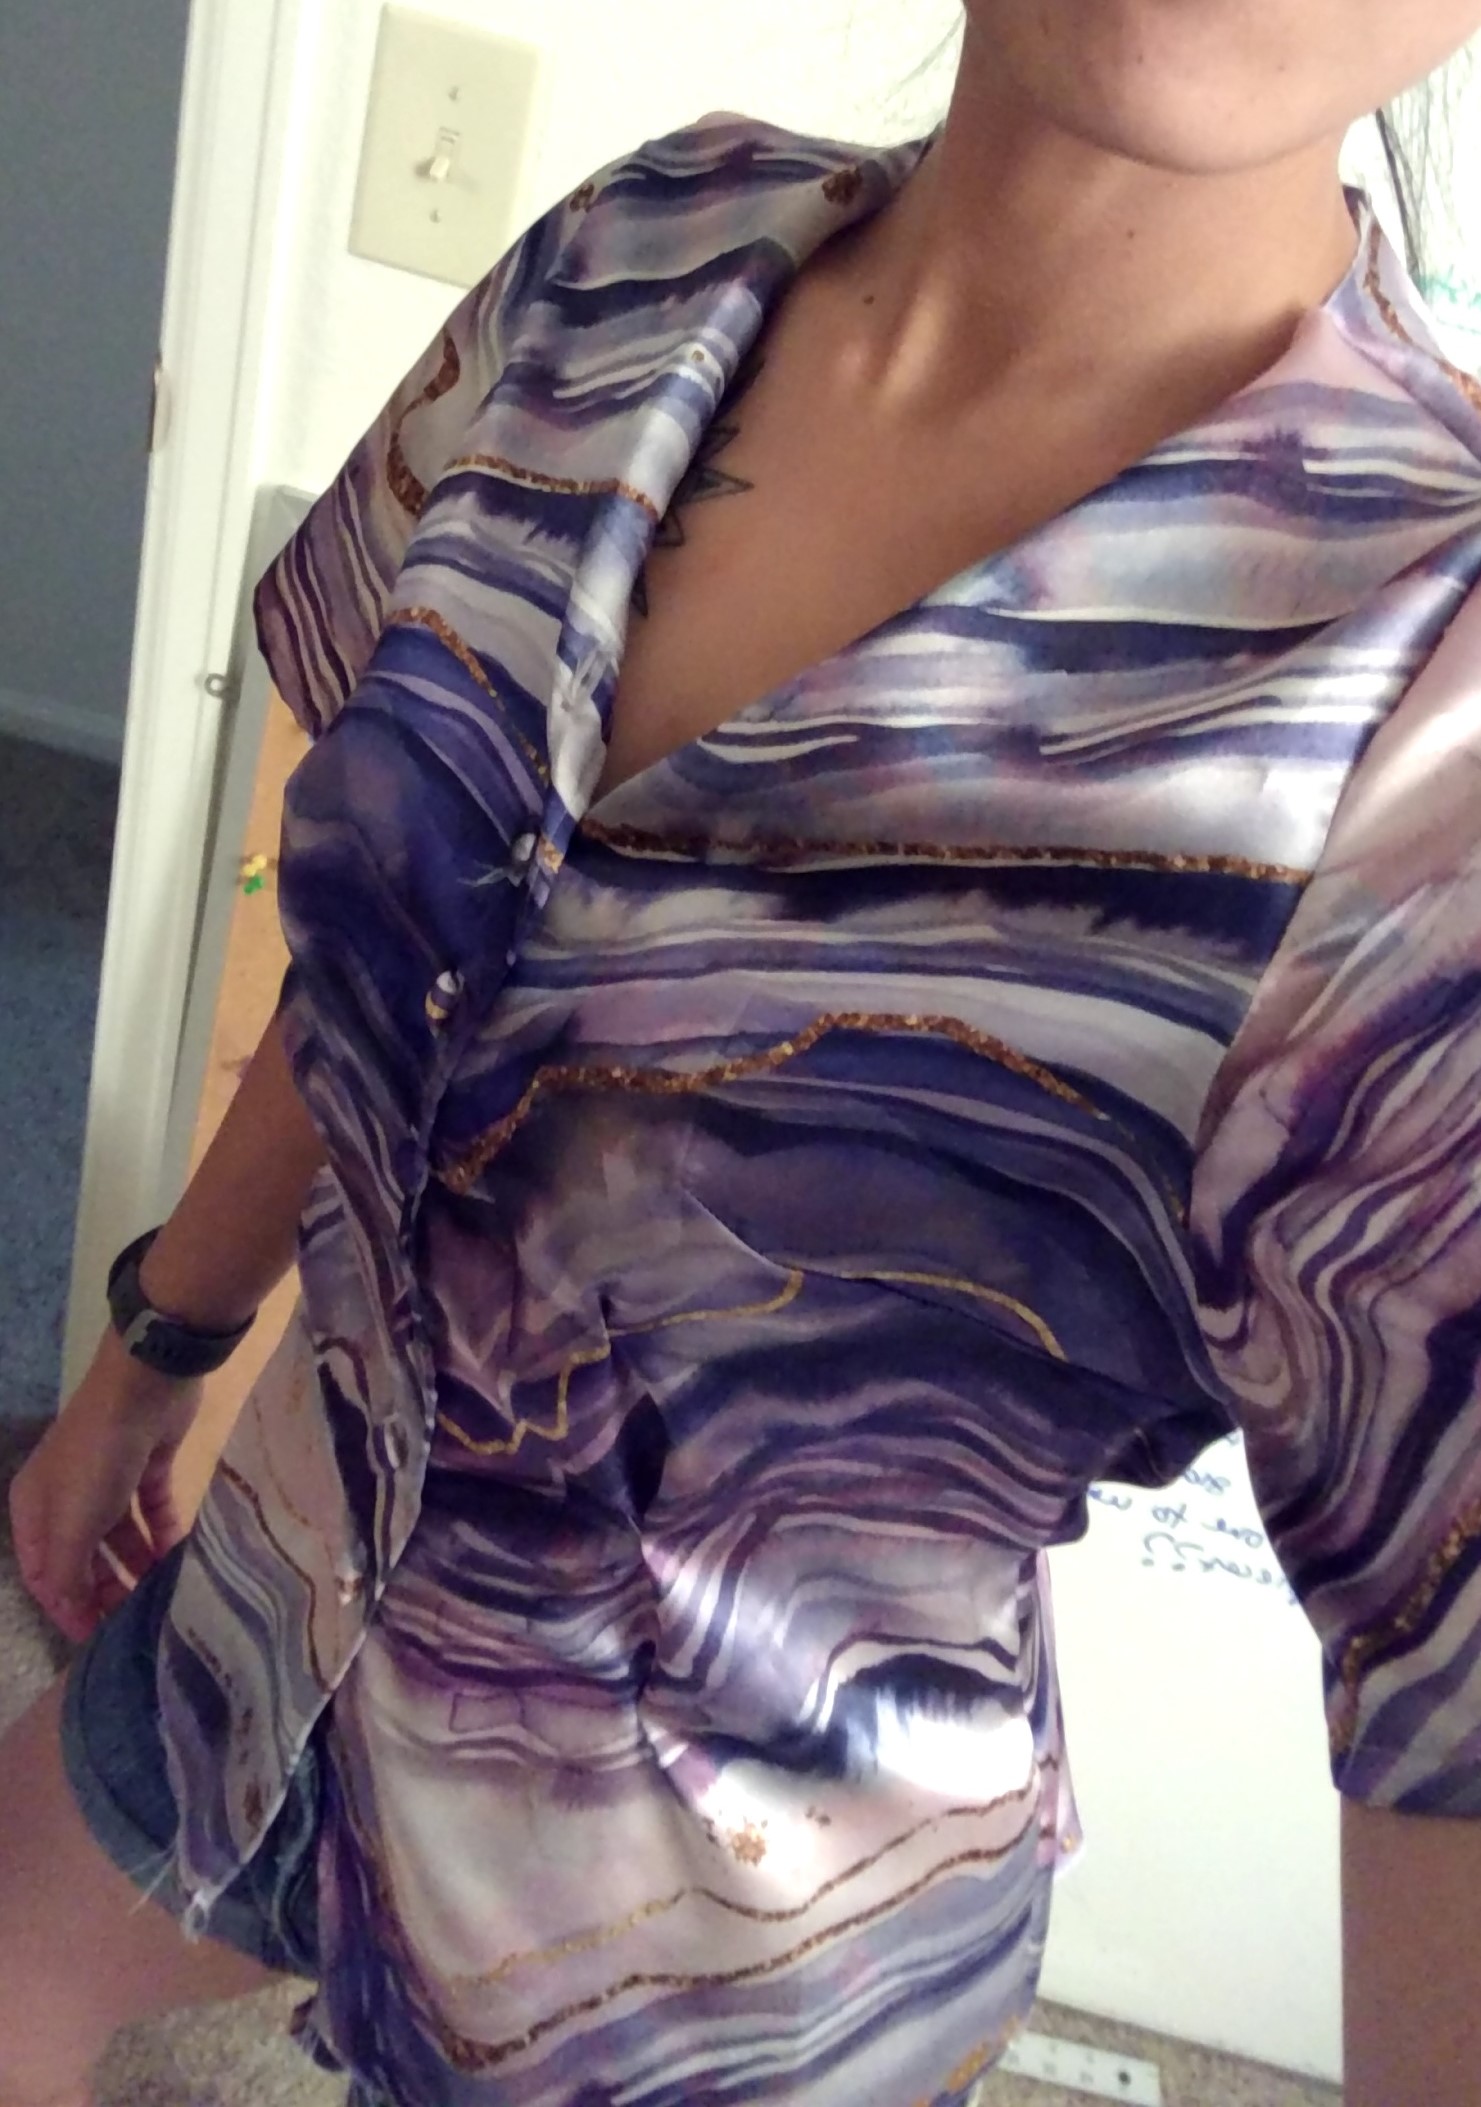
I modified the Lekala #5446 Classical Blouse pattern again, and sewed 3 circle skirts together to get the full volume of the skirt. With the blouse, I constructed the entire thing save for the collar, since I wasn’t sure I wanted to go down that road and have it turn out weird (again). I used buttons that I was able to cover with the same fabric as the shirt (they have a separate back and front, you wrap the fabric around the front, stuff it into the “bowl” of the button, and click the back into place, securing the fabric).
Shirt in progress
Trying to decide on the collar
Decided to fold the top in to make a V-neck
Custom / improv fitting with darts
I used improv fitting while the shirt was on my body to create darts that (a) flattered me and (b) ensured there wouldn’t be wrinkles when I tucked the shirt into the skirt. I pin inside out so that I can sew the darts directly, which assumes my body is symmetrical, and no one’s body is, but it’s close enough.
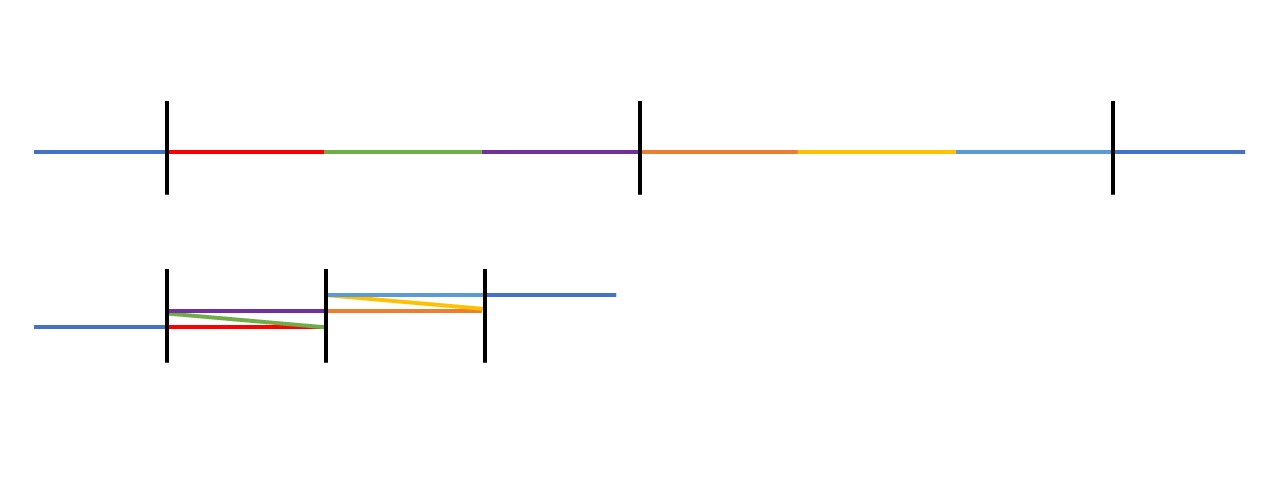
The skirt used about 5 yards of fabric. A basic circle skirt is just that – a circle of fabric with a circle cut out for the waist (more of a doughnut, really). I cut out three doughnuts by folding the fabric in half, and in half again, so I only had to cut out a quarter circle. Then I had three doughnuts, and I cut each one on one side so I could have 3 vertical seams on the finished big doughnut. Now, I had planned to have the inner radius be my waist radius, but I forgot to divide by 3 before I cut out the doughnuts… But it just so happens that knife pleats divide the length by 3, so I added pleats all along the waist to bring it back to the right measurement. This also gave it a bit of poof and volume, which was great!
A hopefully effective way to explain pleats – the red-green-purple section turns out to be the length of just the red section aka 1/3 the length
Originally, this project was supposed to be a dress, but I realized that I wanted to wear the skirt separate from the shirt, so I decided to not attach the shirt to the waistband. I installed a zipper with the waistband, and included some elastic after learning from the Skirt of Projects Past. I wore a tulle petticoat underneath to fluff it out even more than the 3 circles and pleats were fluffing it.
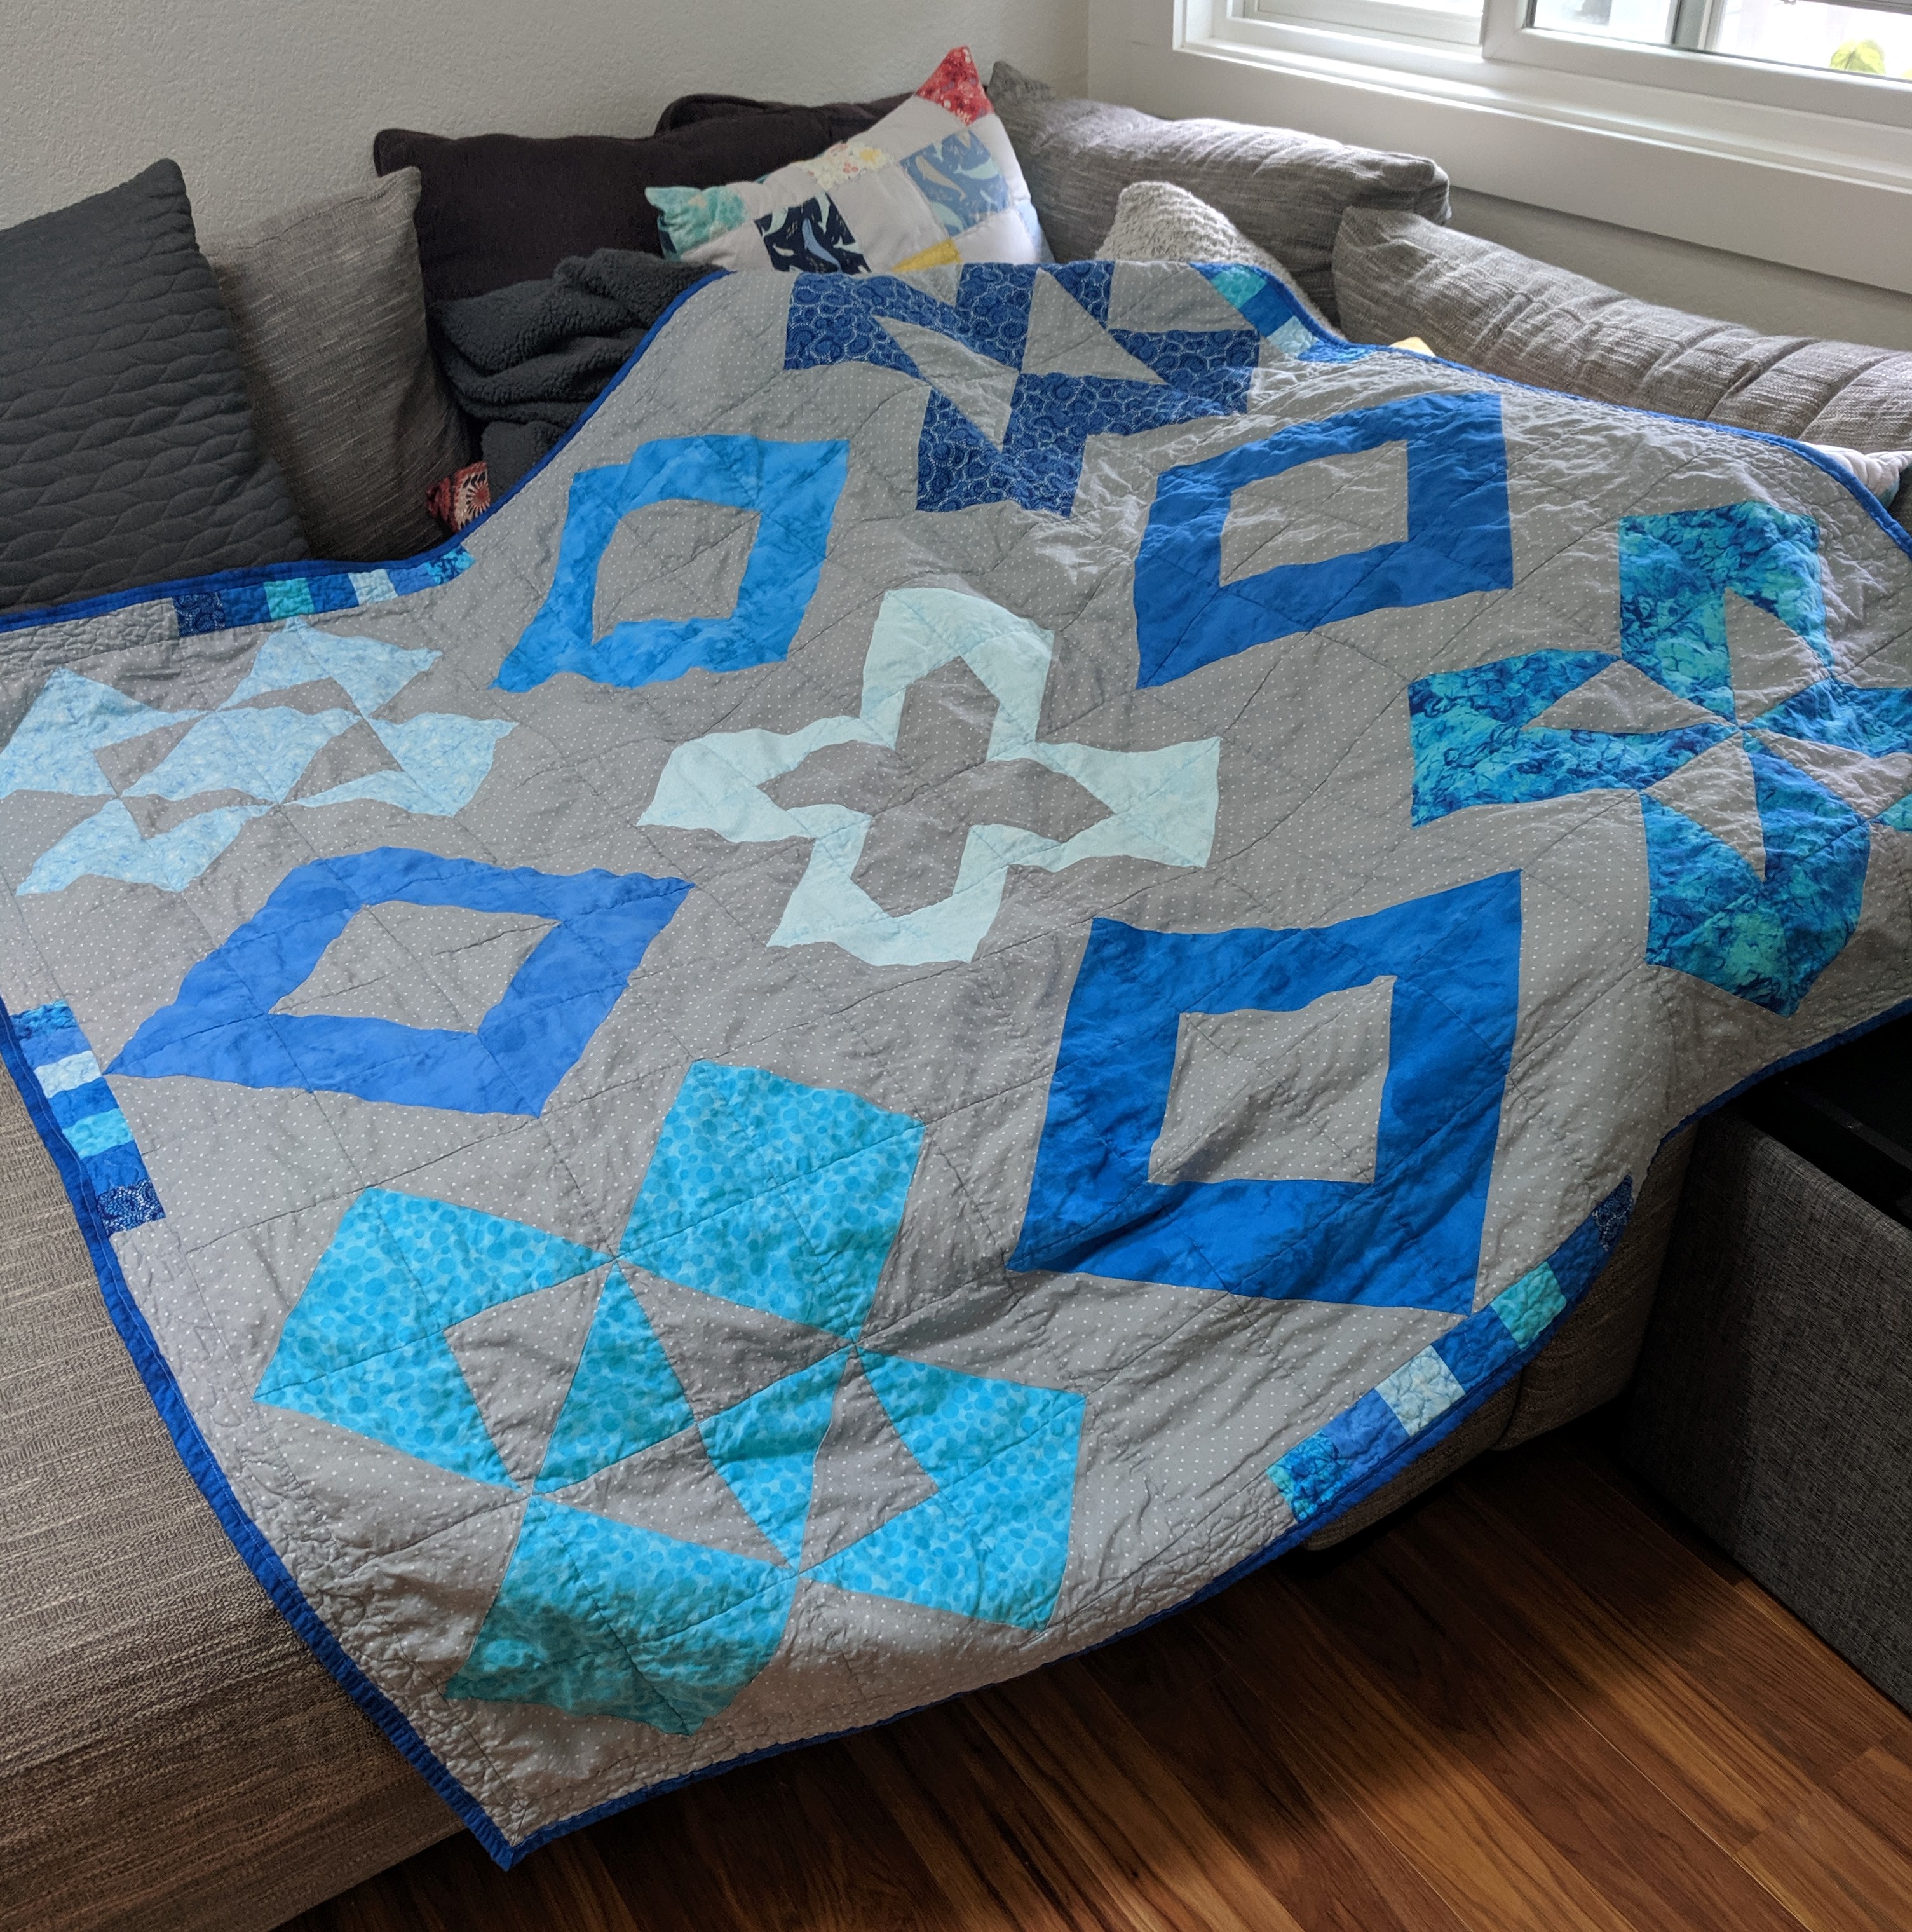
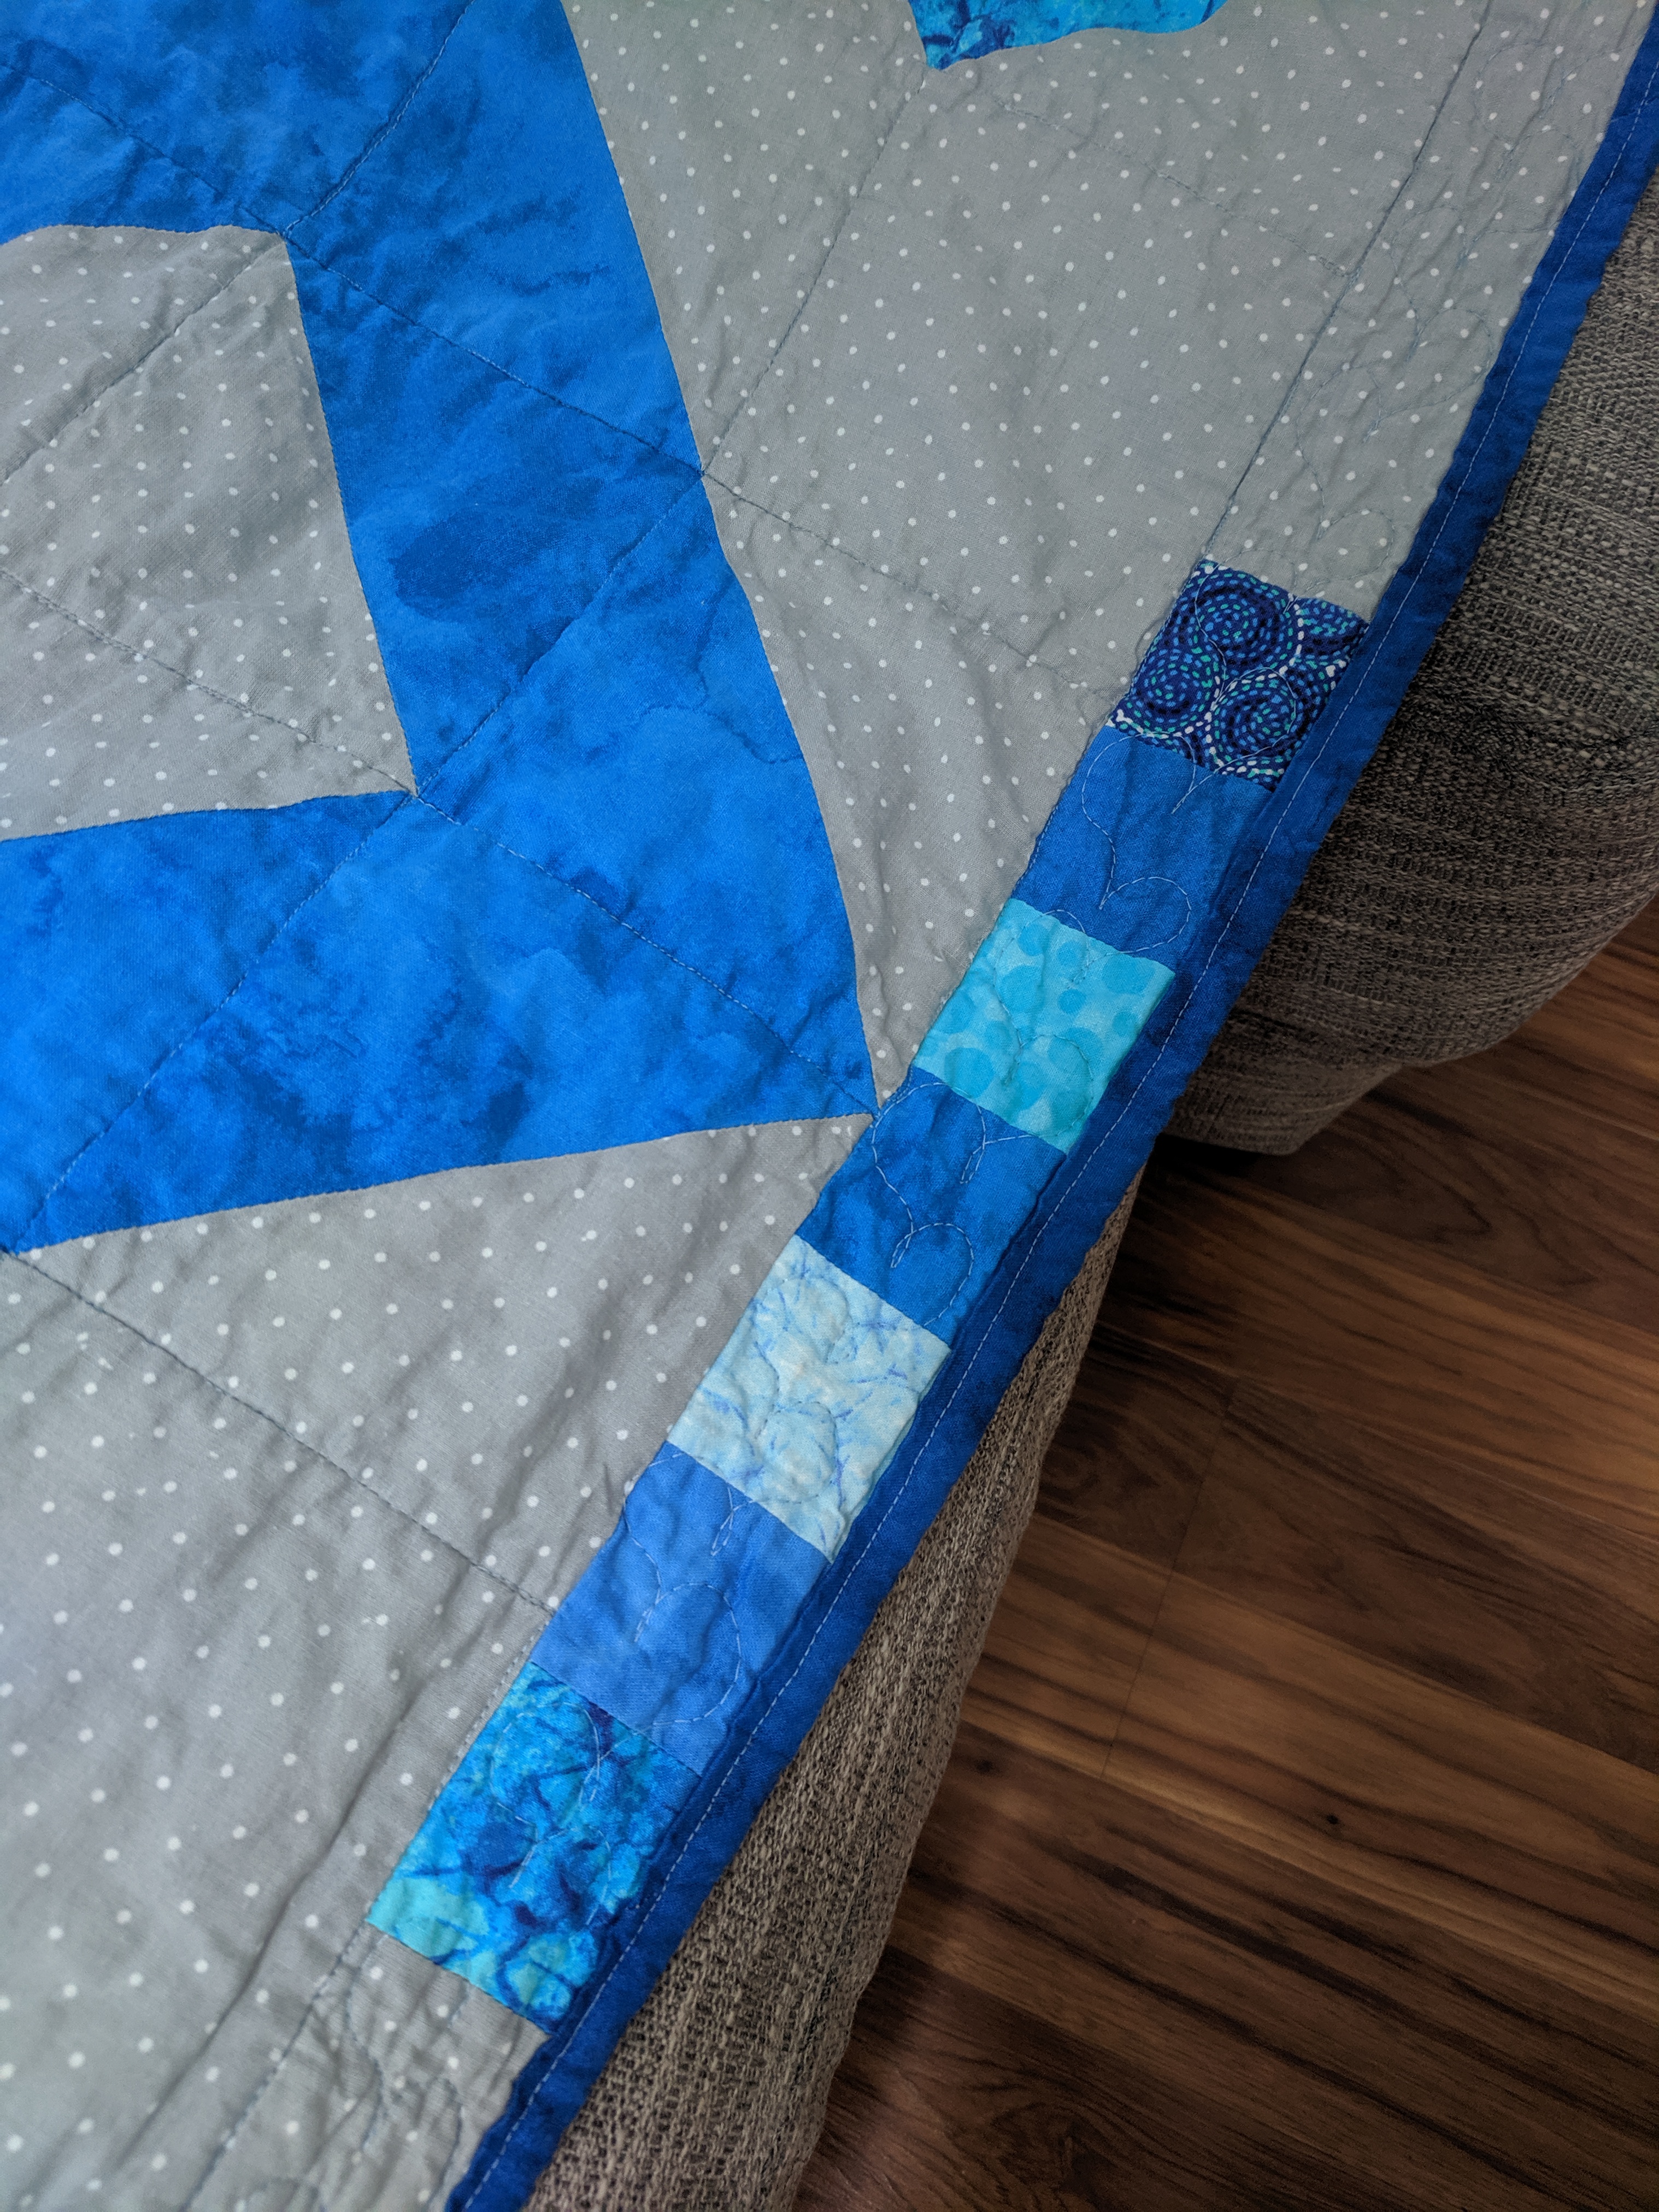
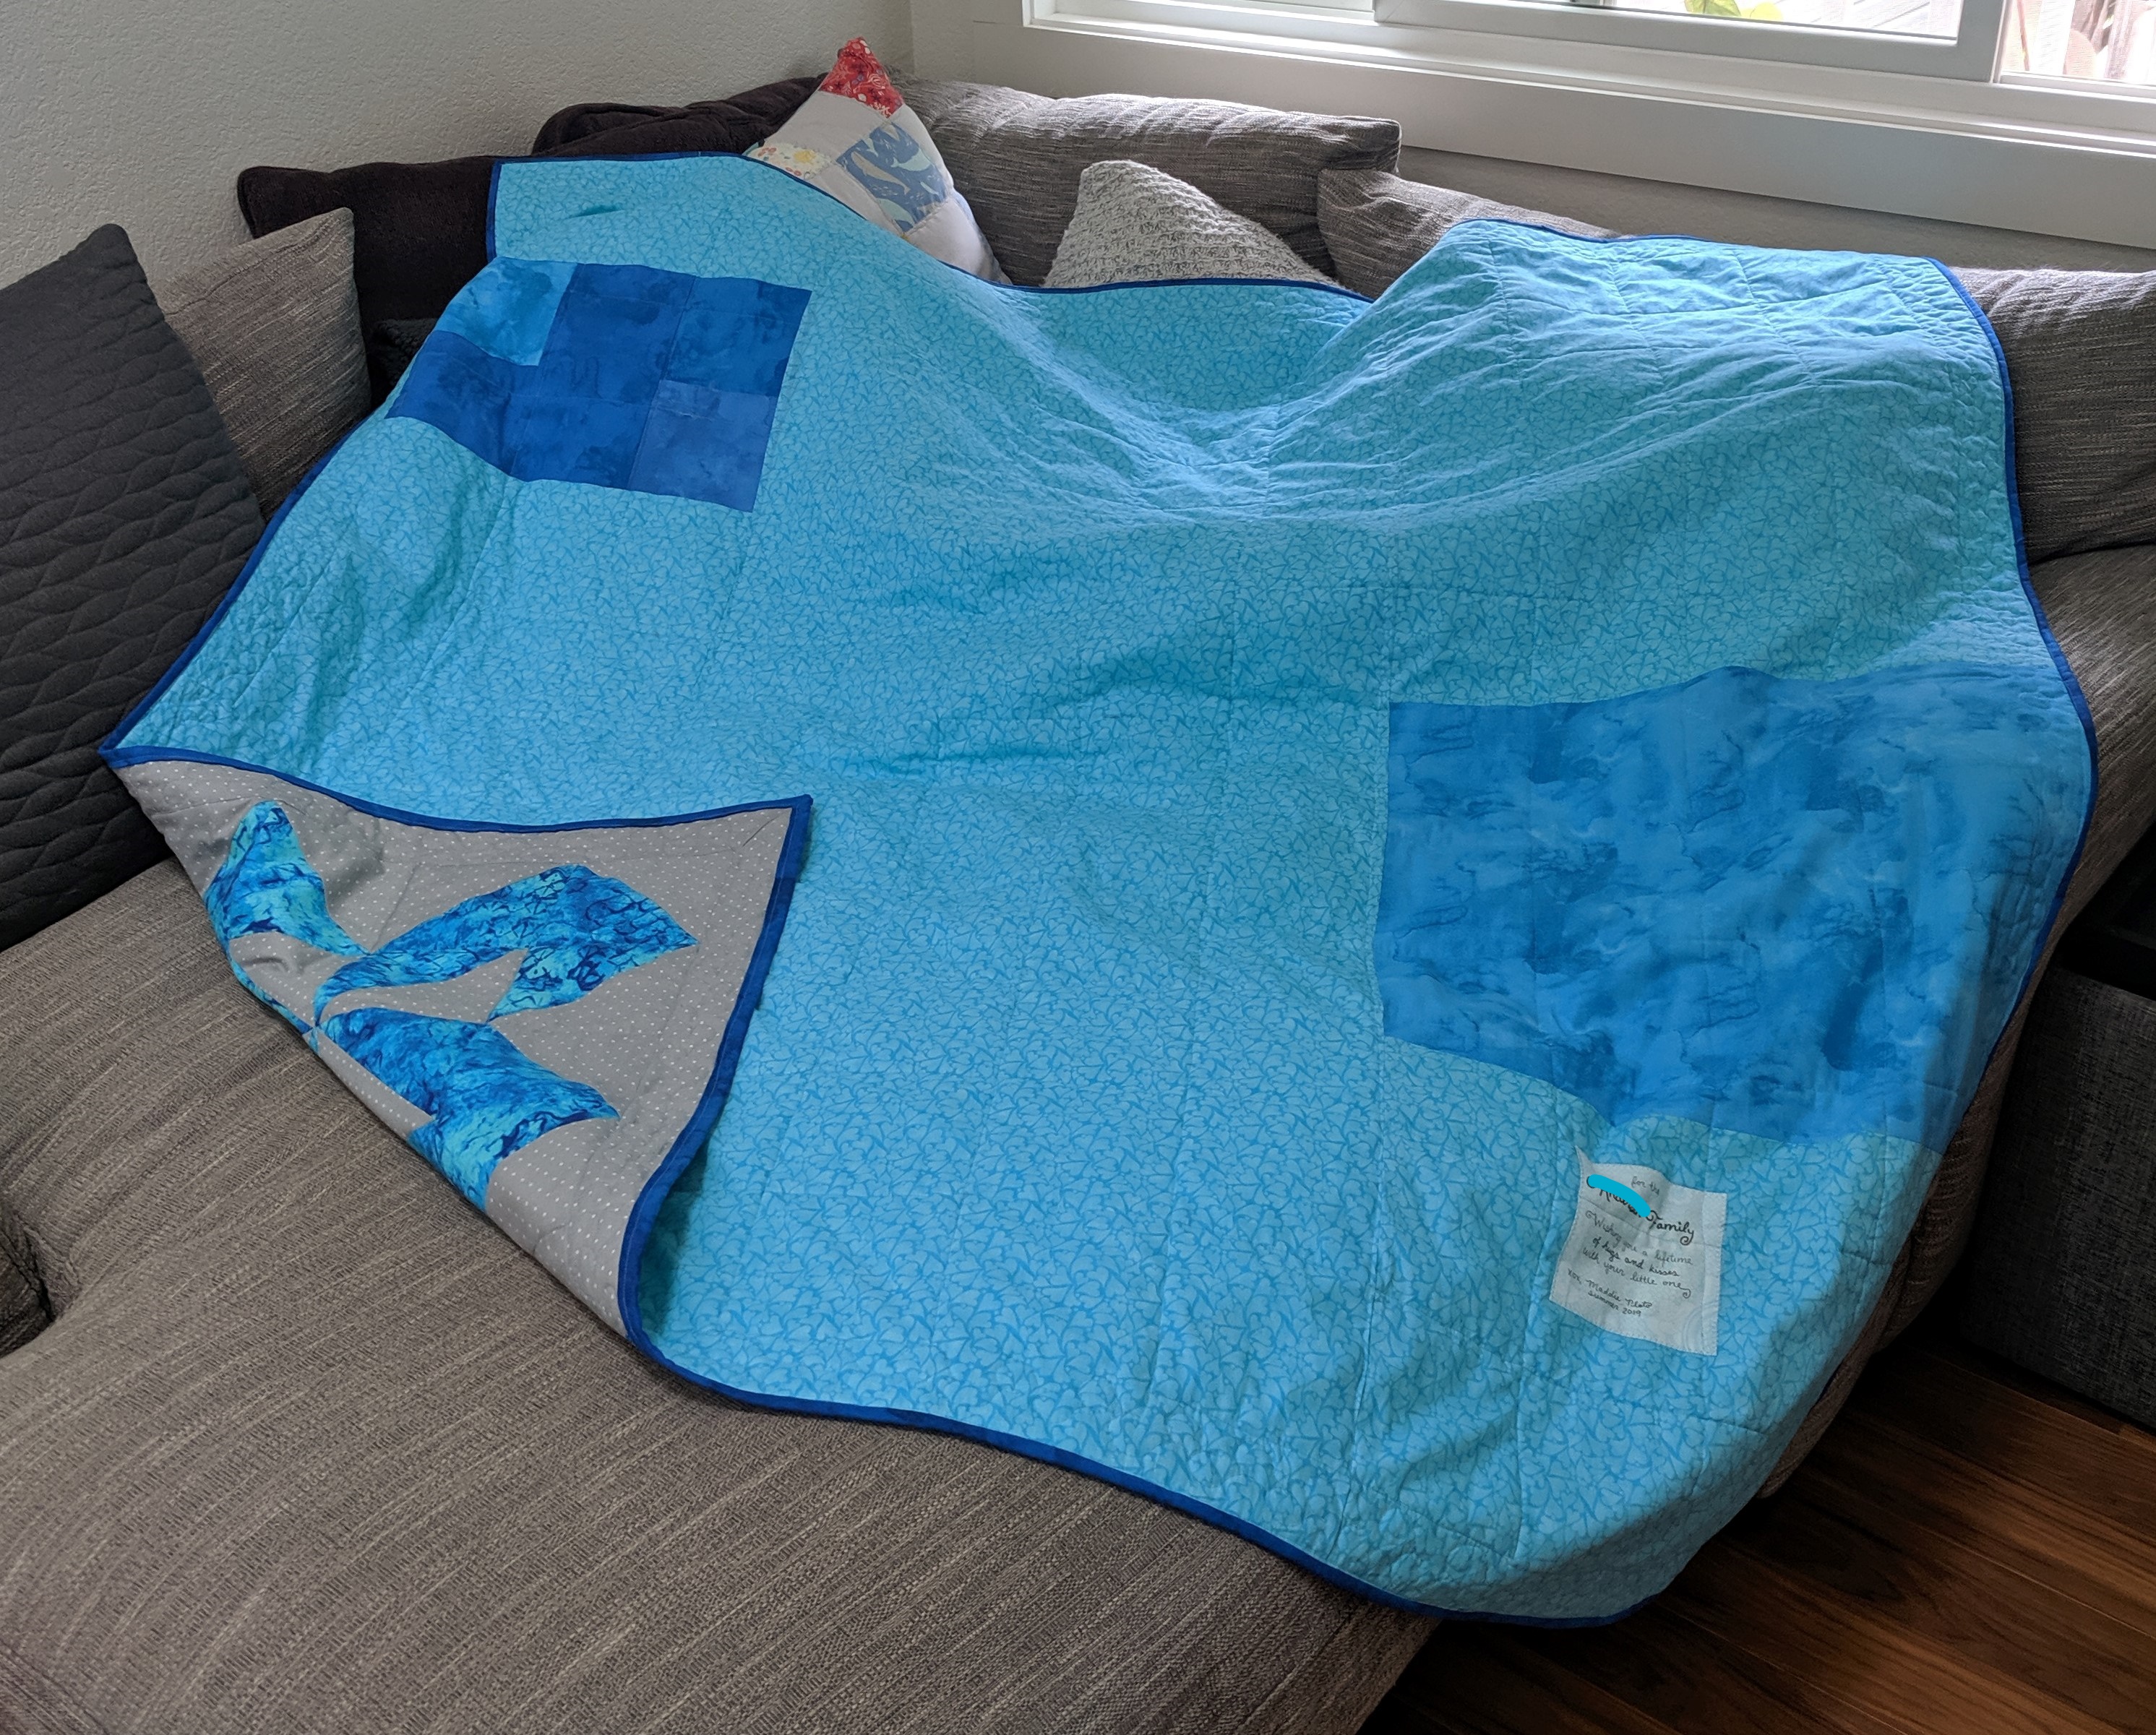
I made this quilt for my wonderful coworker whose wife had a baby 🙂 It is self drafted out of (primarily) HSTs. I based the pattern off “hugs and kisses XOXO” and used a fat quarter bundle from Joann. It ended up ~60″x60″, which is a bit large for a baby quilt but I don’t care.
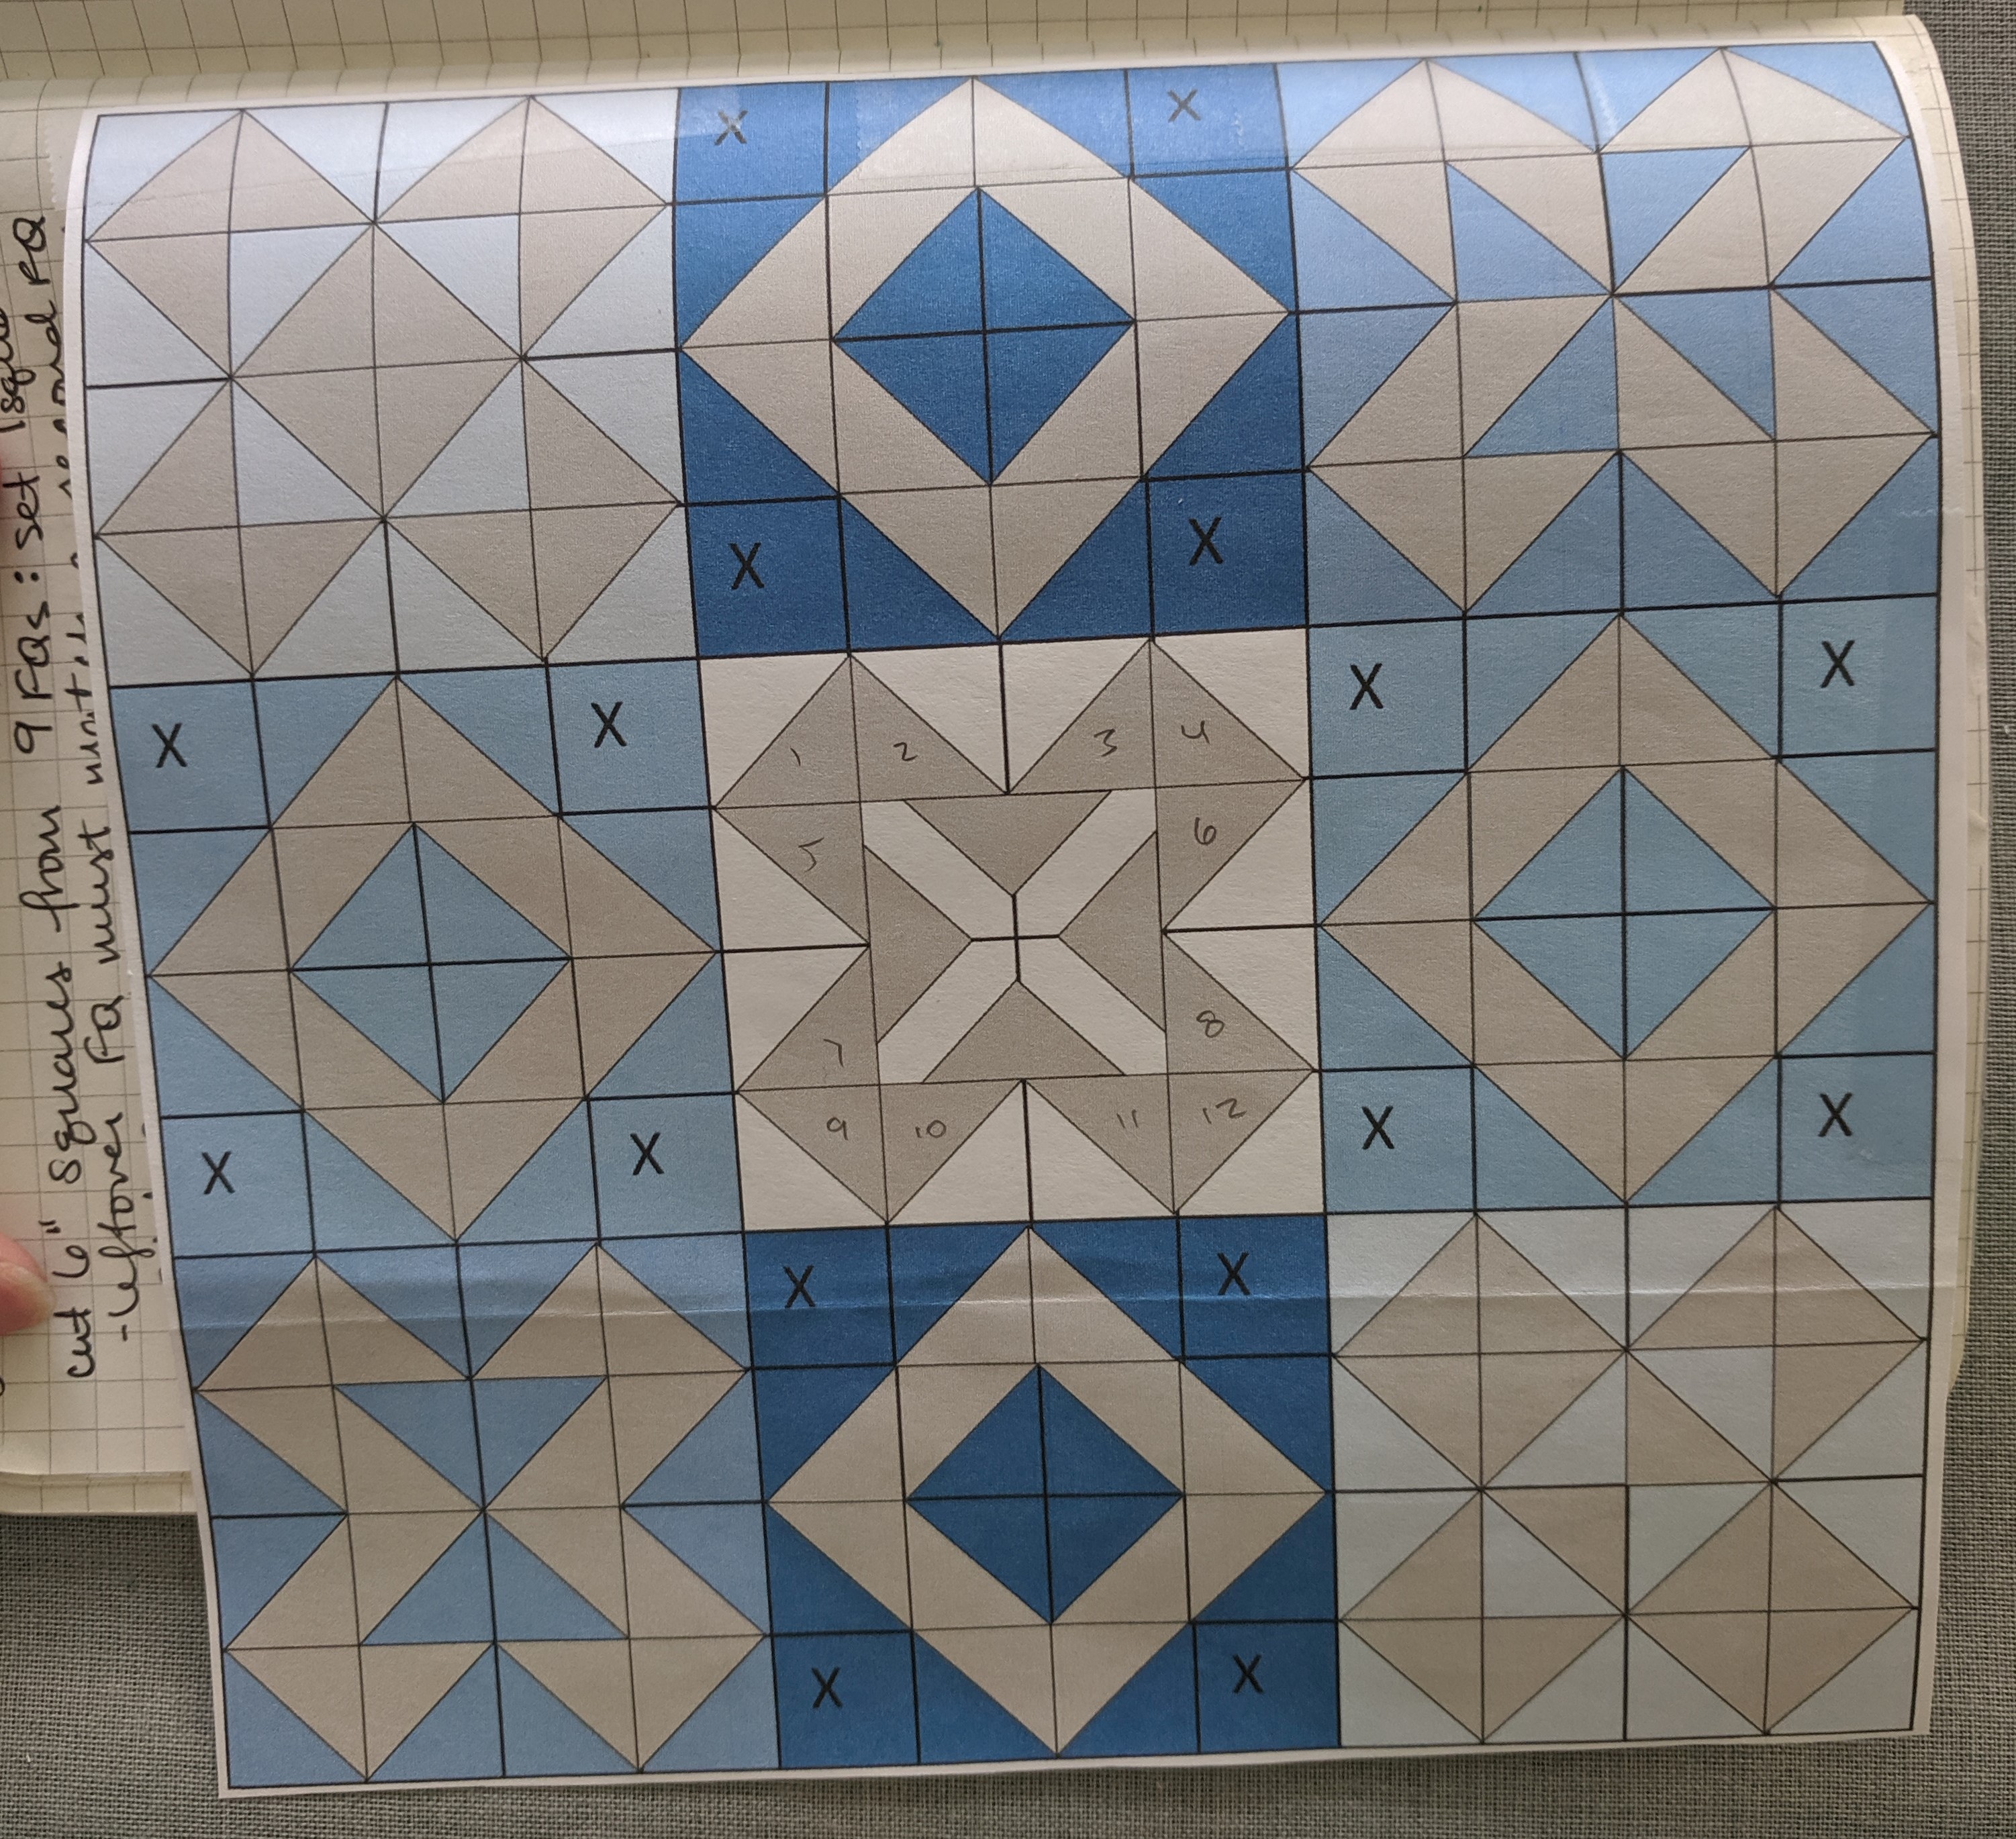
Powerpoint design
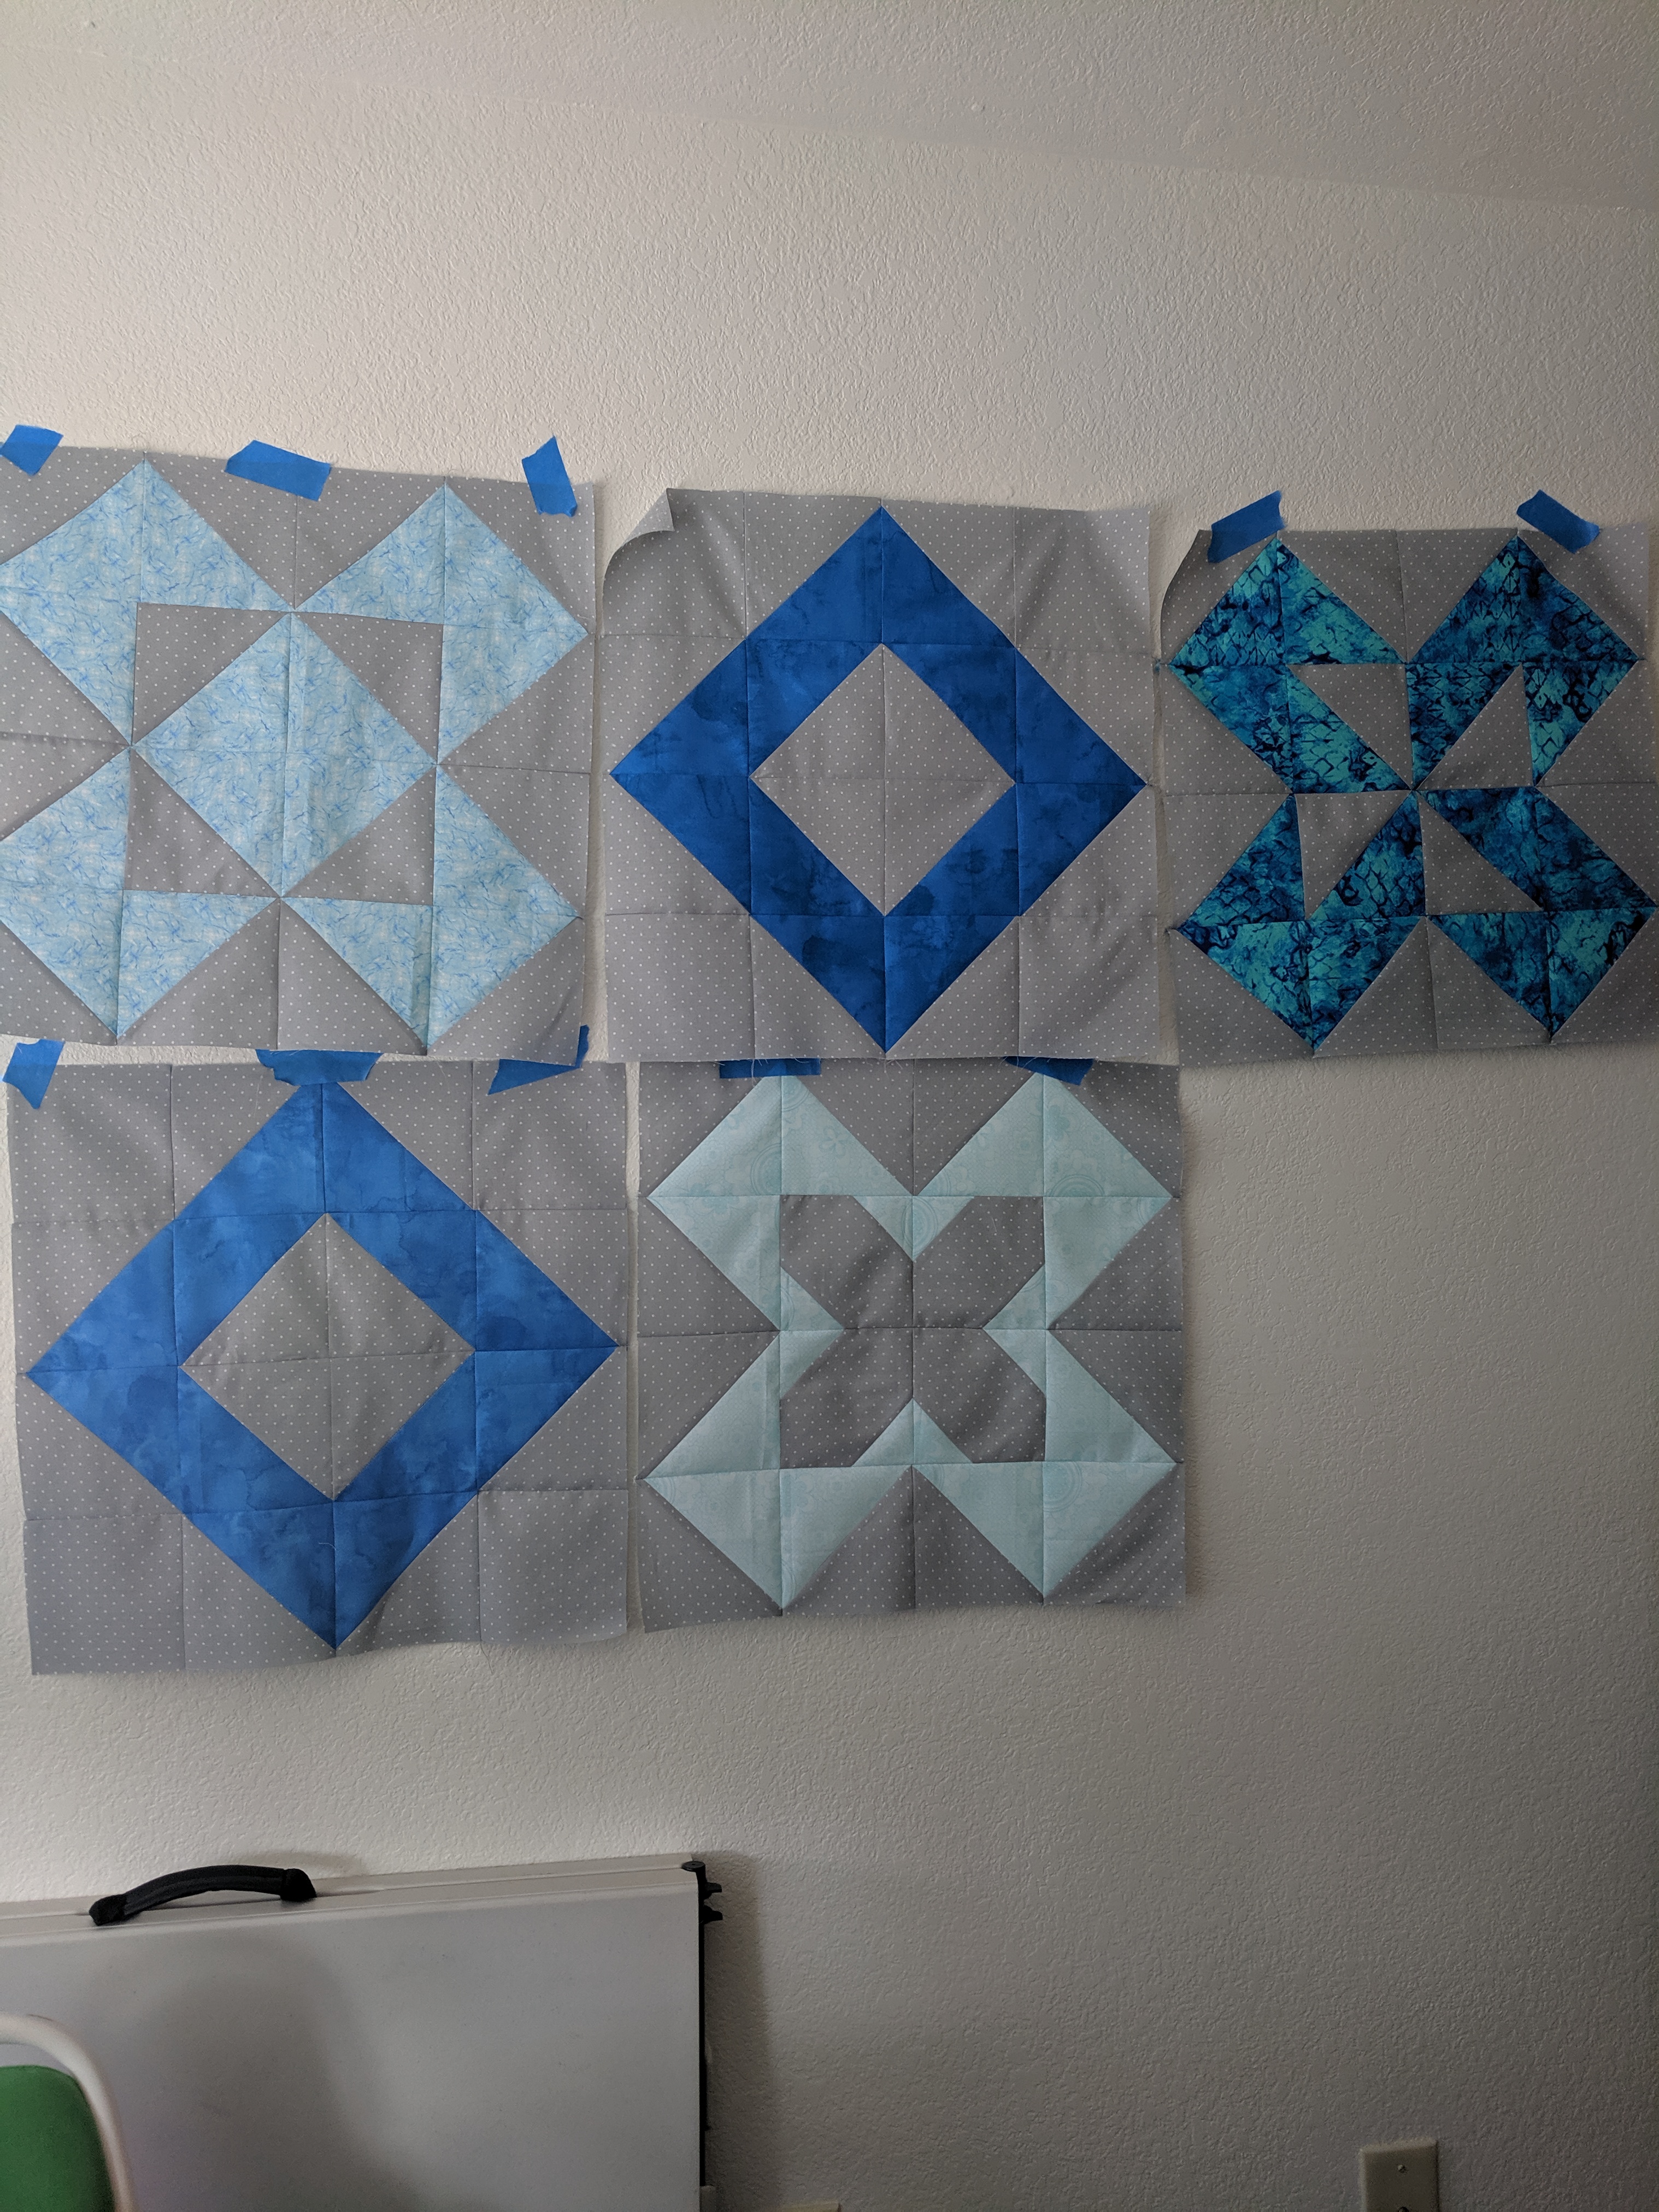
Finished blocks on my wall
HSTs ready to be laid out
I ended up quilting the whole quilt with “stitch in the ditch”, where you quilt between units along the seam lines. For this to work, you have to iron both seam allowances to one side (instead of open). This makes one side of the seam a bit taller than the other, and the quilting goes on the lower side – the ditch. I used some scraps and the same background for the border, and quilted little heart shapes around the entire thing.
Stitch in the ditch on the left in the main blocks, heart shapes in the border on the right