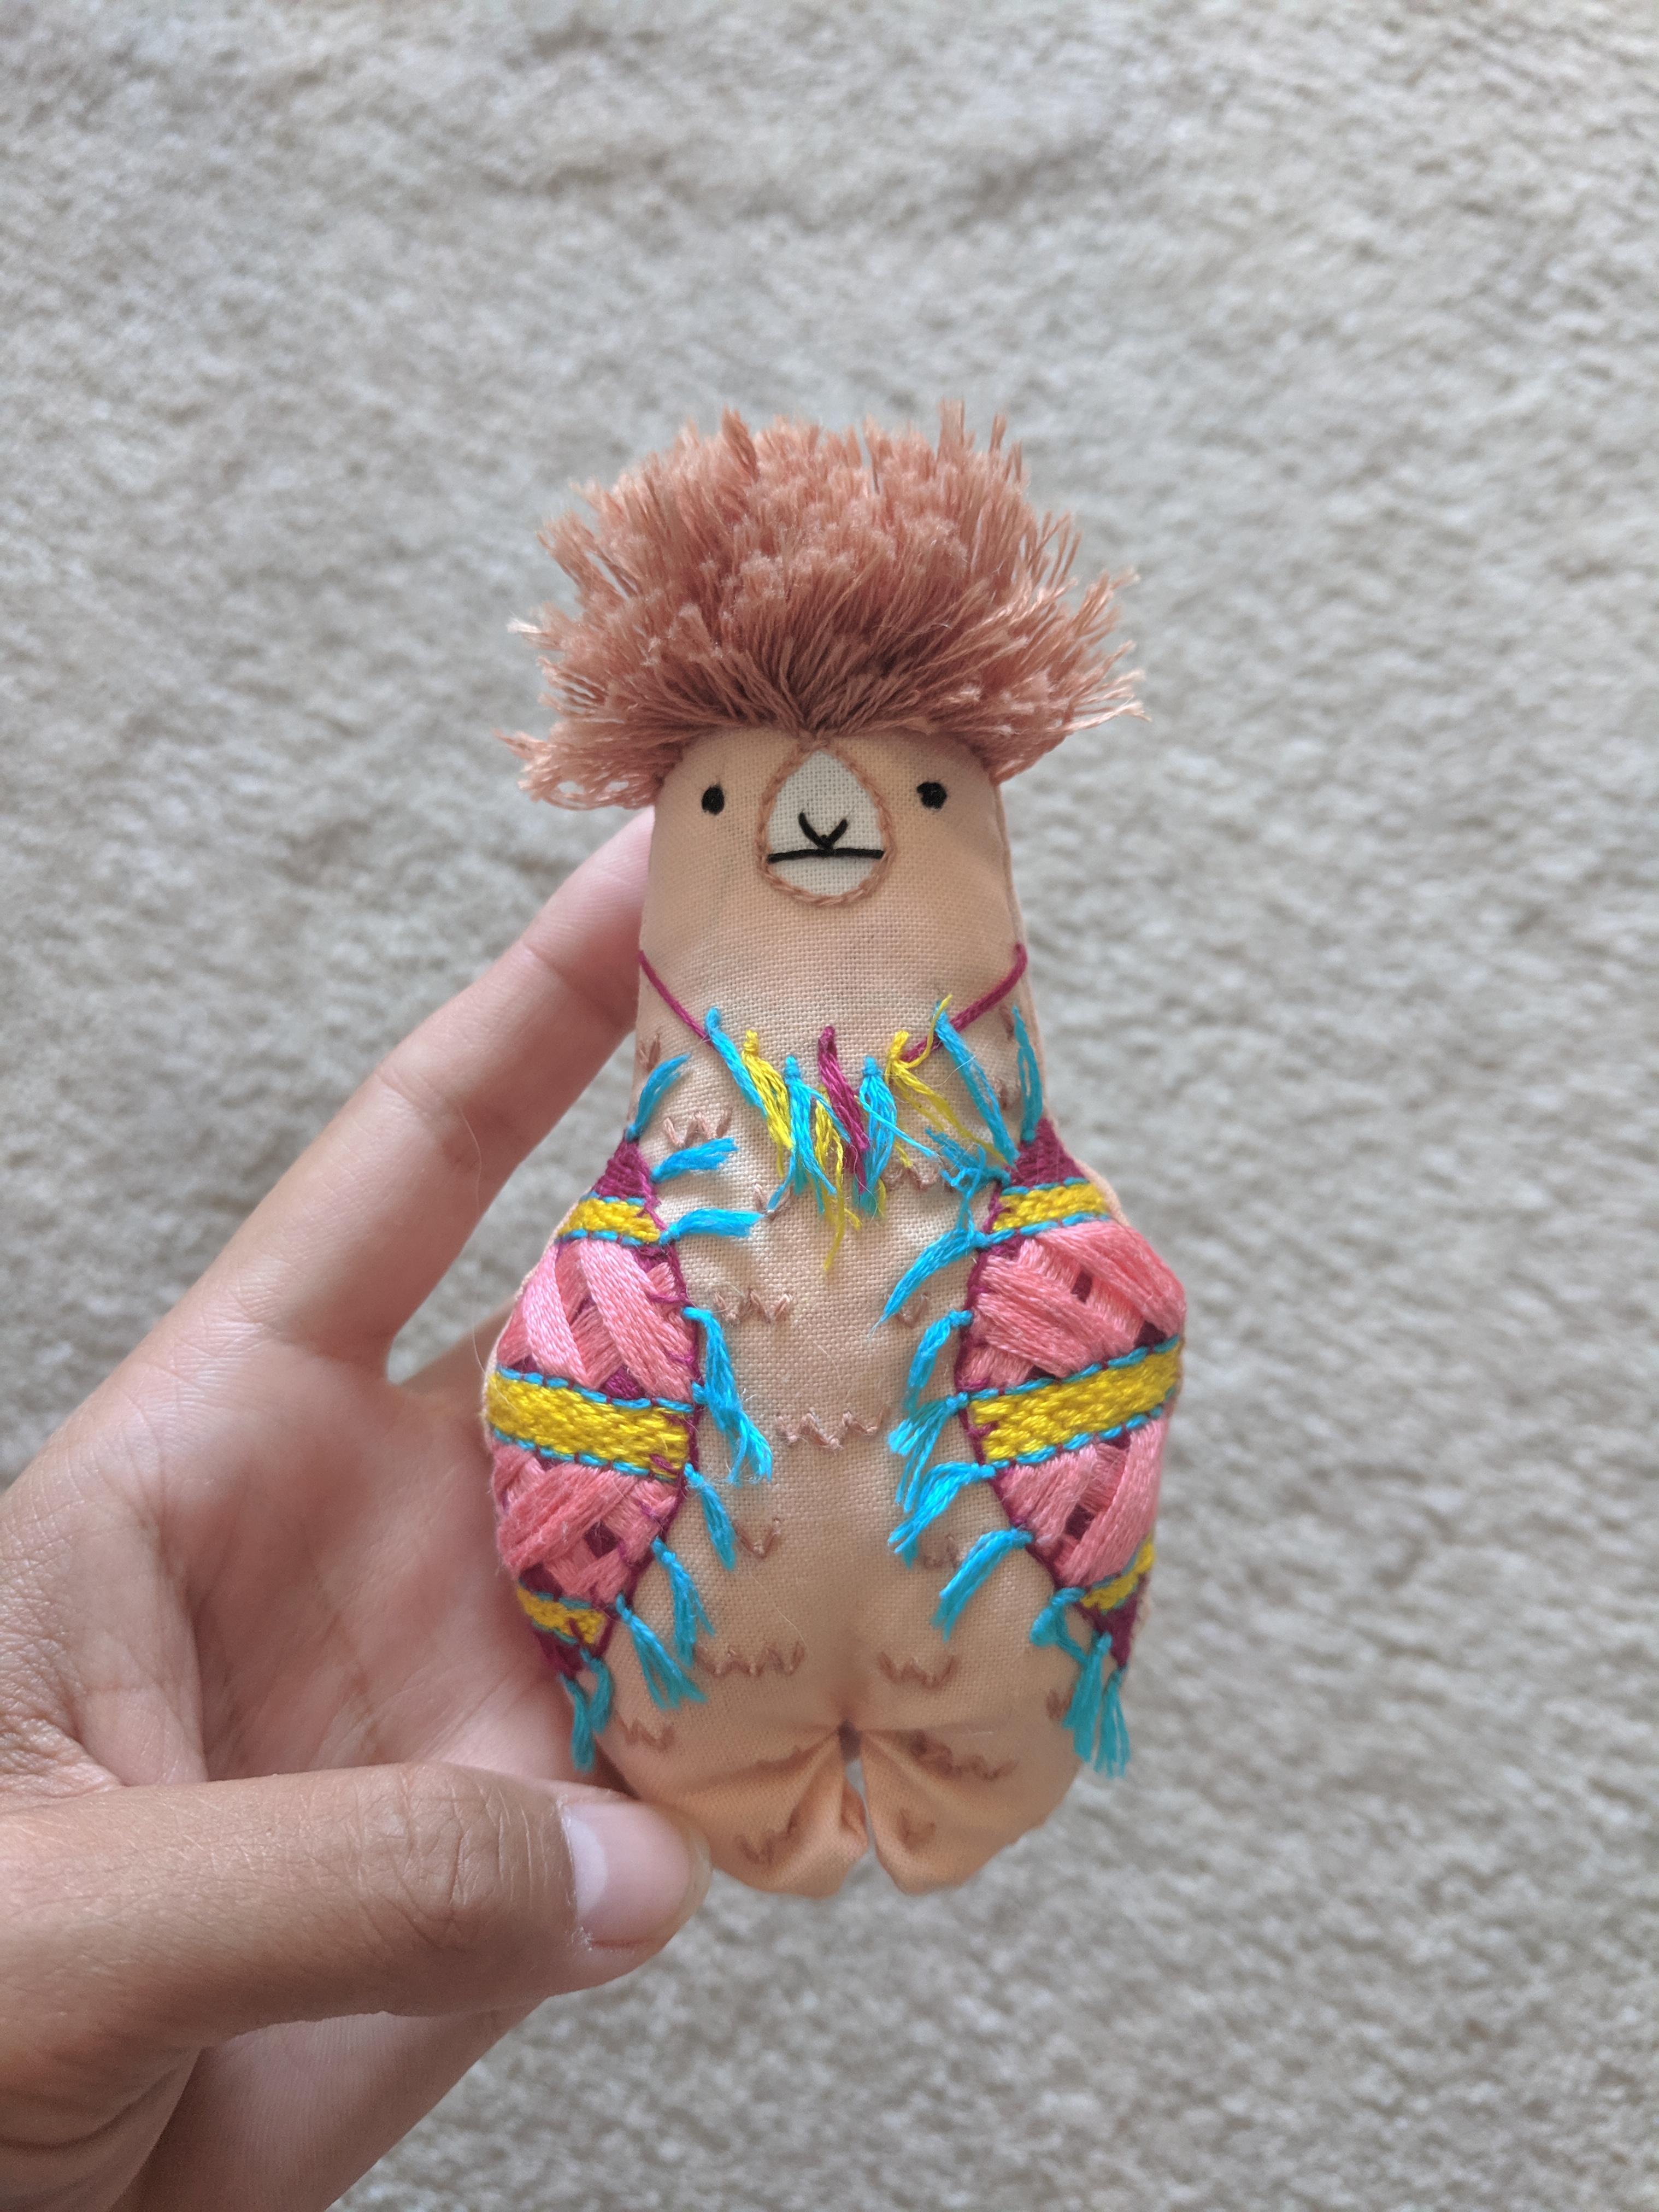
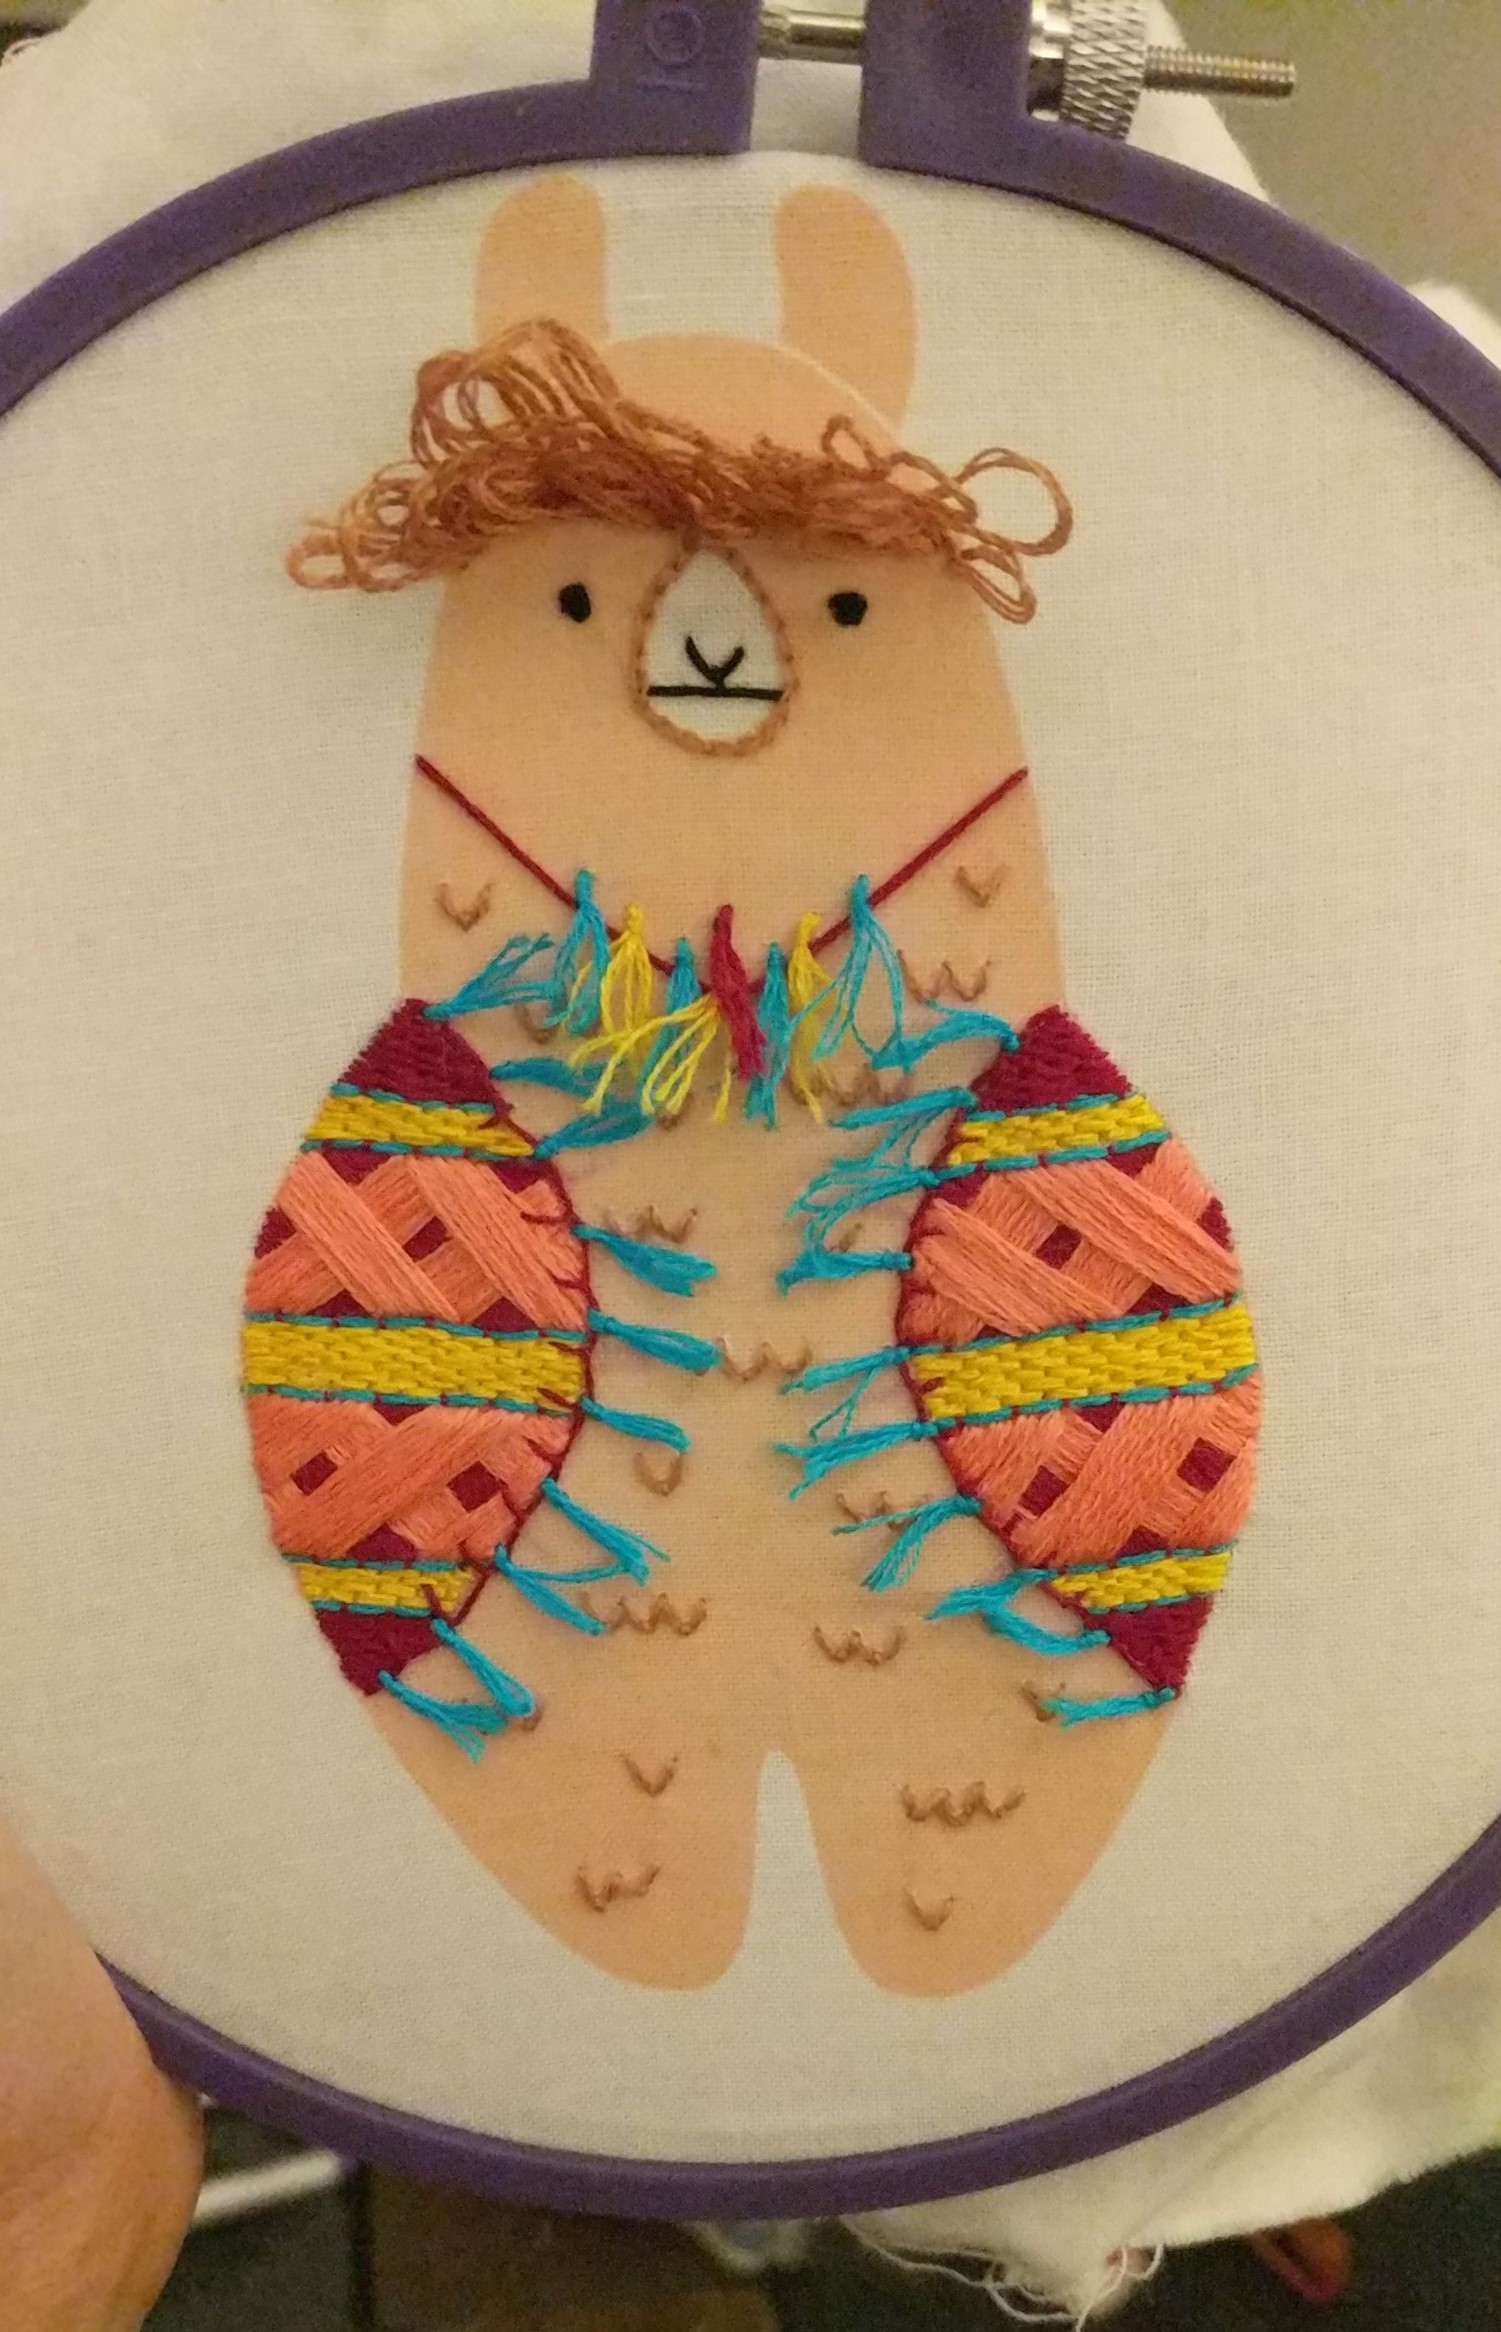
To make this cute llama, I used the embroidery kit from kirikipress on Etsy. It came with preprinted fabric and the stuffing for the inside. The front fabric used embroidered embellishments, and the back is plain. I learned new 3D techniques on this project, like the turkey work for the llama’s hair. Turkey work is done by securing big loops to the fabric, and then you cut the loops to make it fluffy.
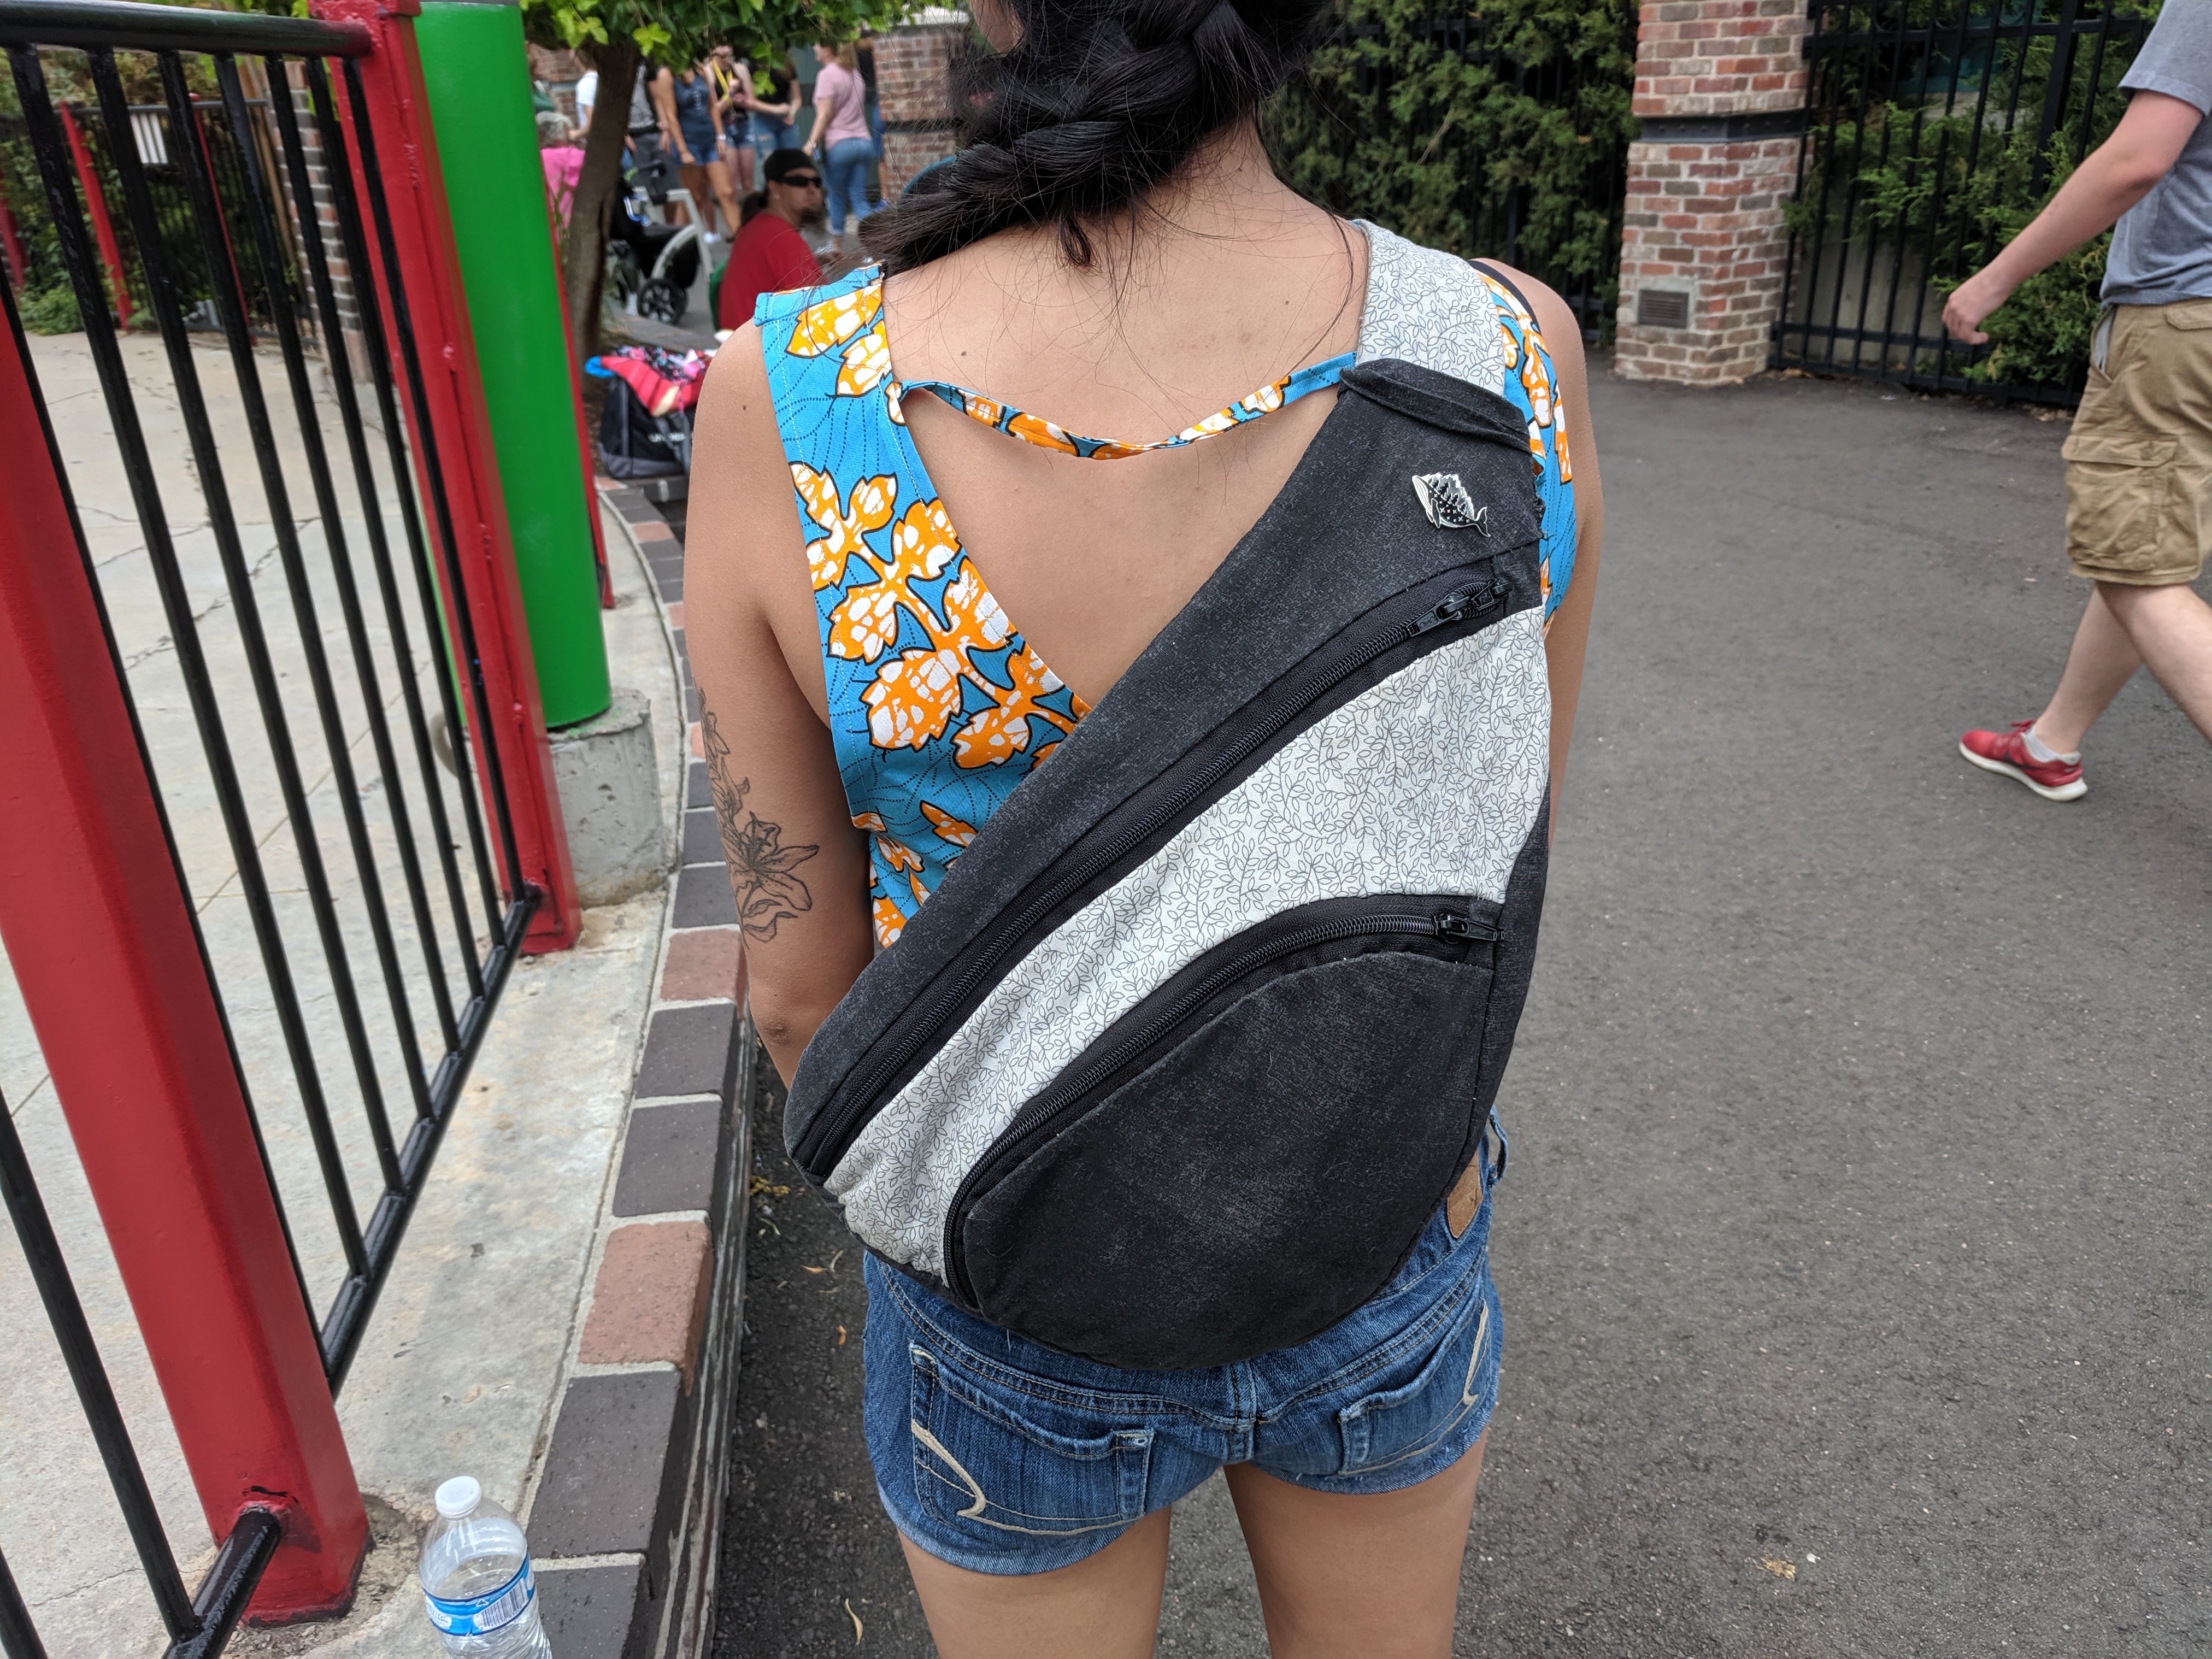
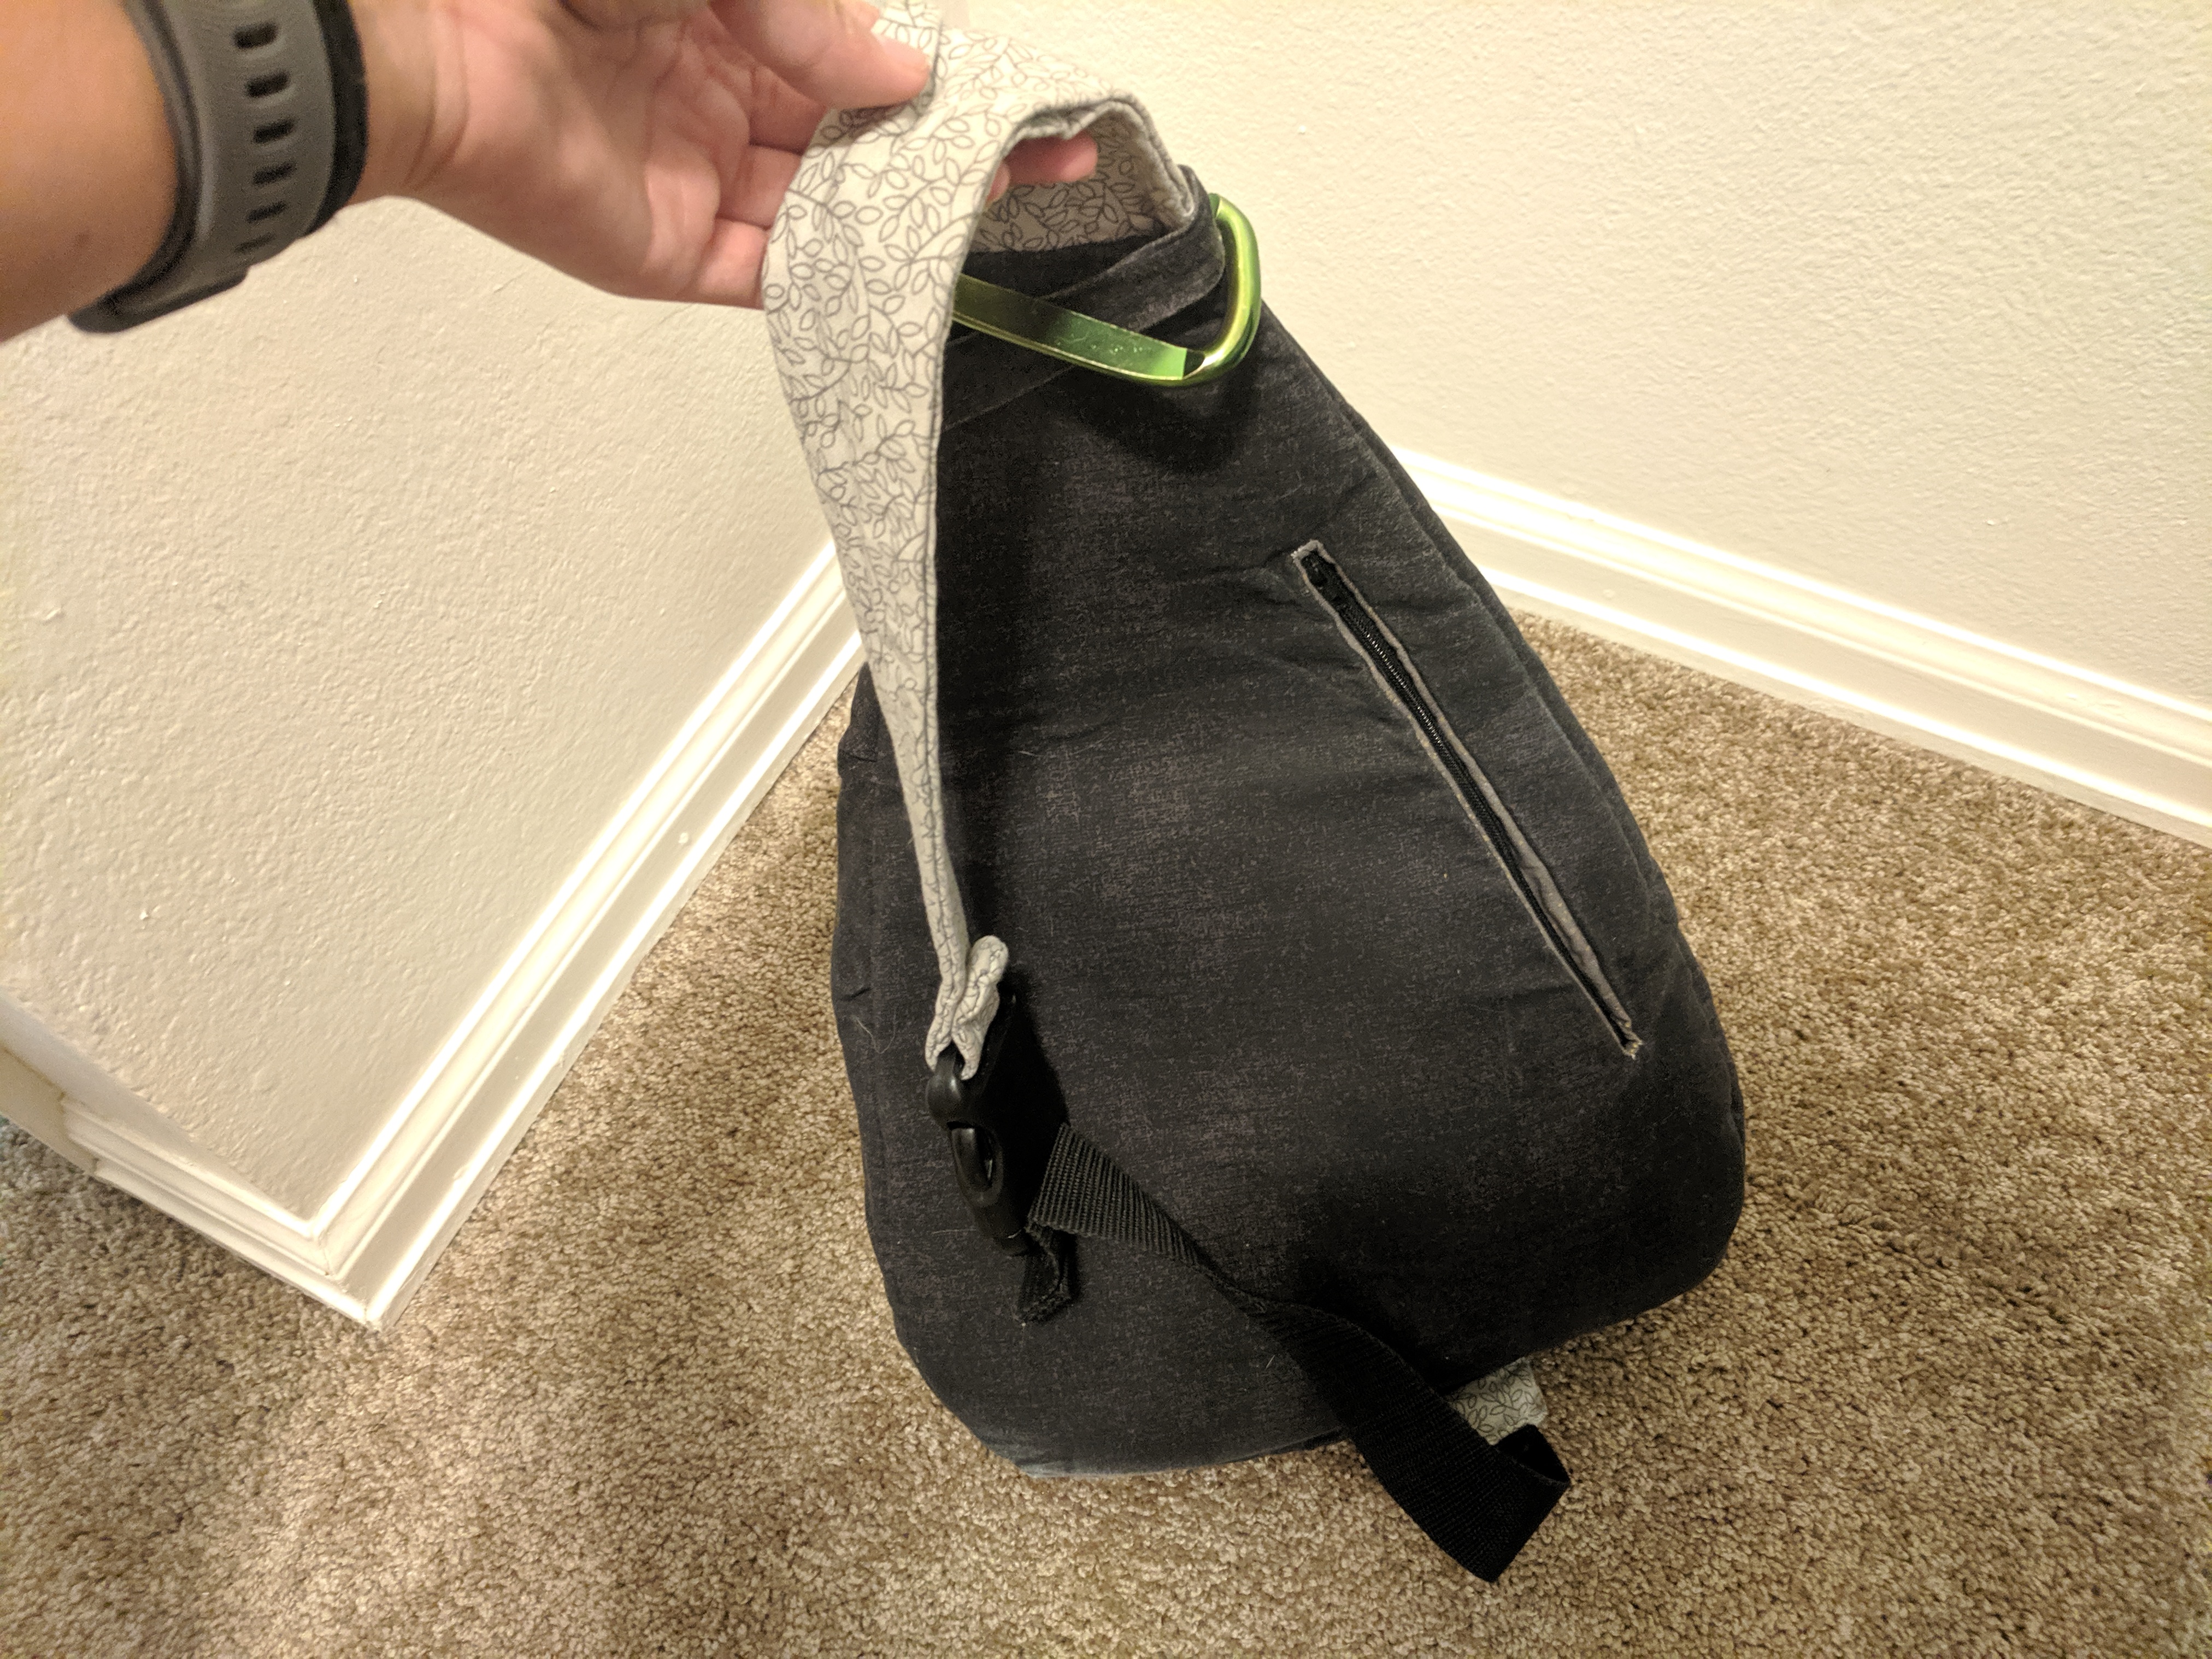
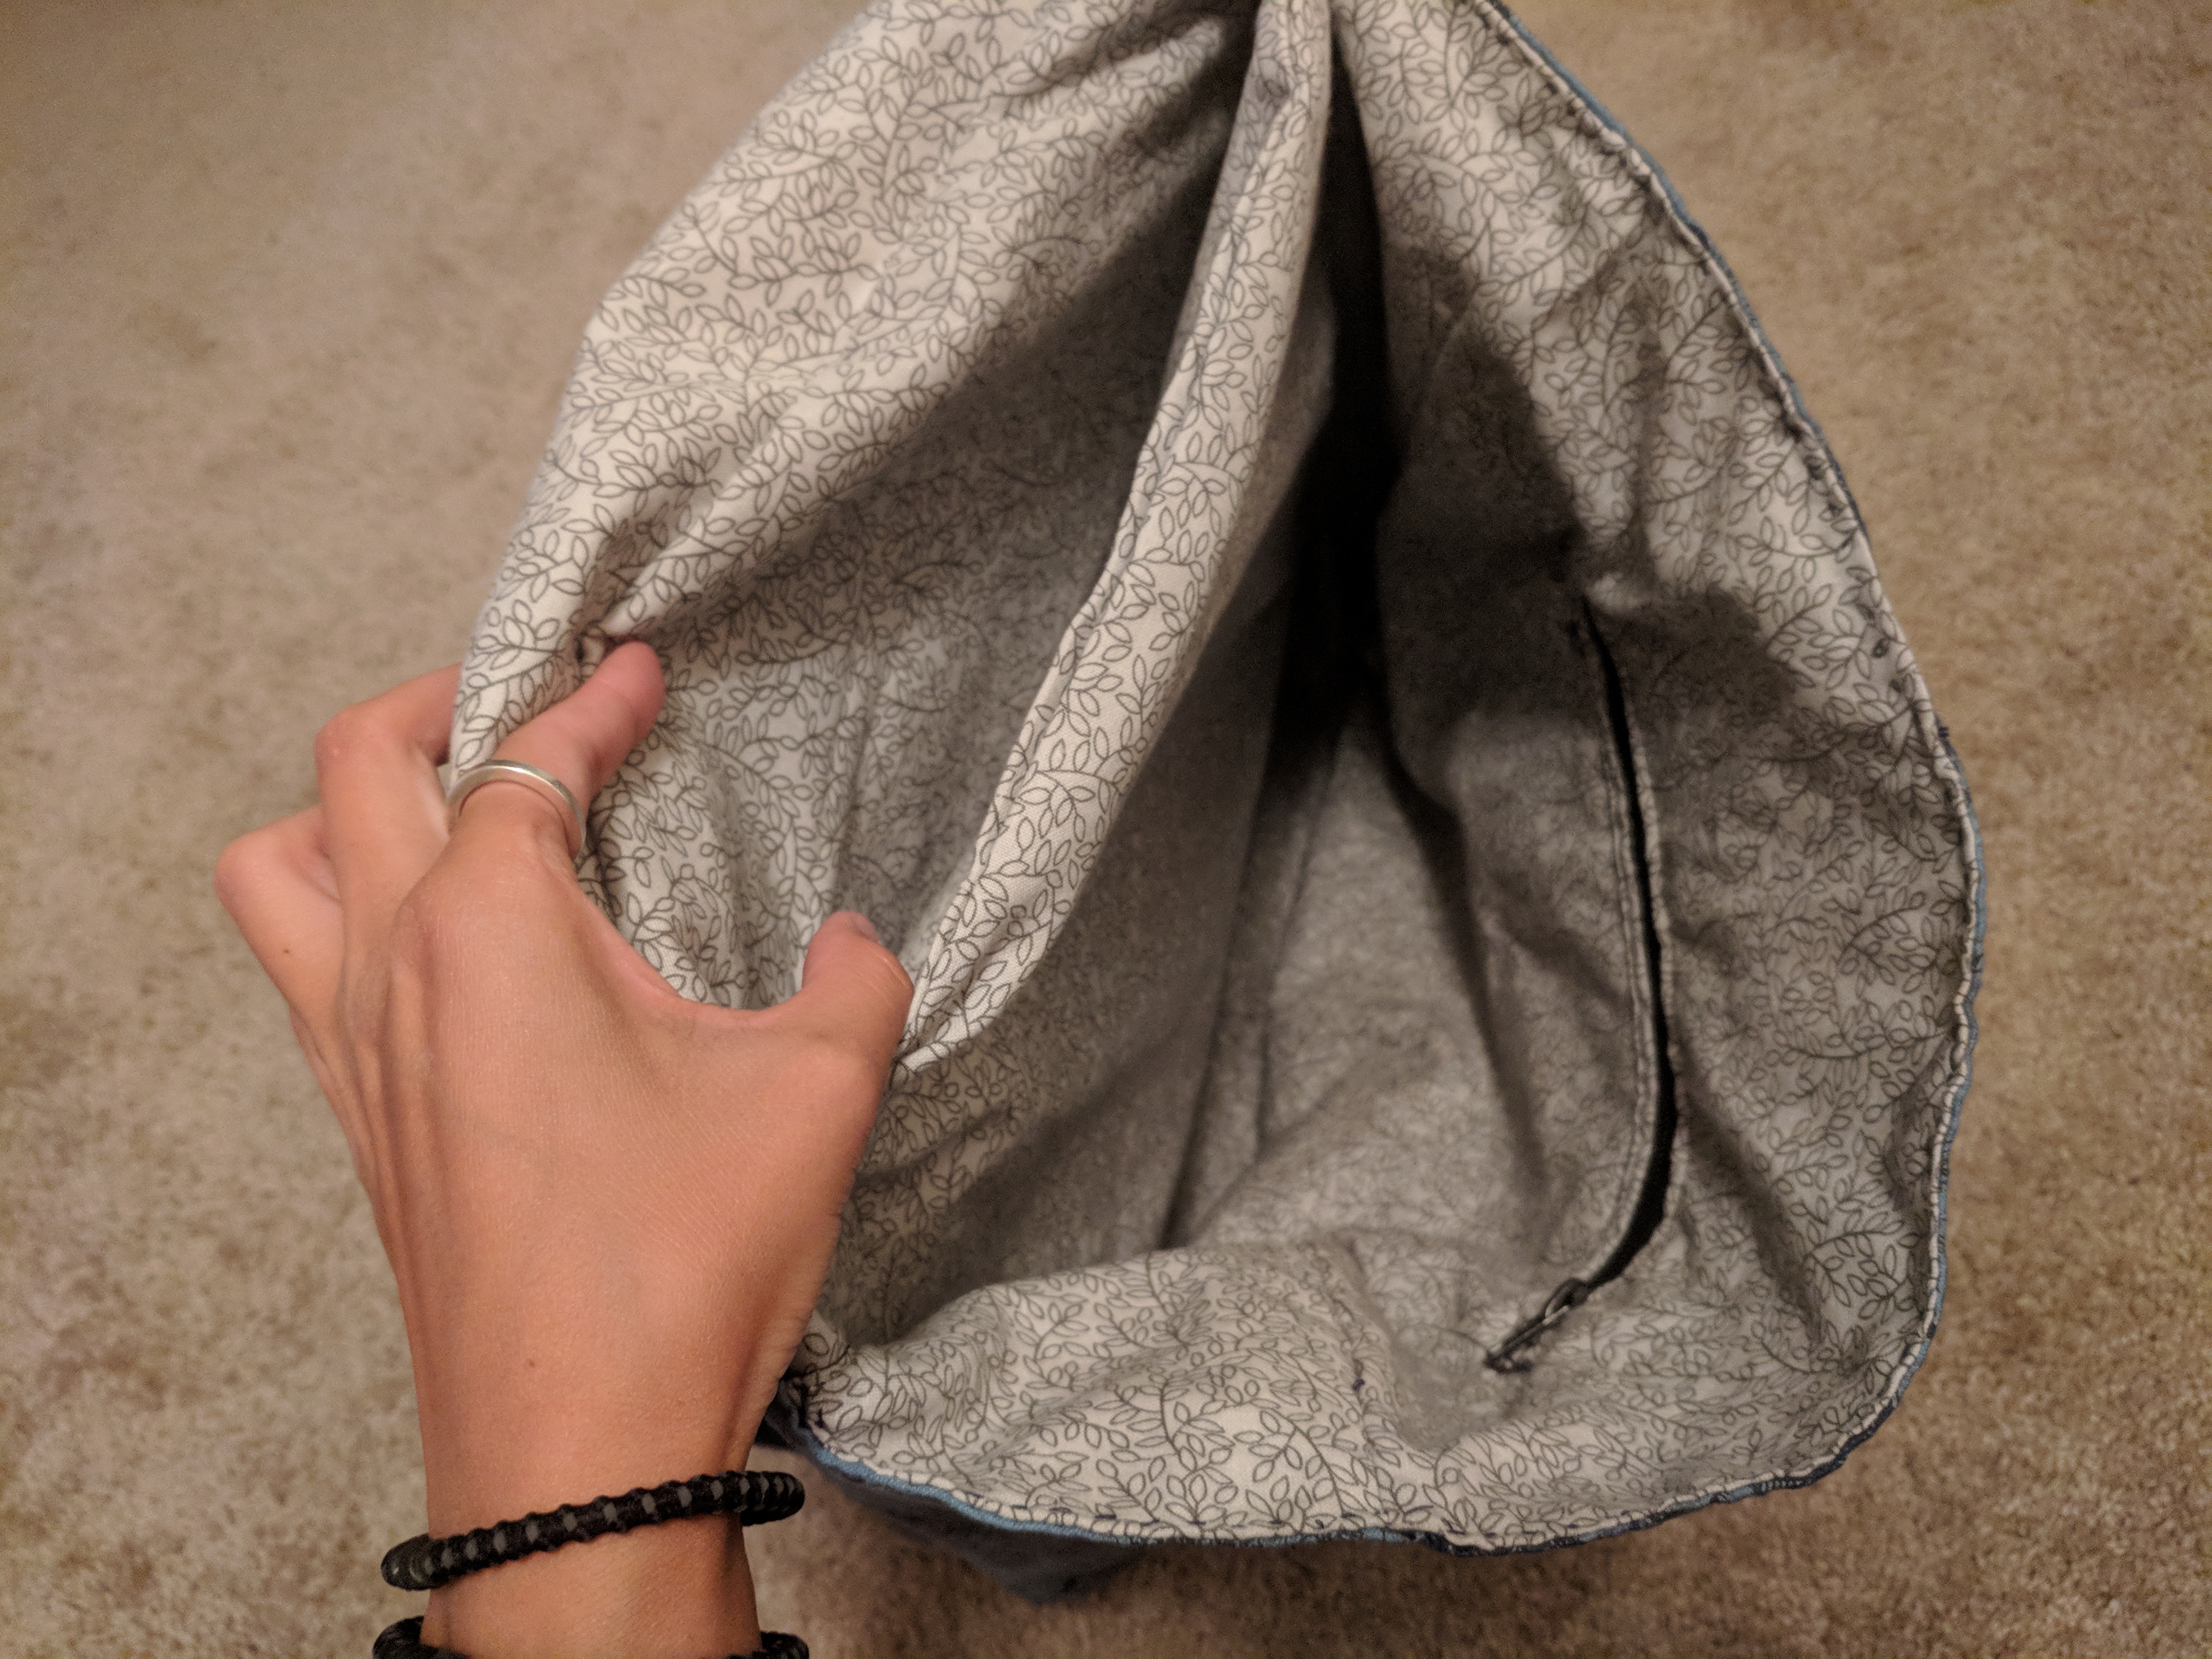
This was my first major sewing project, and all done by hand. The Summit Pack pattern from Cloudsplitter Bags on Etsy was easy to follow, even the zipper installation. This was my first encounter with fusible interfacing, which is amazing – it can strengthen a normal cotton to stand up like a light canvas. I bought all the fabric and notions from Joann, and I didn’t intend for it to turn out like an Oreo, but it does look good 🙂 I modified some of the interior panels to have padded pockets, which are much more functional for me than credit card pockets.
Some friends and I went to an amusement park and I was “Purse Mom”, we could get sunscreen, two water bottles, a couple wallets, and four phones in at one time. I made the shirt I’m wearing, too.
I used a buckle on the strap so I could, theoretically, un-clip it from myself and/or clip it onto something. I added a little band at the top which is usually holding a carabiner to hold jackets, shopping bags, hats, etc.
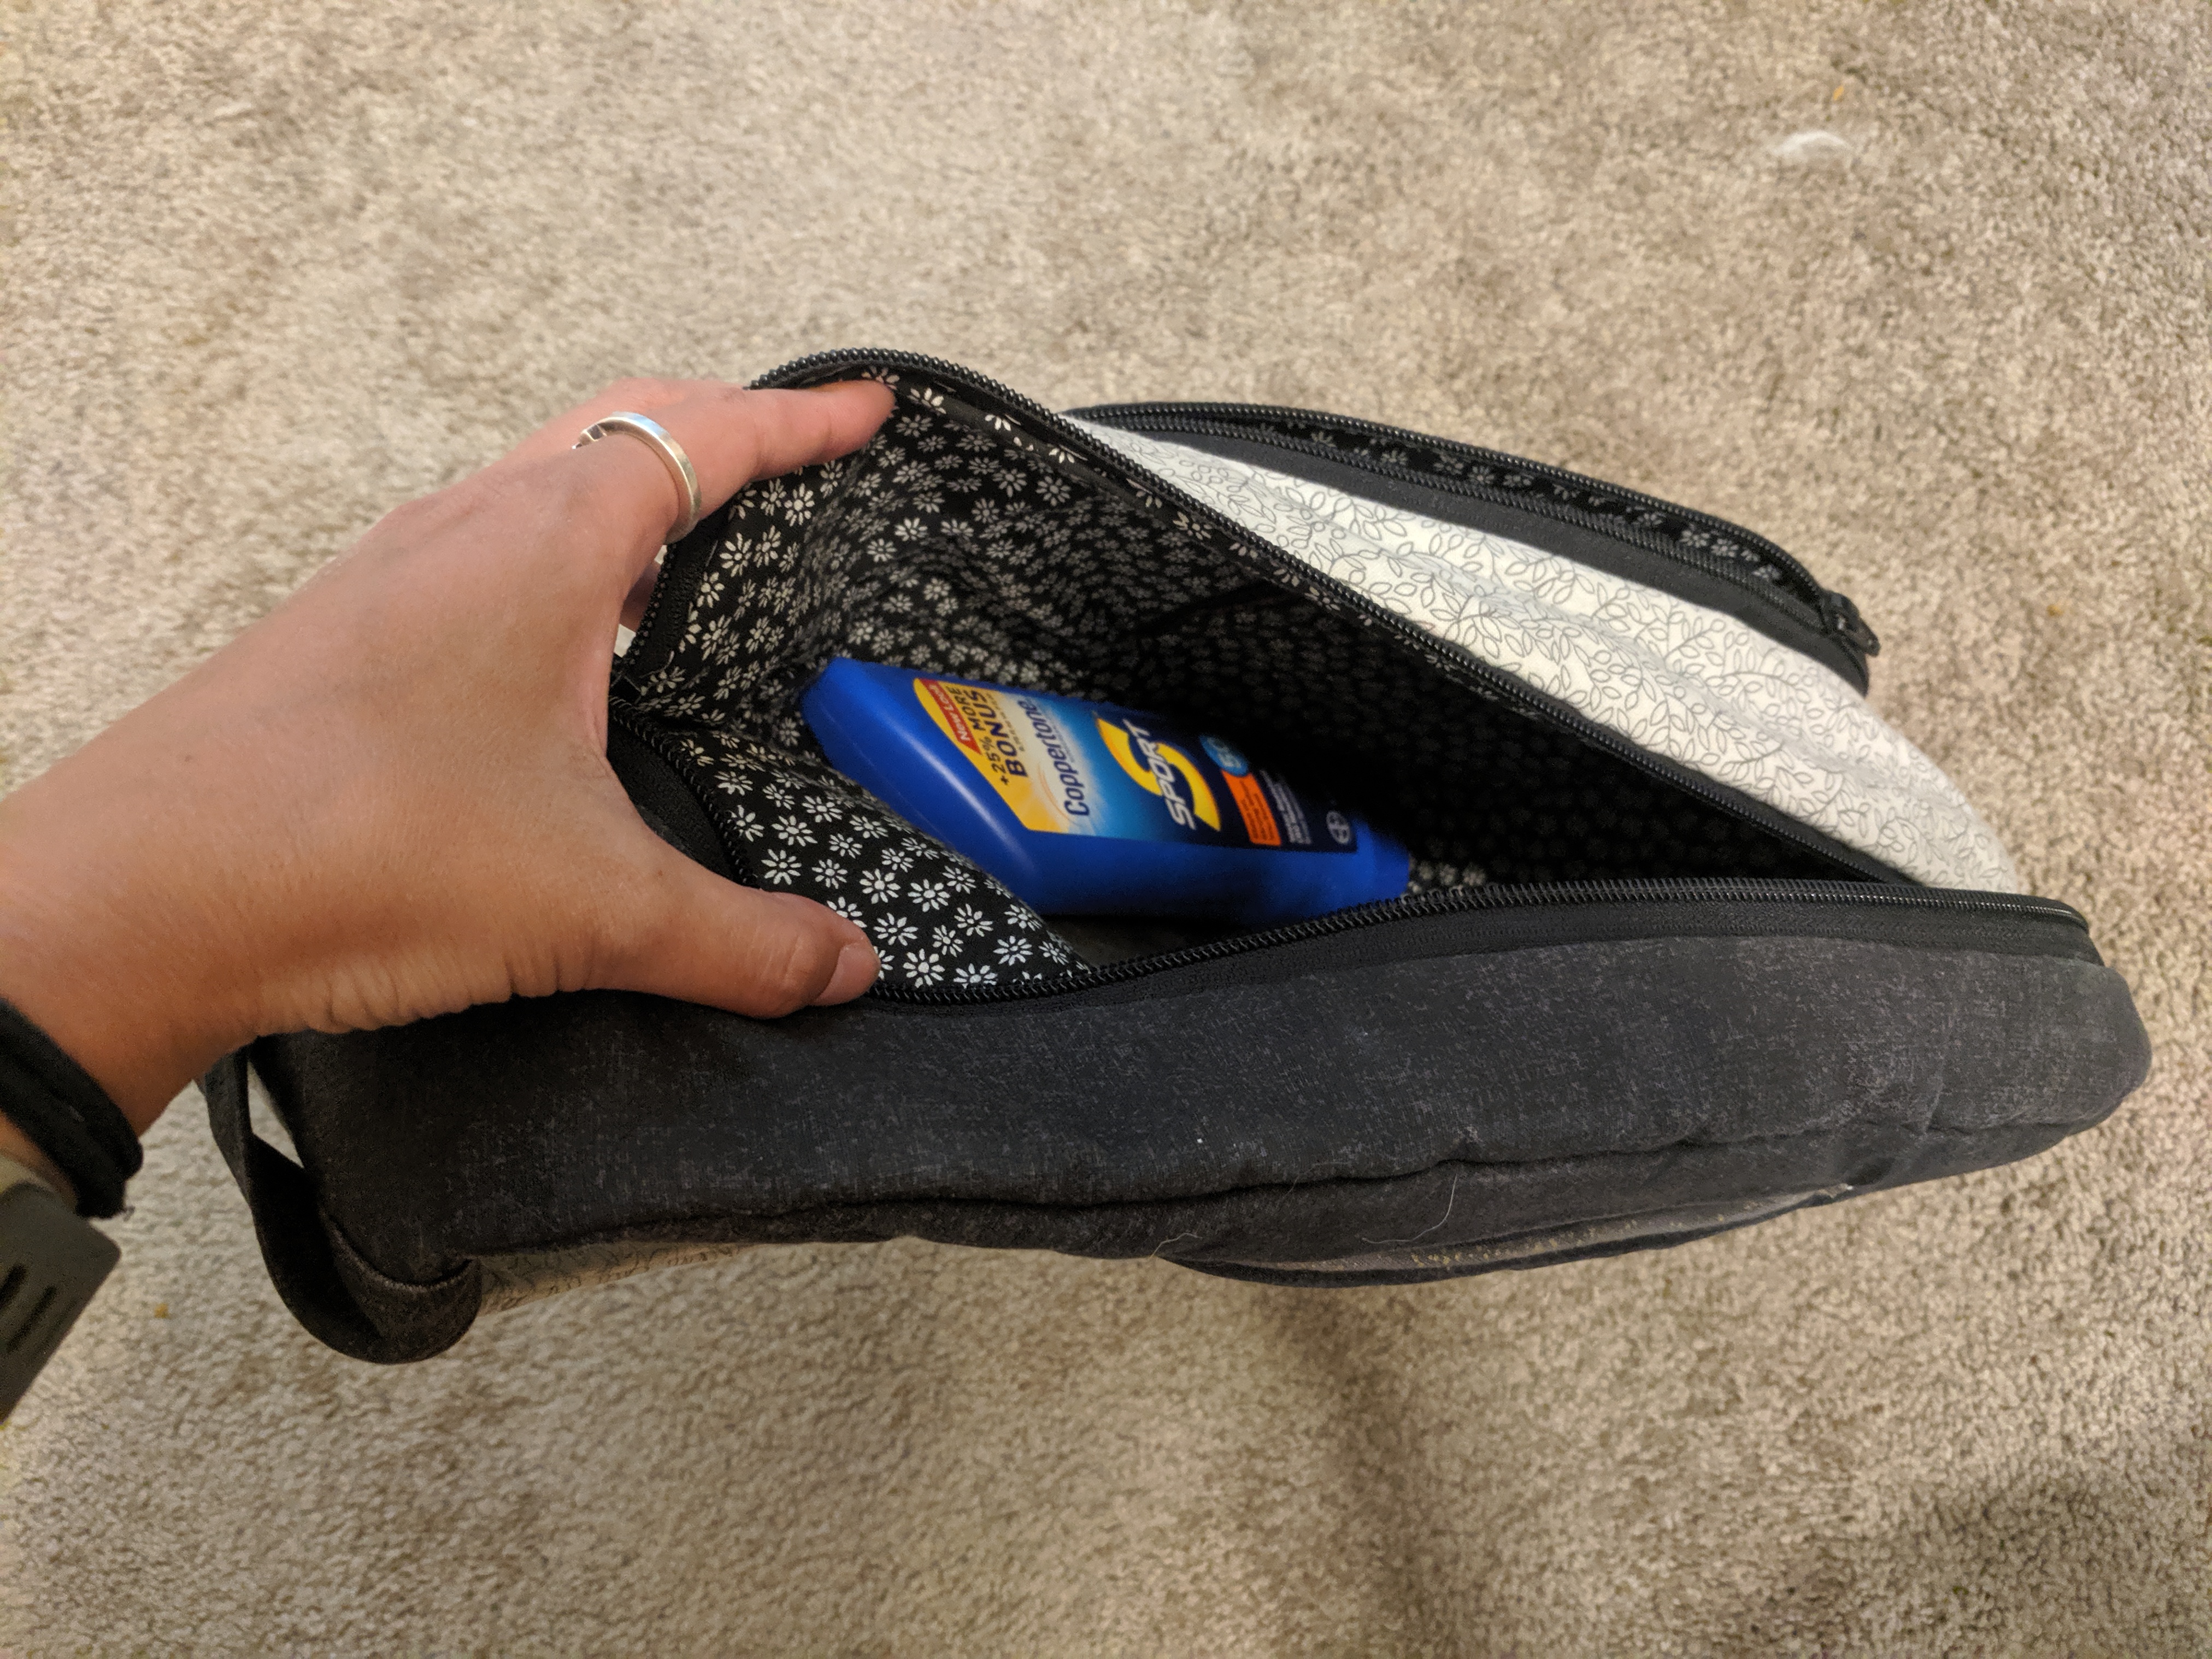
Isn’t the lining fun? Sunscreen for scale.The zippered pocket on the back is where the entire thing was turned right side out when the construction was done.
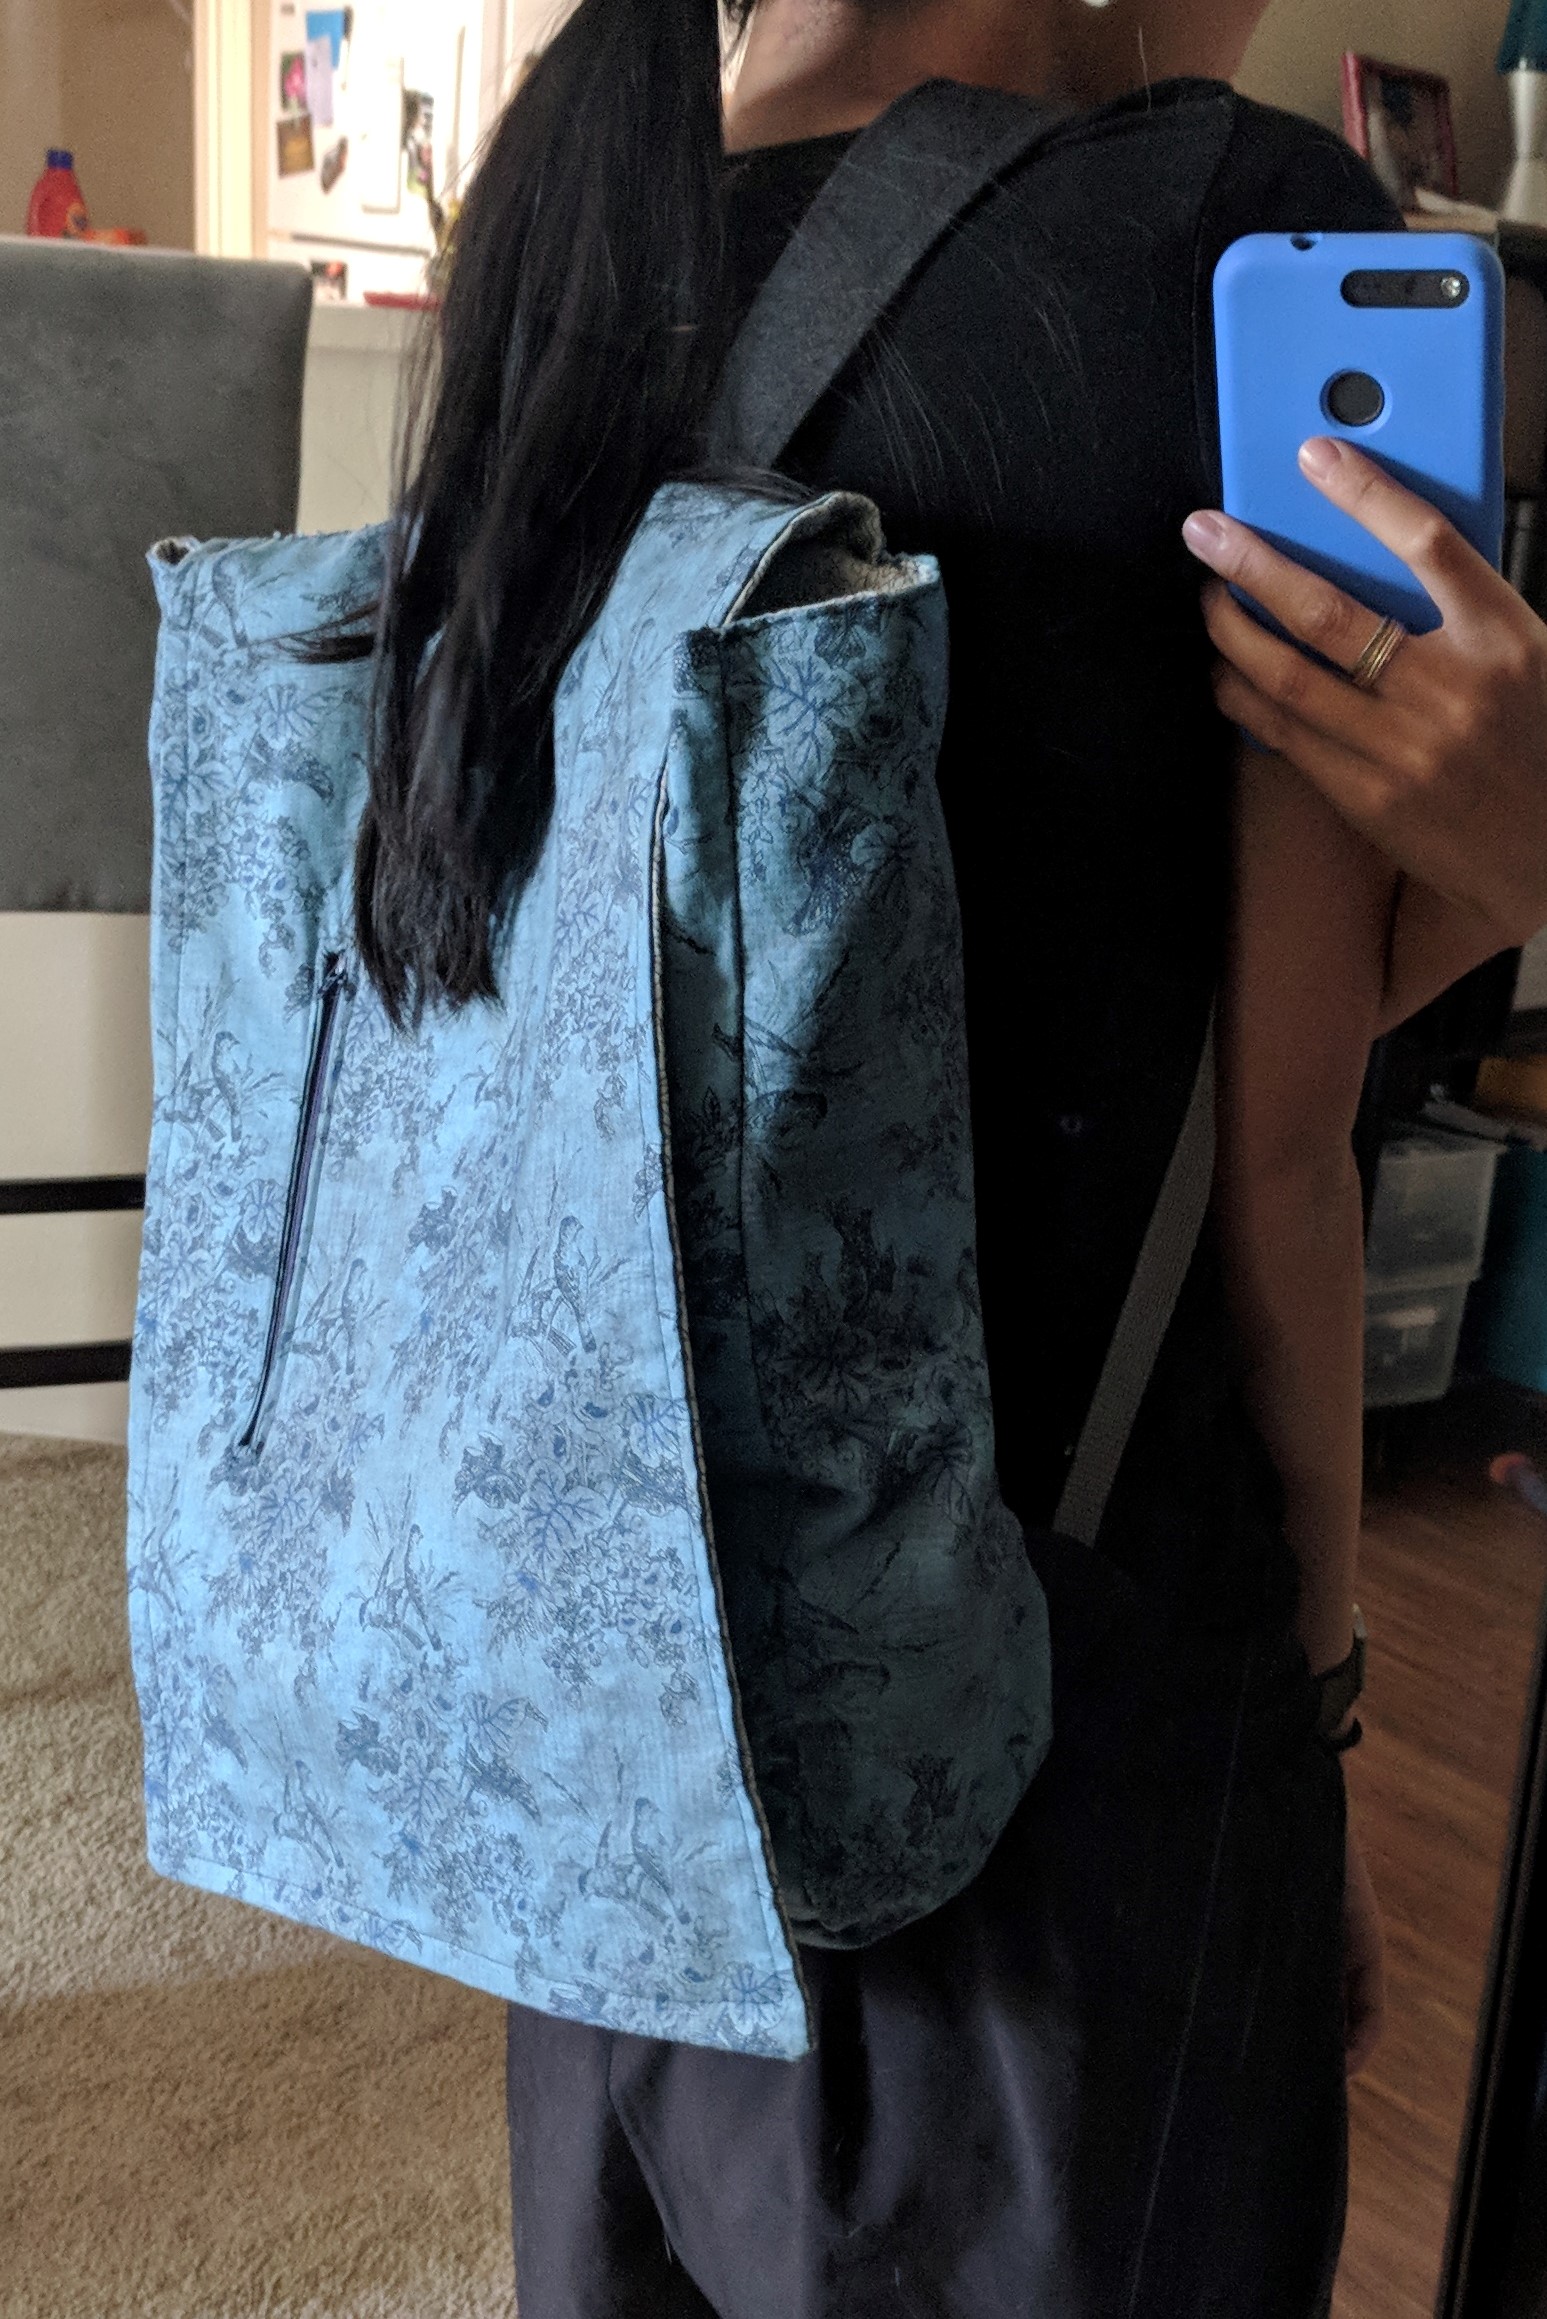
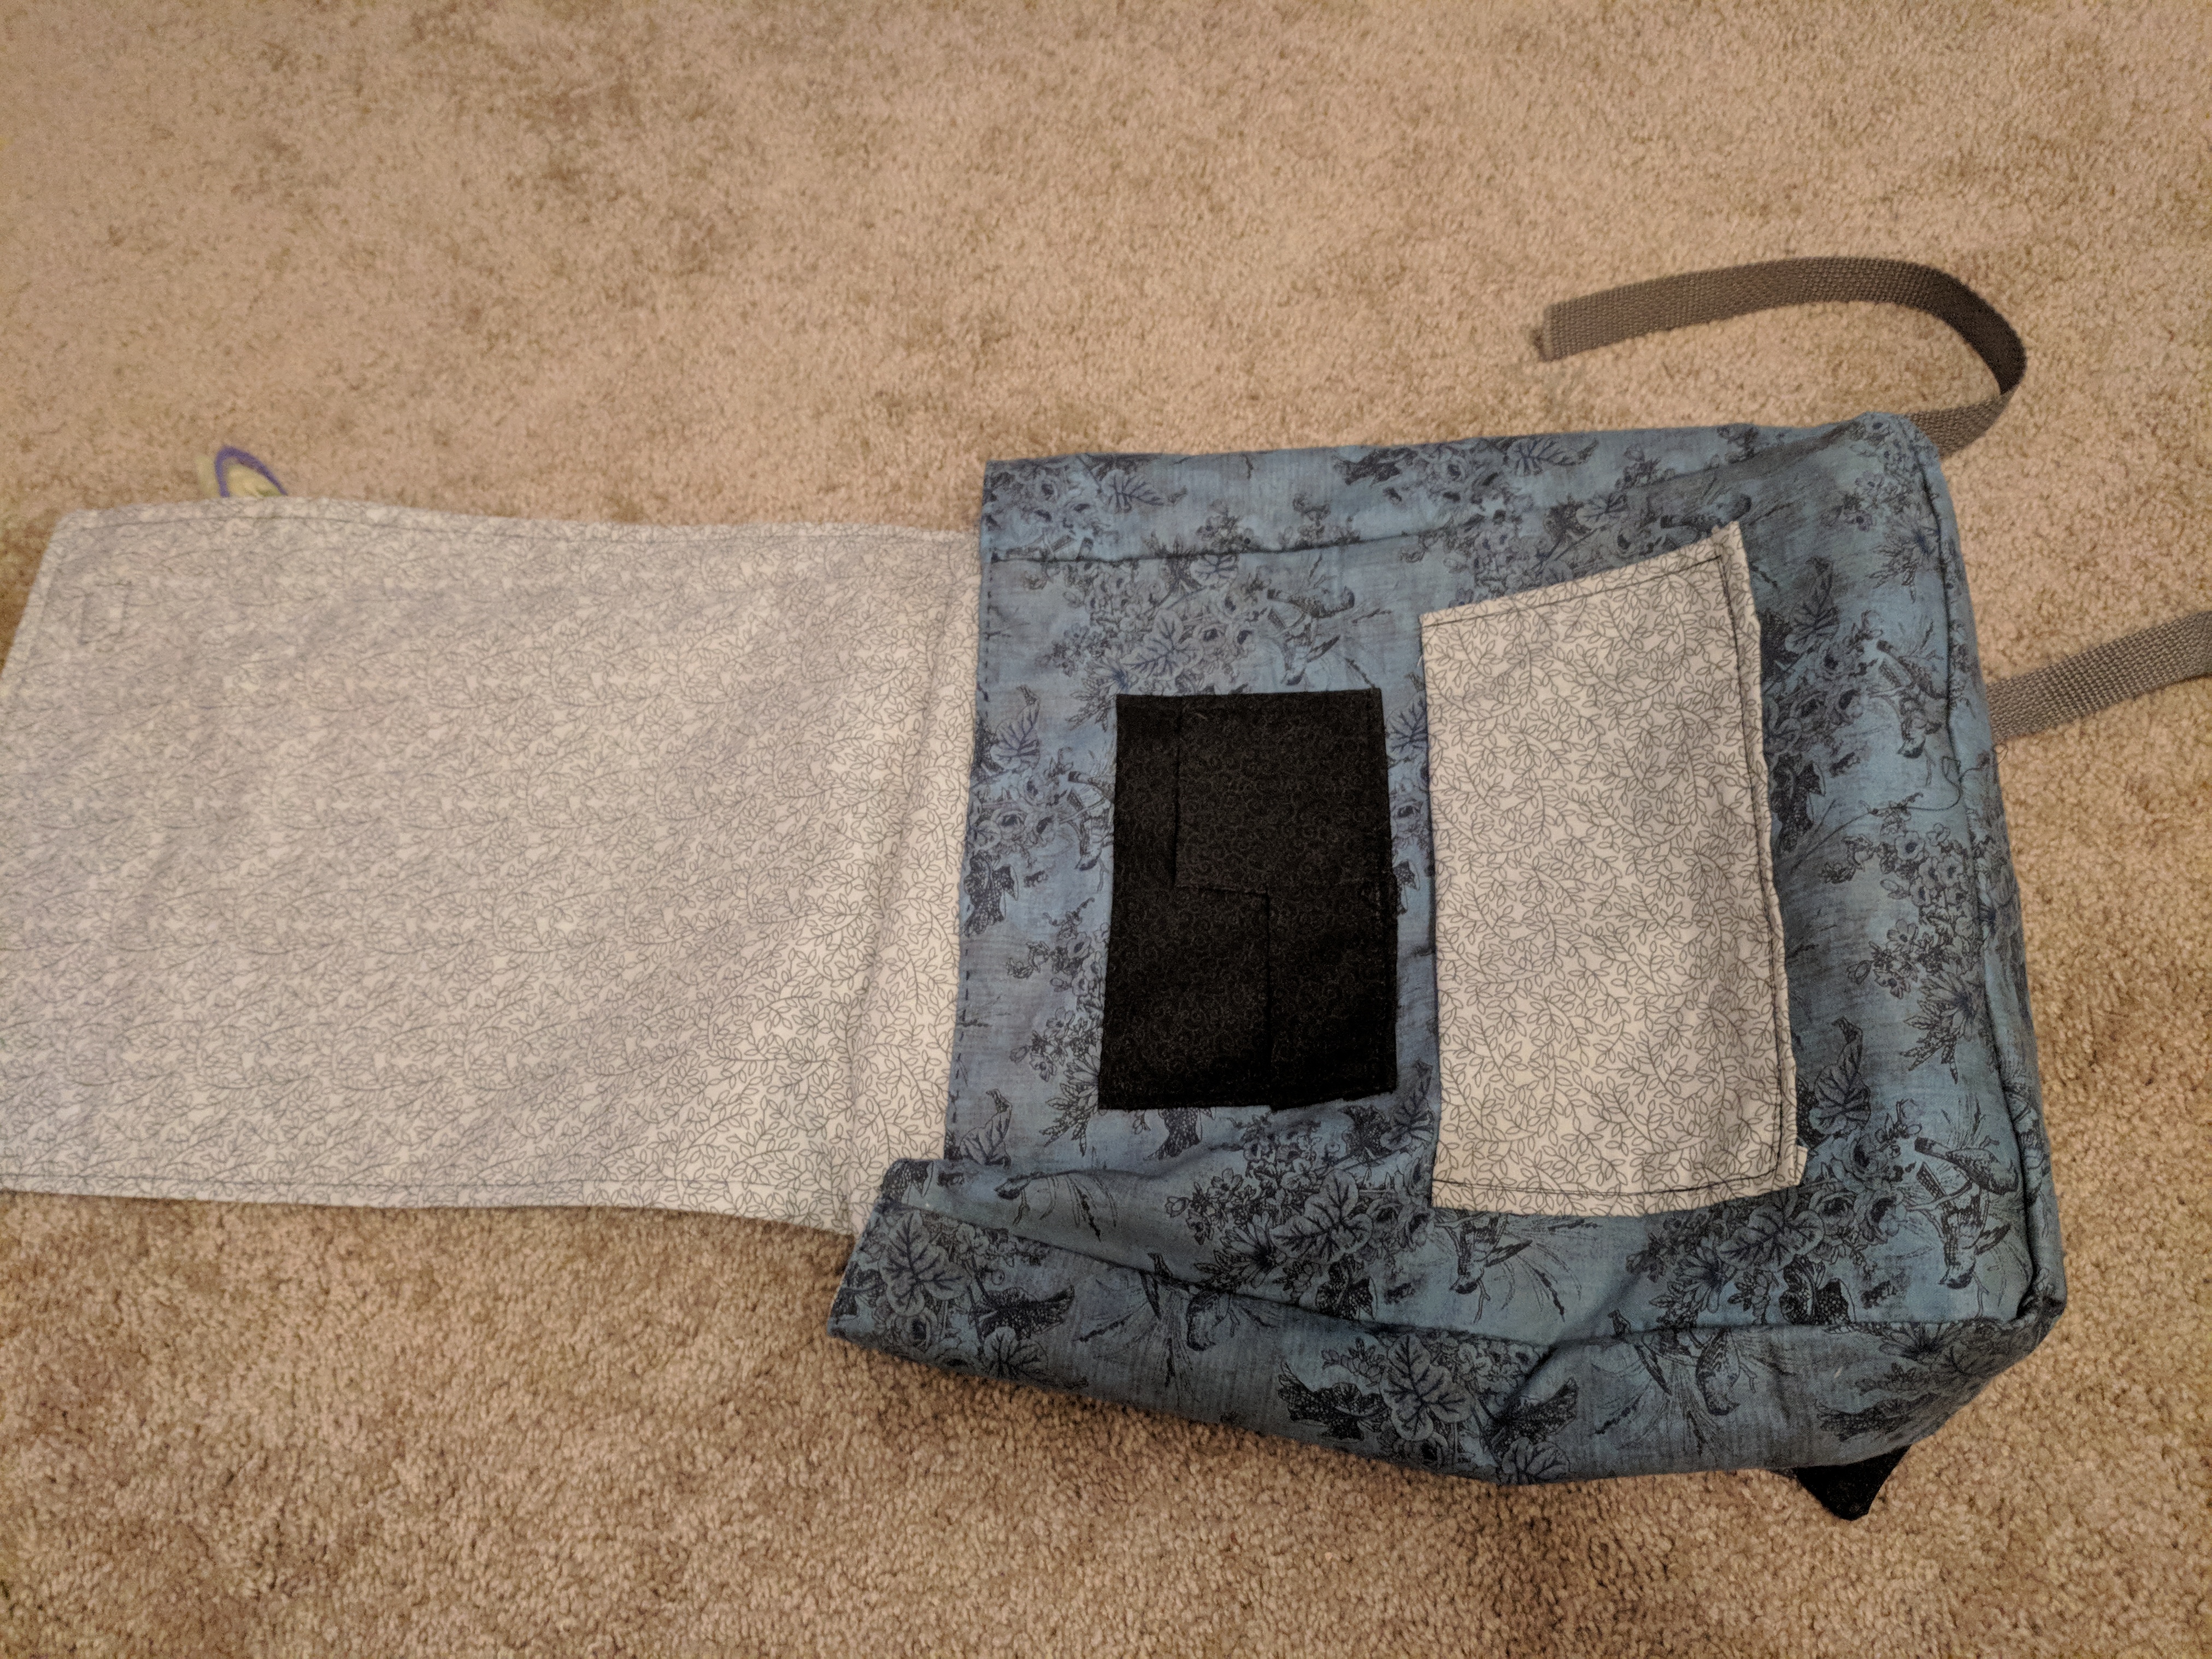
I made this backpack for a friend, we chose the fabric together at Joann and then I constructed it off of the Ruther Backpack pattern from IThinkSewBags on Etsy. I added a laptop sleeve with foam padding, and some additional pockets on the inside flap. This was my first big project using a machine, which I used for most of the construction. I did the top stitching and strap attachments by hand for a homey look.
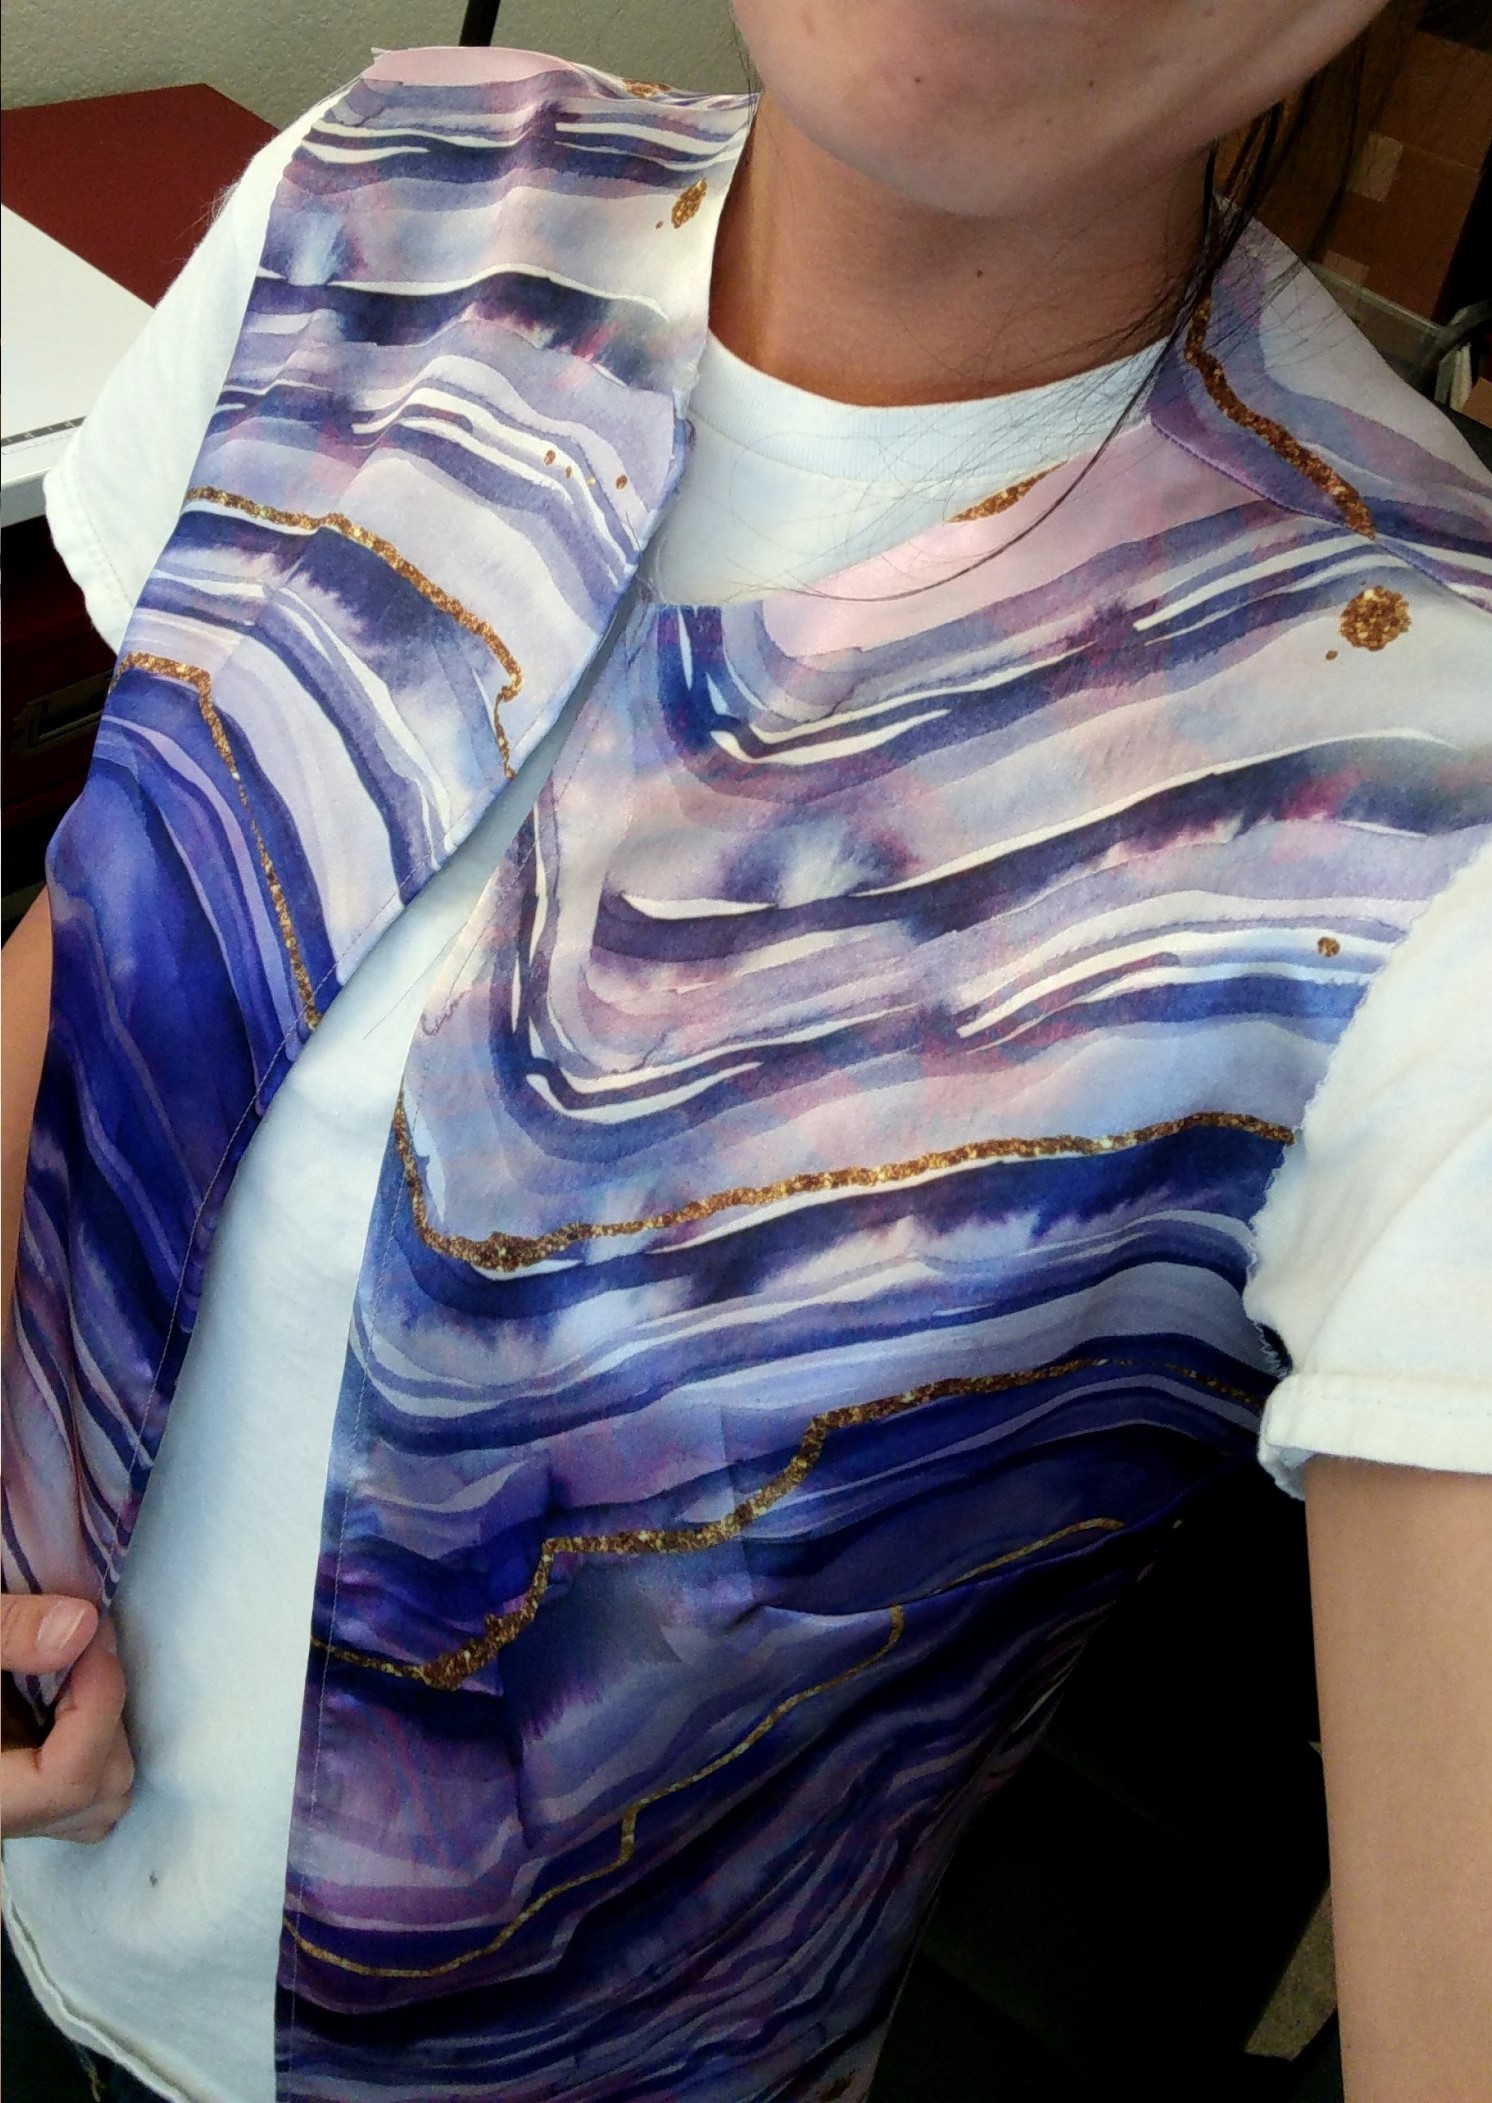
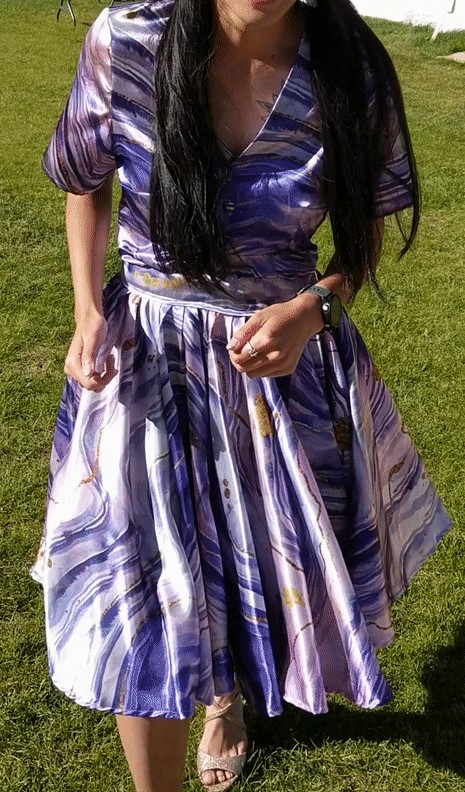
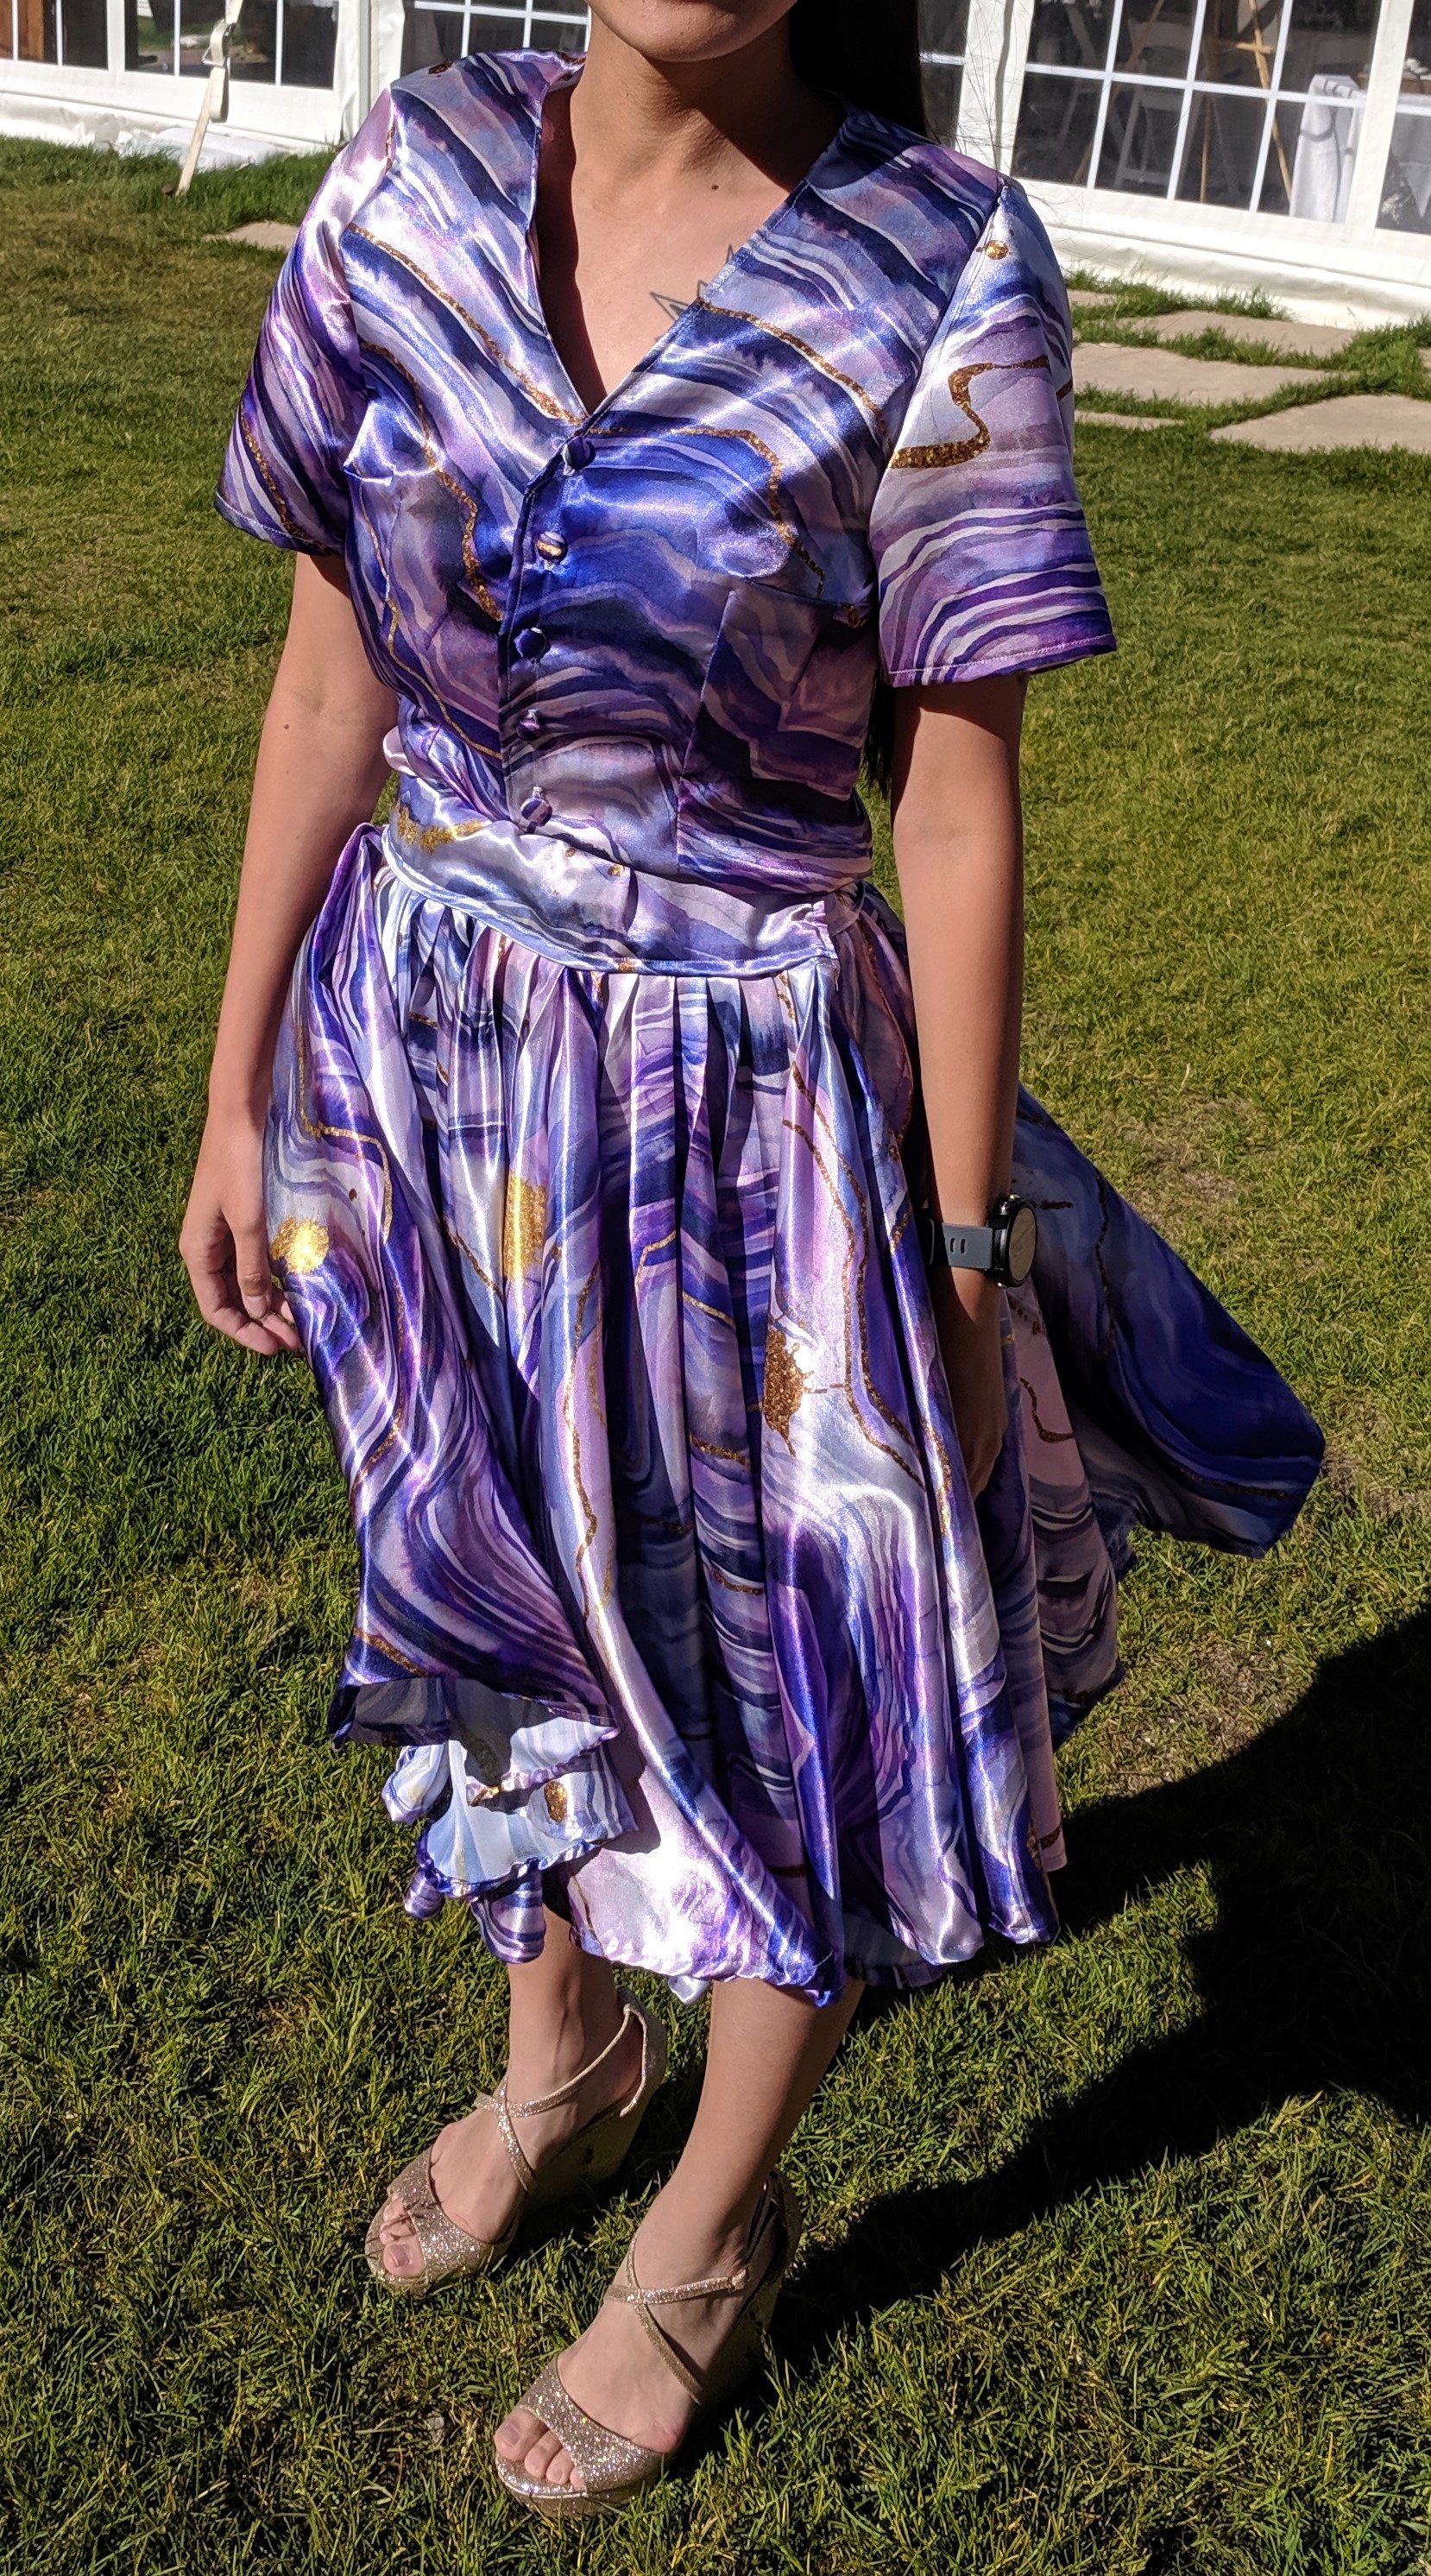
I made this top + skirt for a friend’s wedding. I got the fabric from Spoonflower, a site that takes designs and can print them on many different fabrics. I chose a polyester satin that turned out to be a bit slippery. I used tissue paper to stabilize the fabric and ensure it didn’t fall down the hole in the machine where the needle goes through or stretch out. It worked super well, but was kind of annoying since I had to sandwich each seam in tissue paper, sew, then rip the tissue paper off.
I modified the Lekala #5446 Classical Blouse pattern again, and sewed 3 circle skirts together to get the full volume of the skirt. With the blouse, I constructed the entire thing save for the collar, since I wasn’t sure I wanted to go down that road and have it turn out weird (again). I used buttons that I was able to cover with the same fabric as the shirt (they have a separate back and front, you wrap the fabric around the front, stuff it into the “bowl” of the button, and click the back into place, securing the fabric).
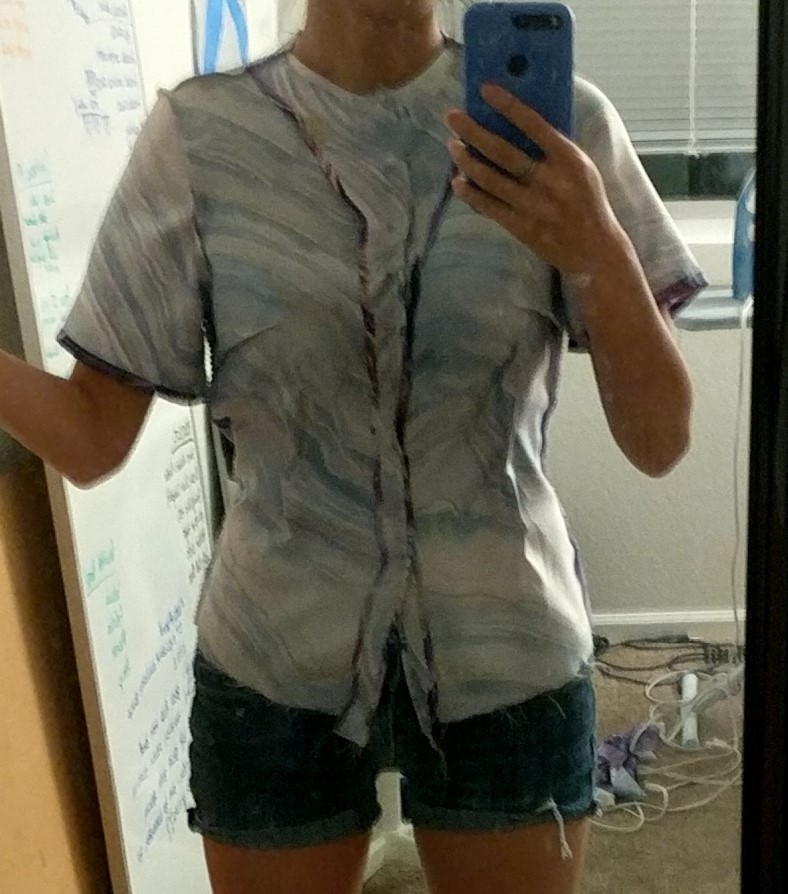
Shirt in progress
Trying to decide on the collar
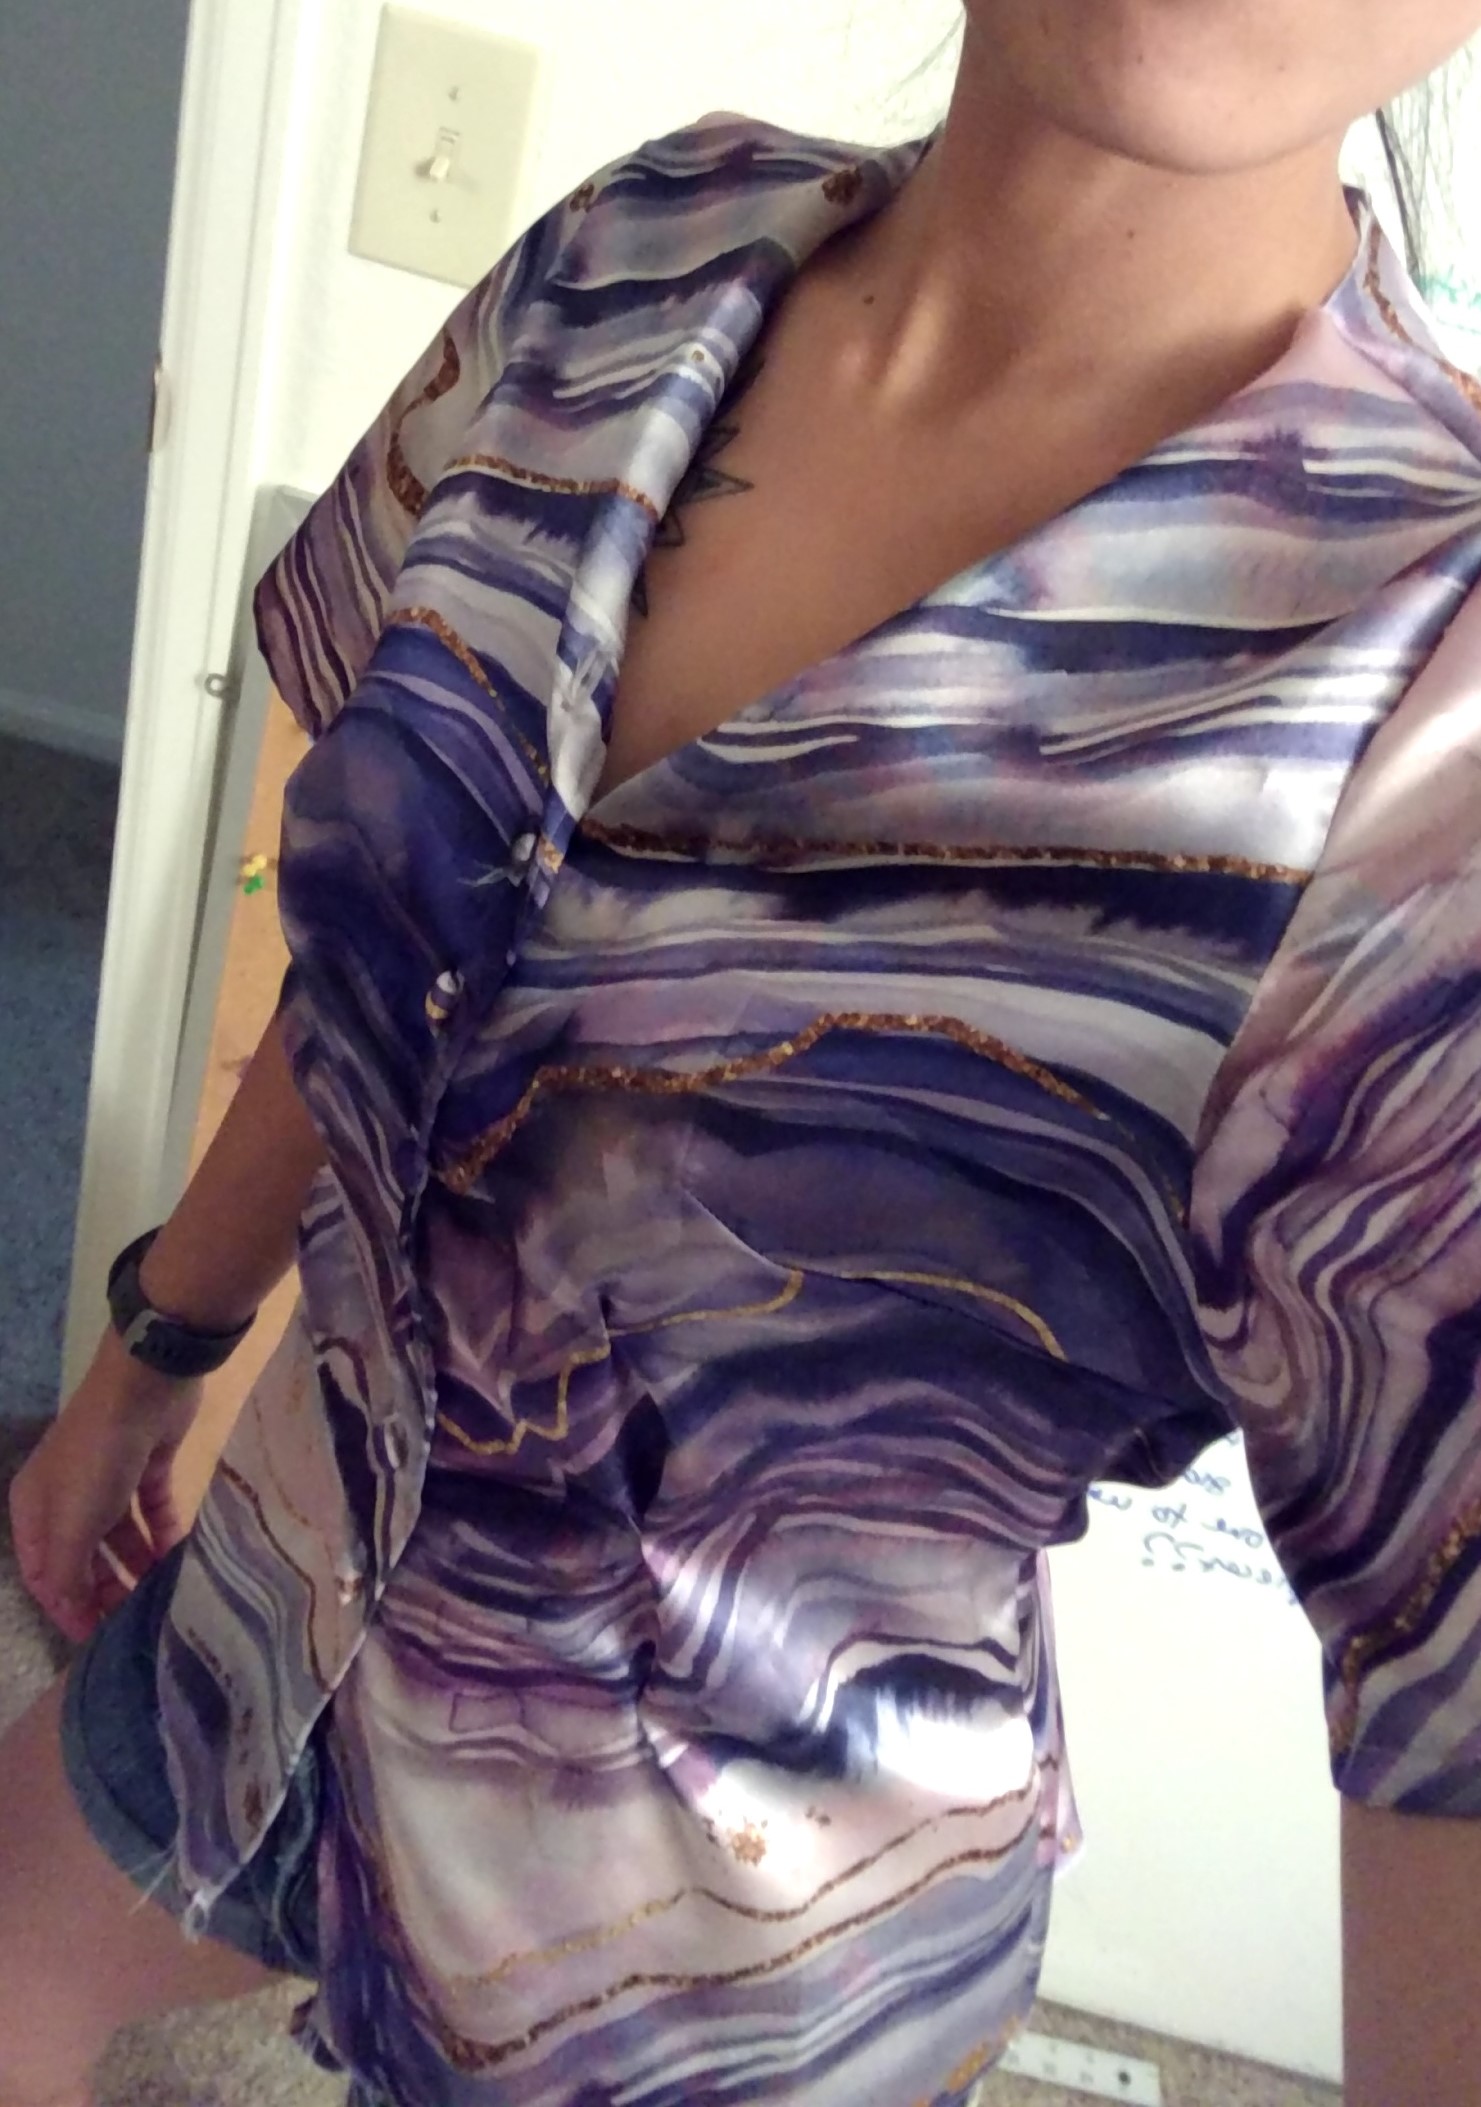
Decided to fold the top in to make a V-neck
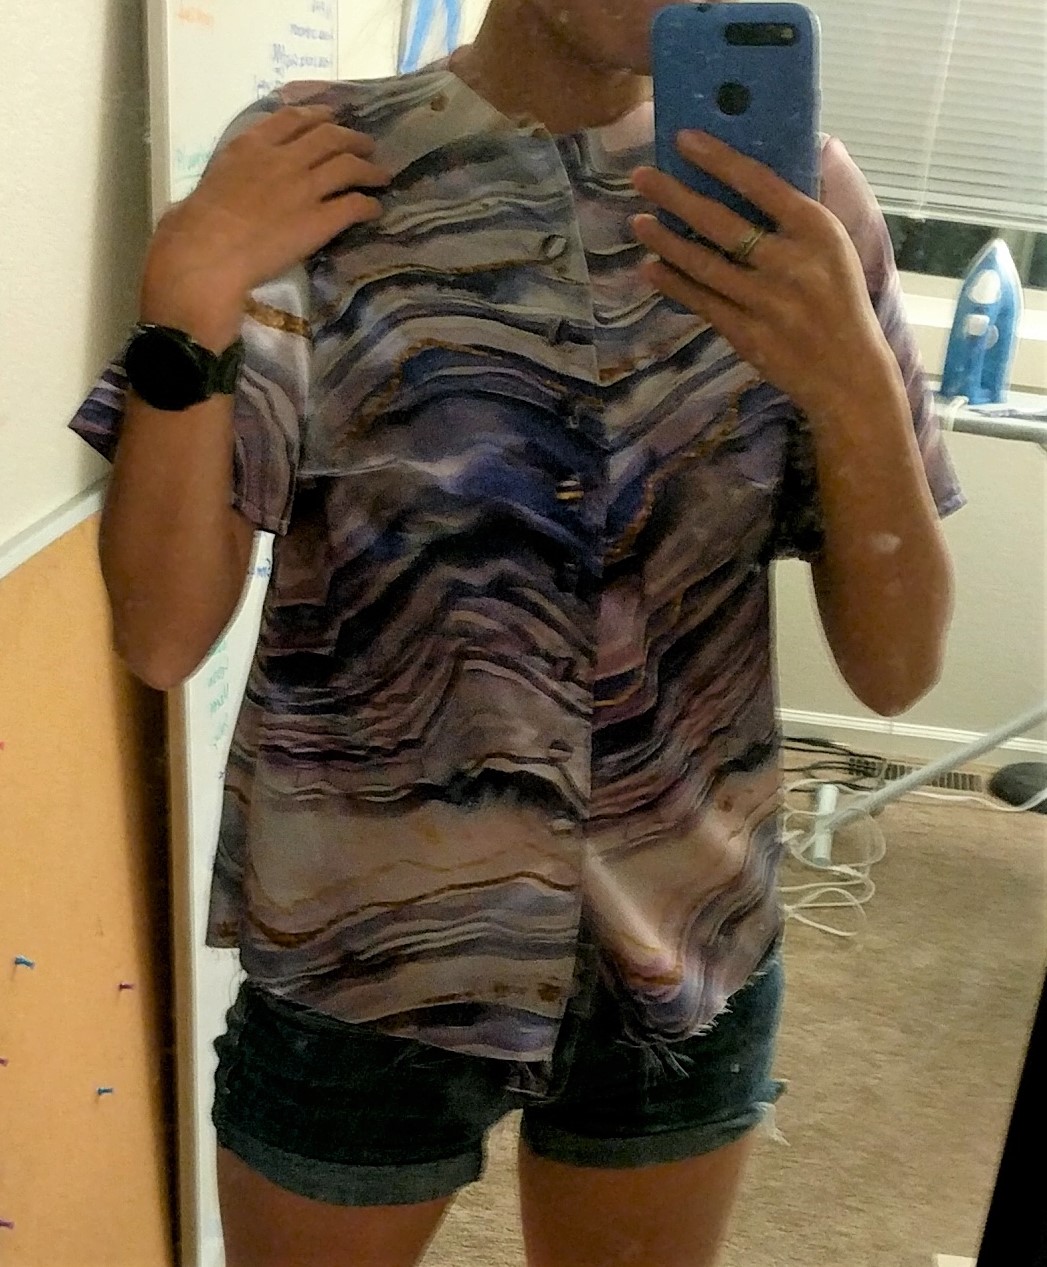
Custom / improv fitting with darts
I used improv fitting while the shirt was on my body to create darts that (a) flattered me and (b) ensured there wouldn’t be wrinkles when I tucked the shirt into the skirt. I pin inside out so that I can sew the darts directly, which assumes my body is symmetrical, and no one’s body is, but it’s close enough.
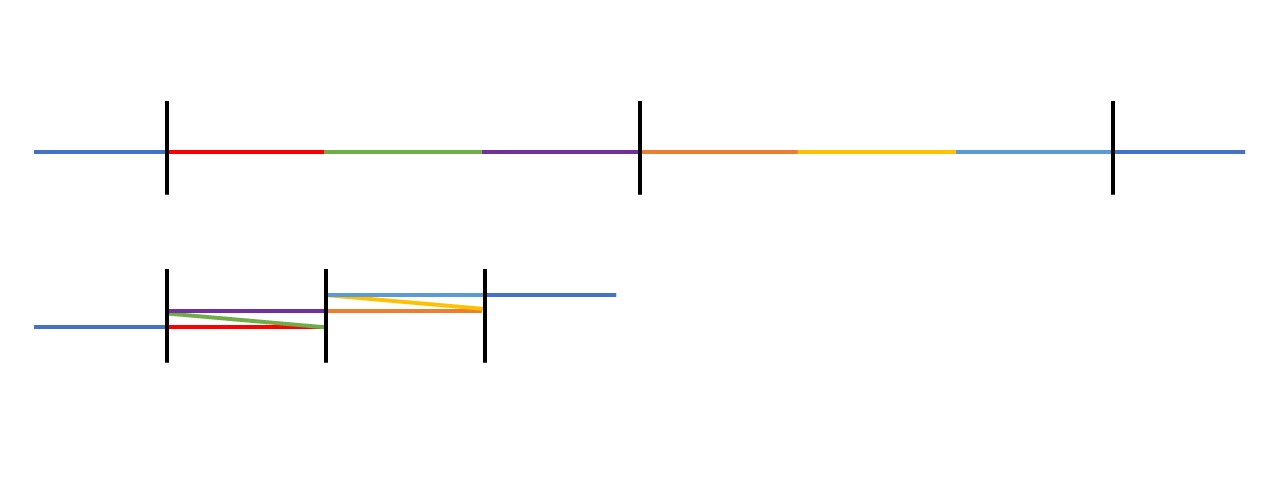
The skirt used about 5 yards of fabric. A basic circle skirt is just that – a circle of fabric with a circle cut out for the waist (more of a doughnut, really). I cut out three doughnuts by folding the fabric in half, and in half again, so I only had to cut out a quarter circle. Then I had three doughnuts, and I cut each one on one side so I could have 3 vertical seams on the finished big doughnut. Now, I had planned to have the inner radius be my waist radius, but I forgot to divide by 3 before I cut out the doughnuts… But it just so happens that knife pleats divide the length by 3, so I added pleats all along the waist to bring it back to the right measurement. This also gave it a bit of poof and volume, which was great!
A hopefully effective way to explain pleats – the red-green-purple section turns out to be the length of just the red section aka 1/3 the length
Originally, this project was supposed to be a dress, but I realized that I wanted to wear the skirt separate from the shirt, so I decided to not attach the shirt to the waistband. I installed a zipper with the waistband, and included some elastic after learning from the Skirt of Projects Past. I wore a tulle petticoat underneath to fluff it out even more than the 3 circles and pleats were fluffing it.
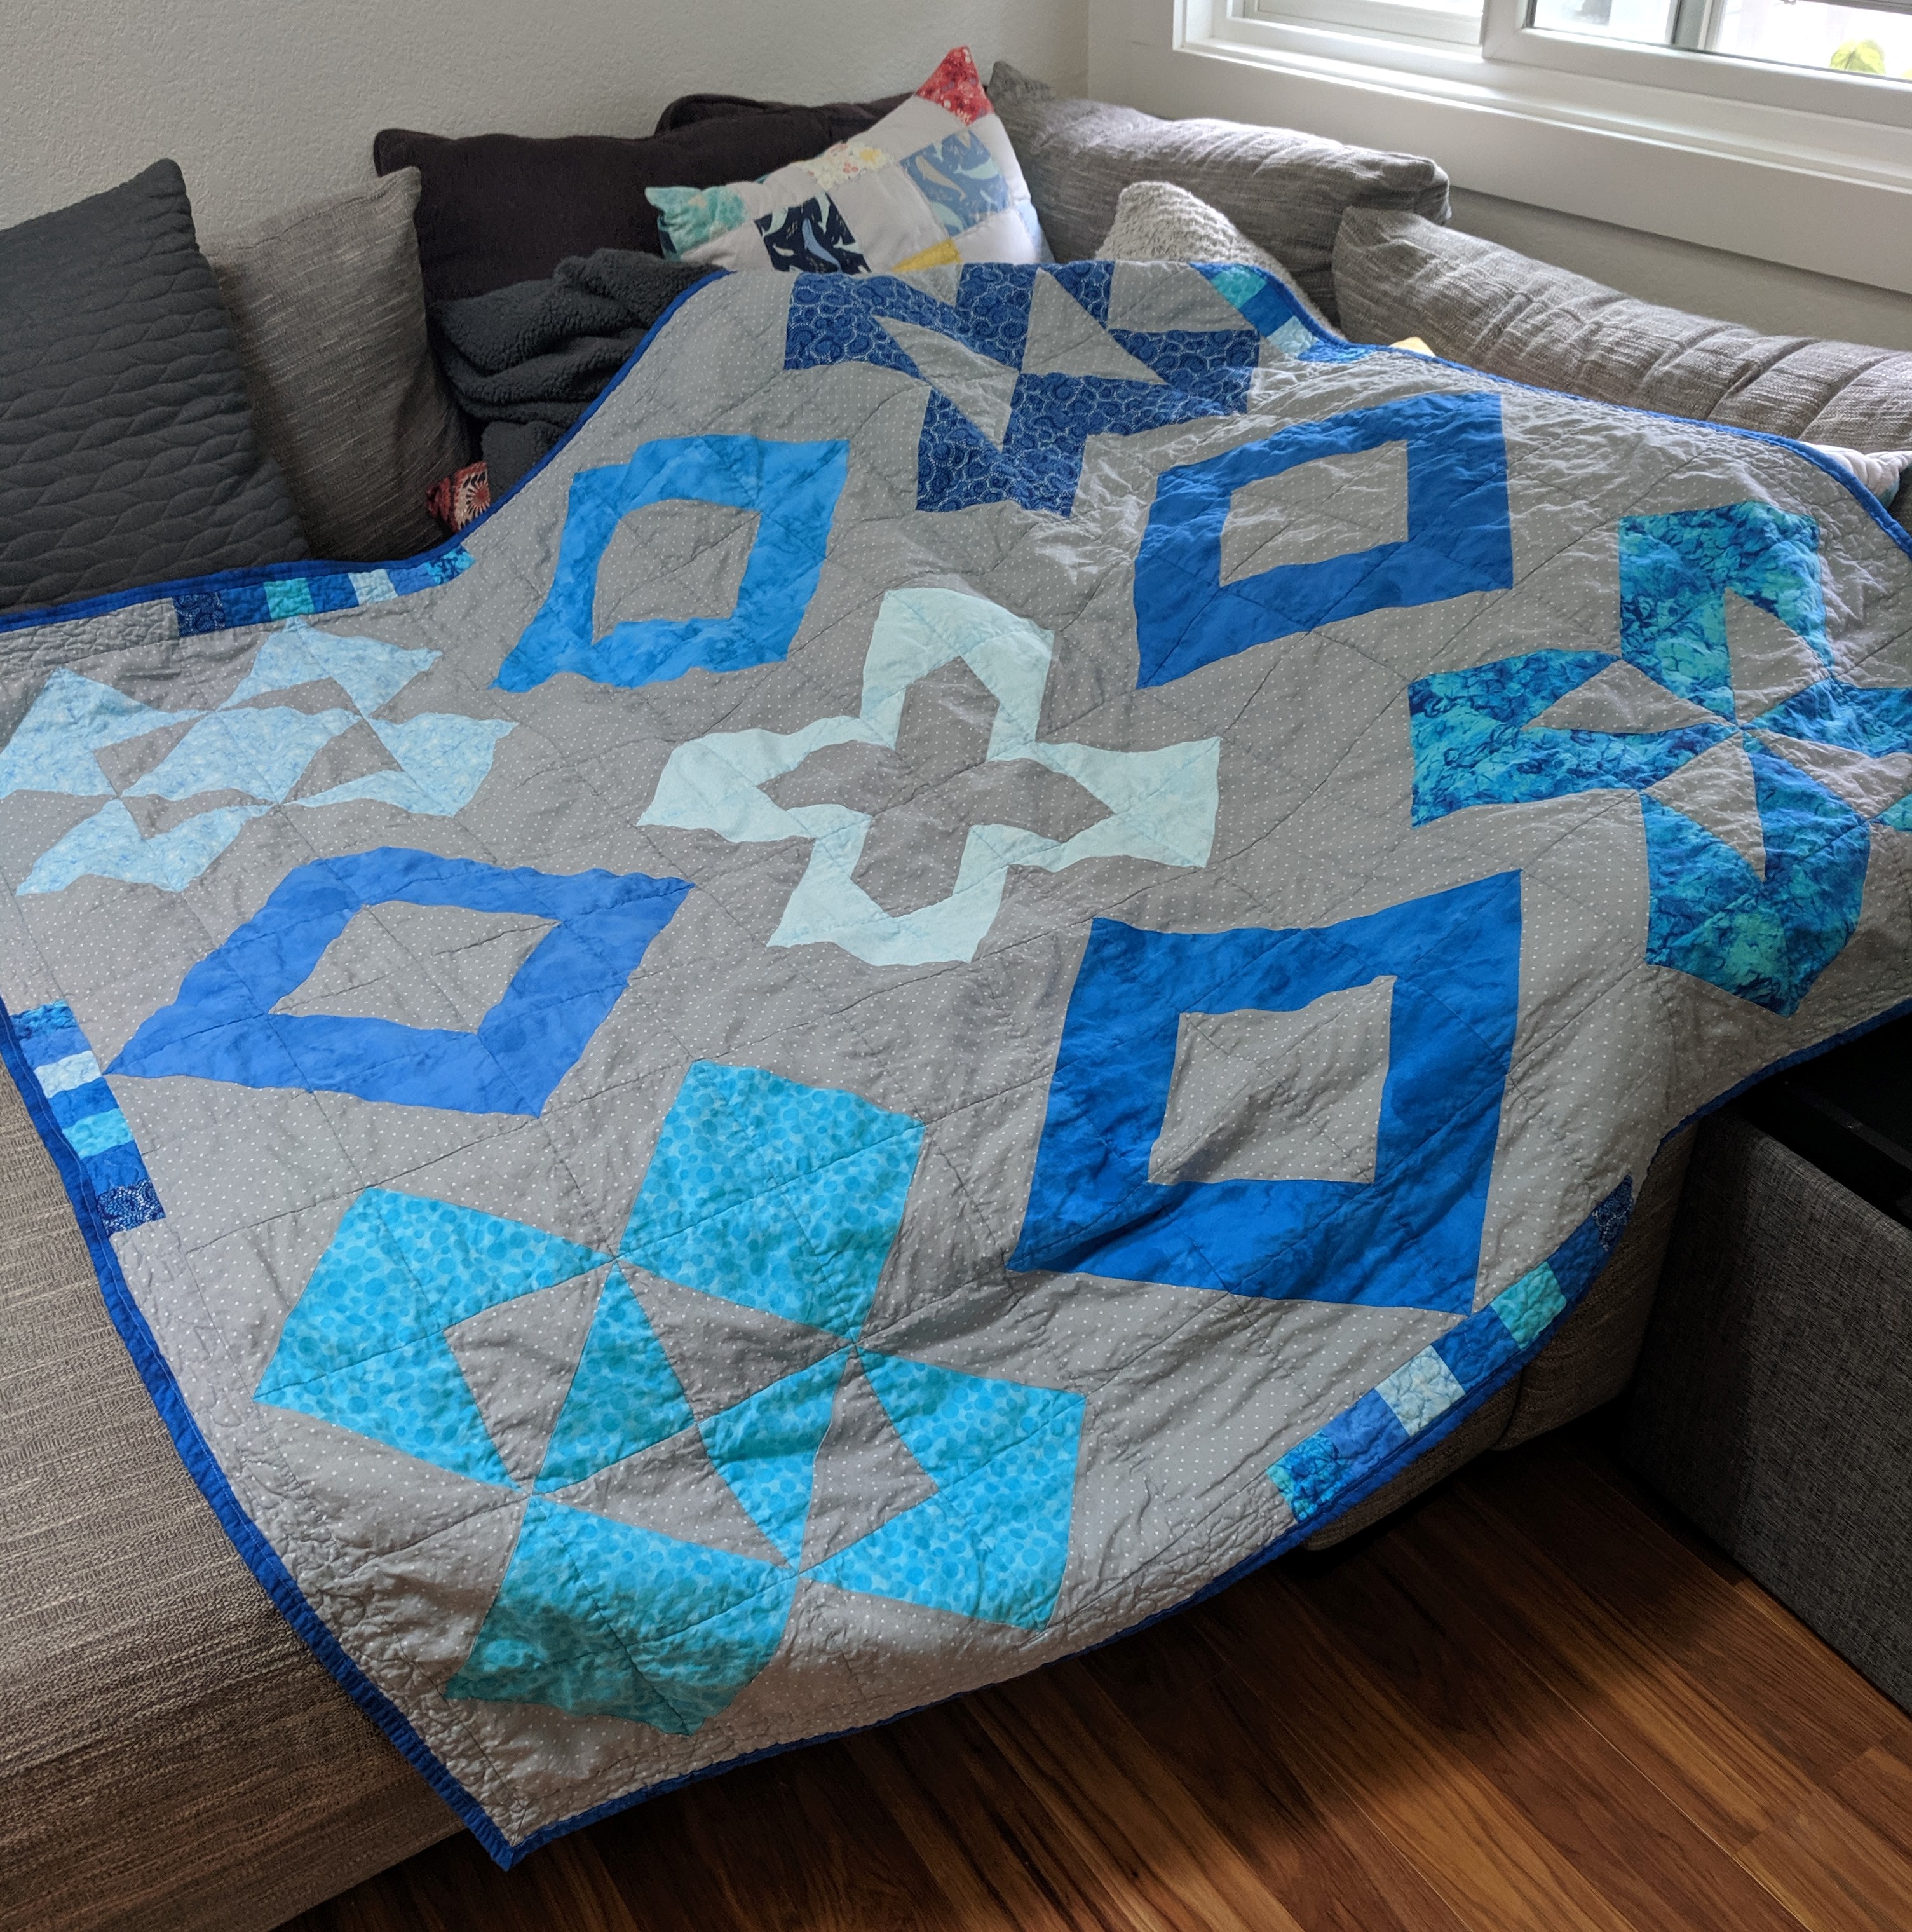
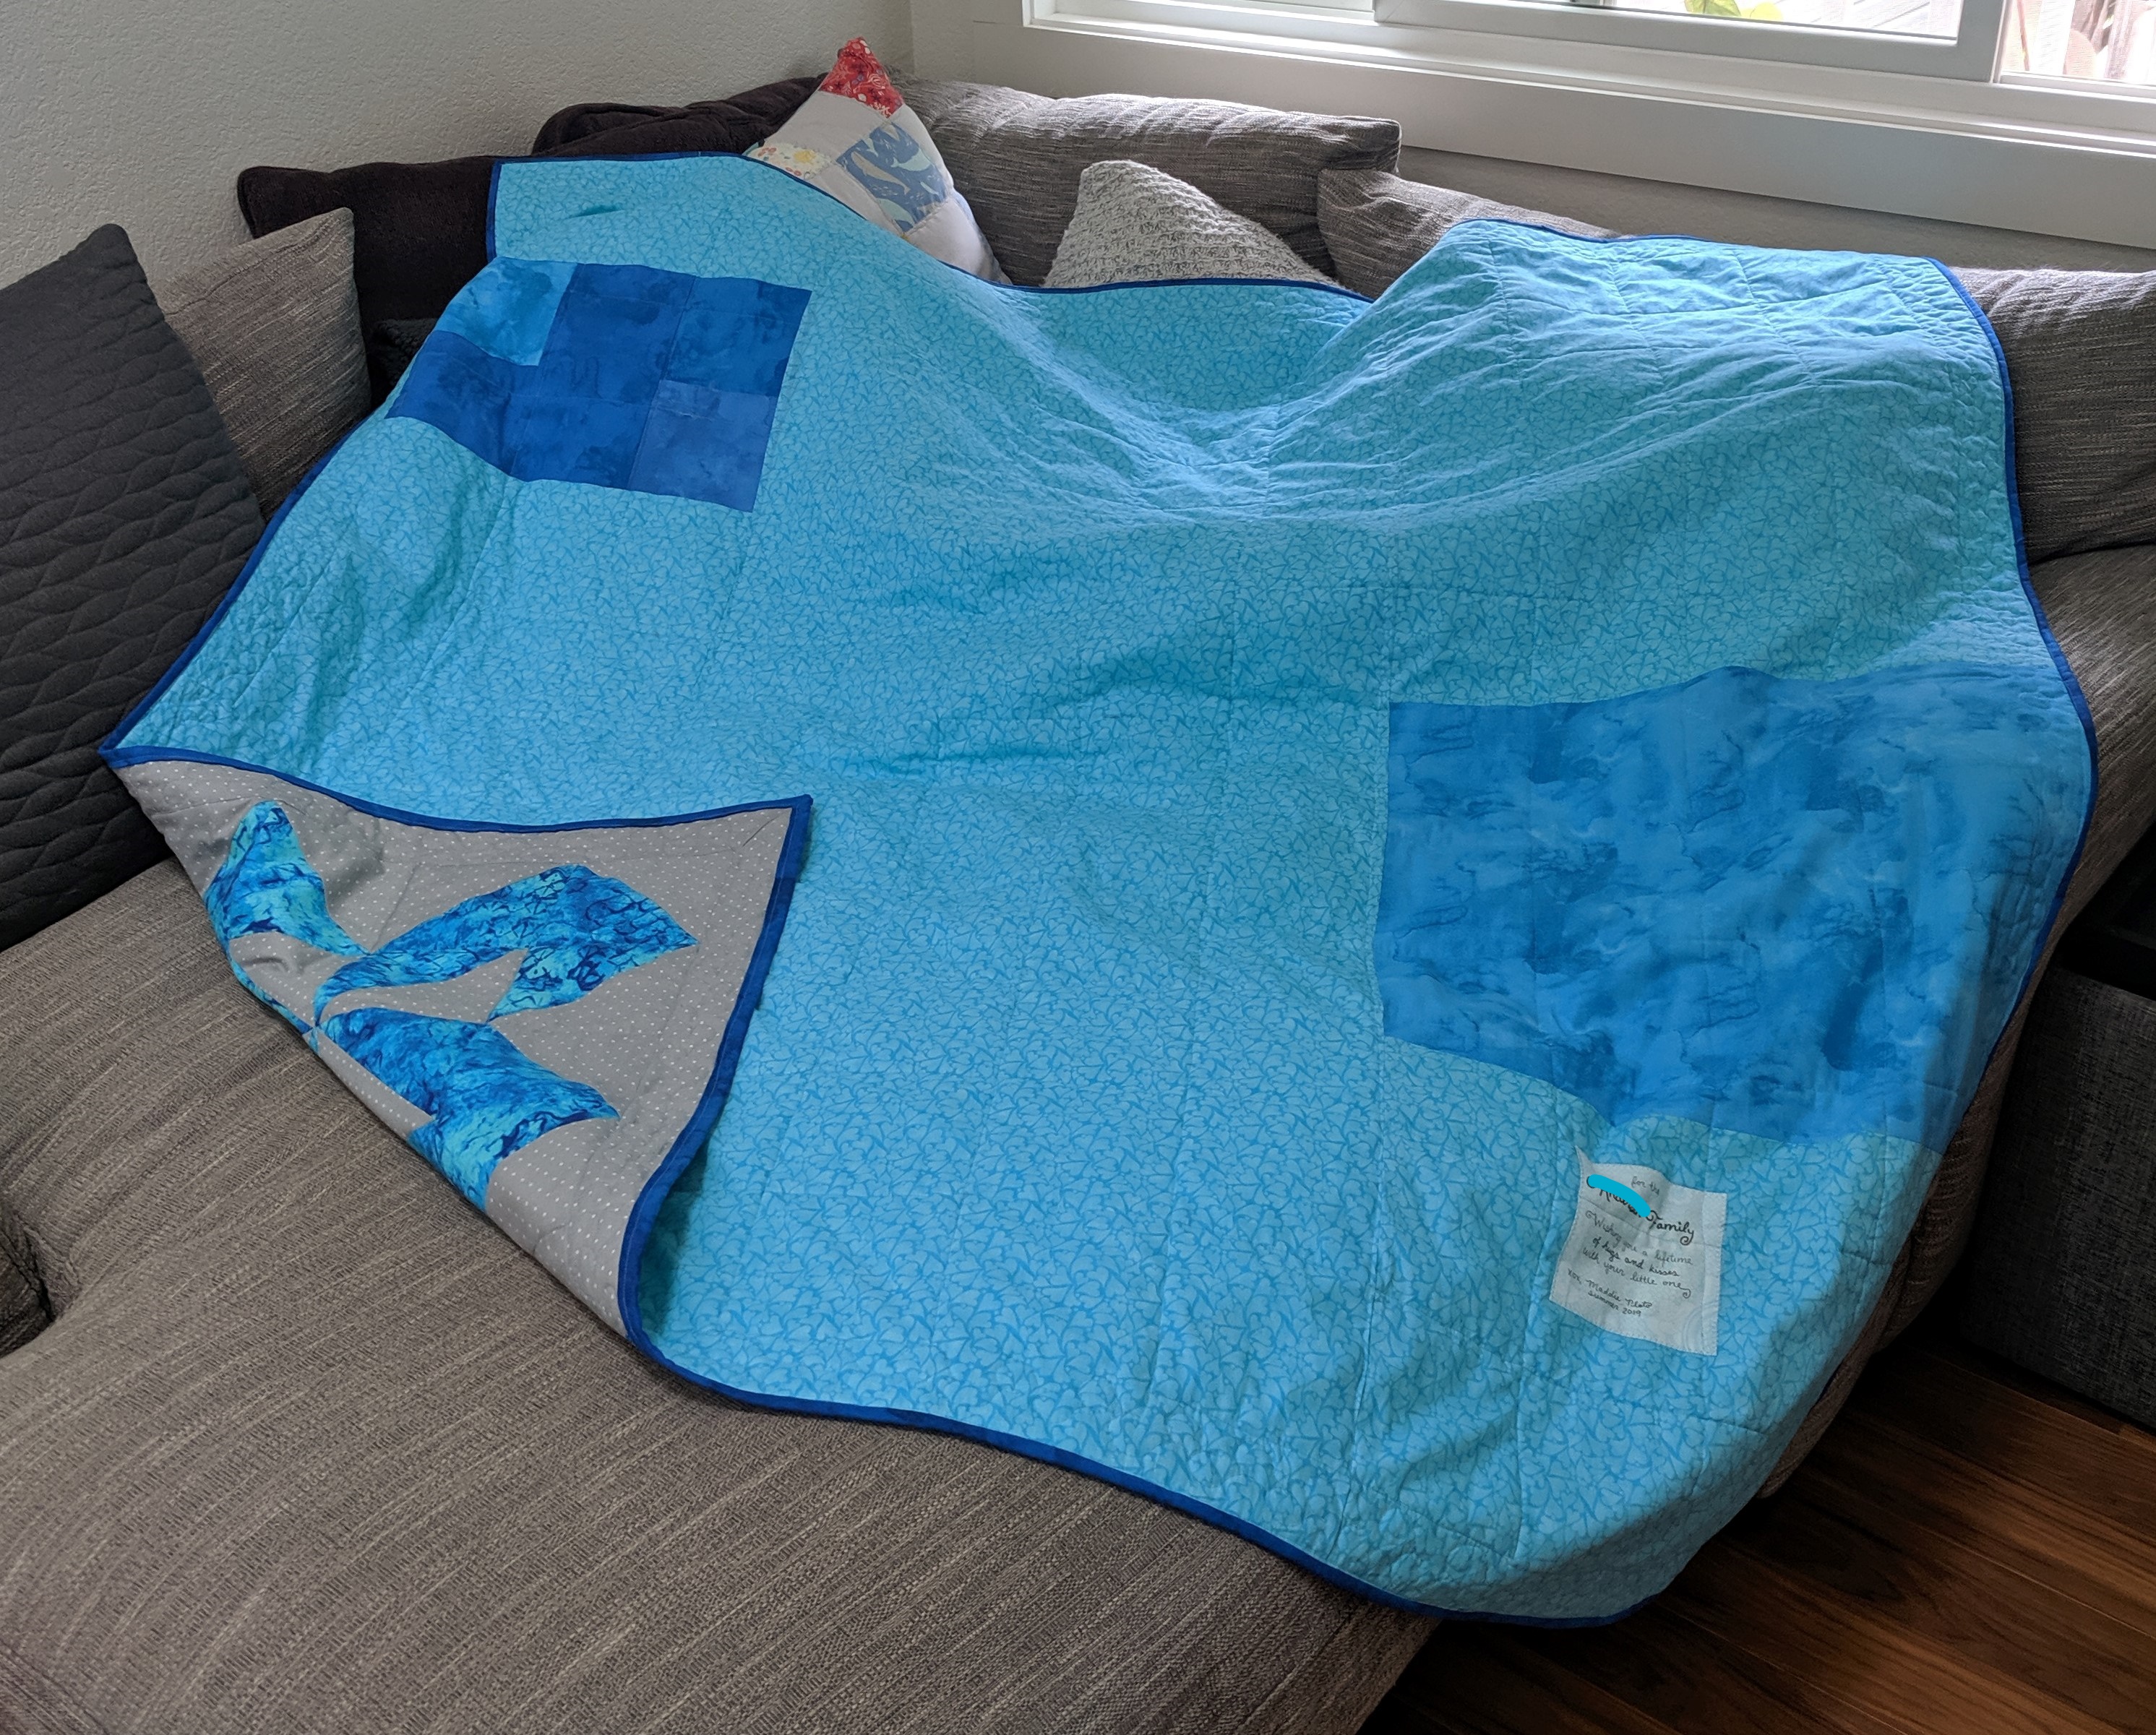
I made this quilt for my wonderful coworker whose wife had a baby 🙂 It is self drafted out of (primarily) HSTs. I based the pattern off “hugs and kisses XOXO” and used a fat quarter bundle from Joann. It ended up ~60″x60″, which is a bit large for a baby quilt but I don’t care.
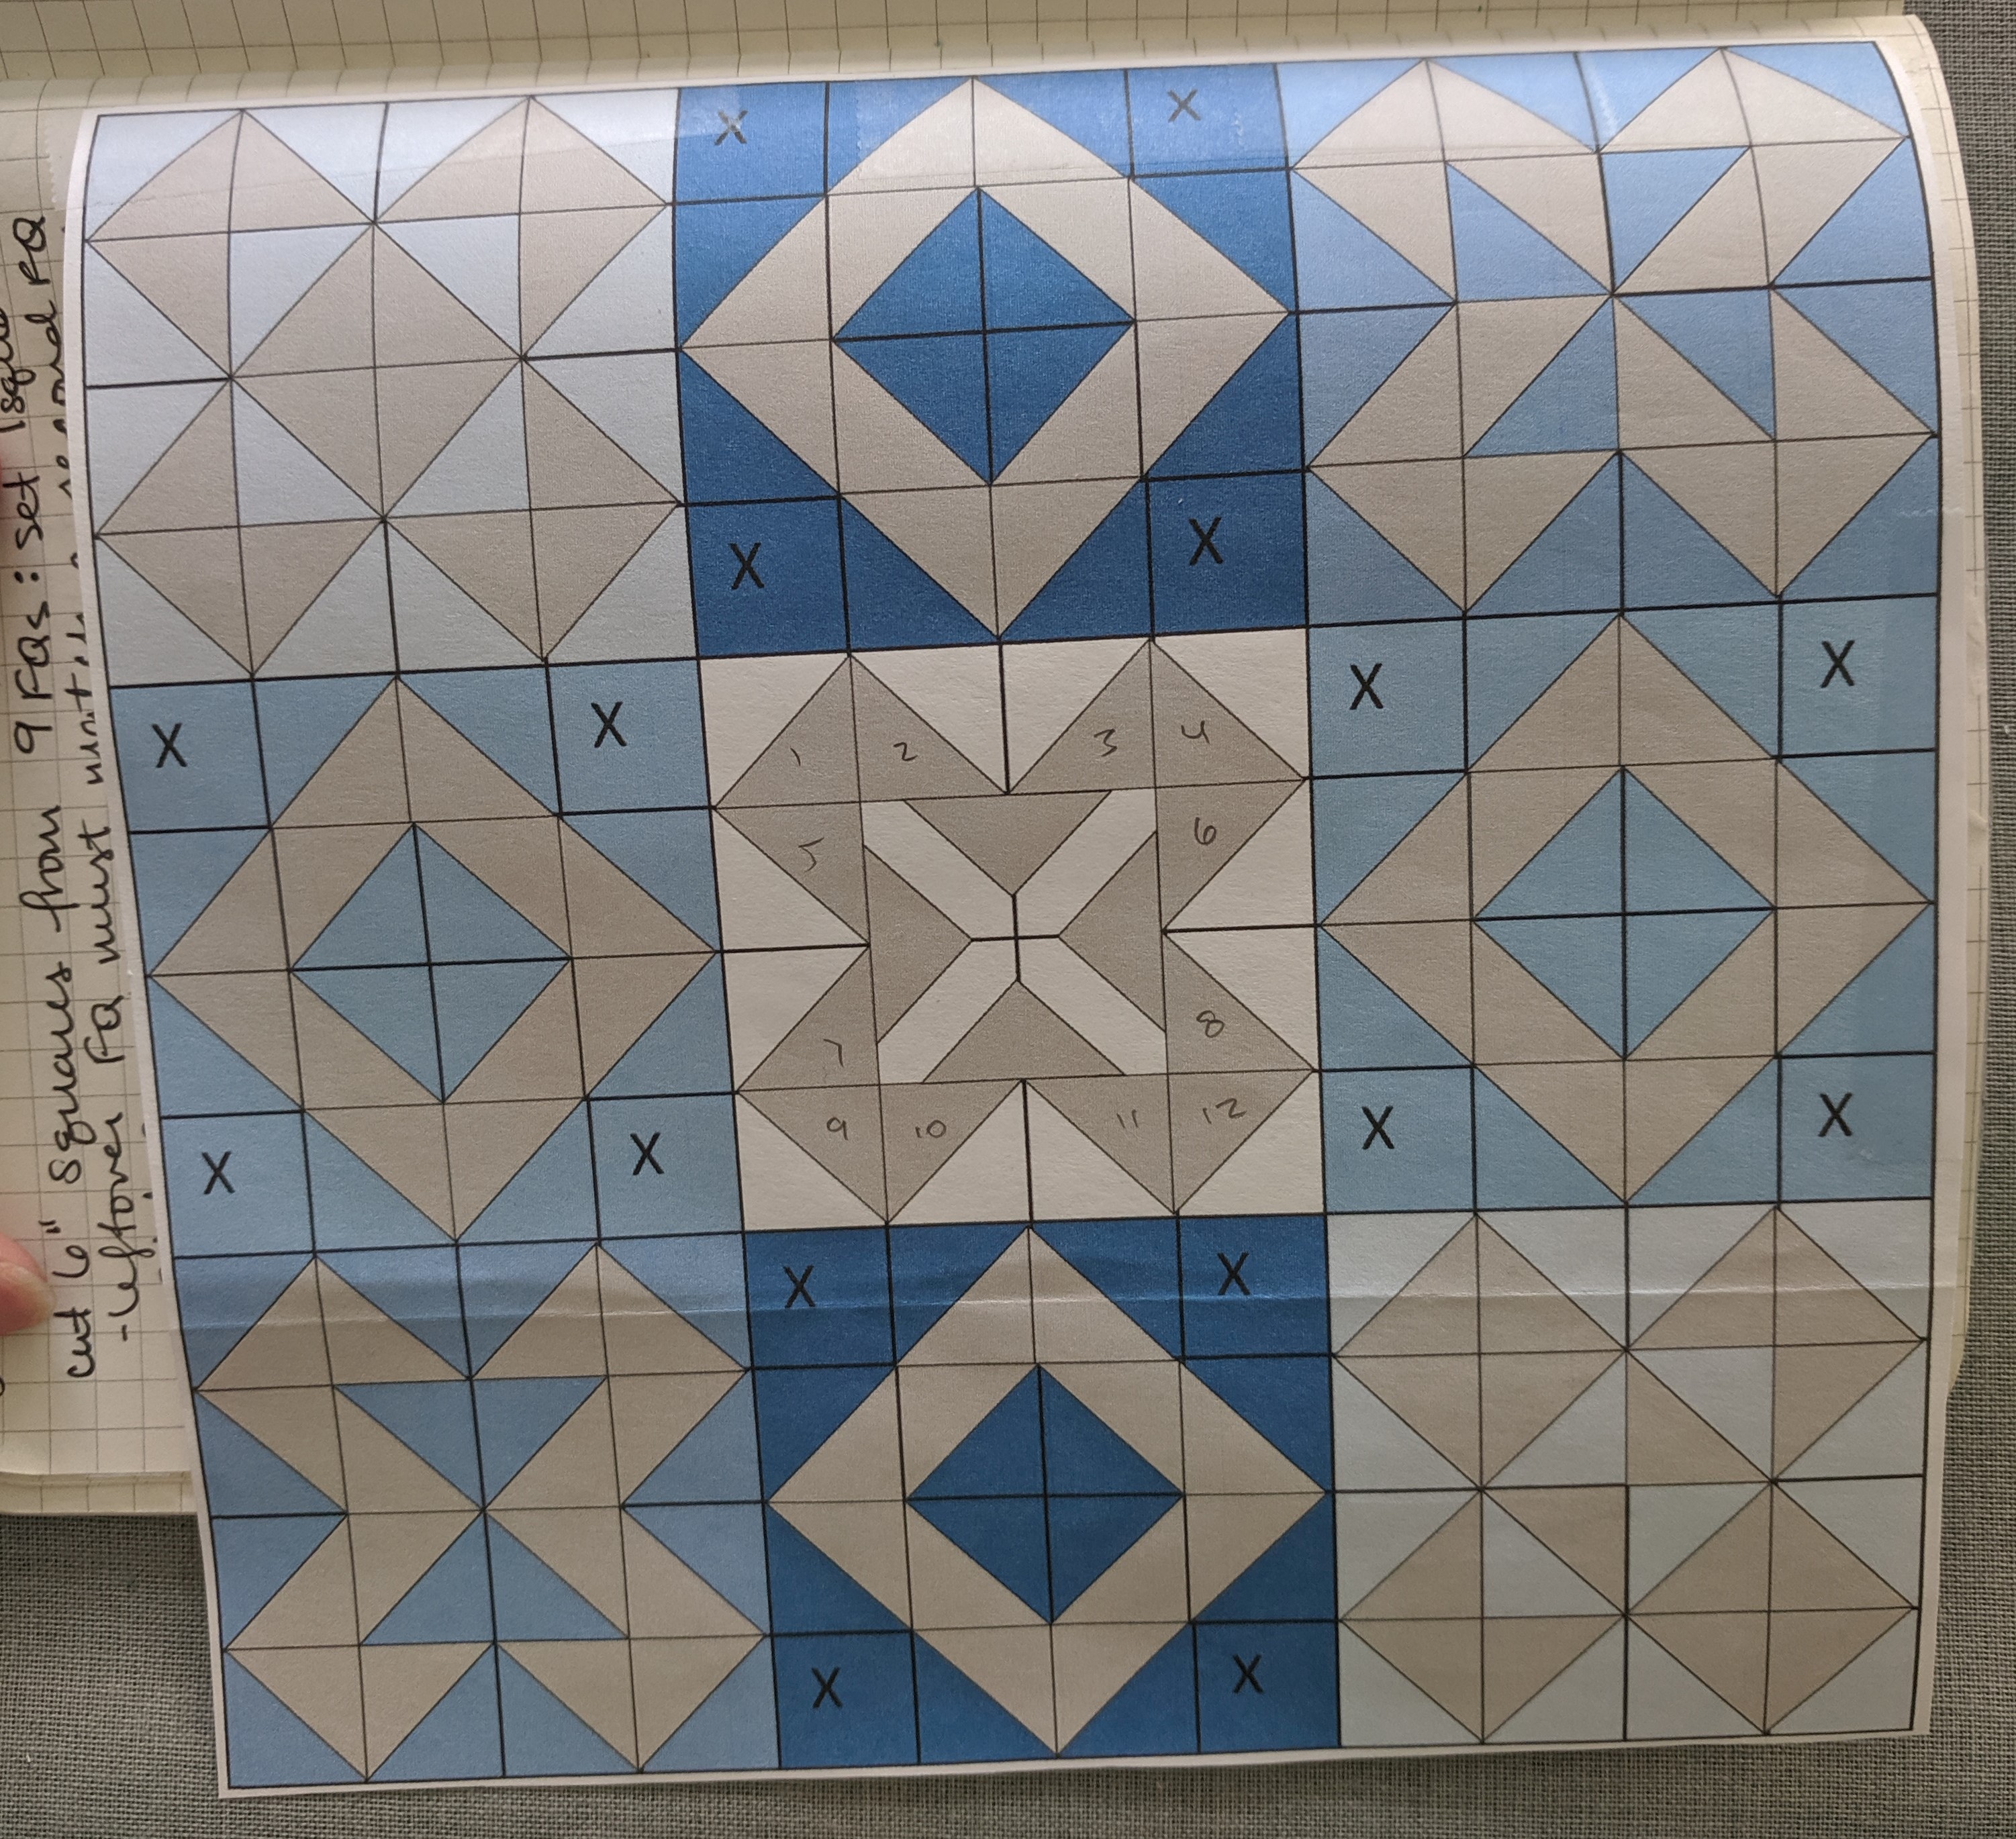
Powerpoint design
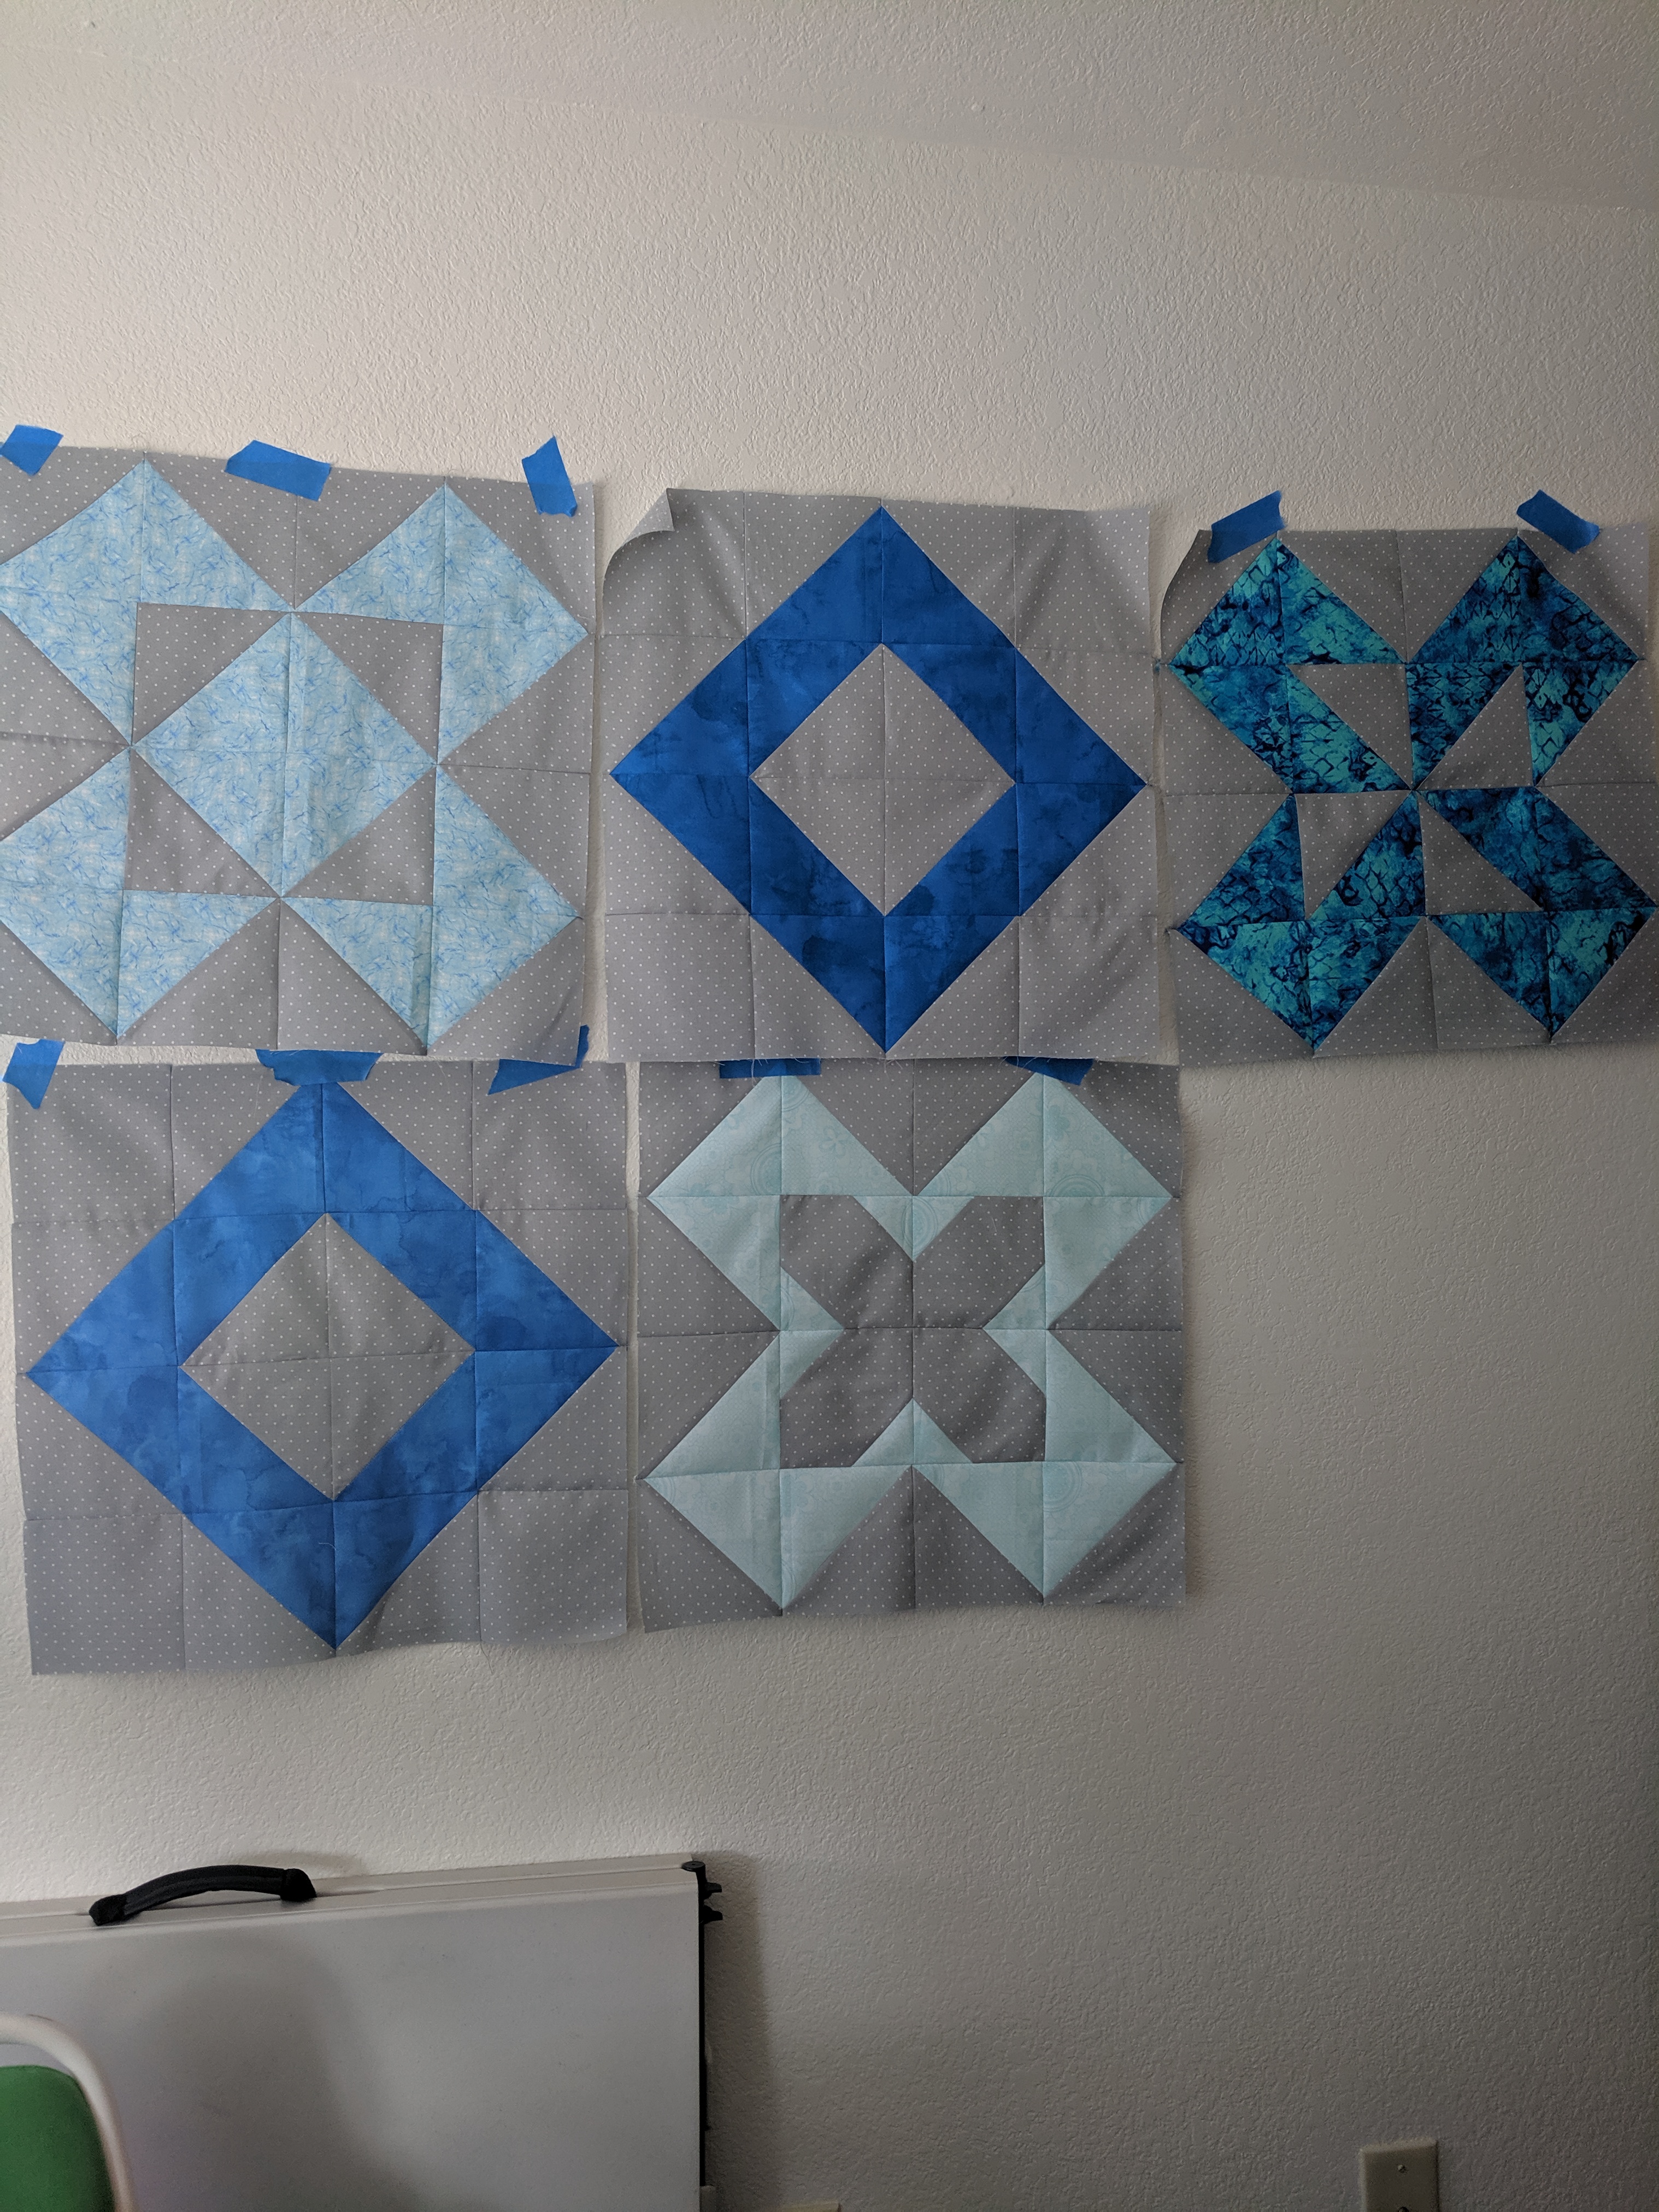
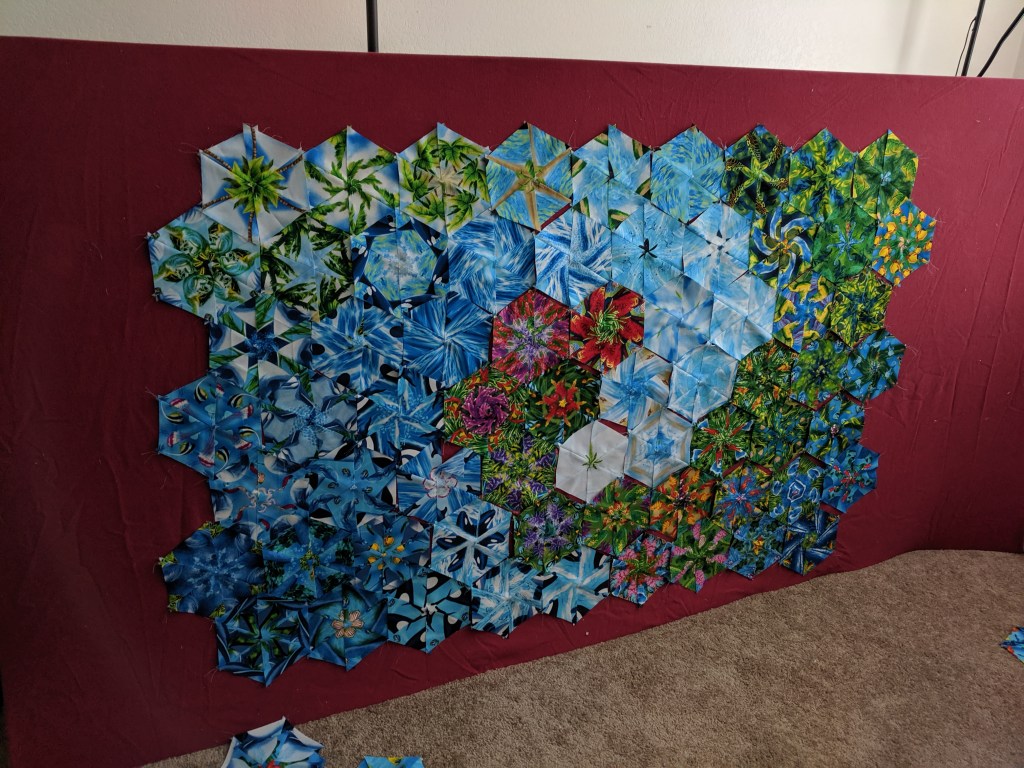
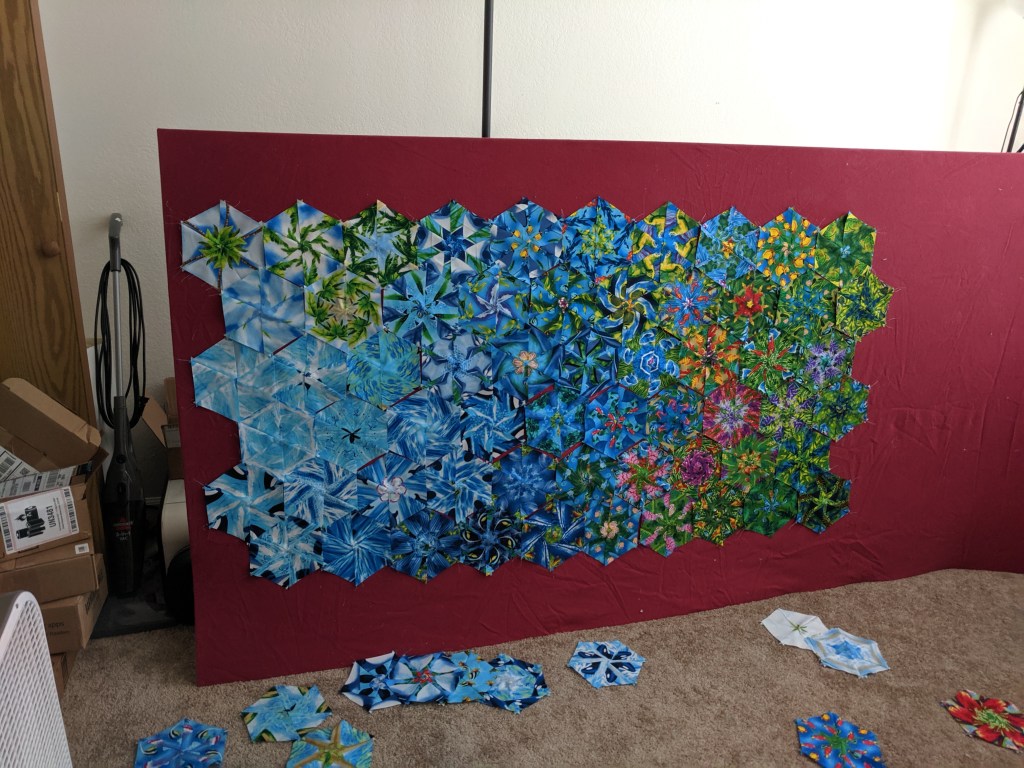
Finished blocks on my wall
HSTs ready to be laid out
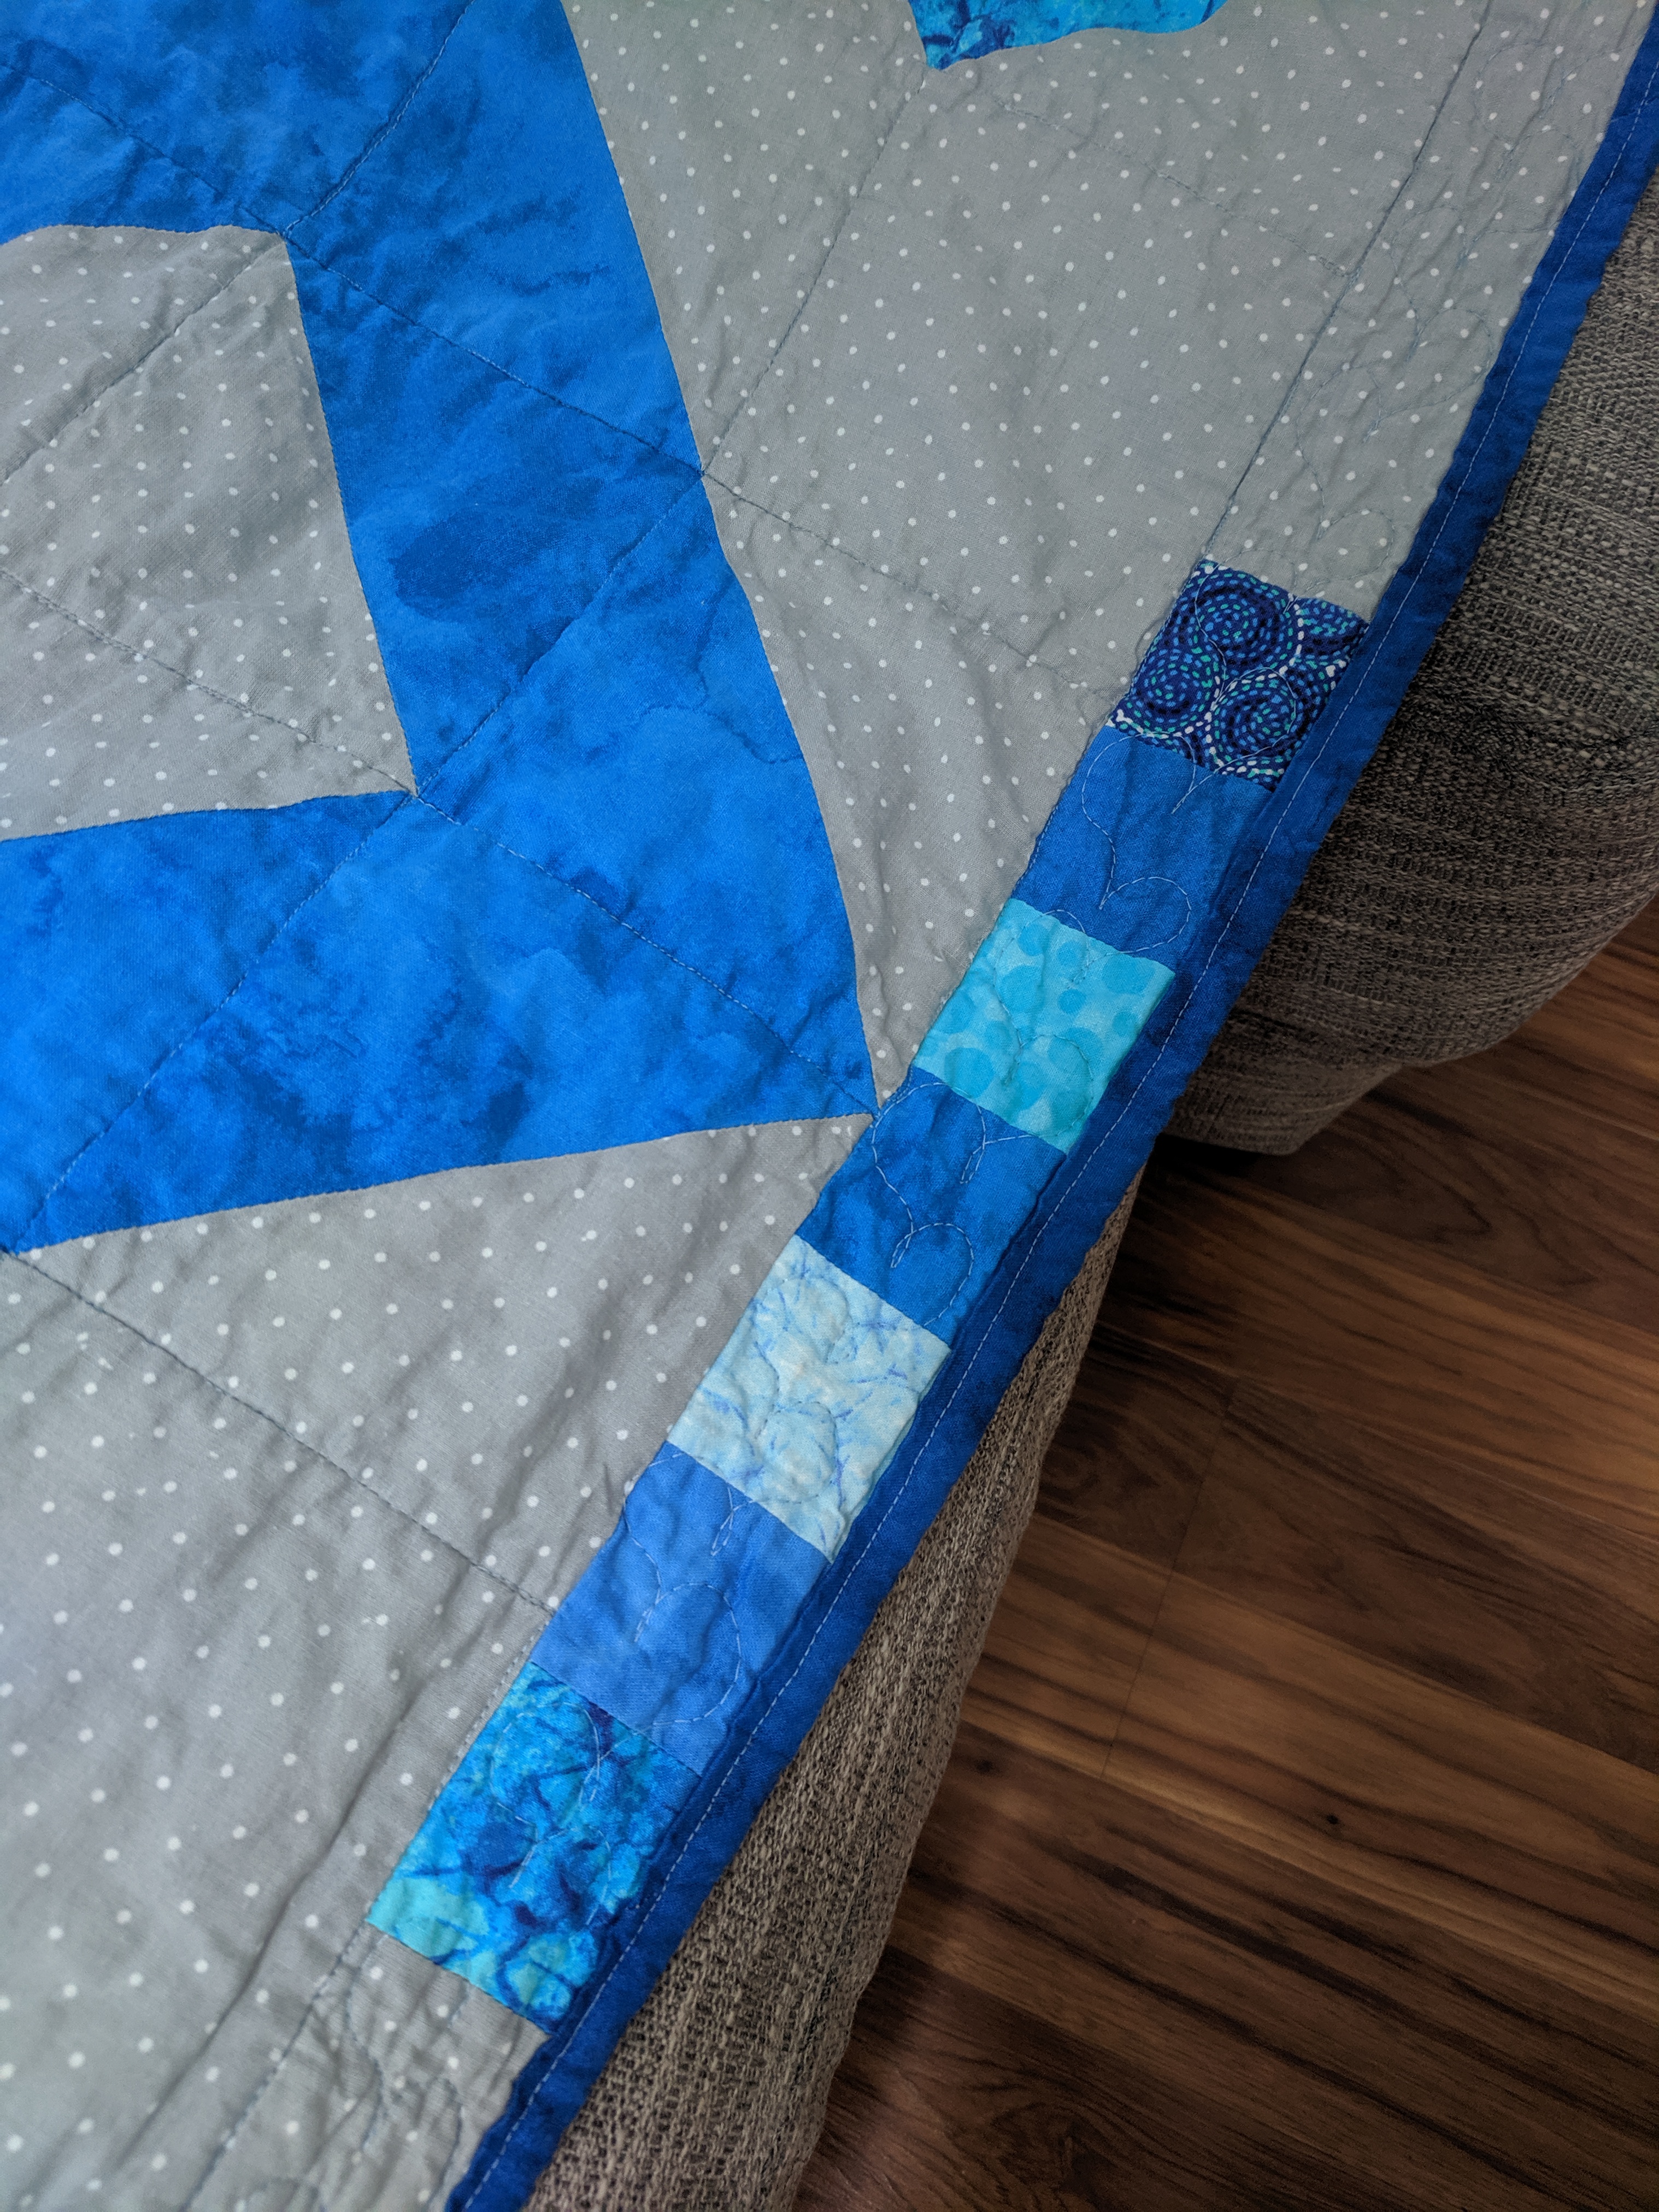
I ended up quilting the whole quilt with “stitch in the ditch”, where you quilt between units along the seam lines. For this to work, you have to iron both seam allowances to one side (instead of open). This makes one side of the seam a bit taller than the other, and the quilting goes on the lower side – the ditch. I used some scraps and the same background for the border, and quilted little heart shapes around the entire thing.
Stitch in the ditch on the left in the main blocks, heart shapes in the border on the right
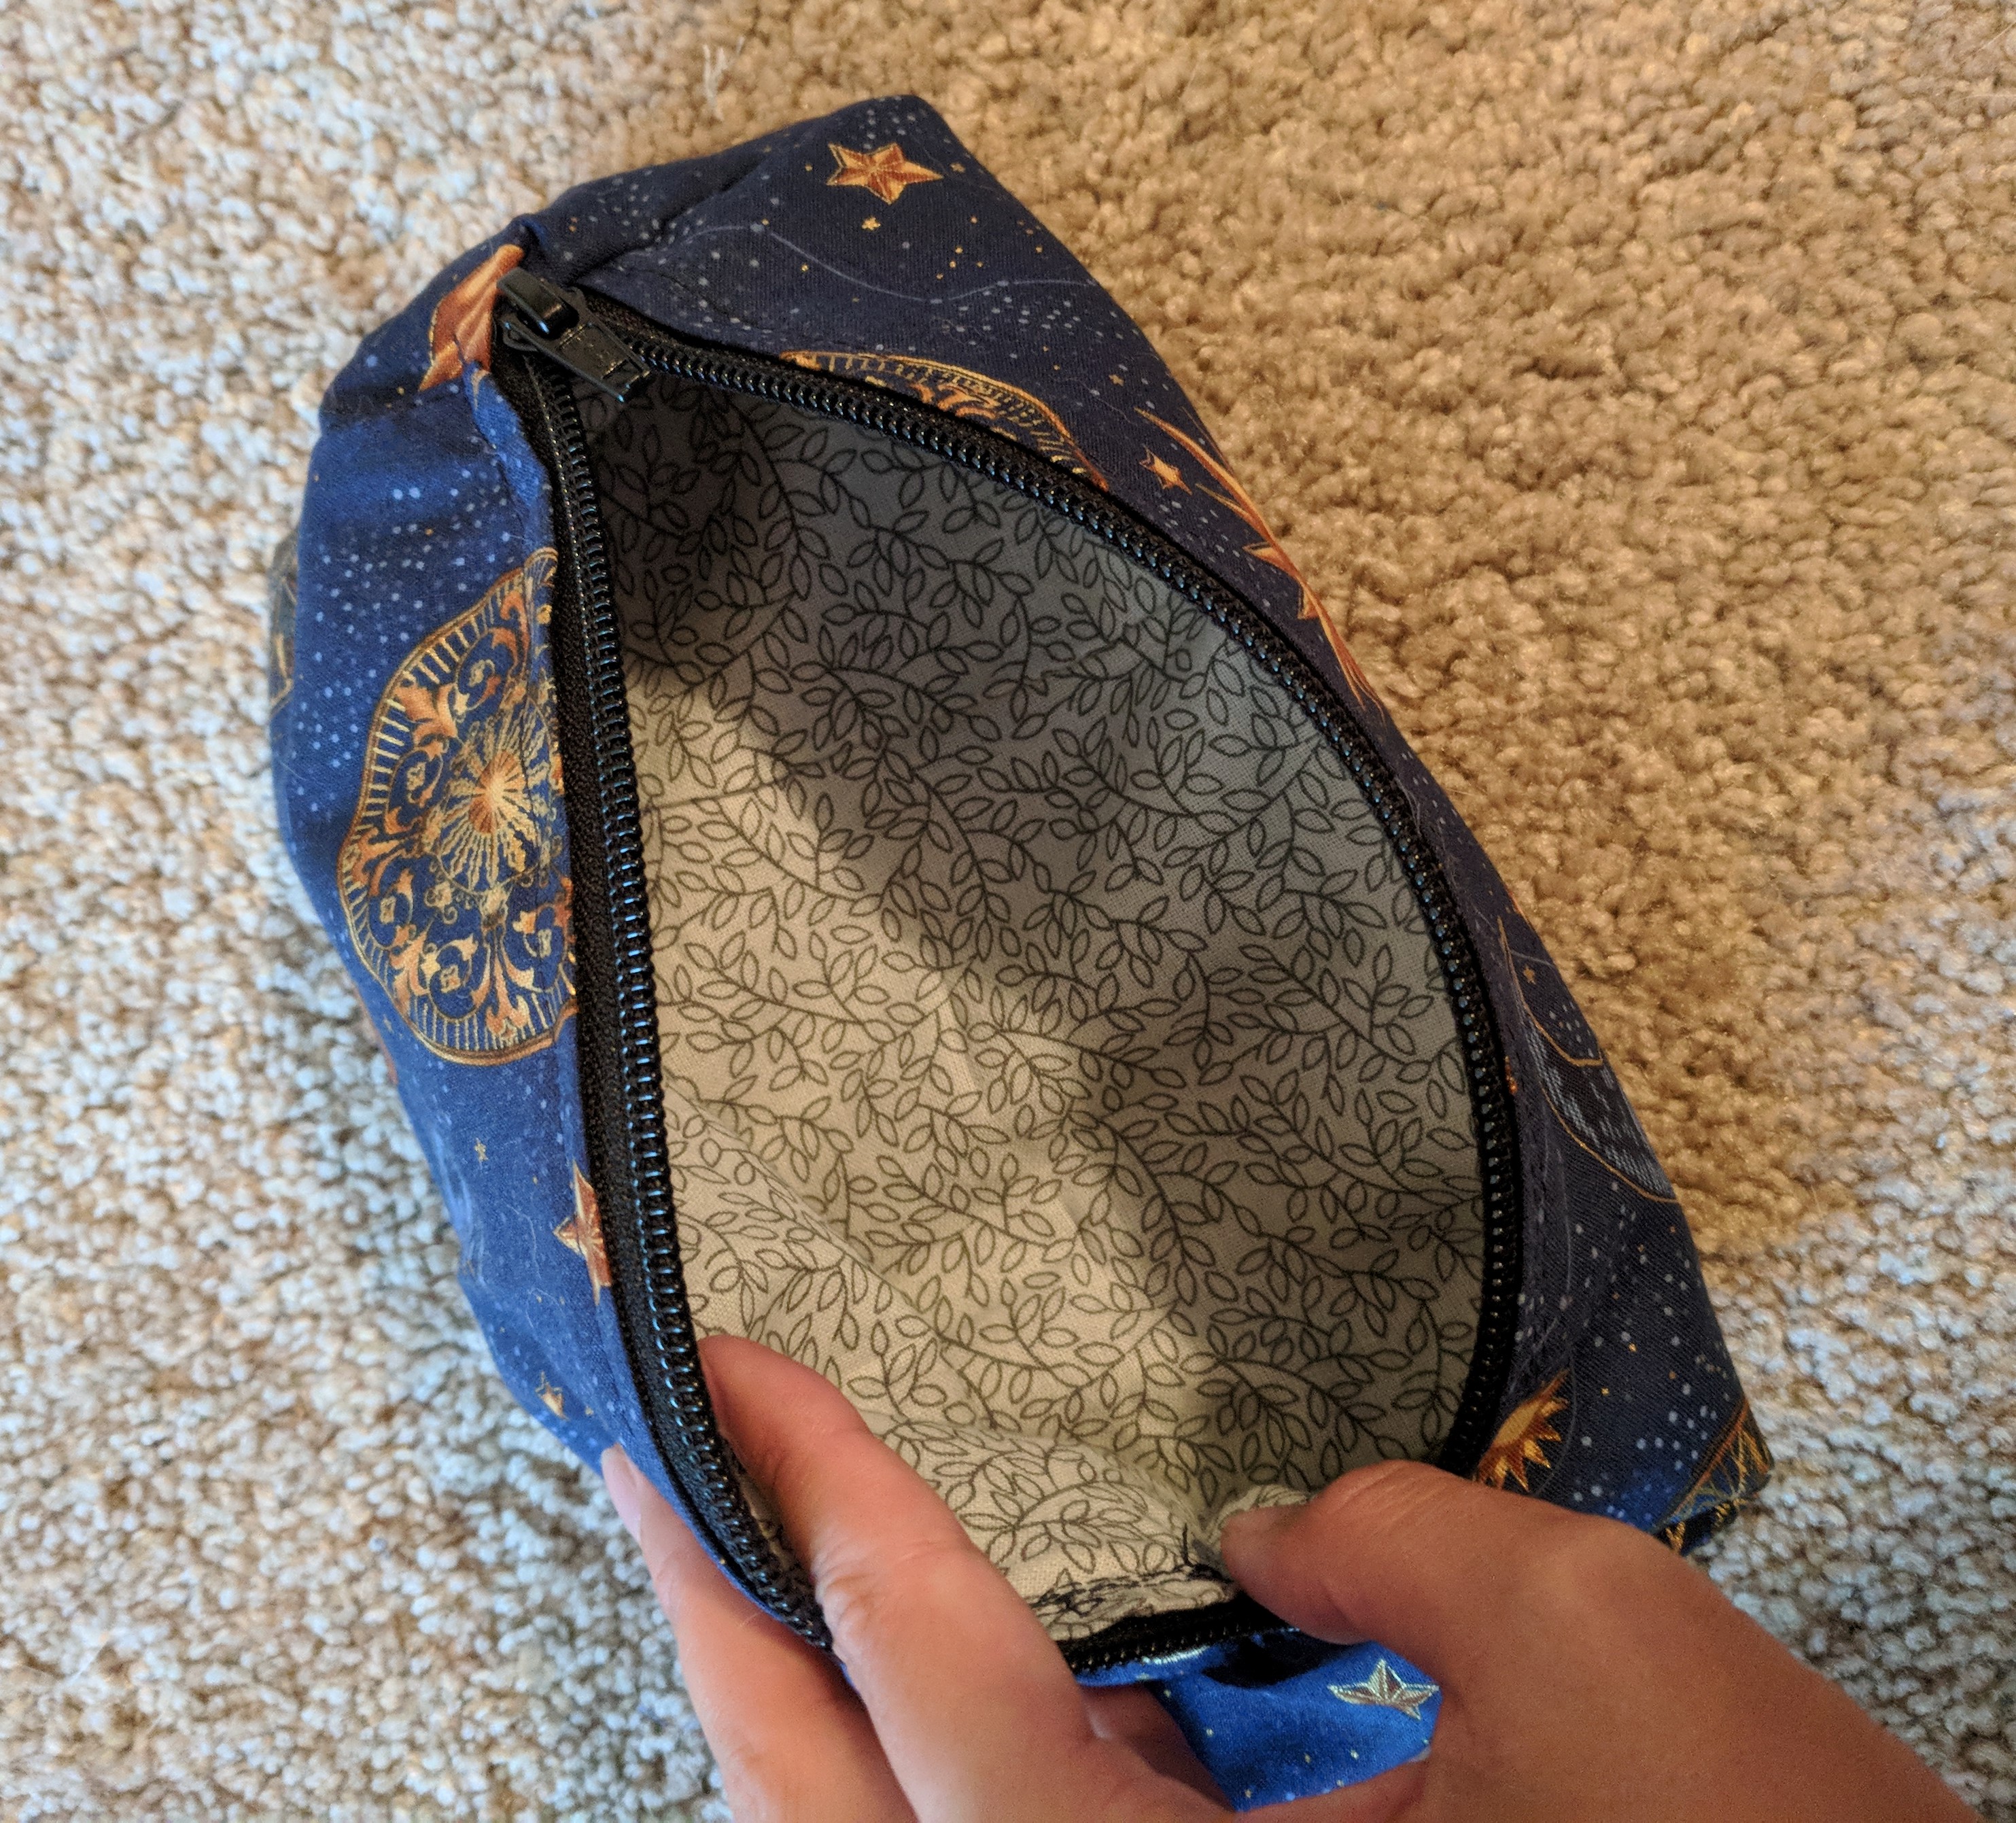
I self-drafted this little zipper bag for a friend for her D&D dice 🙂 It’s a triangular prism, and fully lined. She’s super into space stuff so the outer fabric is suns and stars. Project completed July 4, 2018.
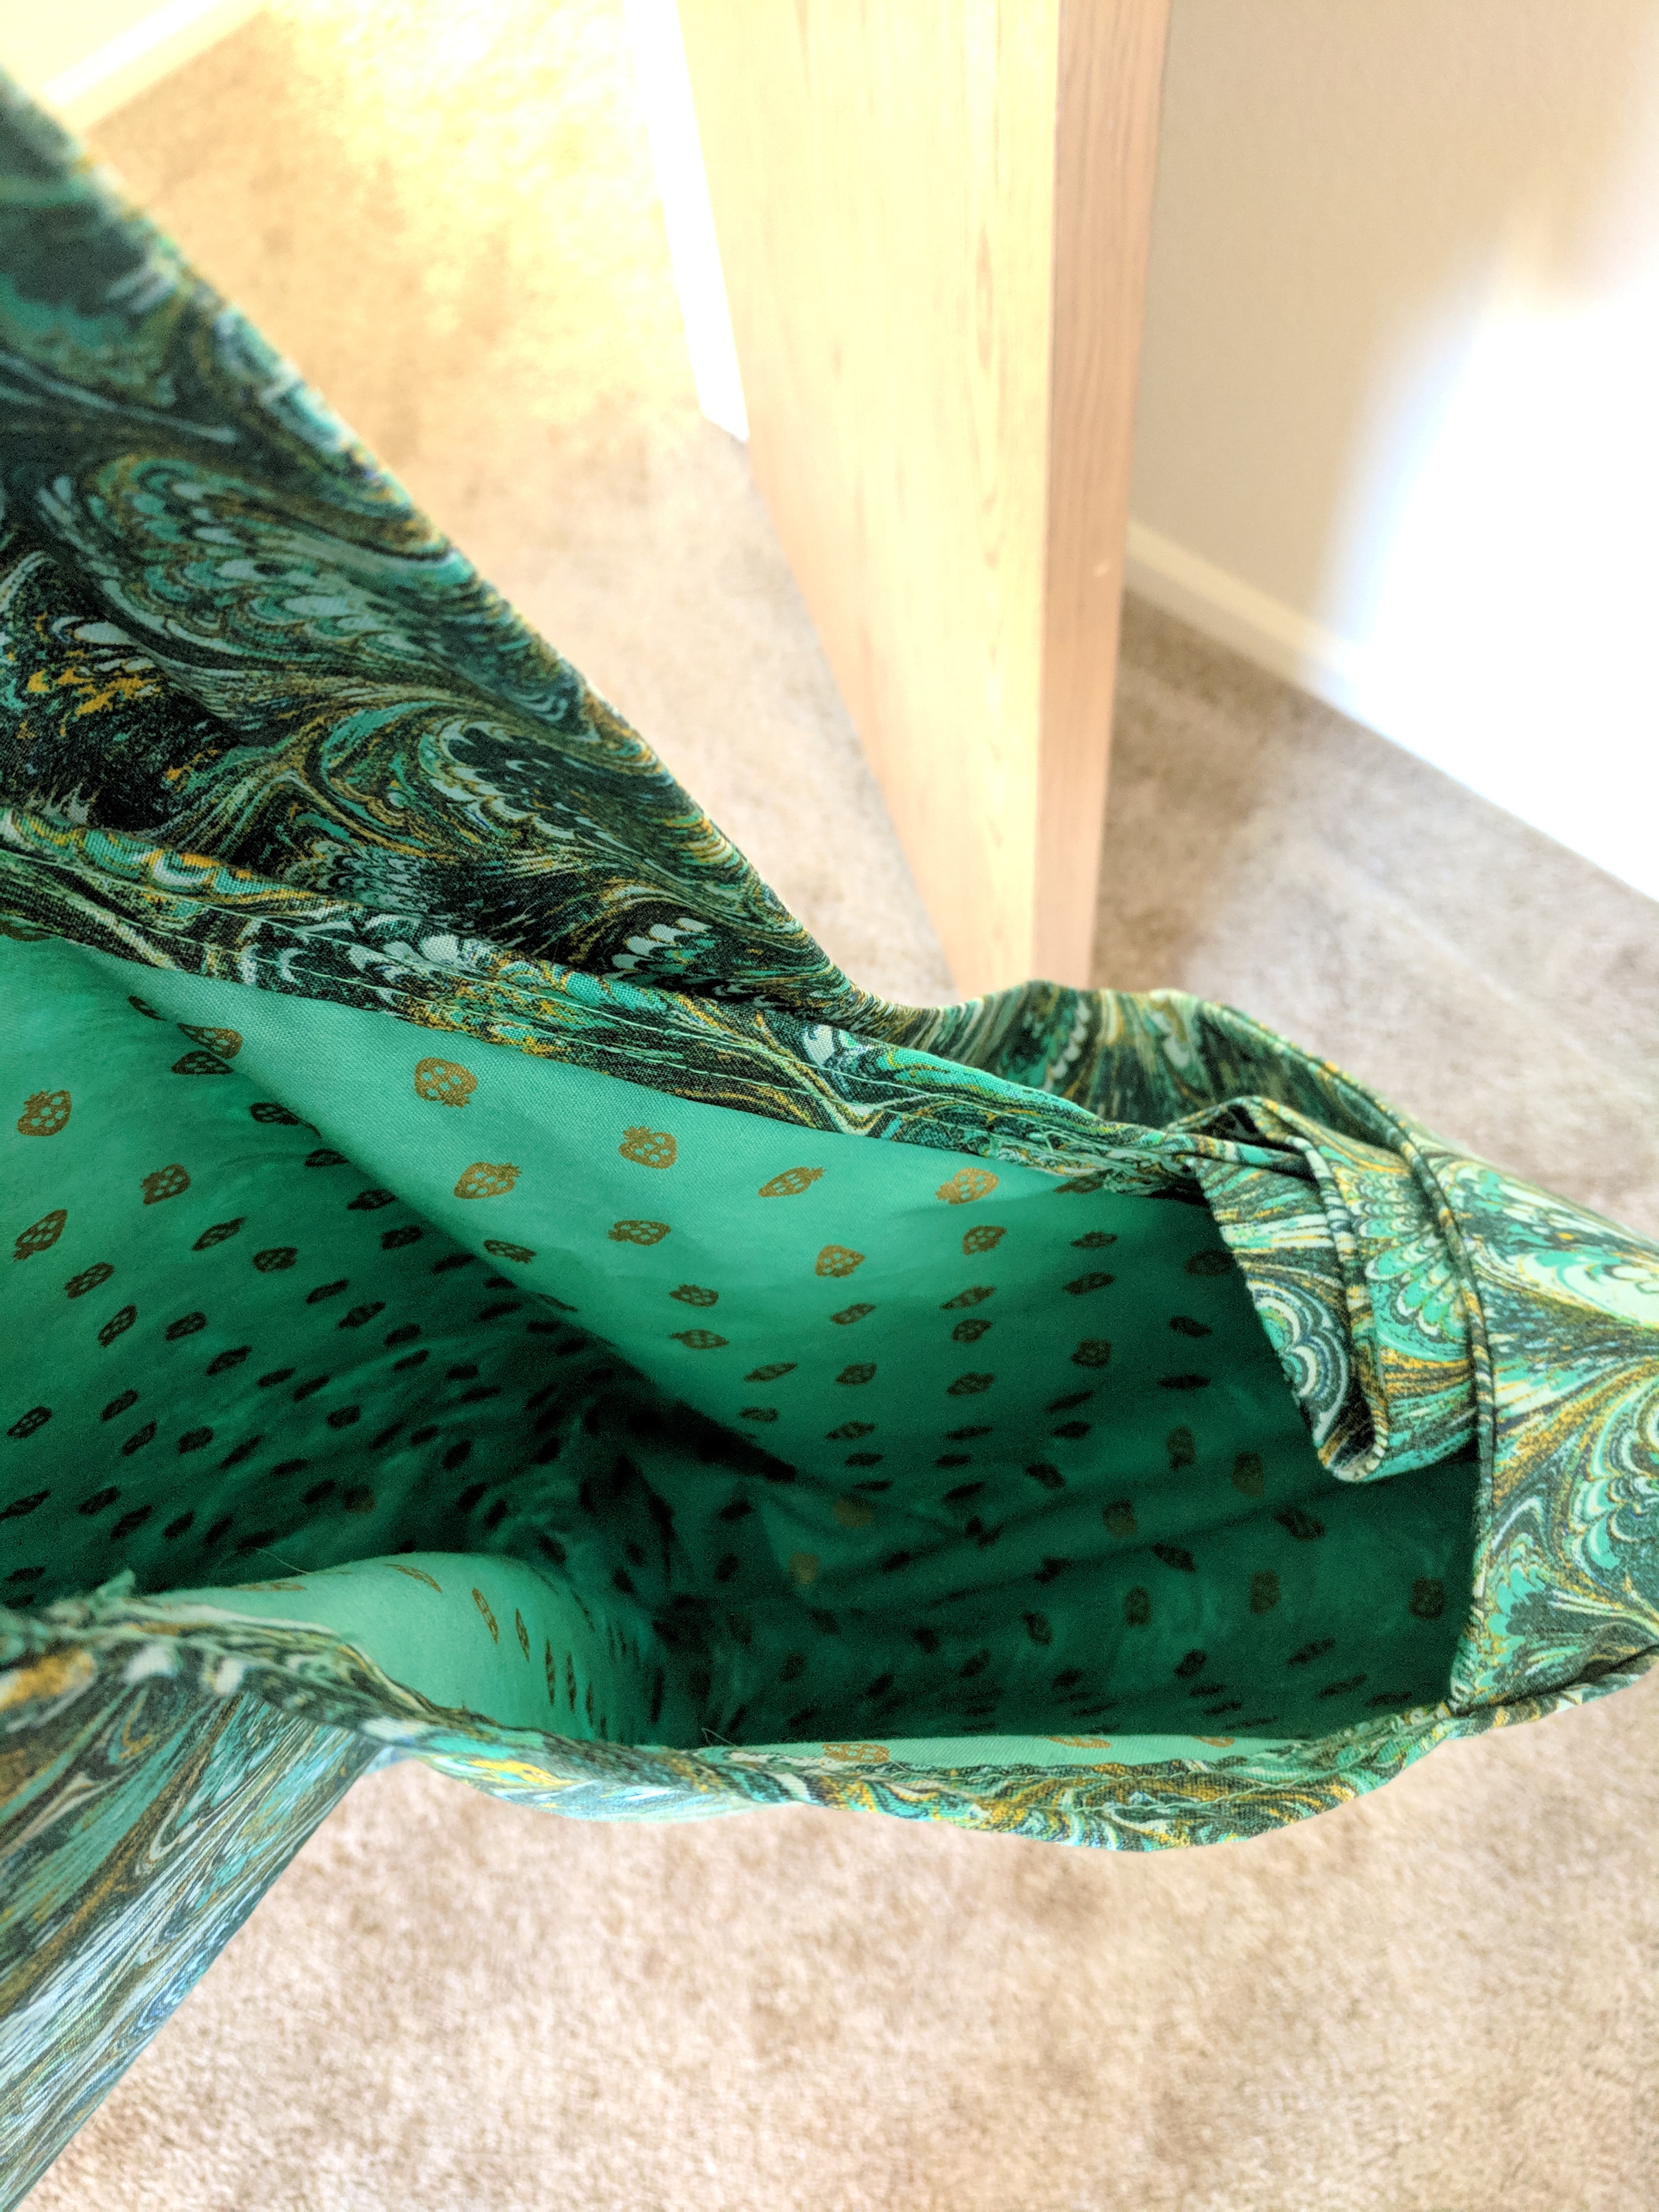
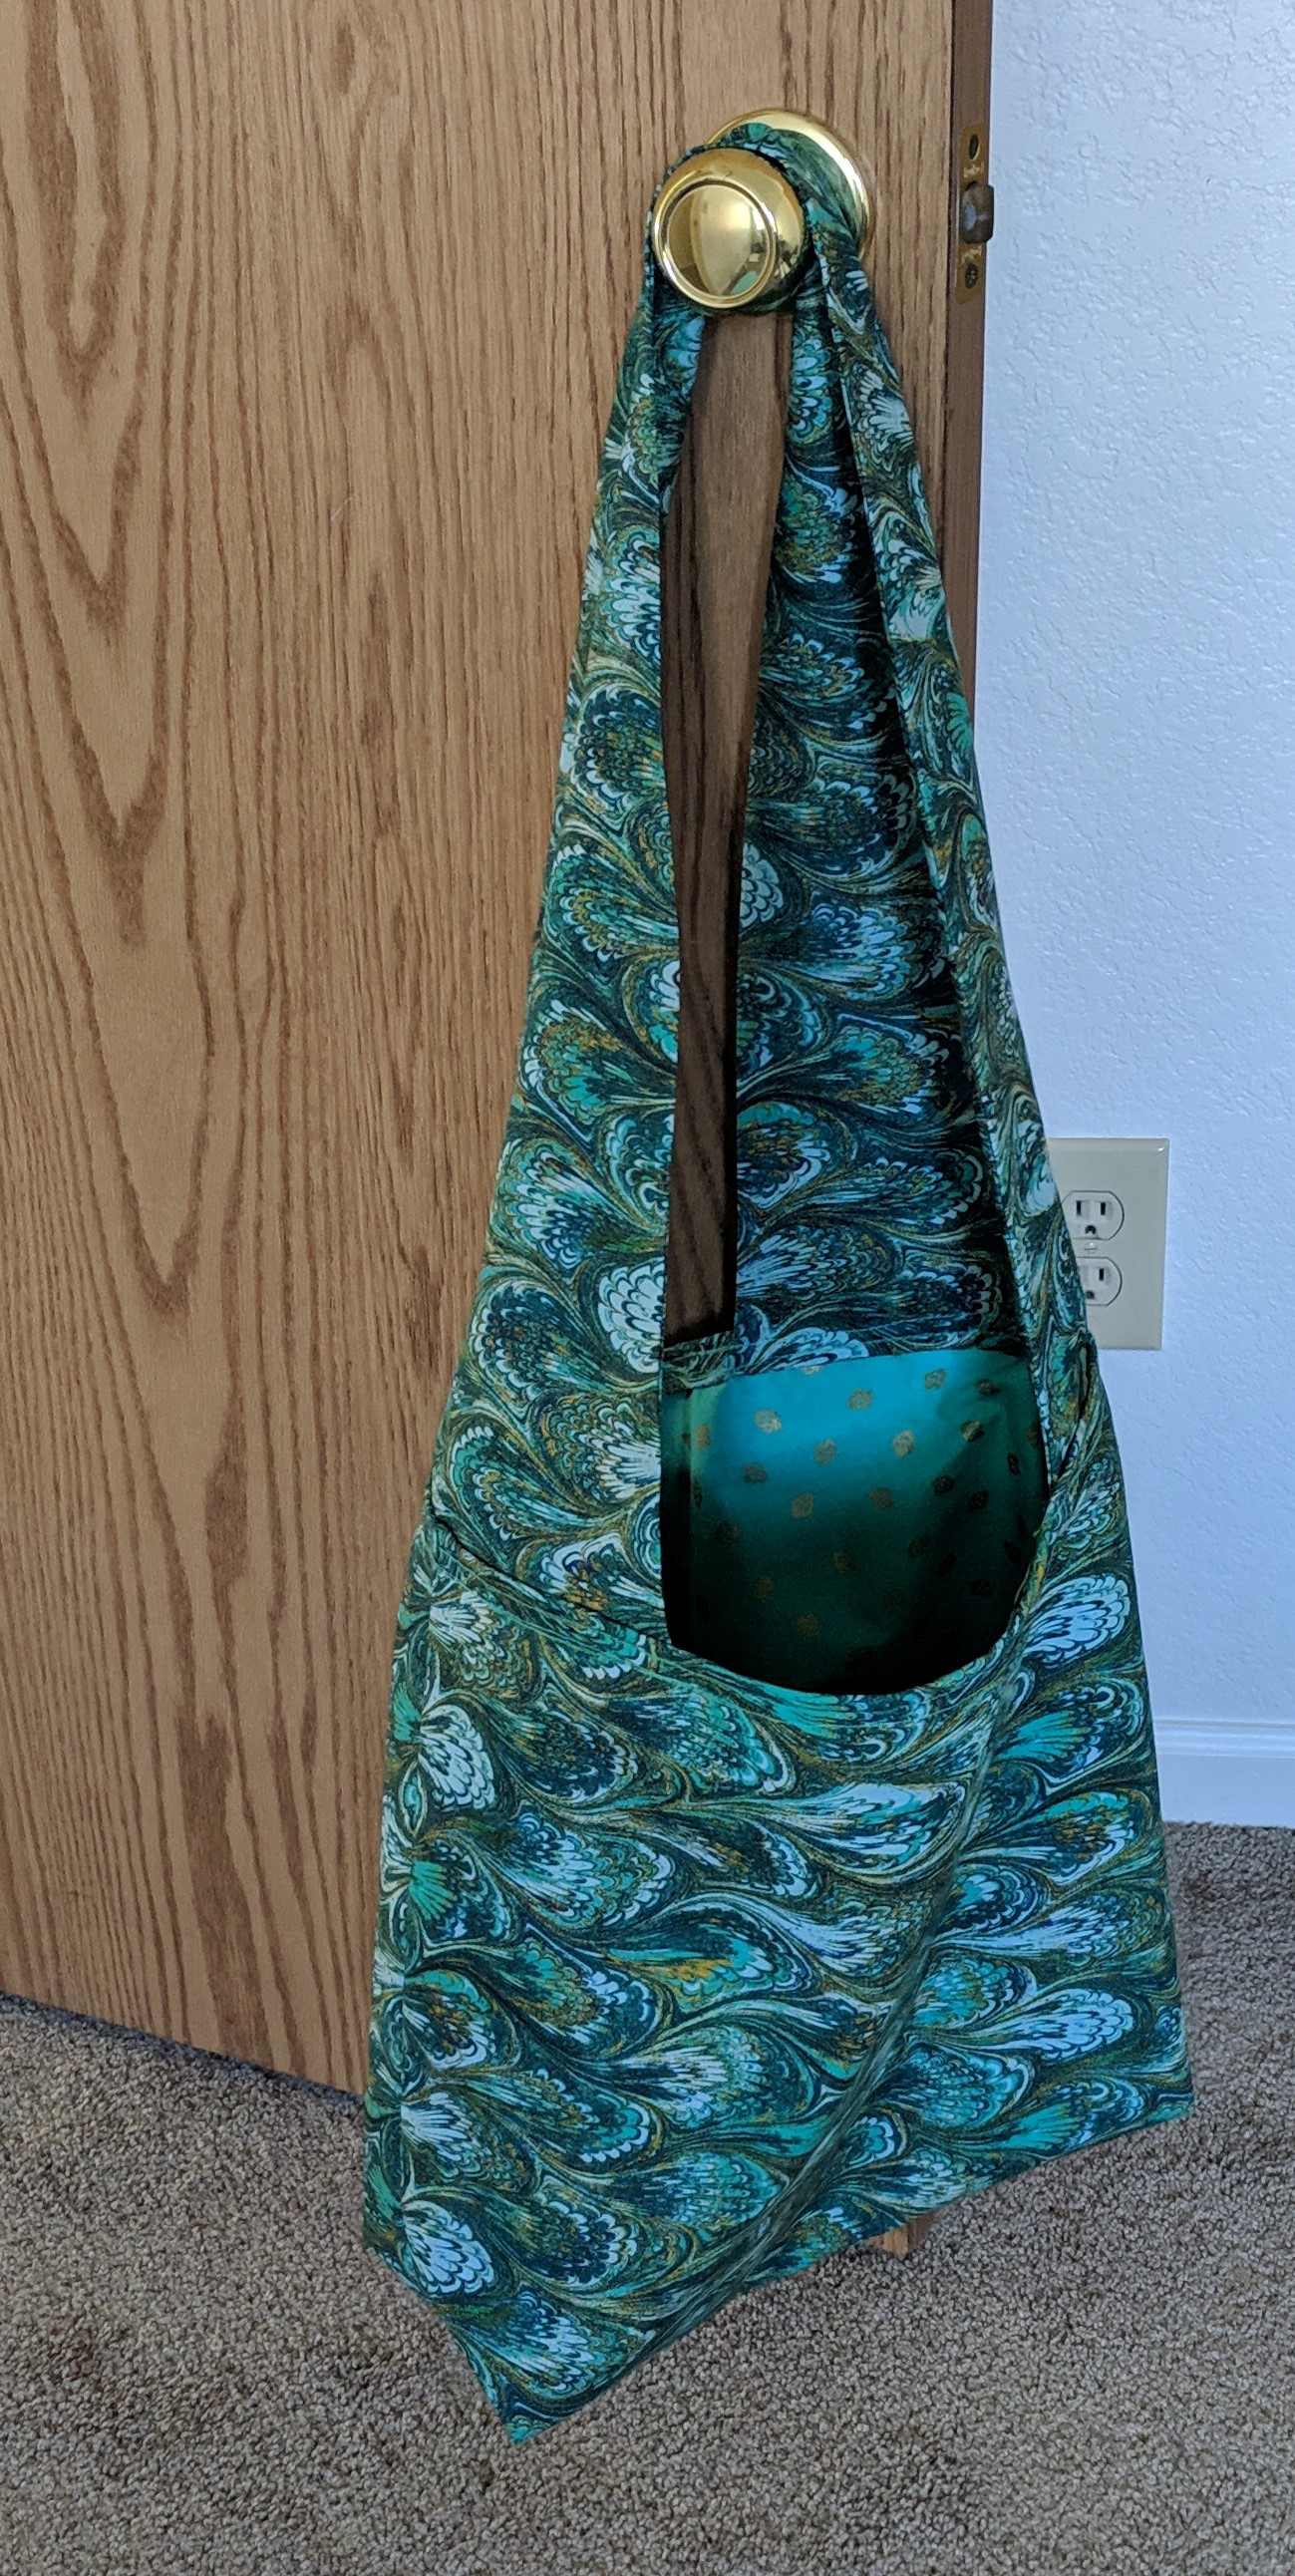
I made this tote bag for my cousin for Christmas – partially inspired by another tote bag she likes to use. I used the 4girlsdesigns shoulder bag pattern with a fun marbled outer fabric inspired by a paper marbling experiment we did together, and cute strawberries for the inner lining. Project completed November 18, 2018.
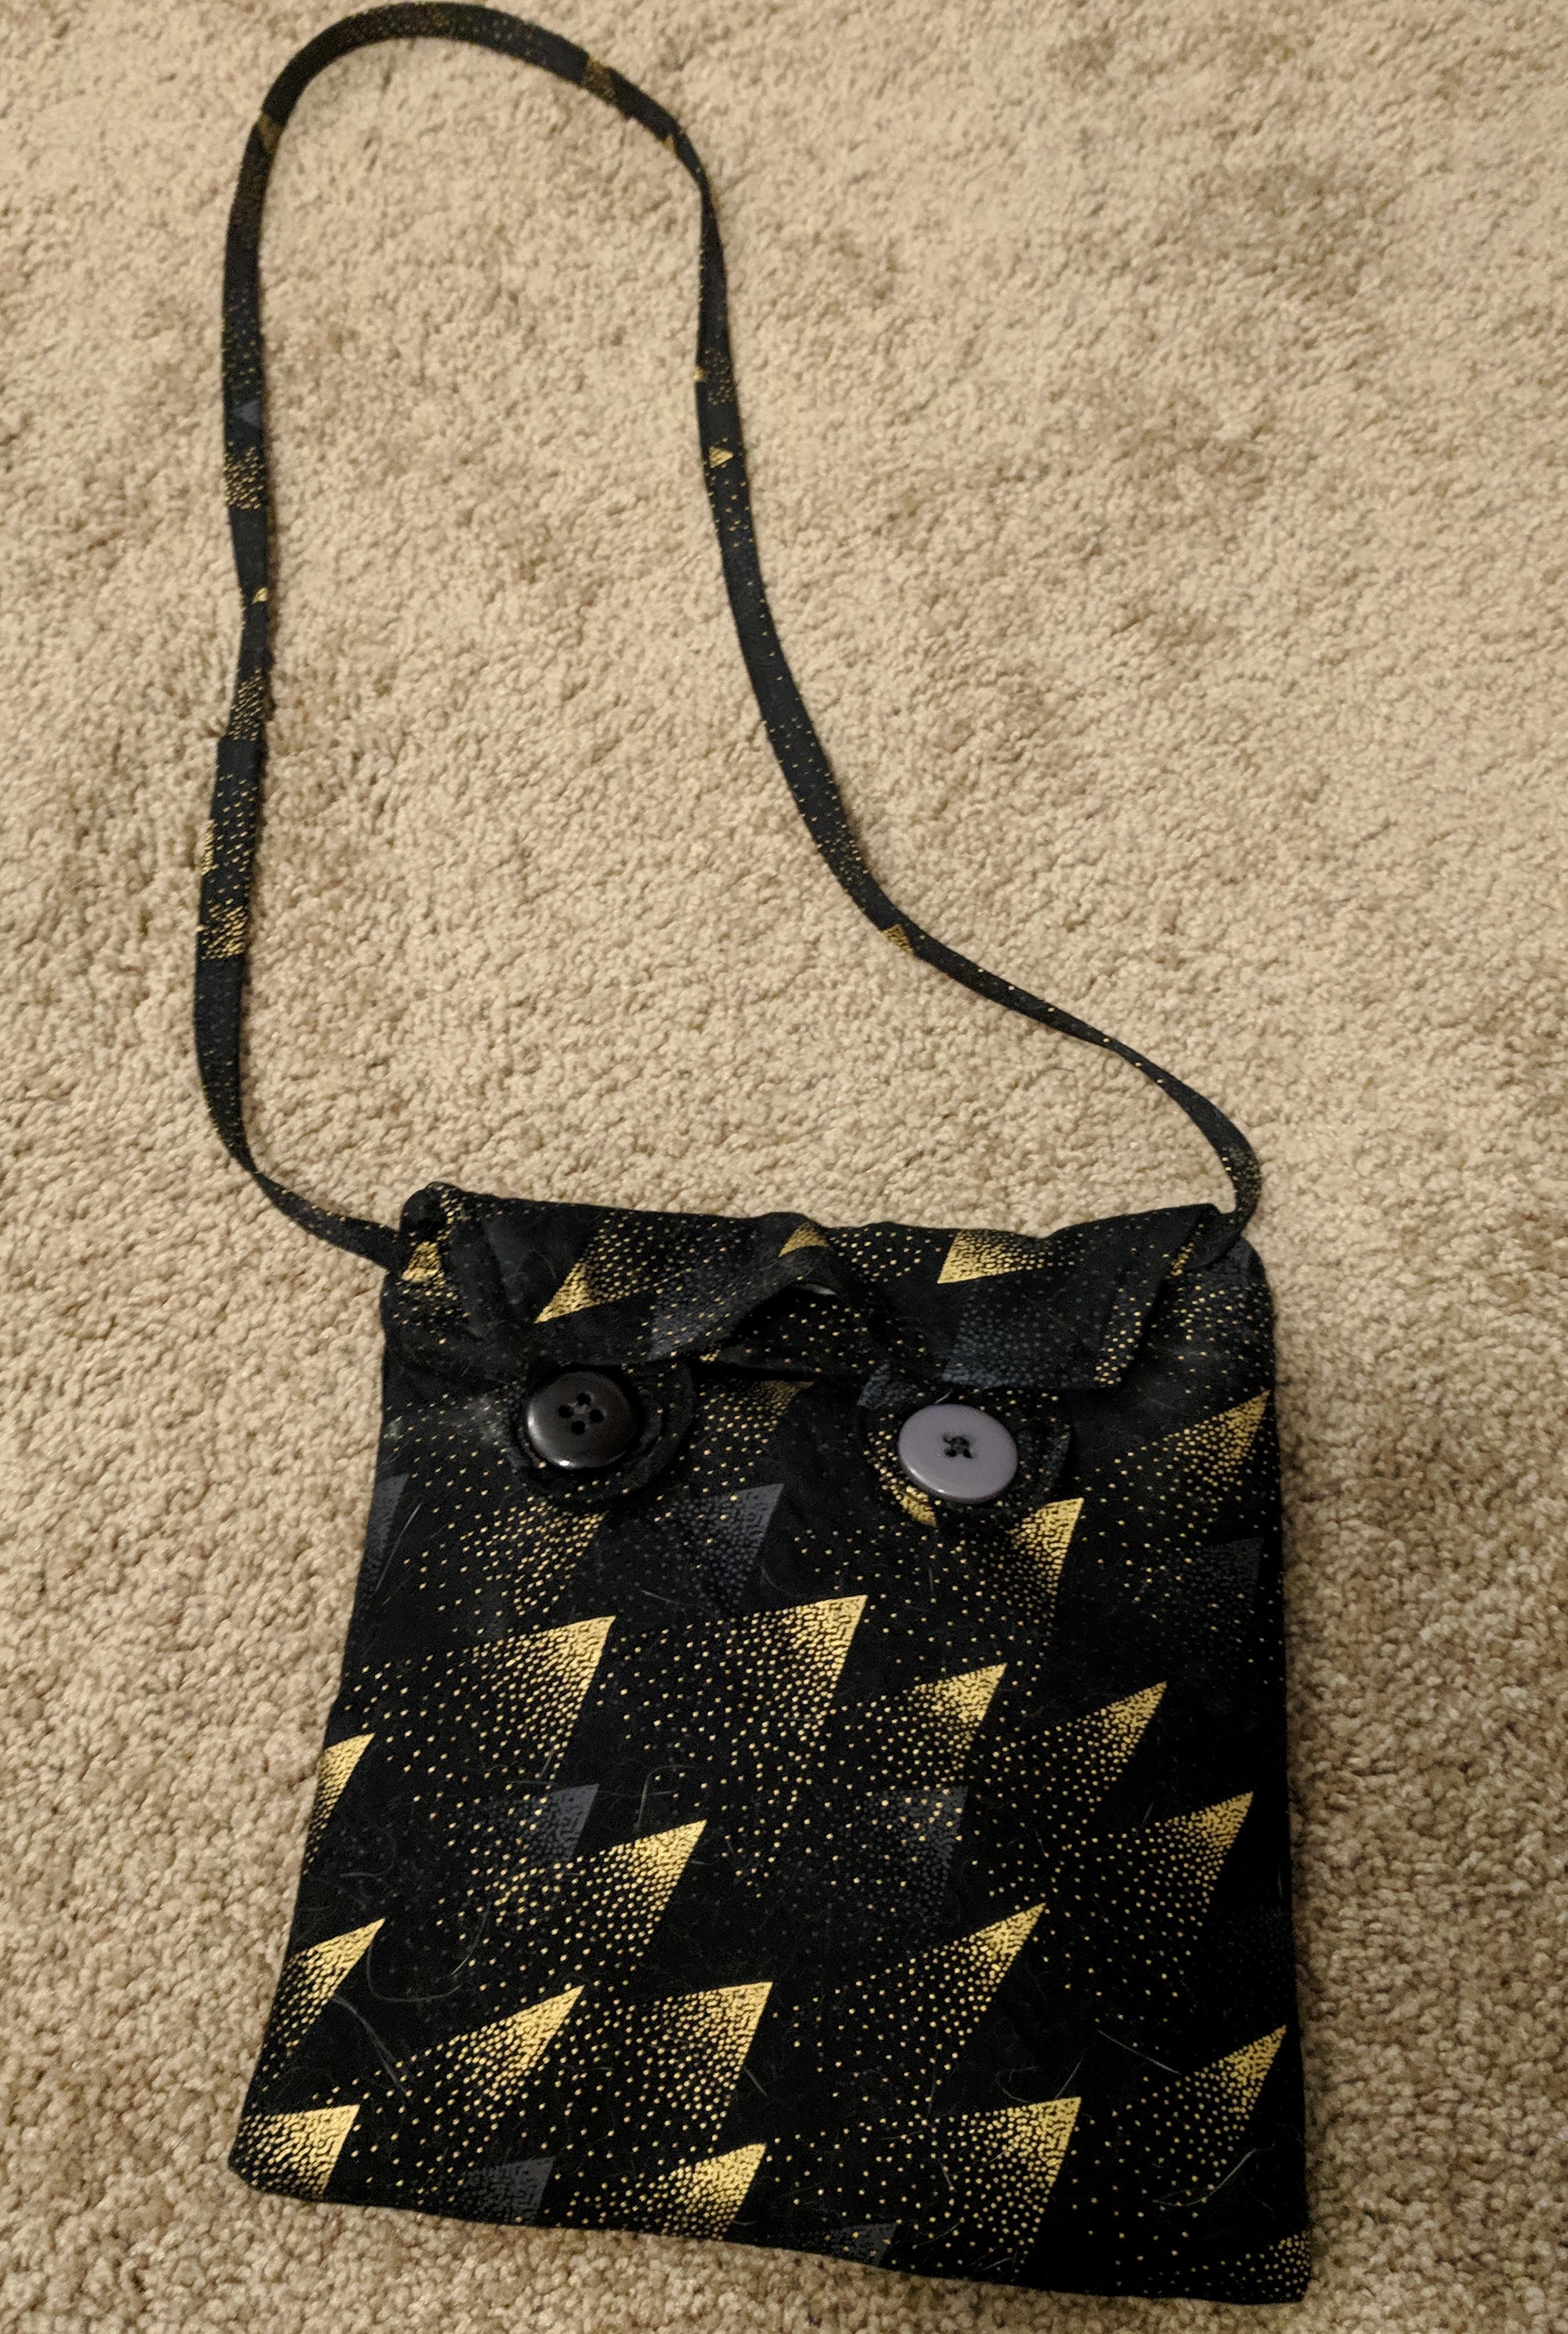
I self-drafted this little black and gold purse using some scrap fabric since I needed a purse that was in between casual and fancy. The top is closed with two buttons and fabric wrapped around little elastic strips. I made it the perfect size to keep all my things inside, and the only thing I’d do differently in the future is have a thicker strap. Project completed March 5, 2019.
One Block Wonders were defined by Maxine Rosenthal in her book, which details every step of assembly and tips and advice on choosing fabric and deciding on layouts. Below are a few other resources I used along the way:
One Block Wonder “Design Helper” shows possible combinations of hexagons based on a picture you upload. I encourage you to grab a picture with a pattern (or not!) and try it out – it’s quite fun.
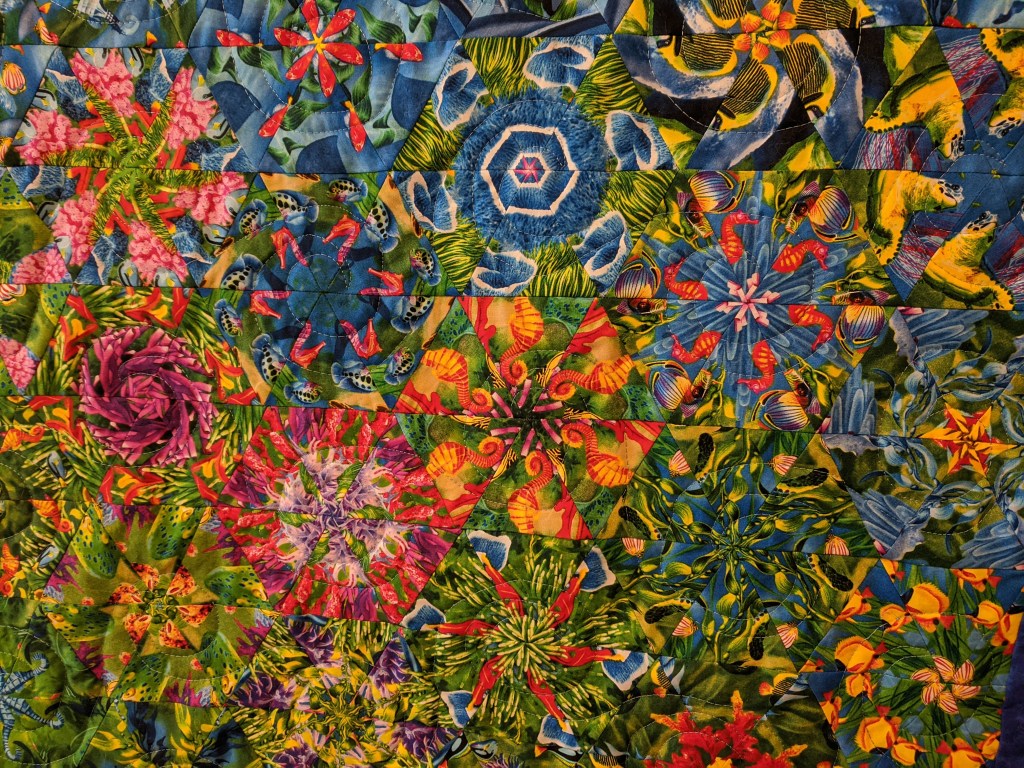
OBWs are constructed using 6 identical pieces of fabric. This can be done using a fabric that repeats the same pattern over and over (usually every 24″) or with a panel (a single image that spans the width of the fabric). Rosenthal suggests using fabric with 2-3 colors, with big and bold design elements with more curves than straight lines. I used the Reef panel by Michael Searle for Timeless Treasures.
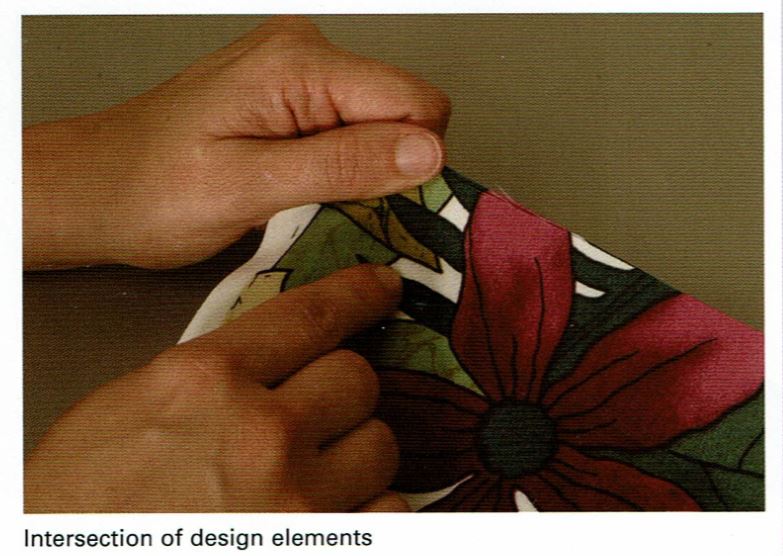
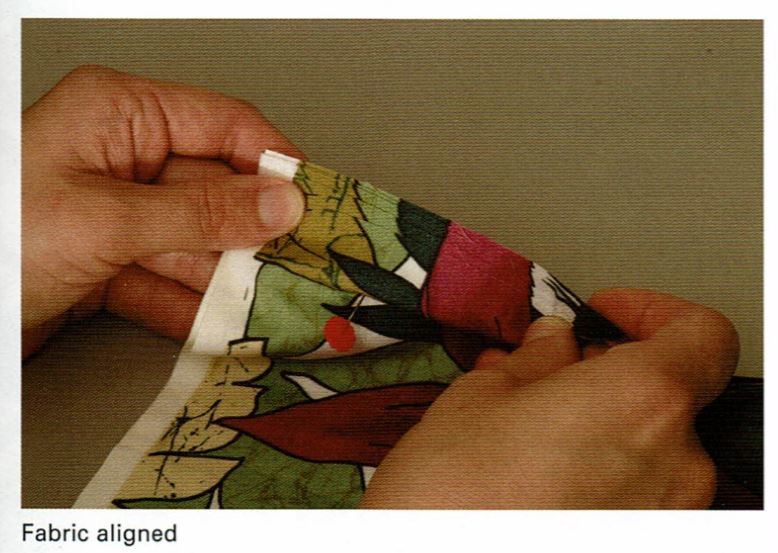
So you cut your 6 identical pieces, and they’re about 44″x24″. Then you stack them up and use pins to pierce the same design element through all 6 layers – so you know that they are aligned vertically (see below for pictures from the book). Rosenthal suggests you do this at 6 different points – each corner and then in the middle on the long sides. Then you shake your fabric by the pins so that the fabric between the pins is also aligned (watch Jackie’s video on this).
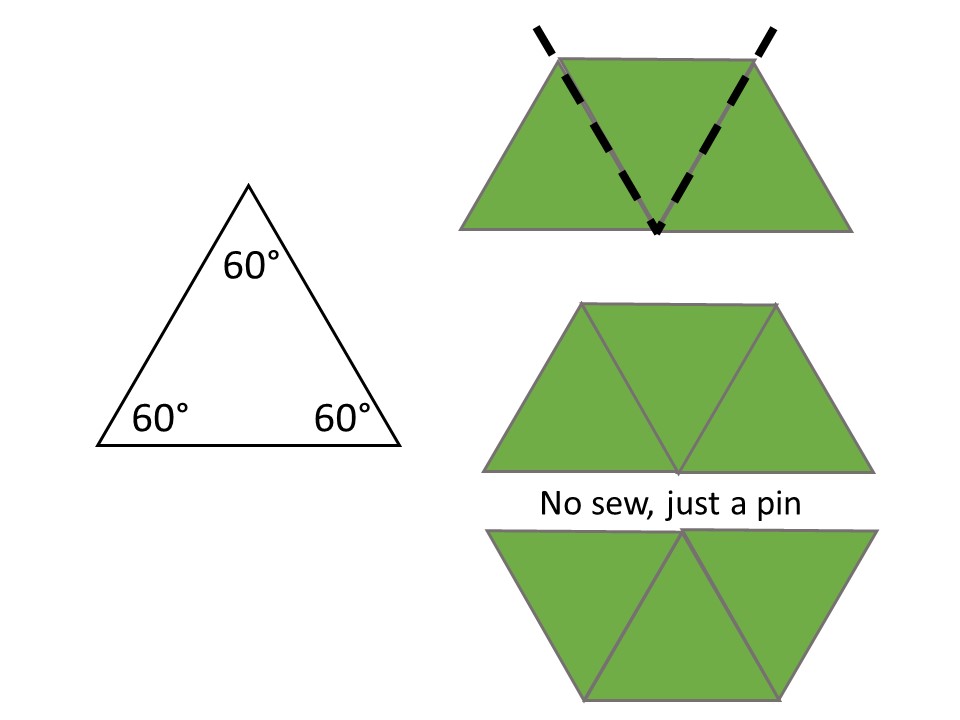
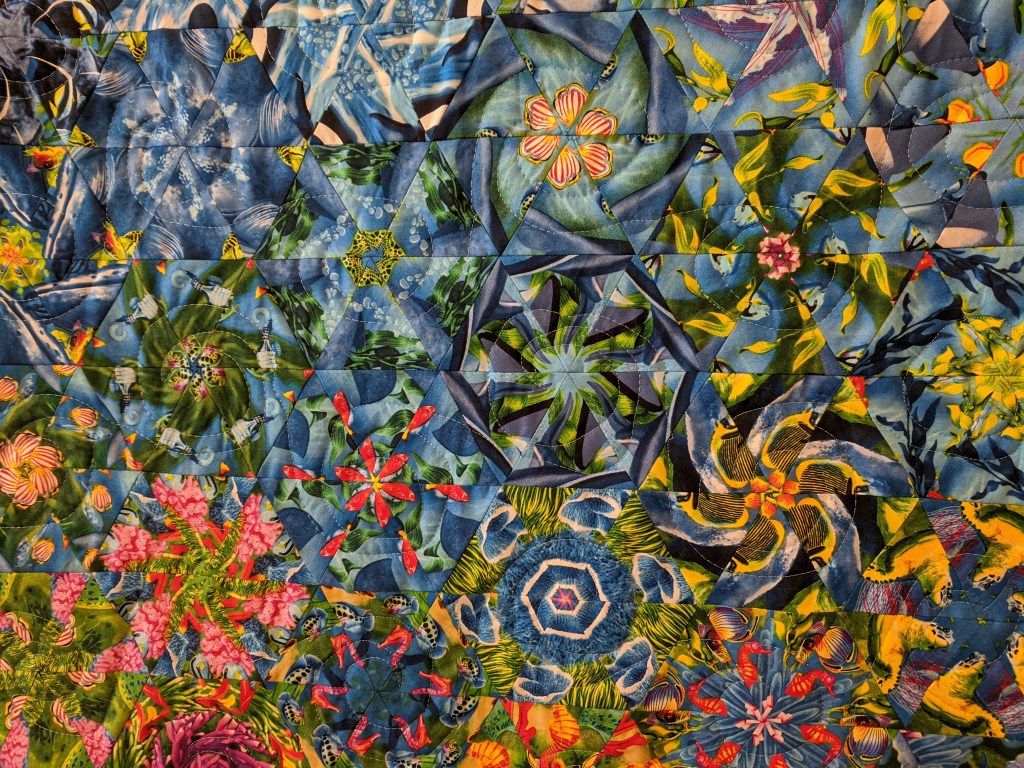
The kaleidoscope effect is created with 6 equilateral triangles arranged in a hexagon shape. Next, you cut your aligned fabric stack into strips, and then into triangles (using a ruler with a 60 ° line). Each triangle is exactly (or… close enough) identical since you aligned your fabric and cut it all at the same time.
Now here’s the genius part, and what makes the OBW so easy to assemble – all straight seams. Each hexagon takes 6 triangles, but you only sew 3 together at first so you have two halves of a hexagon. During the layout stage, you pin these together so they look like a hexagon, which makes it easier to move them around. So – you only sewed straight seams to put 3 equilateral triangles together.
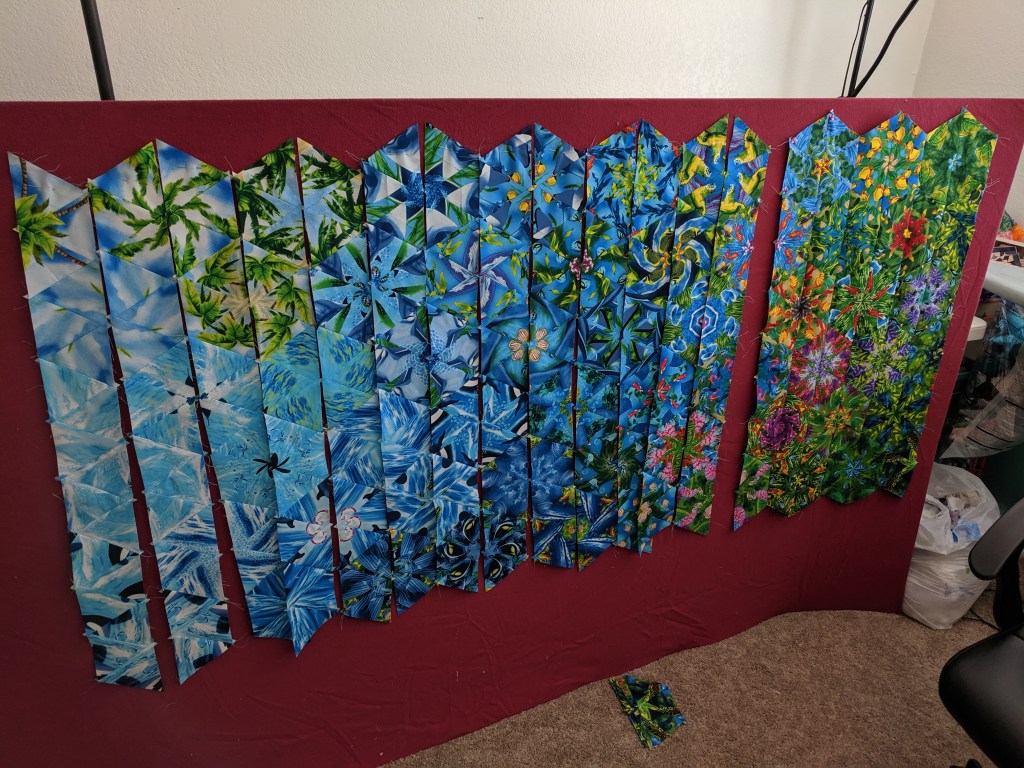
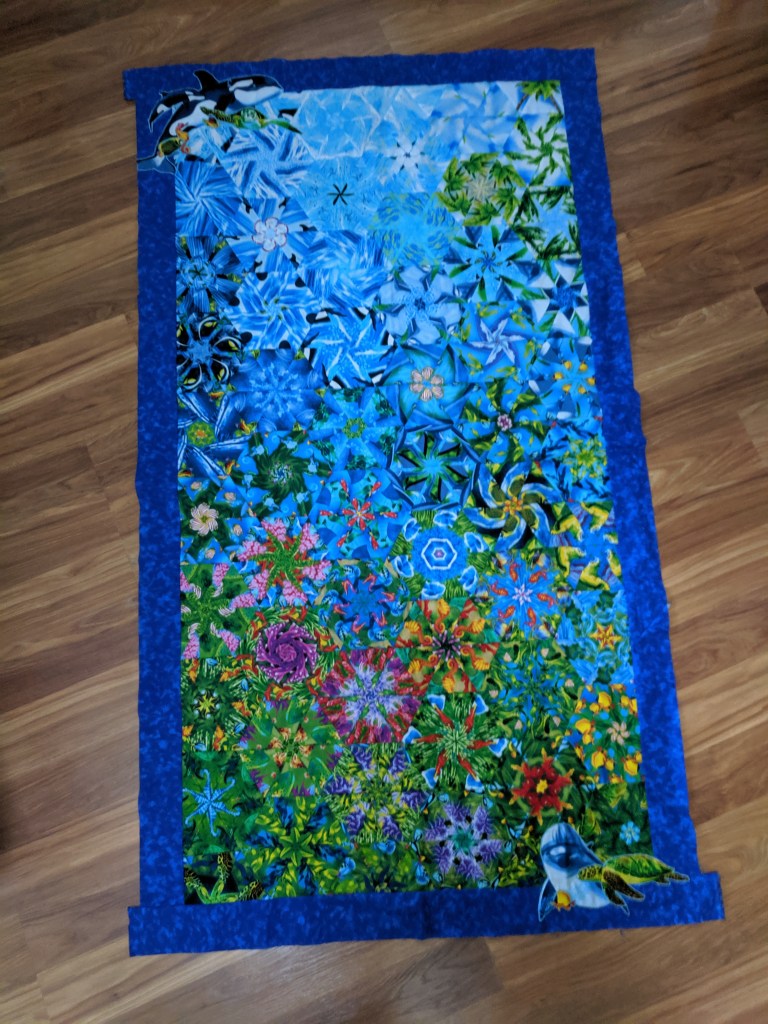
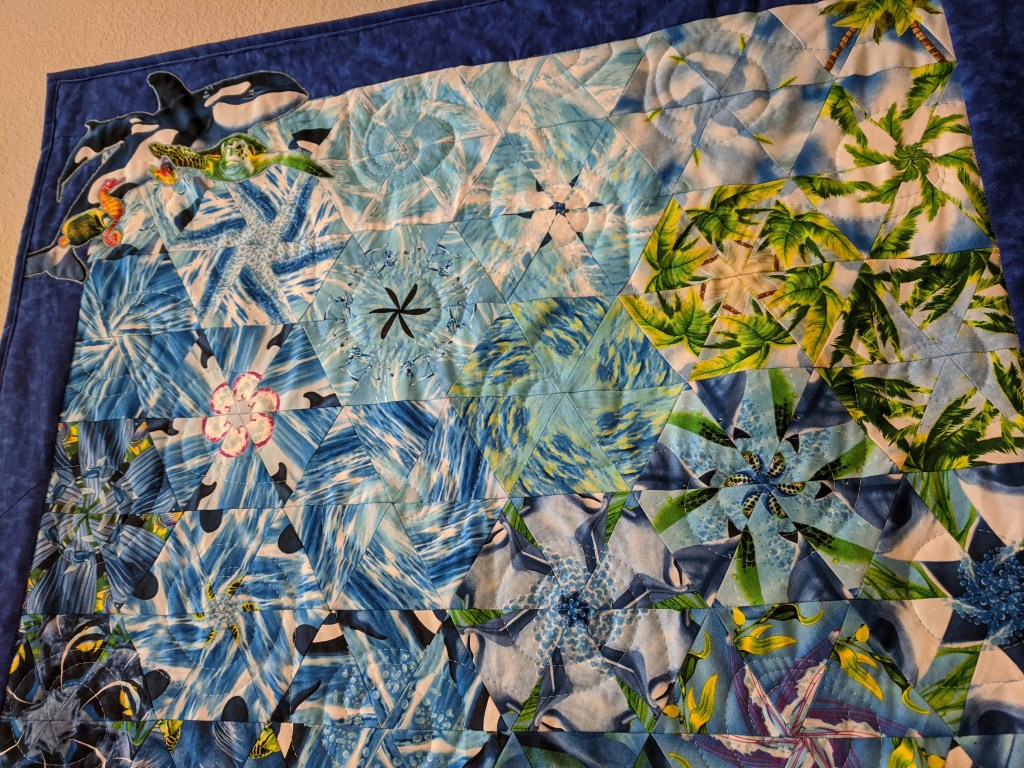
The fun part begins with designing and choosing a layout. This is where my pinterest board (and Polywall from Home Depot) really came in handy. As I laid my hexagons out, I saw that I had: (a) many blue shades, (b) some green shades, (c) some super colorful ones, and (d) hexagons that just did not fit at all. My original idea was to do a blue vs. green type of layout, like a wave or swoosh, to bring in the water theme. I ended up not having enough good hexagons to pull this off, so I went with a gradient design that’s a bit more in line with conventional OBWs.
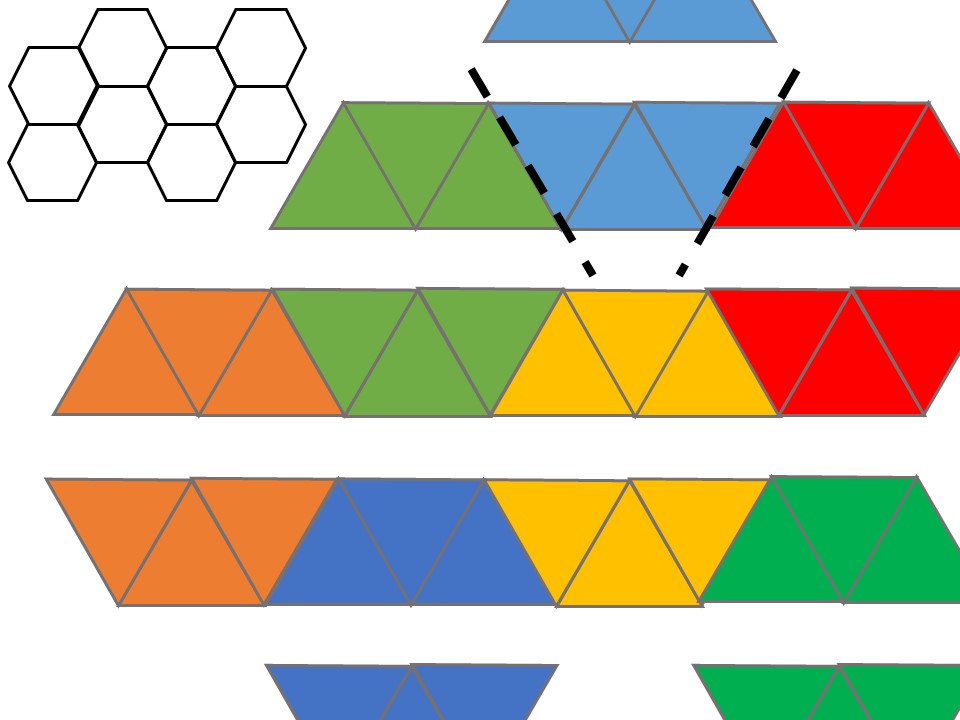
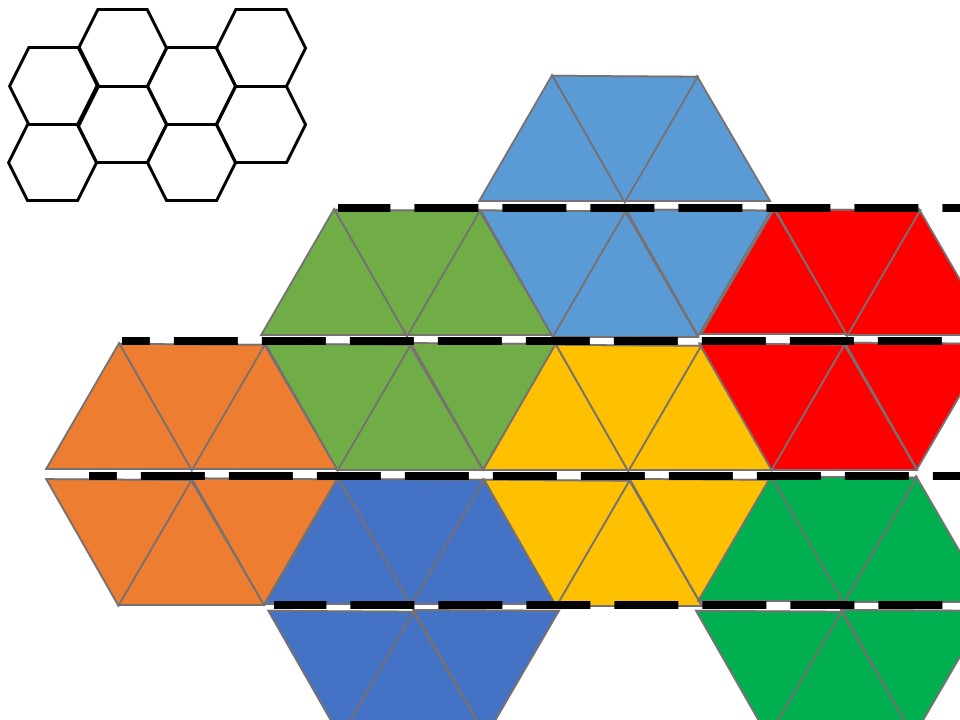
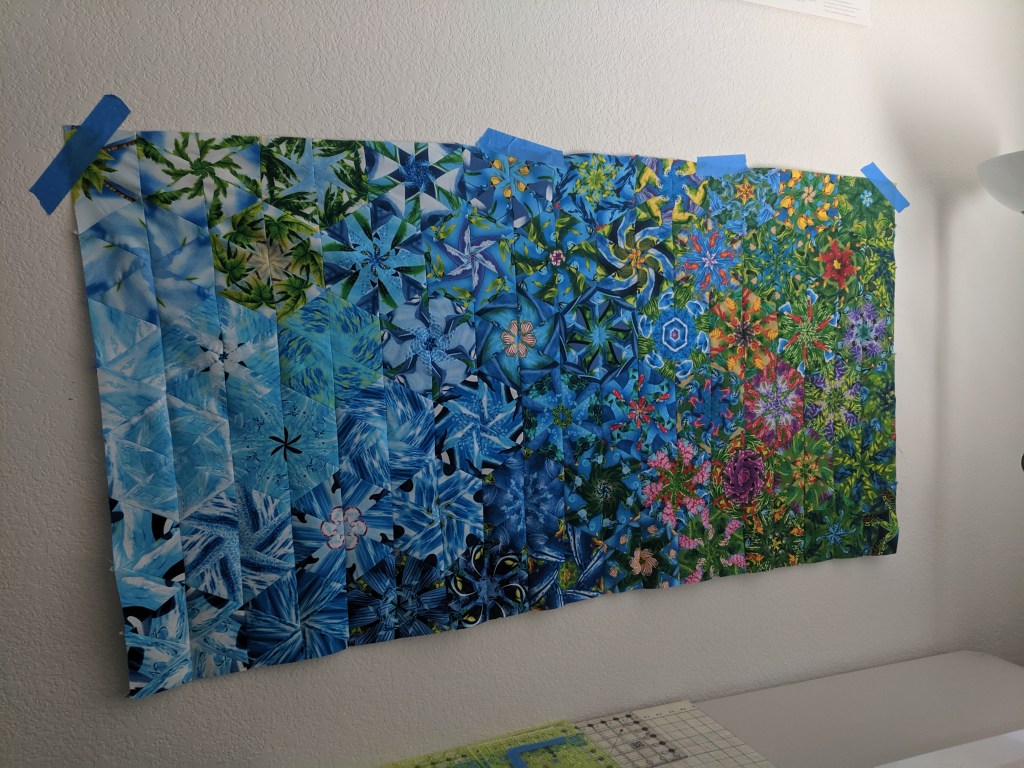
Now remember that we only sewed together halves of hexagons. Due to the grids hexagons create, each half can be sewn to the halves adjacent to it in rows (see below). Then, those rows are sewn together to create the whole grid. The hexagons on the end get cut off a bit so that the finished quilt top ends up rectangular. I used a blue blender from Joann for the border to bring together the ocean theme and give the eye some rest.
Sew into rows
Sew rows together
Individual rows on the left, joined rows on the right
All squared up and ready!
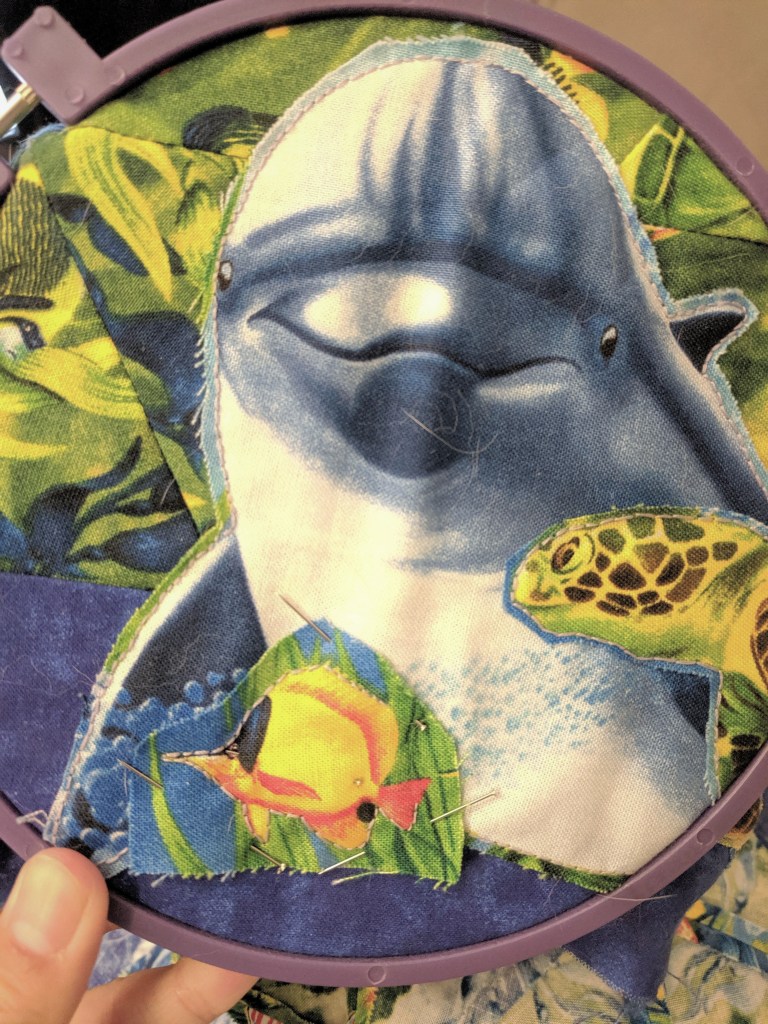
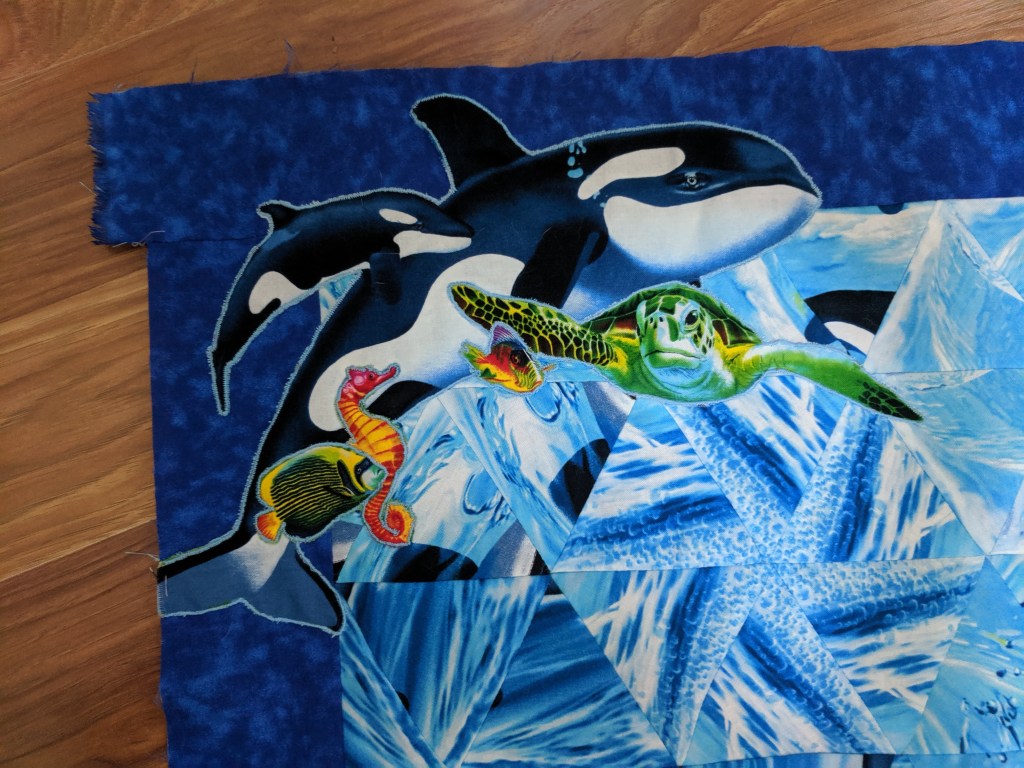
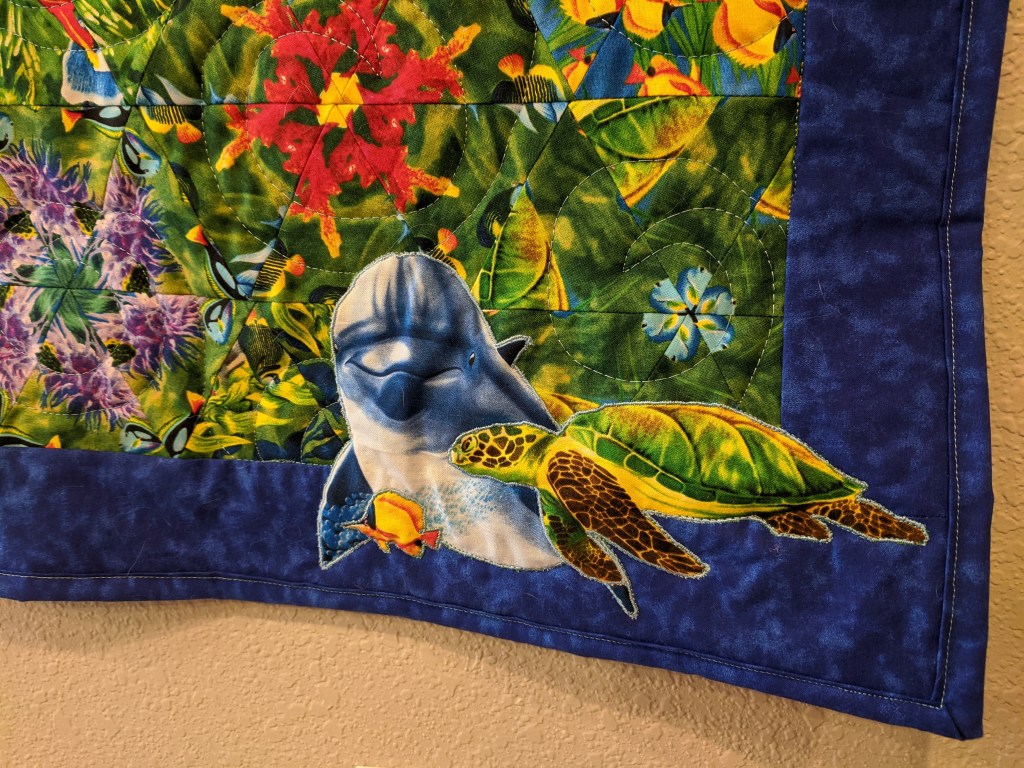
To embellish my OBW, I chose to cut out some of the animals and applique them onto the top. Applique is a technique to sew a patch onto a bigger piece of fabric, and can be done in a ton of ways. I chose to hand baste my animals on and then go over the hand stitches with the machine to clean up the edges. I liked the idea of including some non-kaleidoscope-d bits to help the eye, and plus I love sea creatures so I wanted to feature them, whole, on the front.
Hand basting in the embroidery hoop
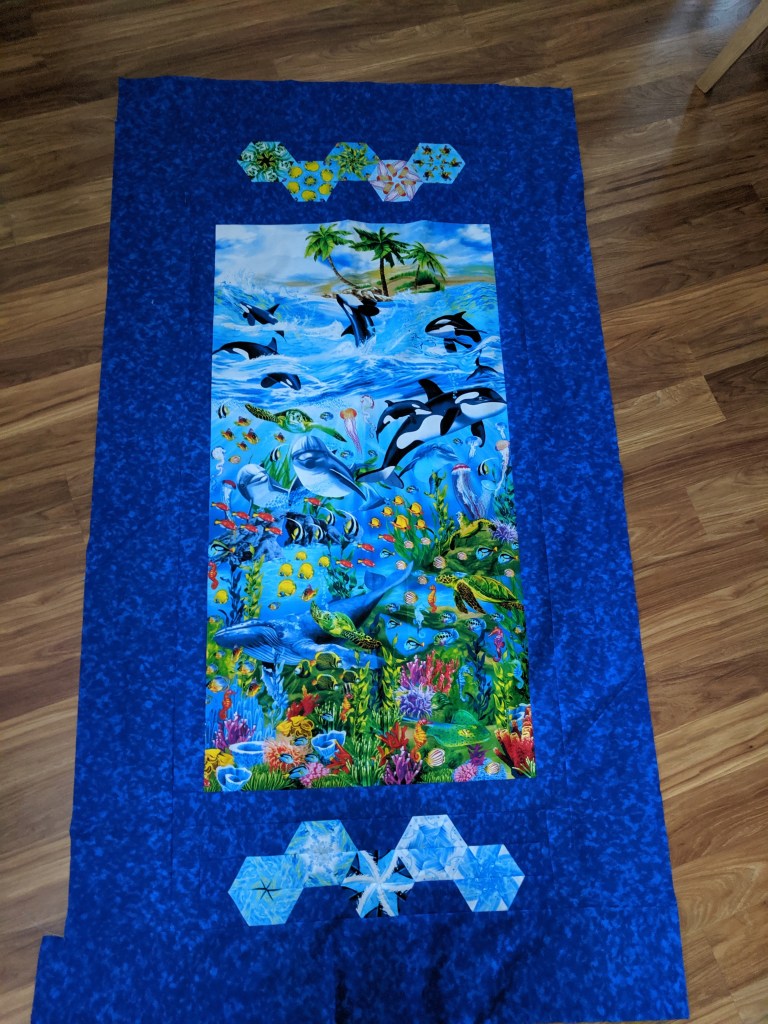
I wanted the backing to be the original panel, so I could flip it over and show people the uncut panel. And I added some of hexagons I liked that didn’t fit in the top 🙂
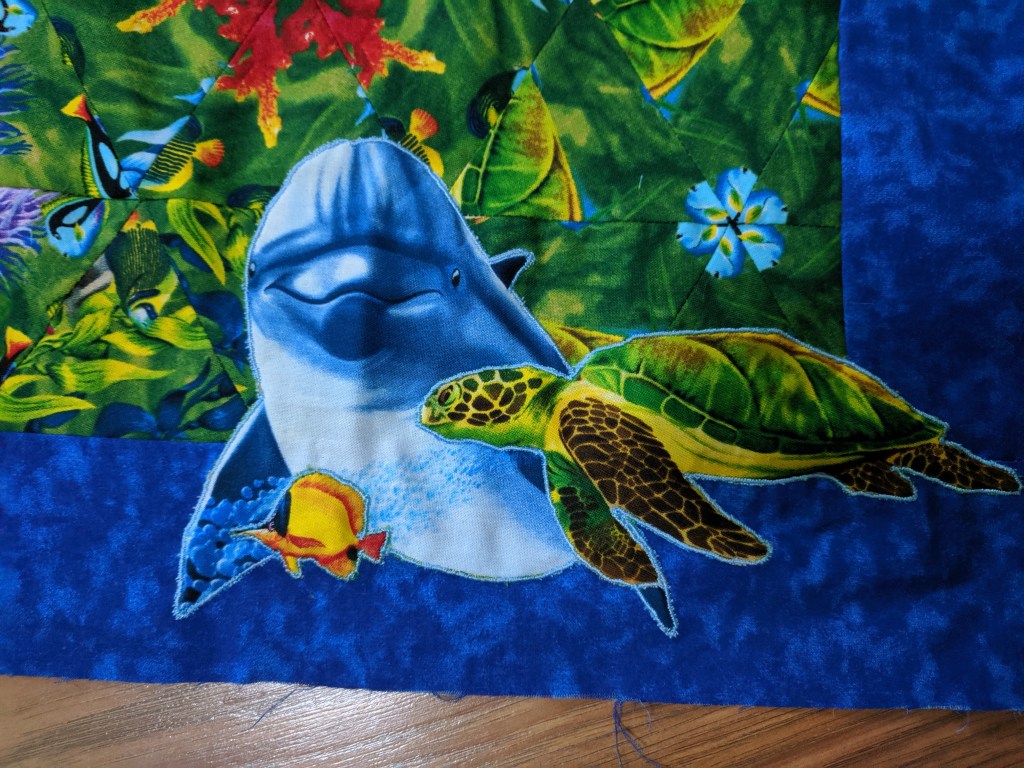
Finished top
Finished backing
In total, making the half-hexagons took a couple days, deciding on the layout took a week, assembling the top took a couple days, applique-ing my animals took a couple weeks, the backing took a couple days, and then I let it sit… and sit…
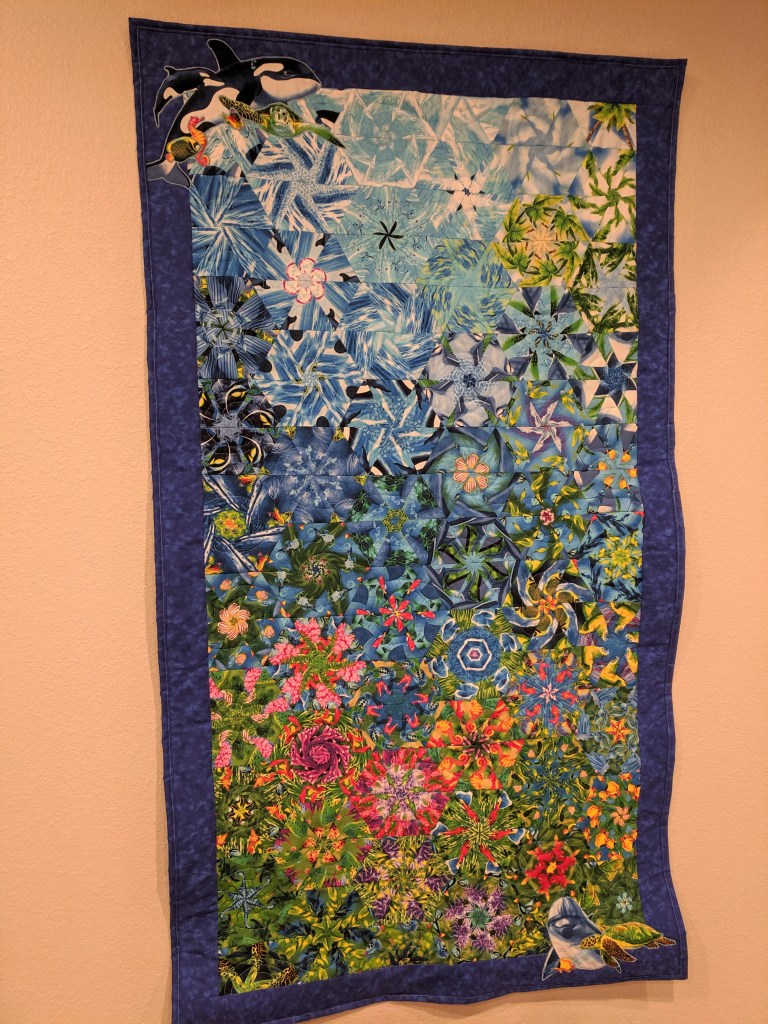
And finally, I decided on a quilting design and quilted it up. 🙂 I added a little tube on the back to help me hang it up, bought a little dowel at Home Depot, and hung it up. I’m so happy to have this done and finally hanging up in my kitchen where I imagined it.
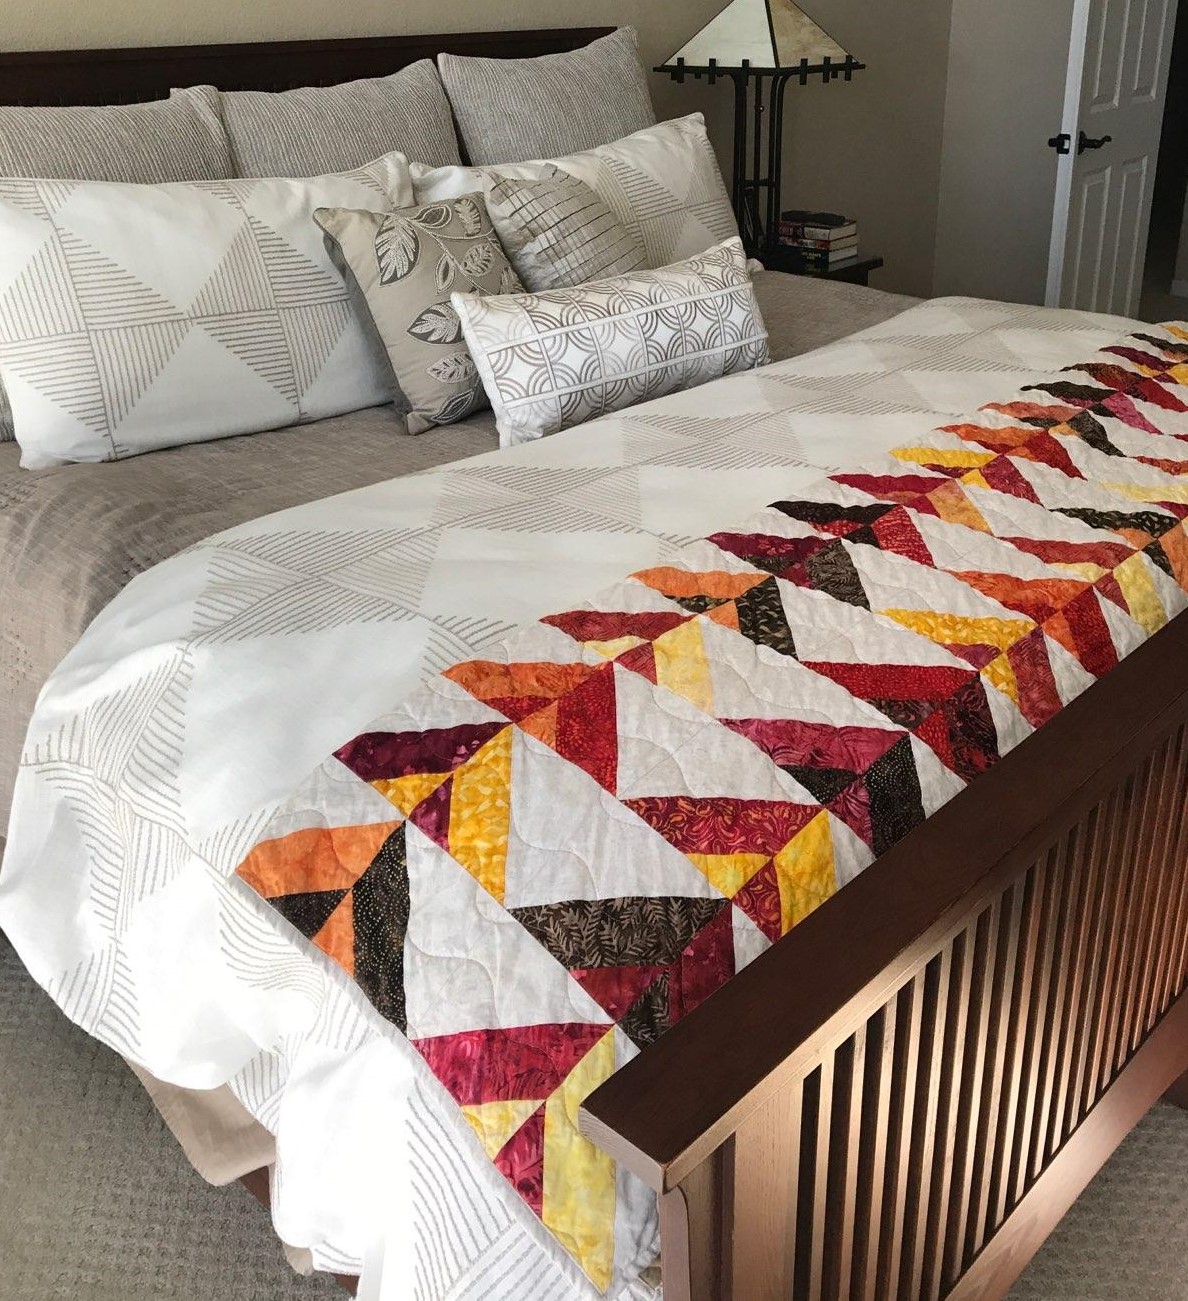
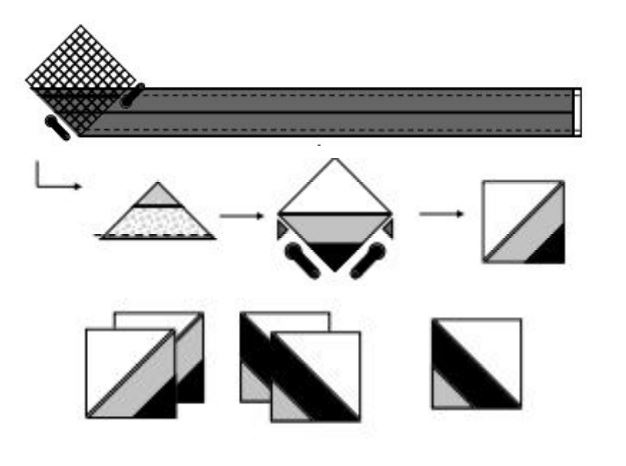
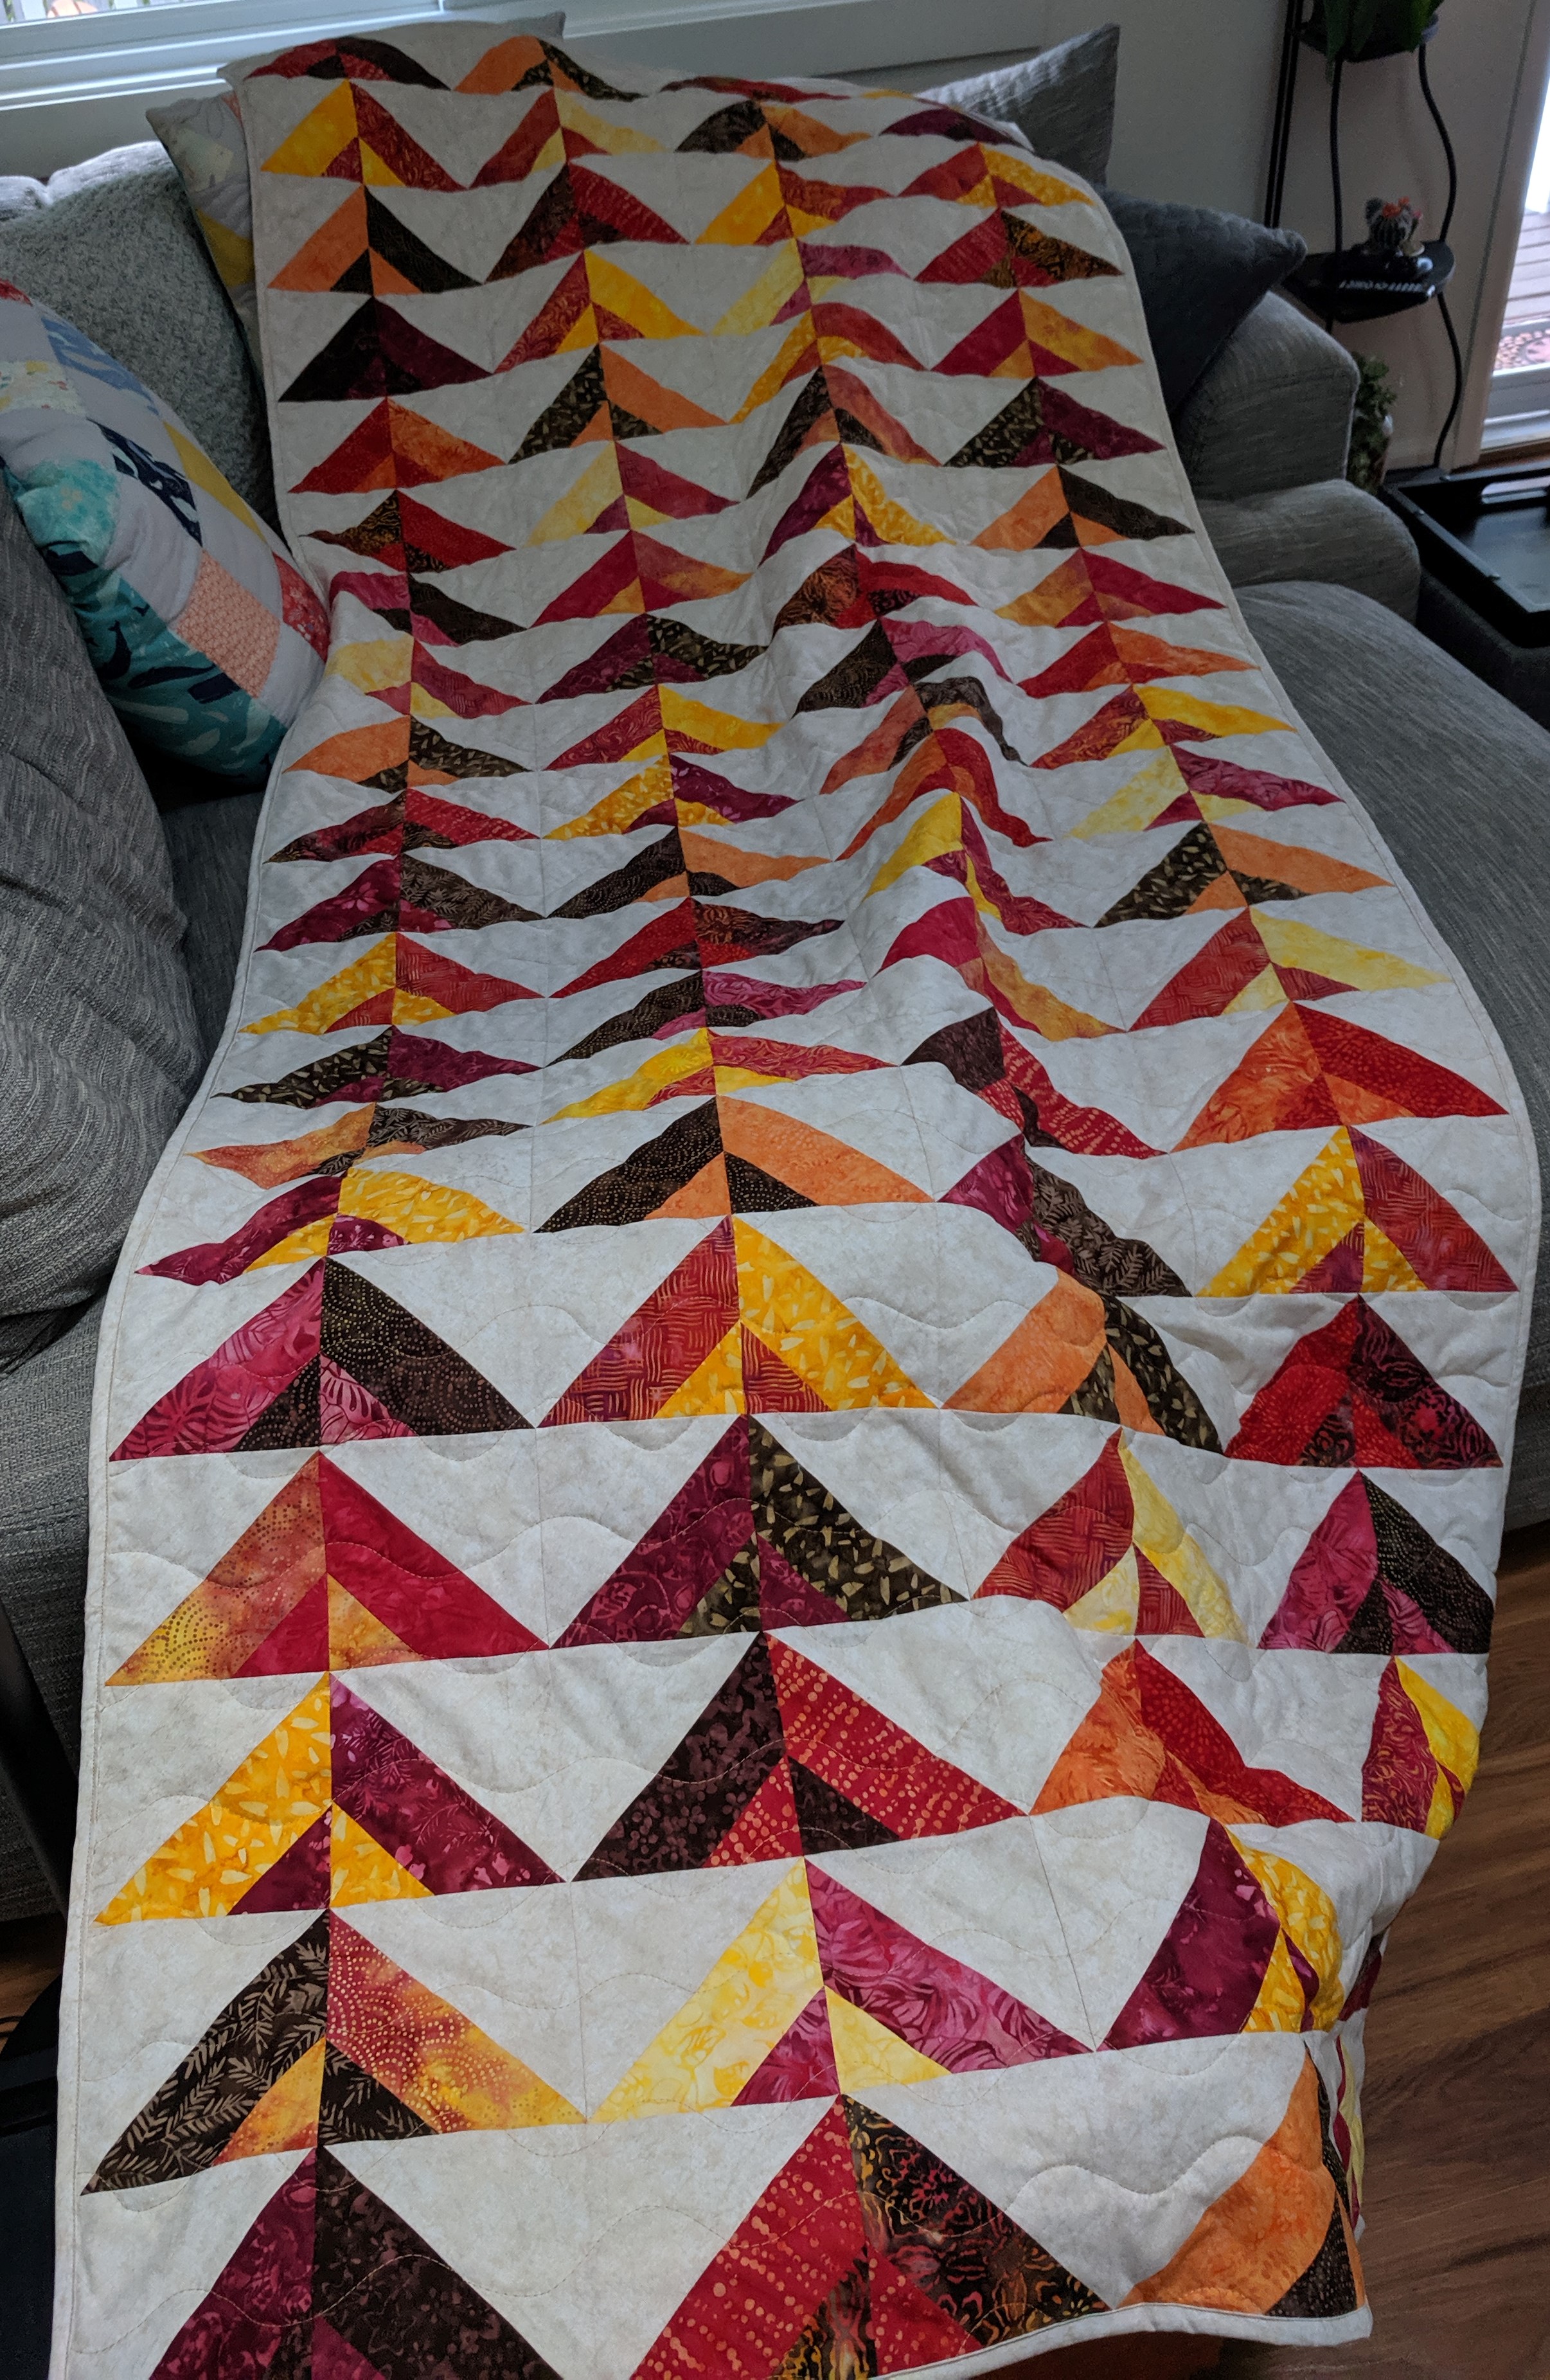
I made this bed runner for my parents! It’s from the On Point pattern from Bluprint/Midnight Quilt Show. It’s another HST type of design, but with a twist. I used the Boundless Batiks Fireside jelly roll to bring in some autumnal/southwestern colors. I sewed pairs of strips together down the long end to create 20 strip pairs, which were then sewn to my background fabric. Now here’s the magical and efficient part: the strip pairs and background fabric is now a tube, right sides in. I used a square ruler to cut out triangles from the fabric, lining up the 5.5″ marks with the sew line. Then you iron them open and it’s a HST!
Actual diagram from the pattern about cutting the tubes to make HSTs
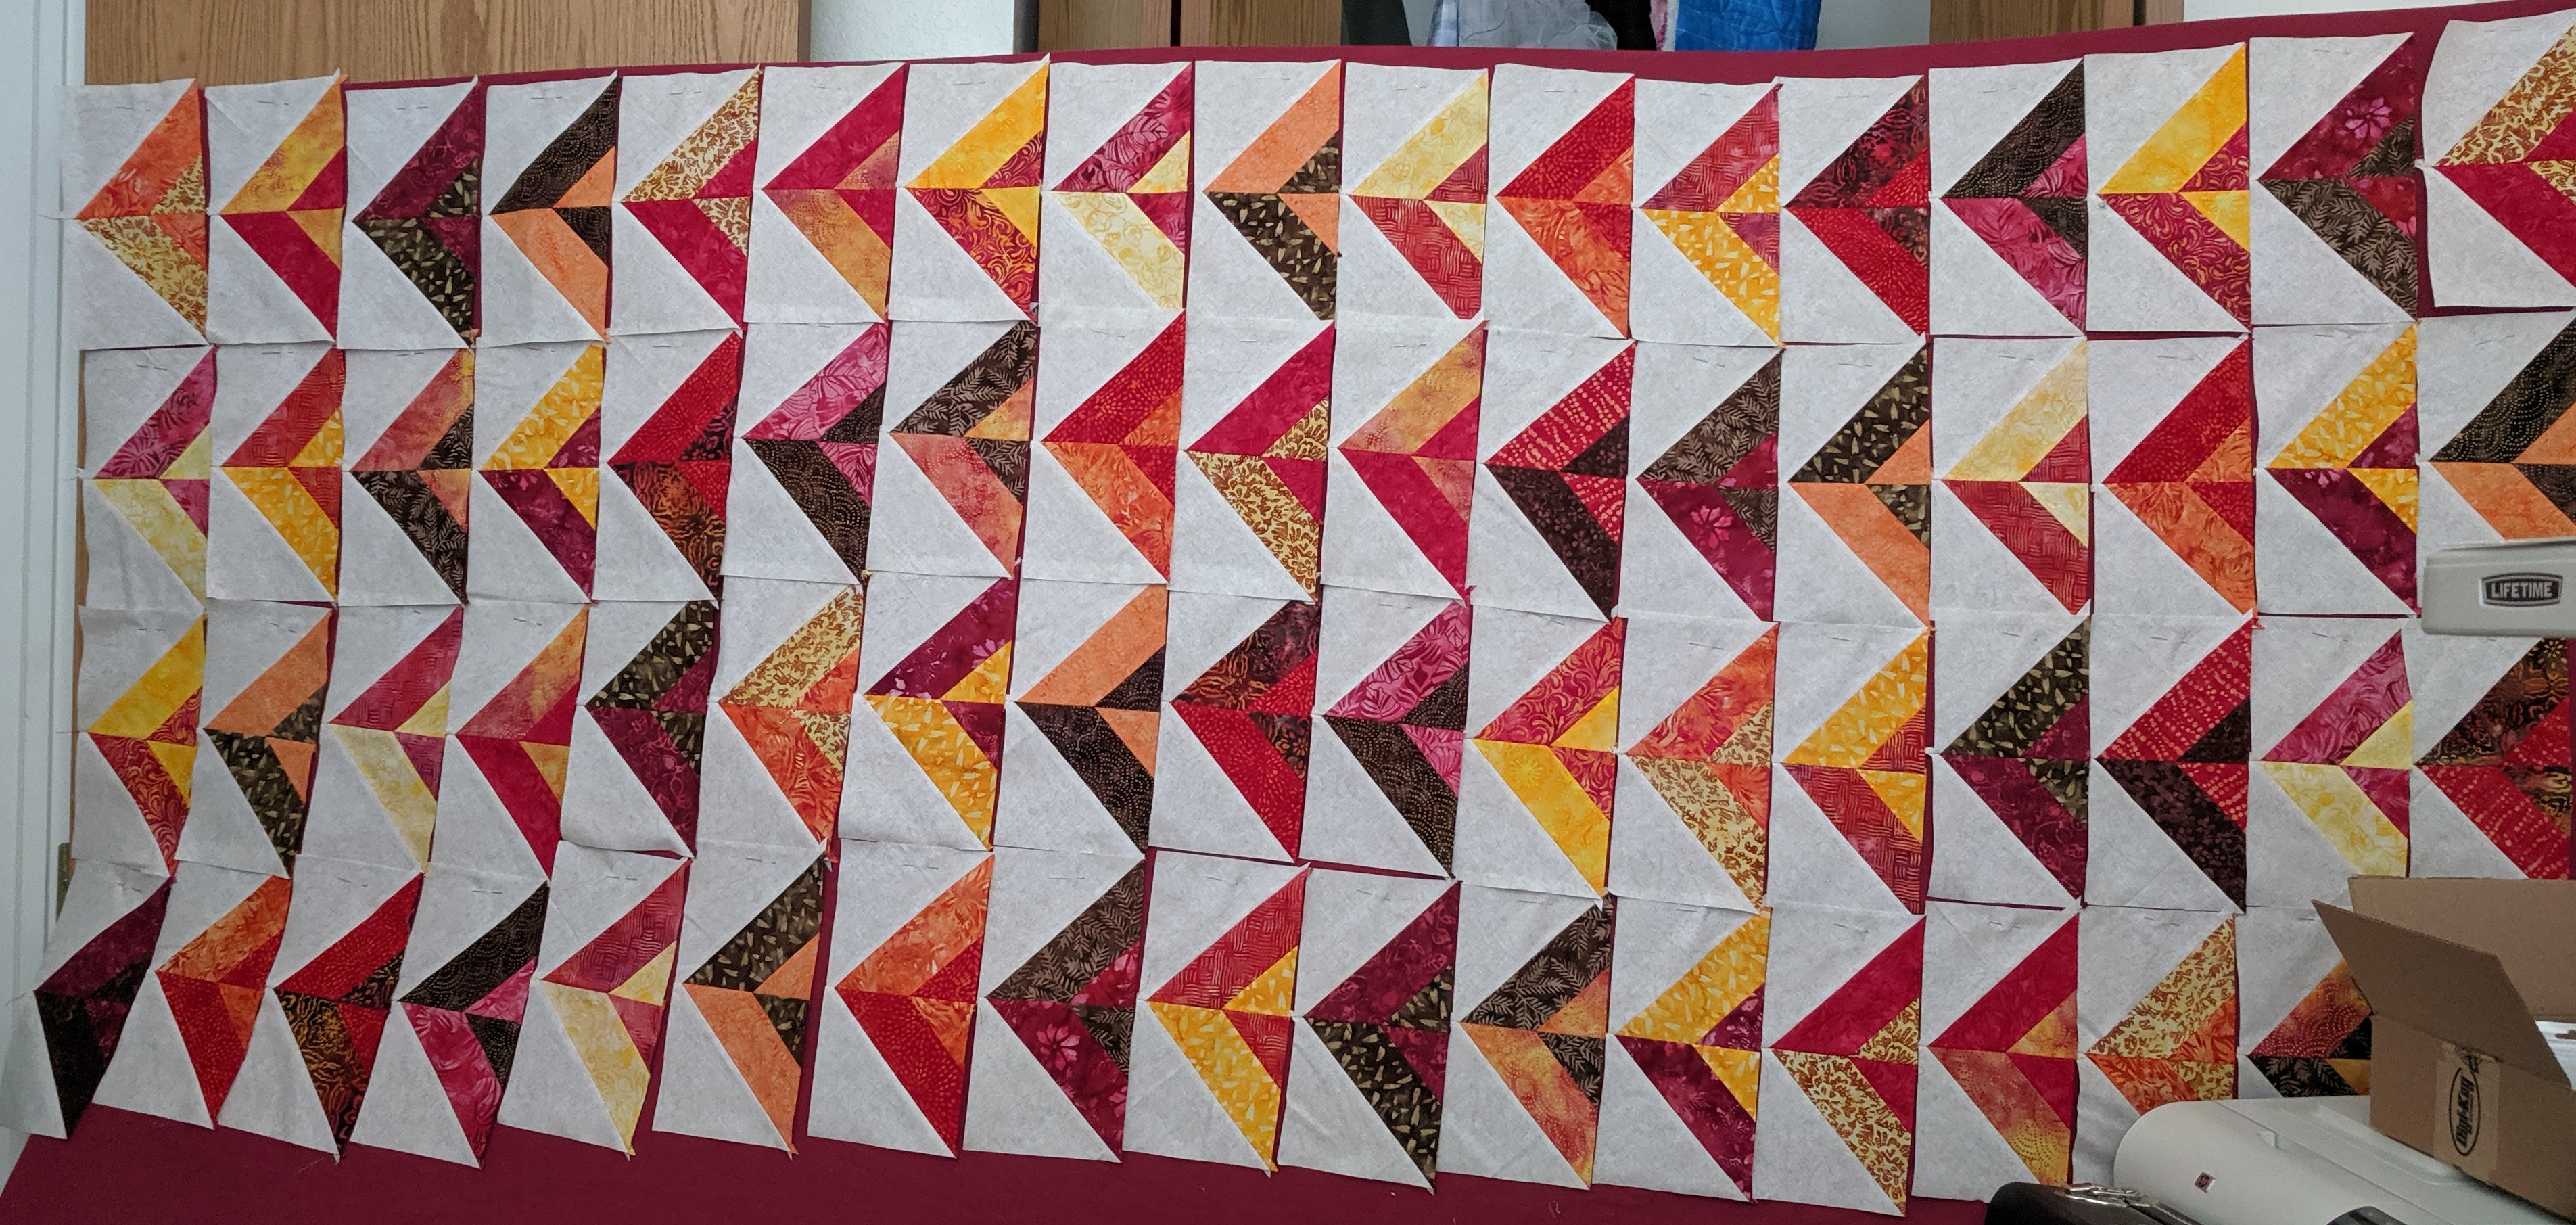
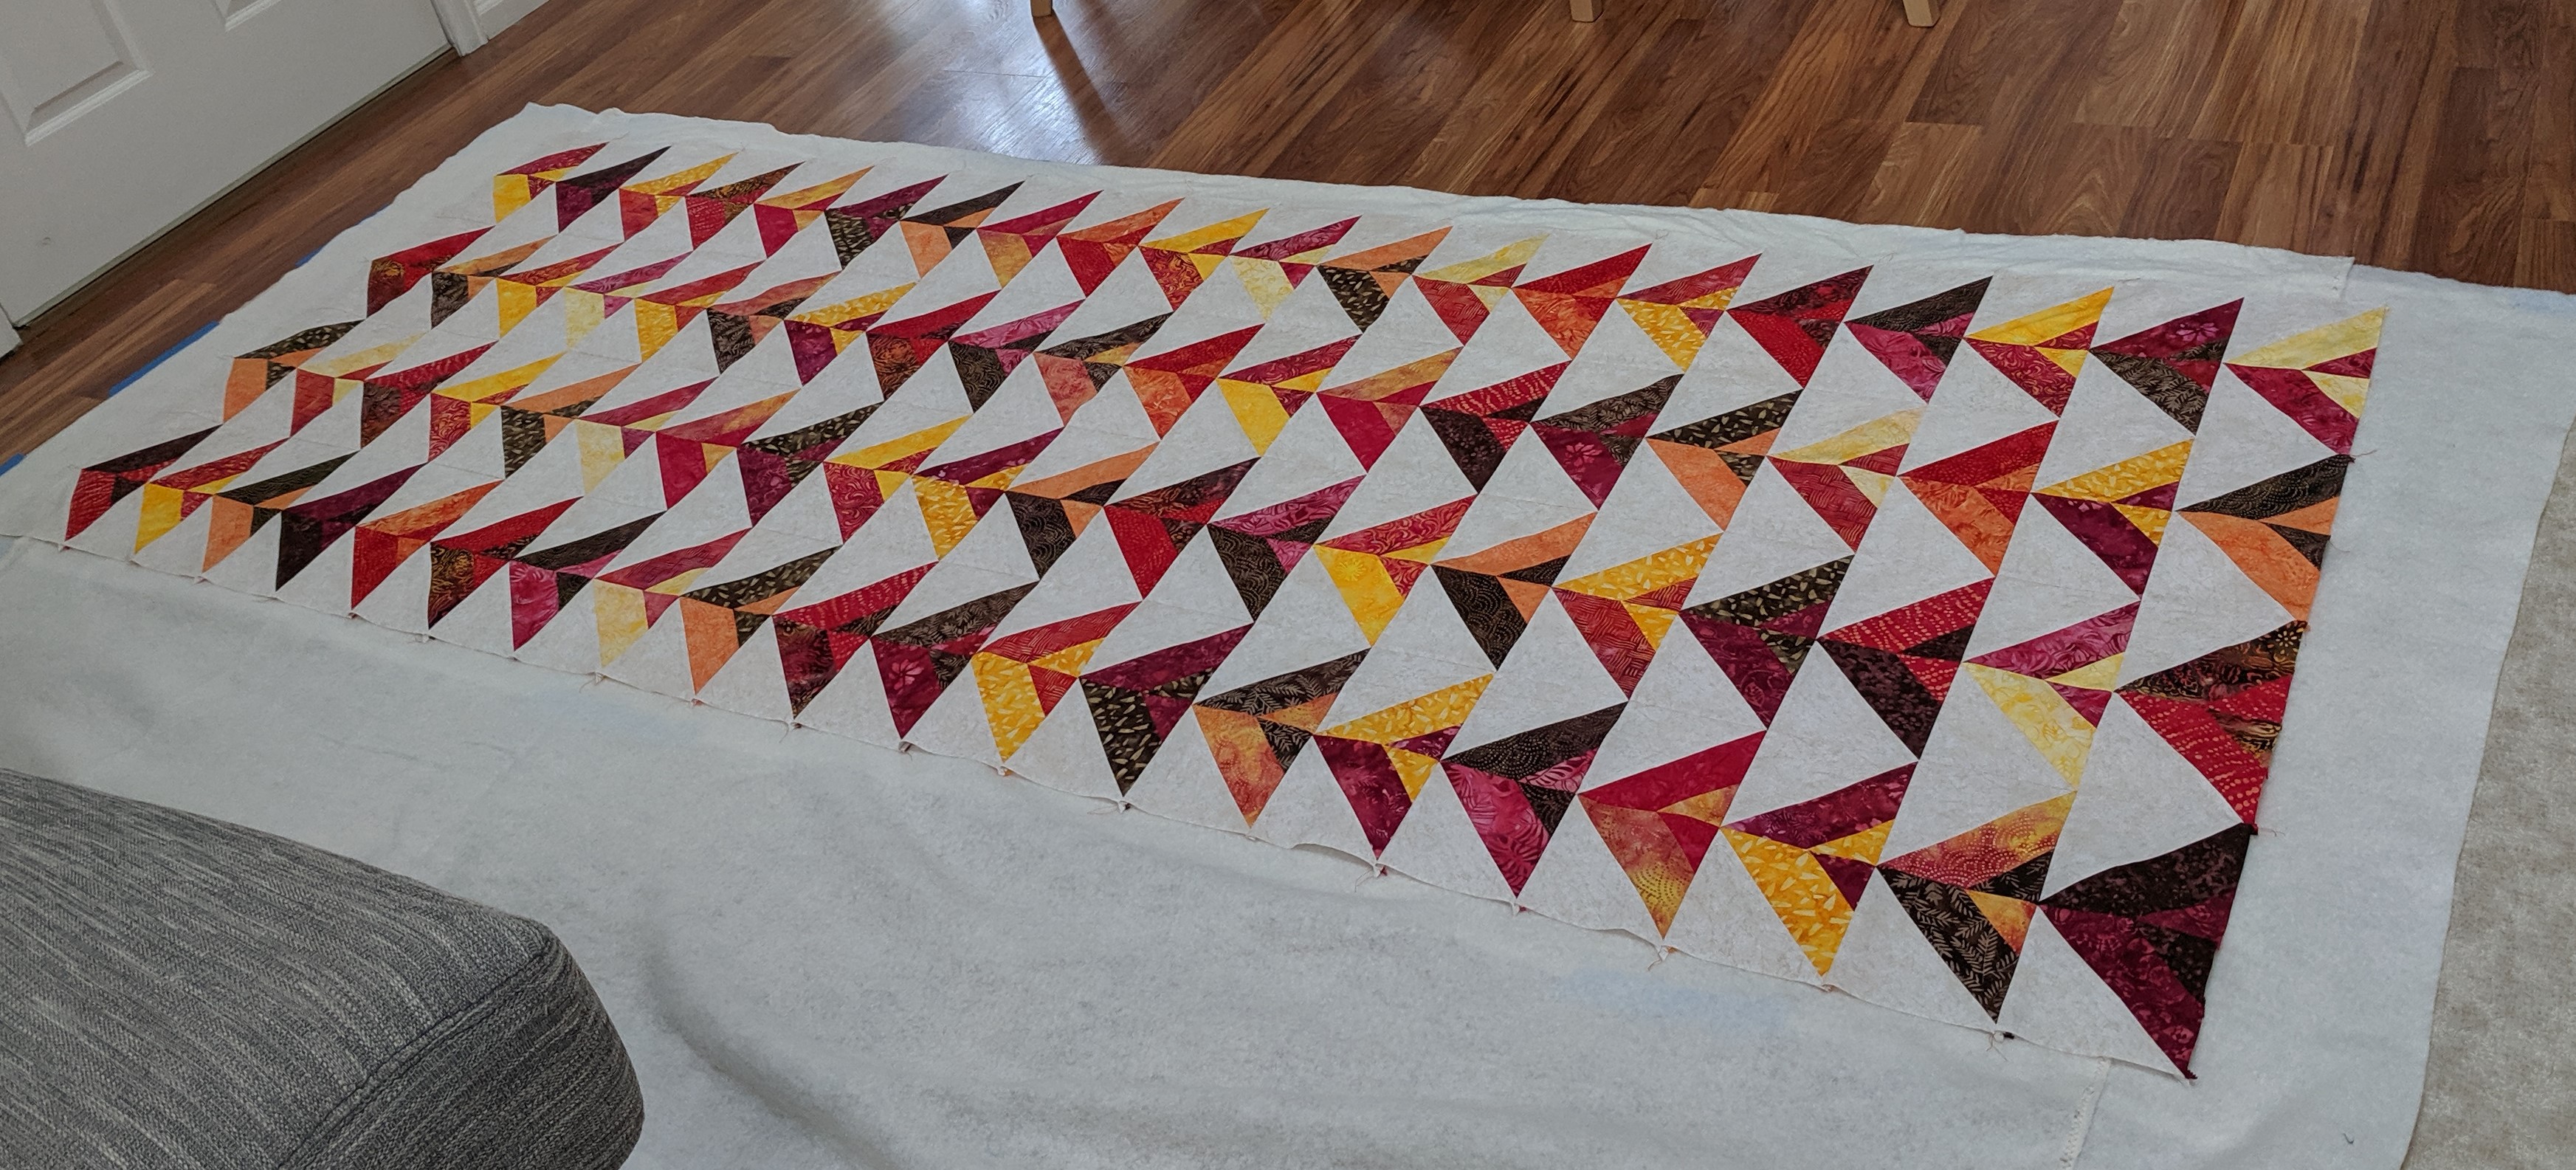
The pattern calls for matching the strips to create triangles inside of triangles, but my mom liked the mismatched strip layout, which I think brings a lot of movement and visual interest to the quilt. I assembled all my HSTs and paired them together to make the mismatched rectangular units. Then I laid them out on my new design wall (a piece of Polywall from Home Depot covered in an old flannel sheet) so that no fabric was touching the same fabric in any direction.
Designing took a bit of fiddling, and my wall fell down at one point – this isn’t even close to the final layout, haha
I wanted to quilt it in a way that minimized the harsh geometry, and since I’d had previous success with wavy lines, I decided to go for it. I chose a tan-ish thread to quilt with that ended up having a bit of sheen to it which makes it look almost gold.
Ready to be basted
Maybe one day I’ll take pictures in a better place than my couch, but it works
Or, the true answer to my most frequently asked question… 🙂
During the video, I’m working on the modified Anna Embroidery from Namaste Embroidery 🙂 it’s my first time doing 3D wired slips, which I’m super excited about. Plus it’s my first big project with the color blending long and short stitch – each leaf uses 4 colors to blend from light to dark. Towards the end you’ll see me tie off my floss on the back.
The real answer is I don’t know, but a garment is on the order of 10 hours or a week, a quilt is more like 20-30 hours or a month?? But here are some other time considerations:
I’m usually working on 2-3 projects at one time
My usual sewing night or session lasts 2-4 hours, and I usually sew 2-3 times a week
I consolidate fabric shopping for multiple projects at once, a fabric trip takes 1-2 hours
I take time to find patterns and research (inside the black hole of the internet)
In the beginning I spent a lot of time flipping through library books to learn about techniques and collect patterns
My time in the sewing room includes cutting fabric, sorting fabric, ironing / pressing, measuring, arranging layouts, exchanging equipment like bobbins and needles, winding bobbins, looking for my scissors and ruler, pinning fabric together, doing mathematical calculations, and… sewing.
It’s impossible to buy exactly the amount of fabric you need for a project. There will always be scraps, unless you’re making a perfectly rectangular item that uses up all the fabric straight off the bolt. For every other project though, there are bits and pieces of various sizes that aren’t used in the item itself. Or just leftovers because I bought more fabric than necessary.
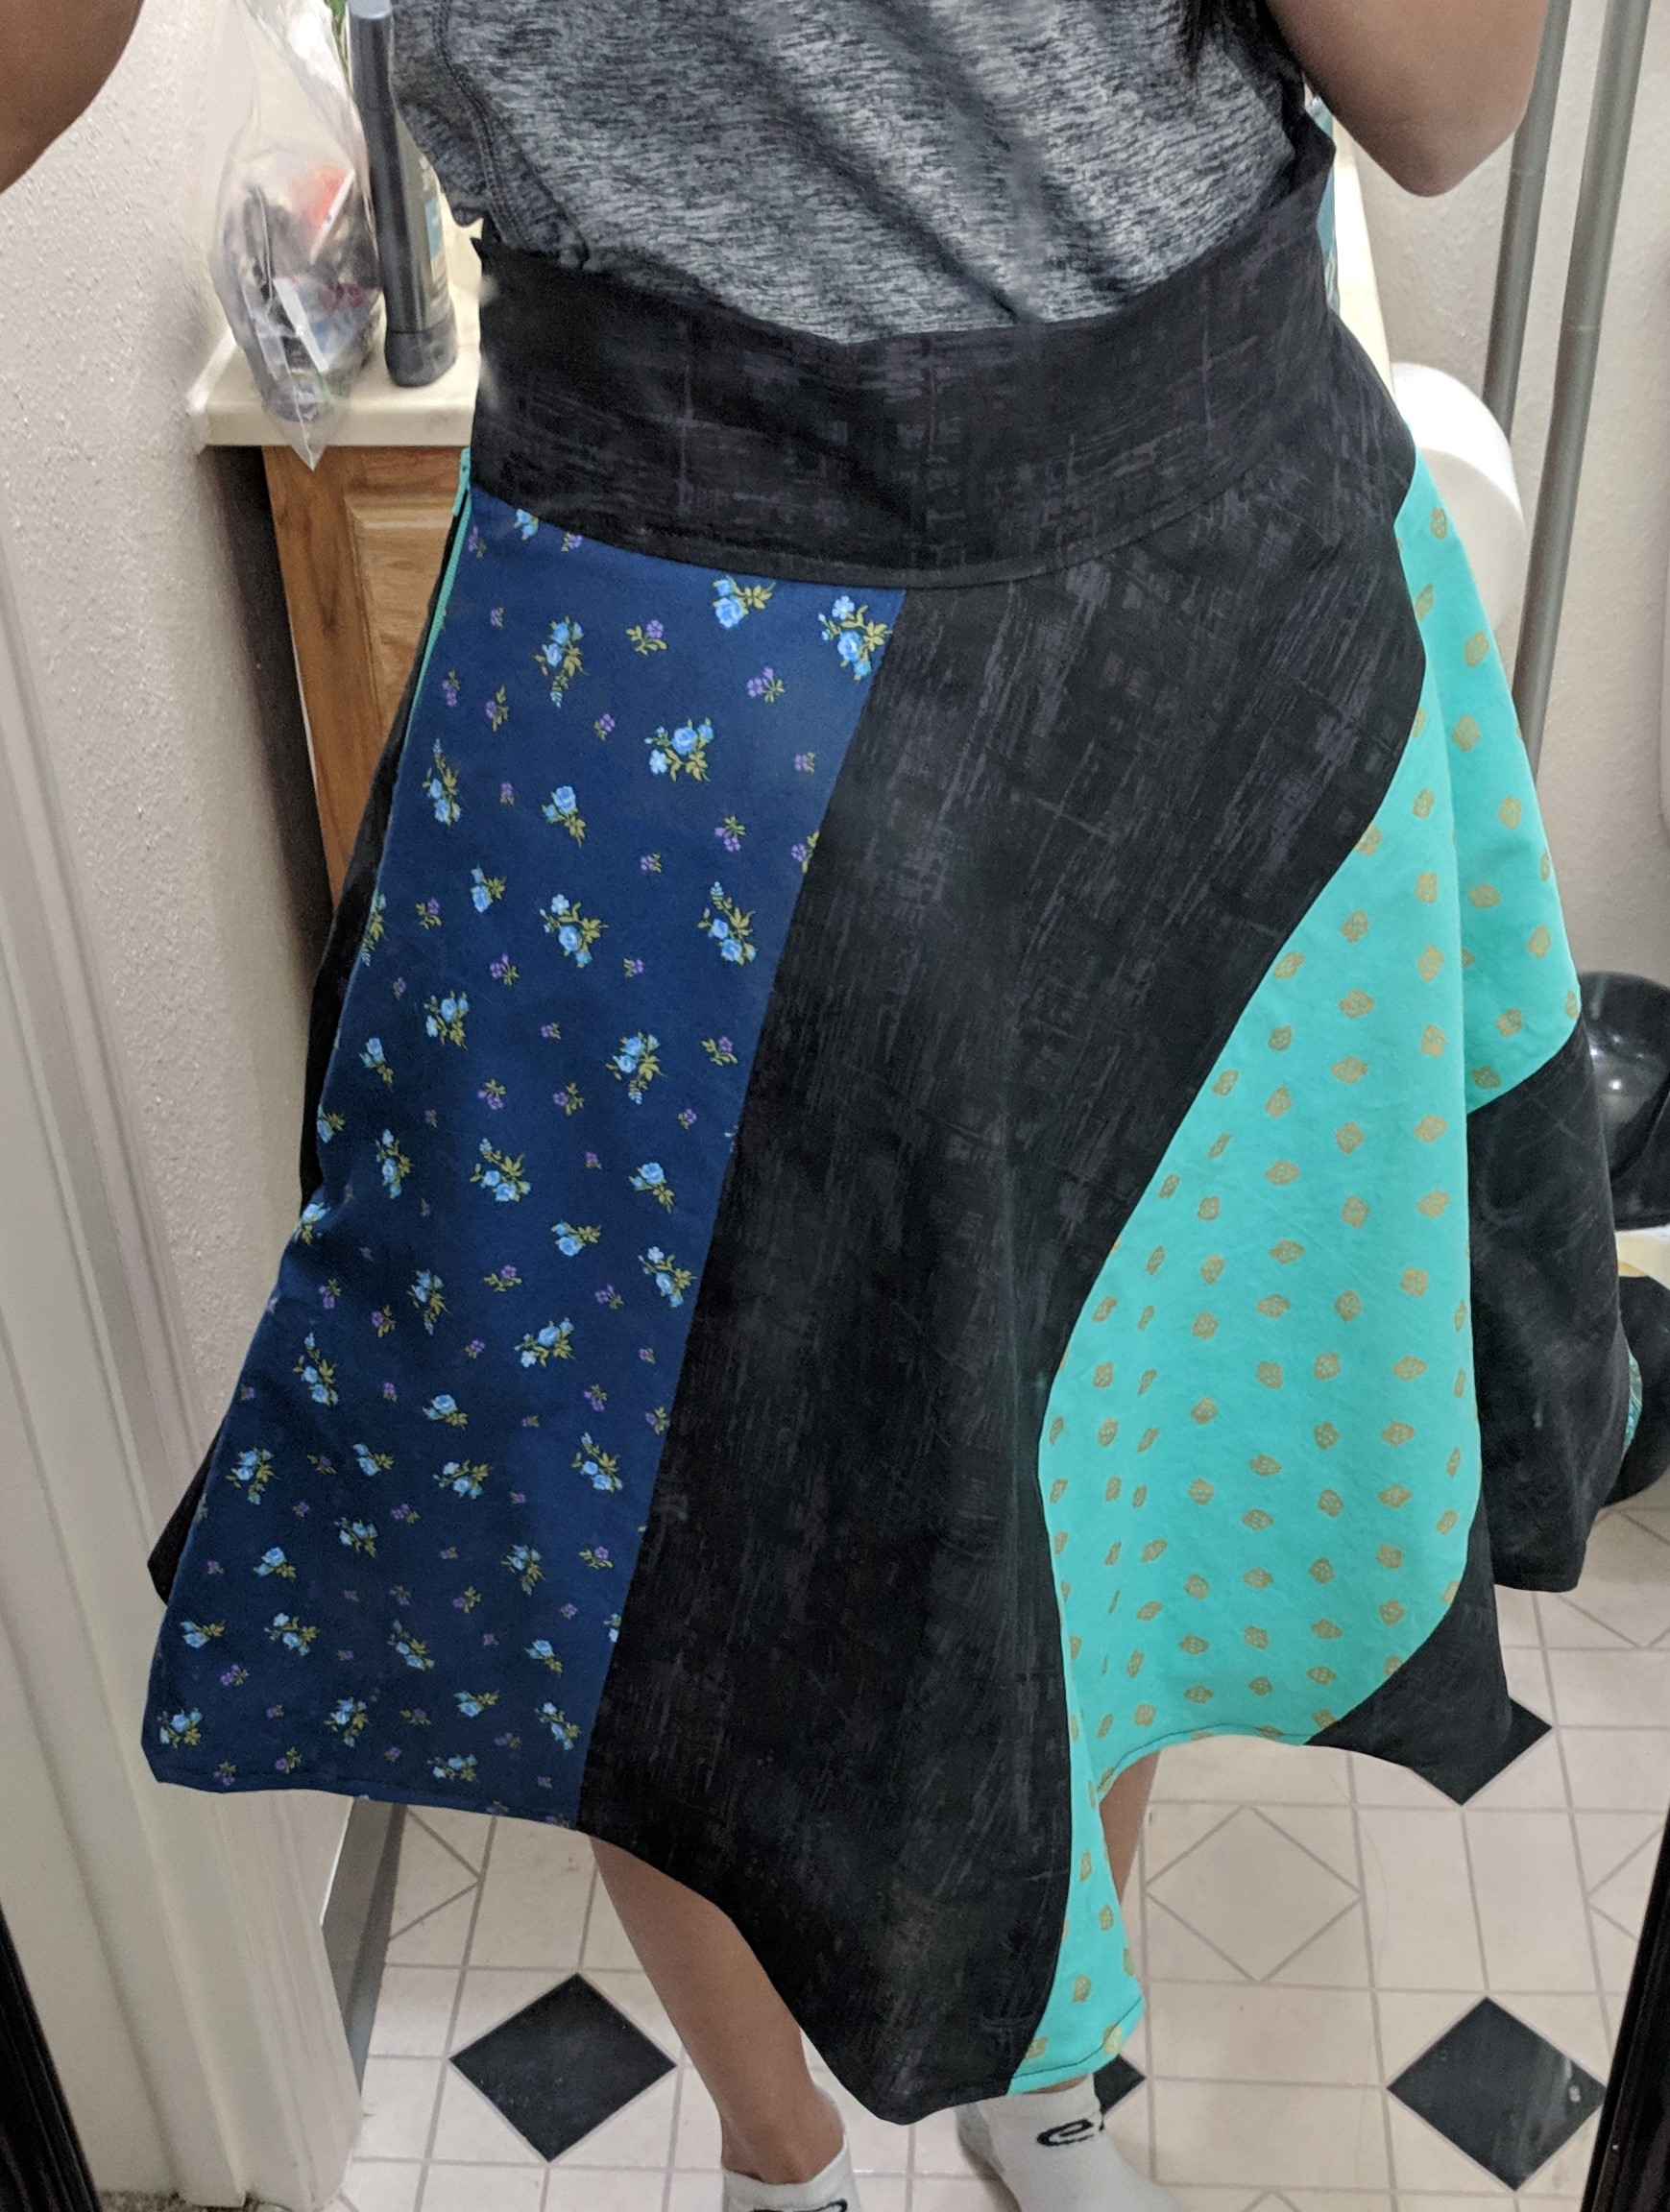
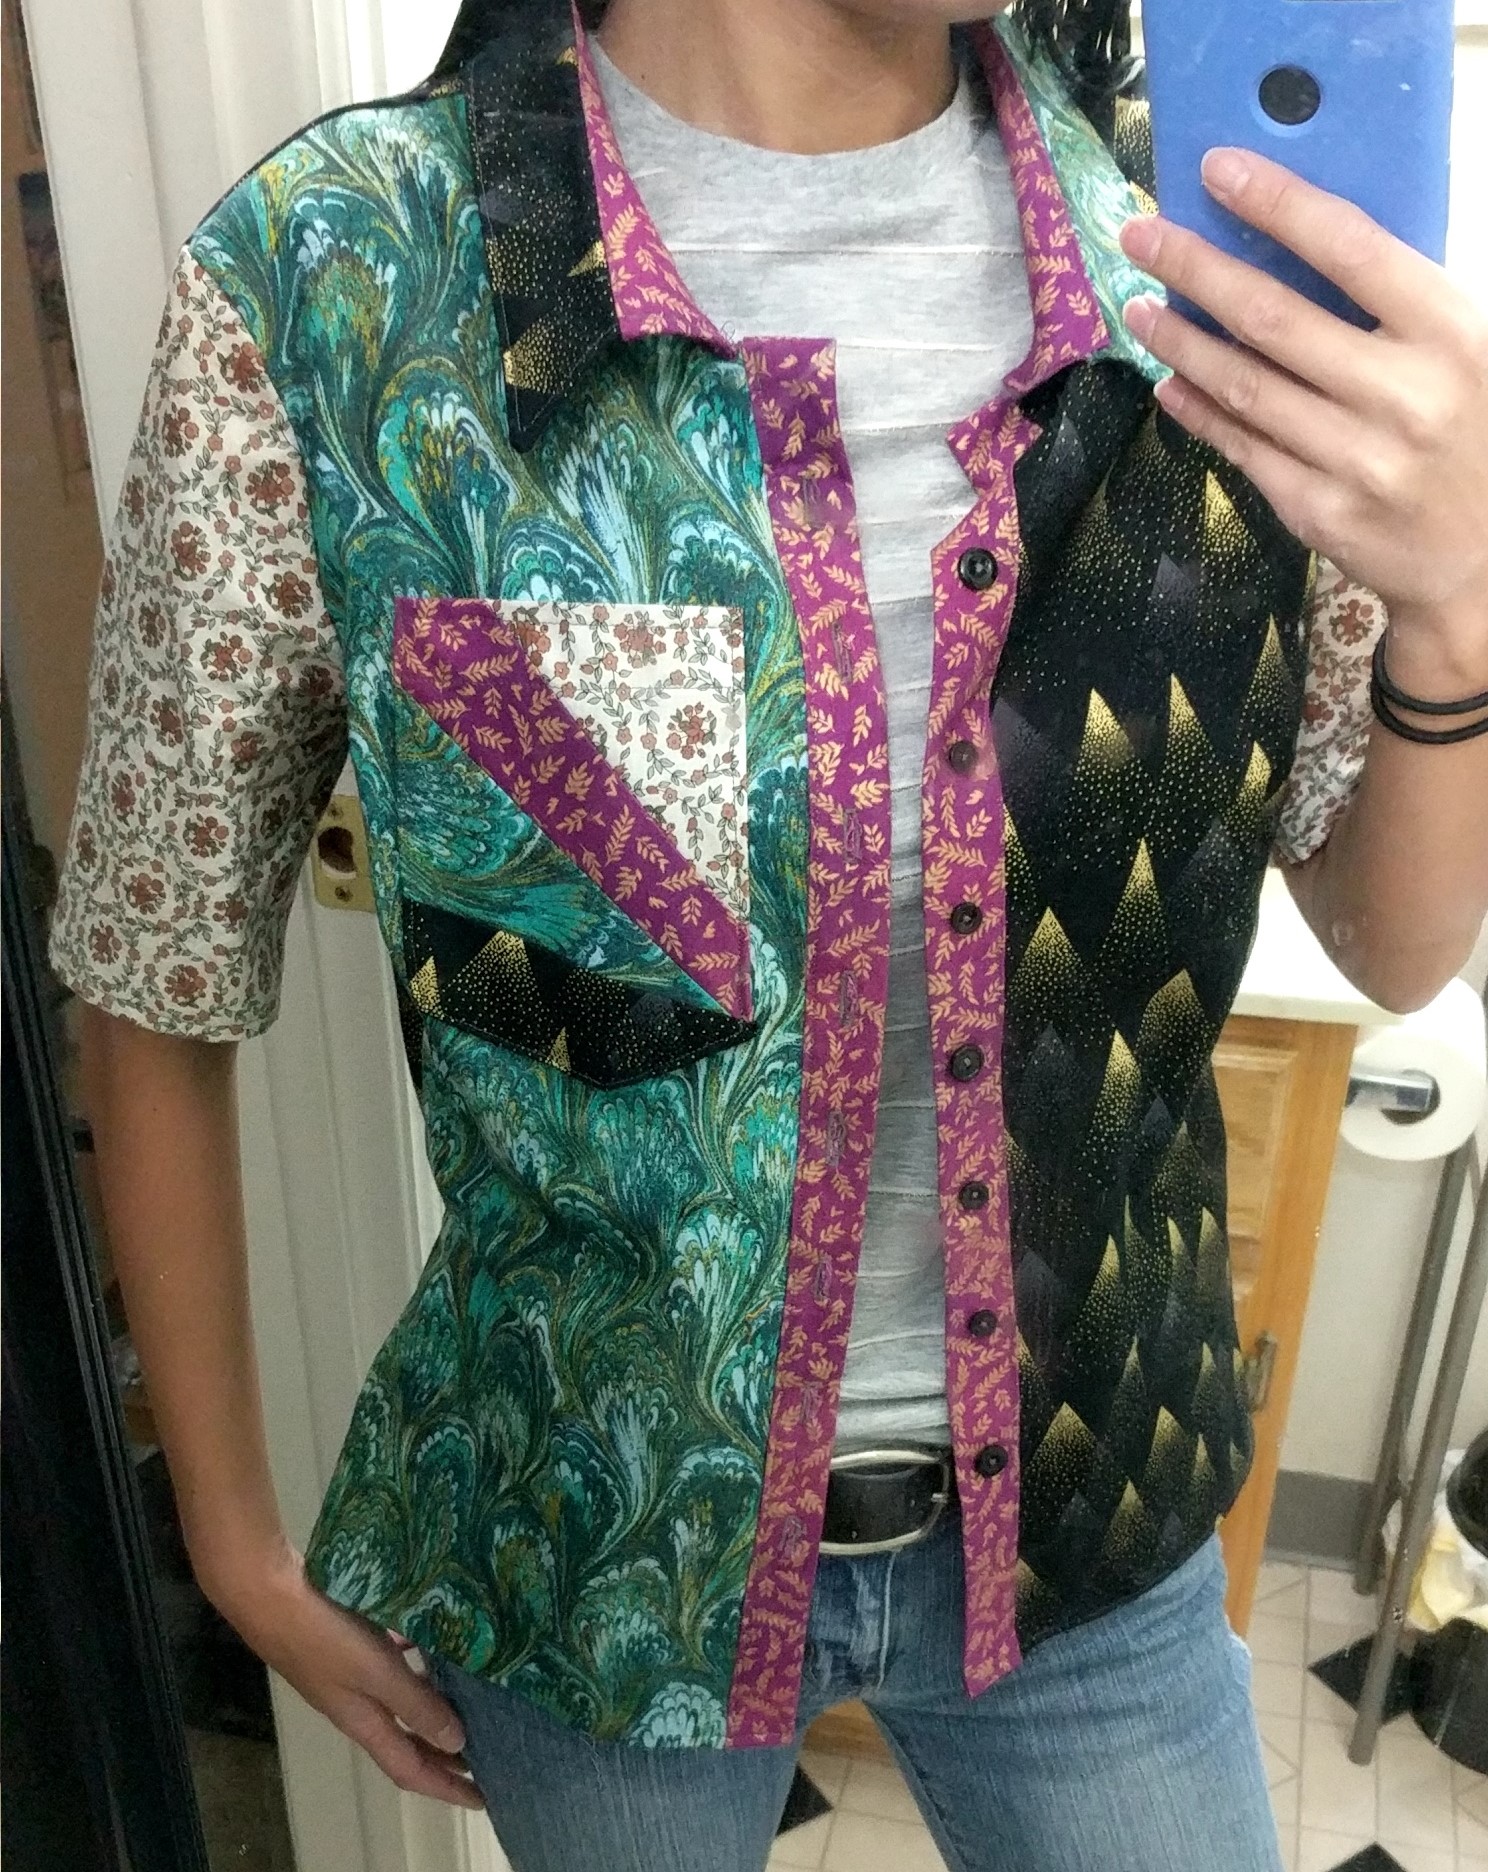
I decided to use some of these old scraps to make two different projects – the Skirt of Projects Past and the Shirt of Projects Past.
I liked (a) not buying new fabric and just recycling and (b) making something super colorful with weird, wonderful patterns. Most of this fabric I bought a year ago to make ties and neck warmers, and they generally have the same size print. And it was all cotton from Joann, so I wasn’t worried about weird shrinkage or anything.
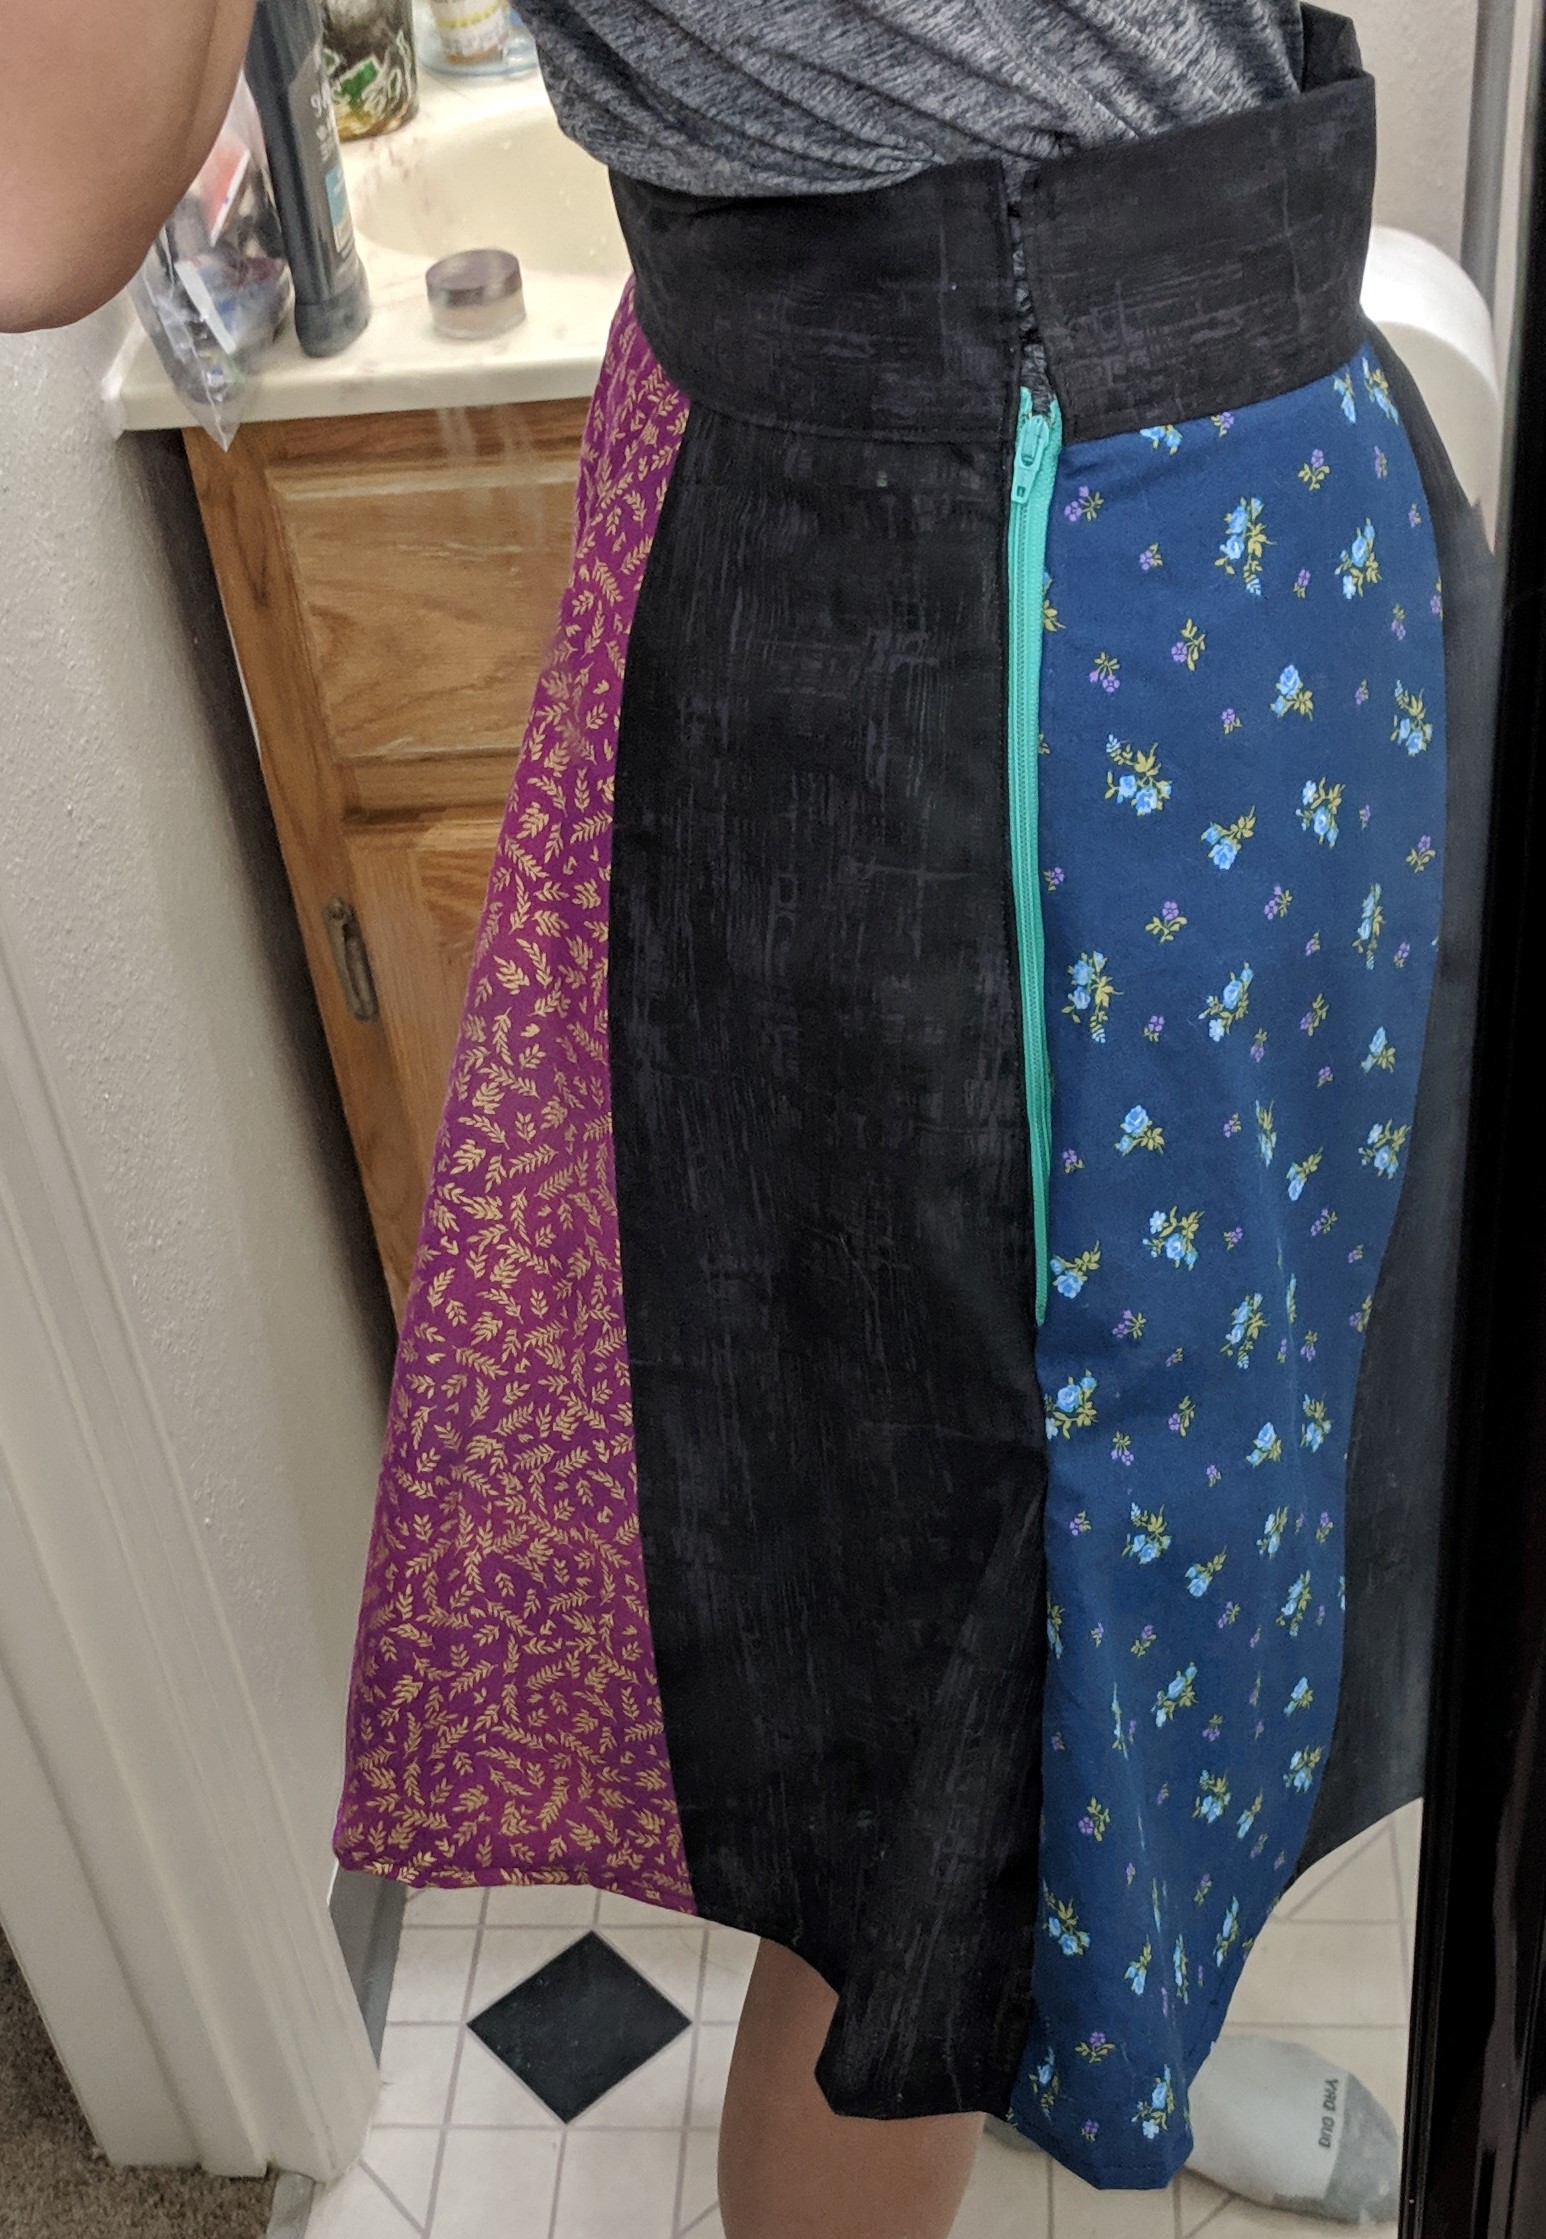
The skirt is made with strips sewn together, alternating print and black (from the Trapper Keeper). Then I cut out approximate semicircles, which created a front and back. I sewed one side together and installed a zipper on the other side. The waistband isn’t as sturdy as I’d like, in projects after this I used elastic inside the waistband just to hold it closer to the body.
I used a modified Lekala #5446 Classical Blouse pattern for the top. I added a pocket using foundation piecing, adding layer after layer to get a pocket sized piece of fabric. I love the overall look of this top, but the collar opening leaves something to be desired, it’s a bit stiff and falls open strangely when buttoned.
Shirt completed March 30, 2019. Skirt completed Jan 10, 2019.