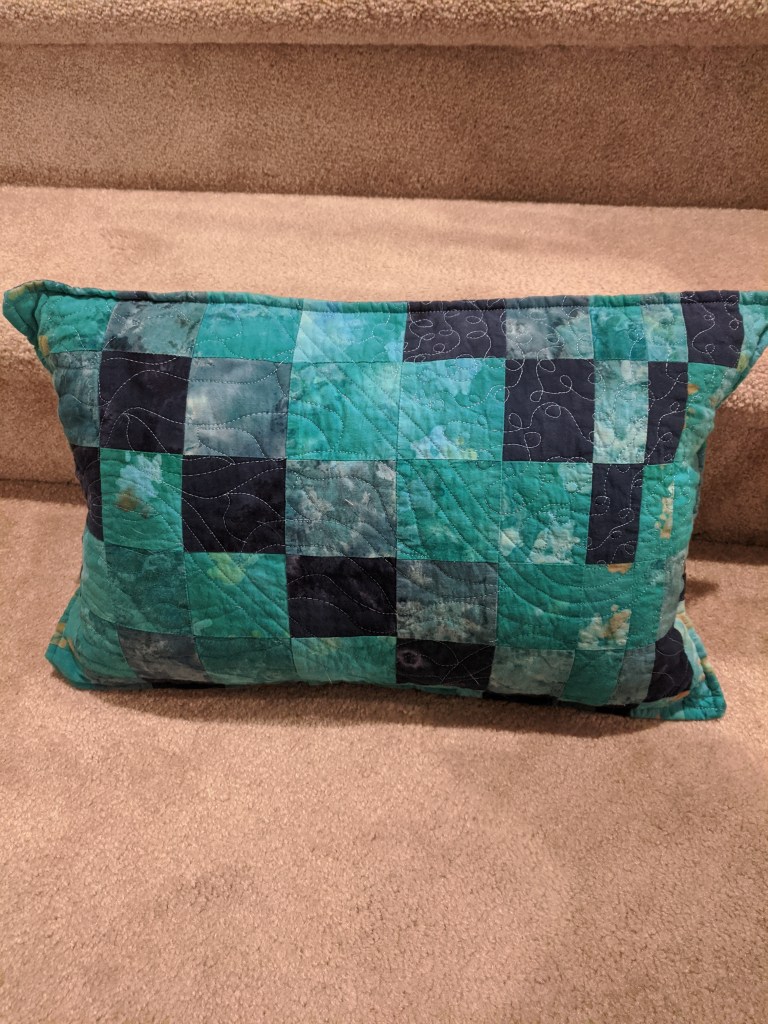
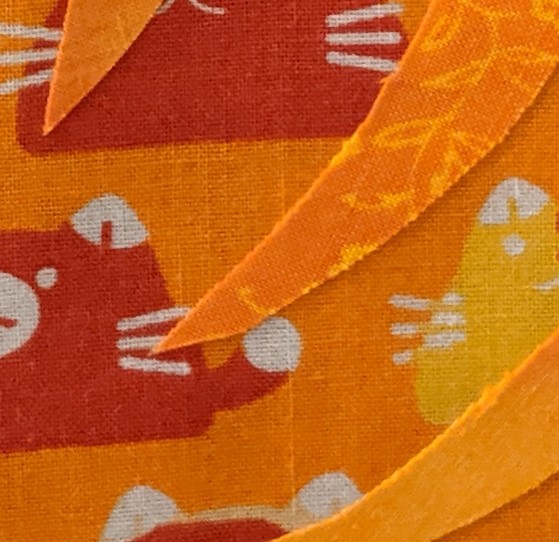
This year I did a bunch of little pillow projects for my friends and family 🙂 I got to learn some different techniques like fusible applique and paper piecing. I used lots of different fat quarters from Joann and scraps from previous projects. I generally used envelope backs and a little label to keep them closed. I stuffed them with some extra stuffing I had from pillows I’d bought previously, unfortunately none of them finished at a normal pillow form size.
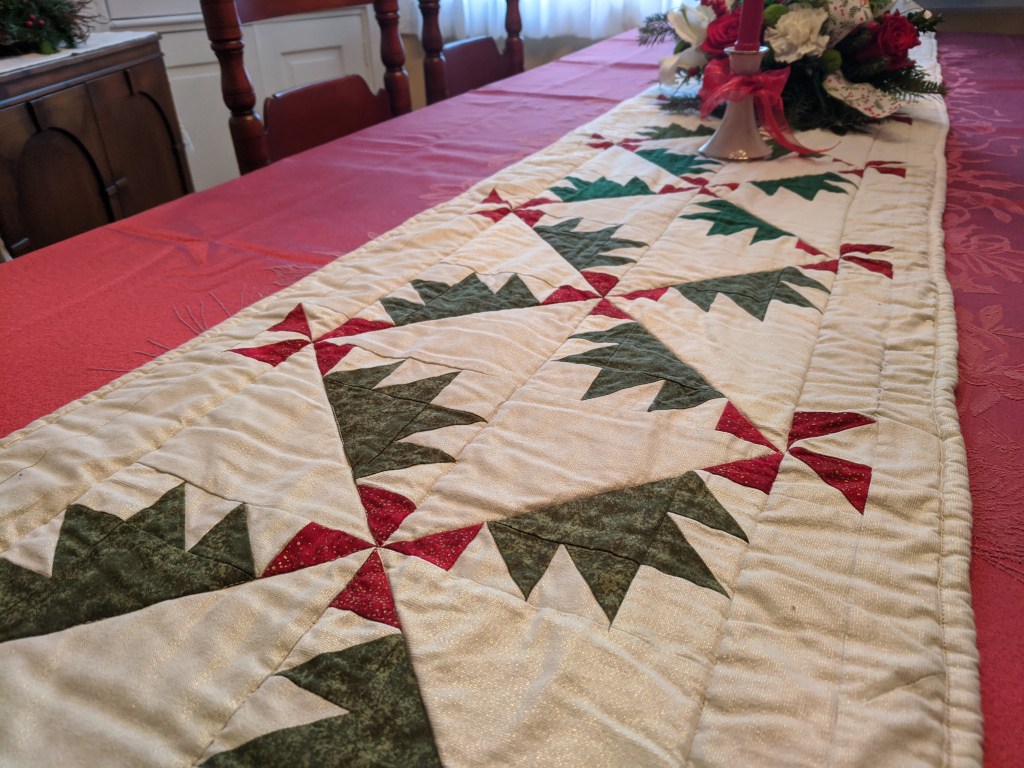
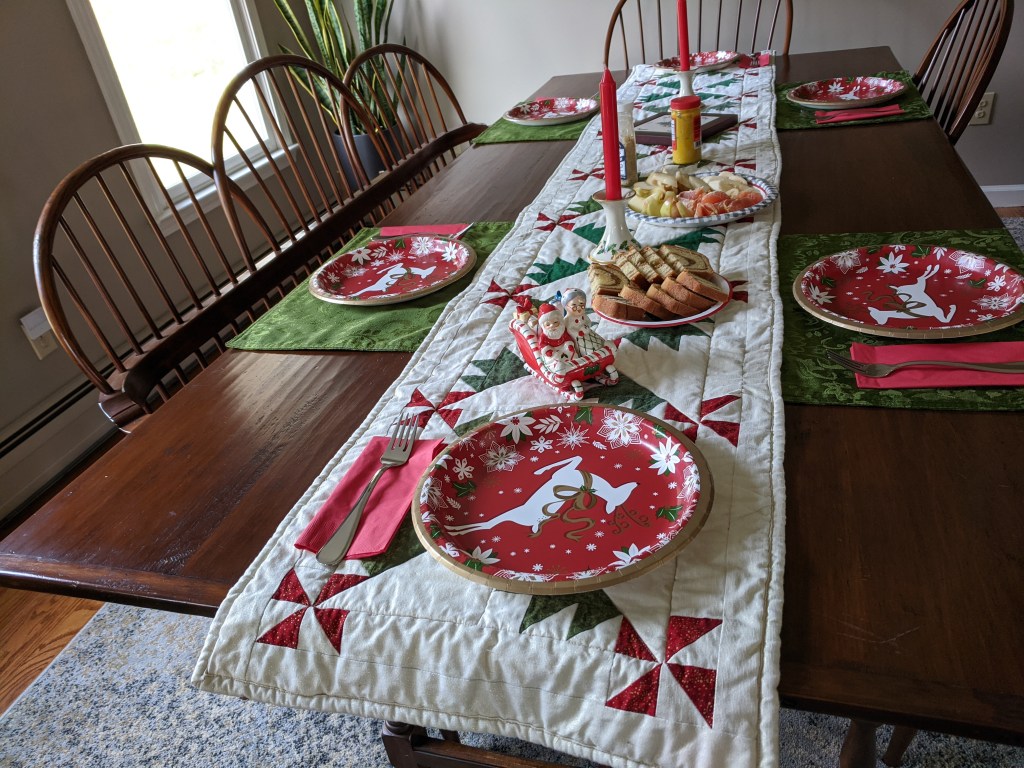
This was my capstone project of 2019, and it turned out so well! I ended up doing all of the work on it in the last week before Christmas which was a bit stressful but it came together and I was proud to give it to my extended family 🙂
I used the Holiday Pinwheel pattern from MSQC, but adapted it to just be one column of eight pinwheels. I liked using some paper piecing to make the tiny HSTs, it made cutting fabric much easier. I used four different green fabrics and this wonderful sparkly cream/white background. The blocks came together pretty easily, the inner border with the “holly berry” mini pinwheels took a couple tries to get right (I didn’t understand the instructions so I just did it by measuring) but it ended up great!
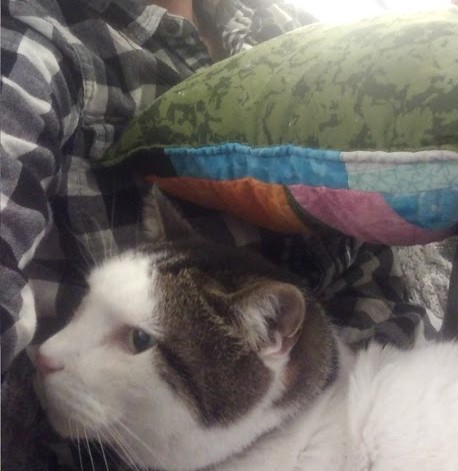
Finished top before basting (featuring the tiny demon)
I did stitch in the ditch quilting for all of the runner and used a pretty thin cotton batting. Since I know a lot of dishes and stuff had to sit on it, I didn’t want it to be so puffy or too textured. It’s also fully machine washable so it’s all good. In its first machine wash, a couple inches of seams came apart (the sparkly fabric probably needed a full 1/4 inch seam allowance, if not more) so I had to do some hand-sewing repairs, but was ready by the time it was needed 🙂
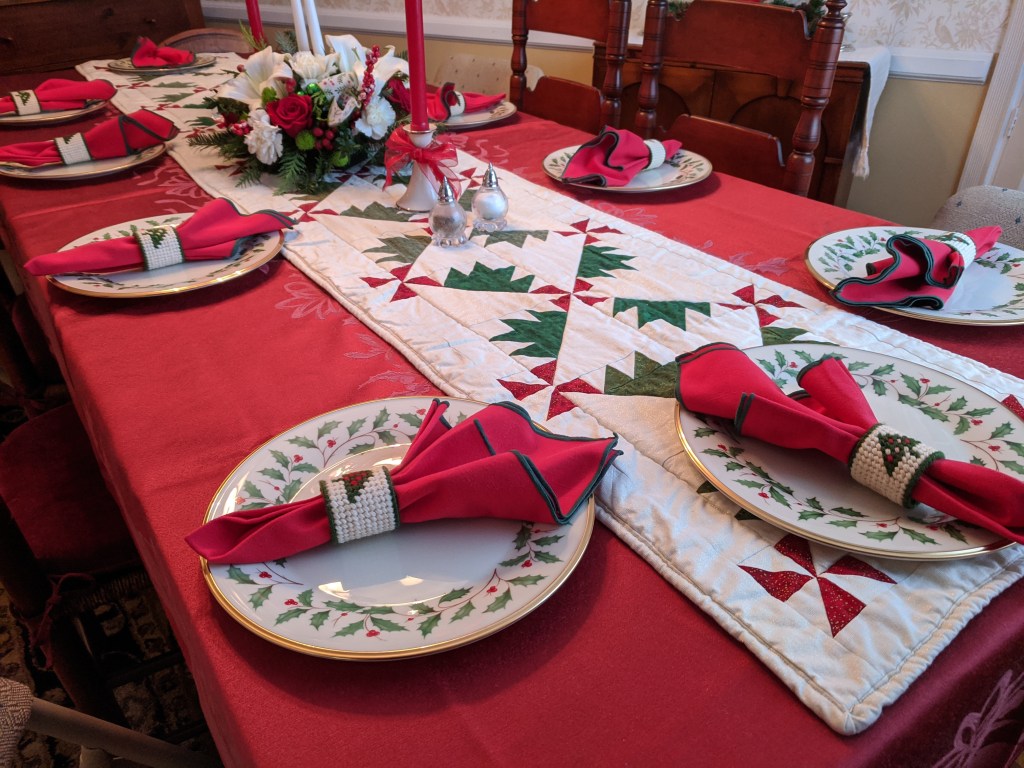
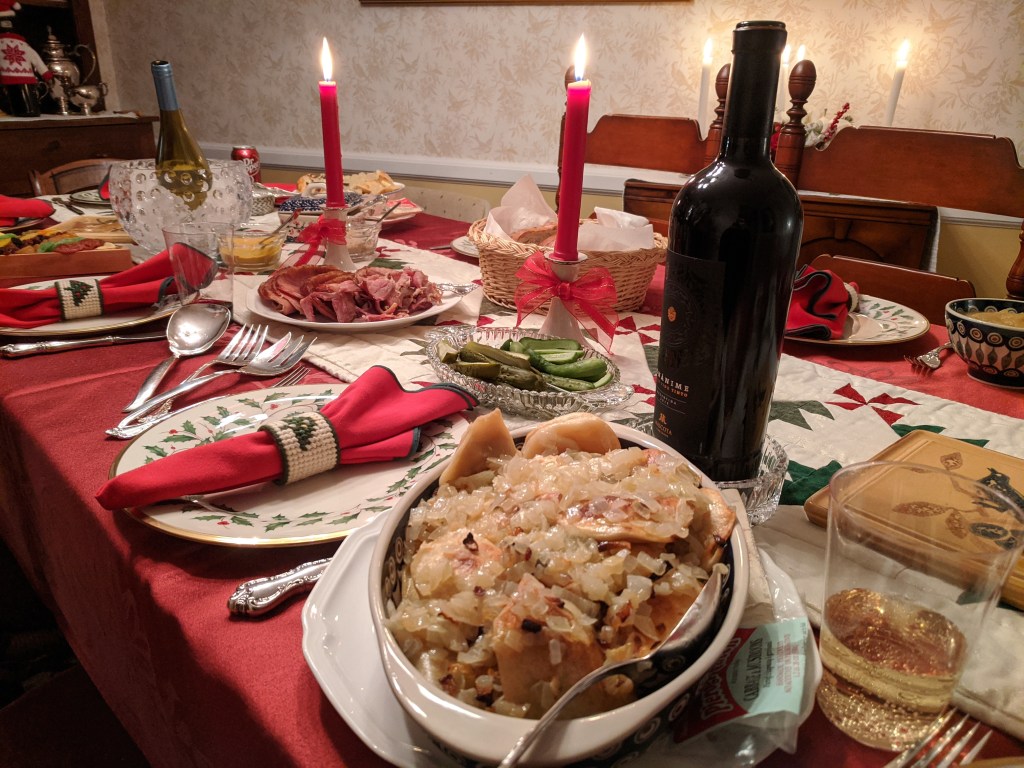
Christmas Eve dinner, our traditional big mealWith pierogies!Christmas Day breakfast 🙂
All in all I was so happy to make something for my family to use and gather around 🙂
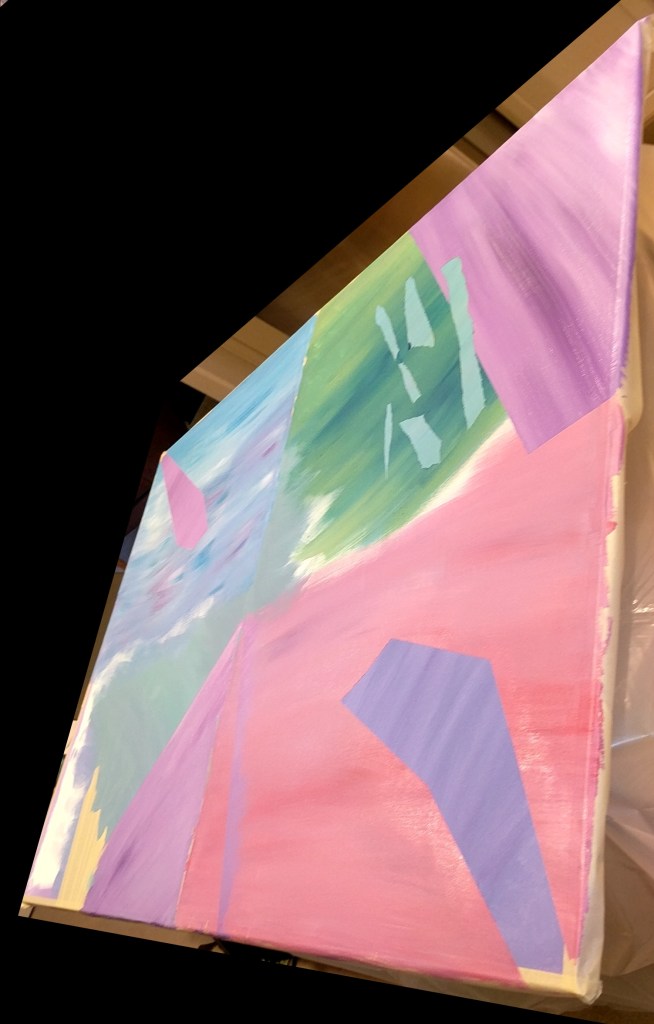
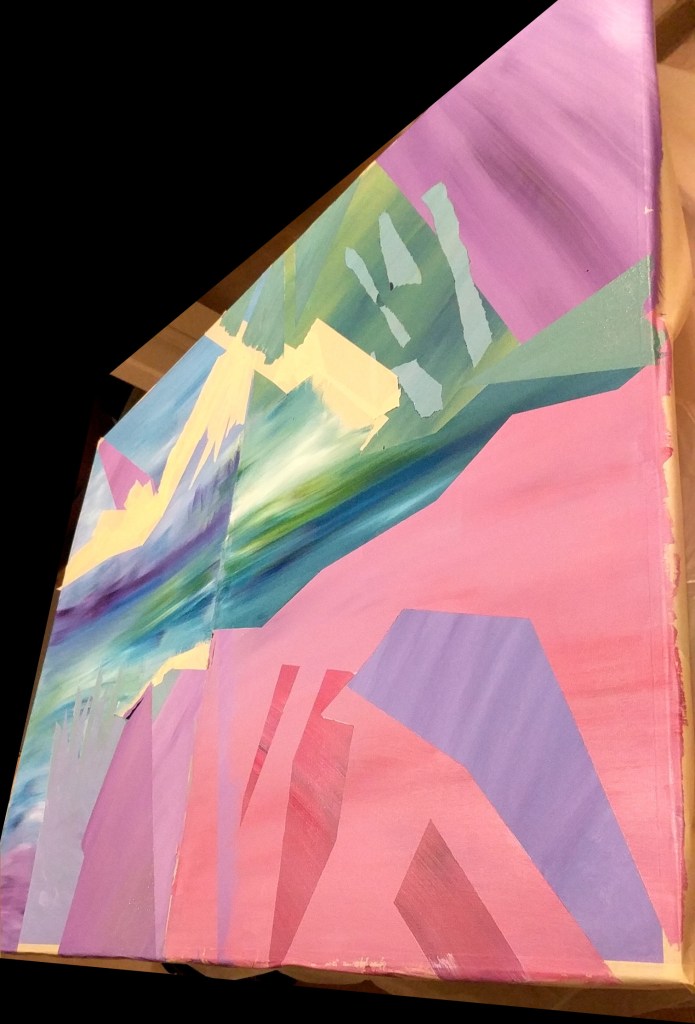
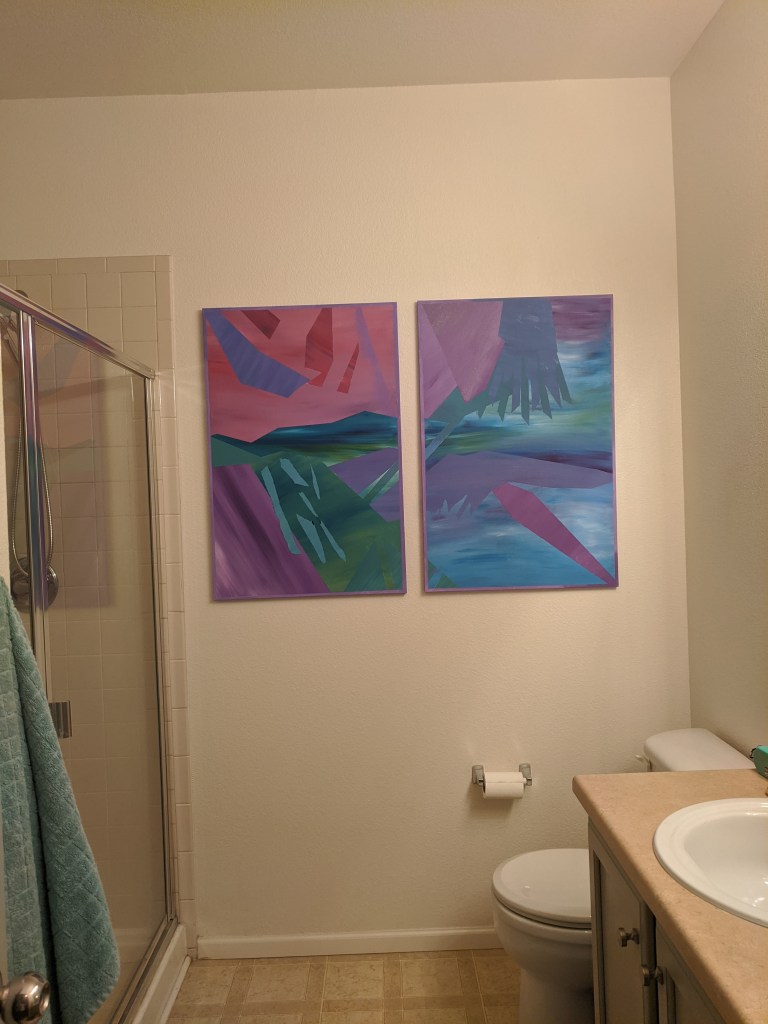
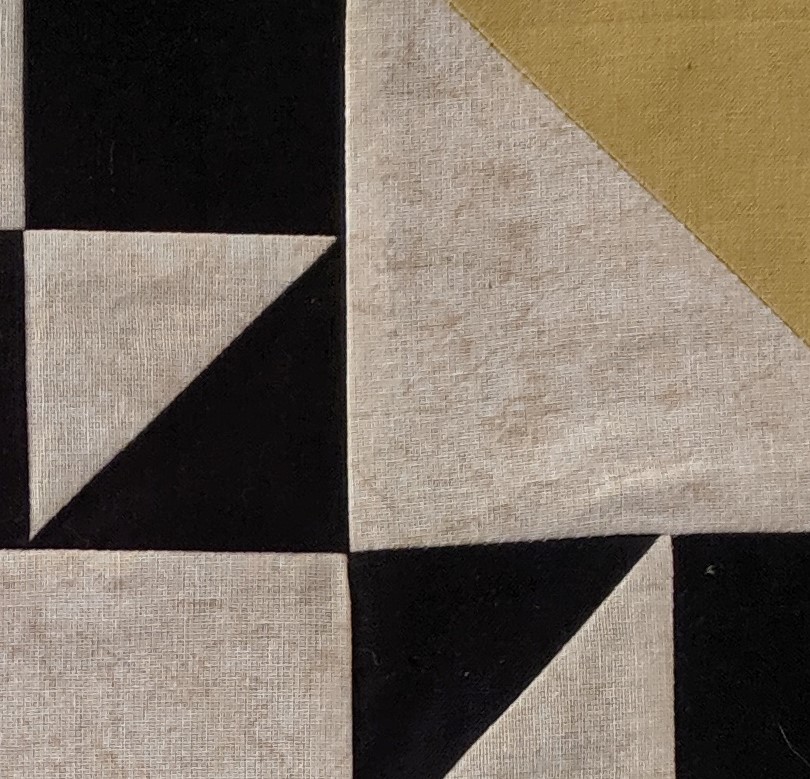
So these started out as a project for my bathroom, since I had a big wall to fill but buying something ~50″ can be expensive. I taped these two canvases together and then used masking tape to create different shapes and straight lines.
Finished and hung up!
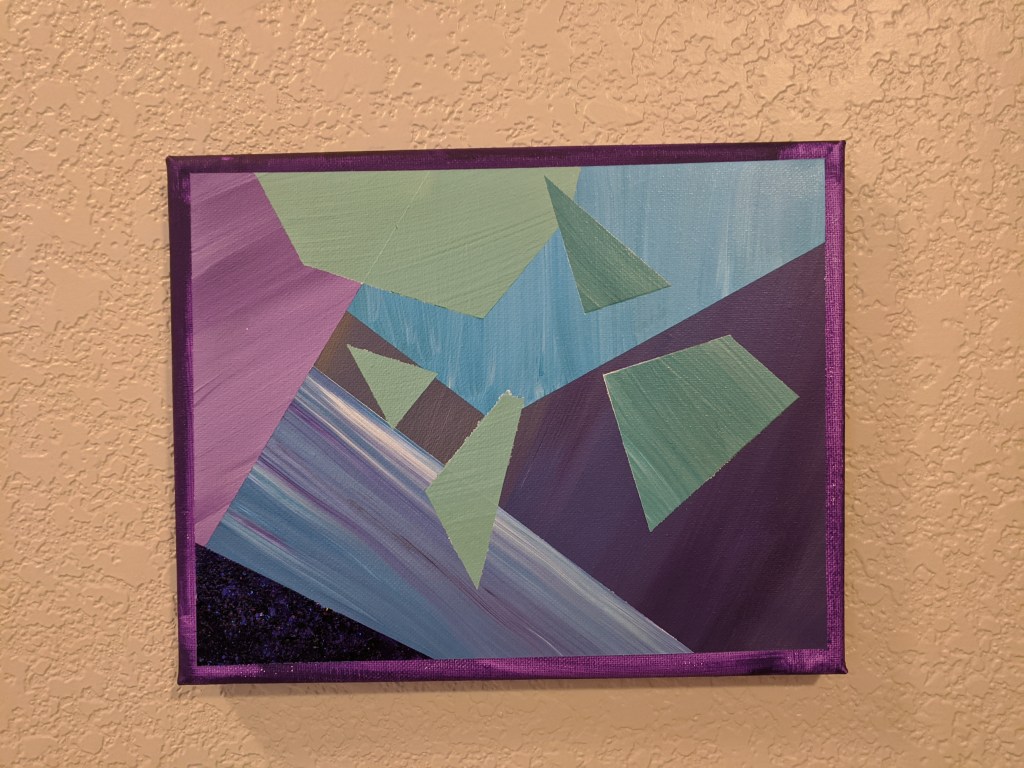
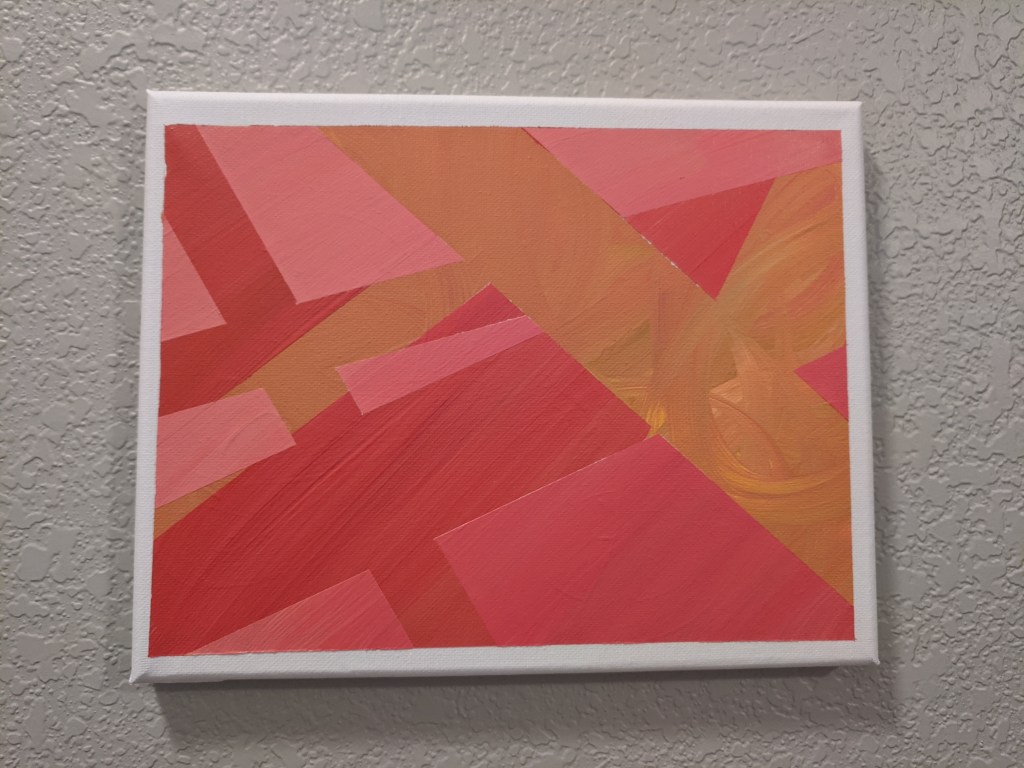
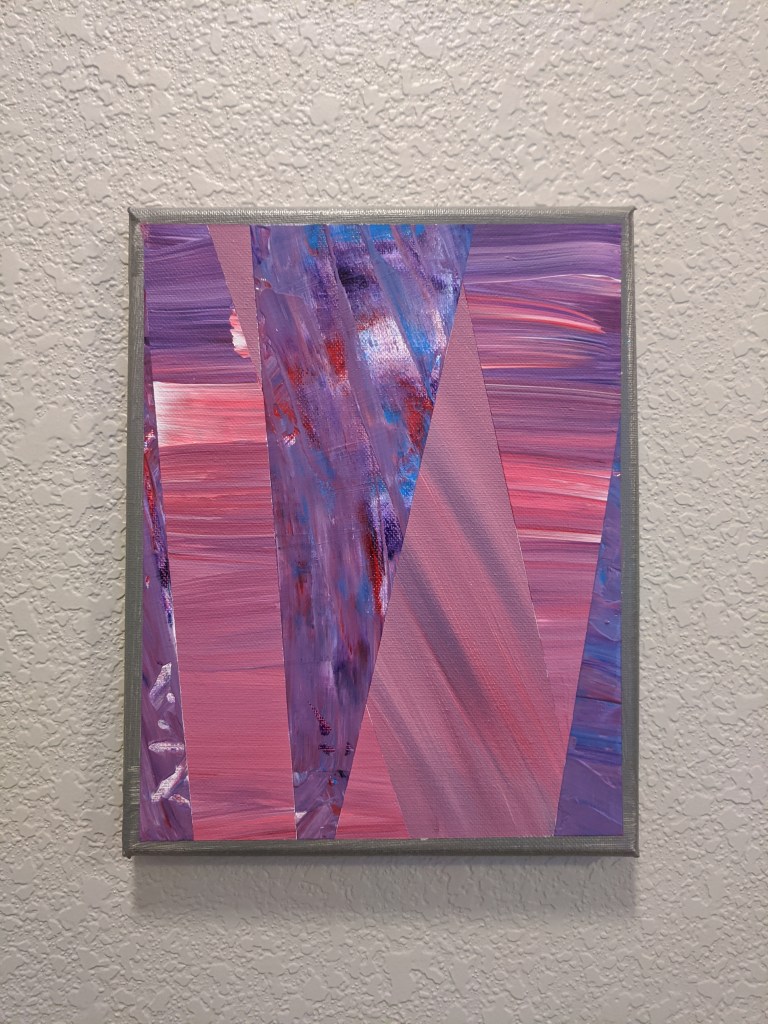
Then, because I had so much fun with those, I bought some small canvasses (8″ x 10″) on clearance and now I’m working on making a little collection that will hang in my entryway.
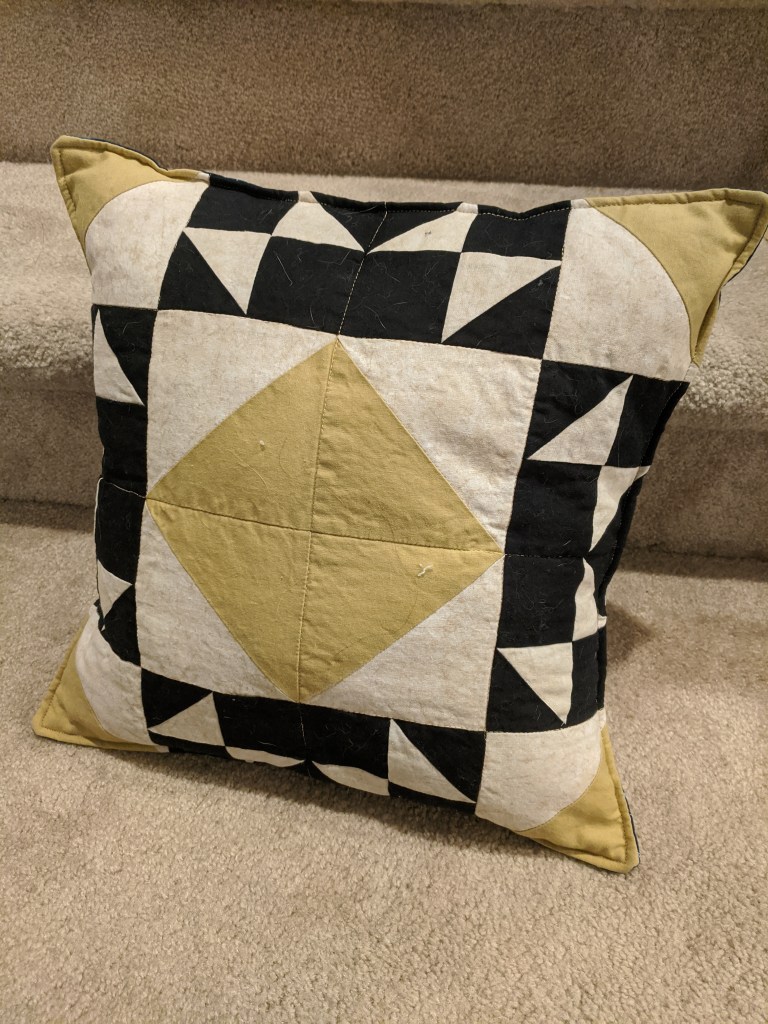
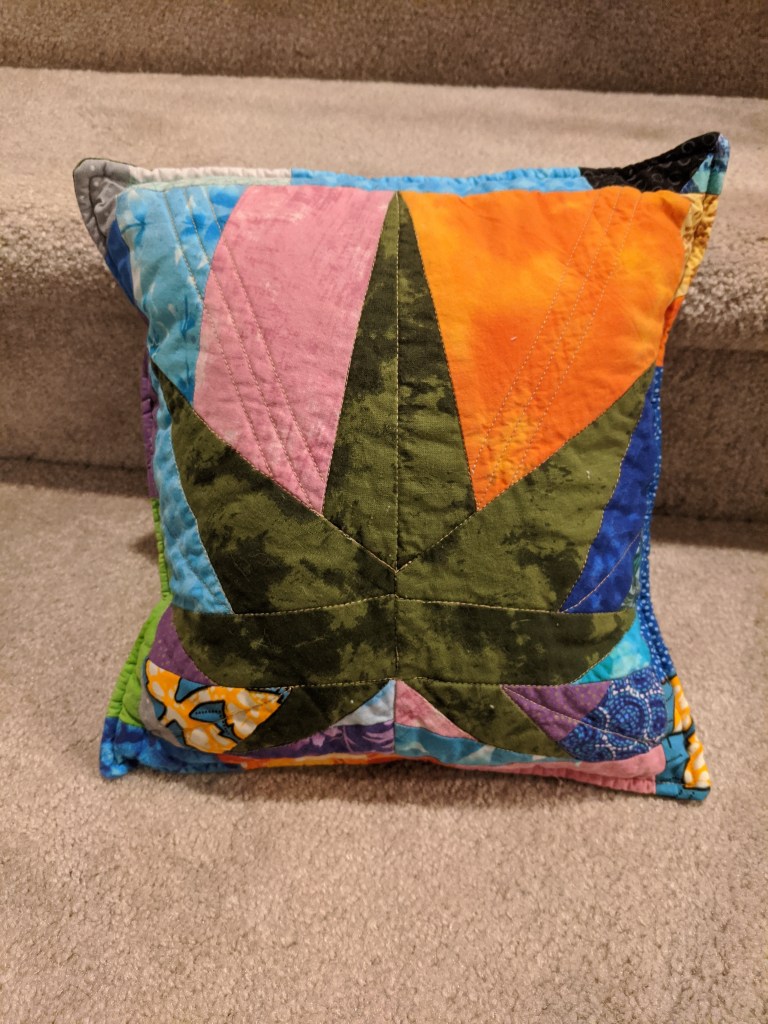
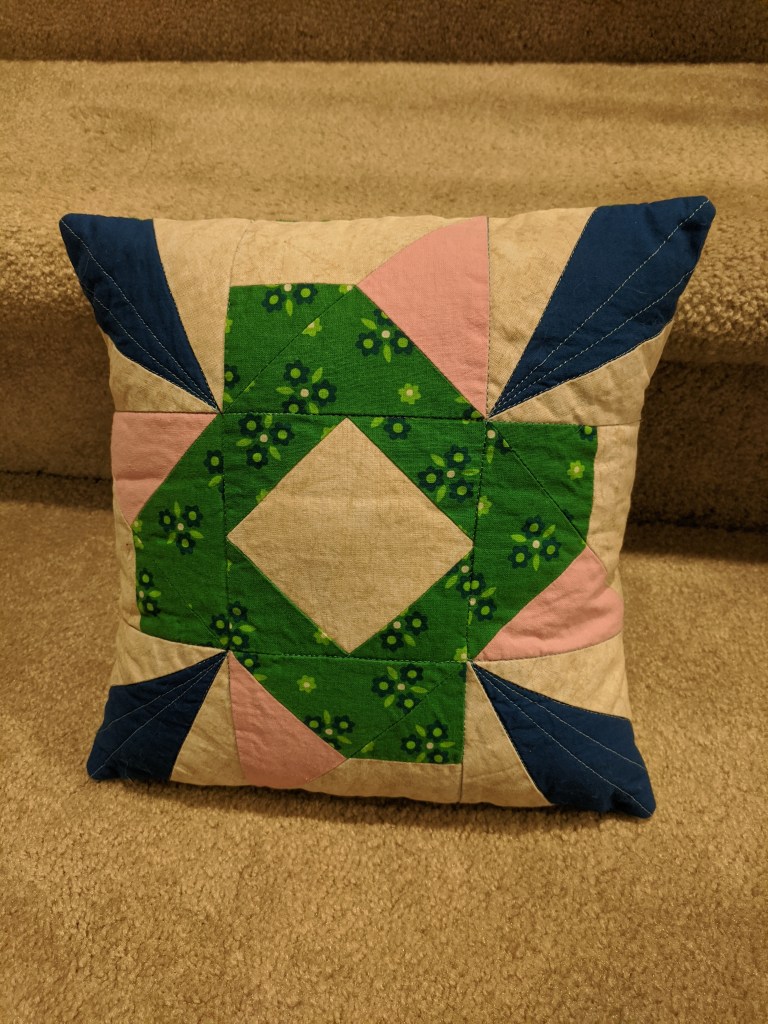
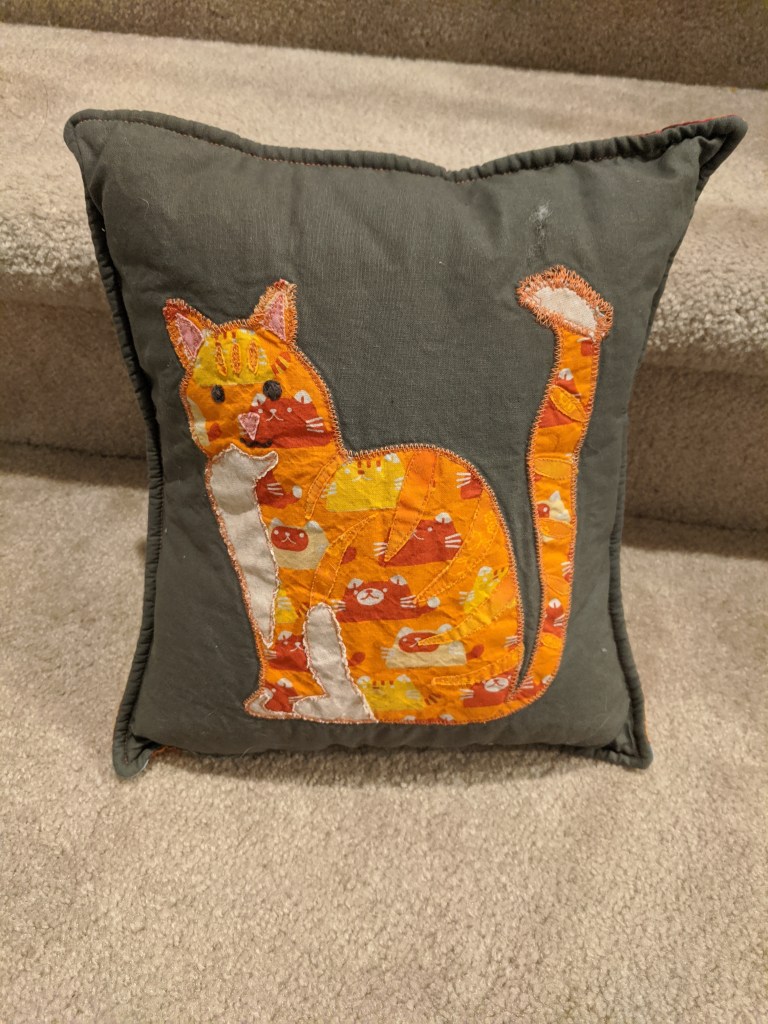
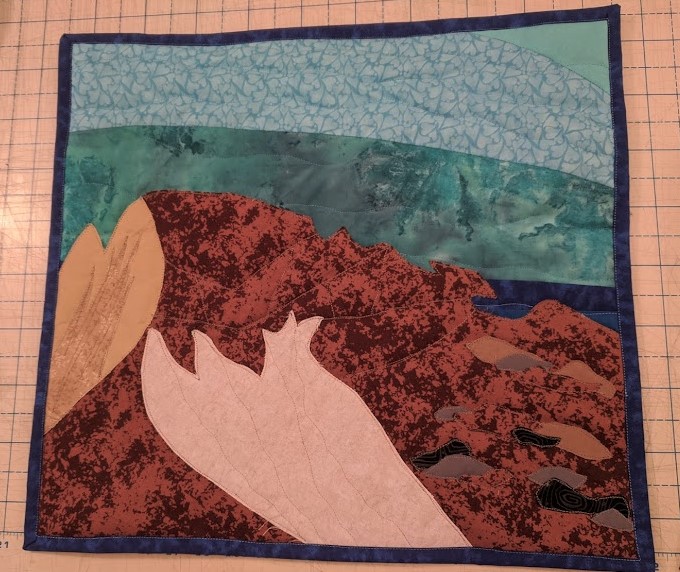
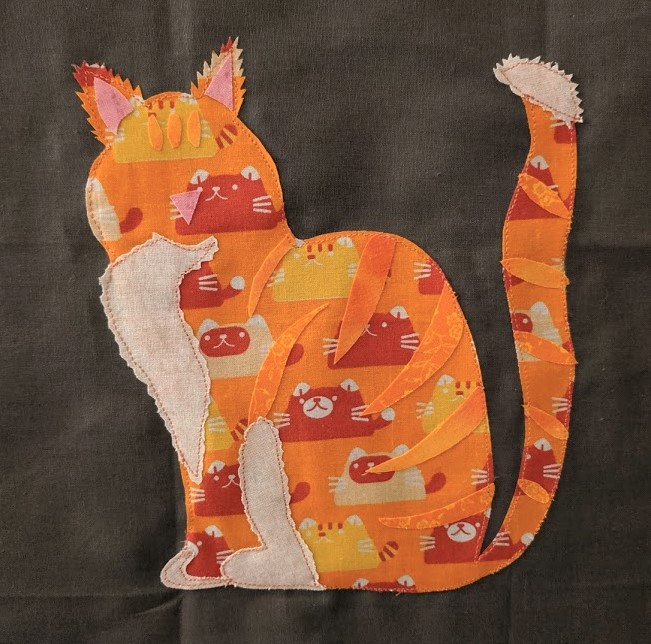
Seeing as everyone will be getting their gifts in the near future… Here are some tiny previews 🙂
I had a lot of fun with Christmas this year. It was nice to work on lots of little projects instead of one huge one, and I tried out some new techniques that I wouldn’t have experimented with on a larger scale. I learned that I really enjoy fusible applique, and it was fun to design and cut out little shapes 🙂 I’ll do a second Christmas post detailing some of the stuff I worked on.
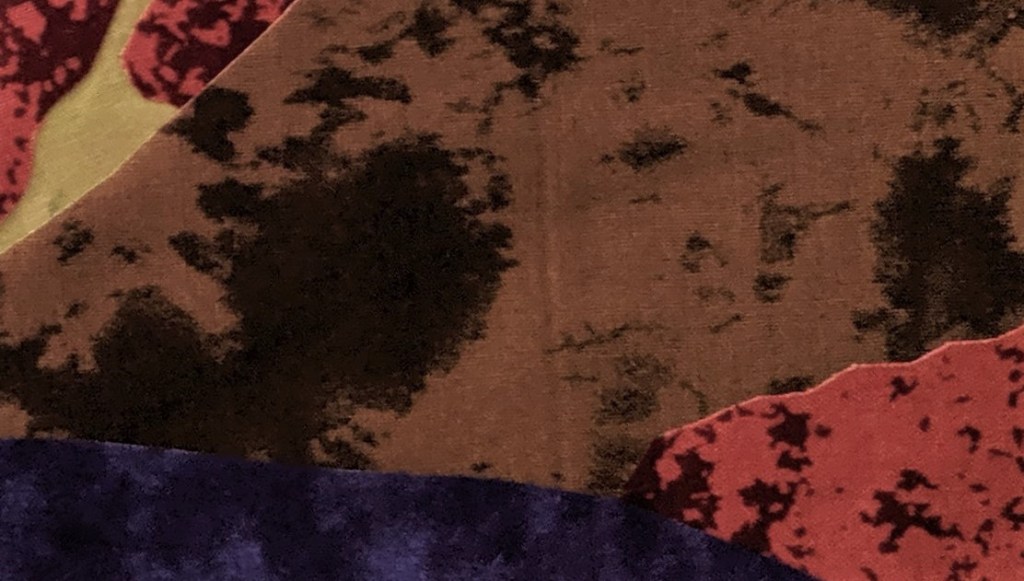
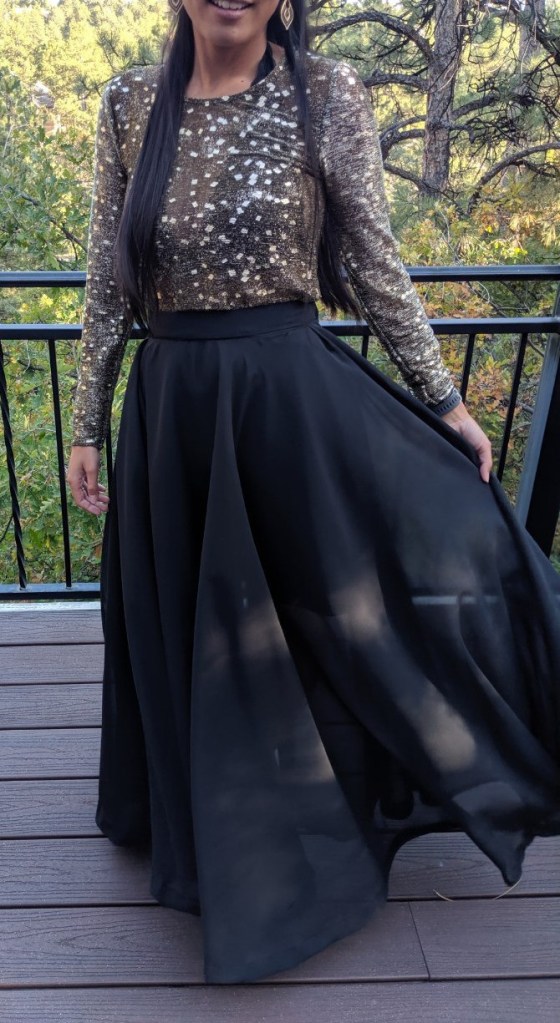
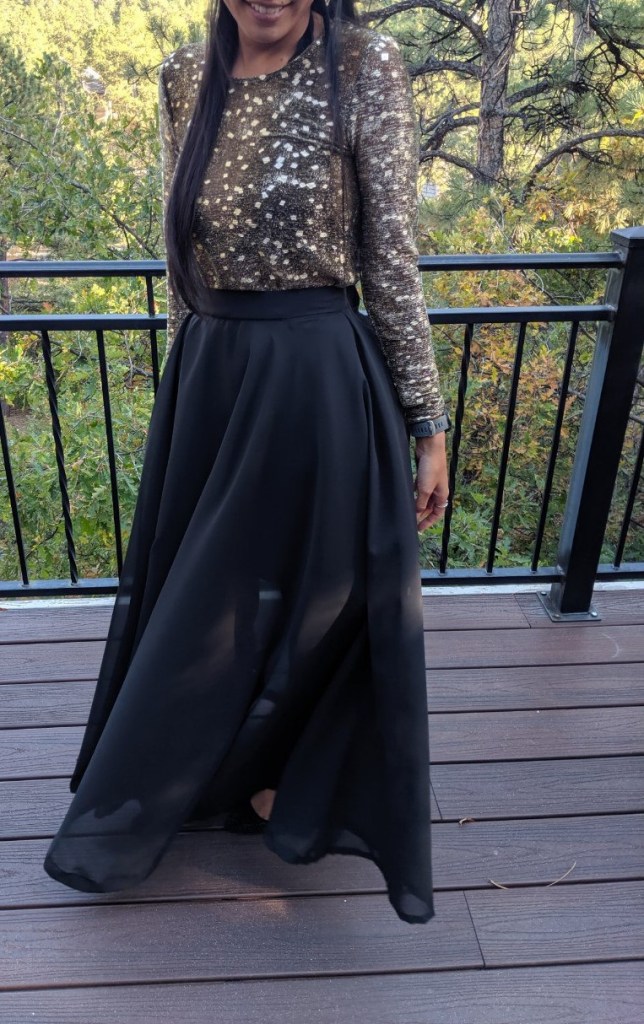
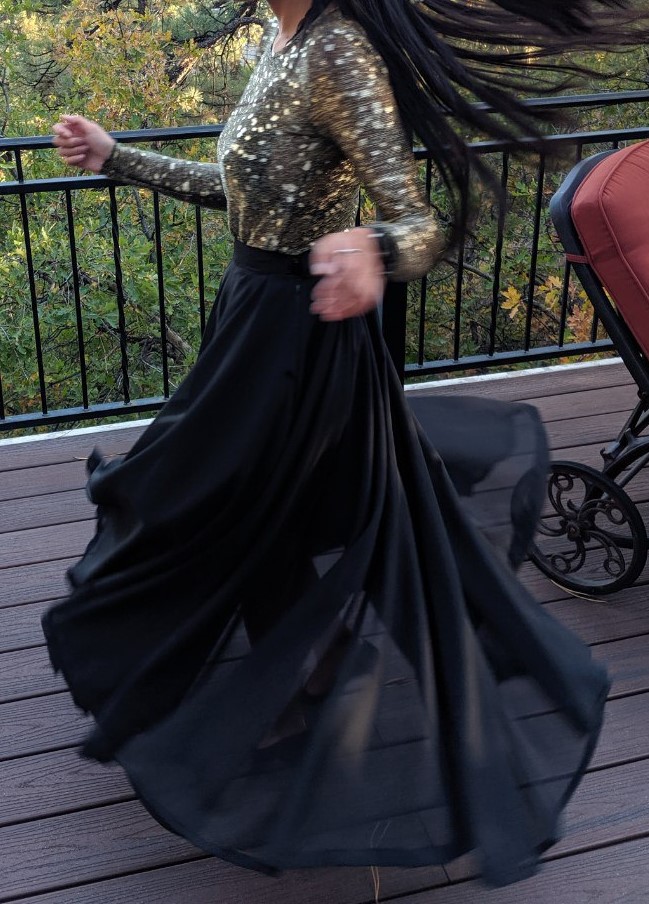
This is a make from a while ago! The fabric is a poly chiffon/crepe de chine from Colorado Fabrics, a wonderful (but overwhelmingly large) store. I wanted to make a circle+ skirt, this is close to a circle and a half. It’s sheer, so I usually wear a long black, gray, or short black skirt underneath. I really love the way it moves, it’s so light and flowy. It is a ton of fabric though – I used about 4 yards and picking it up to go up stairs can be a hassle!
After all this talk of what I do in the sewing room, I think it’s high time to show you some of the tools I use. Most of my tools are from Joann or MSQC, the iron and ironing board are from Target.
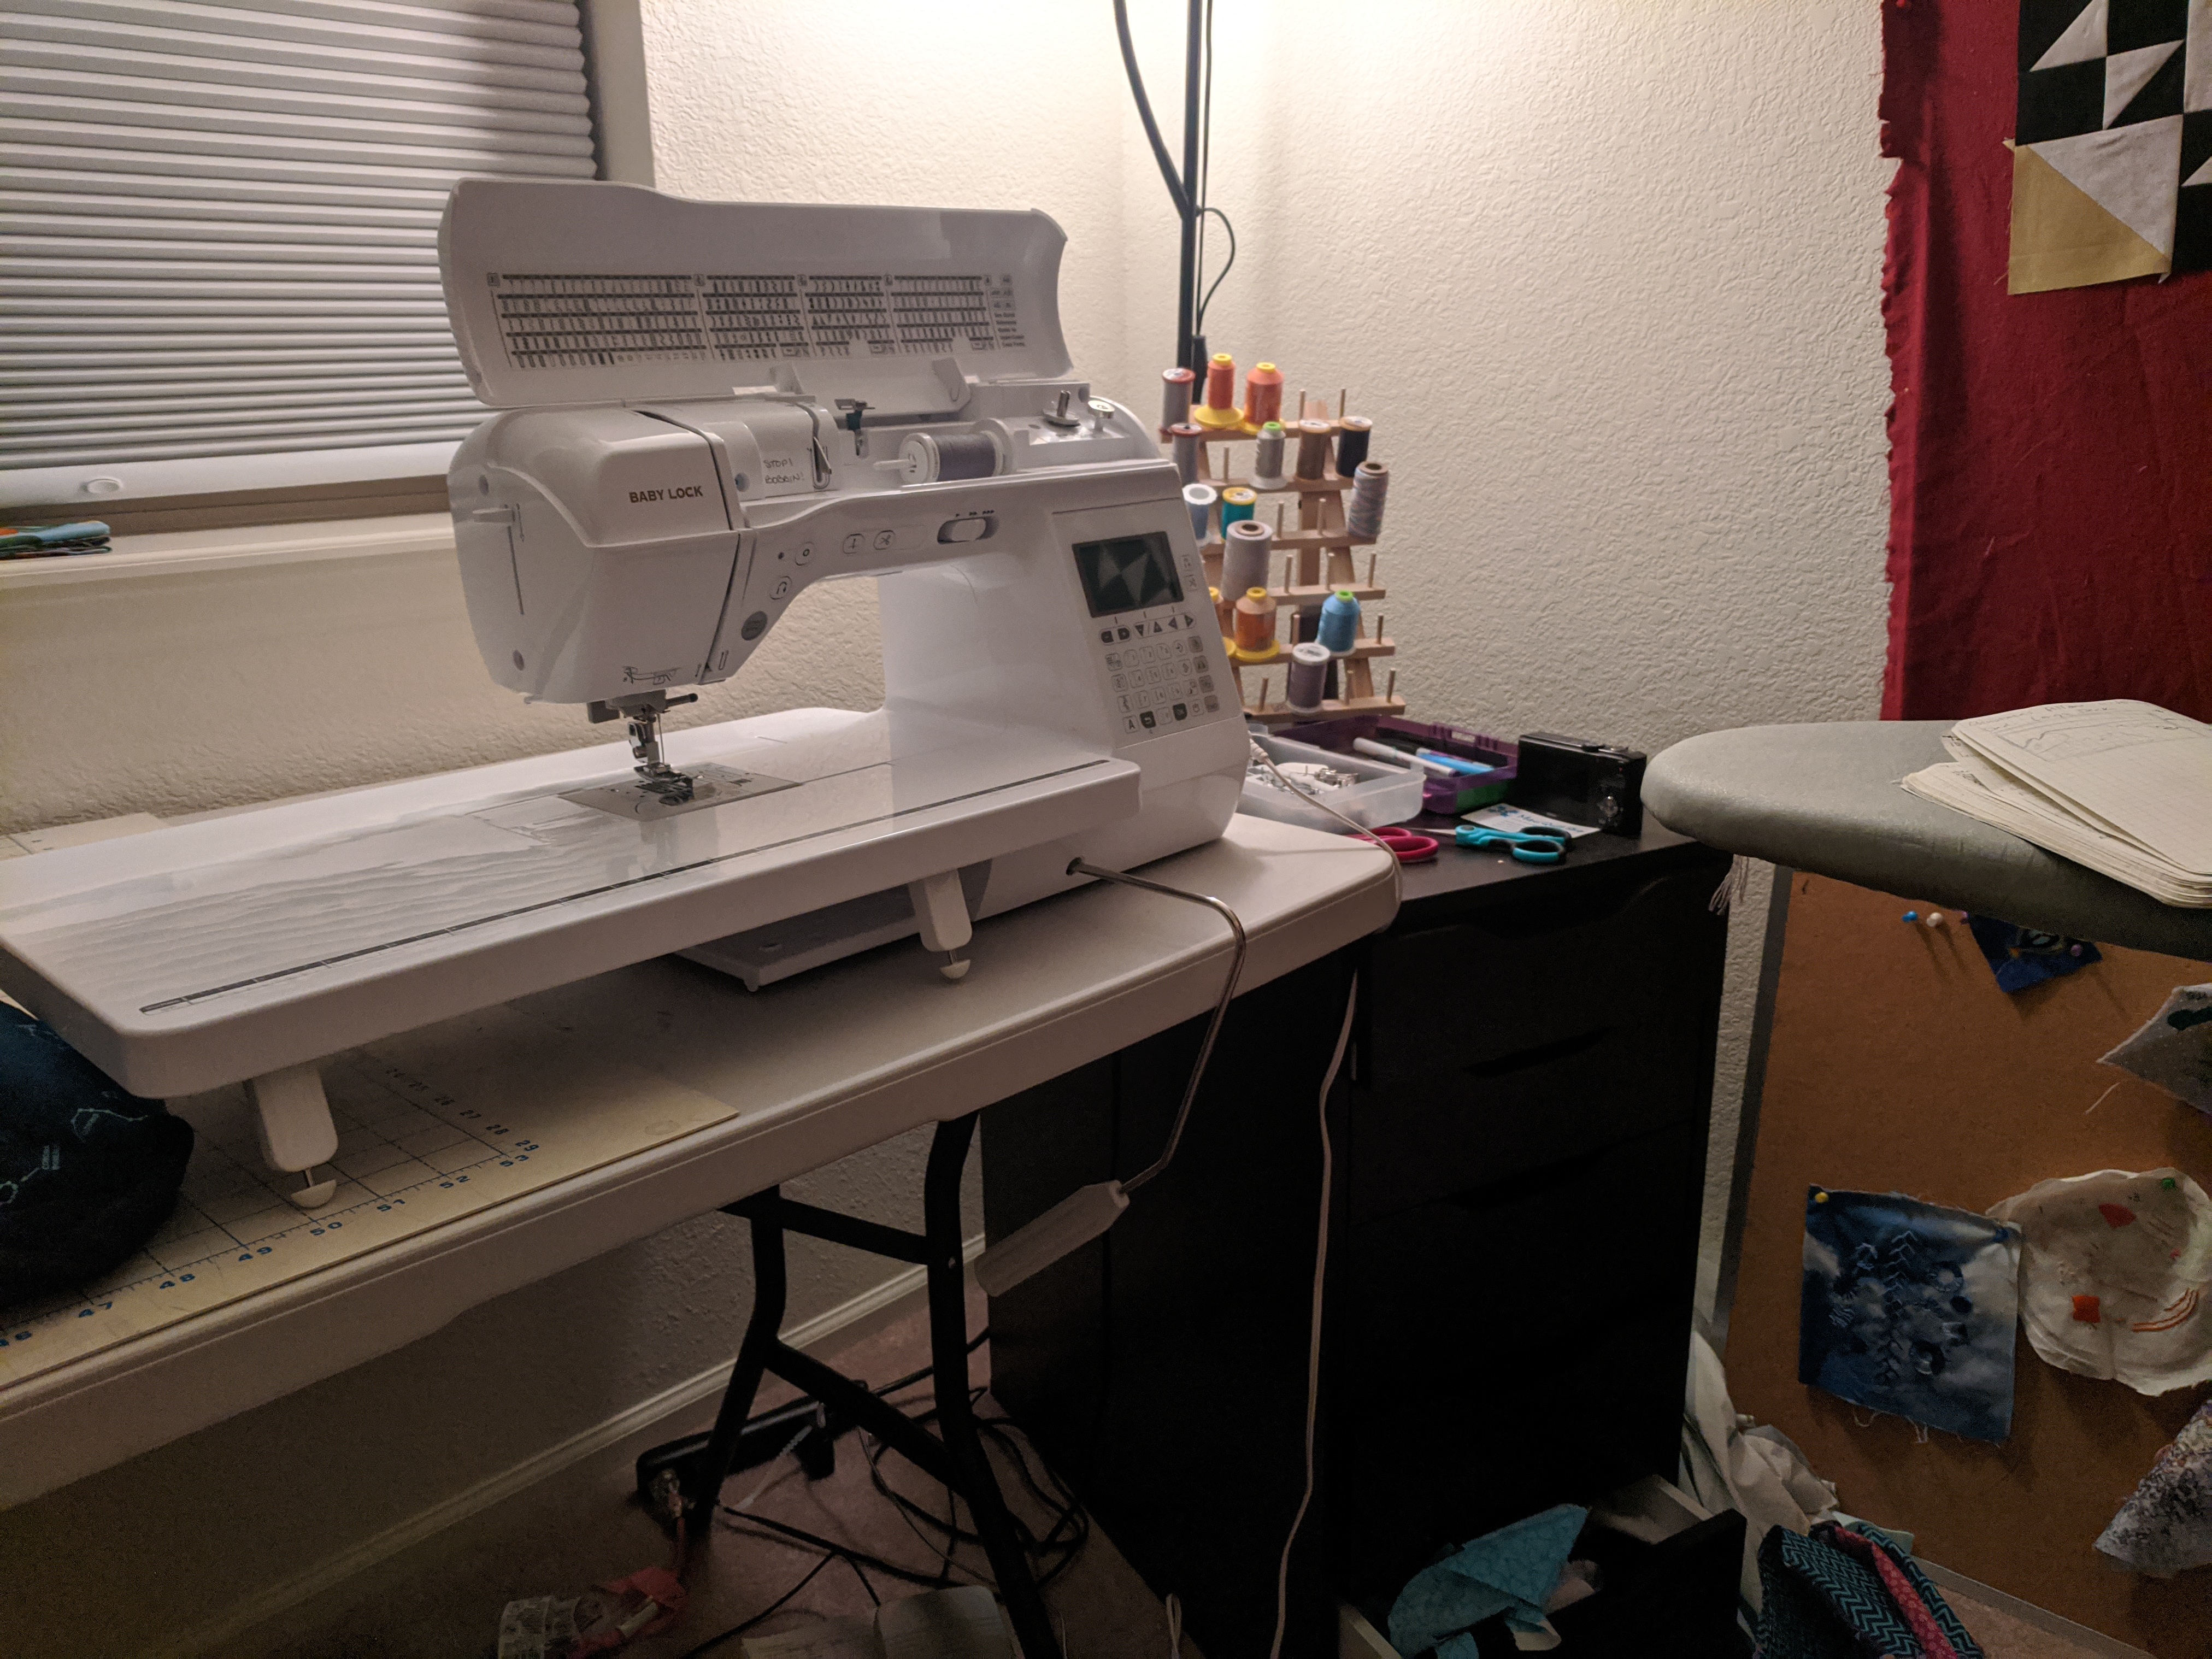
This is my sewing corner – the rest of the room is open and empty so I can lay out projects and fabric. I keep my ironing board right next to the machine because there is a lot of back-and-forth. Sometimes I’ll even put a cutting mat on the ironing board so I can go between cutting and pressing. The design wall is an old flannel sheet, and normal cotton will stick to it without pins, so I can look at layouts before committing to sewing them together. I have my large cutting mat on the table, but sometimes I’ll move it to the ground if I have a lot of fabric to deal with. Plus the table bends upward in the middle due to the weight of the machine on the right, so it’s not perfect.
I own a Babylock Lyric, which I got semi-on-sale and semi-from-my-tax-return. It’s a computerized machine with lots of bells and whistles, but 95% of my sewing is a straight stitch on the default tension and length settings. I sometimes use an overlock or zigzag stitch to seal in clothing seams (professional clothes are finished with a serger, look at the inside of your shirt and you’ll see loops that hold in the raw edges of each seam) and I have the ability to do fun embellishments or letters if I wanted to. The machine is operated with a foot pedal, but it has a speed control switch so I can limit how fast it goes (I like to hang out at the middle speed).
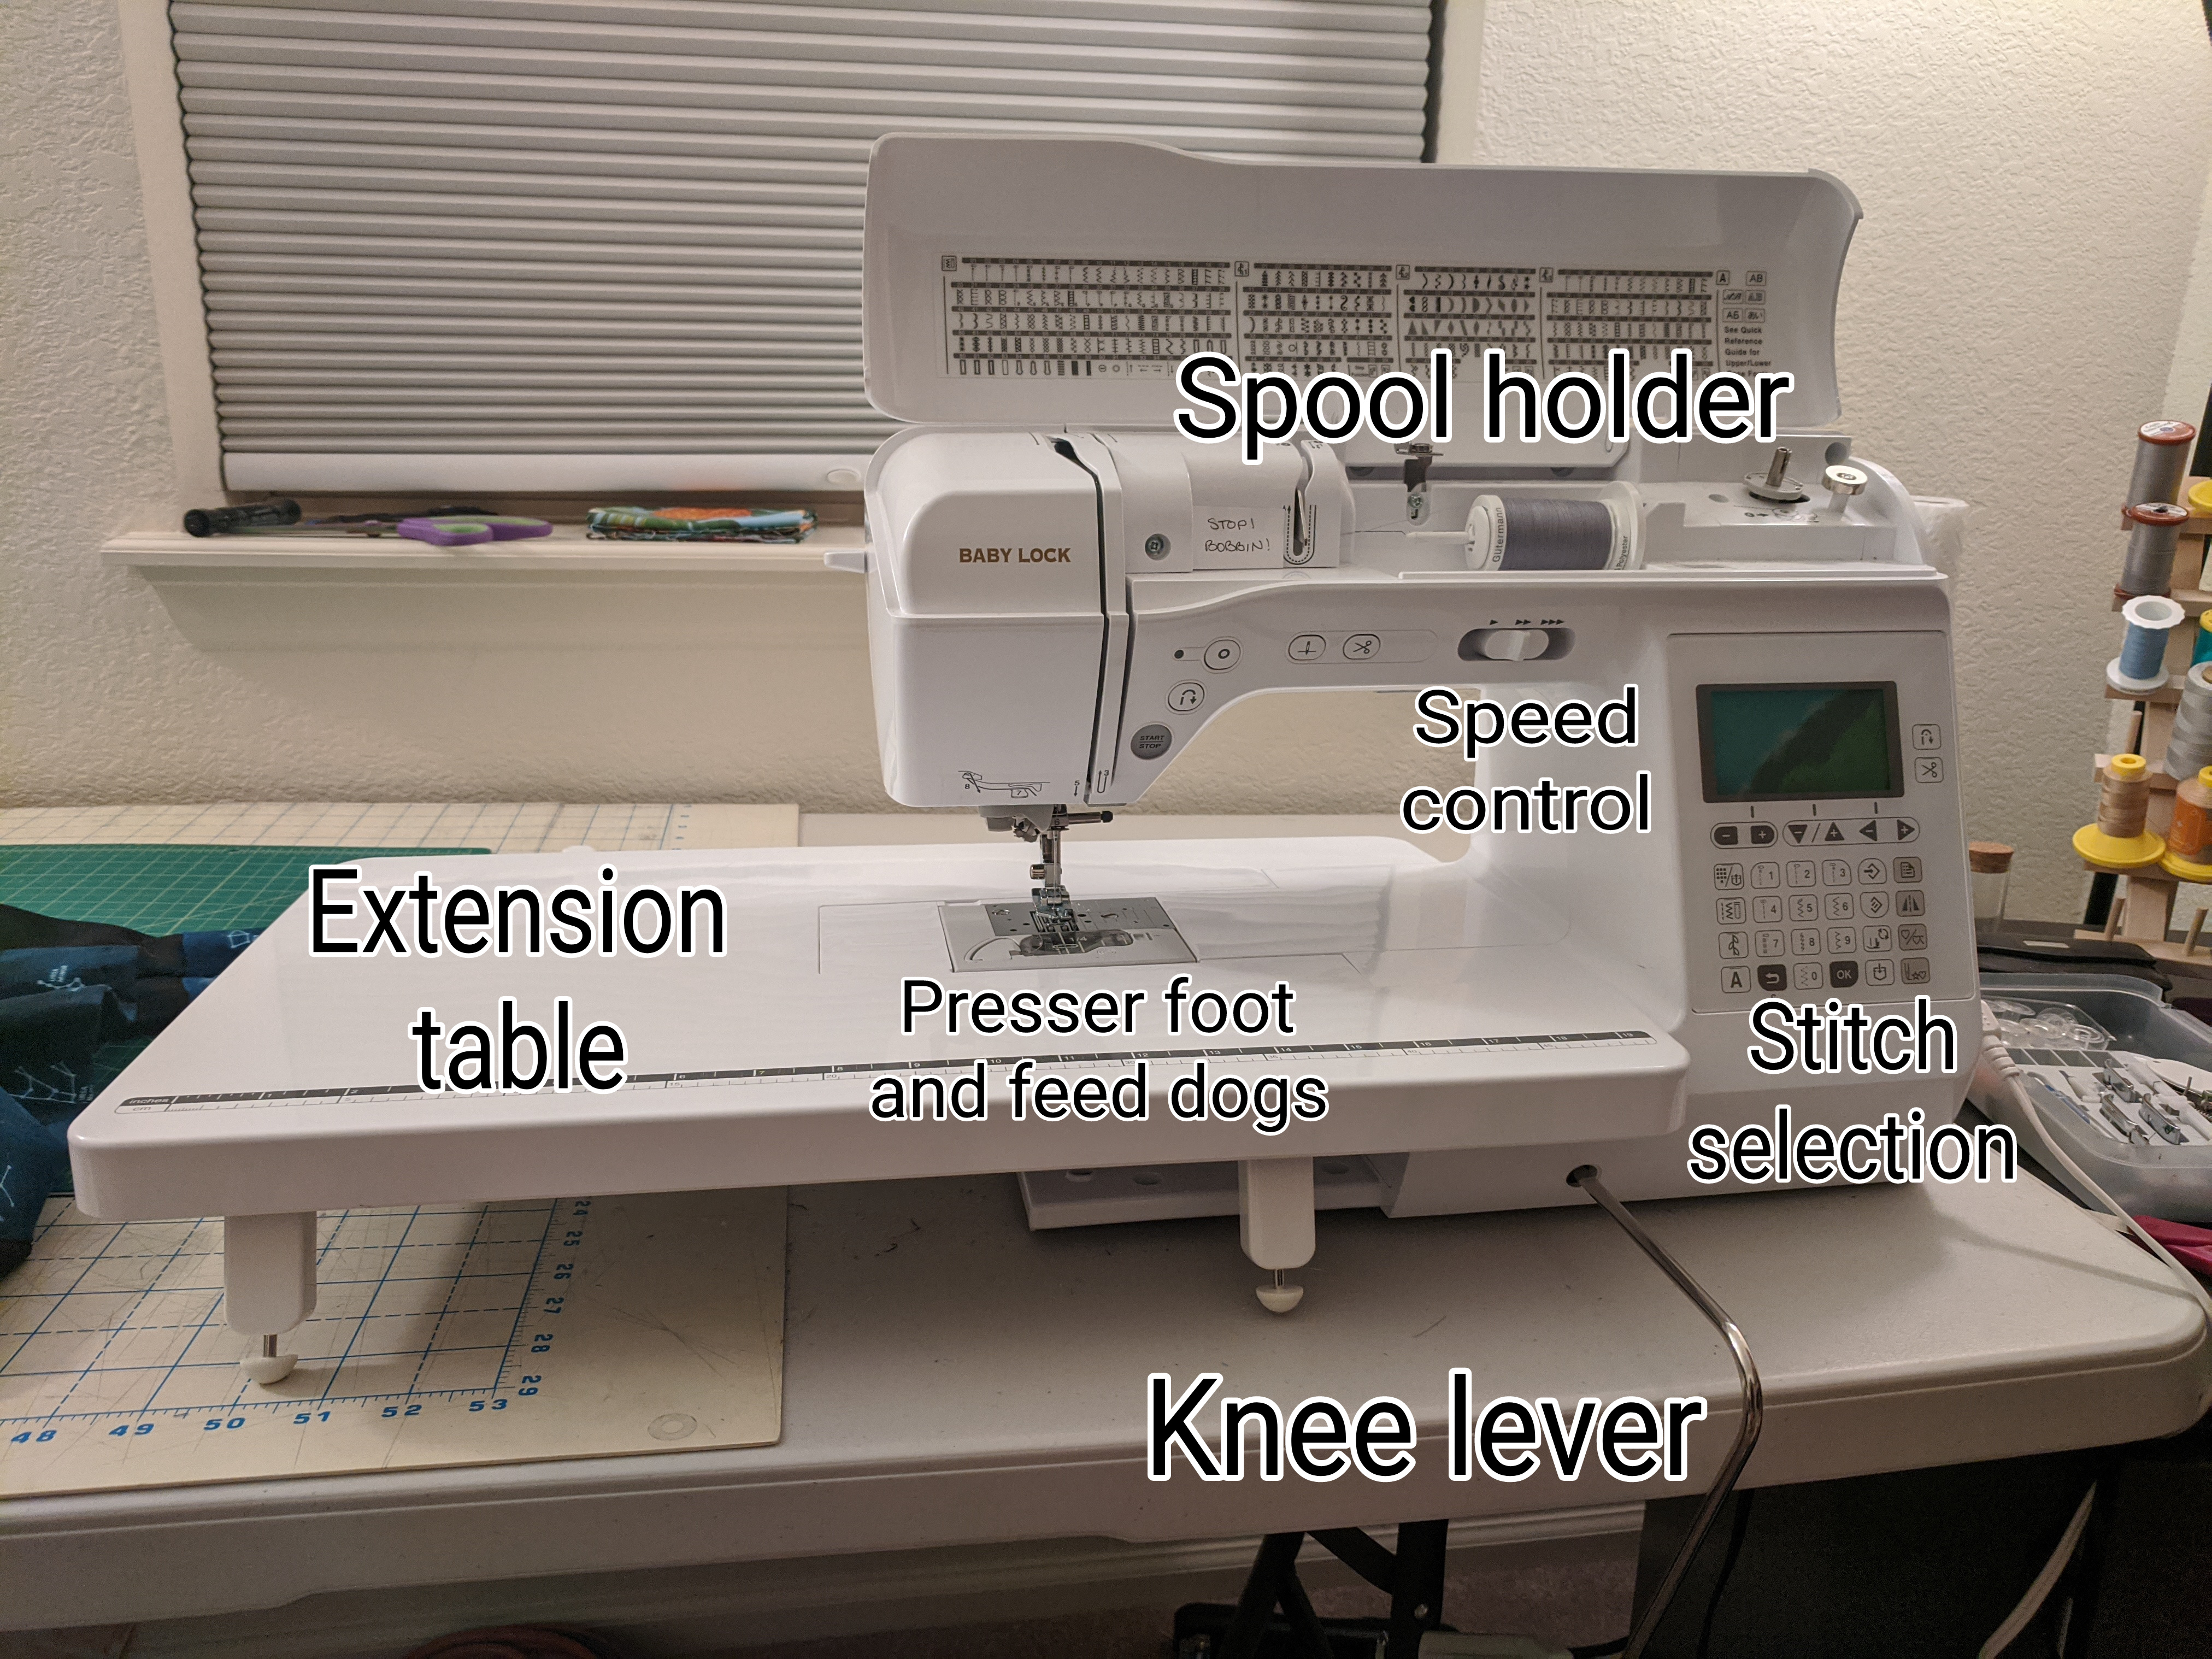
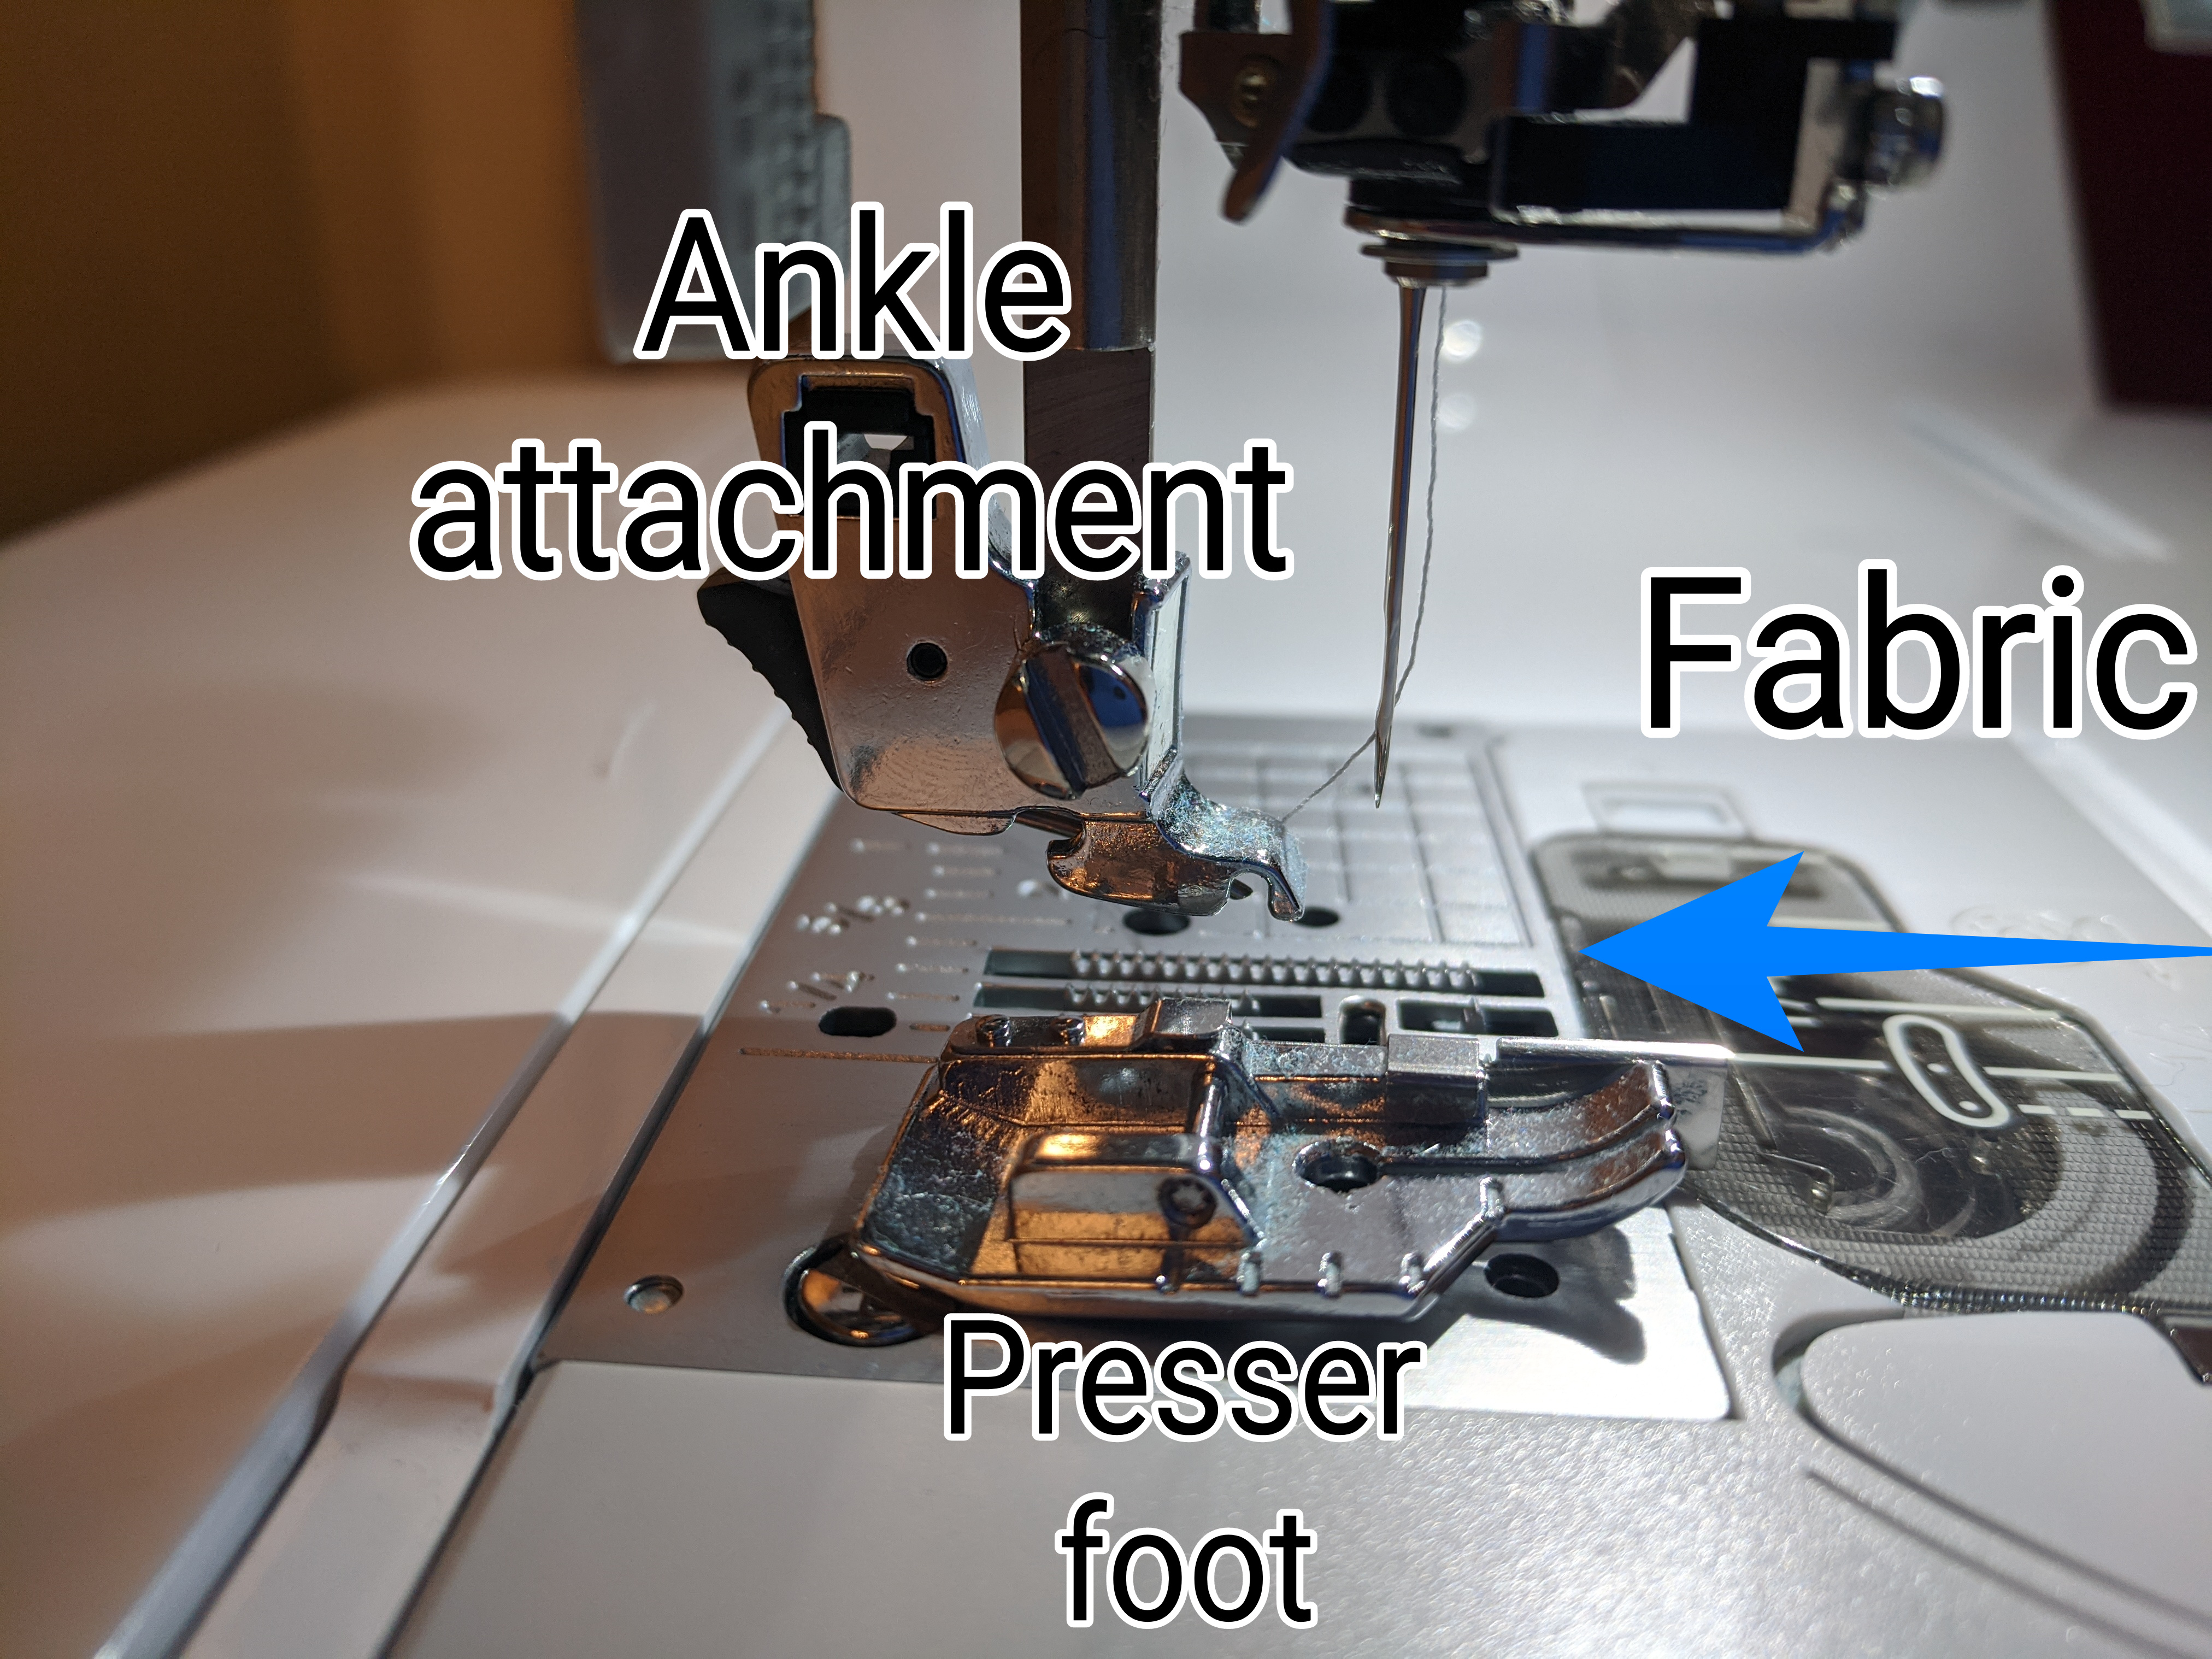
It came with an extension table, which allows the fabric to lay flat as it gets sewn together; it makes it easier to guide the fabric through and prevents gravity from pulling the piece away from the needle. The extension table is near necessary for quilting, especially free motion since any gravitational pull will increase strain on the fabric and effort for me. Foot pedal controls the speed, spool holder holds the thread as it’s being used, and if I have a big spool I have a different attachment for it. You’ve seen the throat before in the Night Sky post, but this is where I have to stuff half the quilt as I quilt it. I’m always trying to quilt to my right so the fabric within the throat decreases over time. The knee lever allows me to raise the presser foot without using my hands, which is useful if I have to finagle something through the needle with both hands, or even if I’m just grabbing other stuff. The presser foot is the thing that secures the fabric to the table as it goes through the machine, so I raise the presser foot to turn corners or remove the fabric from the machine.
Here are some of those presser feet. They sit on the “ankle” of the machine and help the sewist guide fabric appropriately. The ¼” foot has a guide for where to put the edge of the fabric so the needle is ¼” away, which is the seam allowance most quilters use. The open toe foot allows you to see the needle as it goes down, and can be used for fancy stitches. The walking foot has its own ankle attachment and uses plastic pieces to guide the top of the fabric through the machine at the same rate as feed dogs on the bottom (more on that next). The free motion foot allows the fabric to move around easily, and the feed dogs are disengaged.
In this video, I am hand cranking the machine so it goes slow – the feed dogs complete one rotation for each stitch.
The feed dogs pull fabric through the machine. In a mechanical machine, they move via an elliptical gear on the same crankshaft as the needle. In a computerized machine, they move in a box pattern and therefore are completely flat as they move the fabric. This makes the motion very smooth and predictable, keeping the fabric flat and moving at a constant rate.
Most newer machines can wind the bobbin for you, which is neat. The bobbin holds the thread that is beneath the plate of the machine, and the thread from the top and bottom come together to create the stitches. In the above gif, the fabric is moving from right to left. Watch as the thread from the top (yellow) comes down, is caught by the hook, and in turn catches the thread from the bobbin (green). There are machines that can lay down perfect straight stitches like these at 1,000 stitches per minute, or 16 stitches per second.
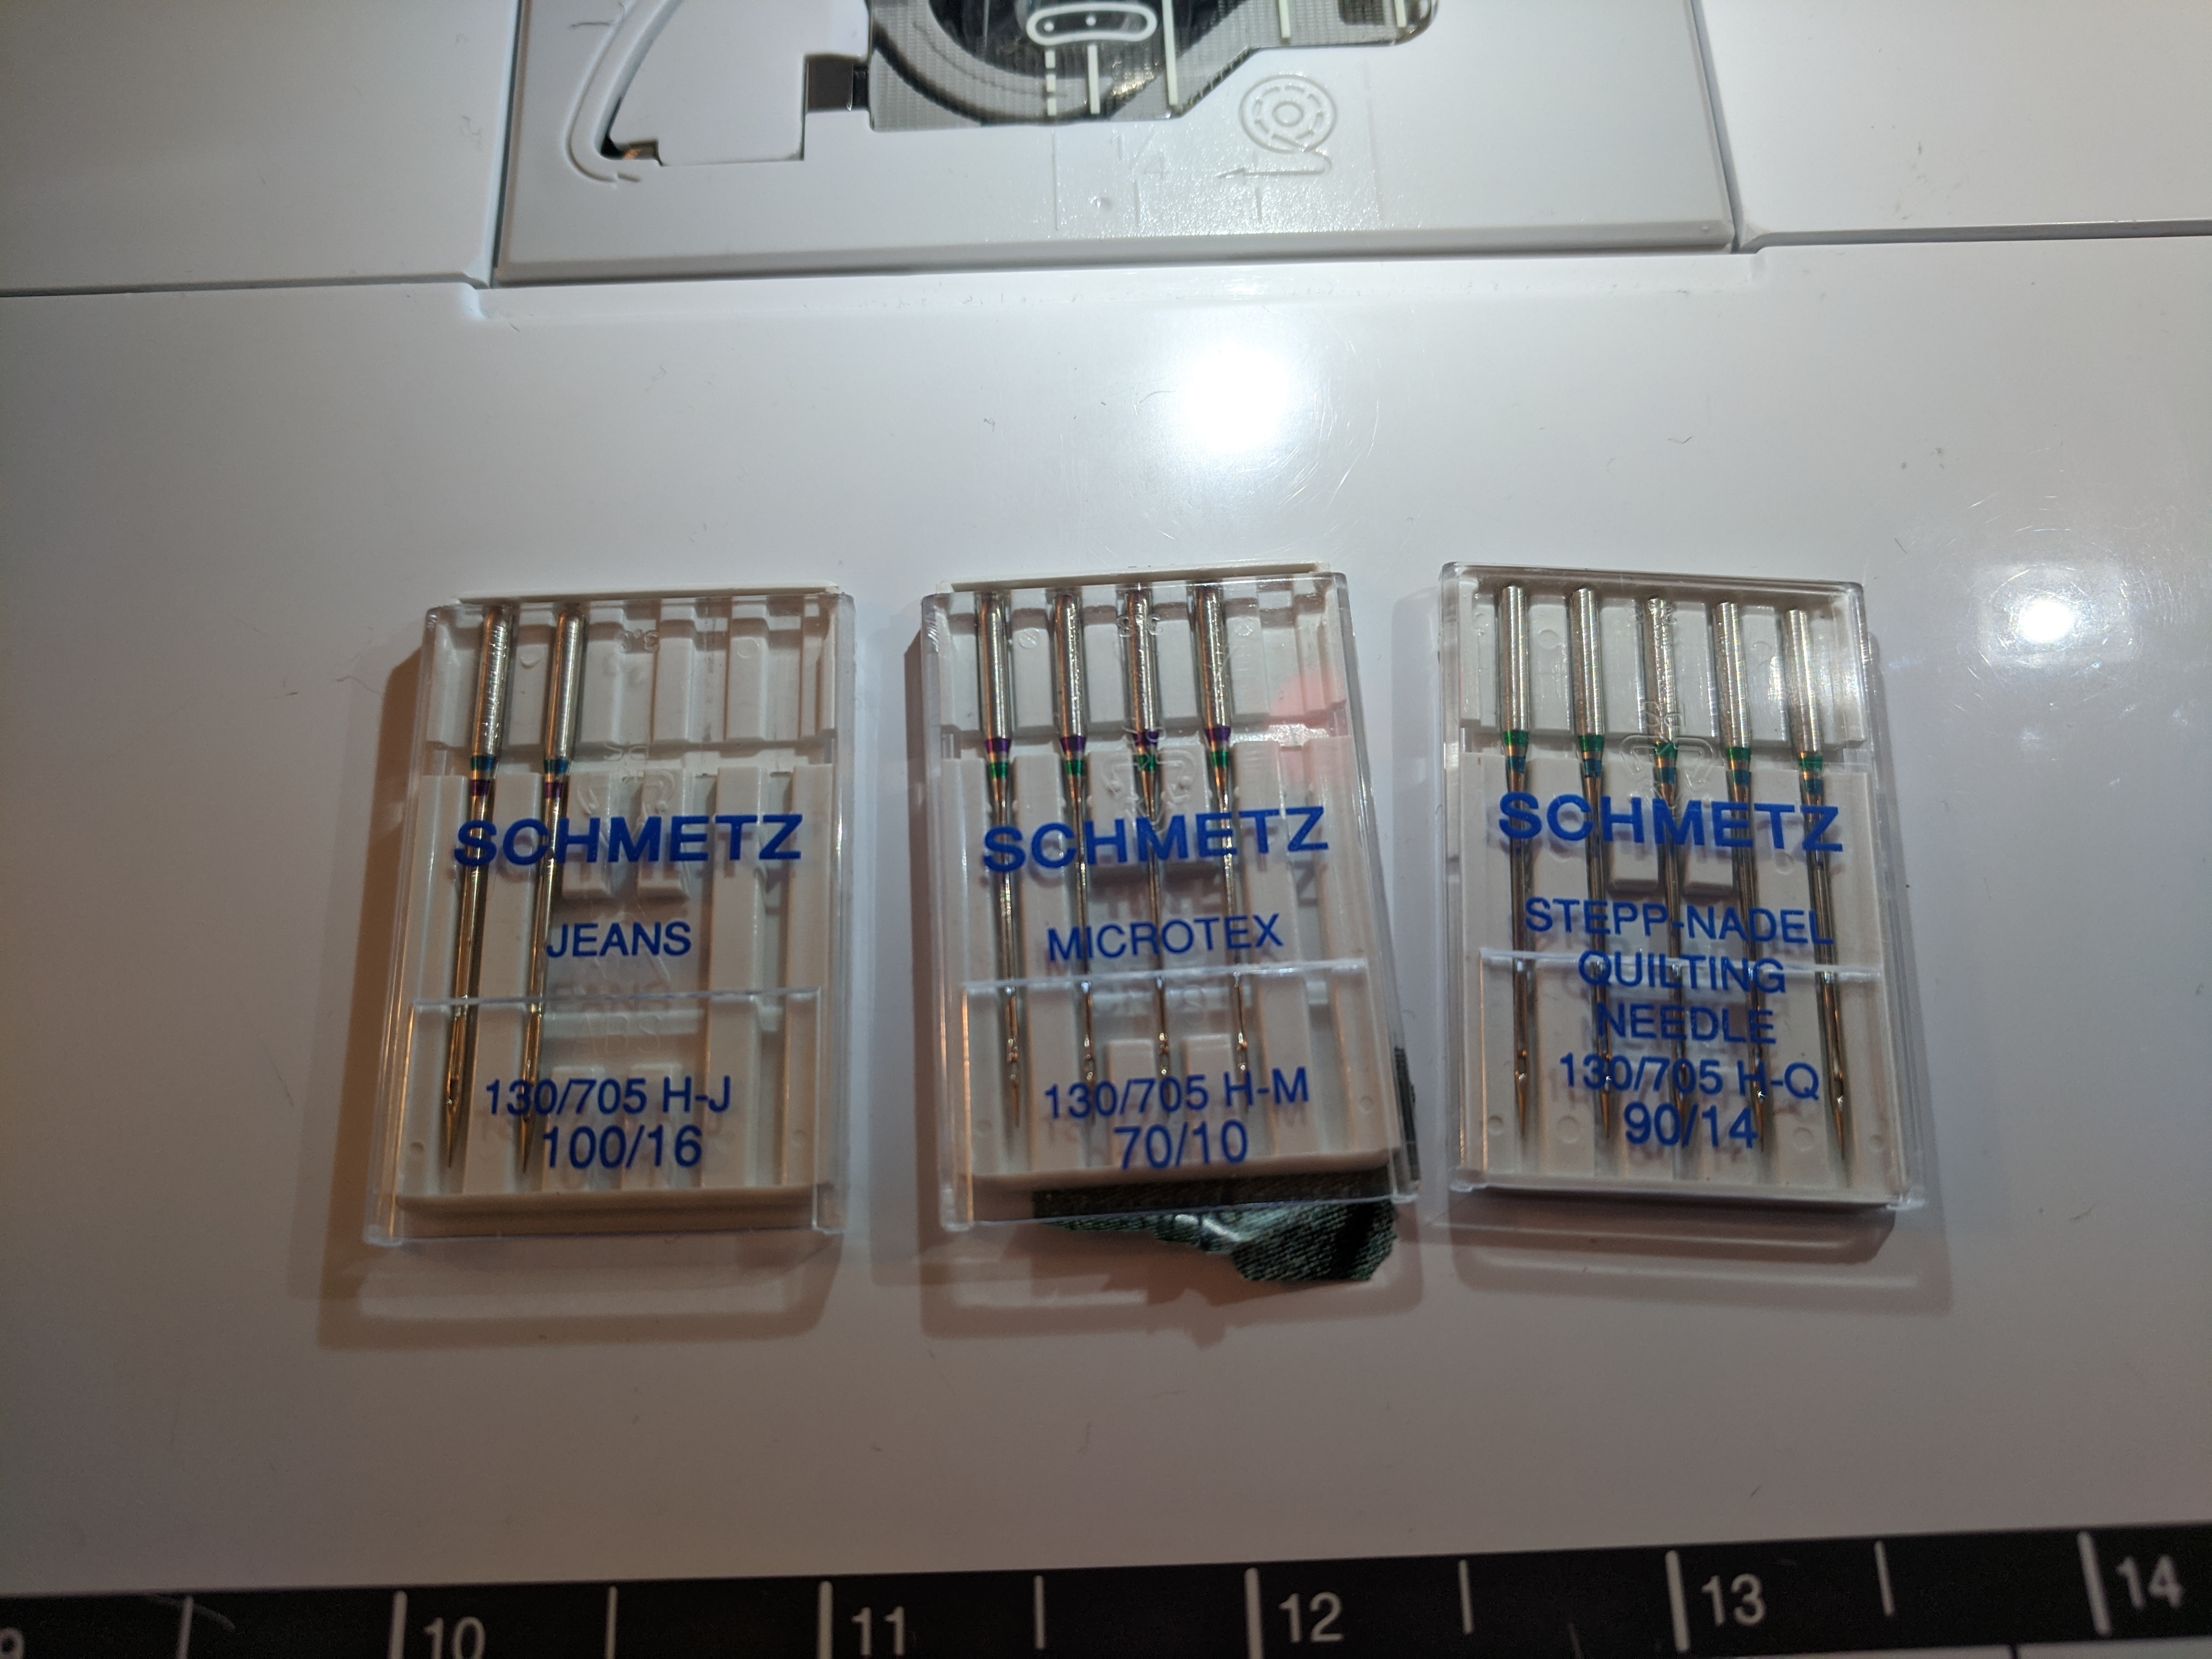
There are many different sizes and types of needles, I usually use a 70/10 for quilting and piecing, unless I’m using a thicker thread in which case I need a thicker needle. Microtex or sharps are useful for cotton, but they make ball point or duller needles for jersey and knit fabrics so the needle doesn’t break any threads. Over time, needles get dull, or I run over a pin and break them. They recommend using a new needle for every project, but it ends up being every two-ish projects for me.
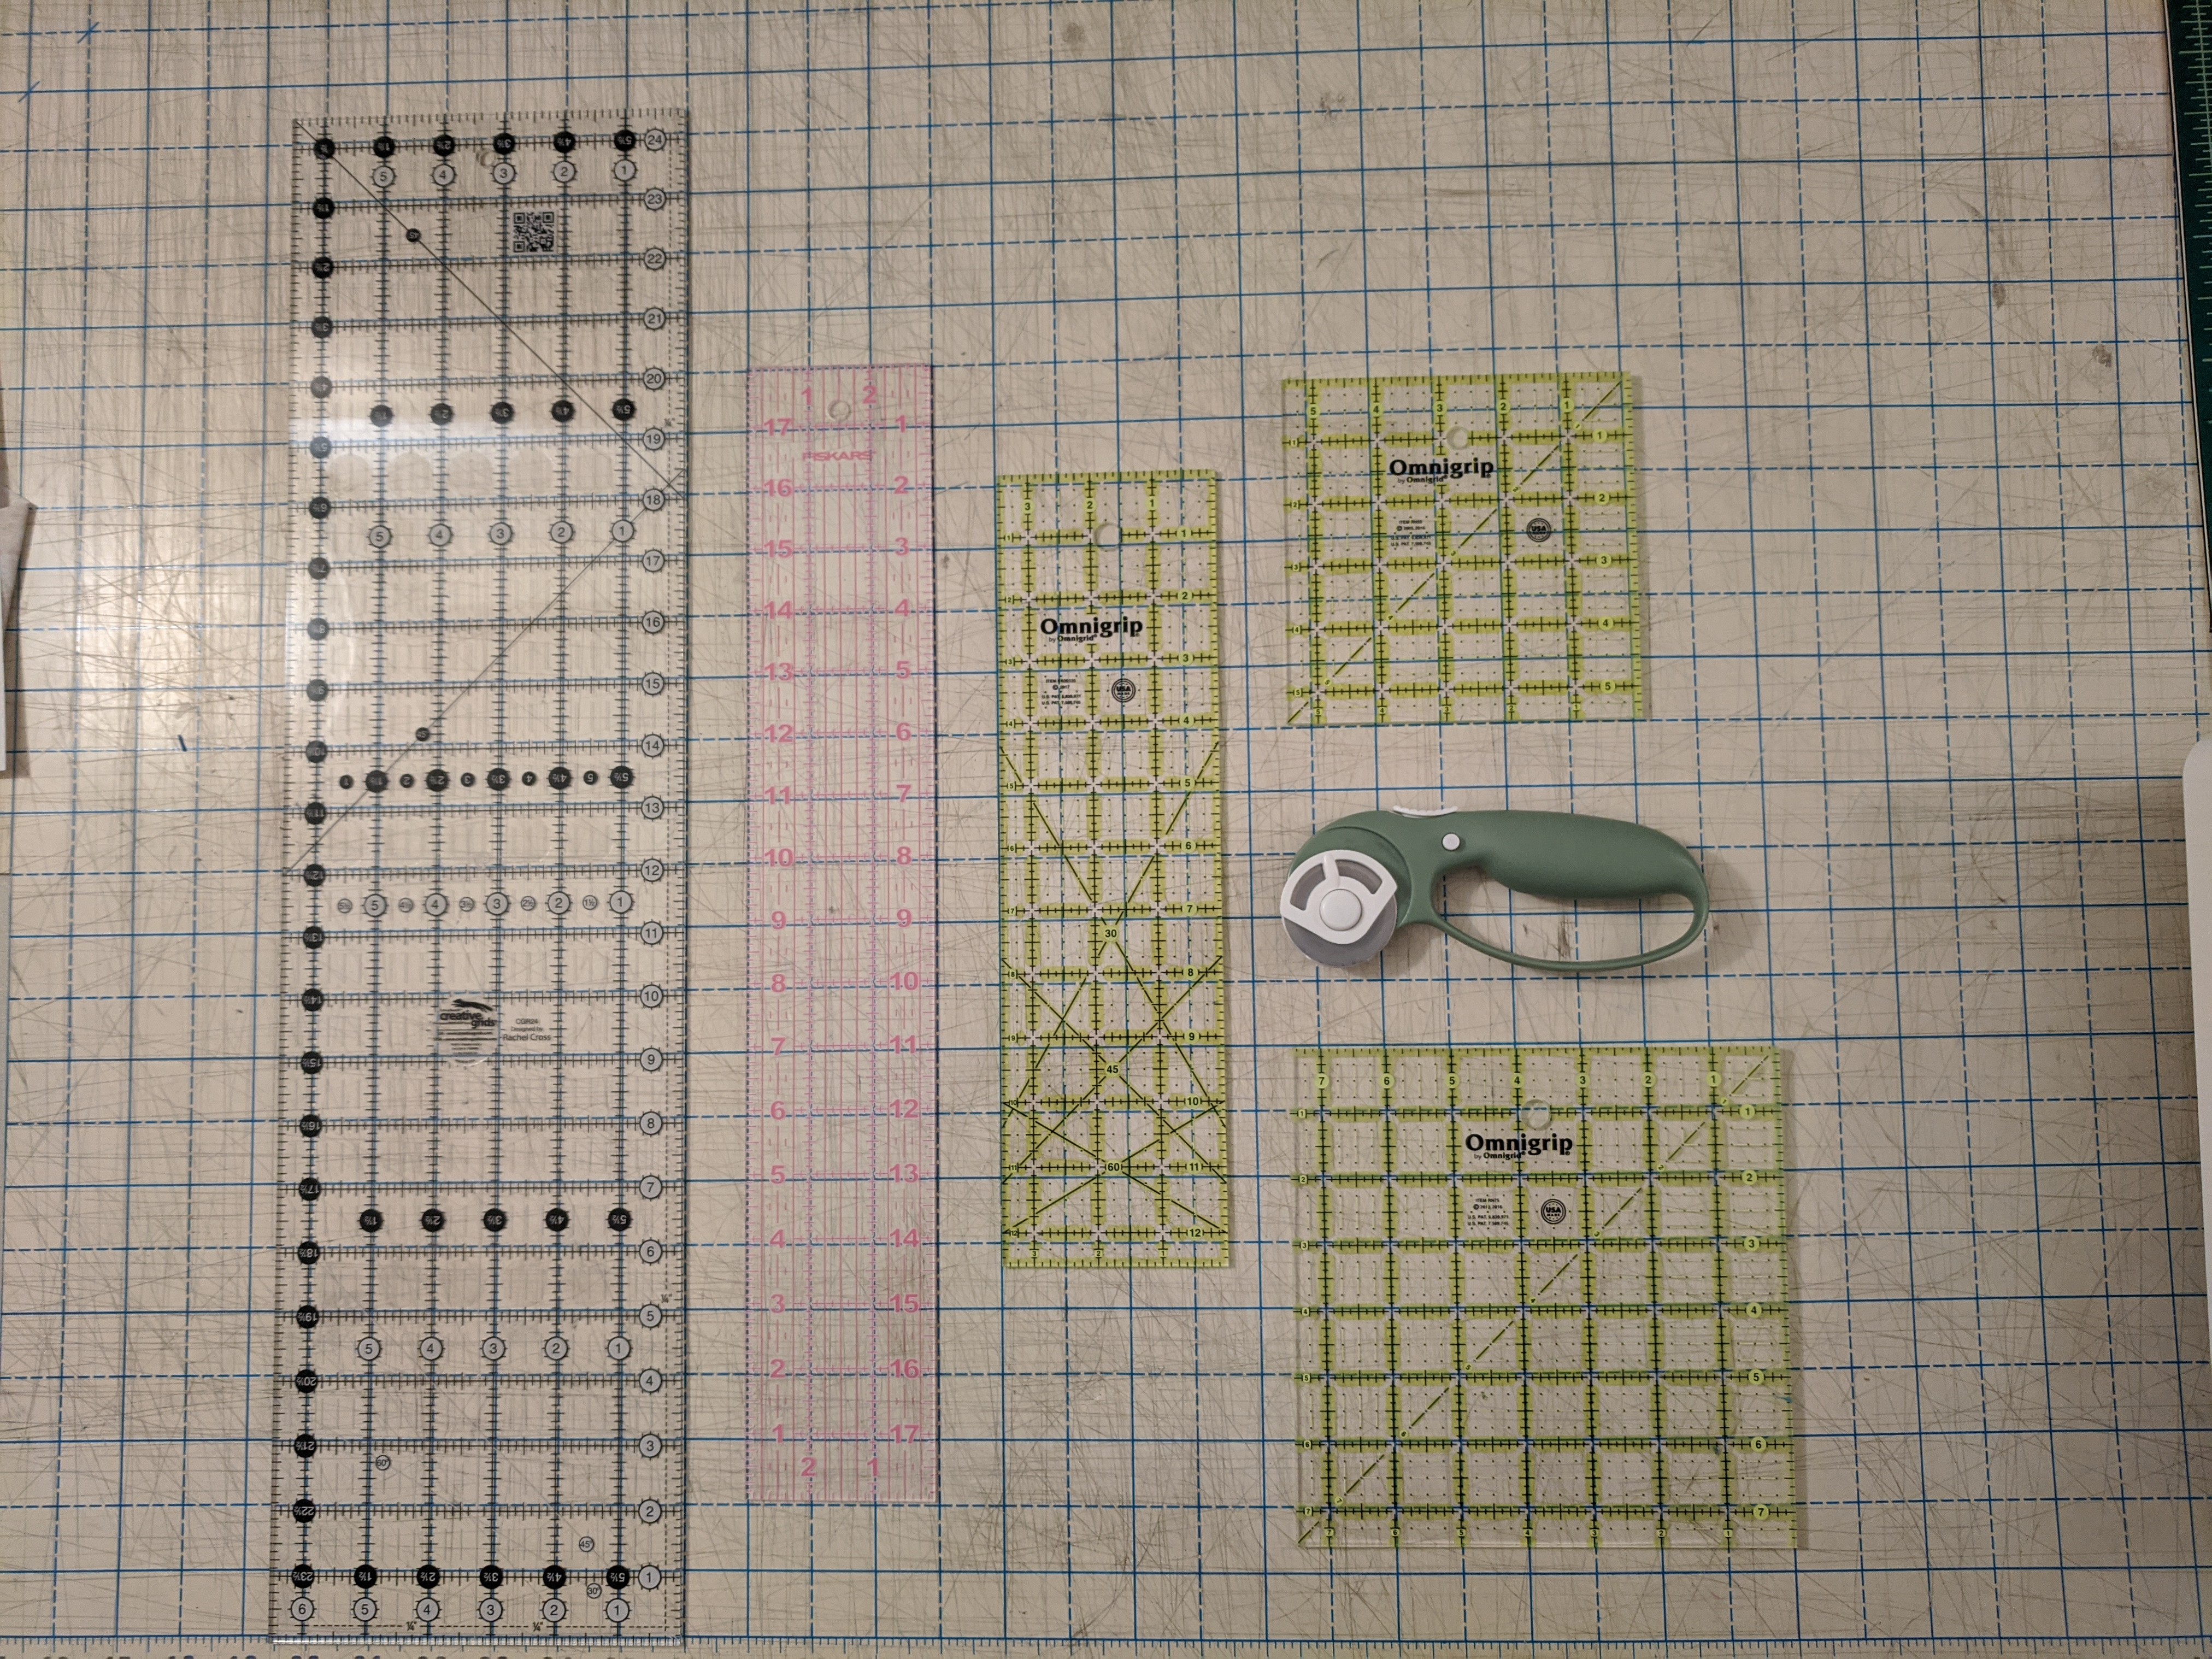
My rulers! So necessary for quilting, since everything is on a grid. Rulers are mostly used in conjunction with the rotary cutter and mats, which make cutting up fabric so easy. I have the big white mat that takes up half my table, and a few other mats that are smaller.
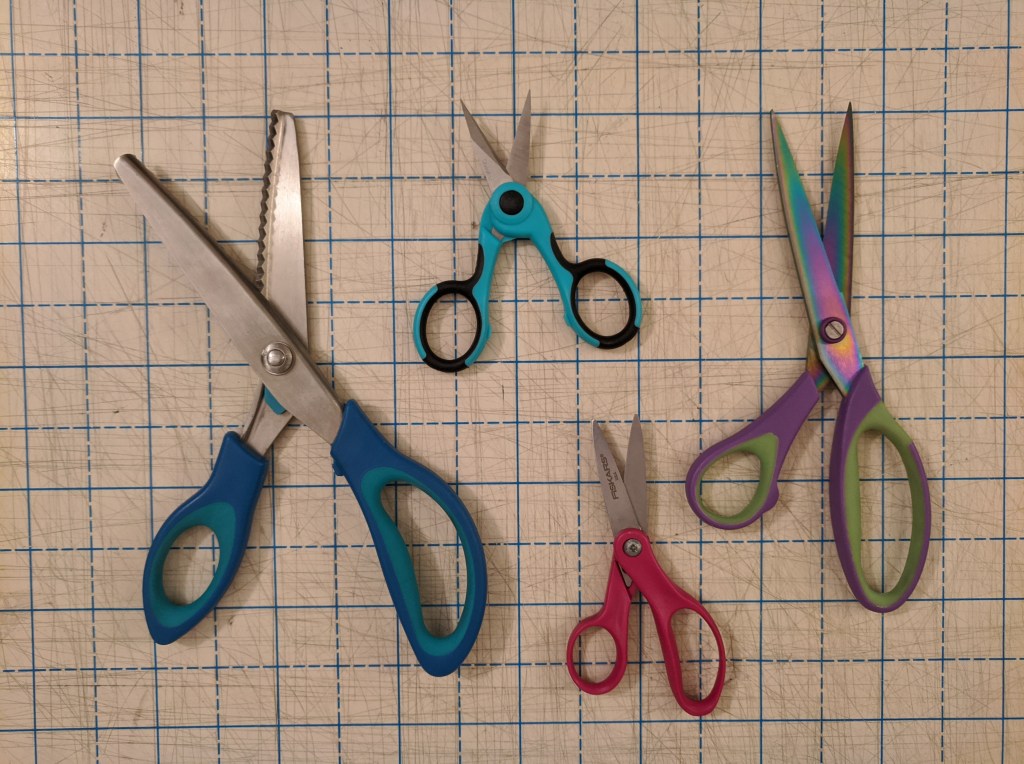
Scissors!
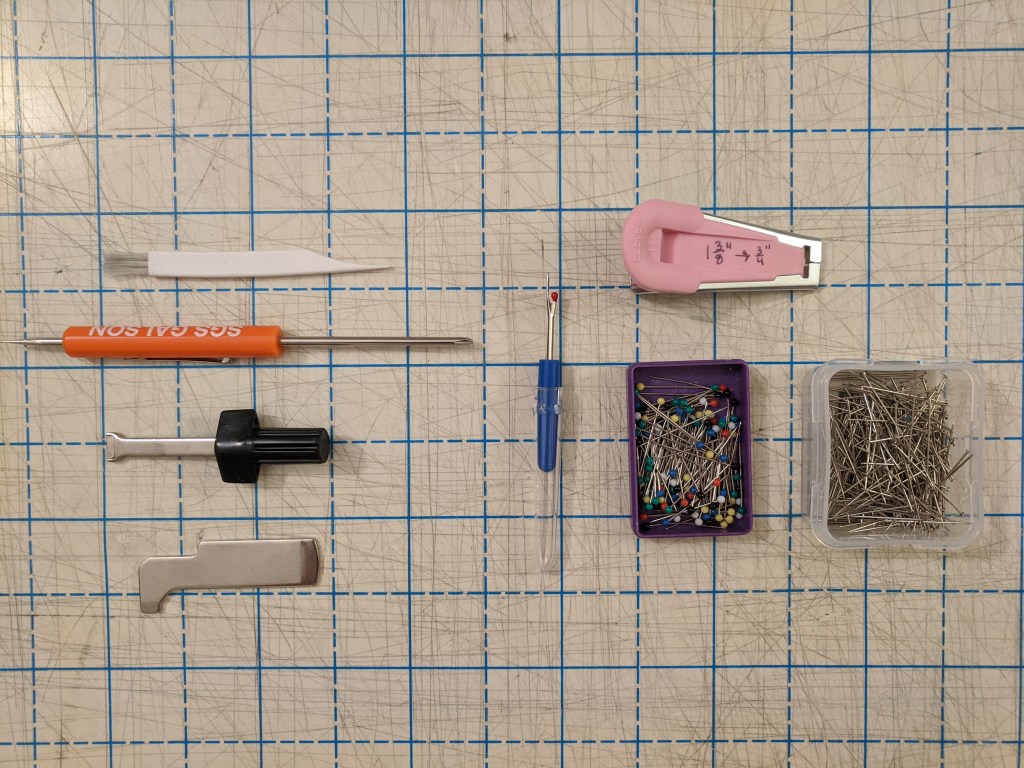
Random notions
As with rulers, there are many different scissors 🙂 I mostly use them for getting bits of thread and cutting batting. That said, paper dulls scissors very quickly, so fabric scissors are for fabric only! I use little ball head pins and satin pins (far right) to hold fabric together, usually for garments. I don’t usually pin when quilting. I also have my maintenance notions – the lint brush (top white) and various screwdrivers help me clean the inside of the machine from the lint that gets stuck in there. In the middle is my seam ripper, ever useful. The pink thing make bias tape, I can cut a strip, feed it through, and it folds the edges over for you.
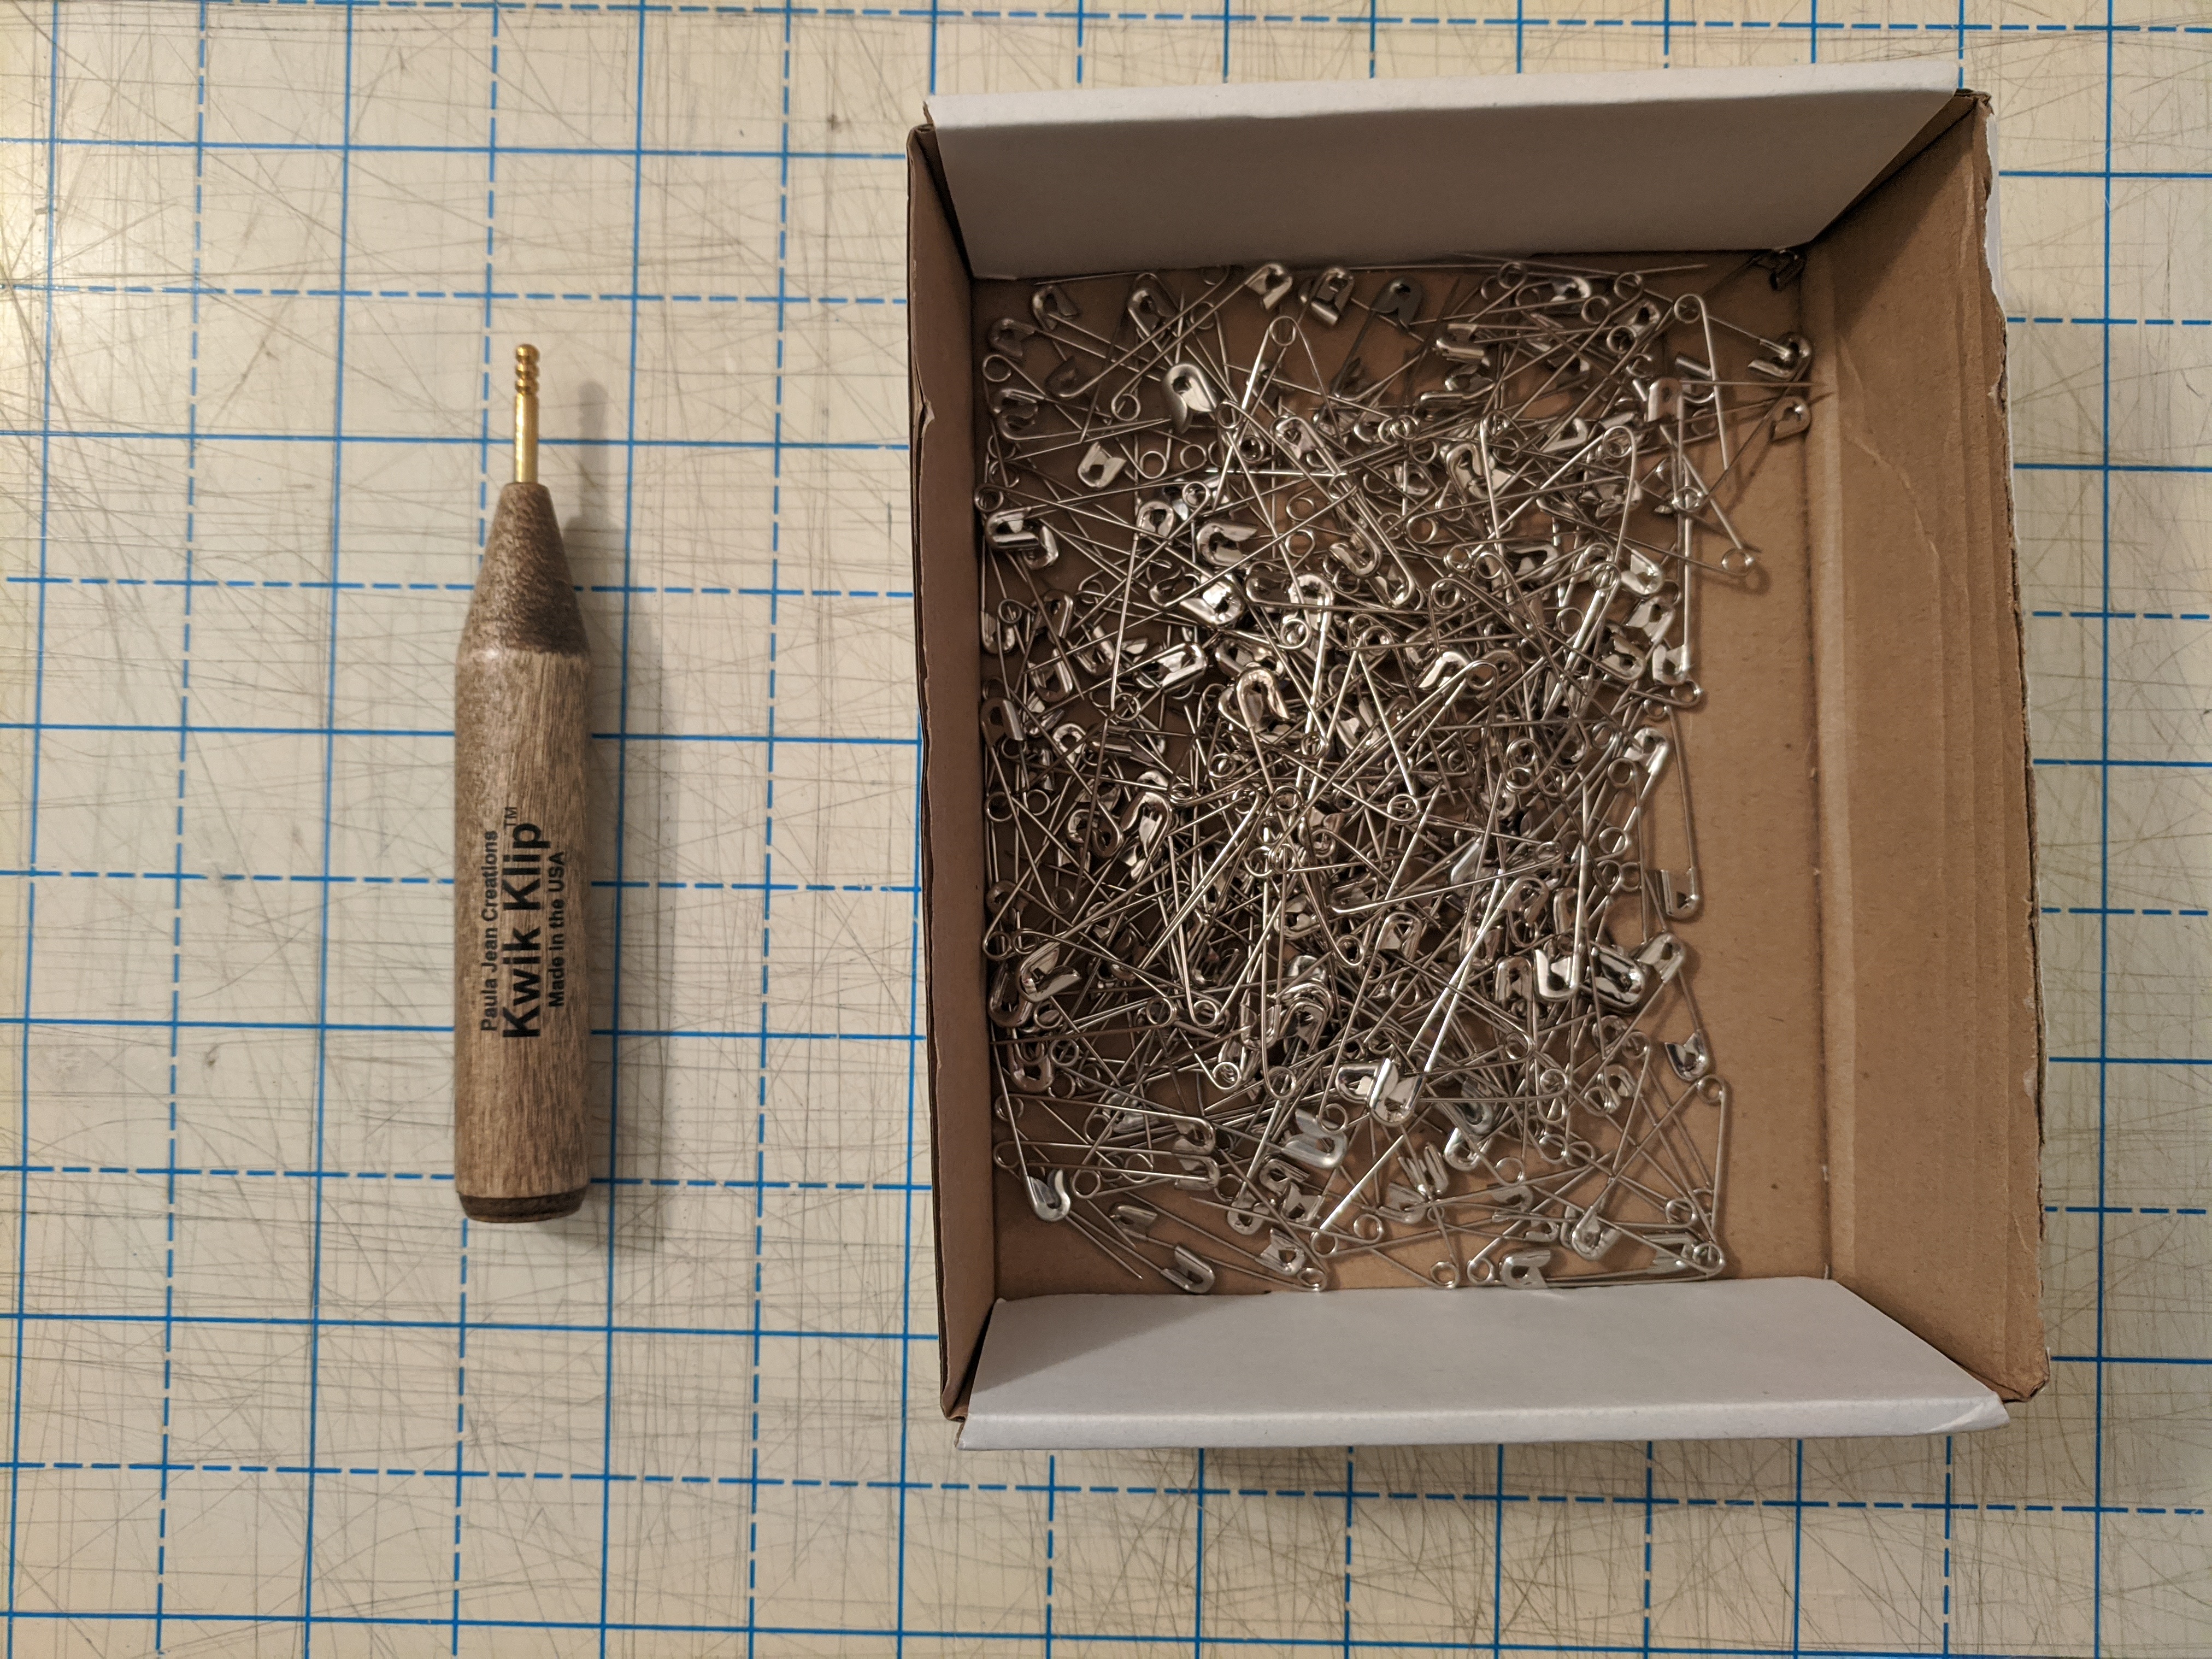
Kwik clip for closing safety pins during basting
Safety pins and the Kwik Klip are used during basting to keep the quilt sandwich together. Spray basting is another way to keep the quilt sandwich together, but I haven’t used it yet.
And last but absolutely not least, my iron 🙂 the iron is critical in all sewing. The first press after sewing a seam helps the thread relax into the fabric, and reduces puckers – and in quilting, the idea is to have the top be as flat as possible. Most of the time, I’m on high heat with steam, since that’s the best for cotton. The iron can also be used for fusing interfacing or applique glue.
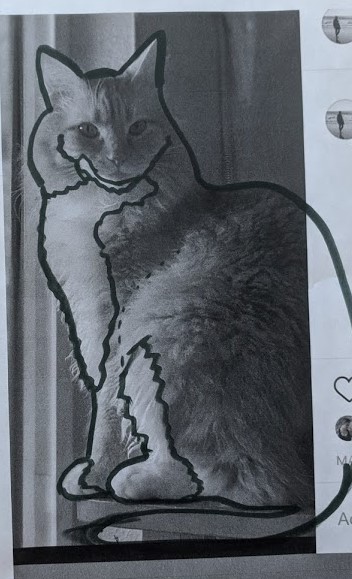
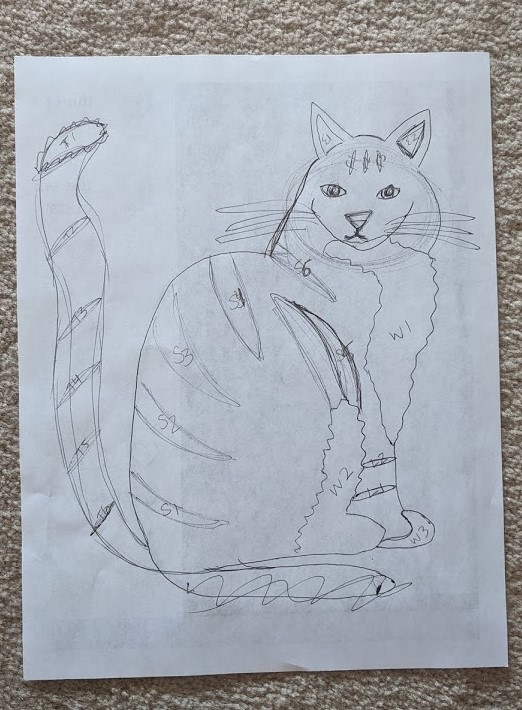
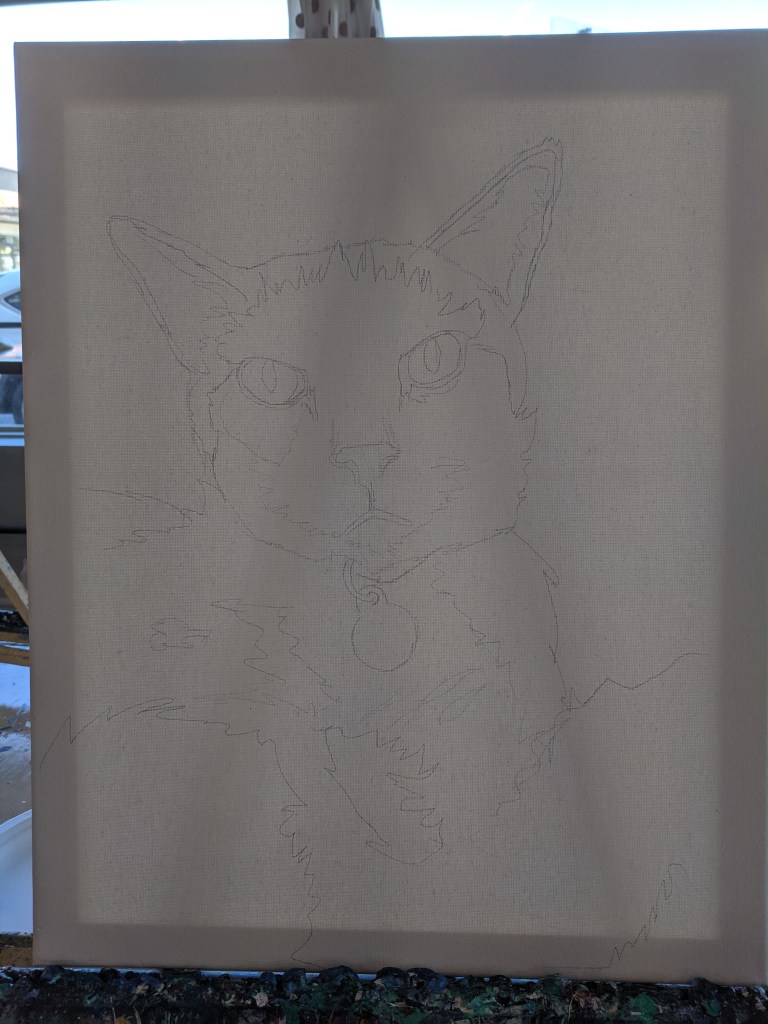
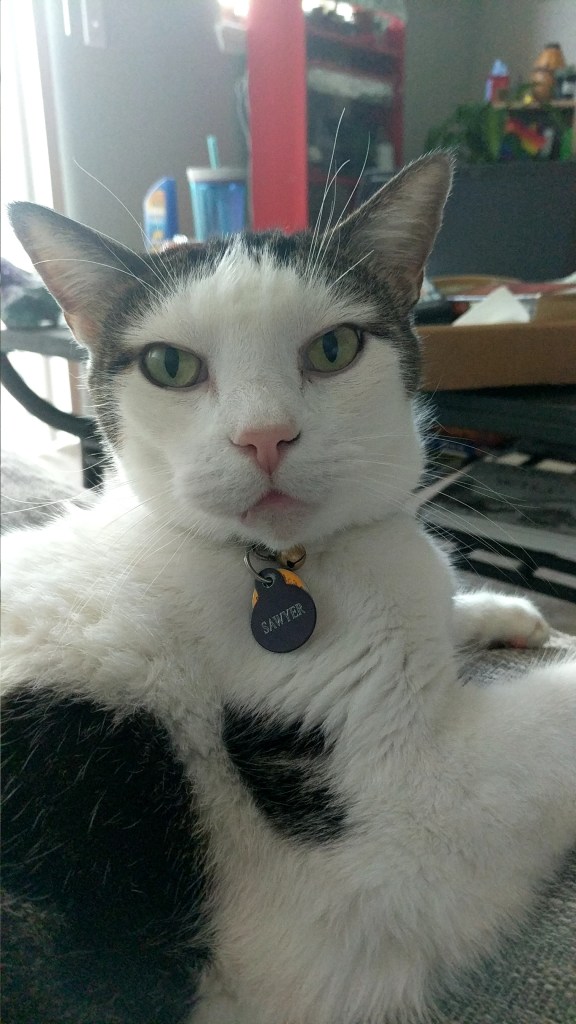
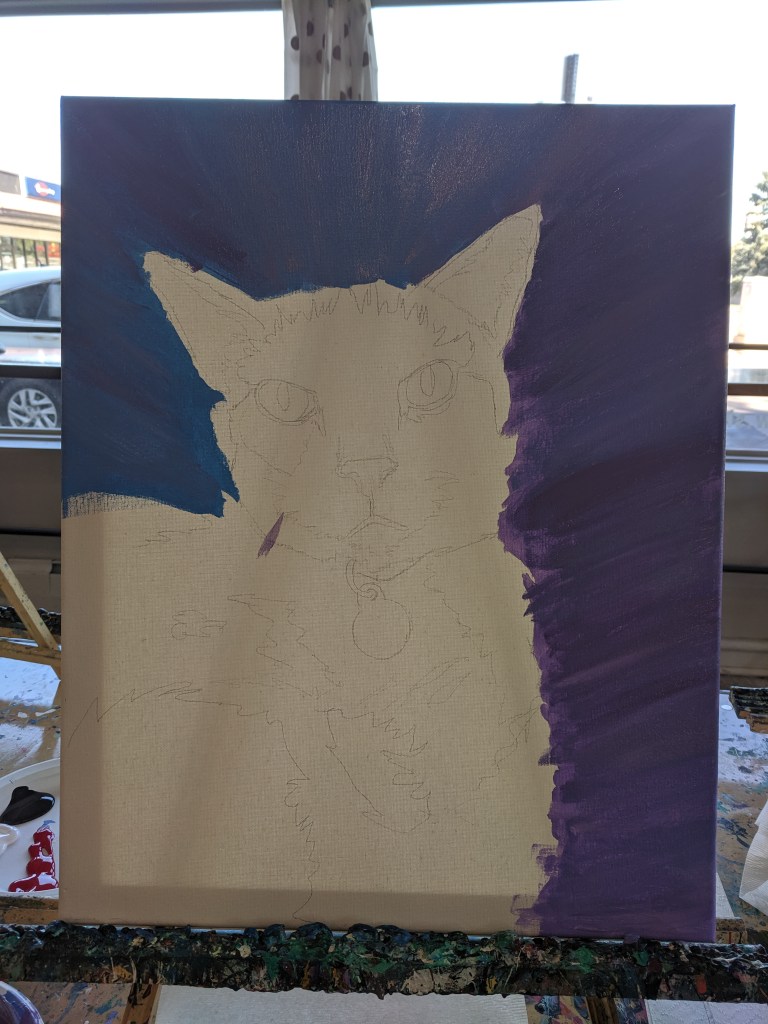
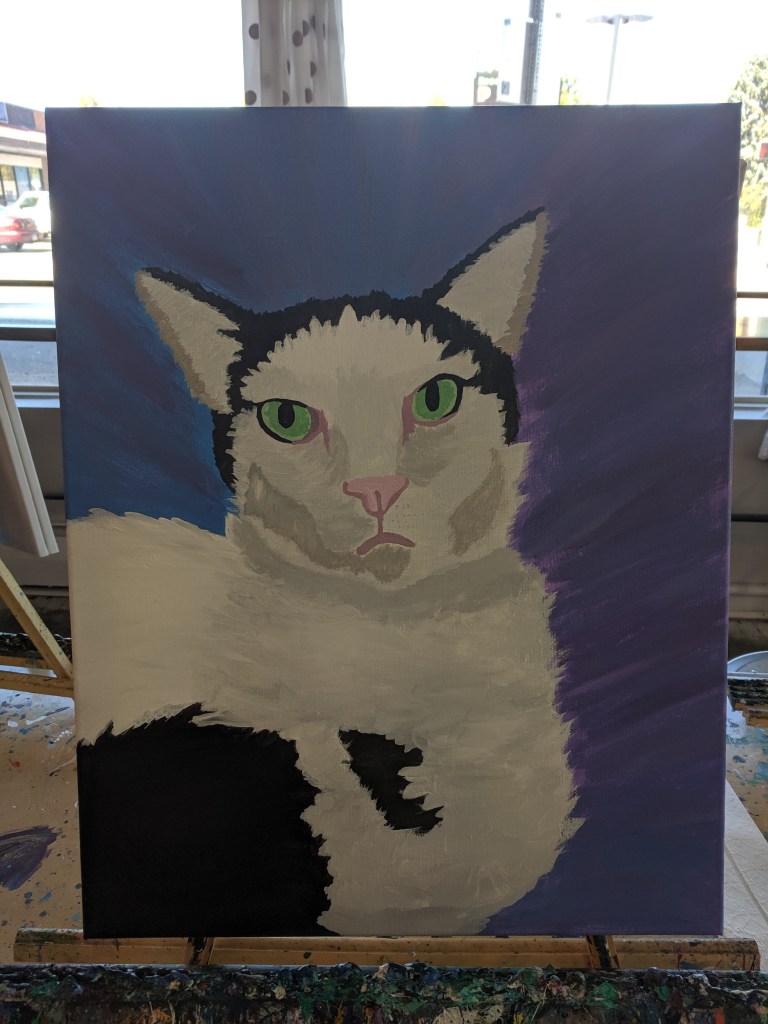
My friend and I went to Sipping N Painting in Denver, one of the pretty standard paint and drink places 🙂 Except they used a photo of our pet to sketch the outline on a canvas for us, and then we filled it in!
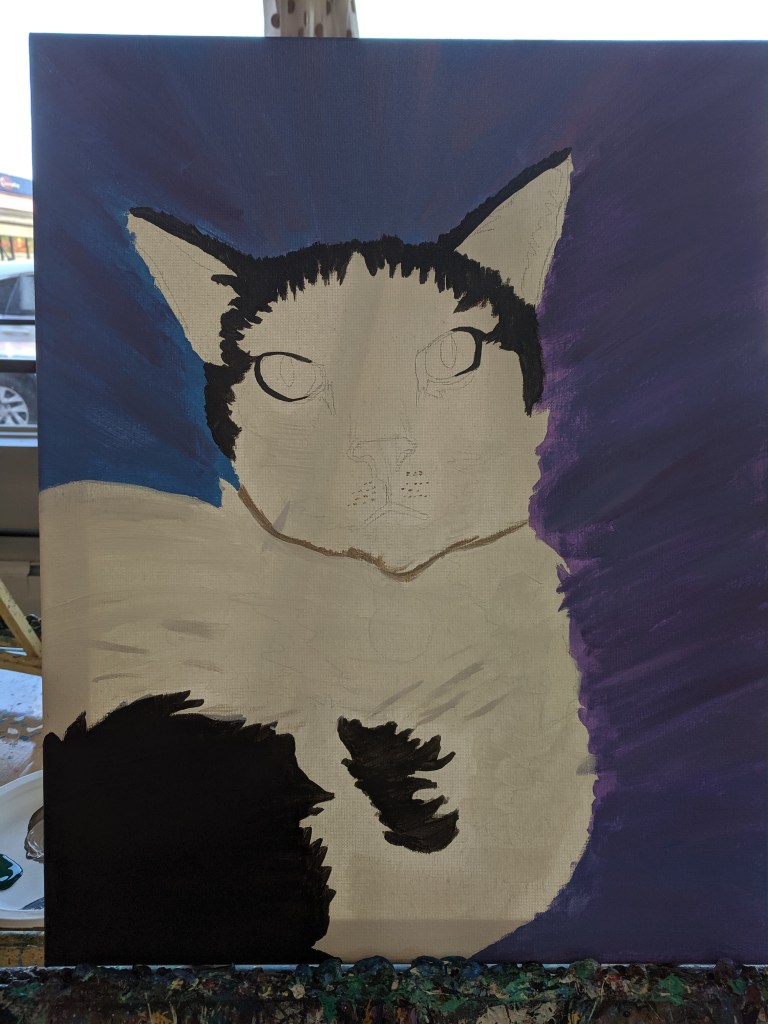
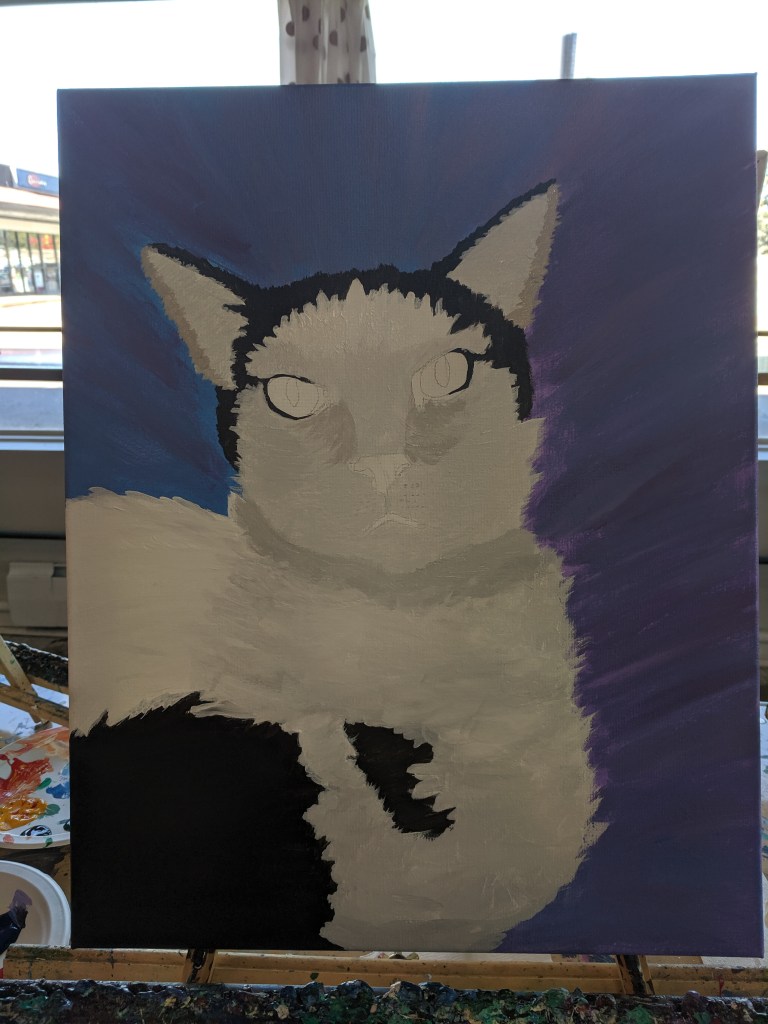
It was originally supposed to be more of an abstract thing using one color in different shades to define highlights and lowlights within the picture, but I decided that I’d do realistic colors (along with the other 3 people in the class) since my cat is just black and white.
Since it was made off a picture-perfect sketch, the true emotion of his Judgement really comes through, which is a true joy. He looks at me with this face all the time and I’m really glad I captured it in painting form.
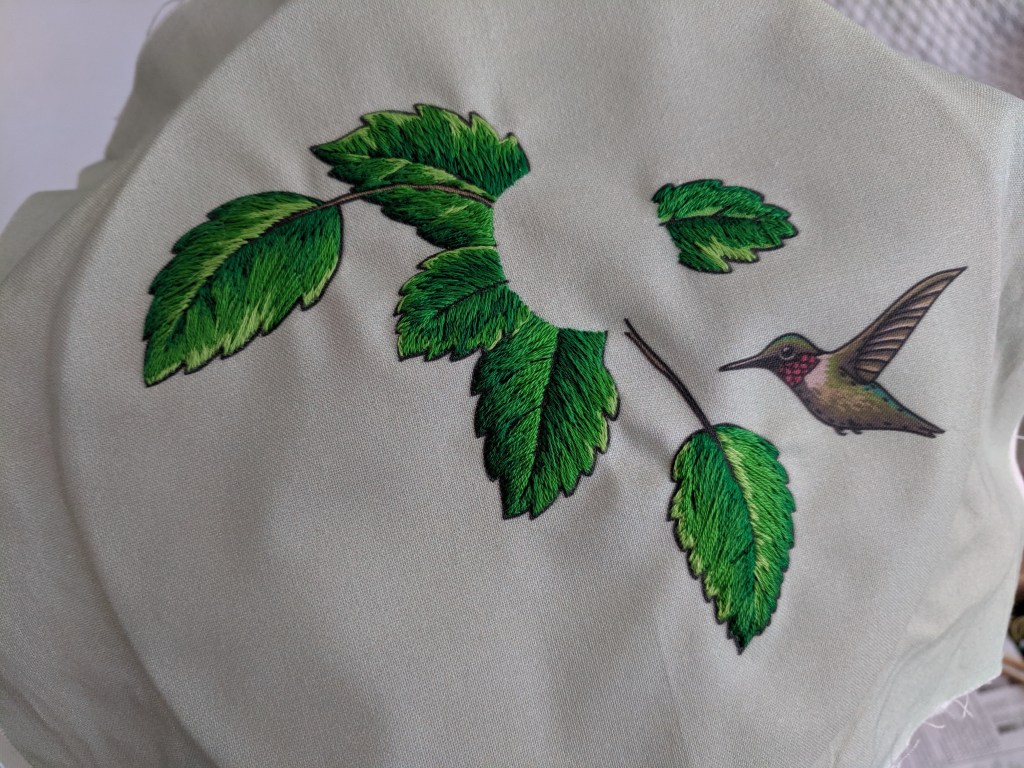
As you know, I get most of my embroidery patterns from Namaste Embroidery. She also has a YouTube channel where she posts long-form videos of her working on the projects. I was inspired by her stumpwork tutorial and had to order the modified Anna embroidery kit. After doing the “Flowers in Her Hair” 1-ply satin stitch, I wasn’t super interested in doing the face, so I ordered the version with just the flower, leaves, and hummingbird. I was transitioning between living spaces and my sewing room wasn’t set up, so coming back to embroidery was a fun “sit in front of the TV and relax” project.
1
2
3
4
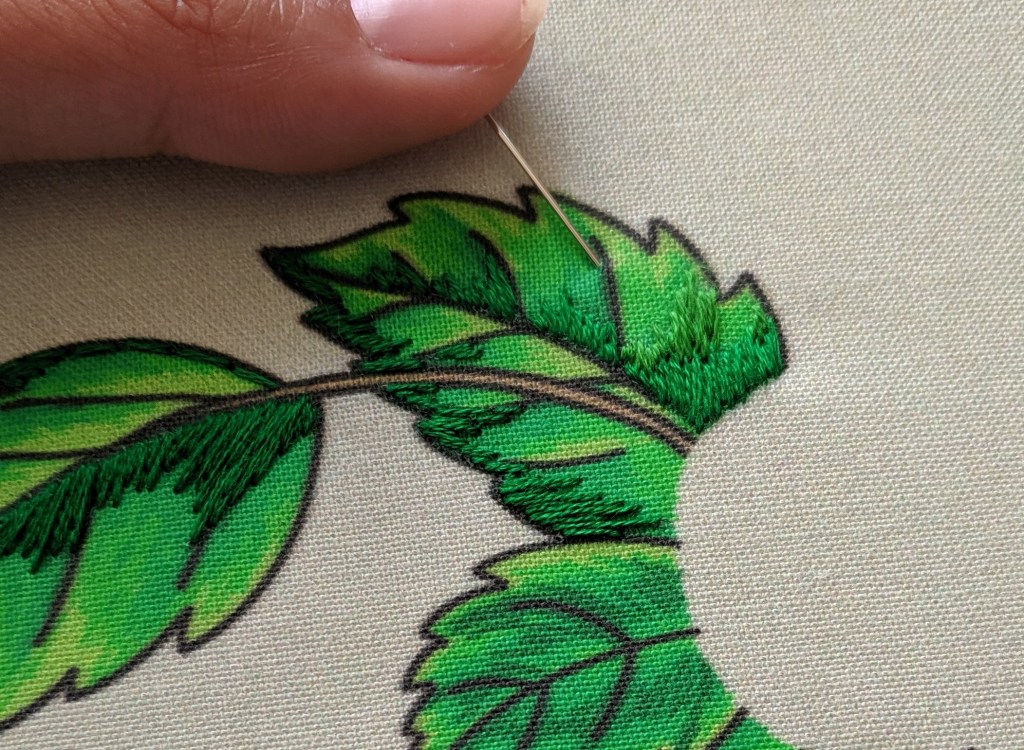
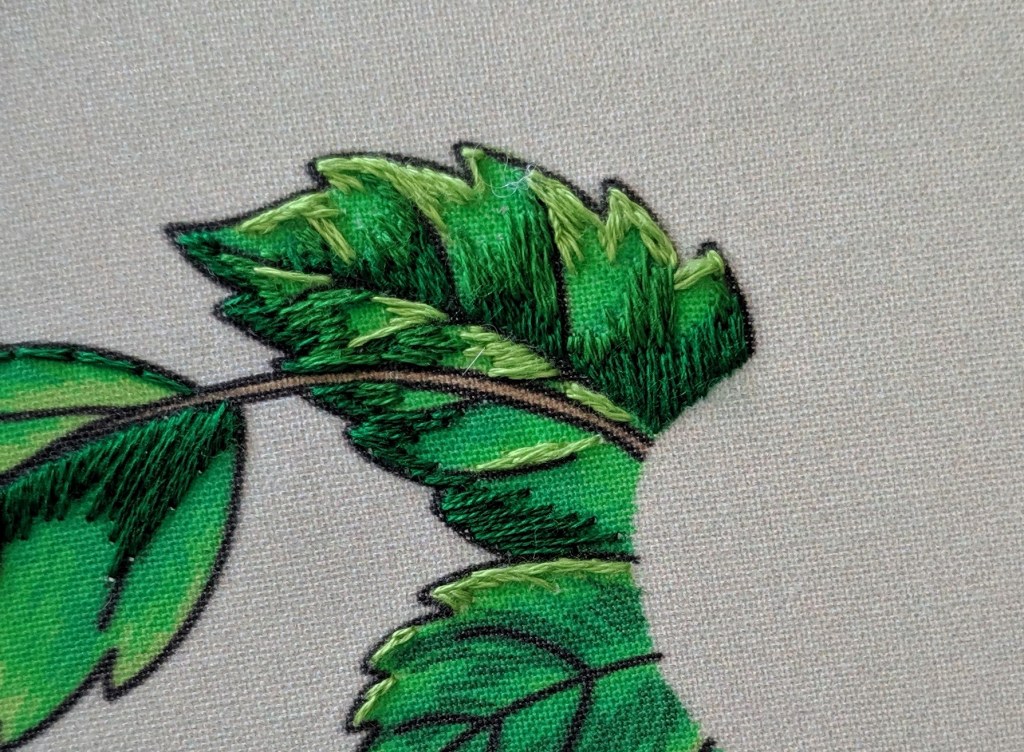
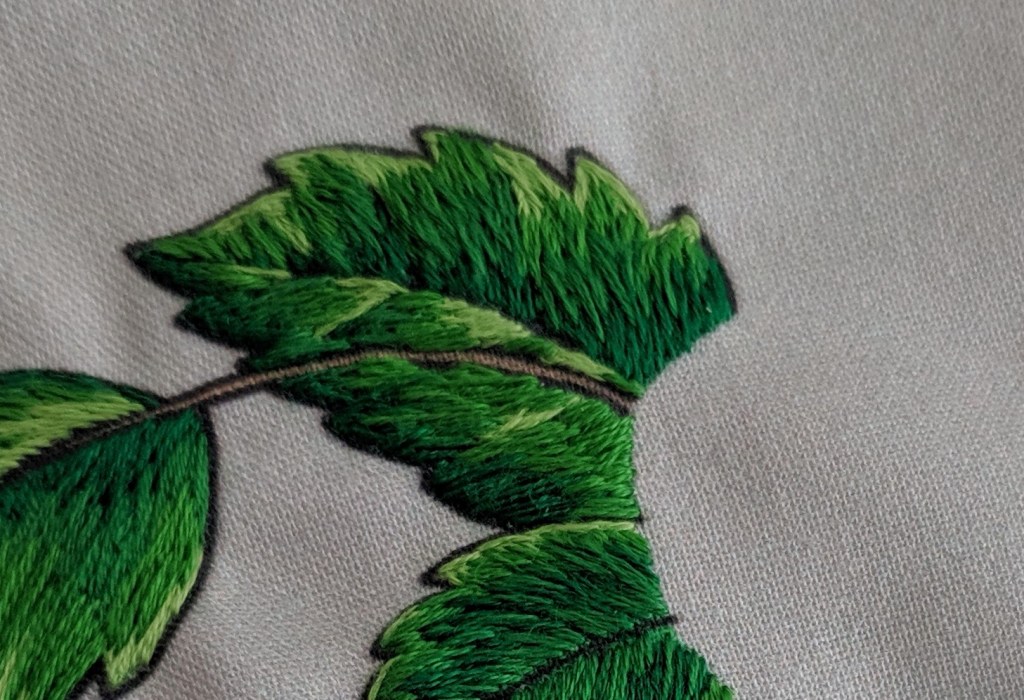
This was my first big project with long and short stitch. I’ve tried it before, but it’s looked weird and awkward, and I wanted a larger project to give me the chance to learn it many times over. Long and short stitch is a technique used to blend colors and do “thread painting”. You use different lengths of stitches with different shades of the same color to create a gradient and blended effect. It requires a bit of preplanning but it’s well worth it. My leaves don’t match, but that’s the nice thing about stitching natural things – they don’t match anyway.
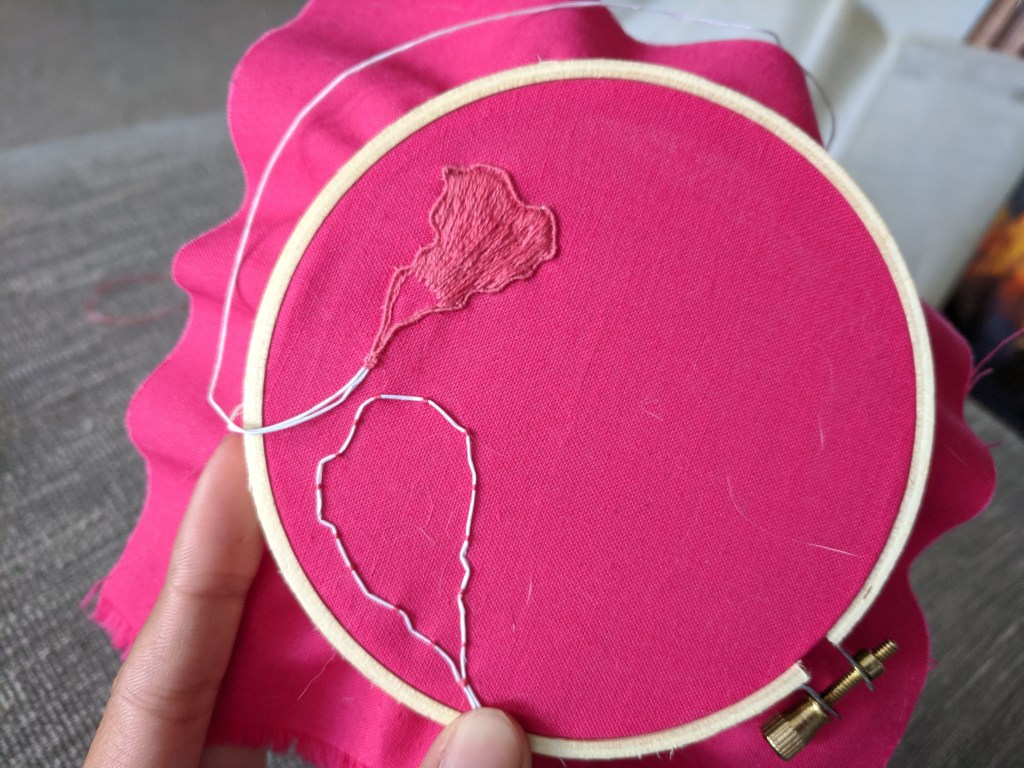
Stumpwork is a type of 3D embroidery where you use wire around the outline of the shape to give it another dimension after stitching. The wire is embedded in the work as it is stitched on a flat piece of fabric, and then the shape is cut out of the fabric. Then you can bend the wire to make it 3D!
Exposed wire getting tacked down
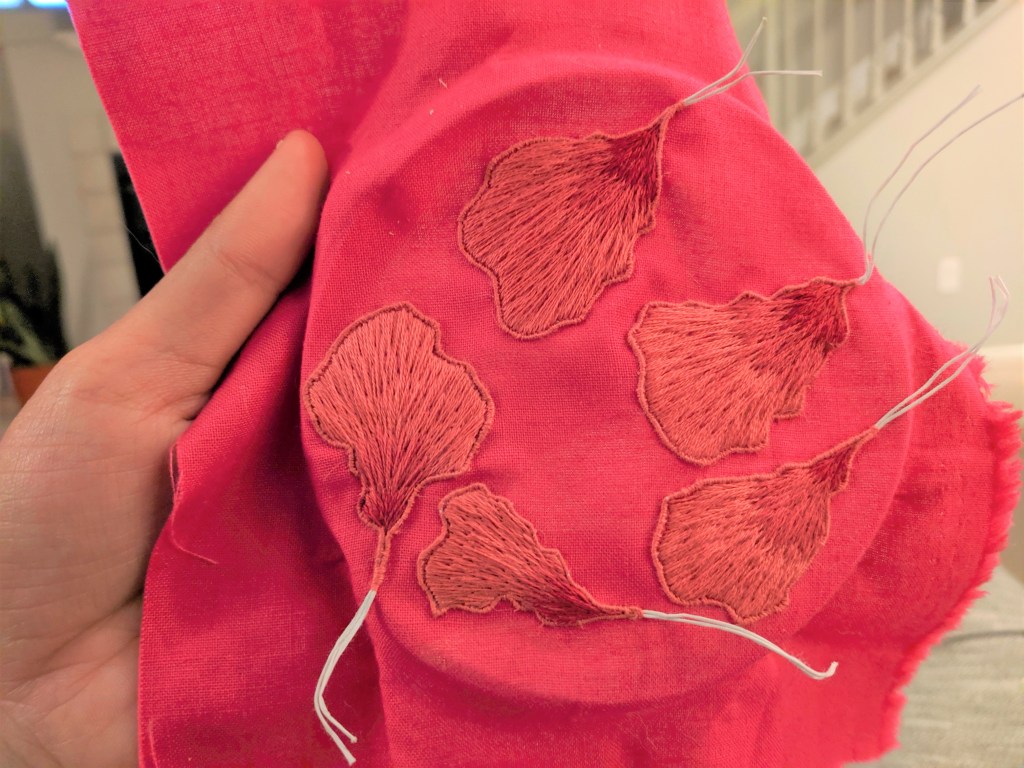
All petals done
Cut out petals
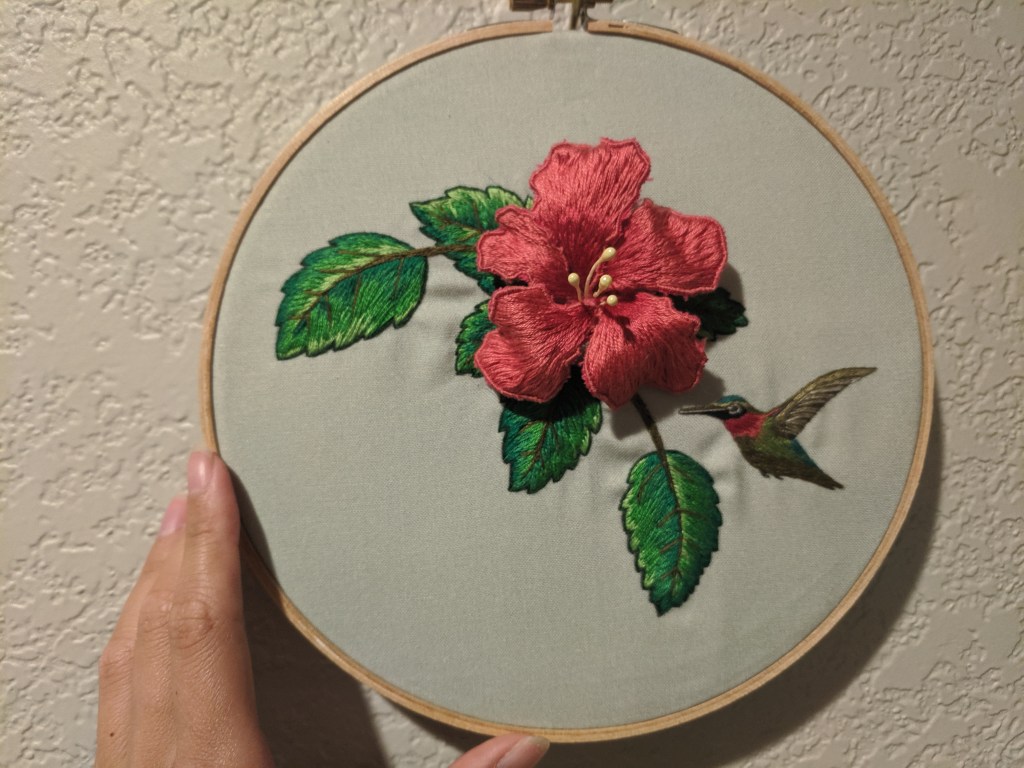
After stitching the leaves, I started in on the flower petals. I enlarged them a bit because I wanted to cover up some leafy mistakes, and also modified the directions because one of the stitches wasn’t working out for me. I ended up using 2-ply floss to wind around the wire, and then filled with long and short stitch. The hummingbird was more 1-ply long and short stitch work, and he came out quite cute. My petals are a bit large, but so very fun. I have this hung on a wall where you can see it from the front and the side.
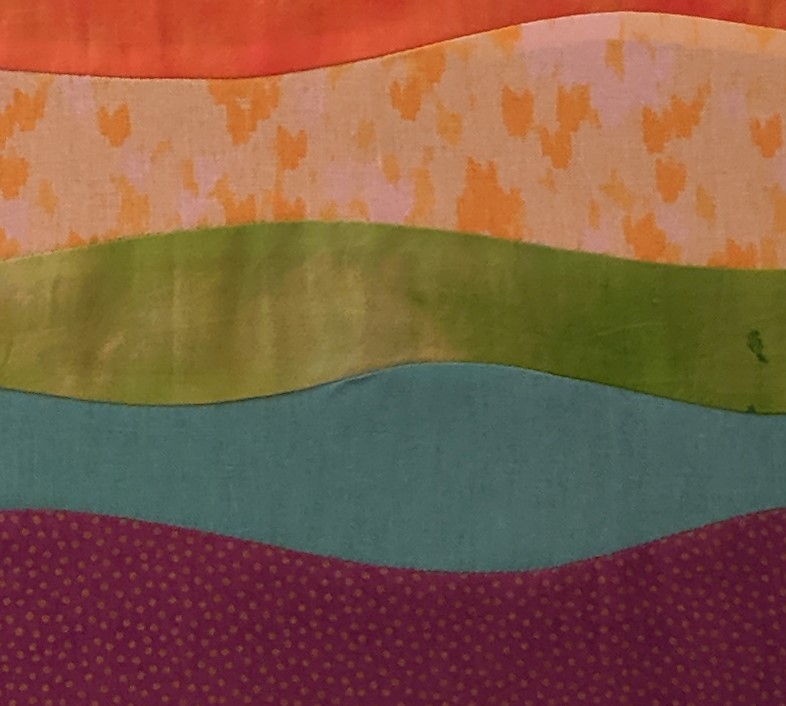
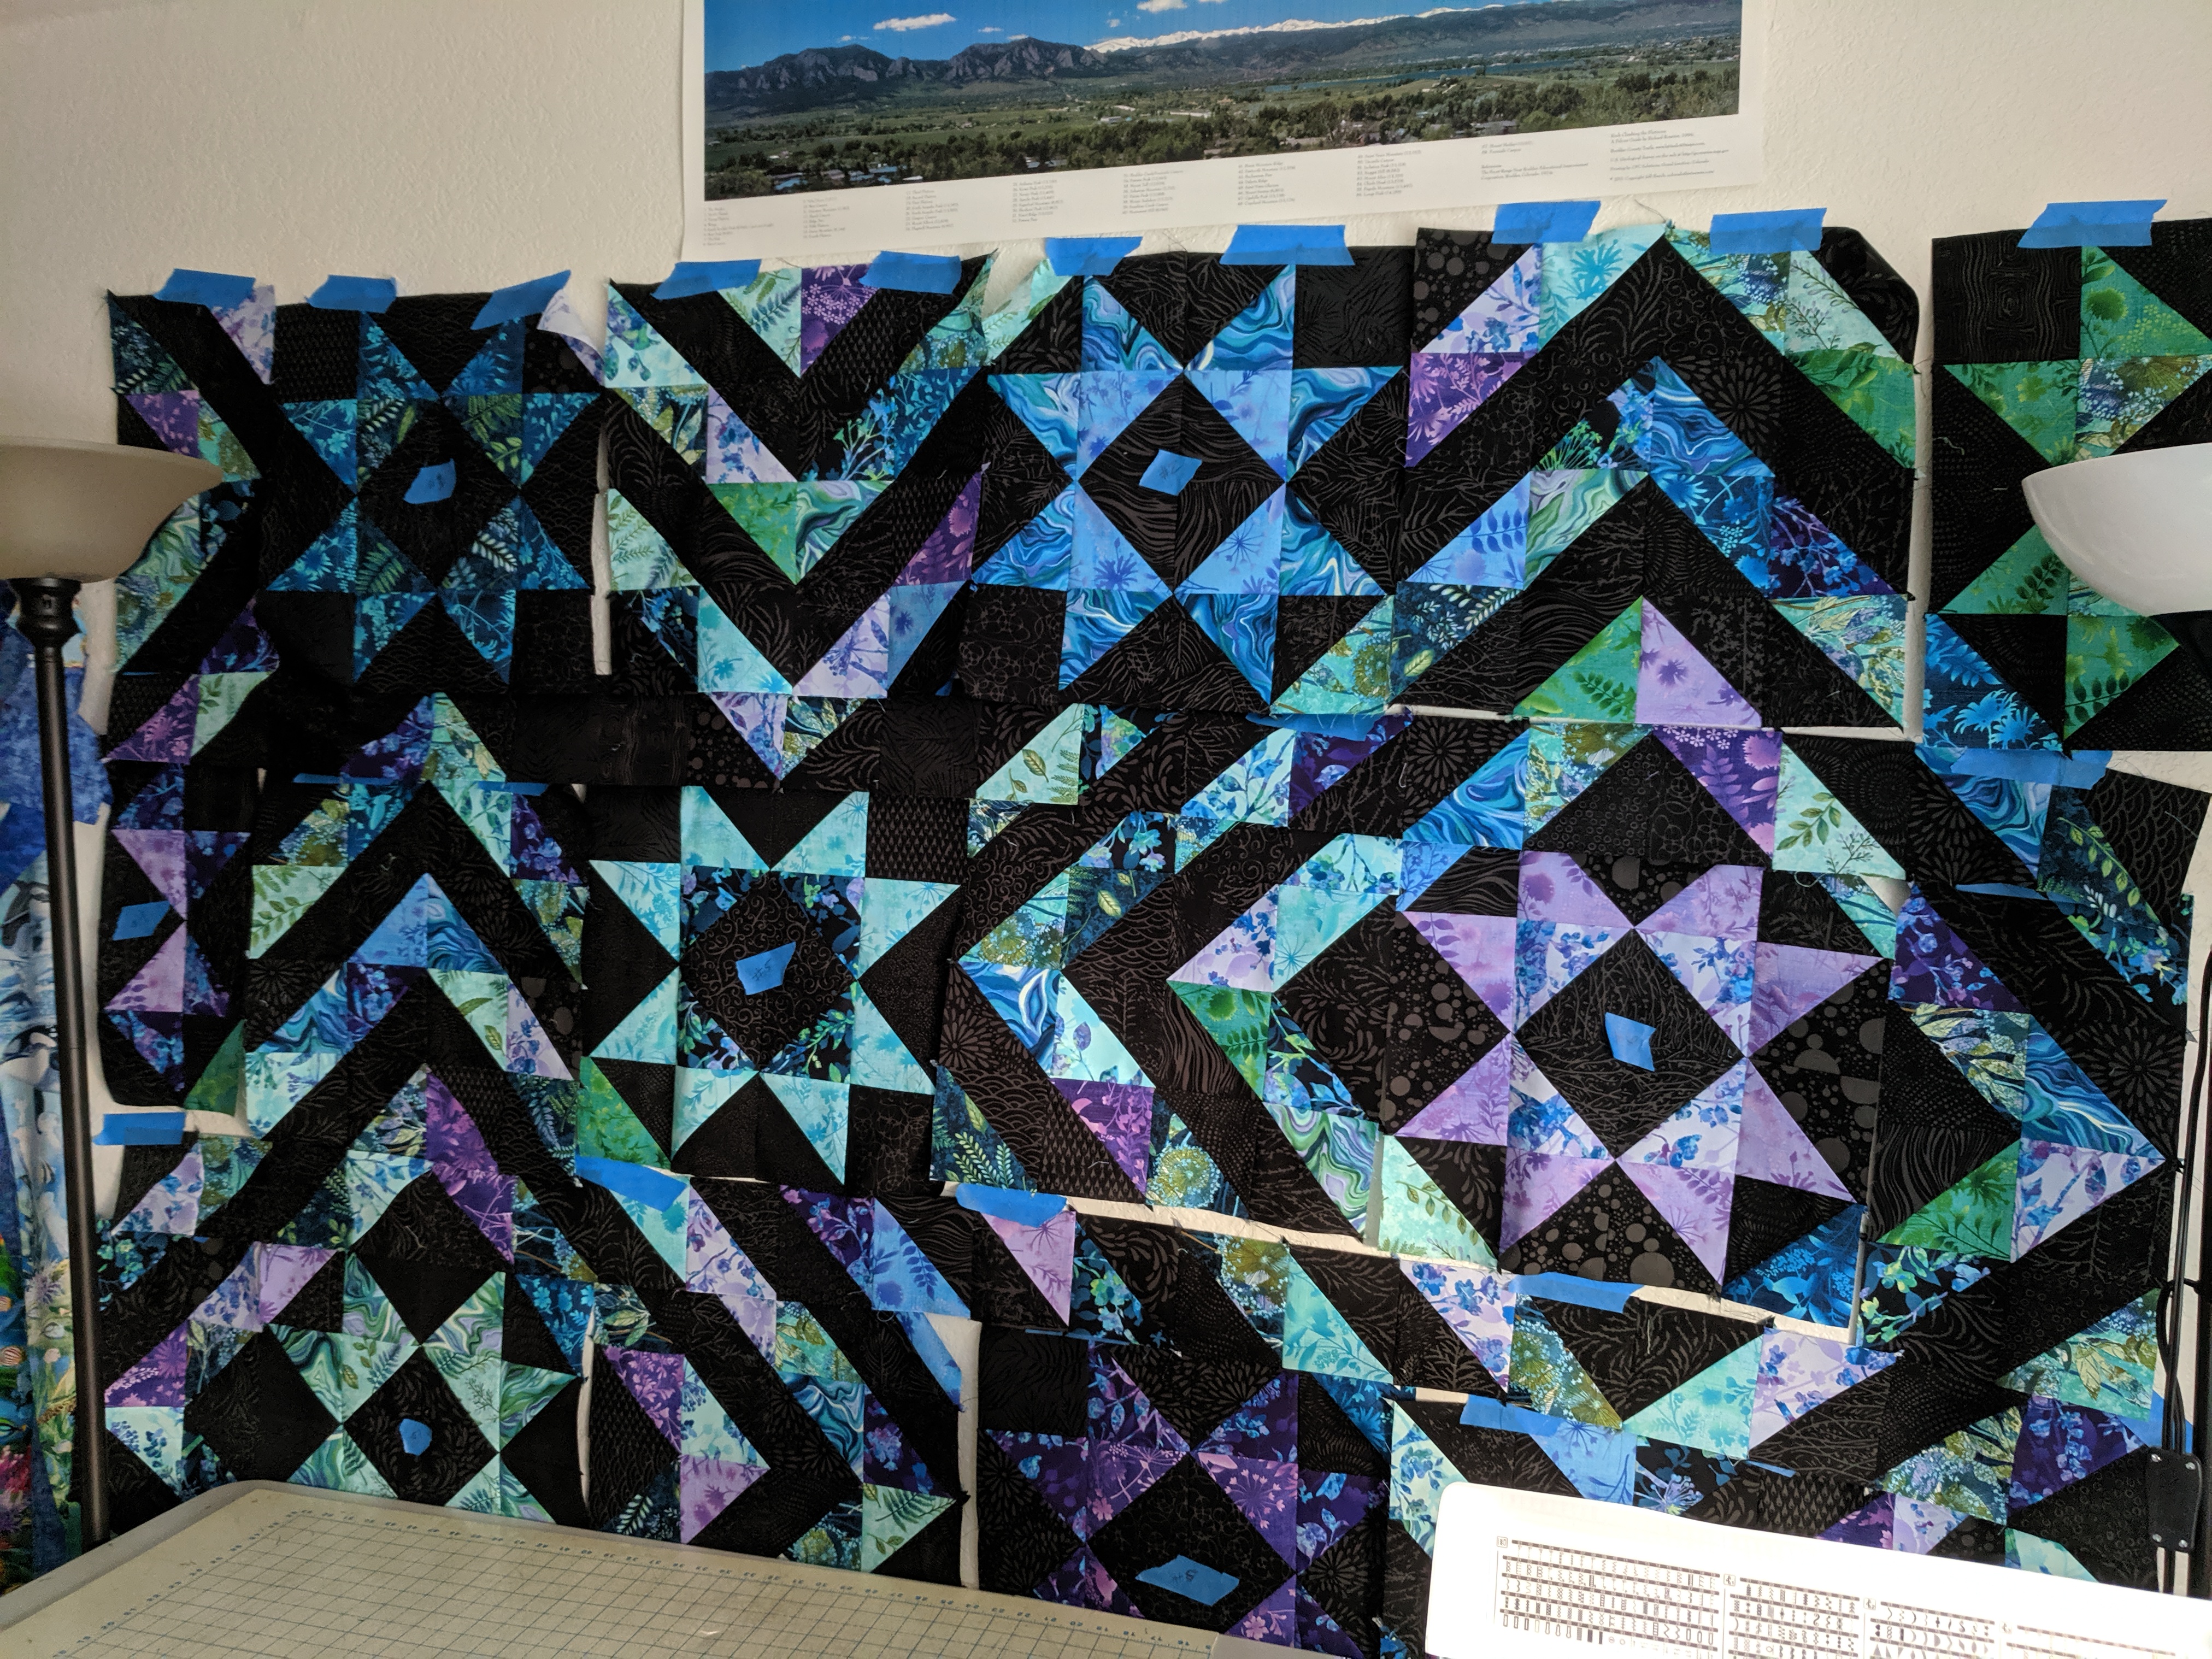
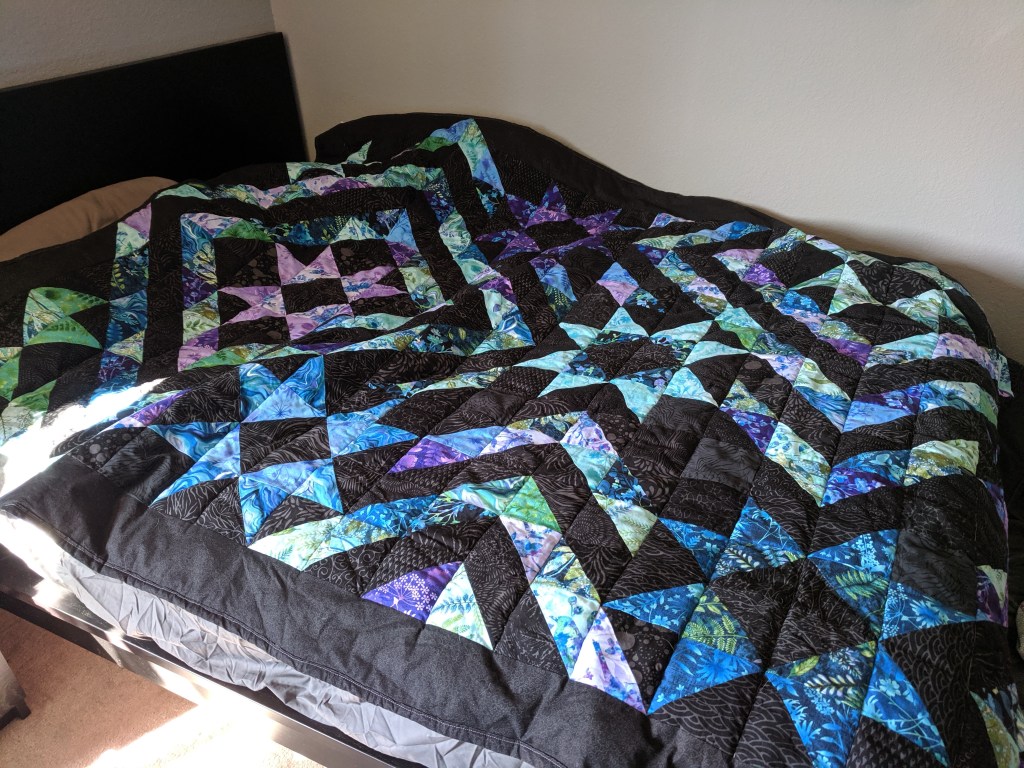
My third big quilt! With the puffy batting I mentioned in the rainbow bargello post. This quilt is based on the MSQC “Night Sky” pattern, but I changed the dimensions a bit to make it rectangular and added more borders.
Taped up and planned on the wall
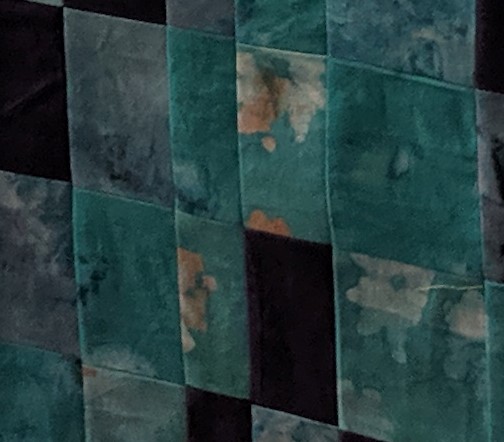
I bought two layer cakes (10″x10″ squares), one in Black Beauty Batik (hand printed high thread count cotton) and one in this whimsical Feather and Flora line from Studio E, and the backing is the Wildflower Toss Eggplant. I had bought the batiks for a different project that I didn’t end up doing, but I think they look great here. I love the black background to go with the stars 🙂 plus I was able to use the magic 8 method that grants you 8 HSTs from two 10″ squares and I didn’t have to cut as much fabric.
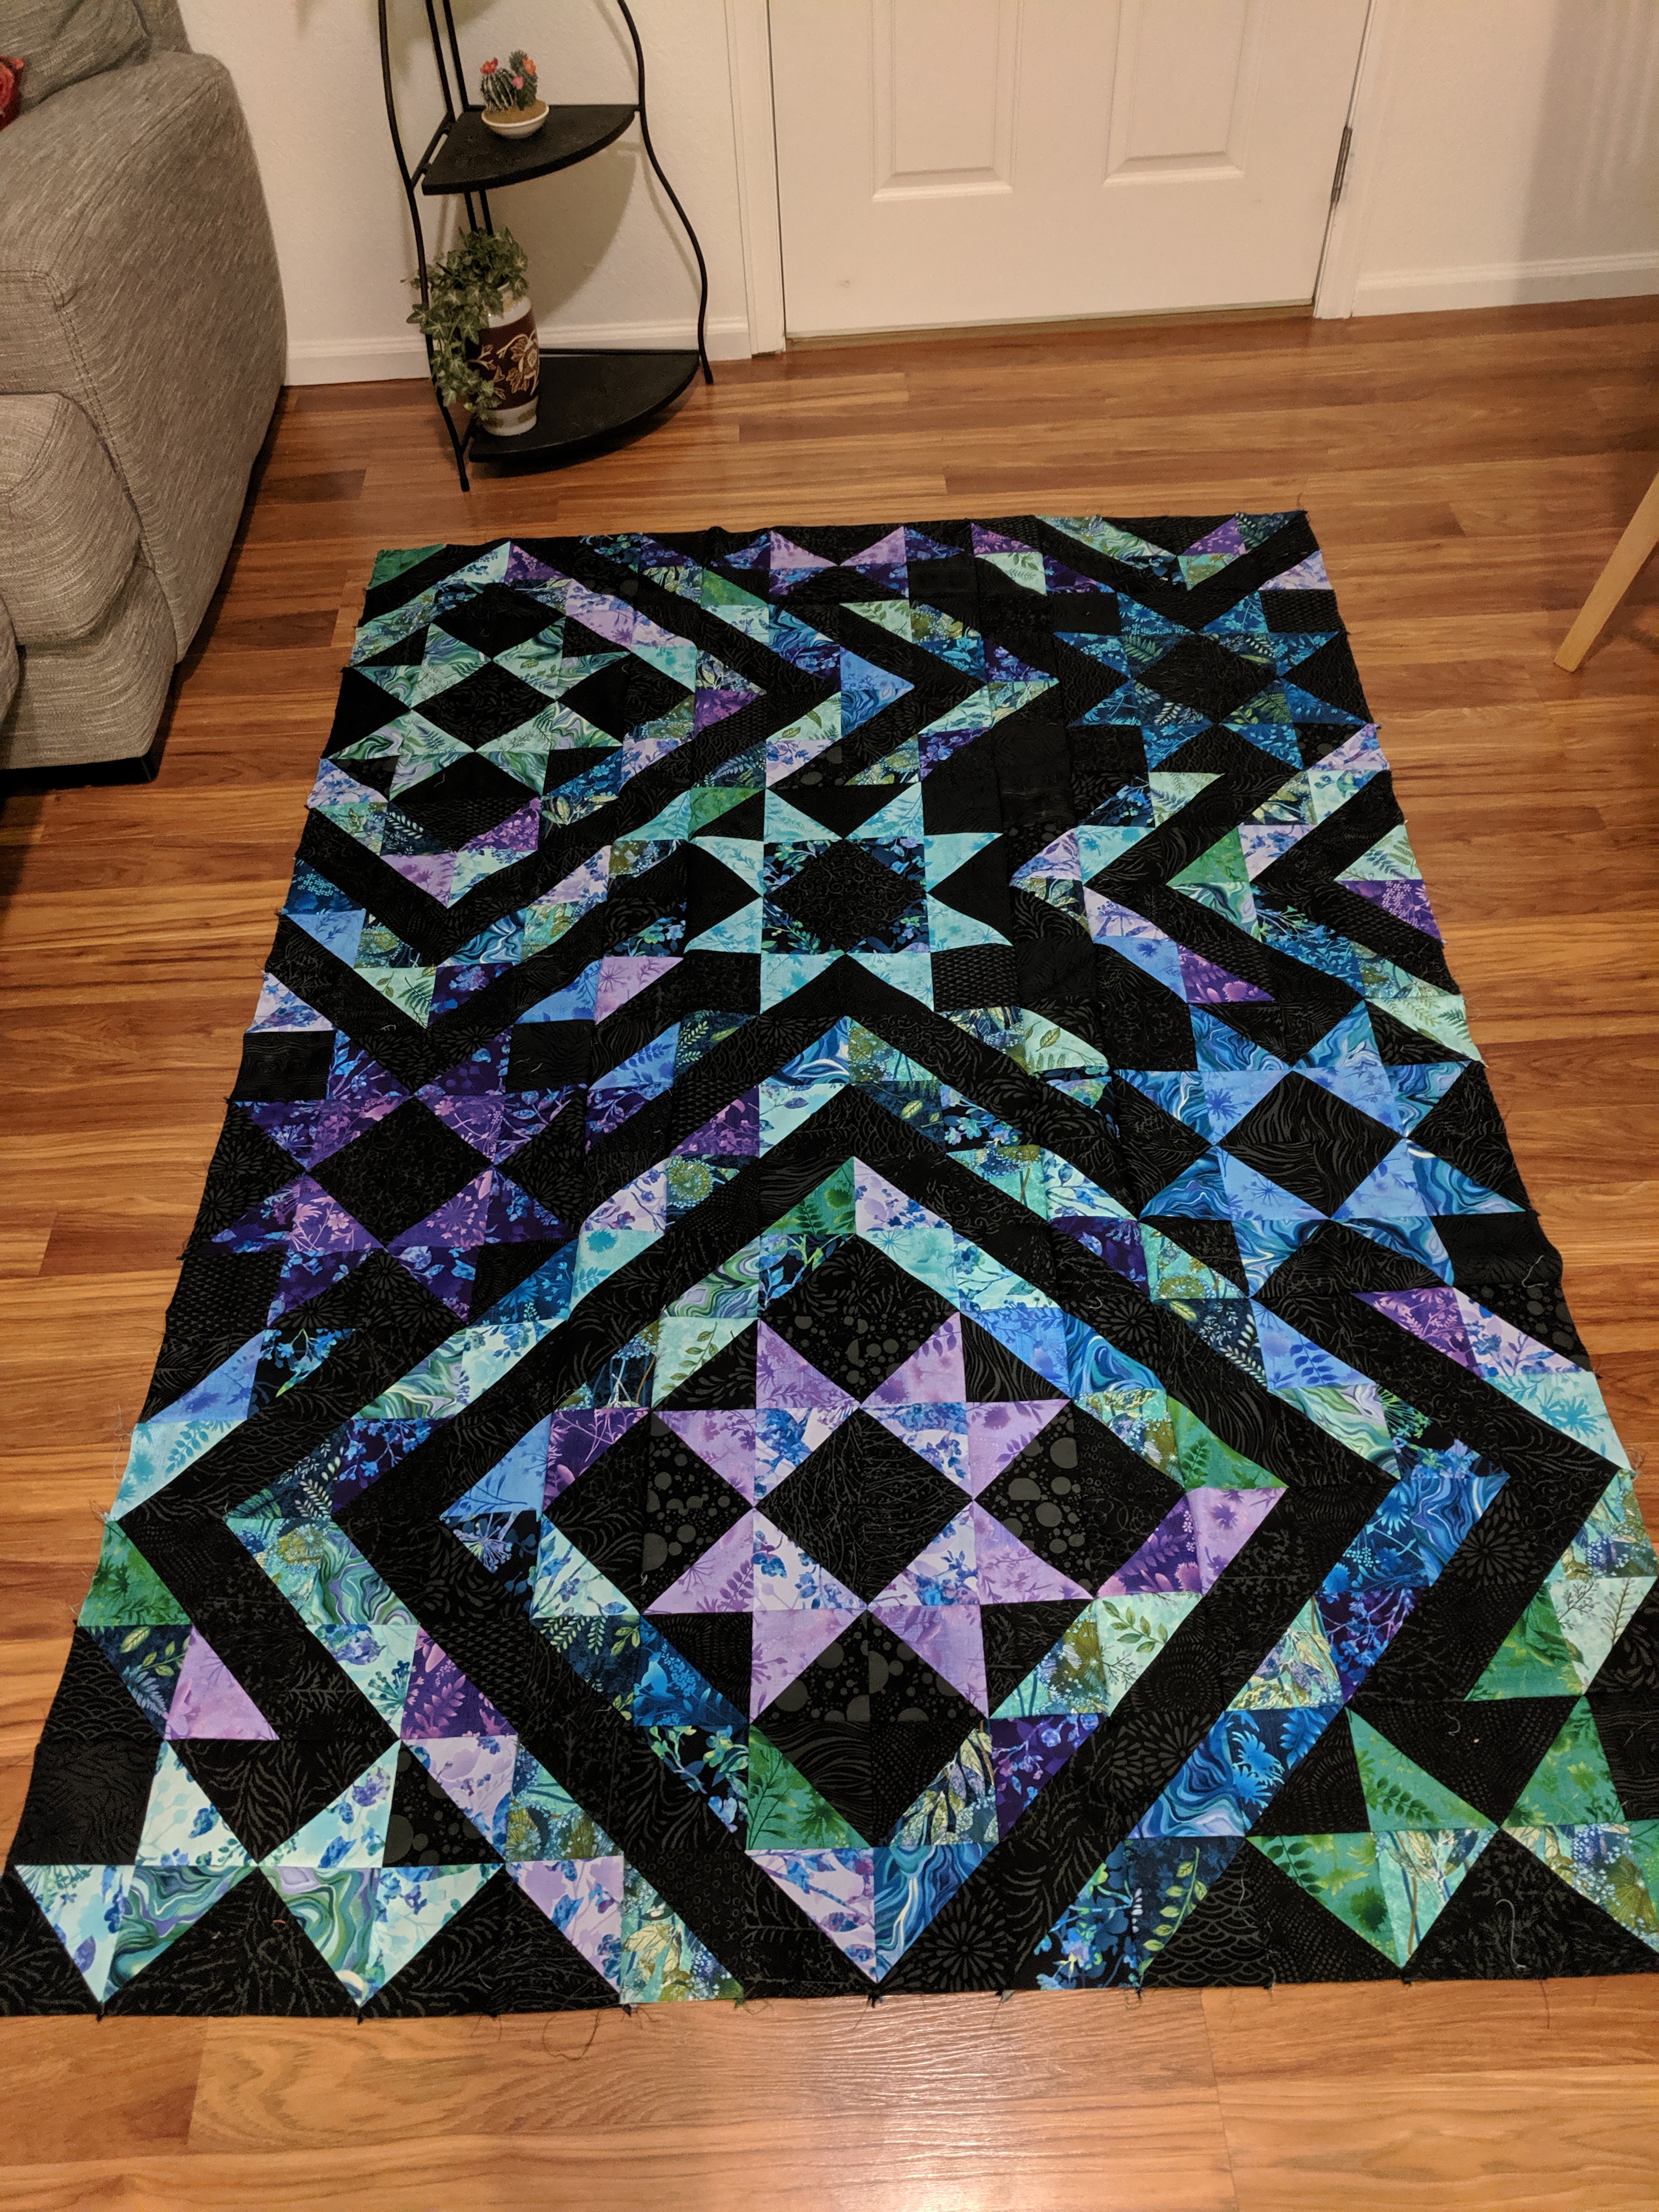
I made all the HSTs and squared them to 4.5″. I decided I wanted the insides of the star to be a different pattern than the outside points, like in the original pattern, and then the borders would be scrappy and random. I made a few stars and then figured out how many I would need to make the quilt big enough for my bed. It didn’t quite work, but I went with a general design that would be close enough and then I could add borders to increase the dimensions.
Top without borders – a bit more chaotic than I planned, but I really like it.
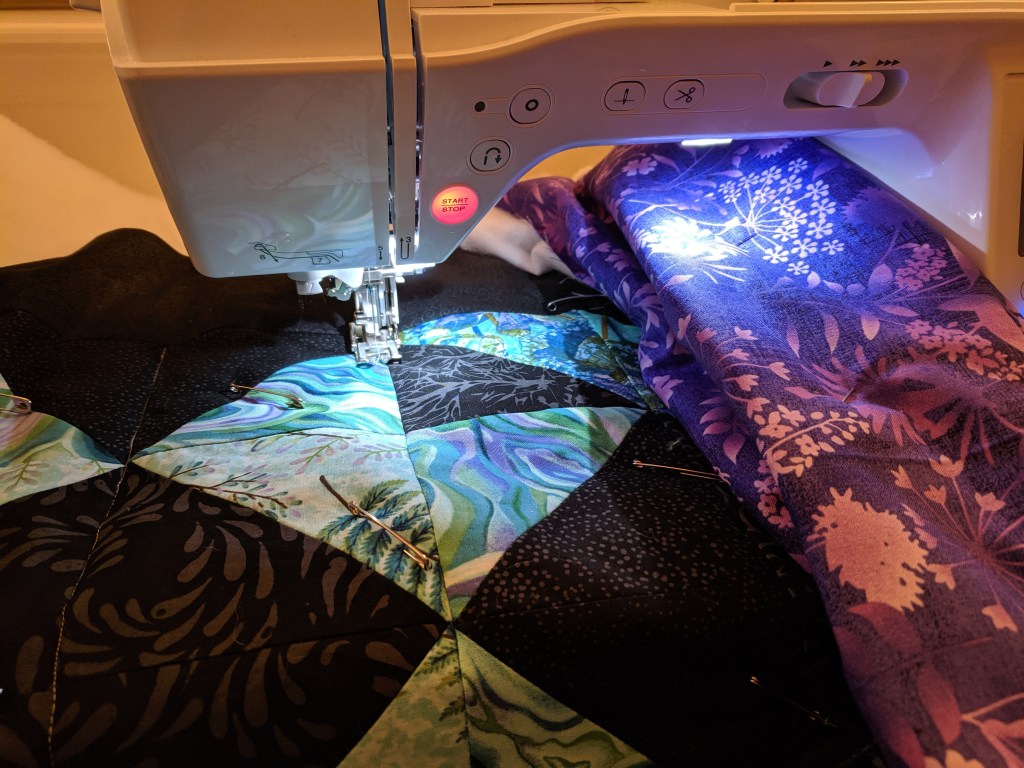
It kind of reminds me of ripples on a smooth pond, if you had dropped the stars in. I really wanted to take advantage of the new puffy batting I got, so I decided to quilt it in horizontal lines with my walking foot, which ended up being stitch in the ditch.
Working on SITD – on the right you see the folded up quilt that I will move to next
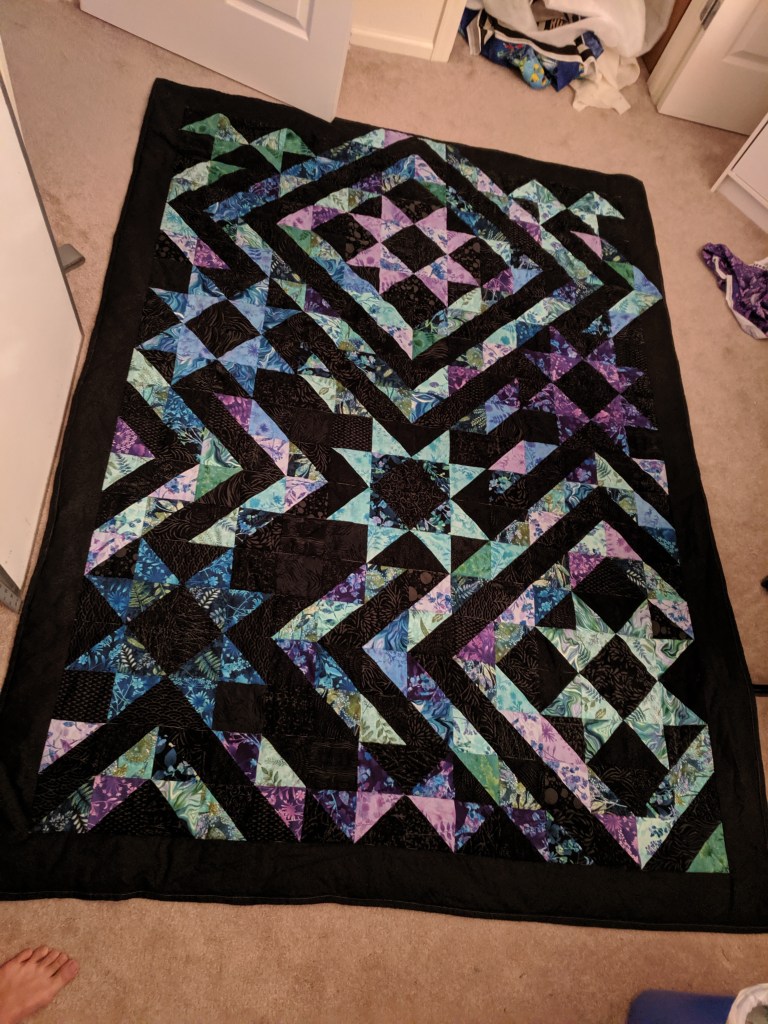
All done! I like it much better with the border
Time check: 5.5 hours to:
Cut fabric for binding (9) 2.5″ strips
Cut fabric for border (6) 4.5″ strips
Sew binding together to make one long strip
Press binding seams open
Iron binding in half hotdog style
Make HSTs for border and sew into border at correct measurements
Sew entire border on
Iron backing fabric
Cut backing fabric and sew middle seam
Iron backing seam and quilt top border seams
Baste quilt sandwich
Stitch in the ditch on all horizontal gridlines using walking foot
Sew binding to back
Sew binding to front
~5min, 16X: laying out quilt sandwich and starting to basteReal time: closing safety pins with Kwik Klip~1min, 4X: stitching in the ditch with walking foot. On the right, see the folded up quilt in the throat.~2min, 8X: putting binding on and turning corner (sealing sandwich together)On the bed 🙂 the rainbow bargello is on the couch now
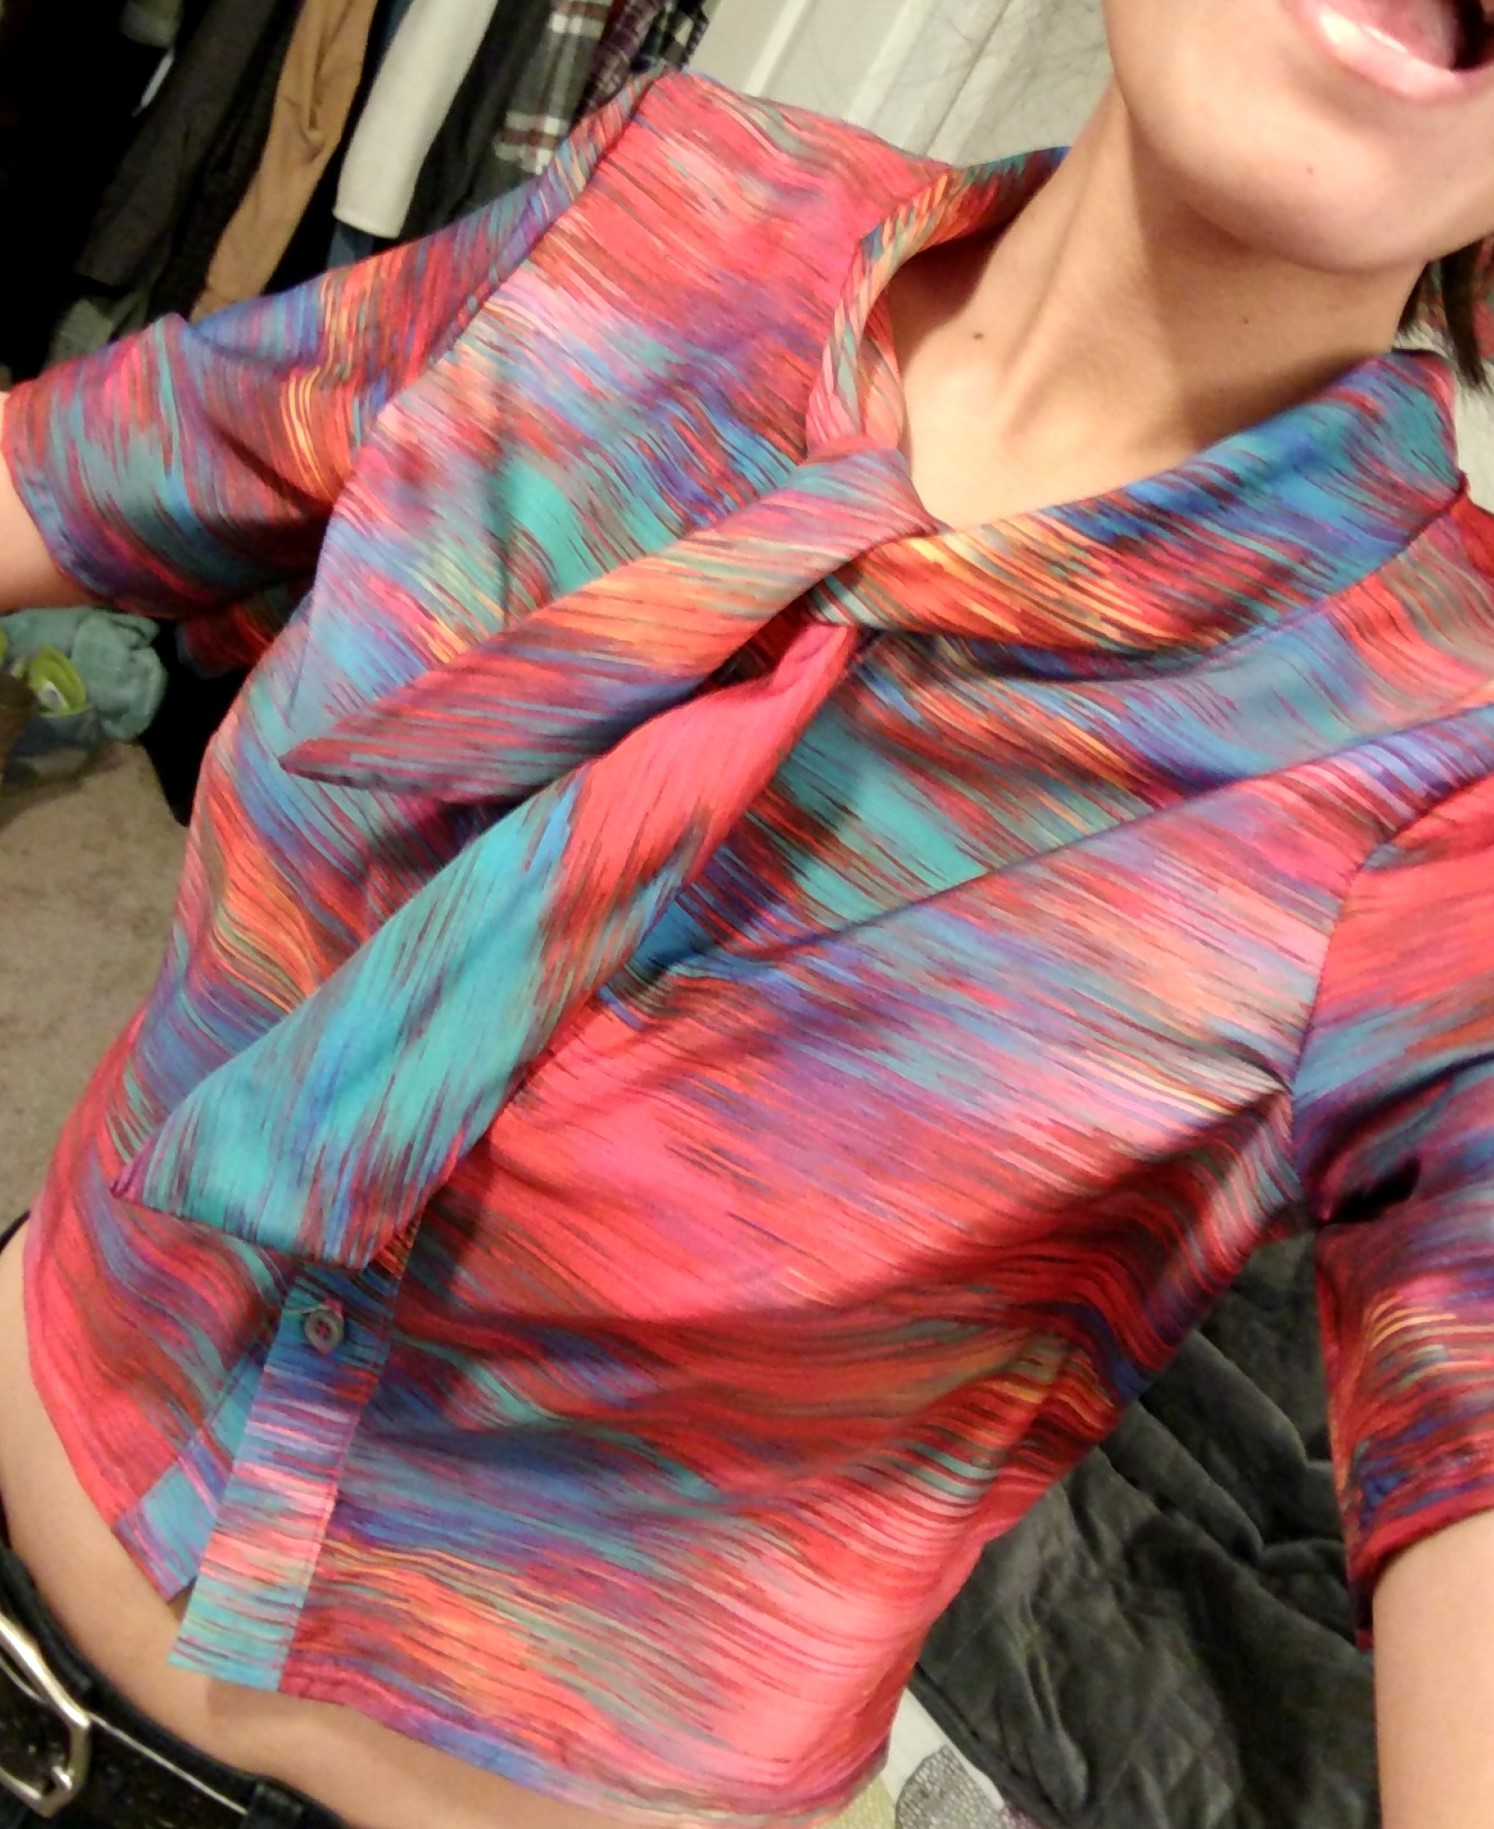
This shirt is based on the bodice of the Lekala S4108 pattern. This was my first shirt, and since I almost exclusively wear button downs, I figured I should just start with a button down. This only used 1 yard of fabric (from Joann), which was really cool. It’s kind of a firm satin? Not as slippery as the purple geode, still a bit flowy.
This, of course, was my first foray into collar making. I cut out the collar according to the pattern, but it ended up being so short that it didn’t wrap all the way around the neck opening. I didn’t have enough fabric to make a new, bigger collar, so I decided to go for a tied collar strip thing (I have another shirt like this so I figured it would work). The improv collar worked great and is the basis for the name since they used to wear those little scarves.
It was also my first time doing sleeves! It’s a bit tricky to sew a sphere-ish thing to a.. 2D/circle thing, but I used a lot of pins. I also skipped some directions which, after consultation with a friend, I should have followed. You’re supposed to “stay stitch” around the sleeve curve so it doesn’t get all out of whack and stretched when you’re sewing, which did happen a bit. But the extra bit of shoulder puff isn’t unwelcome and is pretty subtle.
It was not my first foray into buttonholes, but it was the first time I had to measure and space out my buttonholes. I put the shirt on and marked out where it felt natural for buttons to go, and saw a separation of about 2″ is a good distance. The bottom was just a bit over 2″ after the last button but I decided to not install a button so close to the hem.
I wore this on a date and it absolutely passed my wearability test, but that doesn’t mean I didn’t introduce the piece to my roommate as “am I a flight attendant now?”