
The yarns for this project were inspired by Sky Loom, a Native North American poem set to music by Jean Ford Belmont.
Oh our Mother the Earth, weave for us.
Oh our Father the Sky,
Weave for us a garment of brightness;
May the warp be the white light of morning,
May the weft be the red light of evening,
May the fringes be the falling rain,
May the border be the standing rainbow.
Weave for us, our Mother the Earth,
That we may walk fittingly where birds sing.
Weave, oh our Father the Sky,
That we may walk fittingly where grass is green.
Oh our Mother the Earth, Oh our Father the Sky,
Your children are we, and with tired backs
We bring you gifts,
We bring you the gifts that you love.
As a new weaver and less-than-fully-confident spinner, I bought commercial mercerized cotton warp for the white light of morning; it is strong and beautifully shiny. All the other yarns in this piece are handspun. 🙂 I used pre-blended and dyed wool and silk for the red light of evening, mixing light and dark gray with the dyed wool to introduce clouds and variation.
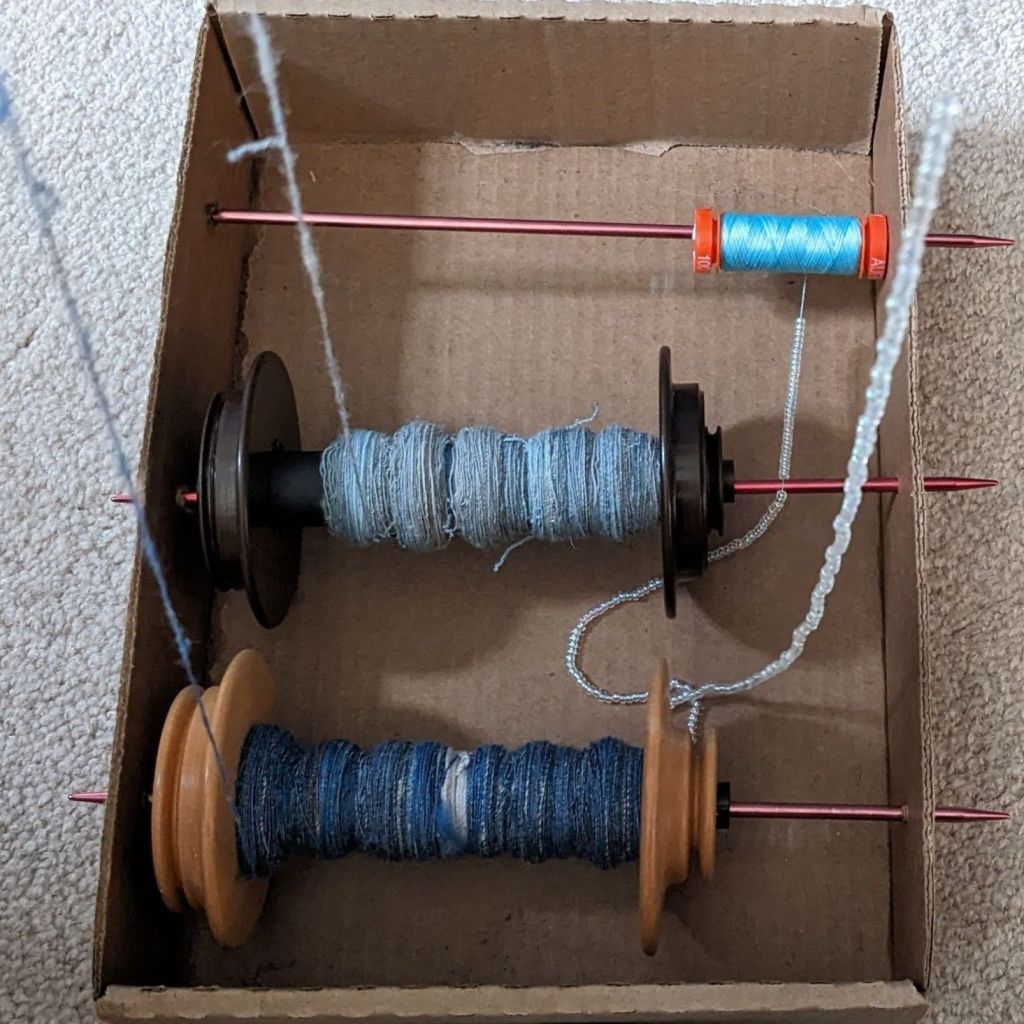
I had some extra gray silk and some random scraps of blue fiber, so I blended those together and spun a light blue and a dark blue ply on my drop spindle. I added a blue thread with shiny clear beads, and plied all three together for the falling rain.
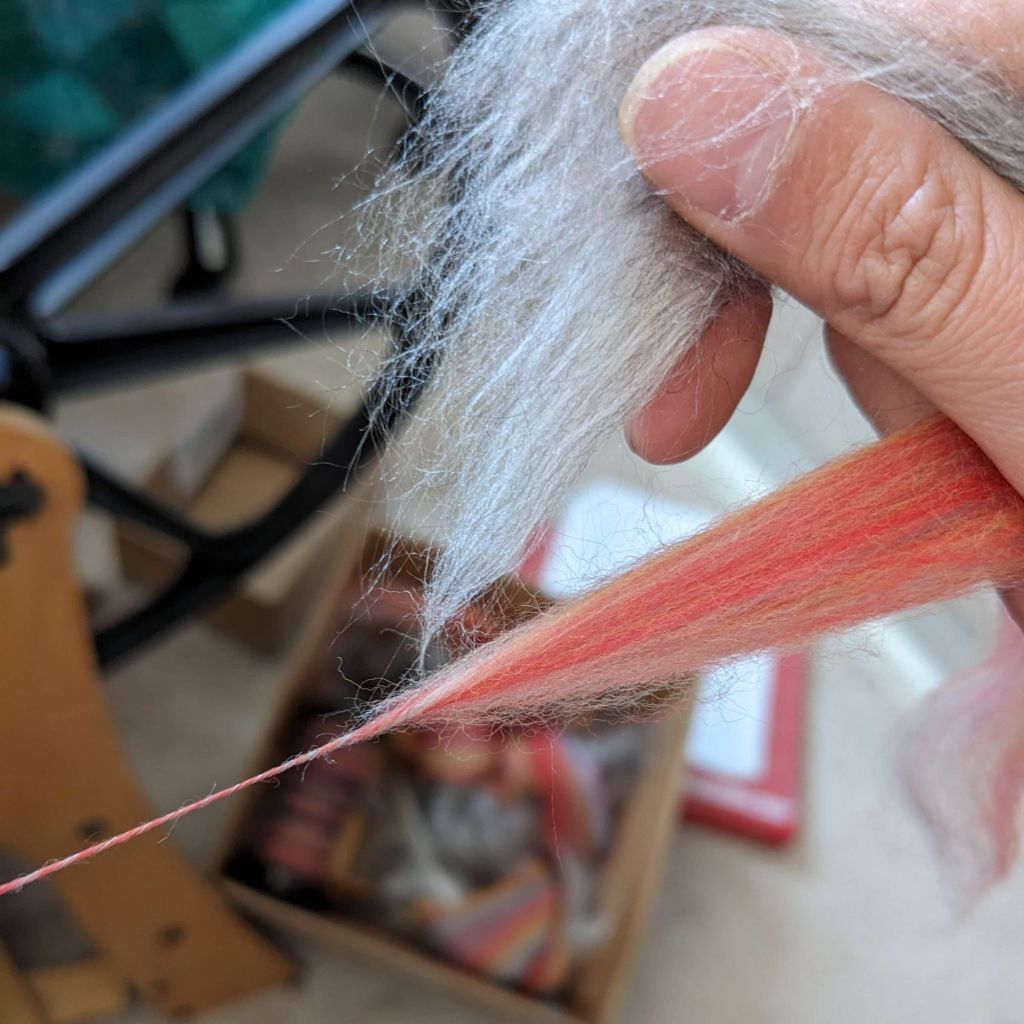
I usually buy fiber online, but I really needed to match the standing rainbow to these other color blends, and I knew that had to happen in person. I went to a local fiber fair and found what I needed at the first booth I went to. 🙂 dark enough to stand out against the red light of evening, bright enough to really be a rainbow. I specifically spun the standing rainbow to be thicker than the red light of evening, so that it would be puffier and stand out as a pattern yarn. I also chatted with some other spinners, who helped me figure out a more ergonomic way to spin at my wheel, which has really improved my experience.
I wanted the pattern border of the standing rainbow to somehow depict the notes in The Road Home. I’ve performed this song multiple times now, and each time it’s a bit different, I have a different conception of home and what it means to me. I know more and more the “beauty of where you belong” and where I find it. I went back and forth a lot about *how* to execute the pattern. I thought about using my 8 shaft loom as a way of depicting the 8 note scale, a 24 to 30 pattern thread section like a patterned band, something with chord progressions… I wanted to have an item that could function like a piece of sheet music, that depicted the way the notes are arrayed on the page, and then in the voice, in pitch and time. Since the border was going to be a fun pattern, I decided on plain weave (over under, under over) for the red light of evening weft to make it easier to weave, visually consistent, and structurally sound.
I struggled with the format for this project for a while, debating what I wanted and how it would need to be executed while I spun all my yarn. Sky Loom is about a garment, but I didn’t want to make a garment in these colors, and I knew it would end up being delicate and/or non-machine washable due to the uneven fiber shrinkage (wool vs cotton) and possible pattern floats (where yarn is free and not woven in). I talked it over with a friend and they suggested a table runner! This was the perfect solution and I was immediately invigorated.
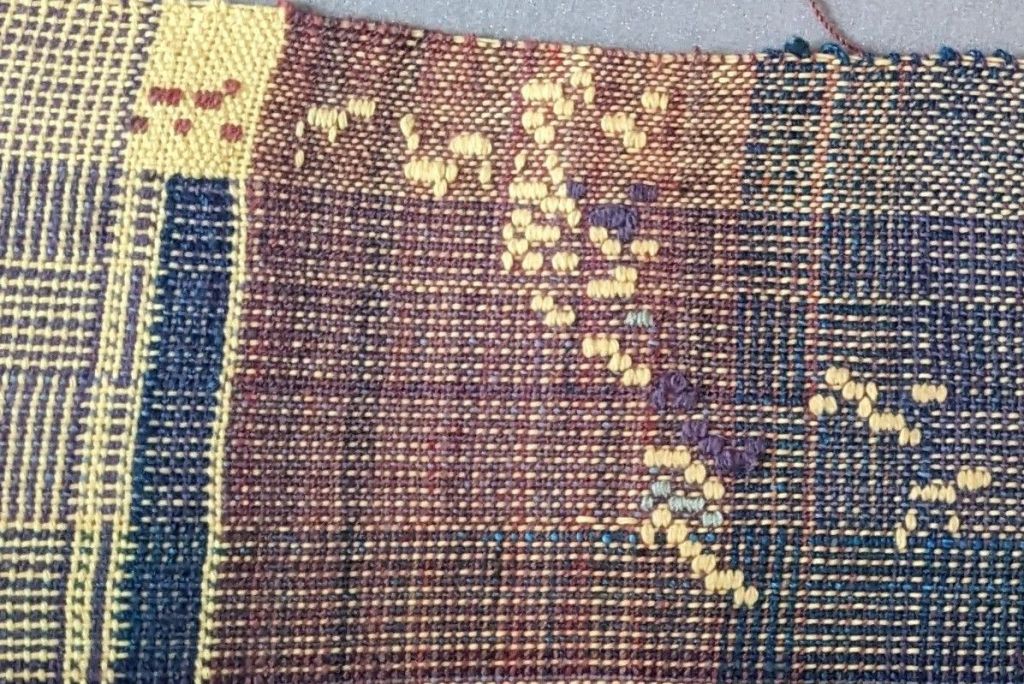
By choosing a table runner, I could have long floats if necessary, since the piece wouldn’t be undergoing much wear and tear. It also defined the dimensions and proportional border width. I decided to be responsible and weave a sample to test out some different techniques and arrangements for the pattern. I quickly realized that weaving a pattern with all the voice parts on the same row was visually overwhelming. I think it might have been easier on the eyes if I had kept going and the ratio of the width to length was different… But I switched to doing one part at a time. Also, most of the parts have at least some undulation up and down their range, so it actually looks more like a standing rainbow, or wiggling rainbow, as it were. The bass part, the lowest voice part in the choir, has the most clear up/down pattern, so I alternated it with the other voice parts that are less visually clear to have more continuity. I used a weft inlay that wraps around two warp threads; the position of the inlay represents the pitch, and each row is an eighth note in the piece. So, looking from the side of the table runner, with a starting pitch, one could use the border as a depiction of what to sing.
From weaving the sample, I knew I needed a special “paper pattern holder” to help me keep track of what line I was weaving – the third verse was 122 rows of non-repeating pattern. I used some scrap binder dividers that were translucent and cut and folded them so that I could see 2 rows at a time through a little window. The translucent quality let me verify what I’d just woven if I needed.

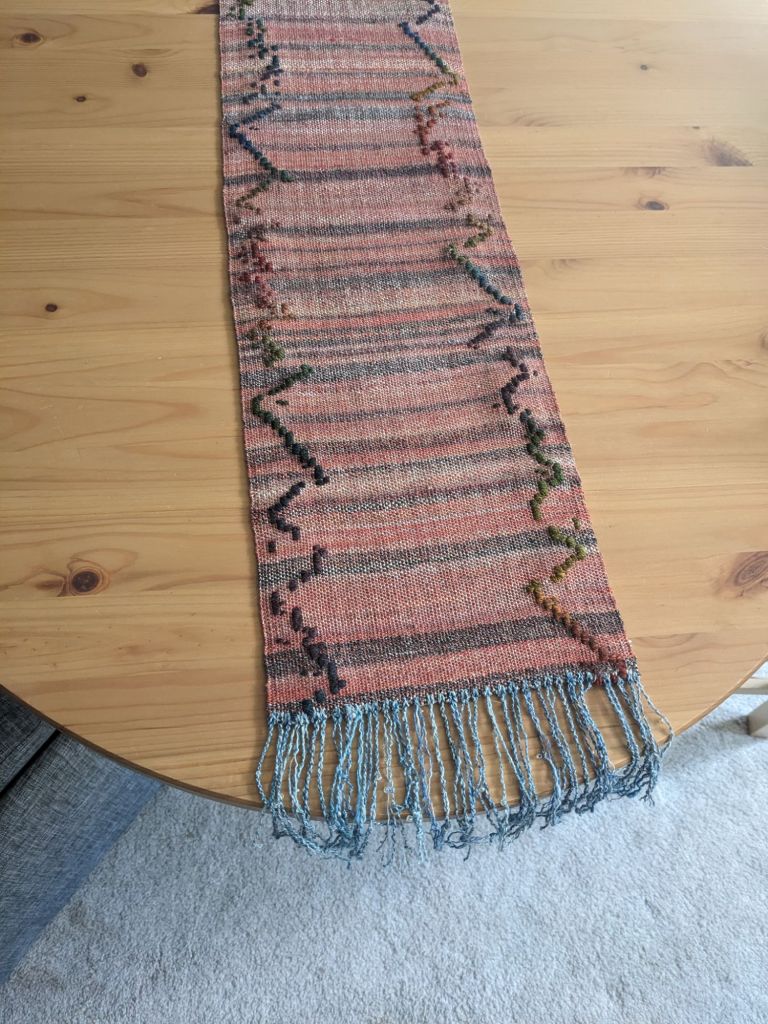
I was able to weave it much faster than I thought! Each verse, the 122 rows, took a little less than an hour – here’s a 1.5 minute video weaving a few rows. I used up all the weft I spun, though I did have to cut the finished piece down to size so I suppose I had extra weft. As always, weaving in all the ends from the rainbow and the cut ends of the warp was super annoying, but necessary. The finishing touch was the falling rain fringe, which I attached using cow hitch knots. I twisted some of them into tassels, left some loose as individual strands, and un-plied some so the fiber would expand and fluff out 🙂
Project completed June 2025.
