One Block Wonders were defined by Maxine Rosenthal in her book, which details every step of assembly and tips and advice on choosing fabric and deciding on layouts. Below are a few other resources I used along the way:
- YouTube playlist from Jackie O’Brien shows all the steps in real time, which was very helpful – especially aligning the fabric.
- One Block Wonder “Design Helper” shows possible combinations of hexagons based on a picture you upload. I encourage you to grab a picture with a pattern (or not!) and try it out – it’s quite fun.
- My pinterest board of inspiration and a guild gallery, there are so many cool OBW’s that people have made. I absolutely plan to do another one.
OBWs are constructed using 6 identical pieces of fabric. This can be done using a fabric that repeats the same pattern over and over (usually every 24″) or with a panel (a single image that spans the width of the fabric). Rosenthal suggests using fabric with 2-3 colors, with big and bold design elements with more curves than straight lines. I used the Reef panel by Michael Searle for Timeless Treasures.
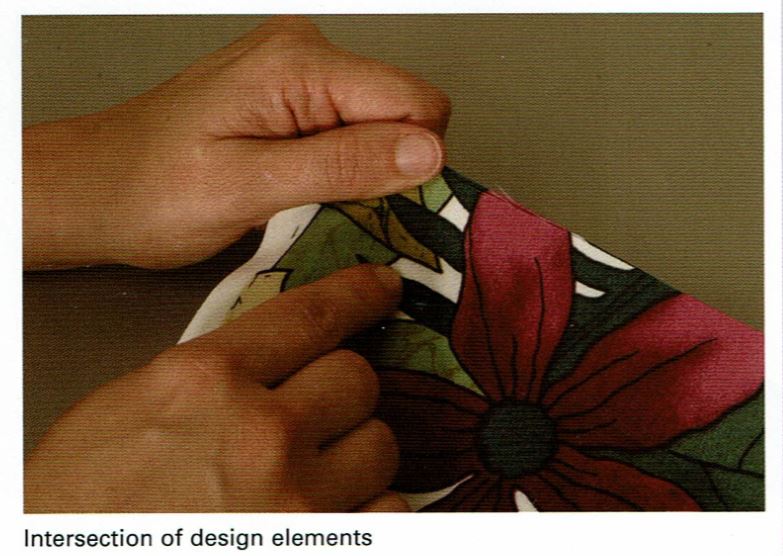
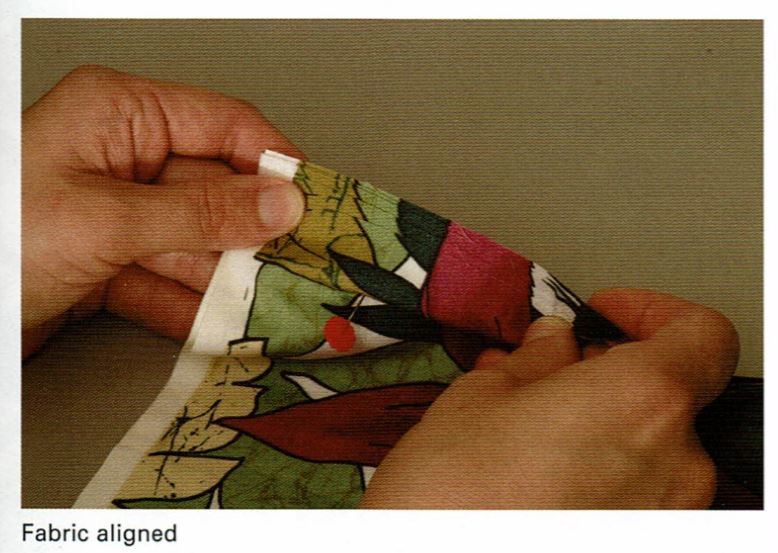
So you cut your 6 identical pieces, and they’re about 44″x24″. Then you stack them up and use pins to pierce the same design element through all 6 layers – so you know that they are aligned vertically (see below for pictures from the book). Rosenthal suggests you do this at 6 different points – each corner and then in the middle on the long sides. Then you shake your fabric by the pins so that the fabric between the pins is also aligned (watch Jackie’s video on this).
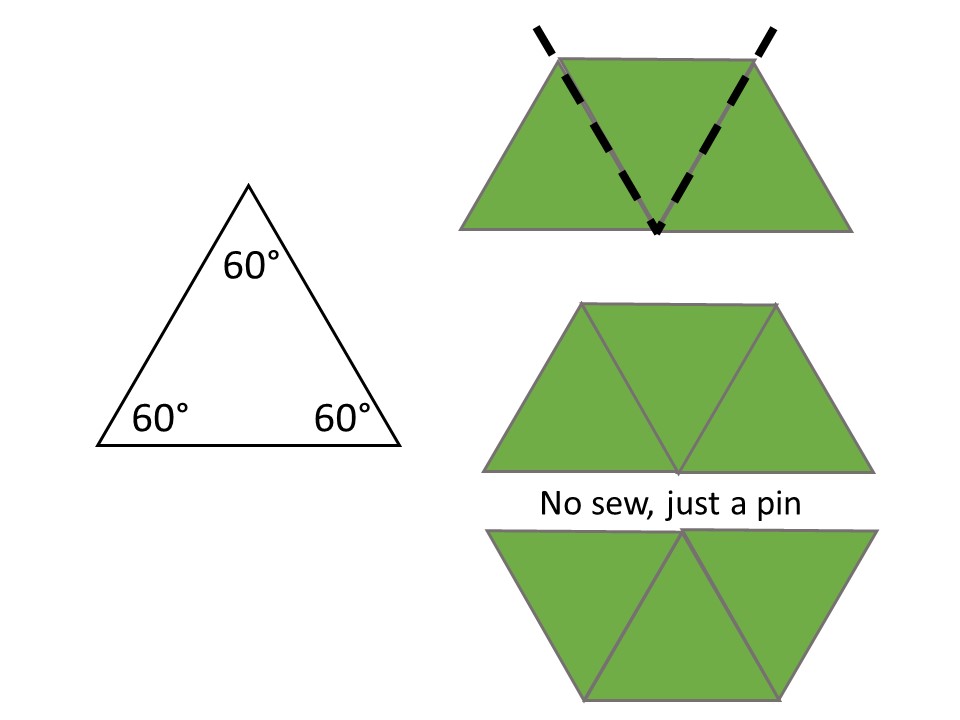
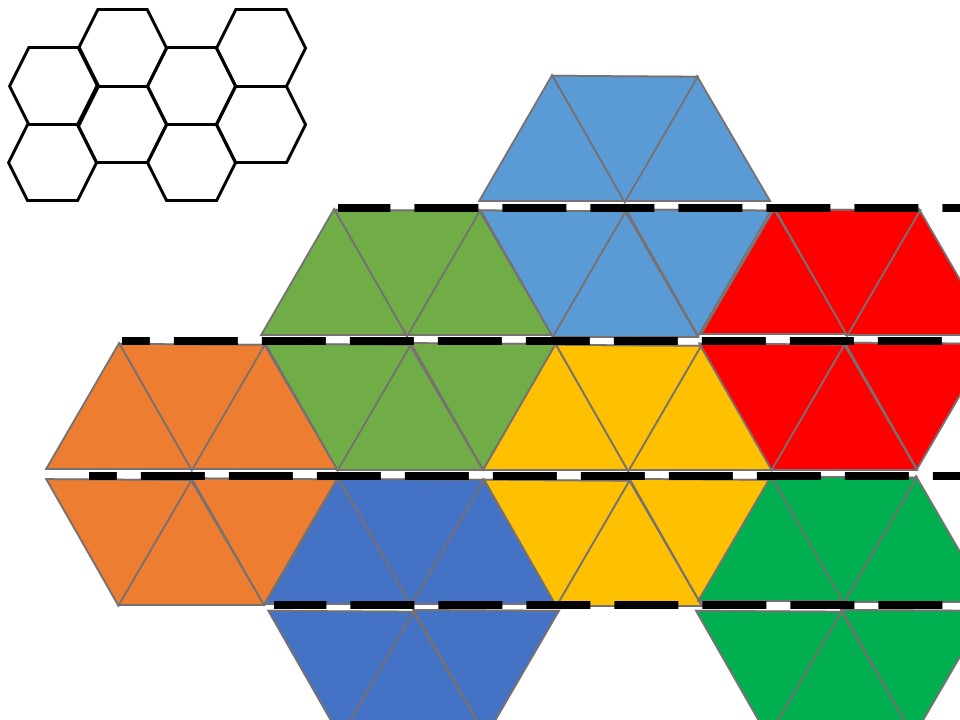
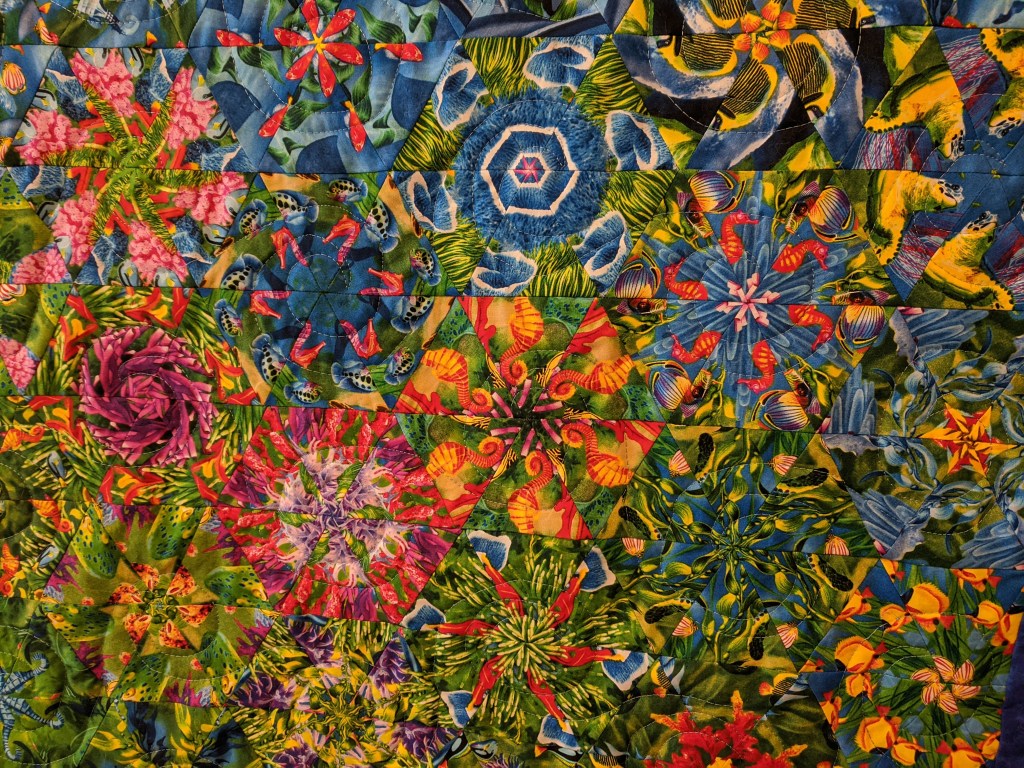
The kaleidoscope effect is created with 6 equilateral triangles arranged in a hexagon shape. Next, you cut your aligned fabric stack into strips, and then into triangles (using a ruler with a 60 ° line). Each triangle is exactly (or… close enough) identical since you aligned your fabric and cut it all at the same time.
Now here’s the genius part, and what makes the OBW so easy to assemble – all straight seams. Each hexagon takes 6 triangles, but you only sew 3 together at first so you have two halves of a hexagon. During the layout stage, you pin these together so they look like a hexagon, which makes it easier to move them around. So – you only sewed straight seams to put 3 equilateral triangles together.
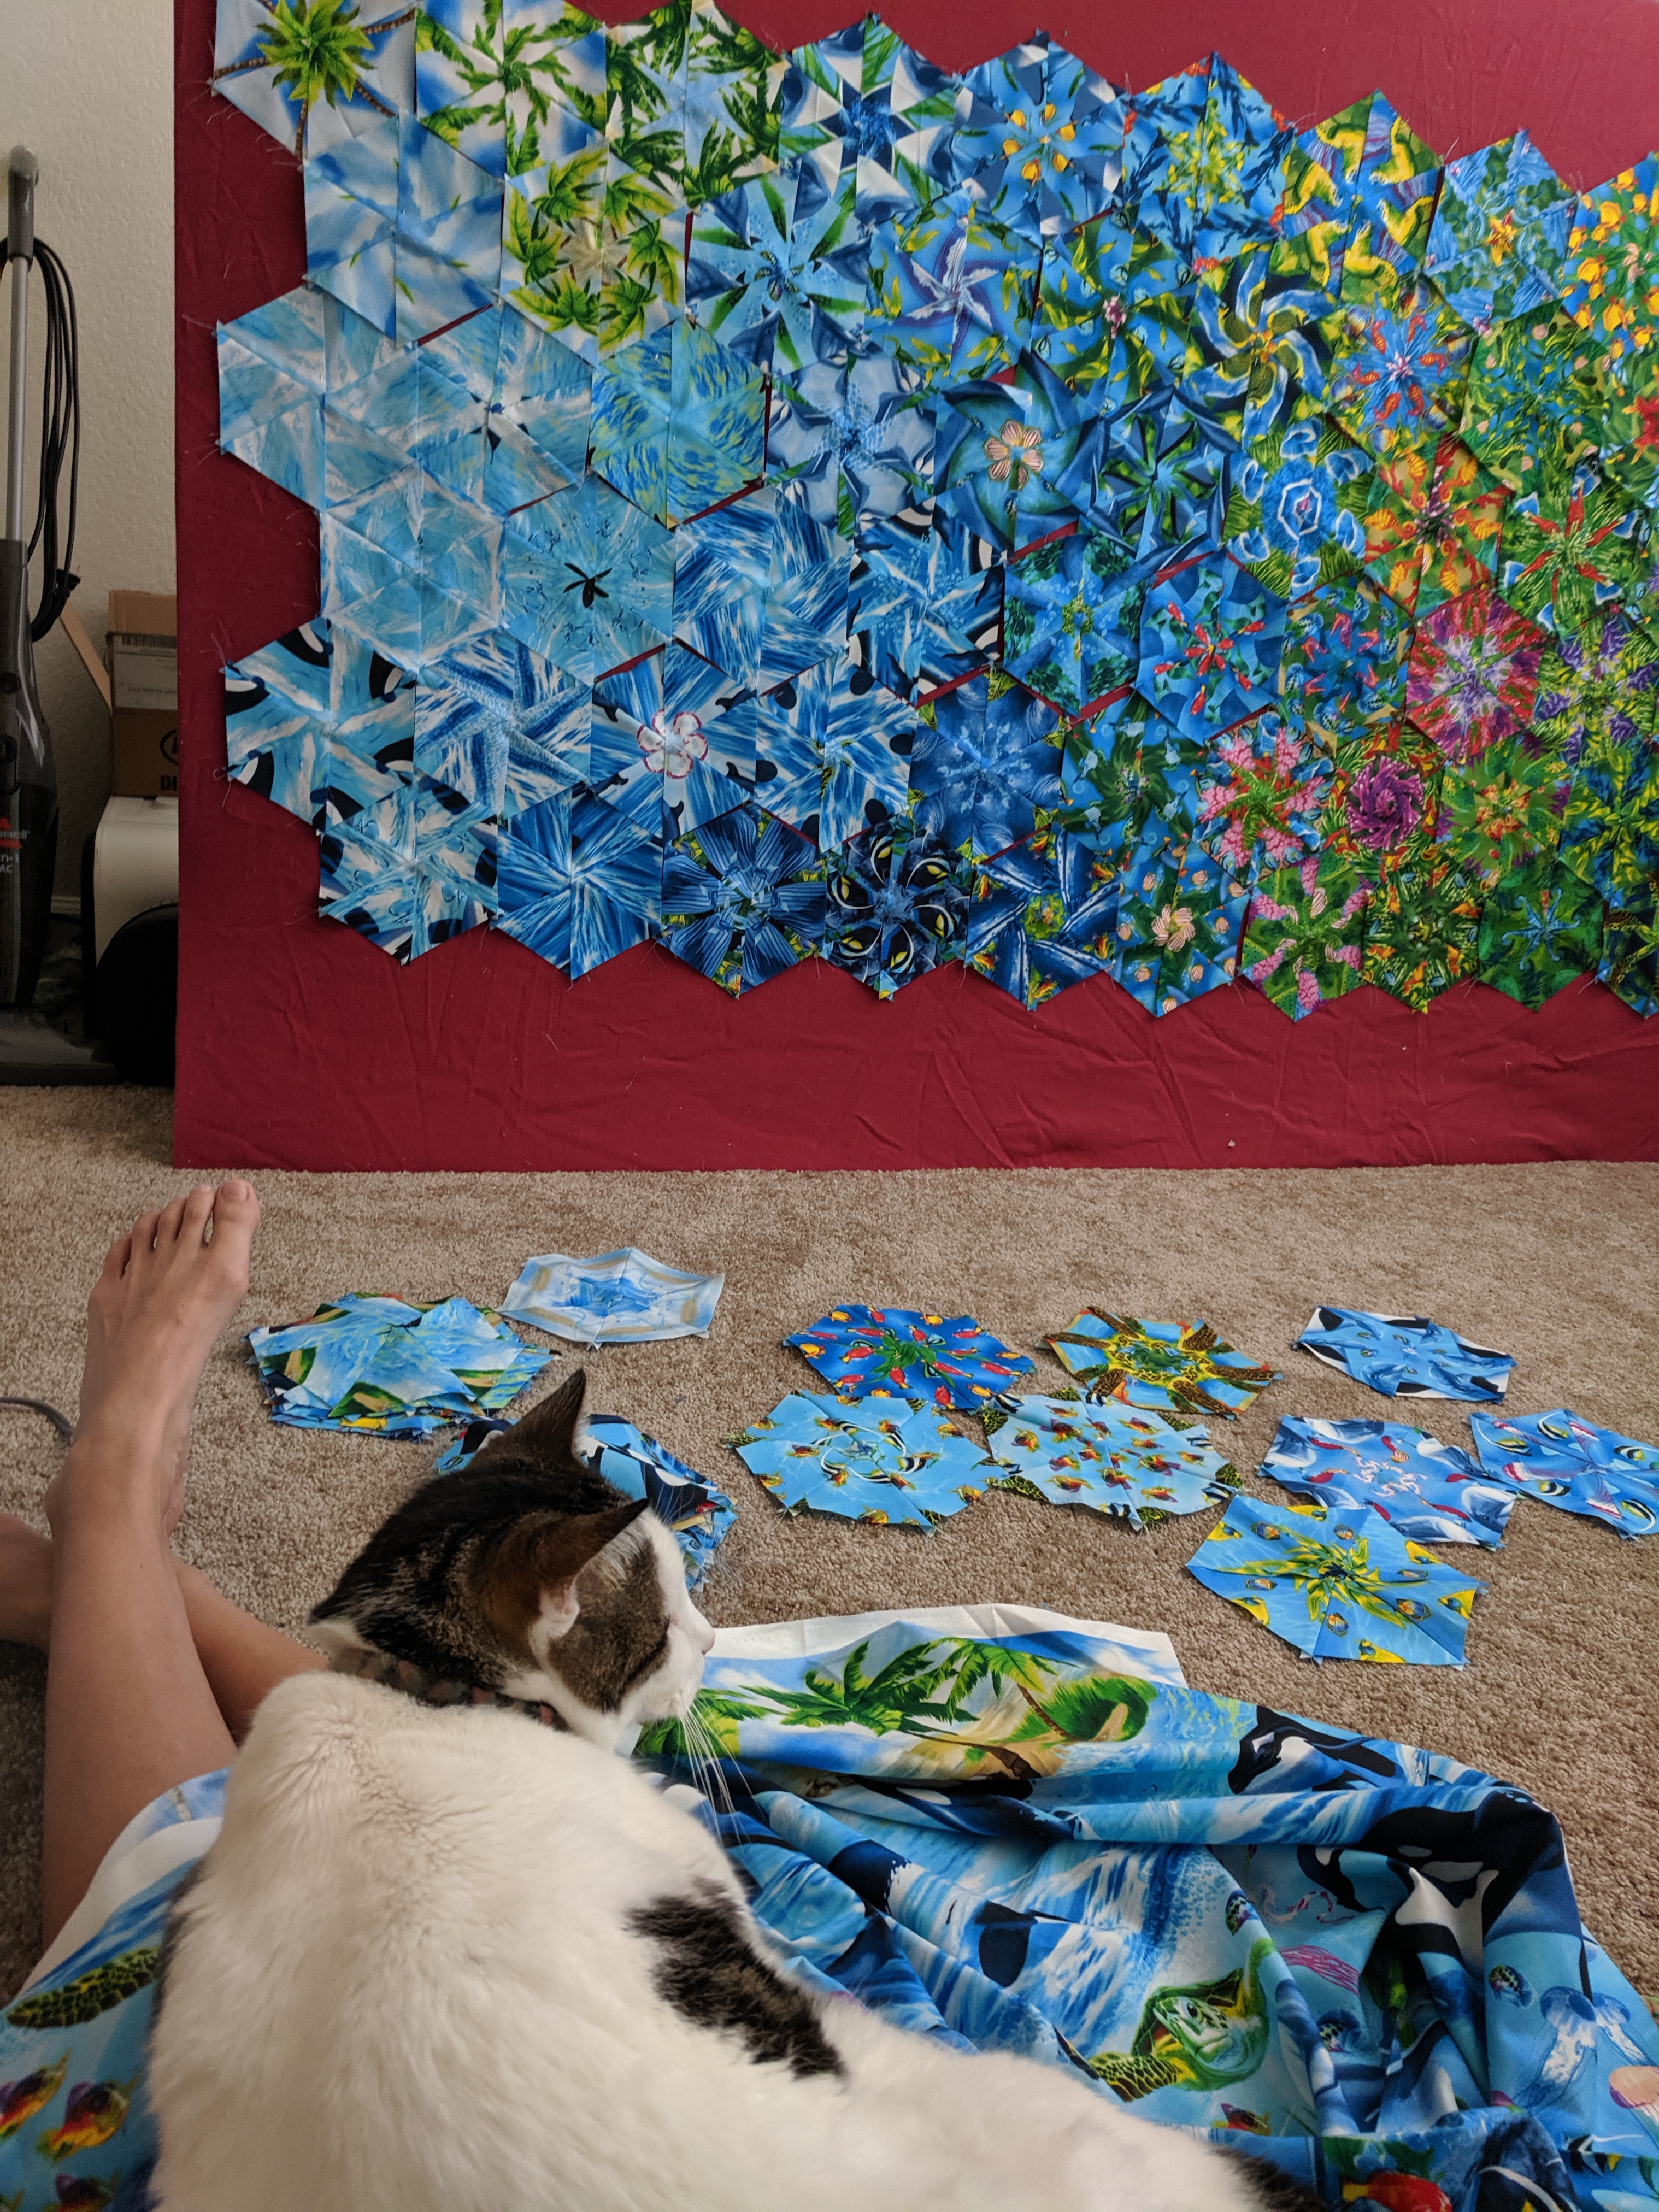
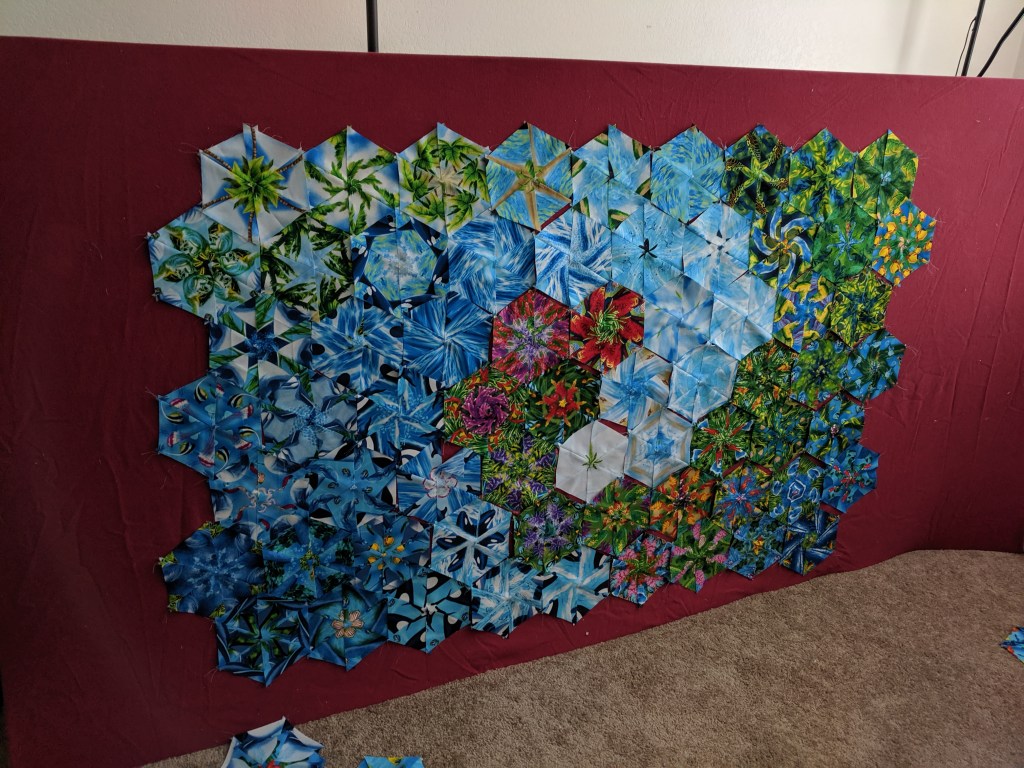
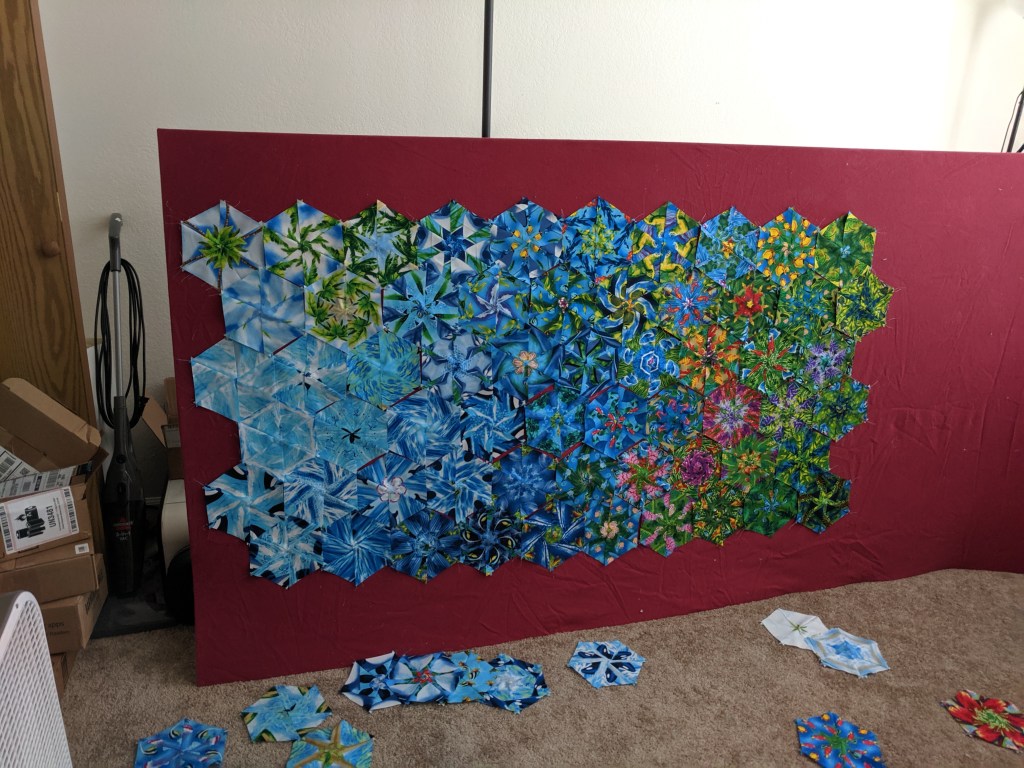
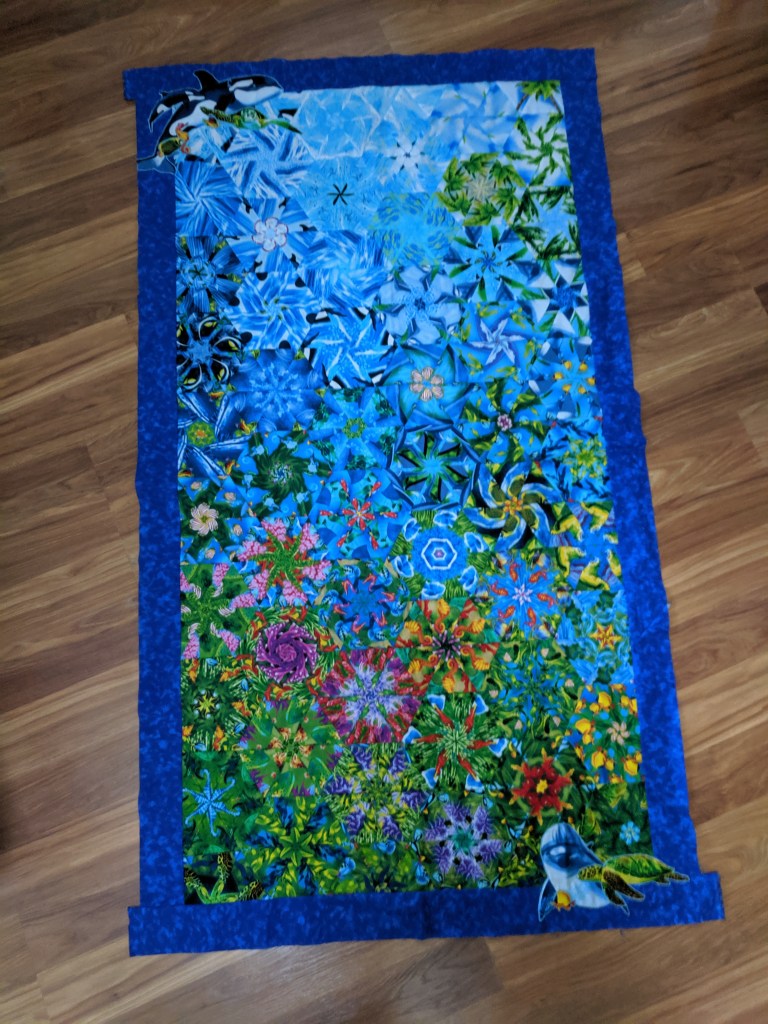
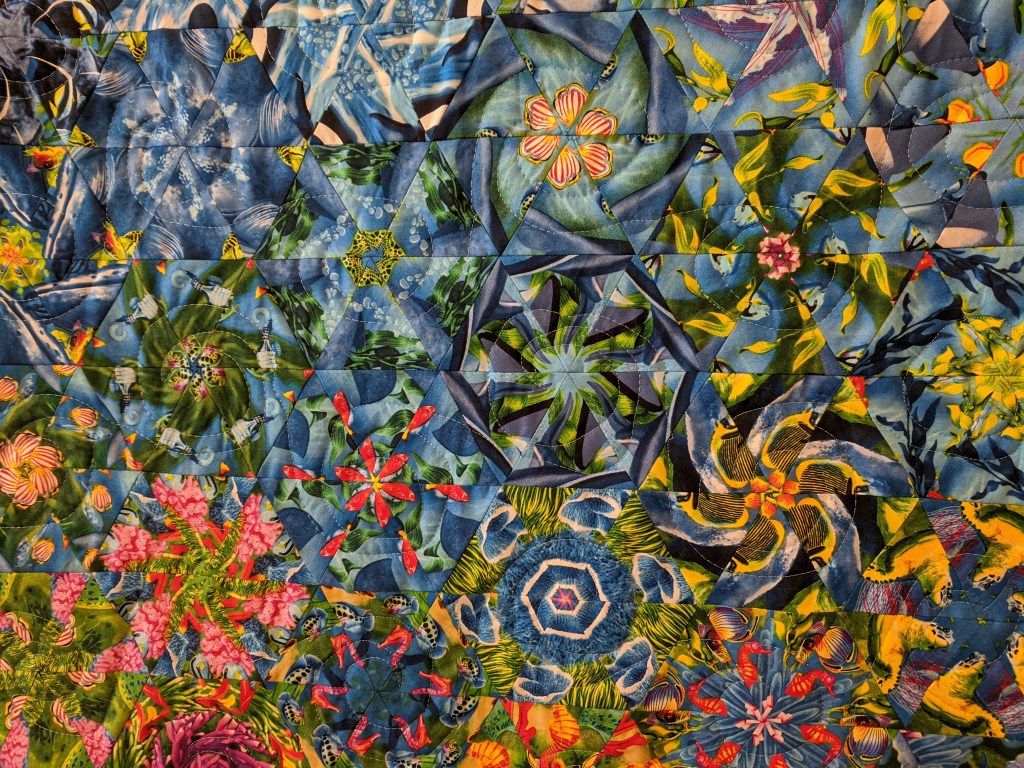
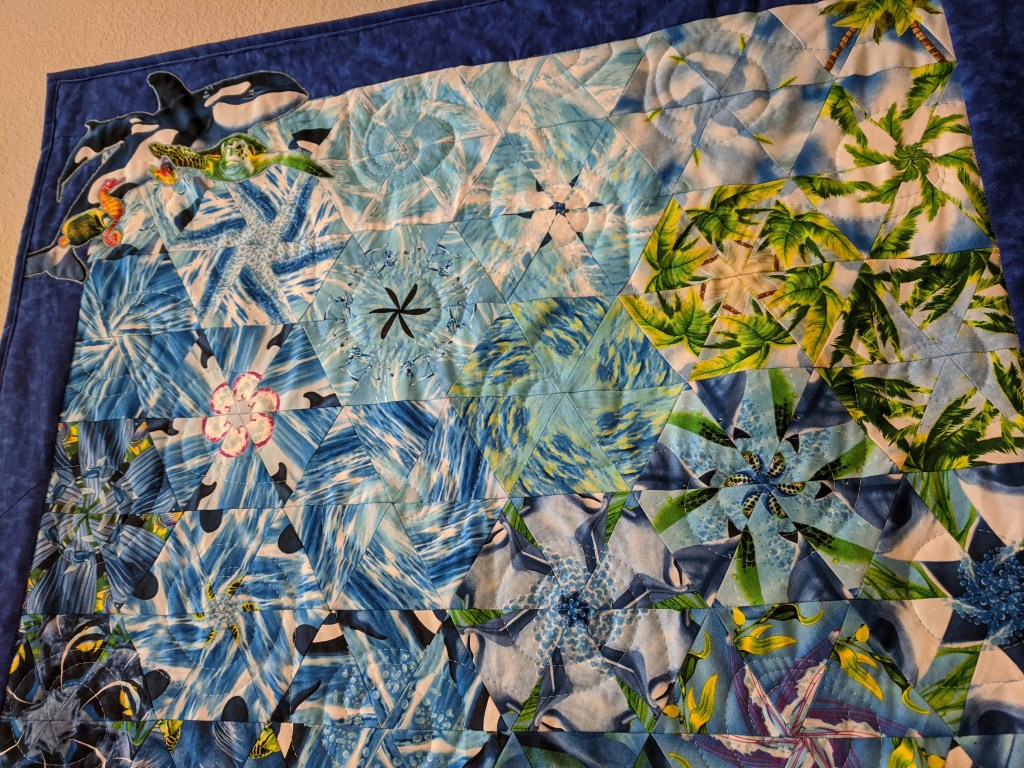
The fun part begins with designing and choosing a layout. This is where my pinterest board (and Polywall from Home Depot) really came in handy. As I laid my hexagons out, I saw that I had: (a) many blue shades, (b) some green shades, (c) some super colorful ones, and (d) hexagons that just did not fit at all. My original idea was to do a blue vs. green type of layout, like a wave or swoosh, to bring in the water theme. I ended up not having enough good hexagons to pull this off, so I went with a gradient design that’s a bit more in line with conventional OBWs.
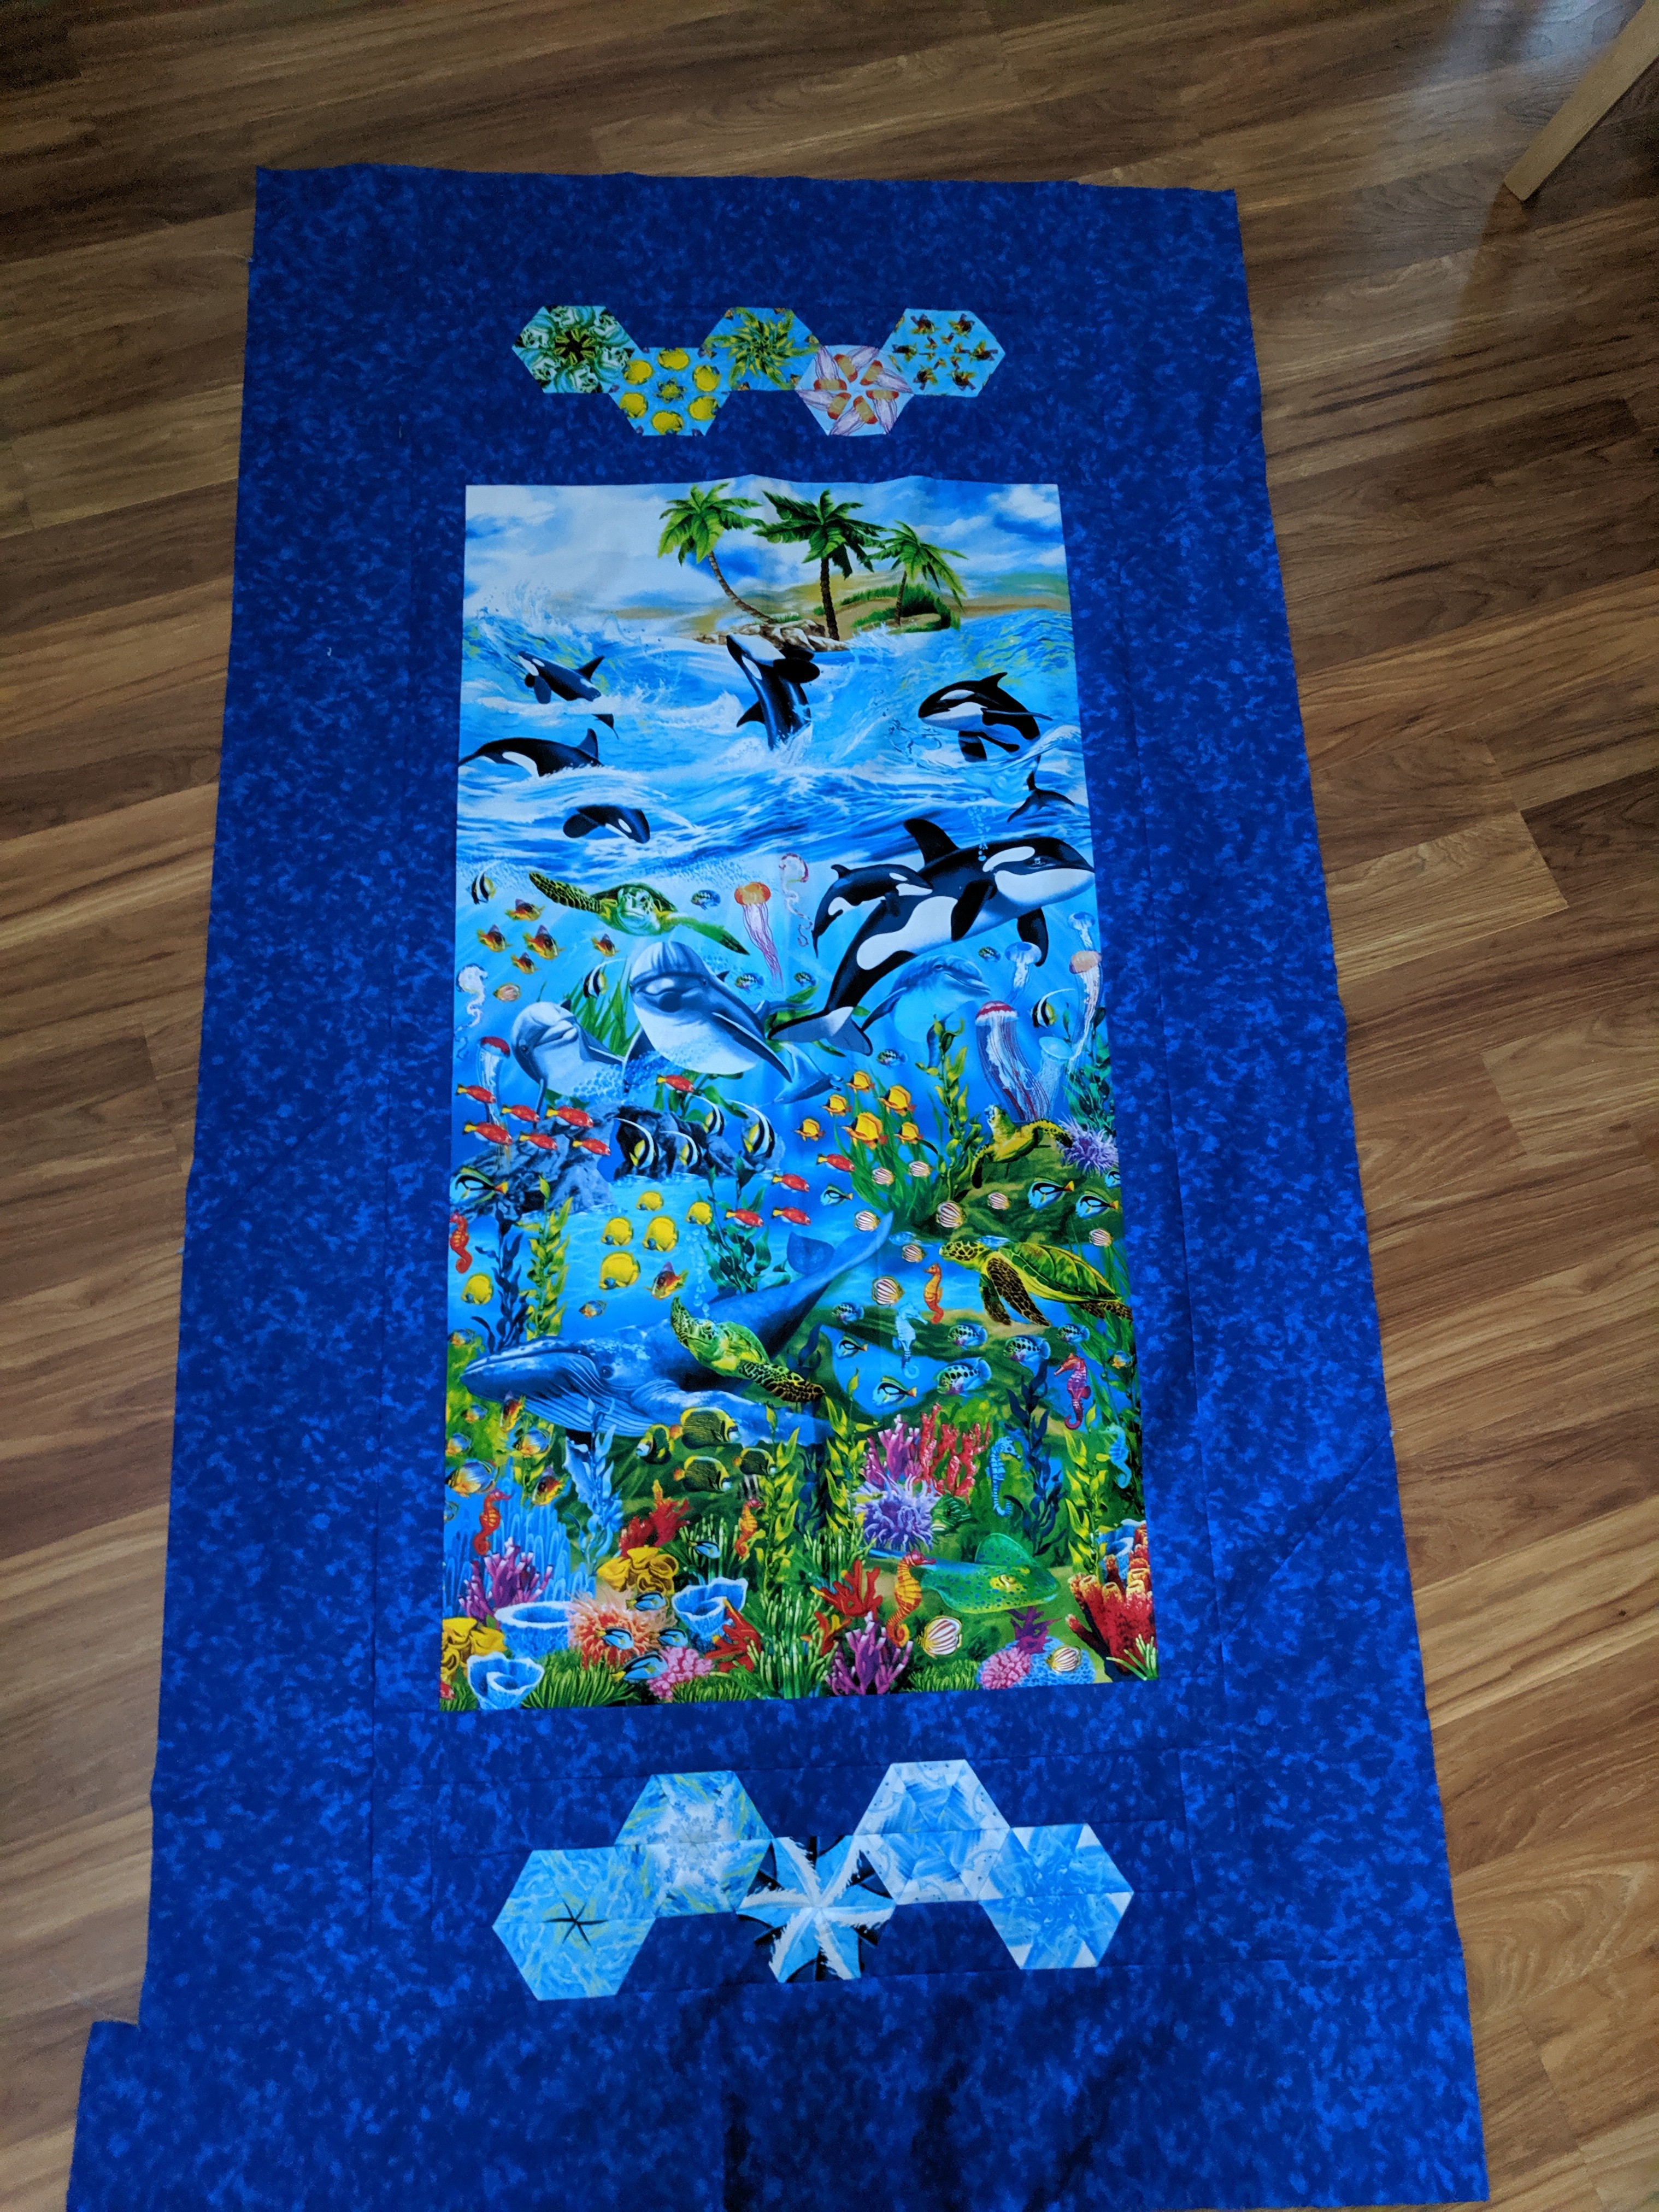
Now remember that we only sewed together halves of hexagons. Due to the grids hexagons create, each half can be sewn to the halves adjacent to it in rows (see below). Then, those rows are sewn together to create the whole grid. The hexagons on the end get cut off a bit so that the finished quilt top ends up rectangular. I used a blue blender from Joann for the border to bring together the ocean theme and give the eye some rest.
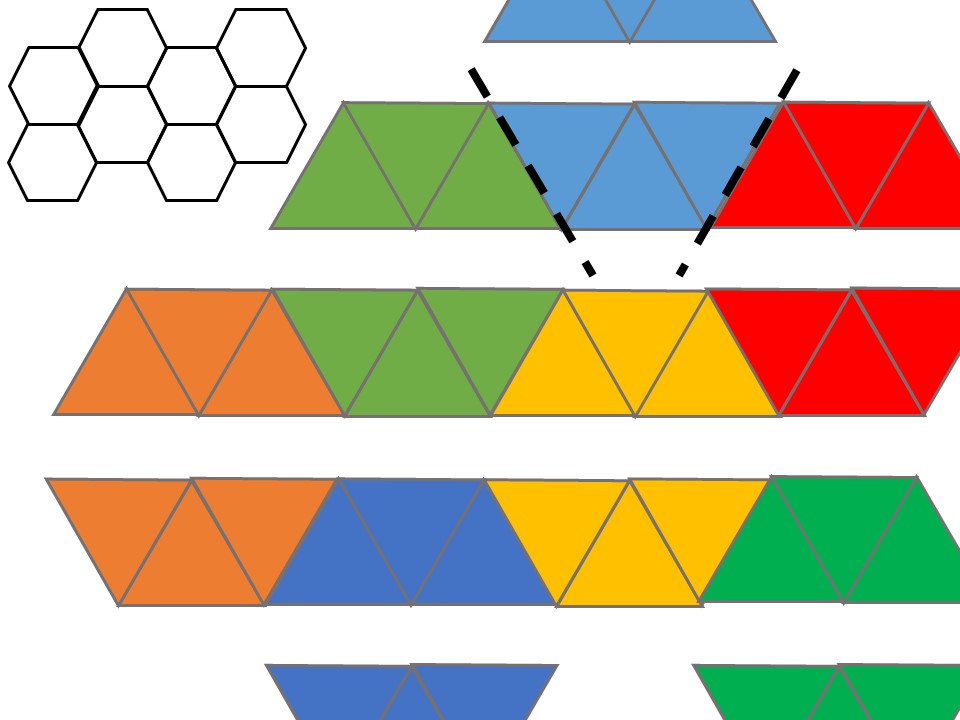
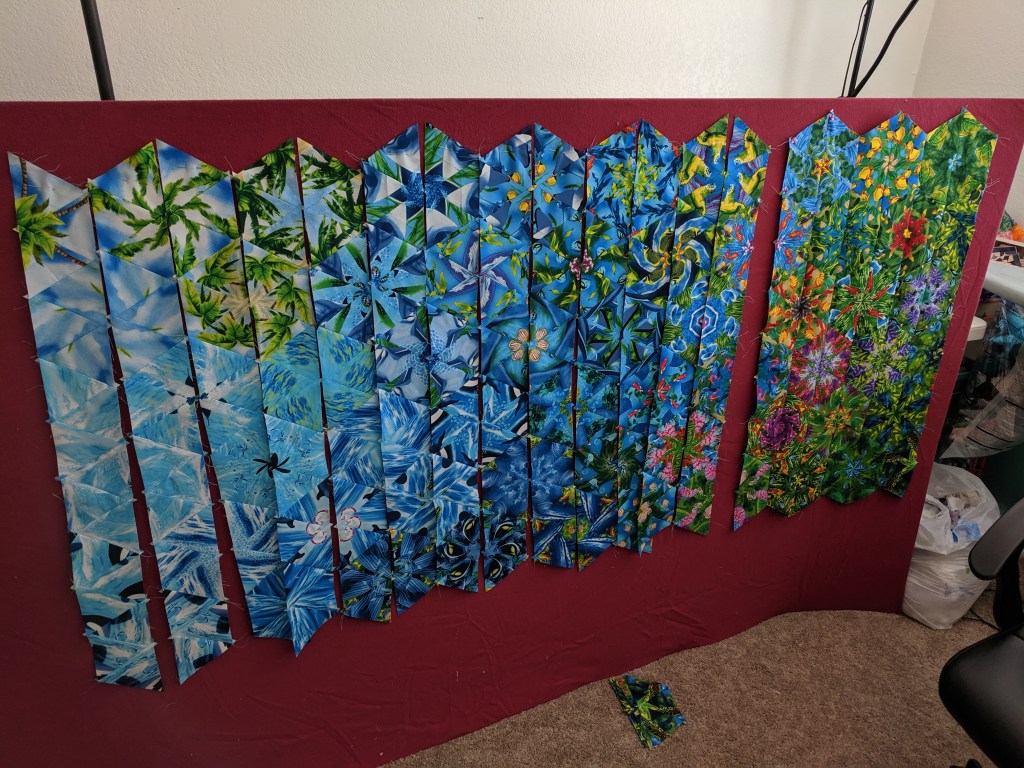
Individual rows on the left,
joined rows on the right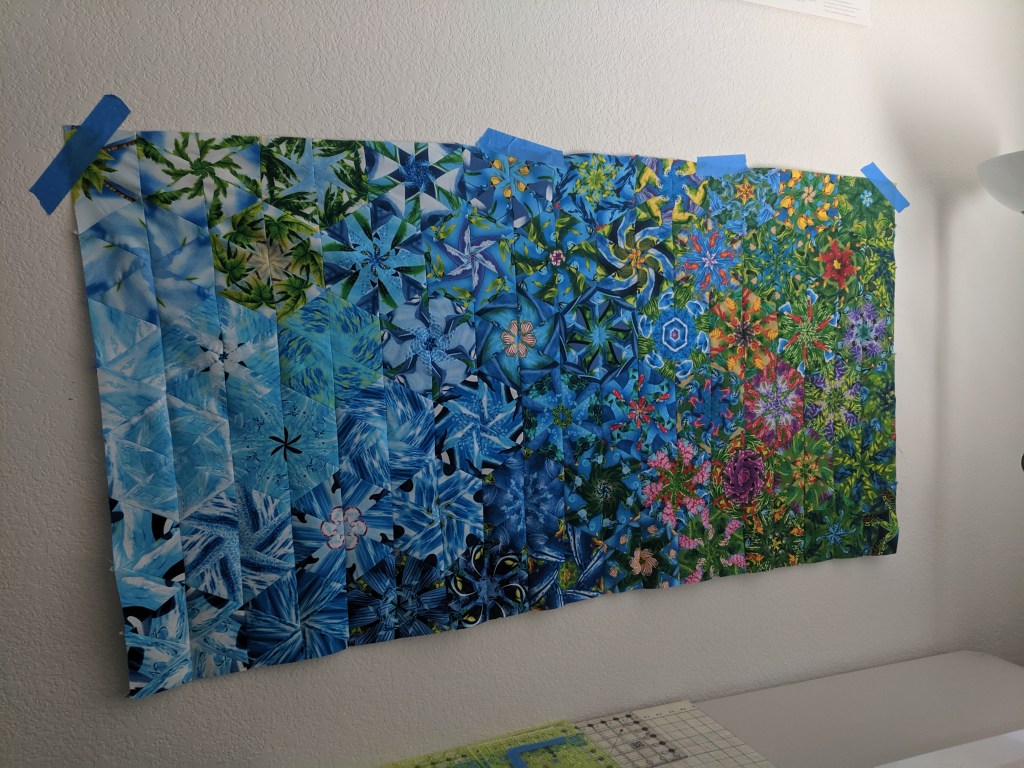
All squared up and ready!
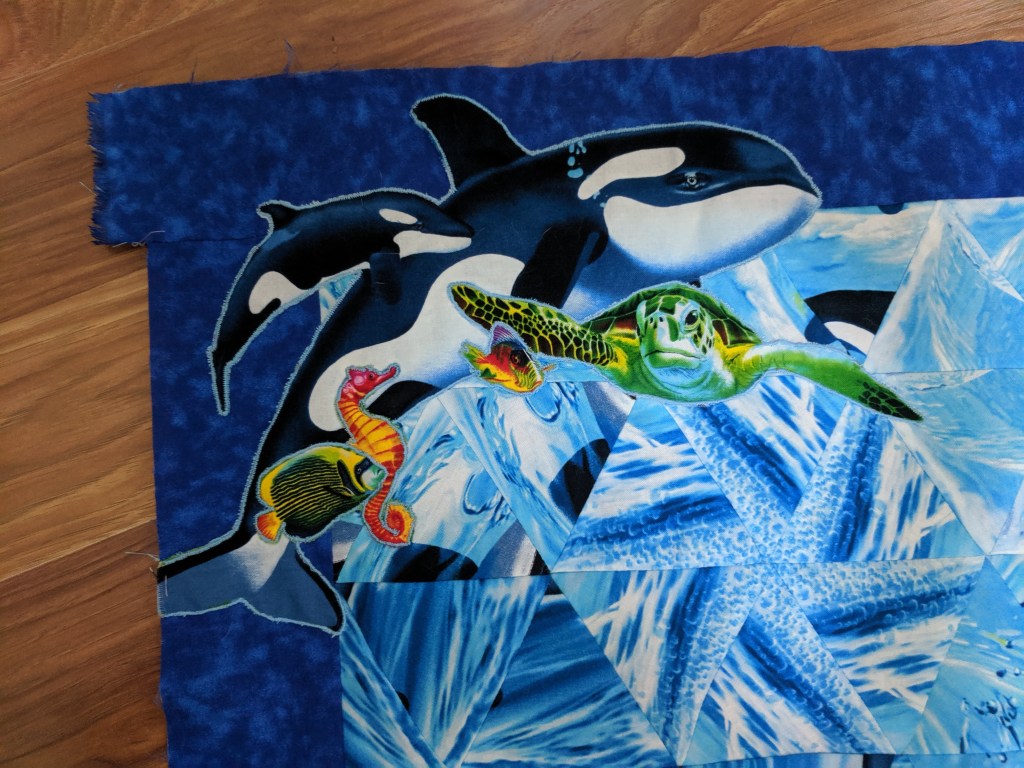
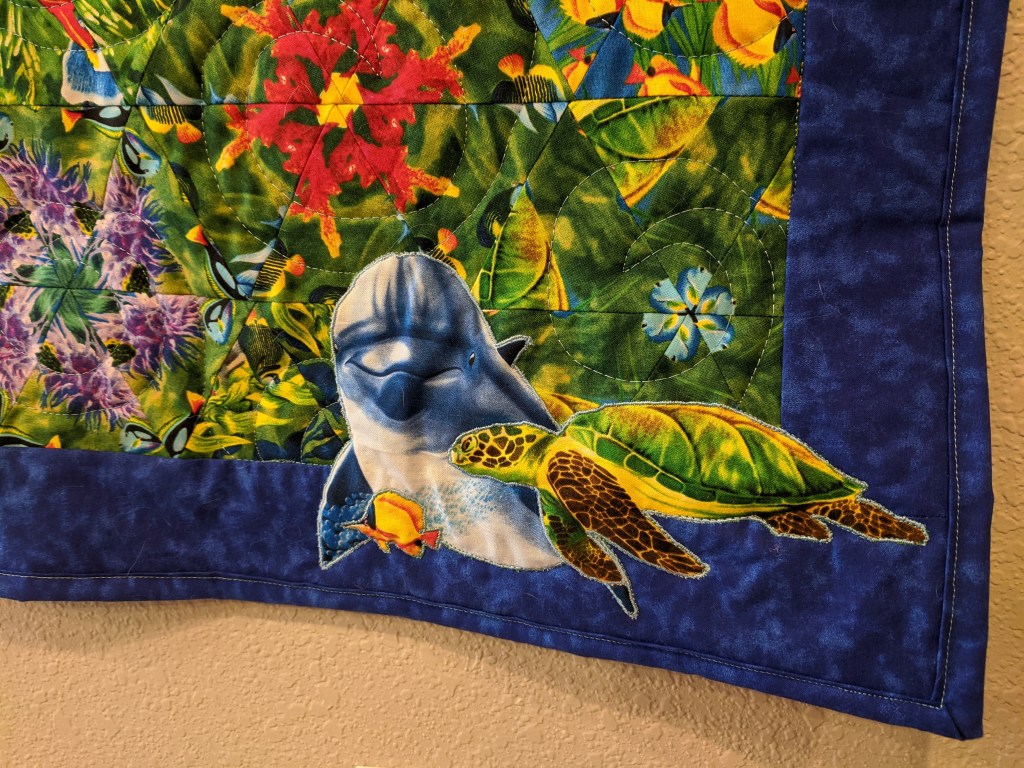
To embellish my OBW, I chose to cut out some of the animals and applique them onto the top. Applique is a technique to sew a patch onto a bigger piece of fabric, and can be done in a ton of ways. I chose to hand baste my animals on and then go over the hand stitches with the machine to clean up the edges. I liked the idea of including some non-kaleidoscope-d bits to help the eye, and plus I love sea creatures so I wanted to feature them, whole, on the front.
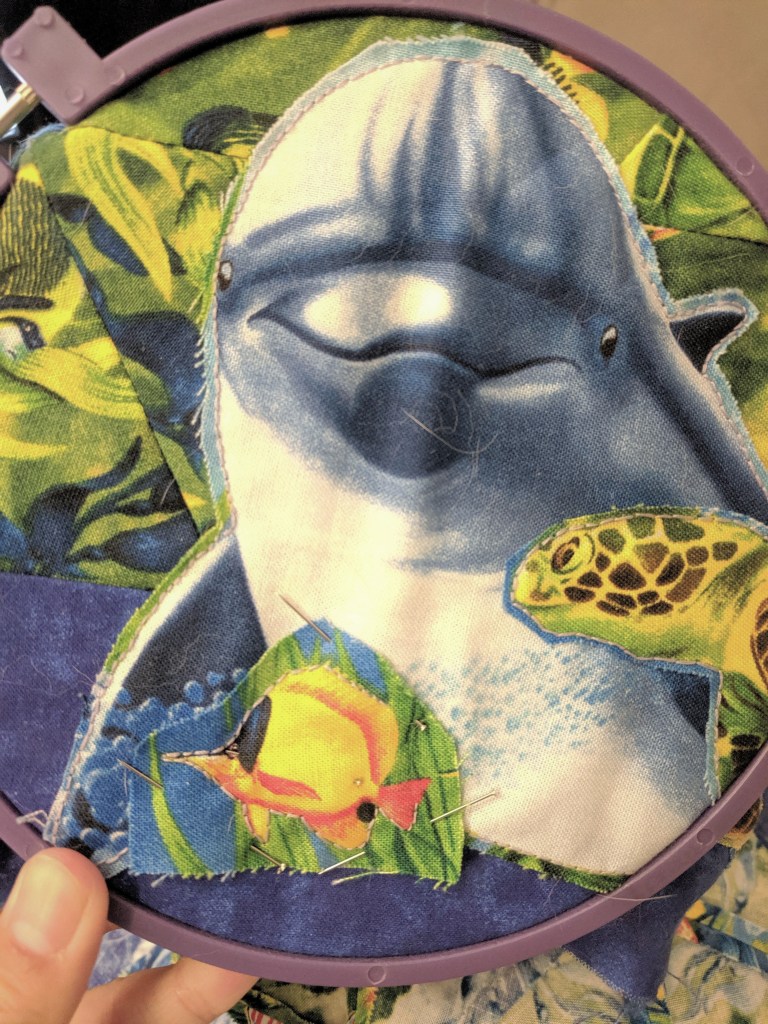
Hand basting in the embroidery hoop 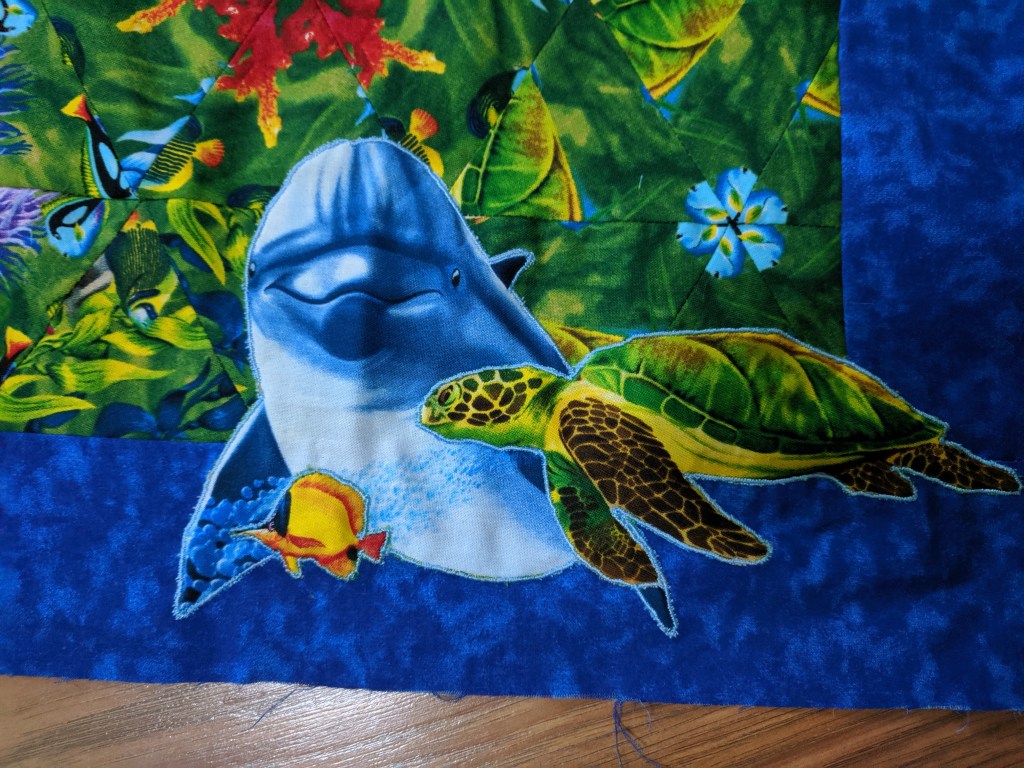
I wanted the backing to be the original panel, so I could flip it over and show people the uncut panel. And I added some of hexagons I liked that didn’t fit in the top 🙂
Finished top 
Finished backing
In total, making the half-hexagons took a couple days, deciding on the layout took a week, assembling the top took a couple days, applique-ing my animals took a couple weeks, the backing took a couple days, and then I let it sit… and sit…
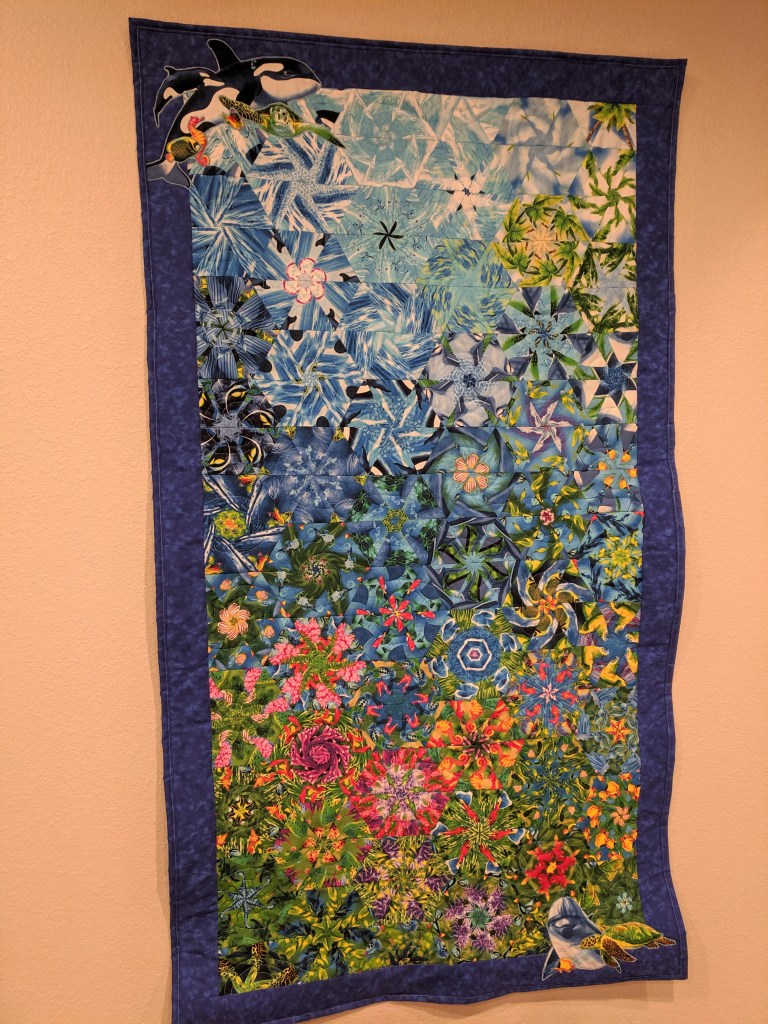
And finally, I decided on a quilting design and quilted it up. 🙂 I added a little tube on the back to help me hang it up, bought a little dowel at Home Depot, and hung it up. I’m so happy to have this done and finally hanging up in my kitchen where I imagined it.

Click on any of the photos to enlarge 🙂

Project completed September 27, 2019.