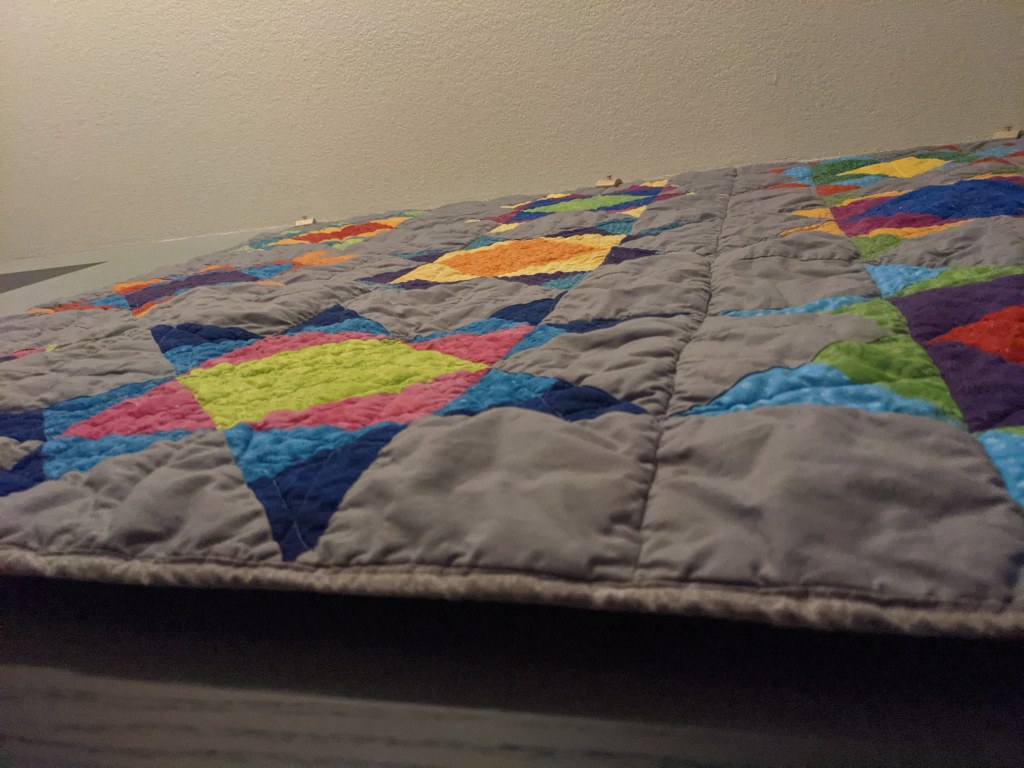
For the longest time…. I have wanted to do a Missouri Star quilt. And finally, I have. I used the pattern from the Block of the Month, although I did figure out halfway through that I could have done it an easier way (less cuts), but it was fine. I wanted to do something bright and colorful to hang up in my bedroom.
Pressing my triangles and squares open
Squaring up my blocks – I like to trim my half-square triangles while they’re still a triangle, since it’s two cuts instead of the four I’d have to do if I ironed them open first. Squaring blocks is so tedious but it does make for an easier, flatter, and better finish. All the blocks are the same size, so they fit together the way they’re supposed to, no crookedness or extra fabric.
I did my normal stitch in the ditch for all of the vertical seams, and then did free motion quilting in each of the stars. In my layout, I put similarly-colored center squares across the quilt from each other, so I decided the do the same with my free motion designs. I did a radial pattern for the red center stars, an echo in the center for the dark center stars, an outside echo for the yellow center stars, my “abstract” design with straight lines bouncing around for the green center stars, and then a full echo swirl from the outside to the center for the center star.
I used the foot as an approximate guide to follow the outline of the star, and then follow that line, and then follow that one…. all the way to the middle. 🙂 As I got closer to the middle, I started making the space between the lines wider. You’ll see me fix a broken thread a few times in there. Anticipating those threads is why I sew with the end of my machine open now, since it’s easier to retrieve the broken thread.
As I expressed in my last post with the Plant Wall Hanging, I think I’m still moving too fast with my free motion quilting, which causes the thread to fray and then break. I had that happen less often with this quilt, since I was keeping it in mind, but it was still happening. I think it’s a combination of moving too fast and not moving at a consistent speed, which I want to work on with my next quilt.
I used hangers from The HangUps CompanyView looking up at it from my pillow 🙂
Overall, I’m really happy with how it turned out. I love the Missouri Star block and I have wanted a quilt like this for a while. I made 10 stars and used one as the label for the back. As usual, I hand sewed my label on. I like having that time under the quilt as it’s in progress – a sneak peek of what it will turn into. The backing is a purple flannel which did not hold up that well in the wash, but I didn’t worry about it since it’s a wall hanging anyway. 🙂
Completed March 2021.
Print: Wilmington Essentials – Magic Colors by Wilmington Prints
Background: Kona Cotton – Medium Grey by Robert Kaufman Fabrics
Binding: Wilmington Essentials – Crackle Stone by Wilmington Prints
Backing: Comfy Flannel – Tossed Unicorns Purple by A E Nathan Co INC
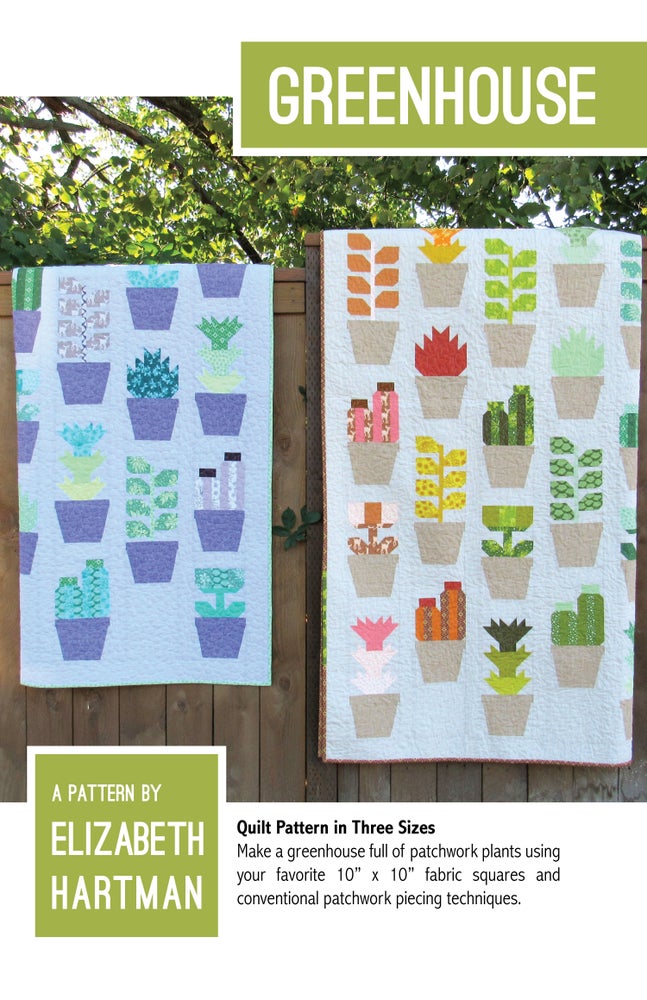
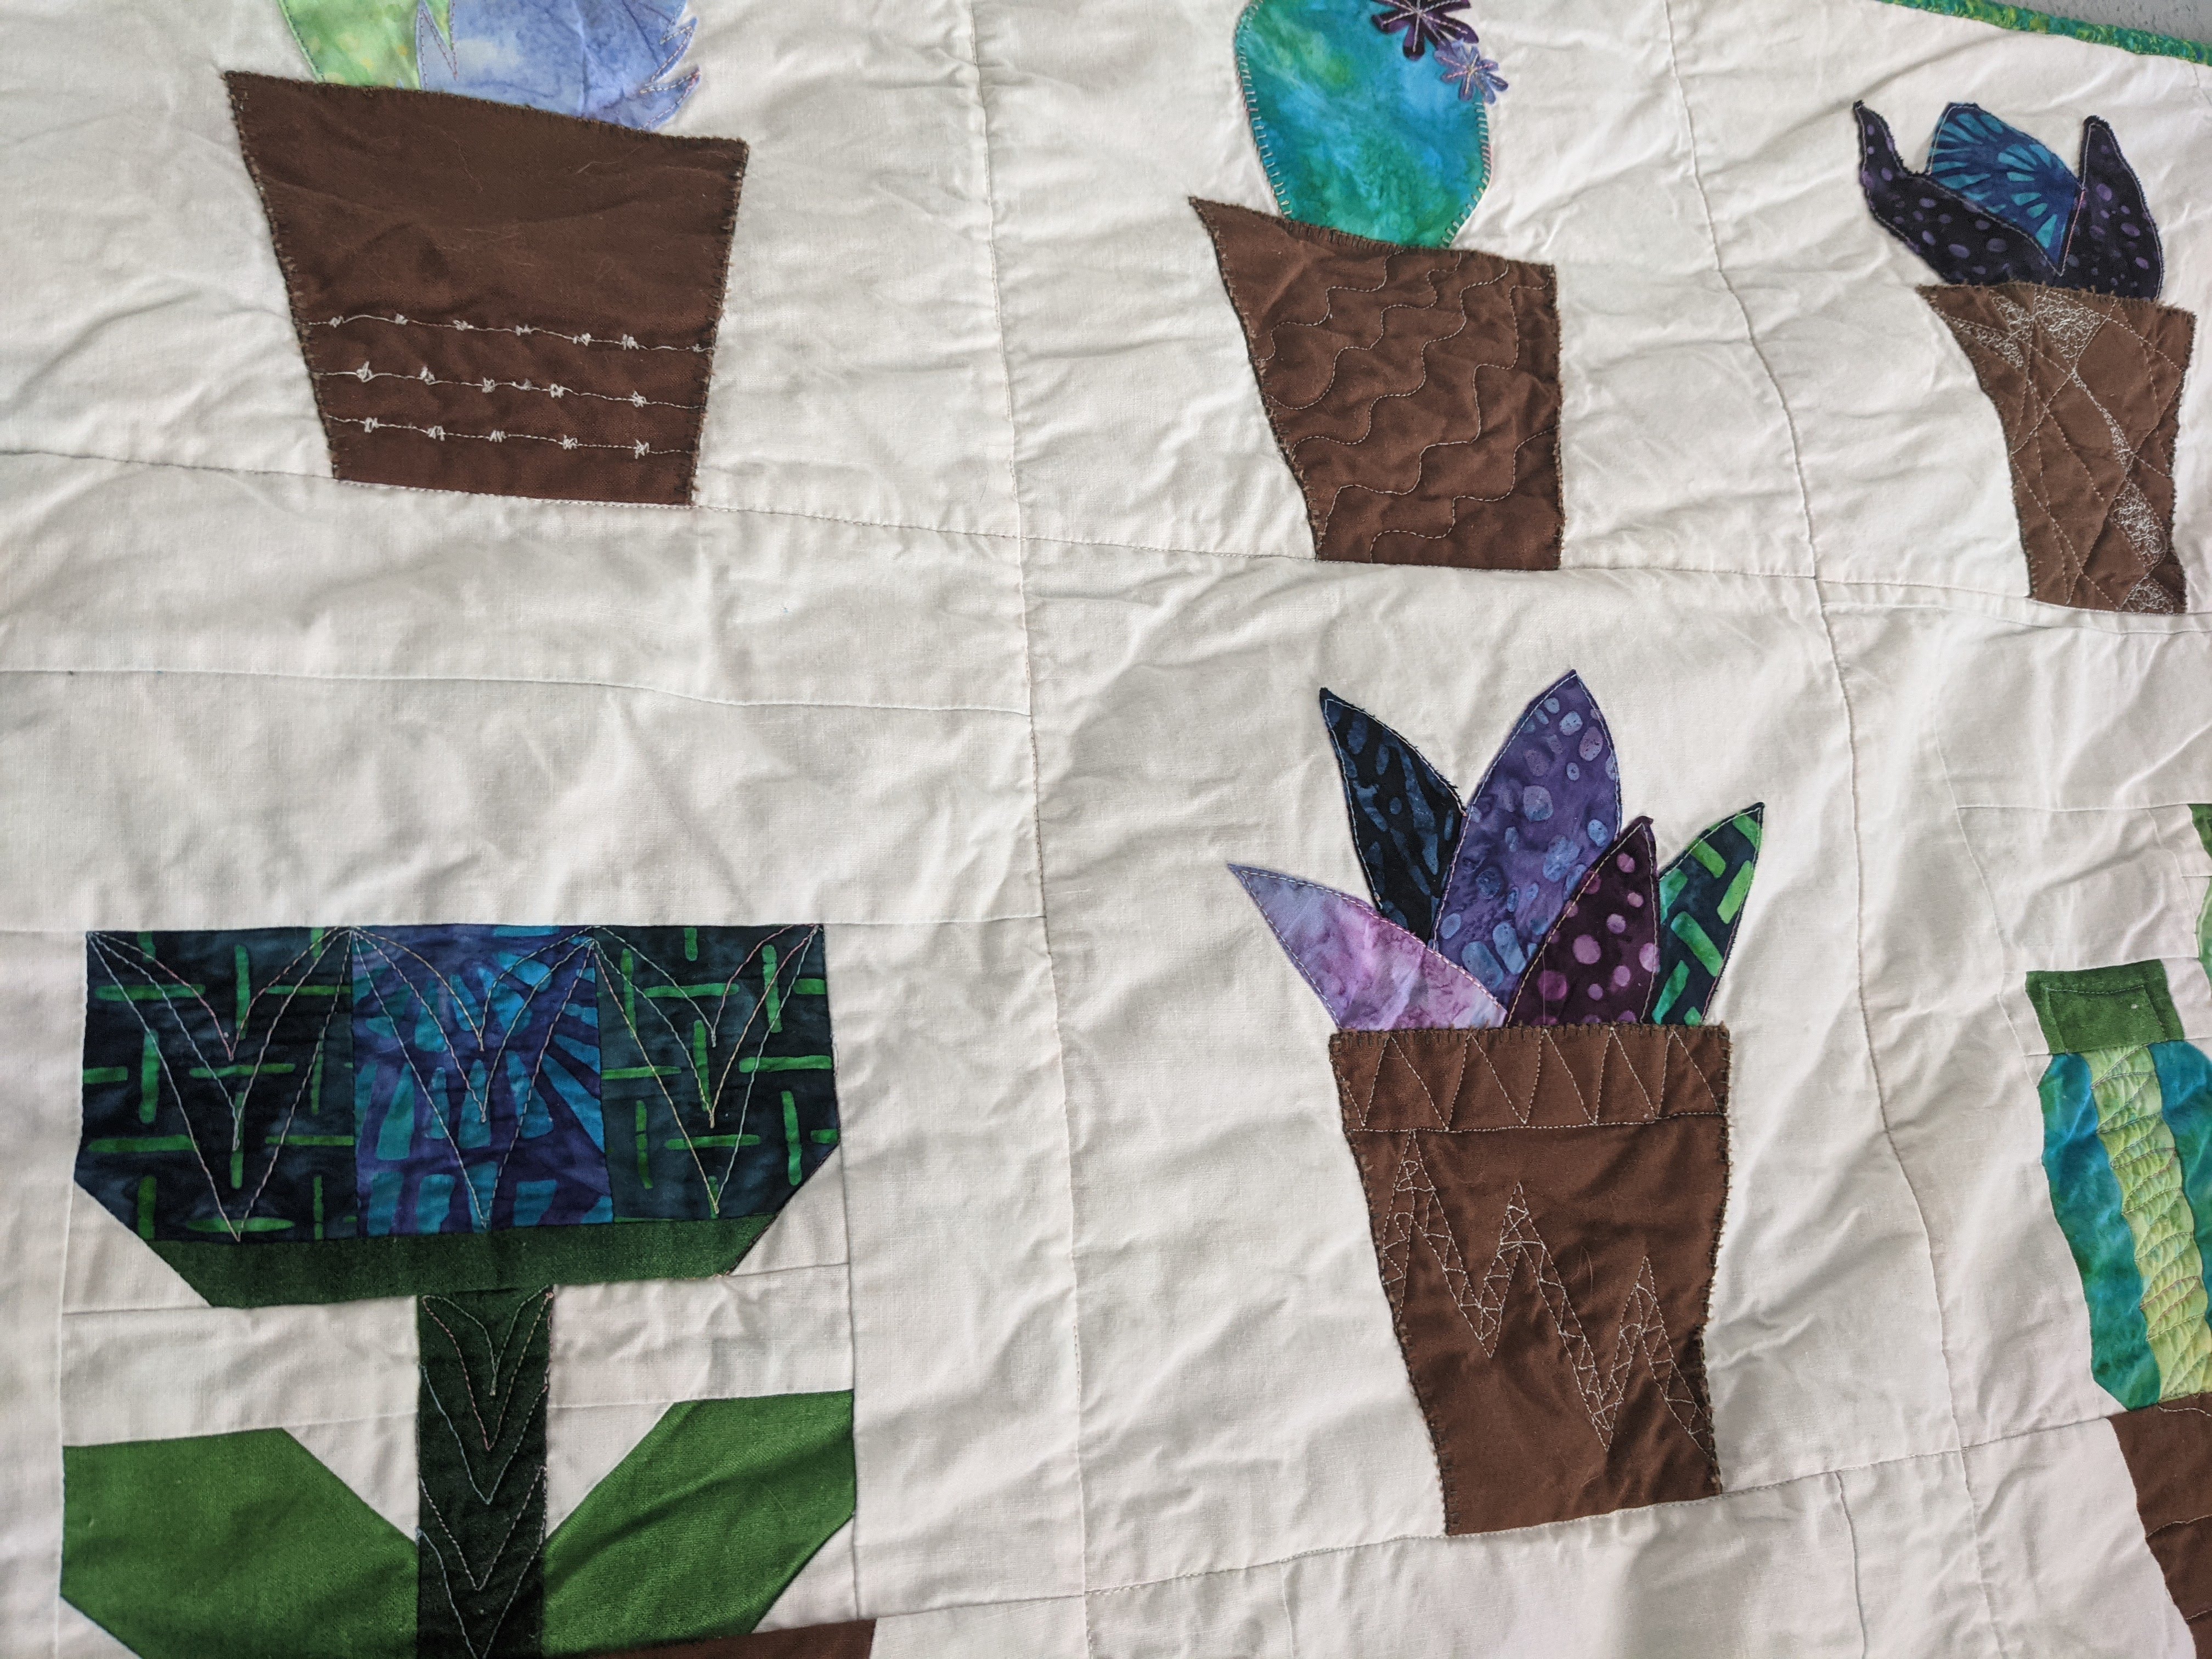
So I’m a big plant person. I love plants. I have had an ongoing collection of succulents for a couple years, and last summer my cousin (who I made the memory quilt for) gifted me a bunch of mature houseplants like pothos, monstera, and colocasia. So I’ve wanted to do a plant quilt for a long time, and I actually bought half the supplies I needed for this quilt in early 2020. At that time, I was planning on doing the entirety of Elizabeth Hartman’s “Greenhouse Quilt”. Hartman creates incredible patterns of actual animals and objects, all pieced, not applique. This means there’s a lot of cutting itty bitty pieces of fabric, sewing itty bitty pieces of fabric… and a lot of mental effort to stay organized and on track. I had done one block of hers a while ago as a pillow, and used one of the plant blocks as a bag for a friend (below).
Flower block from Elizabeth Hartman
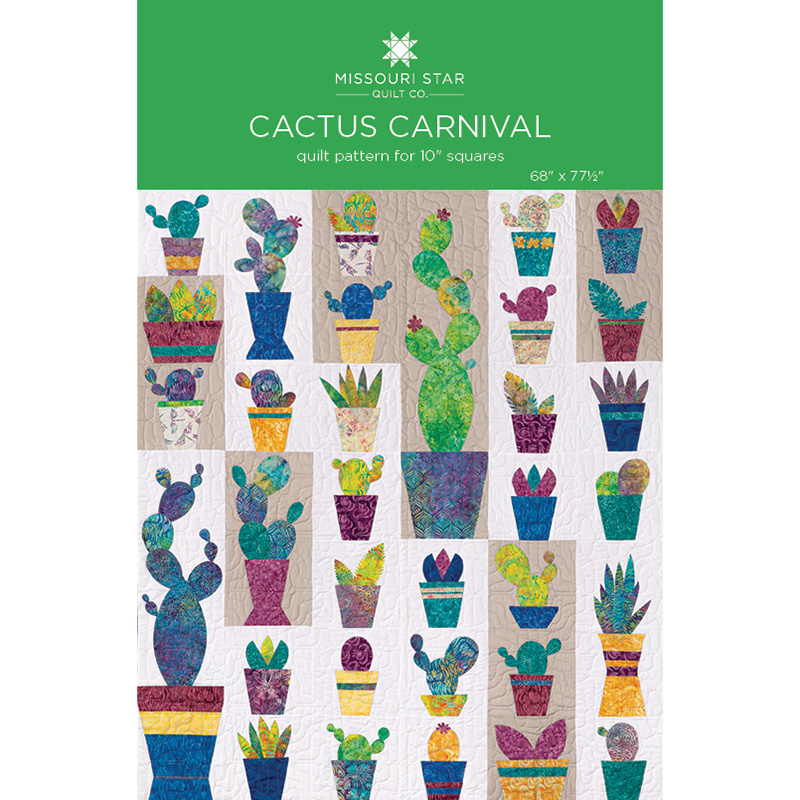
And then I saw MSQC’s “Cactus Carnival”, which is applique, and I knew I could combine both these patterns to create something that wasn’t too hard, and had hard angles and soft curves.
I attempted to standardize the sizes of the blocks, since MSQC’s pattern has a 10″ block, and Hartman’s pattern is based on a 6.5″ wide block with varying heights. I ended up adding borders to the Hartman blocks to make them 10″ wide and 15″ tall, so they could work in columns with the MSQC blocks.
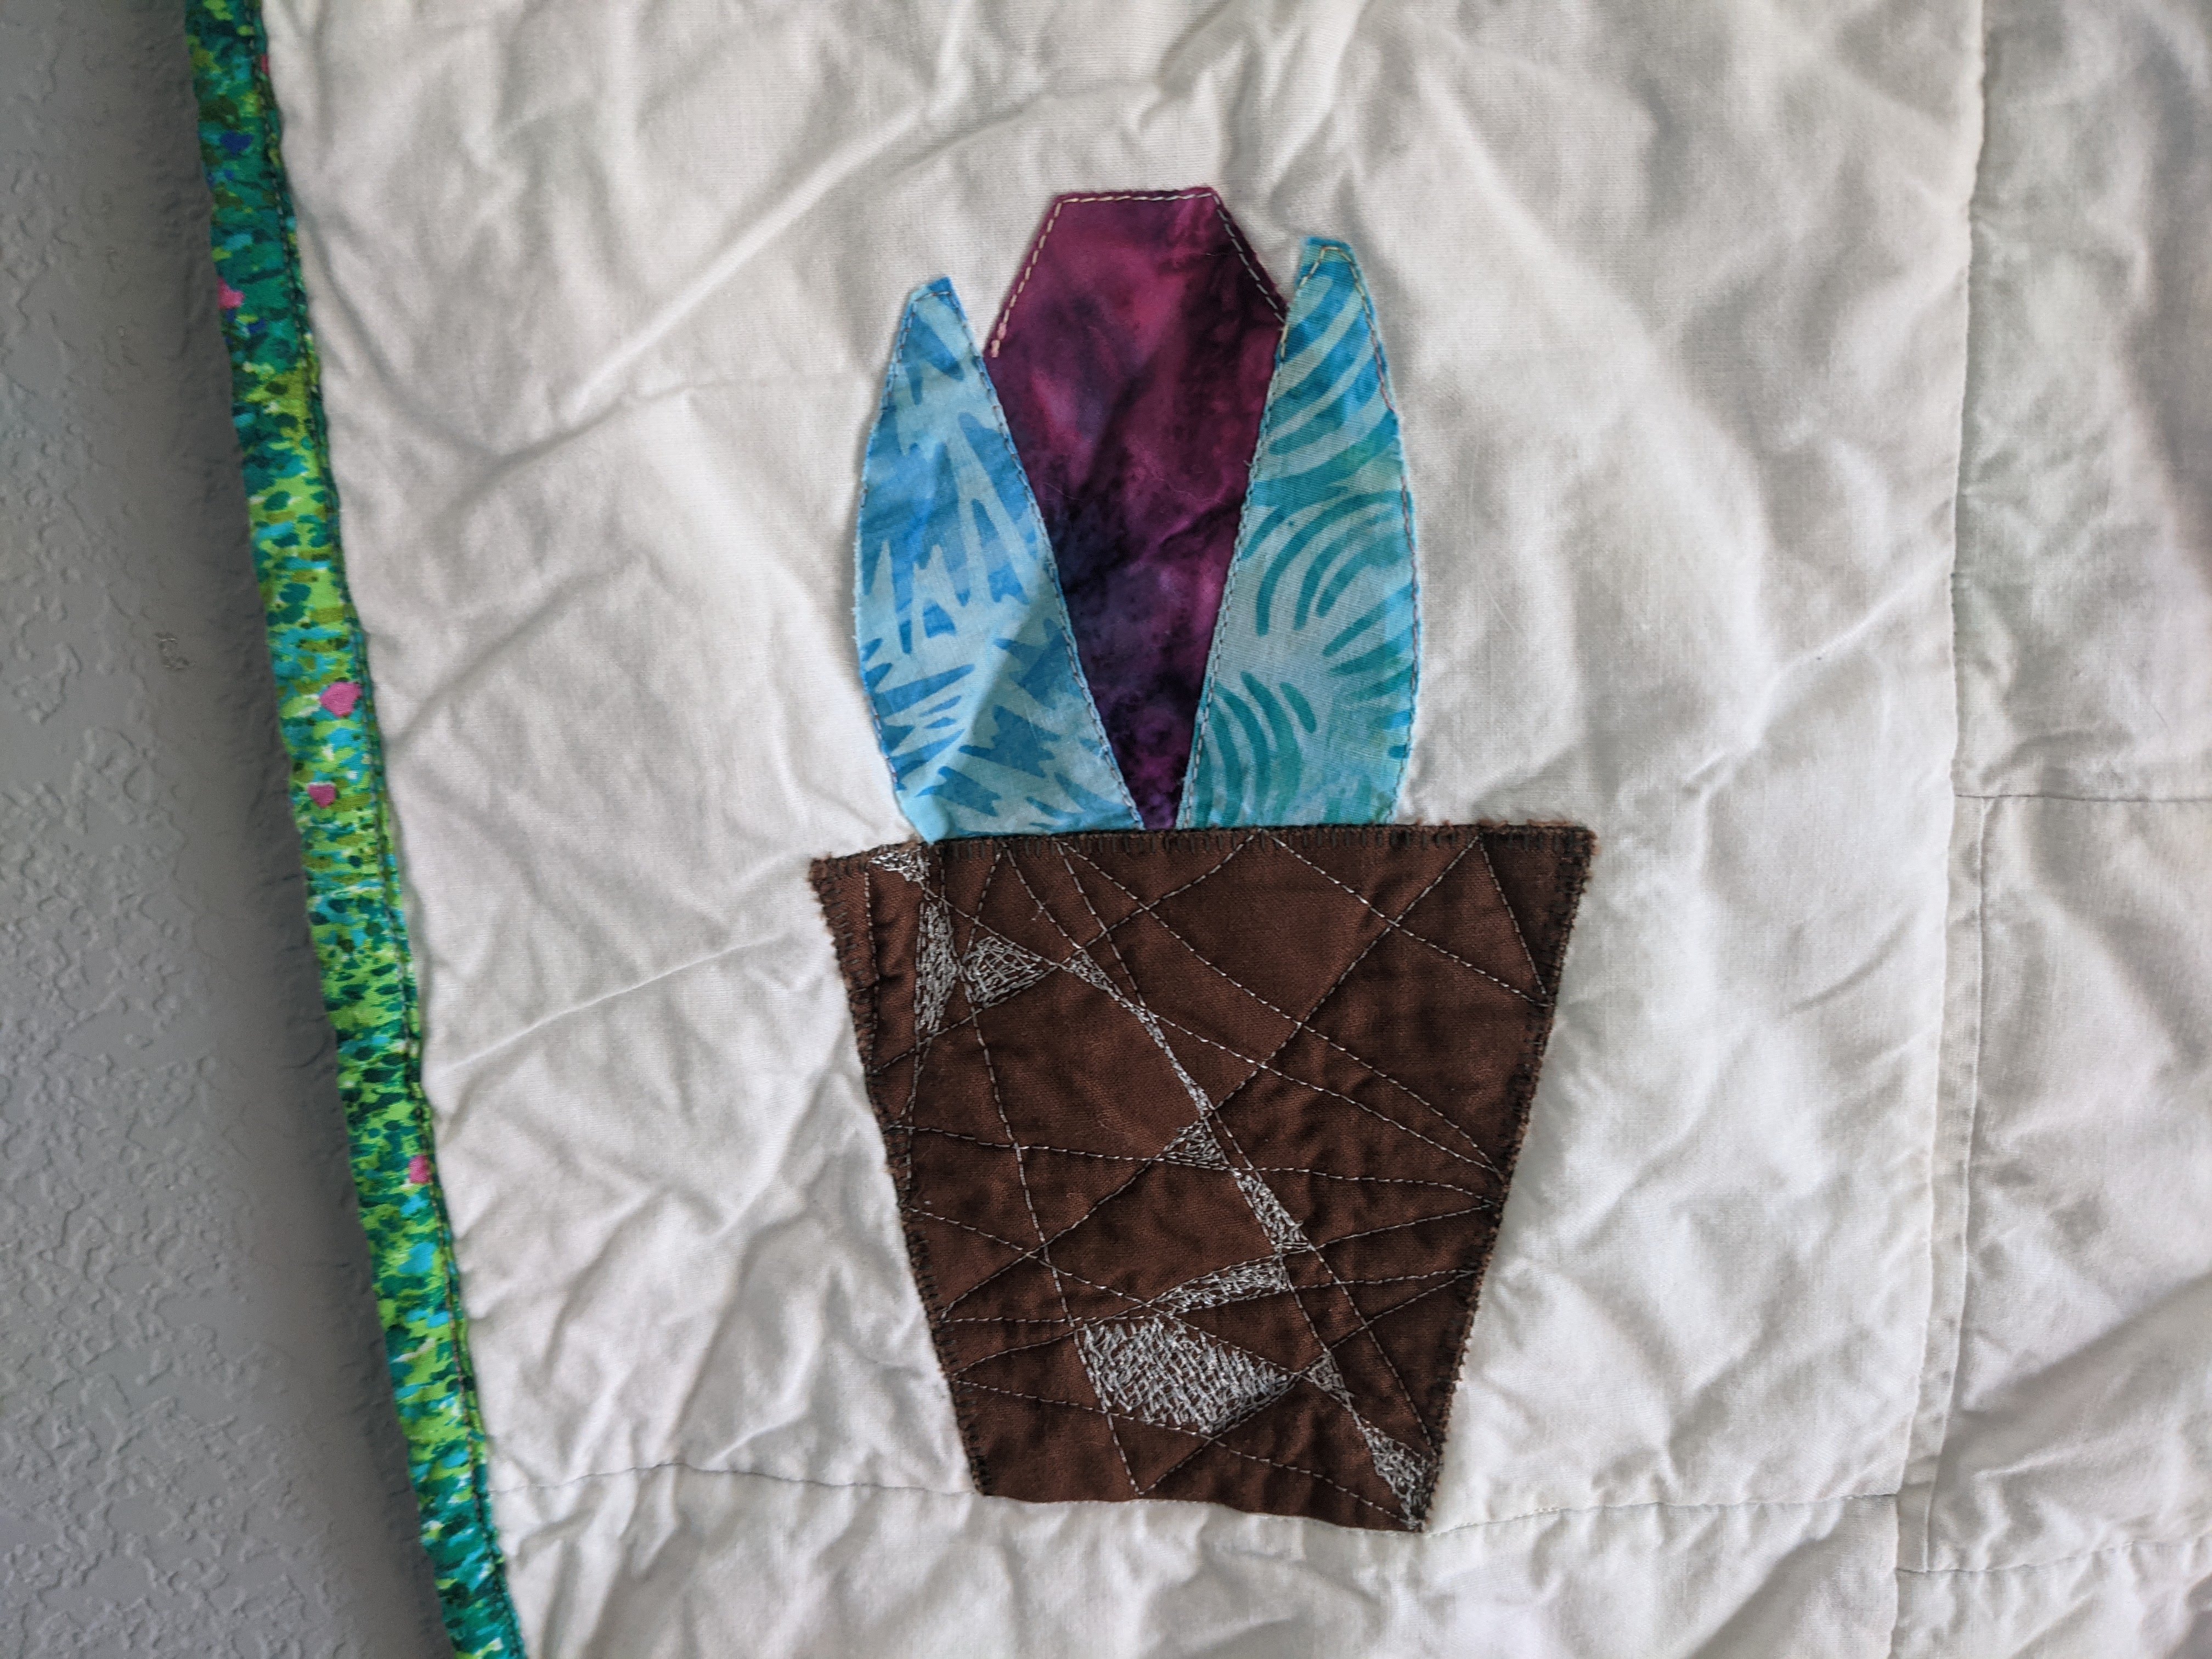
I made four blocks of each of the five general plants from MSQC, and used Heat N Bond for all the applique, which ended up going a lot faster than anticipated. I used my rainbow variegated thread (kind of my favorite thread, let’s be honest I’ve used it for probably half my projects) to outline all my applique’d plants with blanket stitch. I didn’t even have to use Heat N Bond for the pot pieces, and laid those gently on top of my applique’d plants.
I’m only applique-ing the plant pieces here, the pot was a placeholder because the fabric hadn’t come in yetHere I’m going around the main piece, but I come back later to go around every piece. The Heat N Bond doesn’t stay sticky through the washer and dryer, so you have to secure the pieces in another way.
Then I made two versions of each Hartman block – a standard size and an enlarged size. I used the normal pattern for the standard size block, and adjusted the plant to be 8″-9″ for the enlarged size block. The whole time I was kind of stressing because I didn’t think I had enough background fabric to all the blocks, but it ended up totally fine!
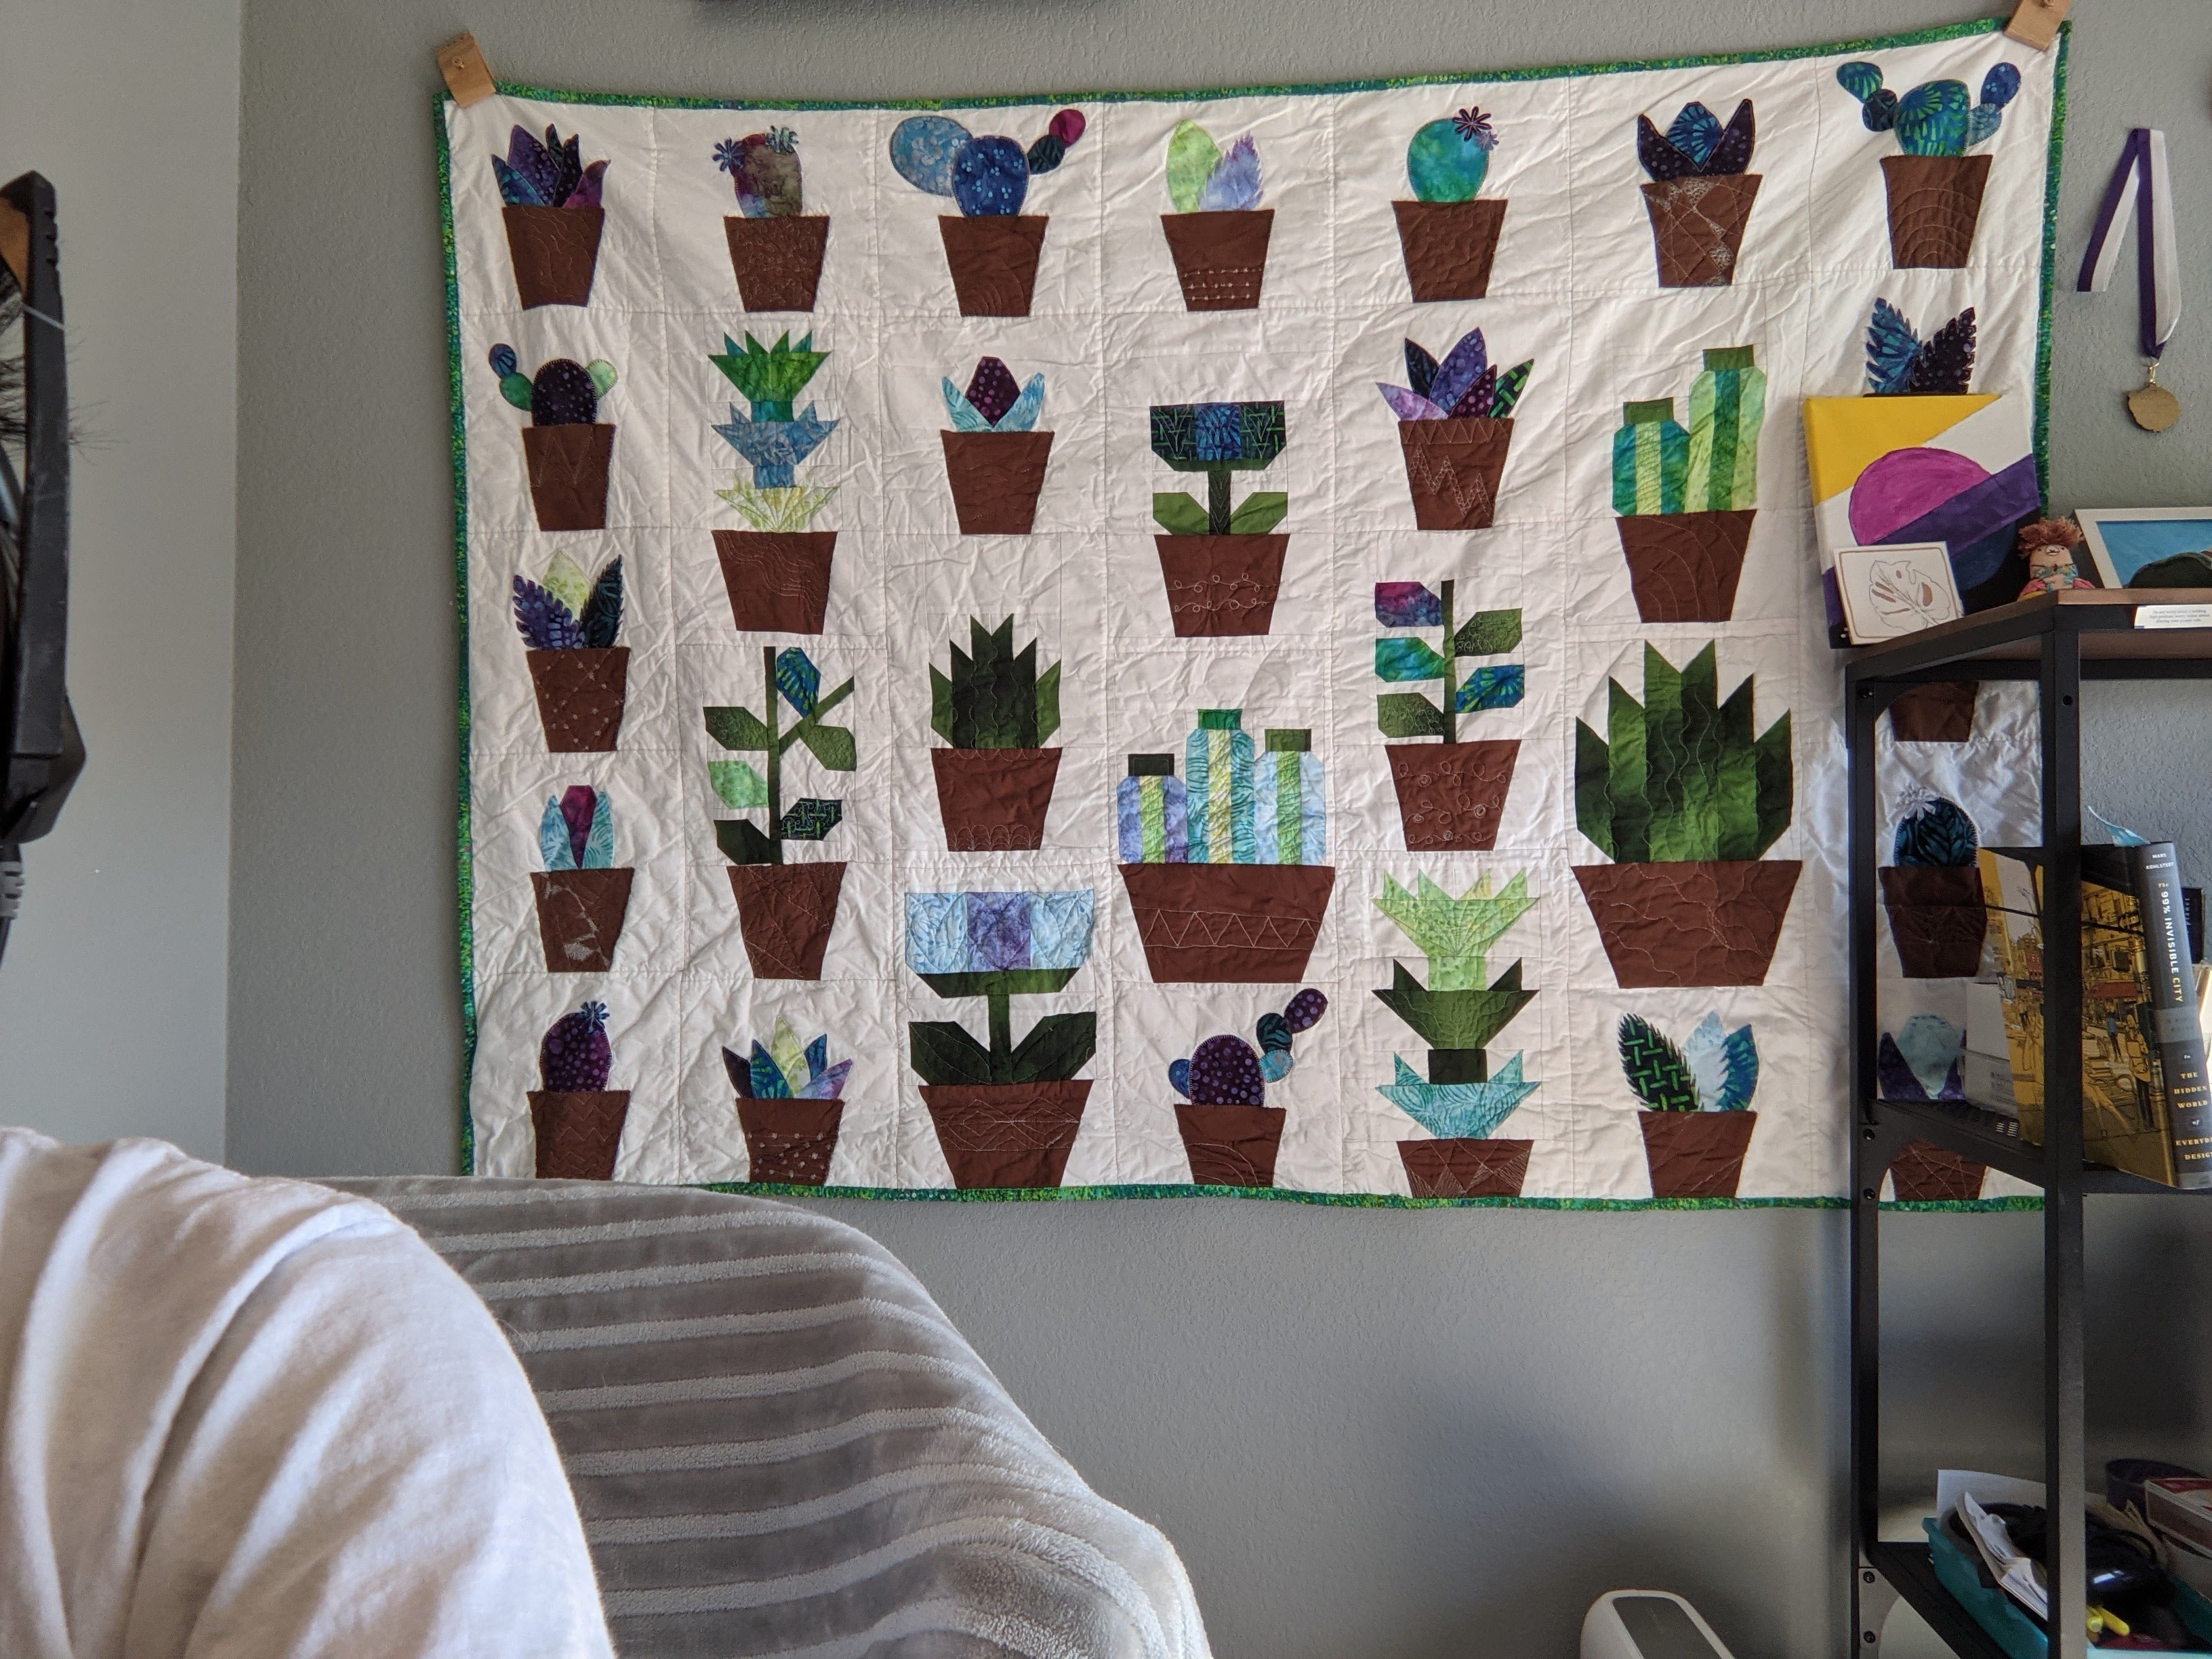
I put all the blocks together in a landscape orientation, which is kind of different for quilts! But I intended this to be a wall hanging in my room, behind where I Zoom/video chat from, so that it could be my background! So I arranged my blocks and sewed them together in columns. My first pass of quilting was just straight lines, stitch in the ditch up and down the columns, and then across horizontally.
Then, I did free motion quilting on the pots! I started off using this white thread I got, but it kept breaking, so then I switched to a shiny gray that I’ve had for a while, and that kept breaking too… Finally I figured out the problem was the needle! But that kind of just made the problem happen less often.
[Future Finch, who is writing this post, has completed the Plant Quilt and is working on the next quilt and running into the same problem while free motion quilting. I am now convinced that it’s because I was pushing the quilt through the machine too fast, which pulls the thread too tight and then it snaps. I have been working on slowing down and having patience, which is difficult! The machine is running very fast, so it’s kind of loud and the needle is moving quickly, but I have to move slowly and steadily. I’ve gotten to the point where it’s happening even less often than during the pots, but I’m still working too fast. I don’t know if I want to turn up the machine speed, although I think that could help. It just stresses me out because it’s so loud, which makes me go faster.]
But I persevered through my mistakes and the pots ended up so fun. I had six different “motifs”: swirls, abstract, wavy, rainbow, zigzag, and dots. Each pot, I rolled a die to decide which motif I’d use – as long as it wasn’t the same as the pot I just did or any adjacent pots. It was so fun to vamp on different motifs and find new ways to represent them. It was nice to not have to come up with an entirely new idea, but just a new take on the same motifs. So it was fun to do and fun to look at 🙂
As I was finishing up, I wasn’t sure if it needed more quilting or if I should quit while I was ahead. The applique plants and pots had their own blanket stitch outlines, and the pots had the FMQ, but the Hartman blocks were kind of empty. I called a friend and we decided that I should do limited quilting on the Hartman plants so they blended in with the whole quilt. I matched the designs between the standard and enlarged blocks, so the small cactus has the same quilting as the large catcus, etc. I think it really brought everything together! Last up was the binding and putting it through the washer and dryer. Since I found them at Target, I throw in a “color catcher” sheet with all my new quilts (and some of my more brightly colored clothes), which did come out a gray-ish green.
And now it’s hanging up behind my desk, courtesy of some quilt hanging clips my parents got me for Christmas a couple years ago. 🙂
Project completed February 11, 2021.
Colorful plant pieces: Artisan Batiks – Aviva by Lunn Studios for Robert Kaufman
Ombre Green: Wilmington Essentials – Ombre Washart Forest by Wilmington Prints
Brown pots: Bella Solids – Earth by Moda Fabrics
White background: Kona Cotton – Snow by Robert Kaufman Fabrics
Backing and binding: Painterly Petals – Textures Mint by Studio RK for Robert Kaufman