


Late 2023 I was in a yarn store with a friend, and they had “learn to spin” kits with a drop spindle on a table display. She gestured to me and said “look, you could learn how to spin!” and I said, immediately, “I DON’T NEED ANOTHER CRAFT!!!!”
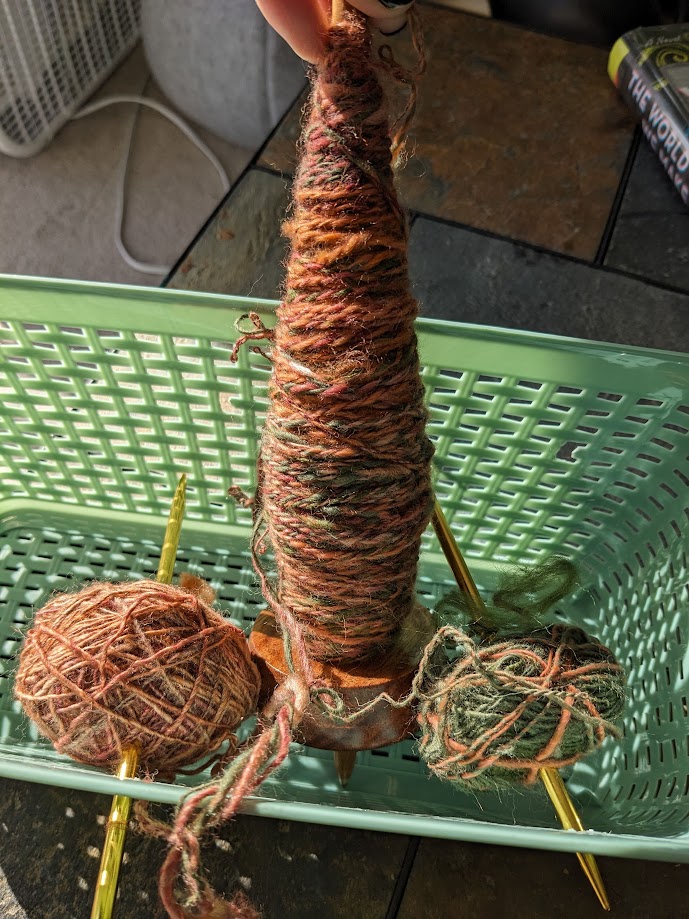
Yeah so I have four spindles, a spinning wheel, and I’ve completed whole projects with my handspun yarn ❤

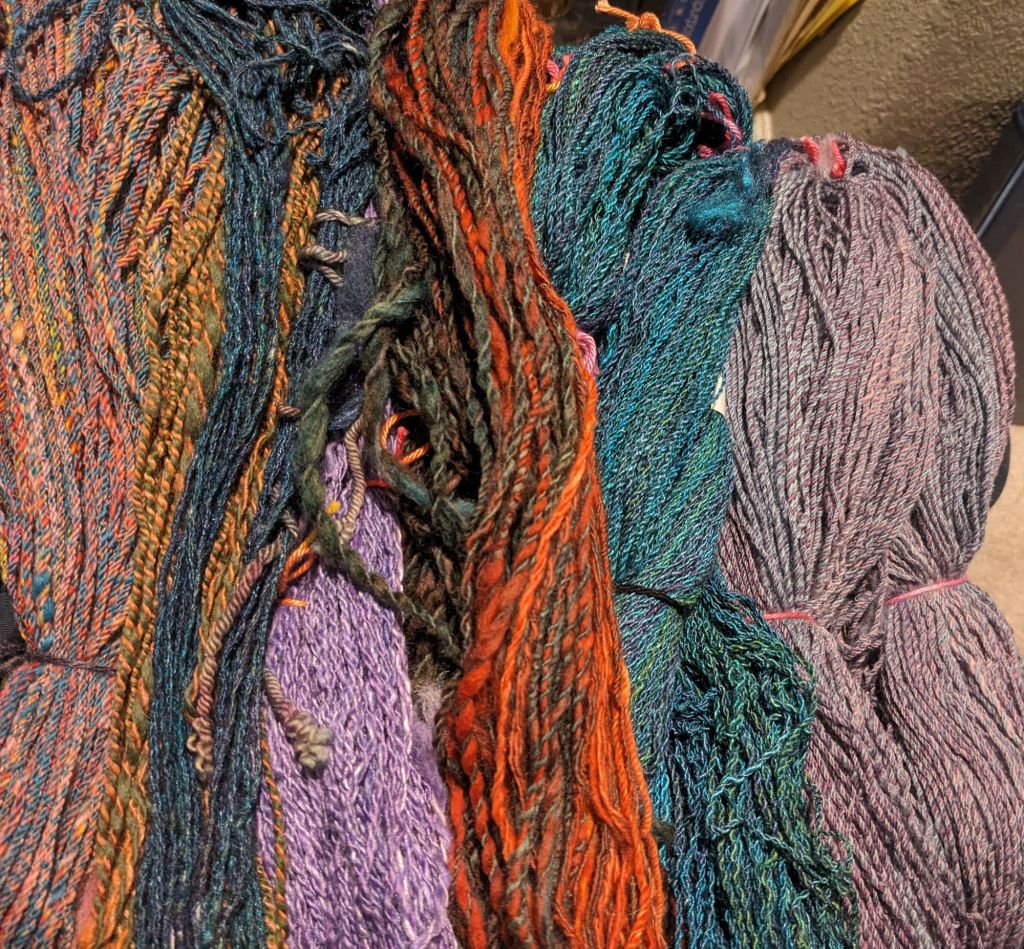
Spinning yarn is simply… simple. It’s putting twist in some strands of fiber, and holding that twist “energy” in the yarn. And it’s ancient. We’ve been spinning as long as there have been nets to hold and trap things, clothes to wear, and bags to weave. I find spinning with the spindle to be the ultimate, original fidget spinner (literally), and with a bonus that I’ve created something! It’s a great hand activity for podcasts and audio media.
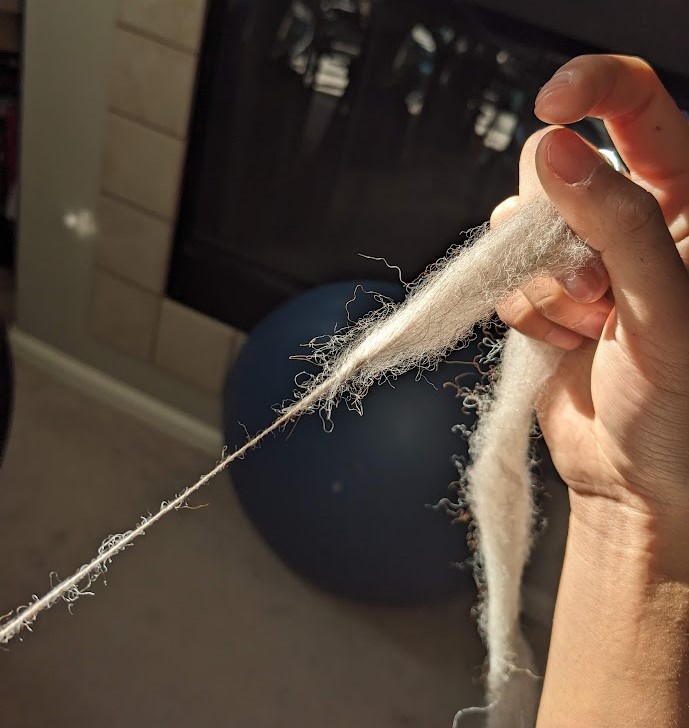
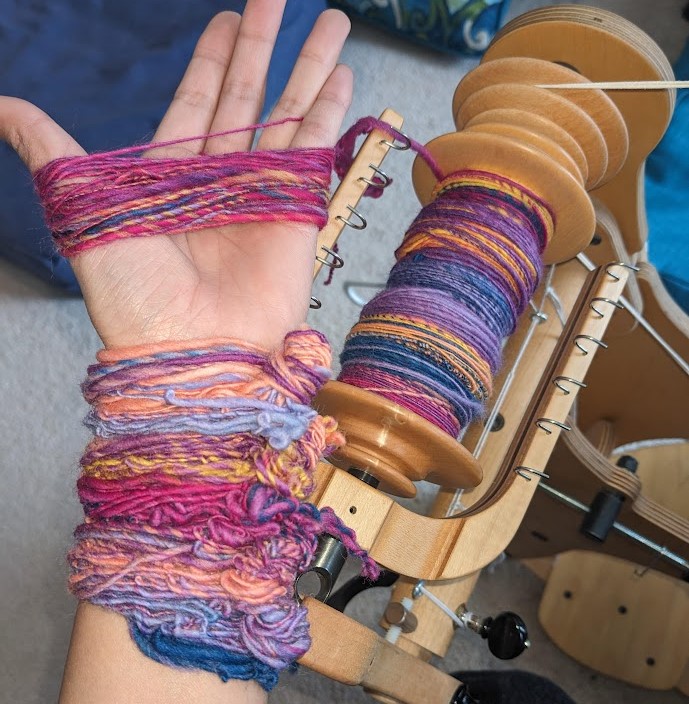
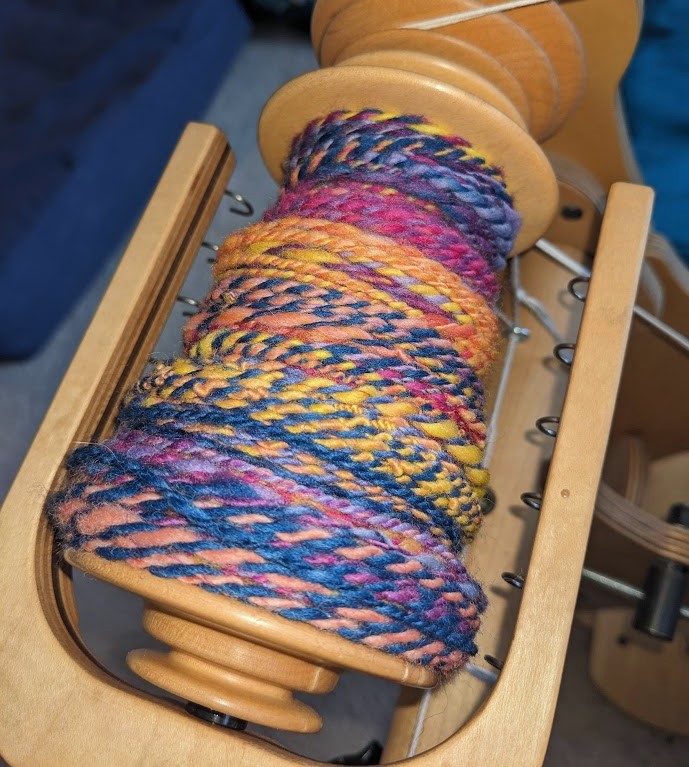
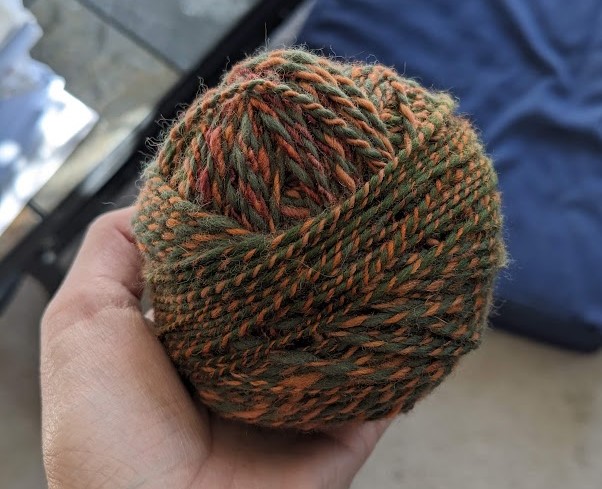
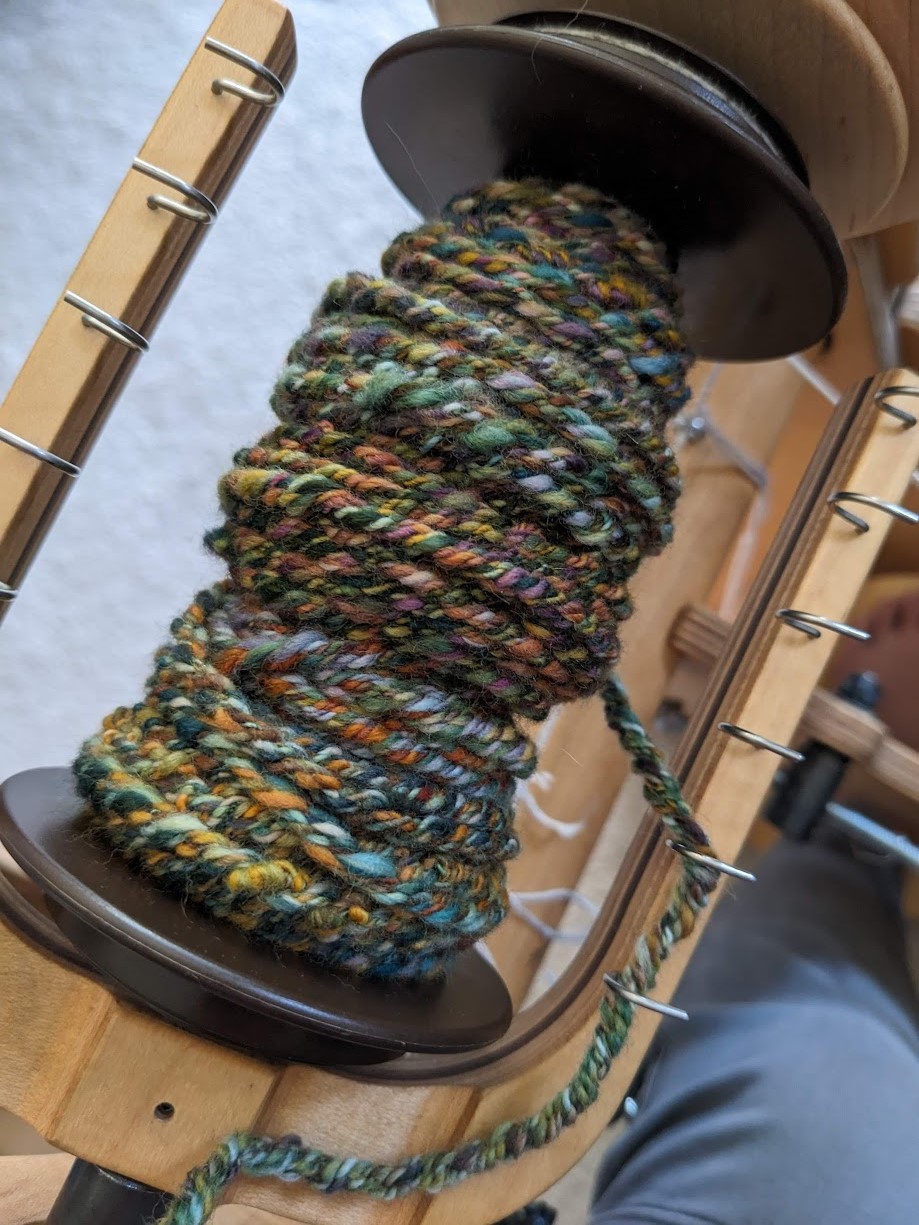
I find the color blending is like doing watercolor “wet on wet” – you can have plans, but the medium itself executes the plan and introduces beautiful randomness that I couldn’t have made myself. This is especially true when doing a two-ply yarn – I spin one long string and (systematically) fold it in half, not knowing what the middle is going to look like at all!
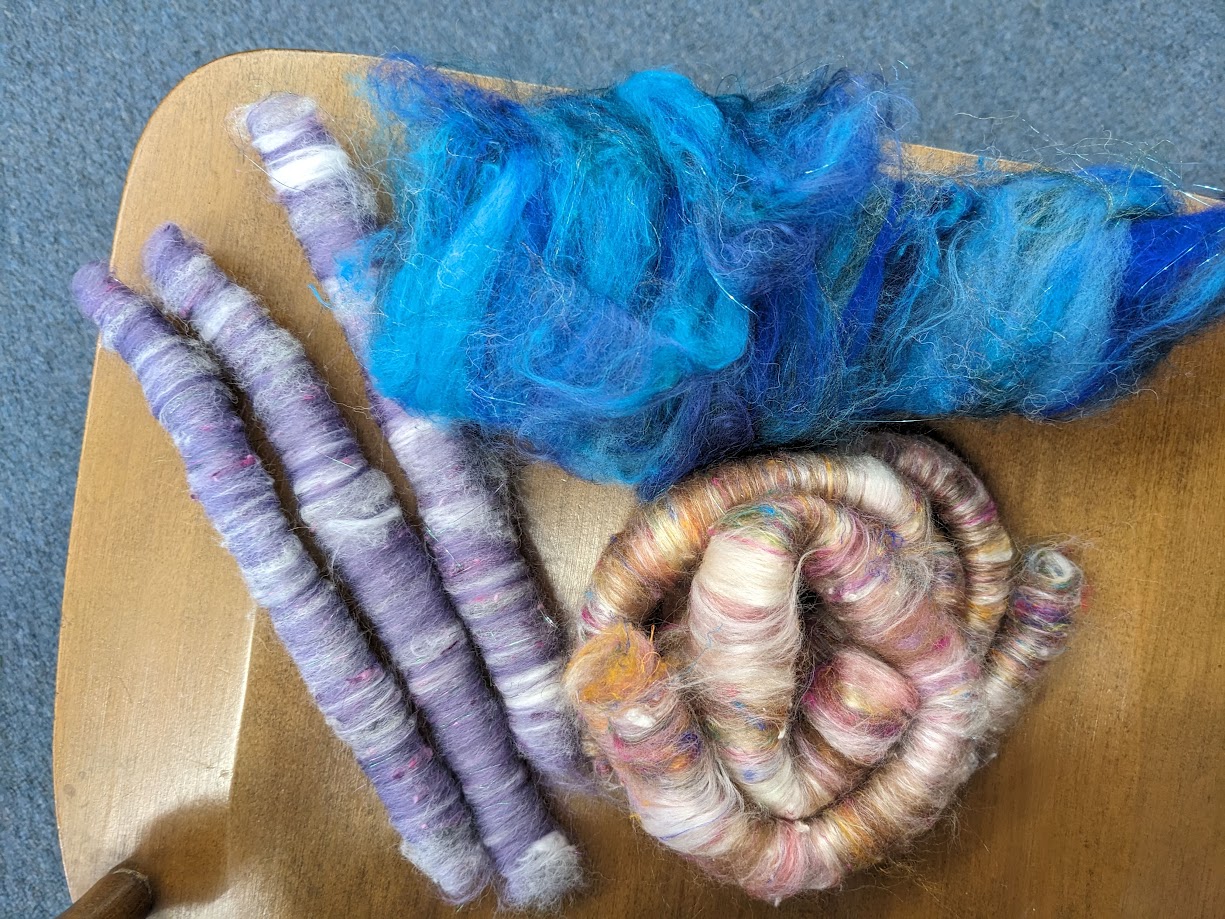
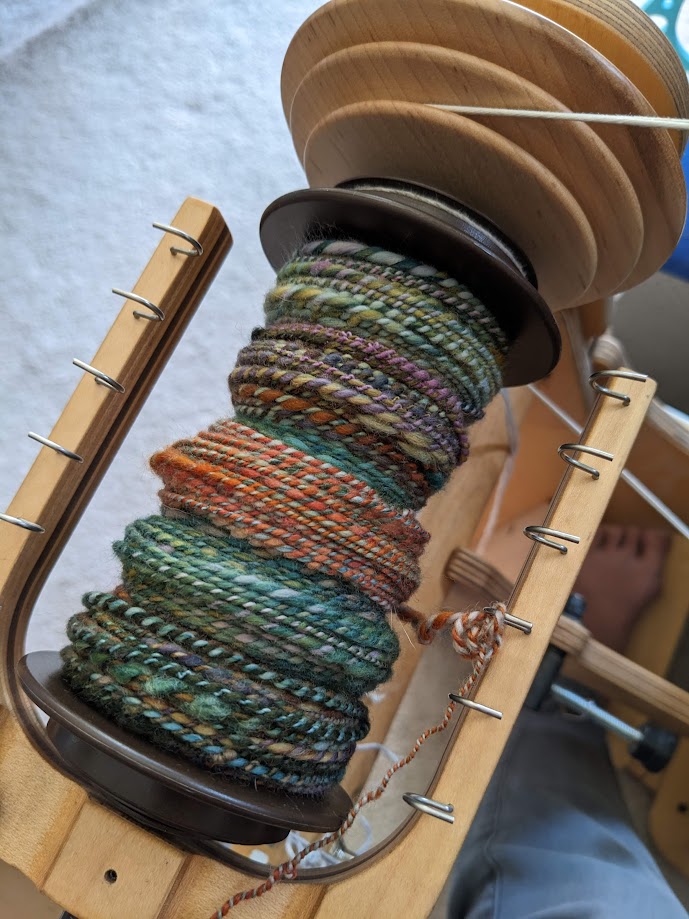
Plus, I can make a lot of different textures – wiry, fluffy, thick, thin, varied, consistent… just a lot of experimentation and fun.
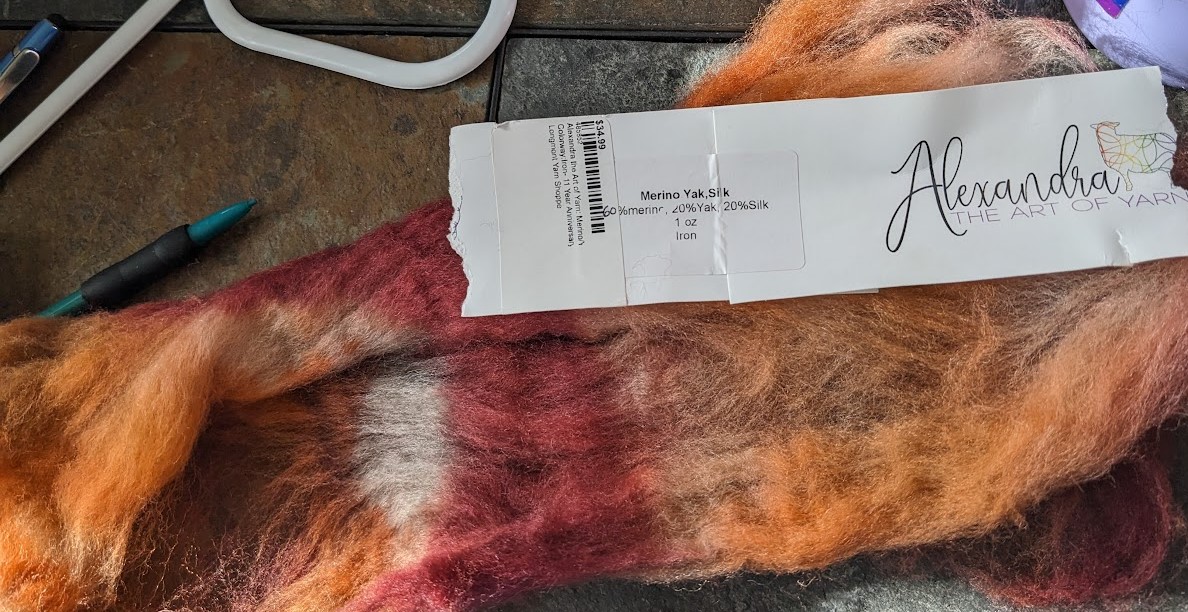
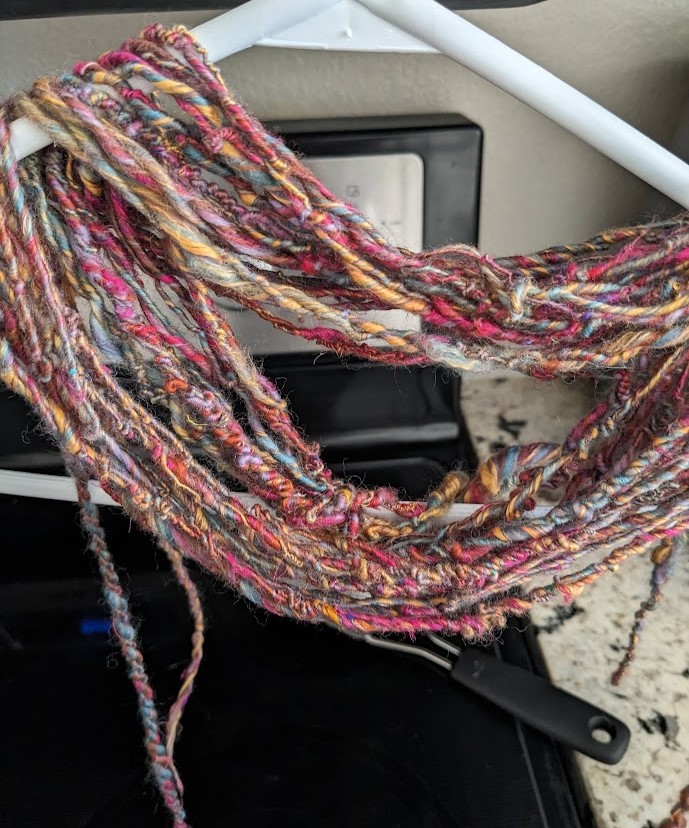
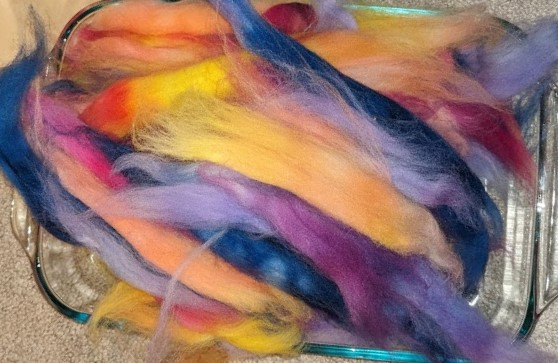
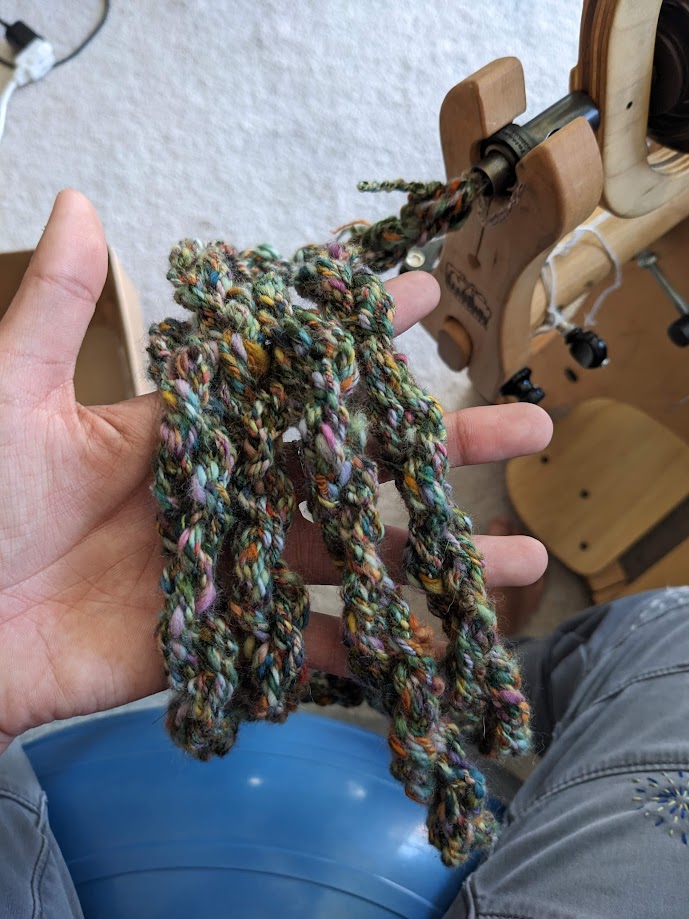
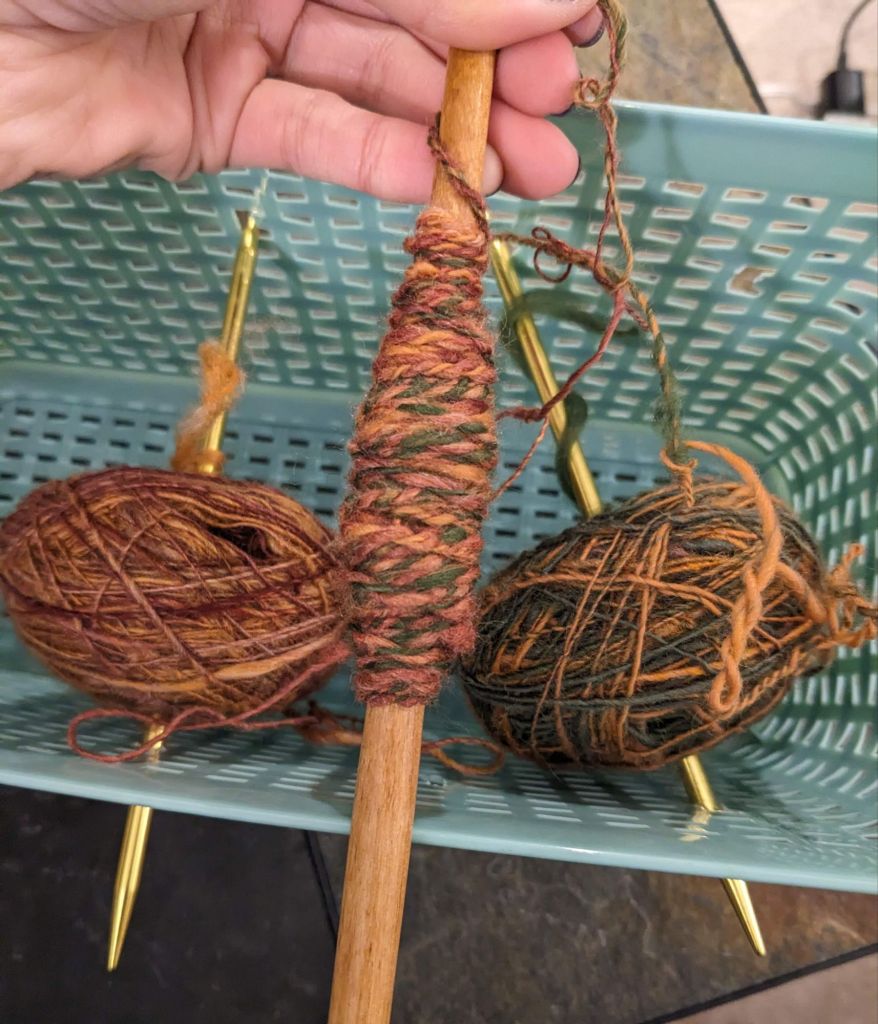
I plied this yarn a bunch of times to make a strap for a bag 🙂 It was some leftover fiber from my Tetons Extravaganza and it was just so colorful and green/flowery that I wanted to use it in a different way.
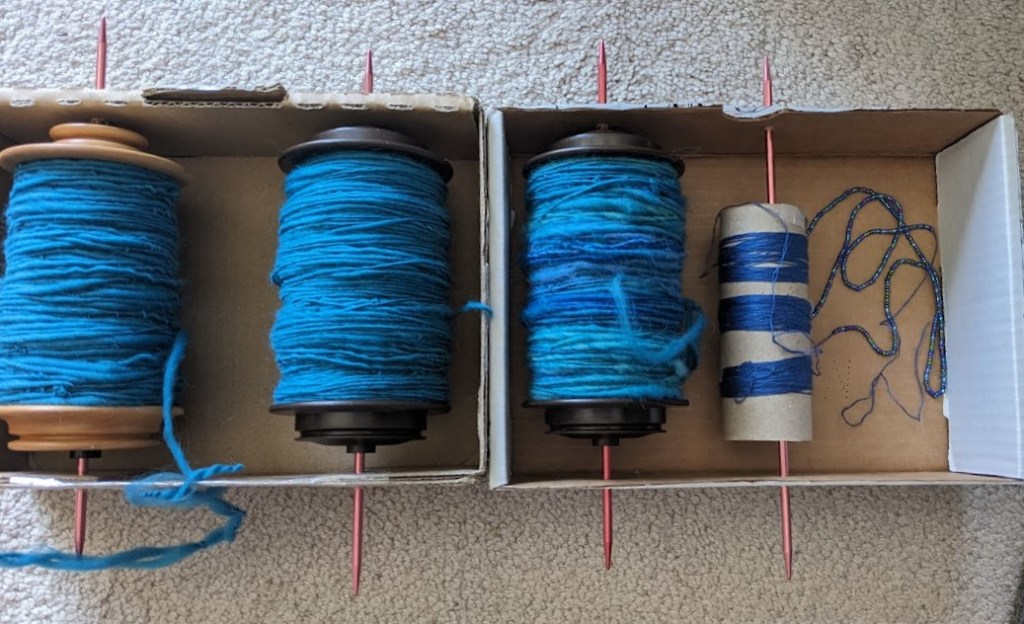
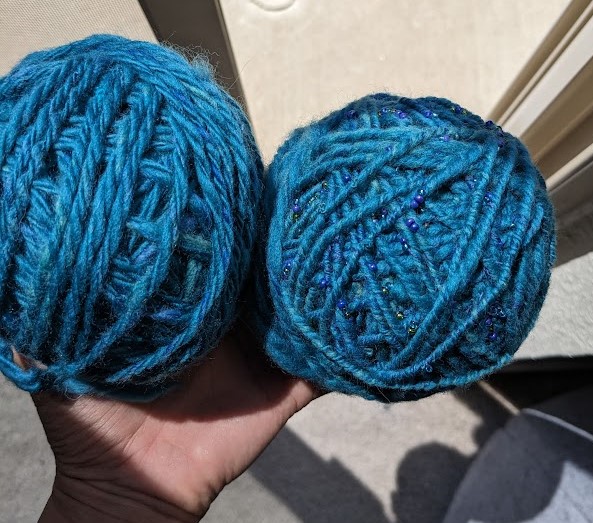
And then I got crazy and started adding beads!! 🙂 So shiny and fun. It was kind of annoying putting all the beads on the thread, but super worth it.
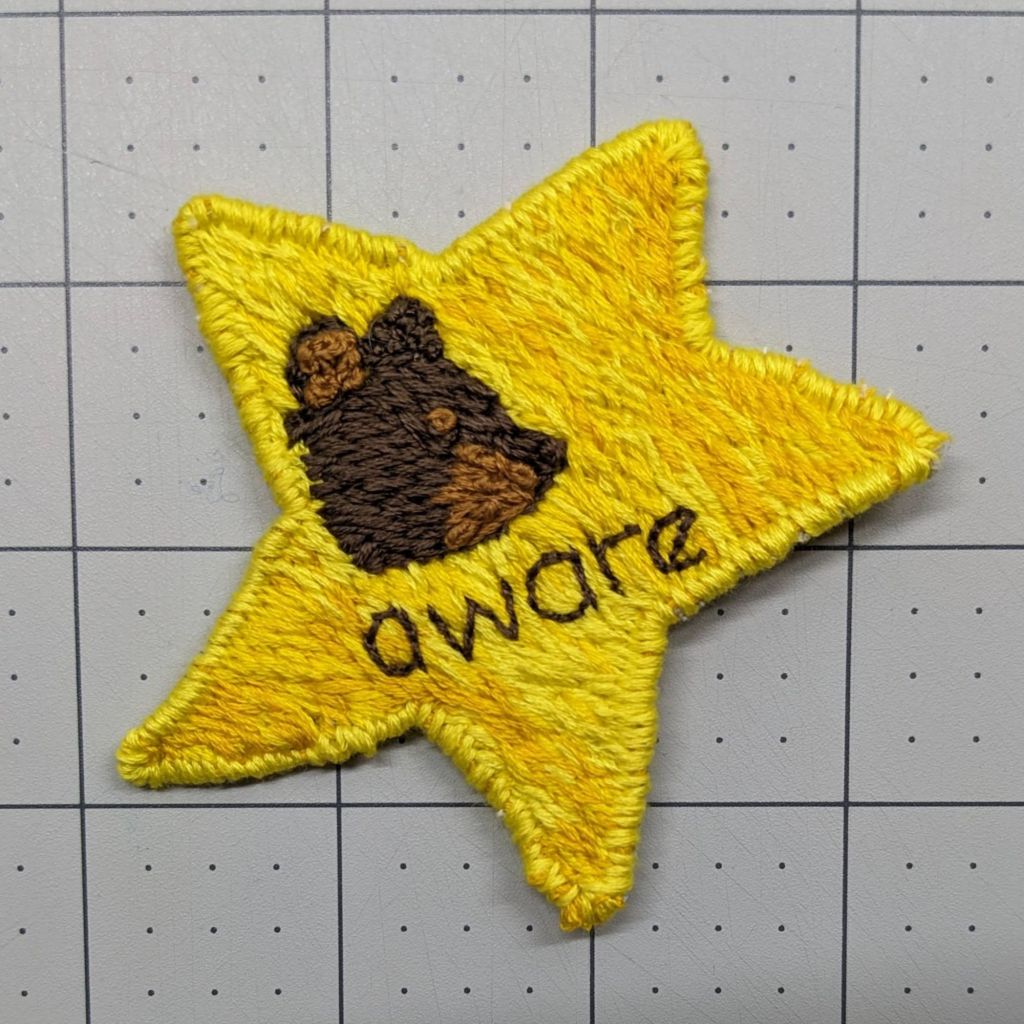
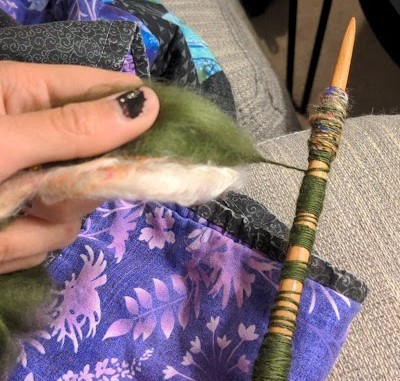
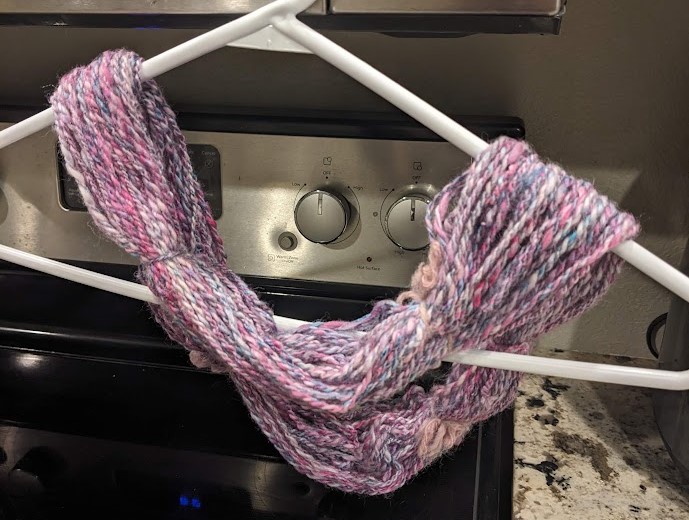
And of course, making things with the yarn I make. 🙂 crochet, weaving, I have even spun yarn thin enough to embroider with.
I’m figuring out how to walk around my house and spin, and my next data metric is figuring out how much yarn I can get from a given weight of fiber – which is a test of consistency, and makes the final fabric more even and less lumpy.
Main inspirations and resources:

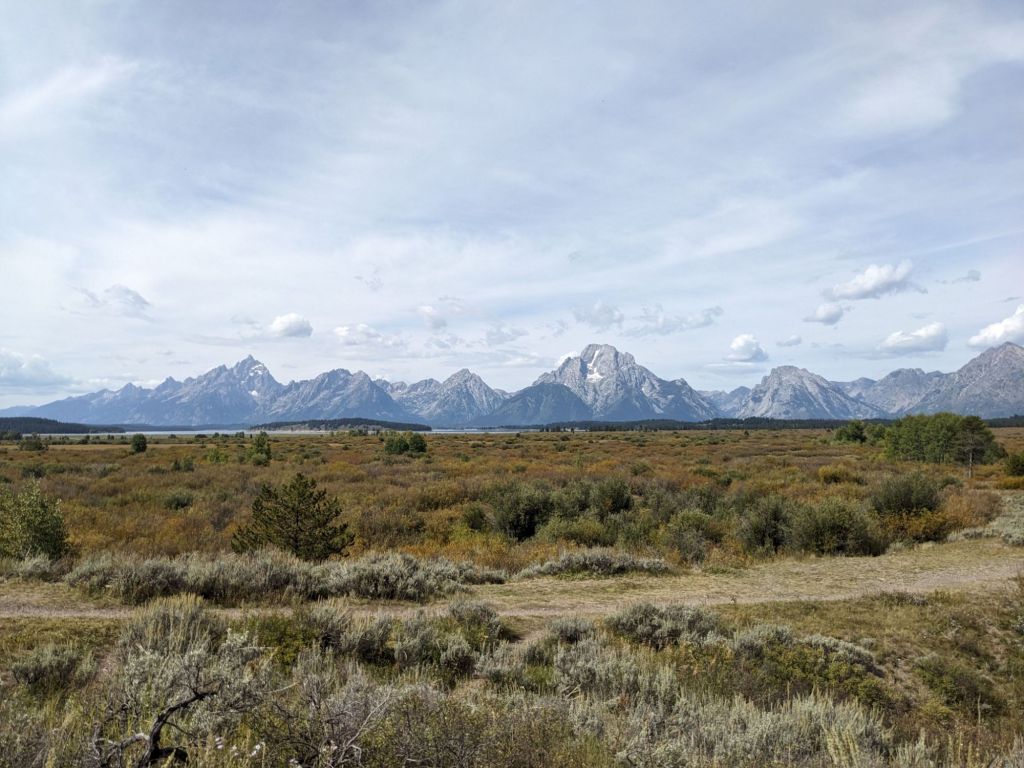
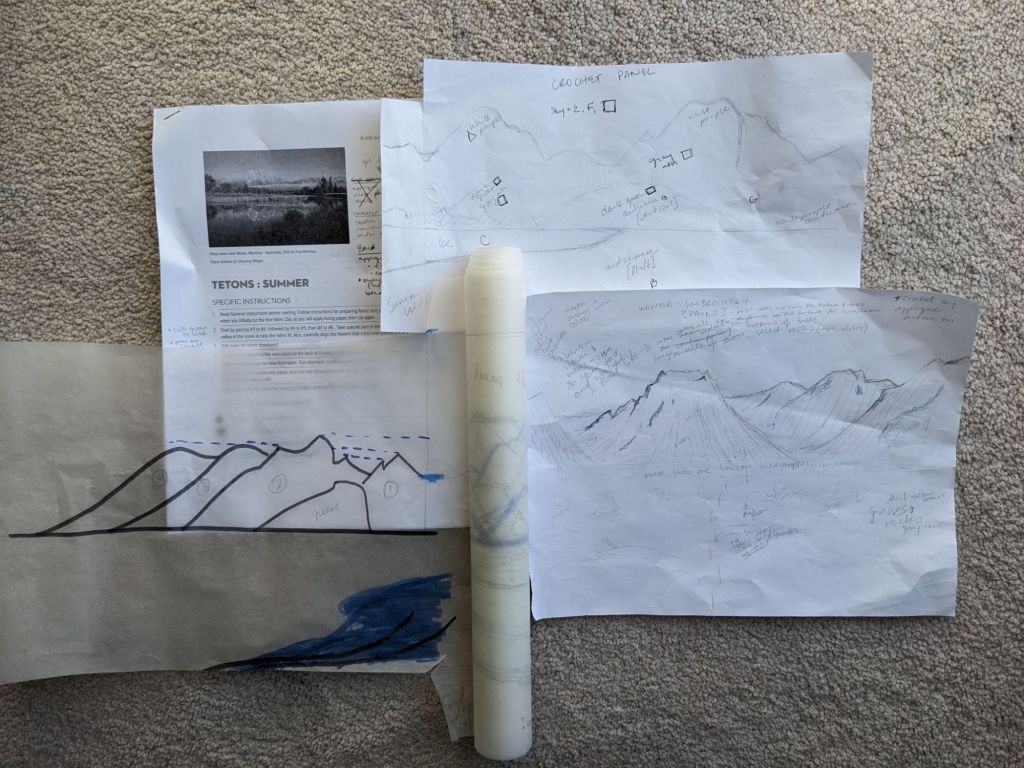
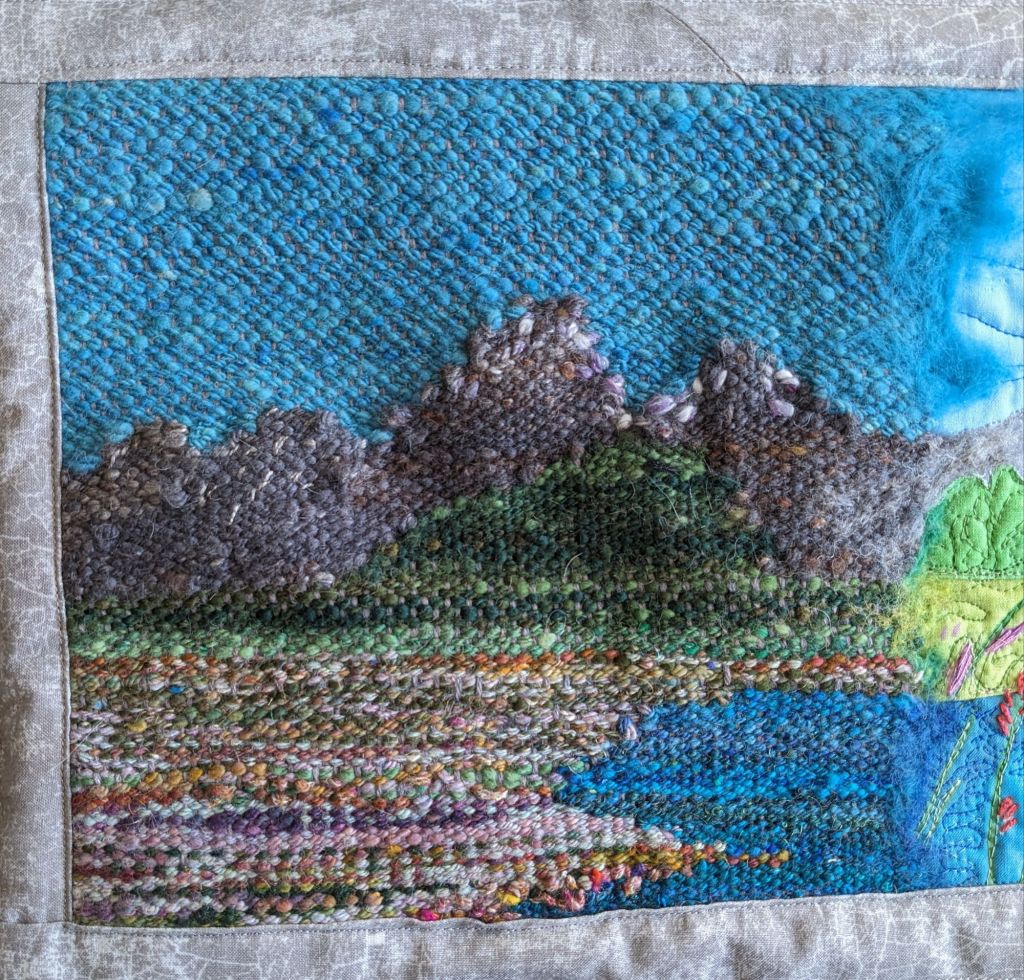
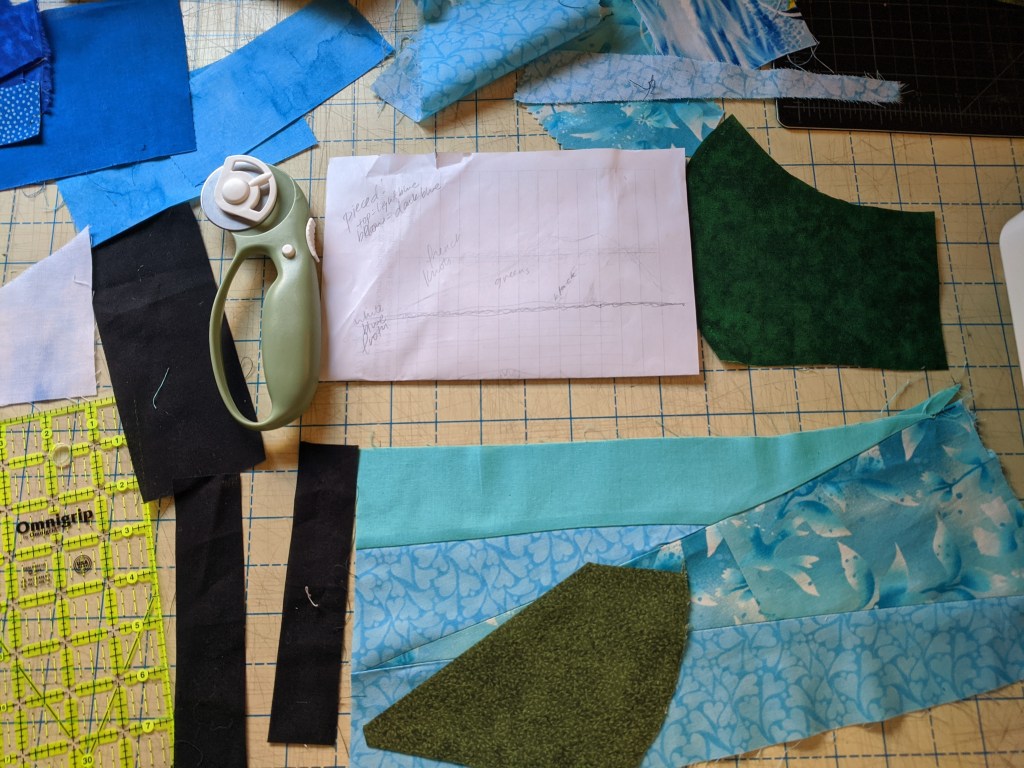
So I’ve collected a lot of skills 🙂 and after picking up a “summer” quilting kit from the Grand Tetons last year, I wanted to expand that project into a Whole Big Thing. The kit references the possibility of doing the same scene but with different fabrics for different seasons, but I wanted to do a full panorama with different peaks, depicting as much as I could of the Teton Range. I used some tracing paper to plan out panels for each of the four seasons, scaled so they’d match up with the quilted panel. My main reference photo is from Willow Flats Overlook when I visited in 2023. The perspective of the quilt is a bit different, but I kind of… made it work.
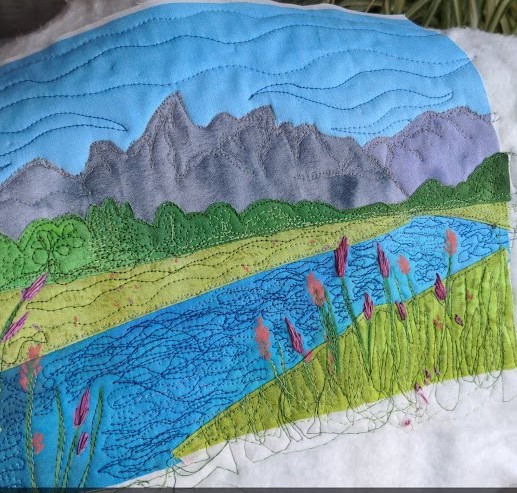
I started off with the applique quilting kit and added some free motion quilting for details. It was really fun to work on things on a smaller canvas and be able to do details without getting overwhelmed. I also added some hand embroidery for the flowers because I wanted them to pop out 🙂
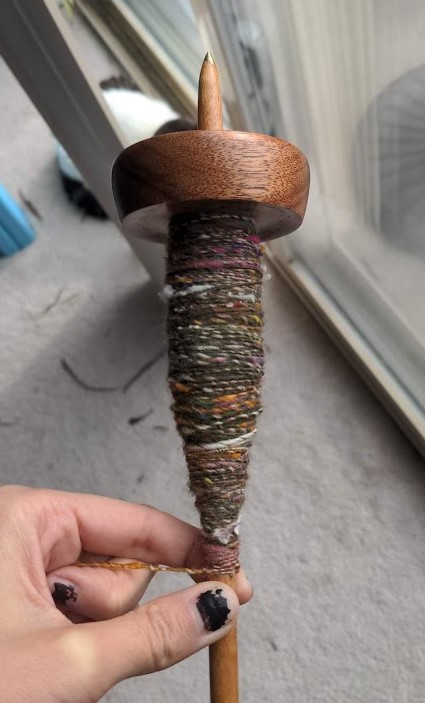
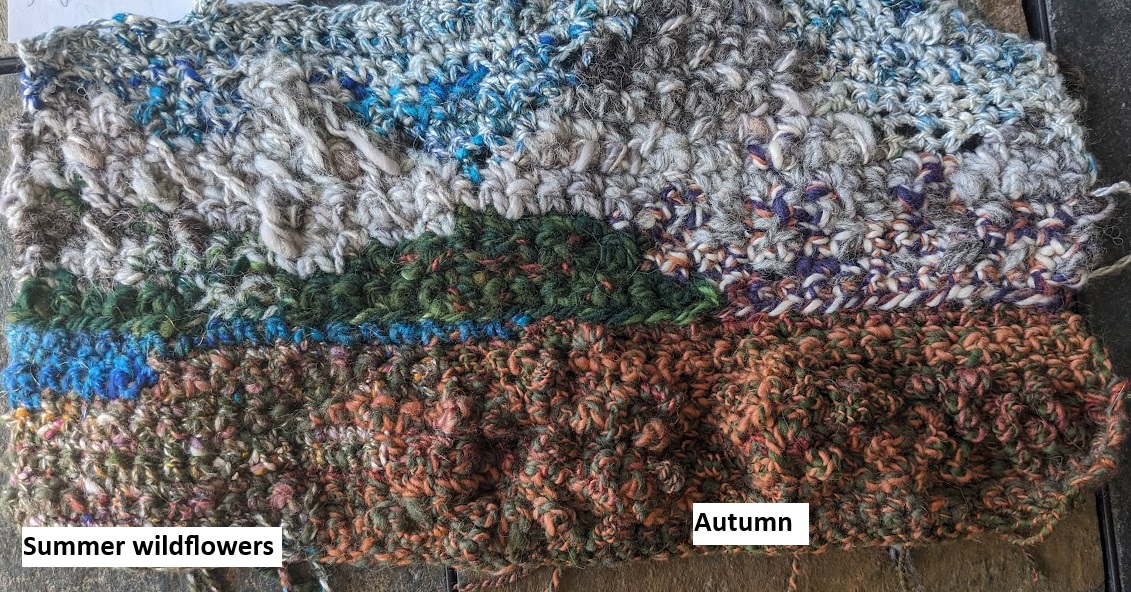
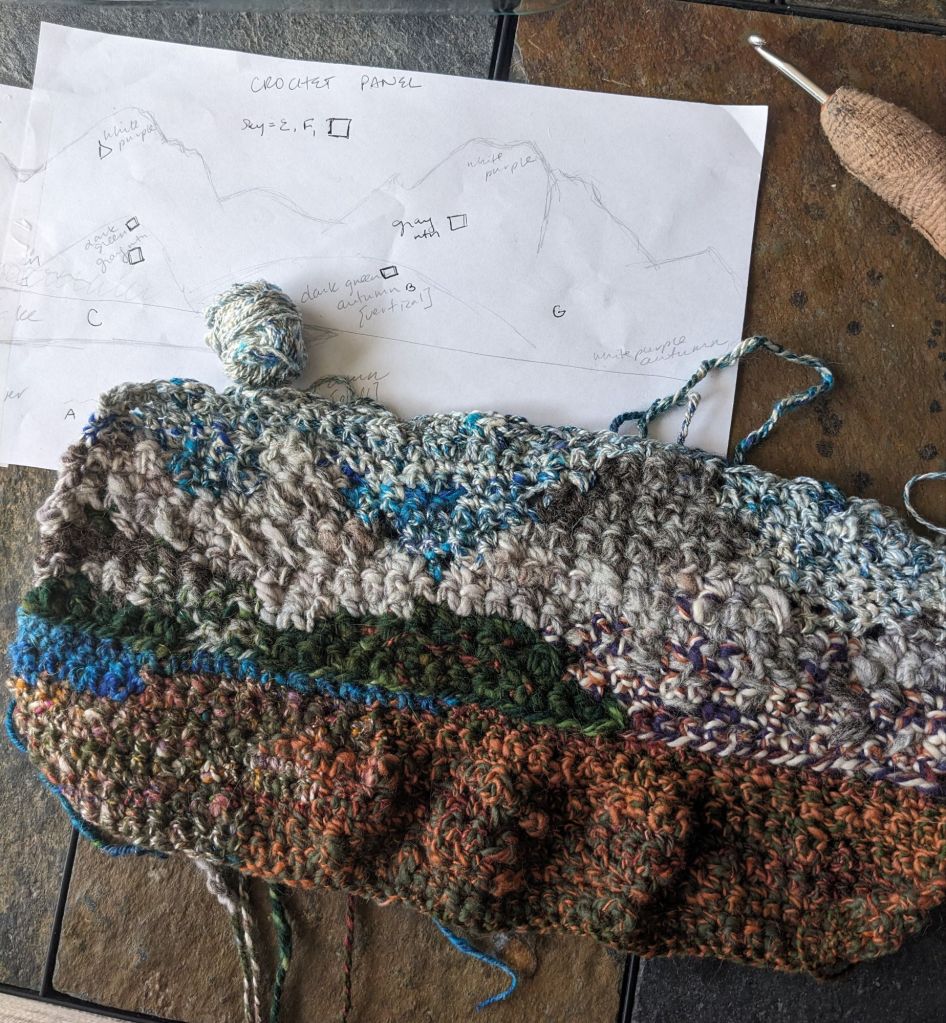
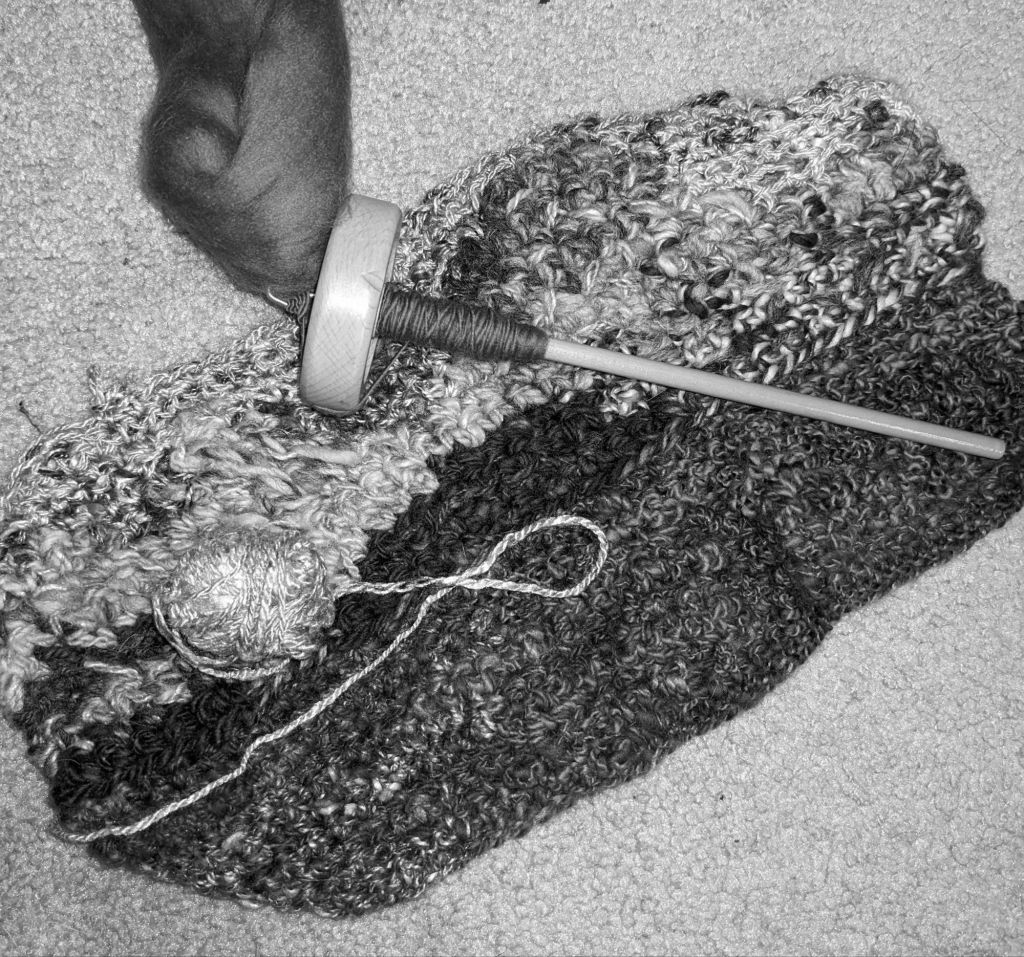
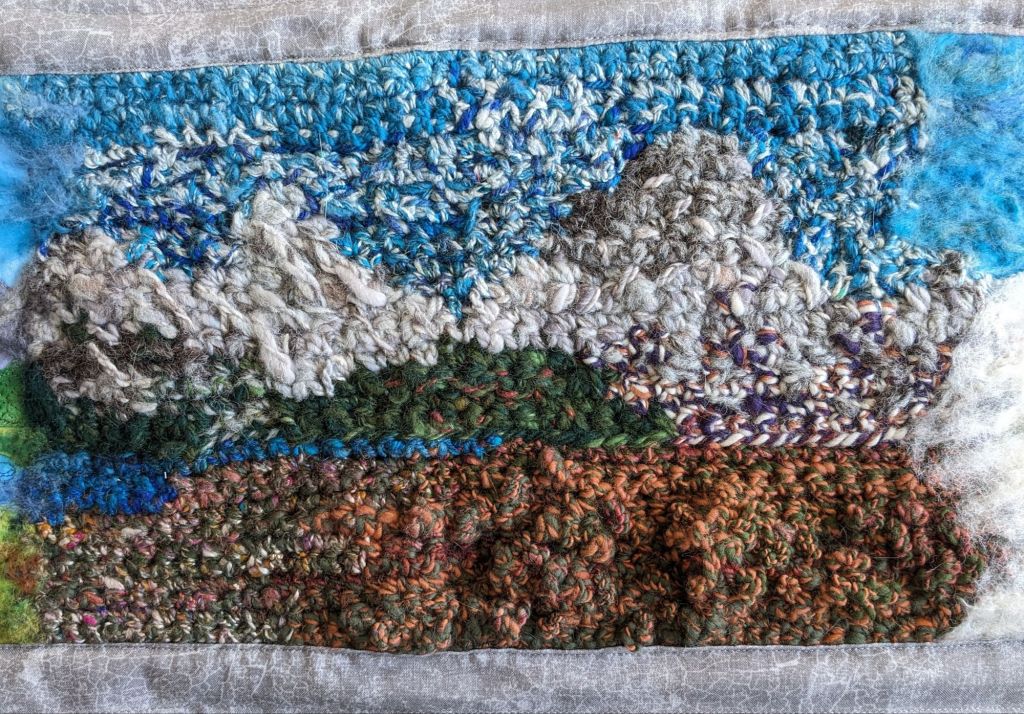
My first instinct for the next panel was to use crochet, using some funky colorwork and textured stitches. I spun up yarn for each of the different sections: sky, lake, mountains of various white and gray mixes, and autumn-y colors for the sagebrush.
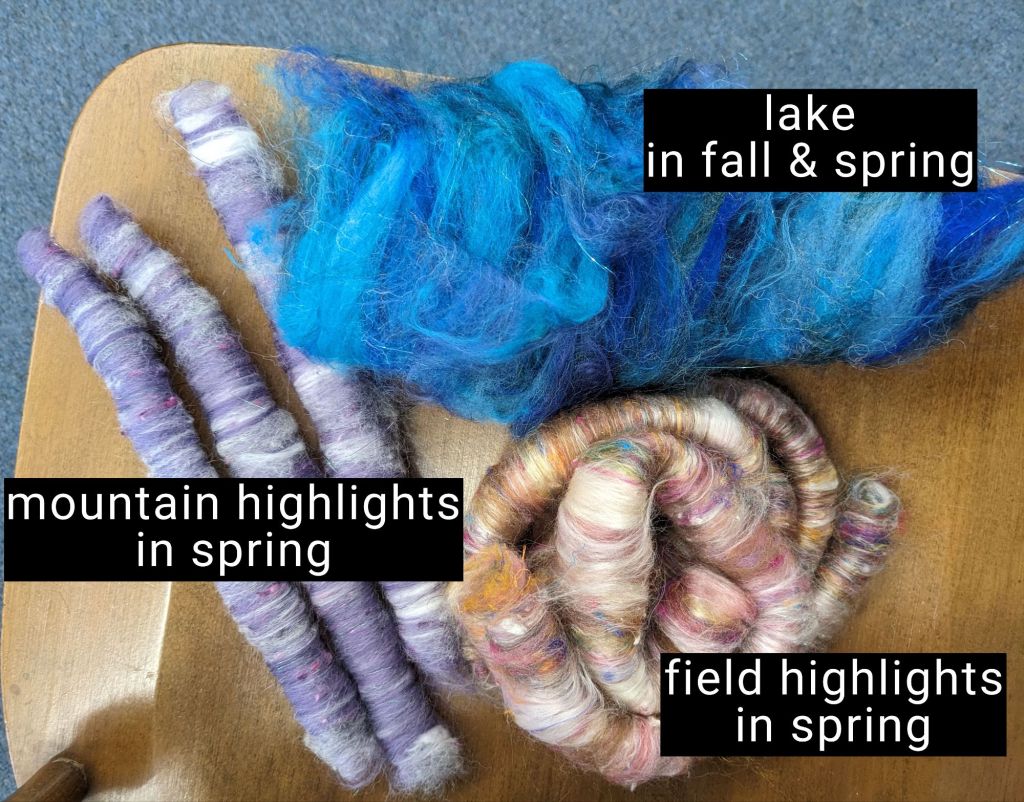
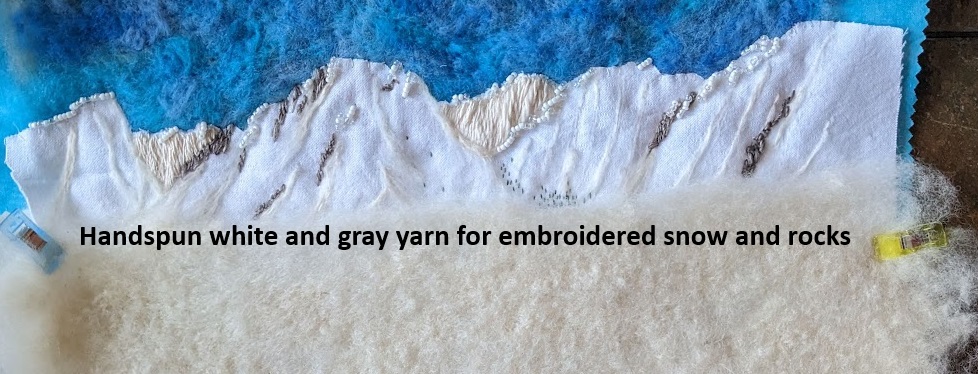
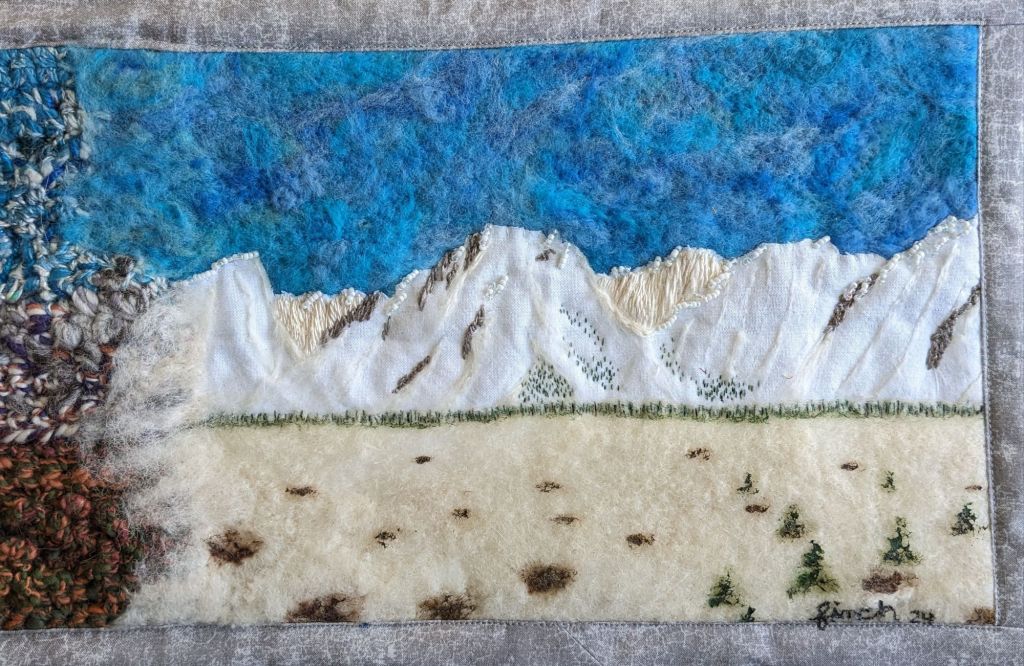
After I had summer and autumn, I struggled with what to do next. I knew I wanted an embroidery panel and a woven panel, but I wasn’t sure which should be spring and which should be winter. I talked it over with a friend and we decided that the crochet shouldn’t be next to the weaving, since they have similar textures and detail resolution. So winter was embroidery! I started by needle felting the background sky and foreground, to automatically add texture that I didn’t need to stitch. I spun some thin yarns of cream/white and rock gray, which was a fun challenge to spin thin enough and consistently enough that I could use it with a normal sized needle. I also thought some beads would be fun for the shininess of the snow 🙂
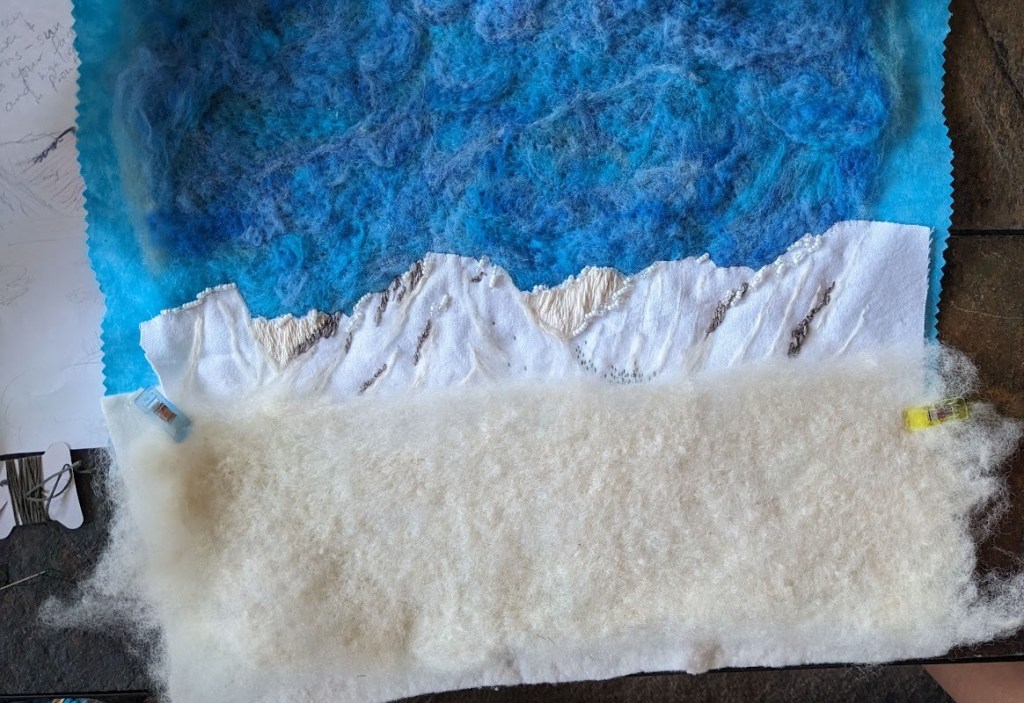
I was planning to do the winter foreground details with embroidery, but I realized I wanted to incorporate paint into this project, so I used acrylic paint to add trees, bushes, and rocks. It was difficult to paint onto the felted surface because the brush strokes pick up fibers from the felt, but it was doable.
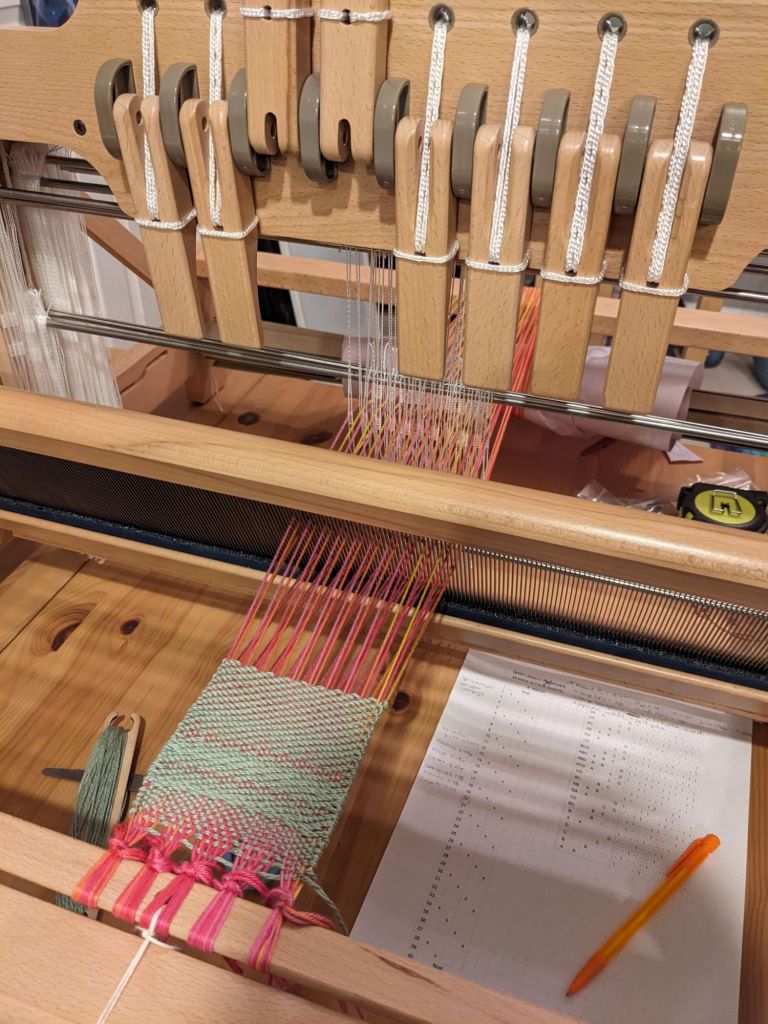
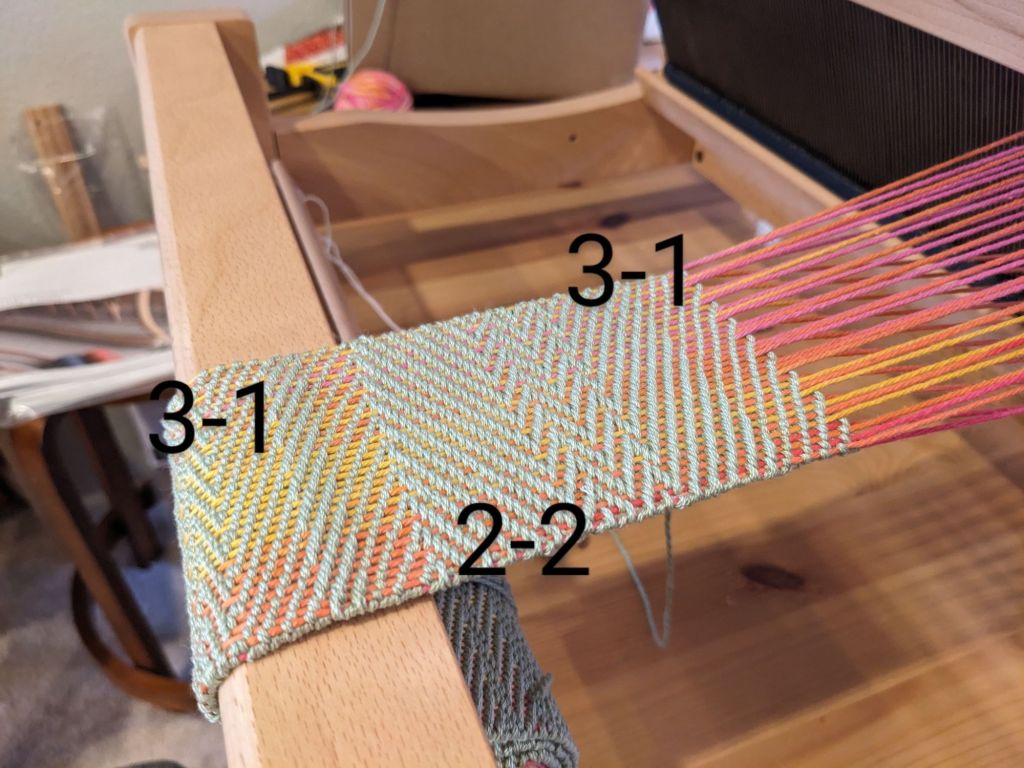
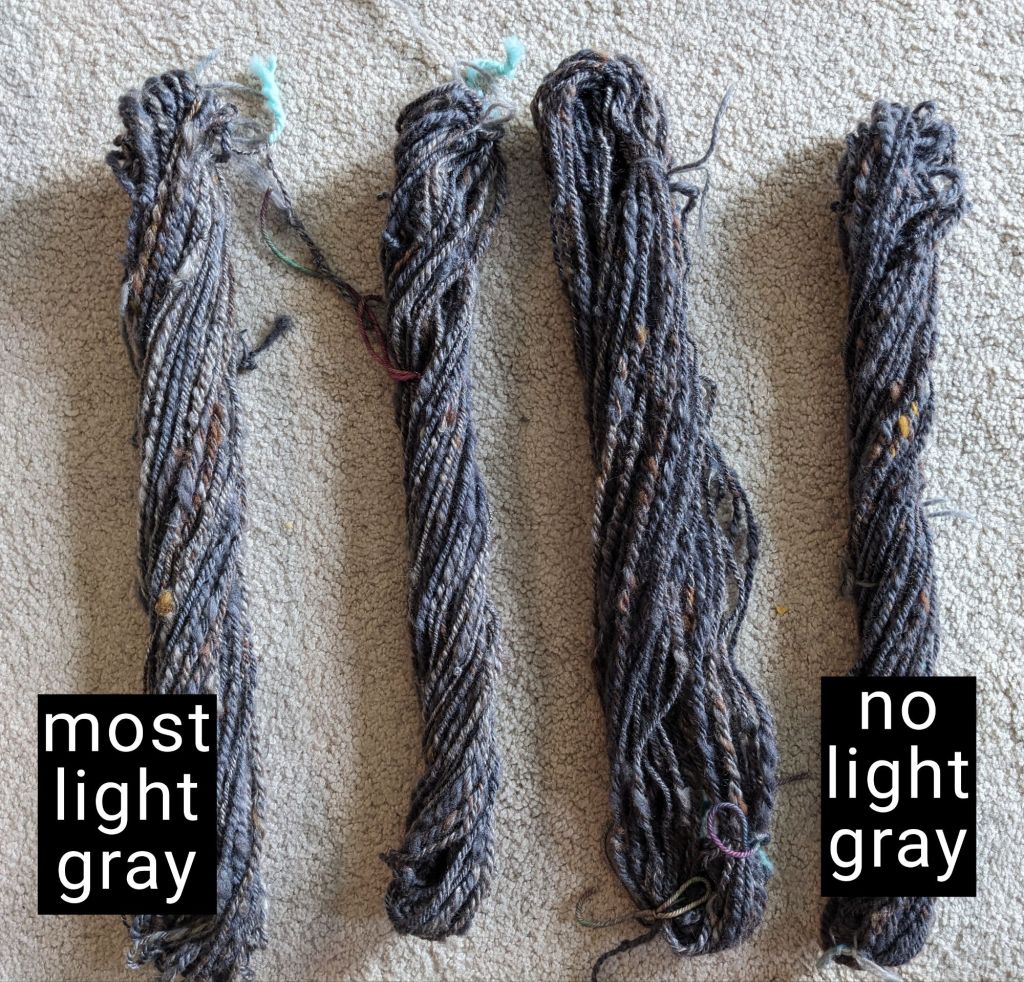
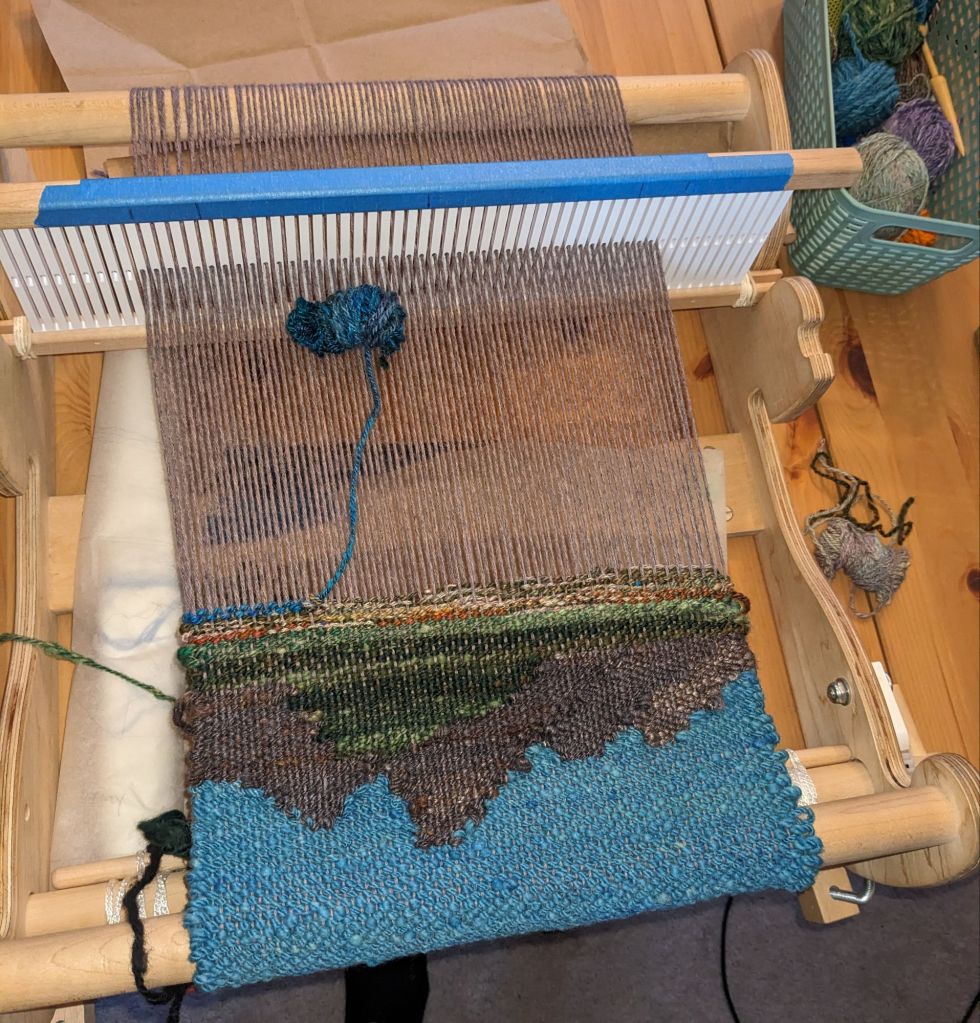
Then I needed a tapestry weaving for spring. Just like with the crochet, I only used yarns I’ve spun, and spun up a few more just for this. I had four different mountain-y layers that I wanted to represent, so I spun four different grays with graduated levels of light gray. In hindsight, I made WAY TOO MUCH, but it was fun. And now I have more mountain gray for later.
I took a weaving class where we were able to take the loom home for a week, and capitalized on this moment to (a) finish this project, and (b) see if this type of loom is useful for tapestry weaving (that’s not its primary use). It was a successful proof of concept for using this type of loom for tapestry, but I think I’m going to pursue purchasing a different kind of loom for some more flexibility and growth potential.
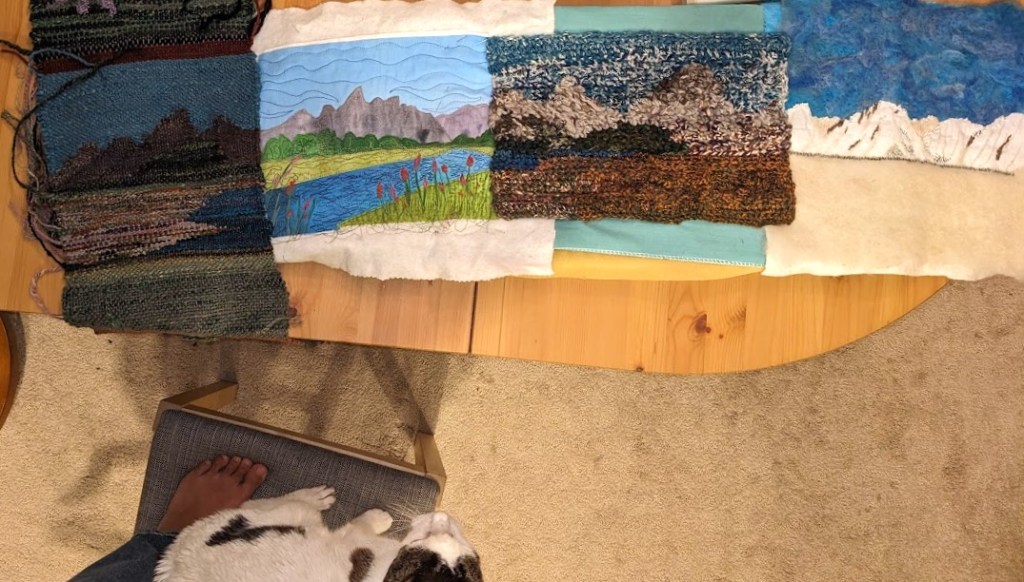
I used some extra fiber to needle felt over the seams between the panels, and then did a border to secure everything together.
My main challenge in finishing this up was getting the crochet to sit the way I wanted it to. I ended up gluing it to some stiff scrap fabric to stabilize it, which went well…. Until I started sewing the fabric frame on. Hot glue and sewing machine needle is not a good pair. 🙂 But I took my time, learned my lesson, and got it done.

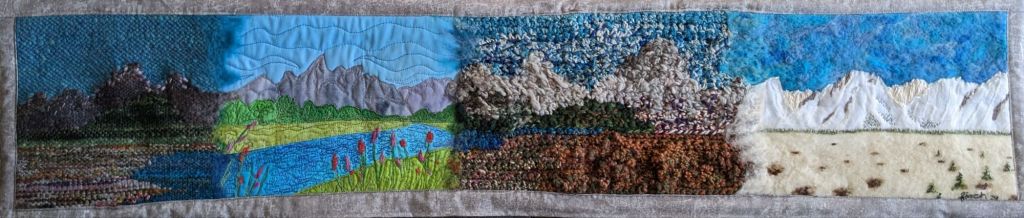
Project completed October 2024
I made these for my friend and her husband, based on their “Save the Date” stationery 🙂 it was super fun to revisit the wired slips technique and bring these flowers to the third dimension.

I made three different flowers; one with 5 petals (the one on the right), one with 7 petals (in the middle), and one with 20 petals (bottom left). I wanted to have different colors and textures across the flowers, and different petal shapes. The 5-petal flower has teardrop petals that come to a point, the 7-petal flower has petals with flat tops, and the 20-petal flower has rectangular heart shaped petals.
I poked the petals into one layer of fabric and folded the ends up, then embroidered the center stamens and pistils onto the fabric and anchored the petals to the fabric. Then I added in the leaves and made tiny stitches between petals and leaves and into the base fabric to secure all the elements together. I added another layer of fabric underneath the base fabric for some structural stability, and glued the entire assembly to a square canvas. The plain background ended up too plain, so I added some watercolor to the background to spruce it up and give it the idea of more leaves in the distance.
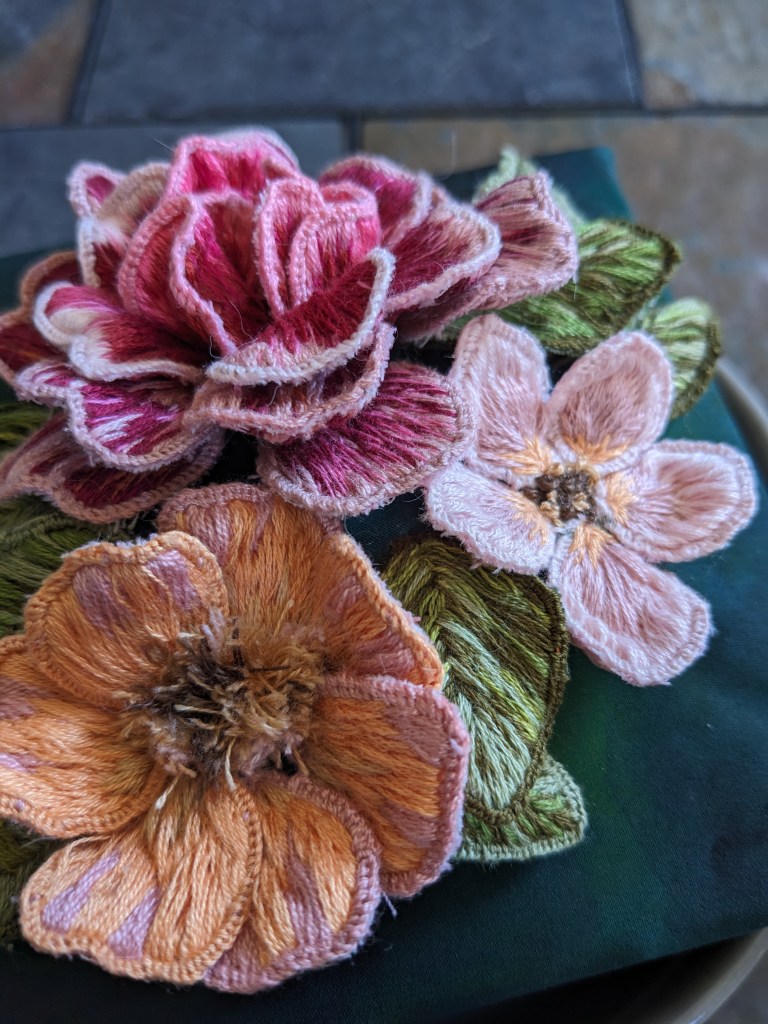
Project completed September 2023.
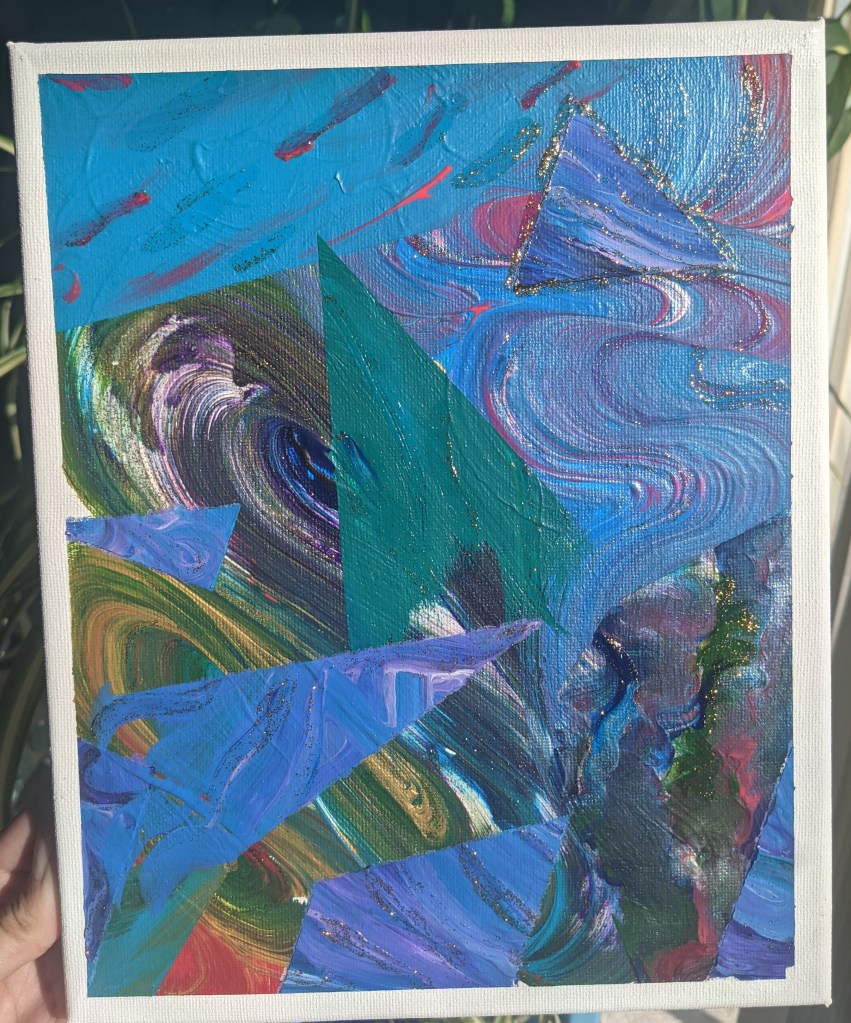
I was inspired to pick up the brush again by katiesstudio on TikTok; I wanted to try out their “swirl the blobs” technique of moving and mixing color across the canvas. And of course, I brought my masking tape techniques with me.
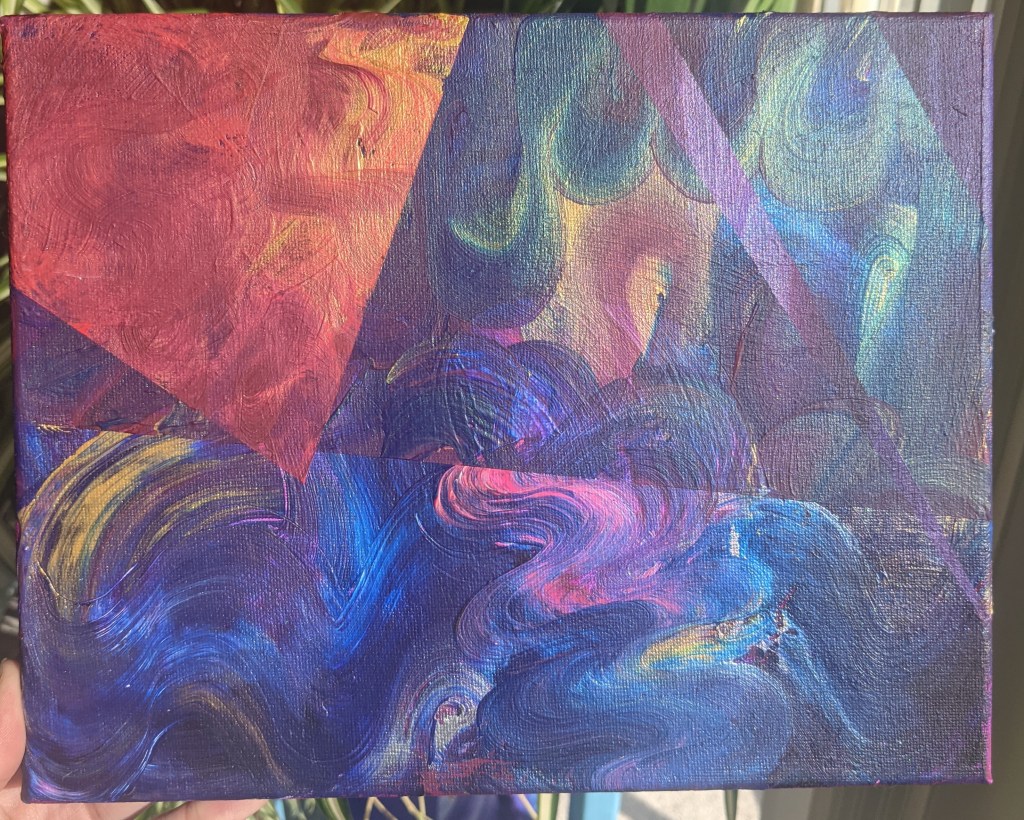
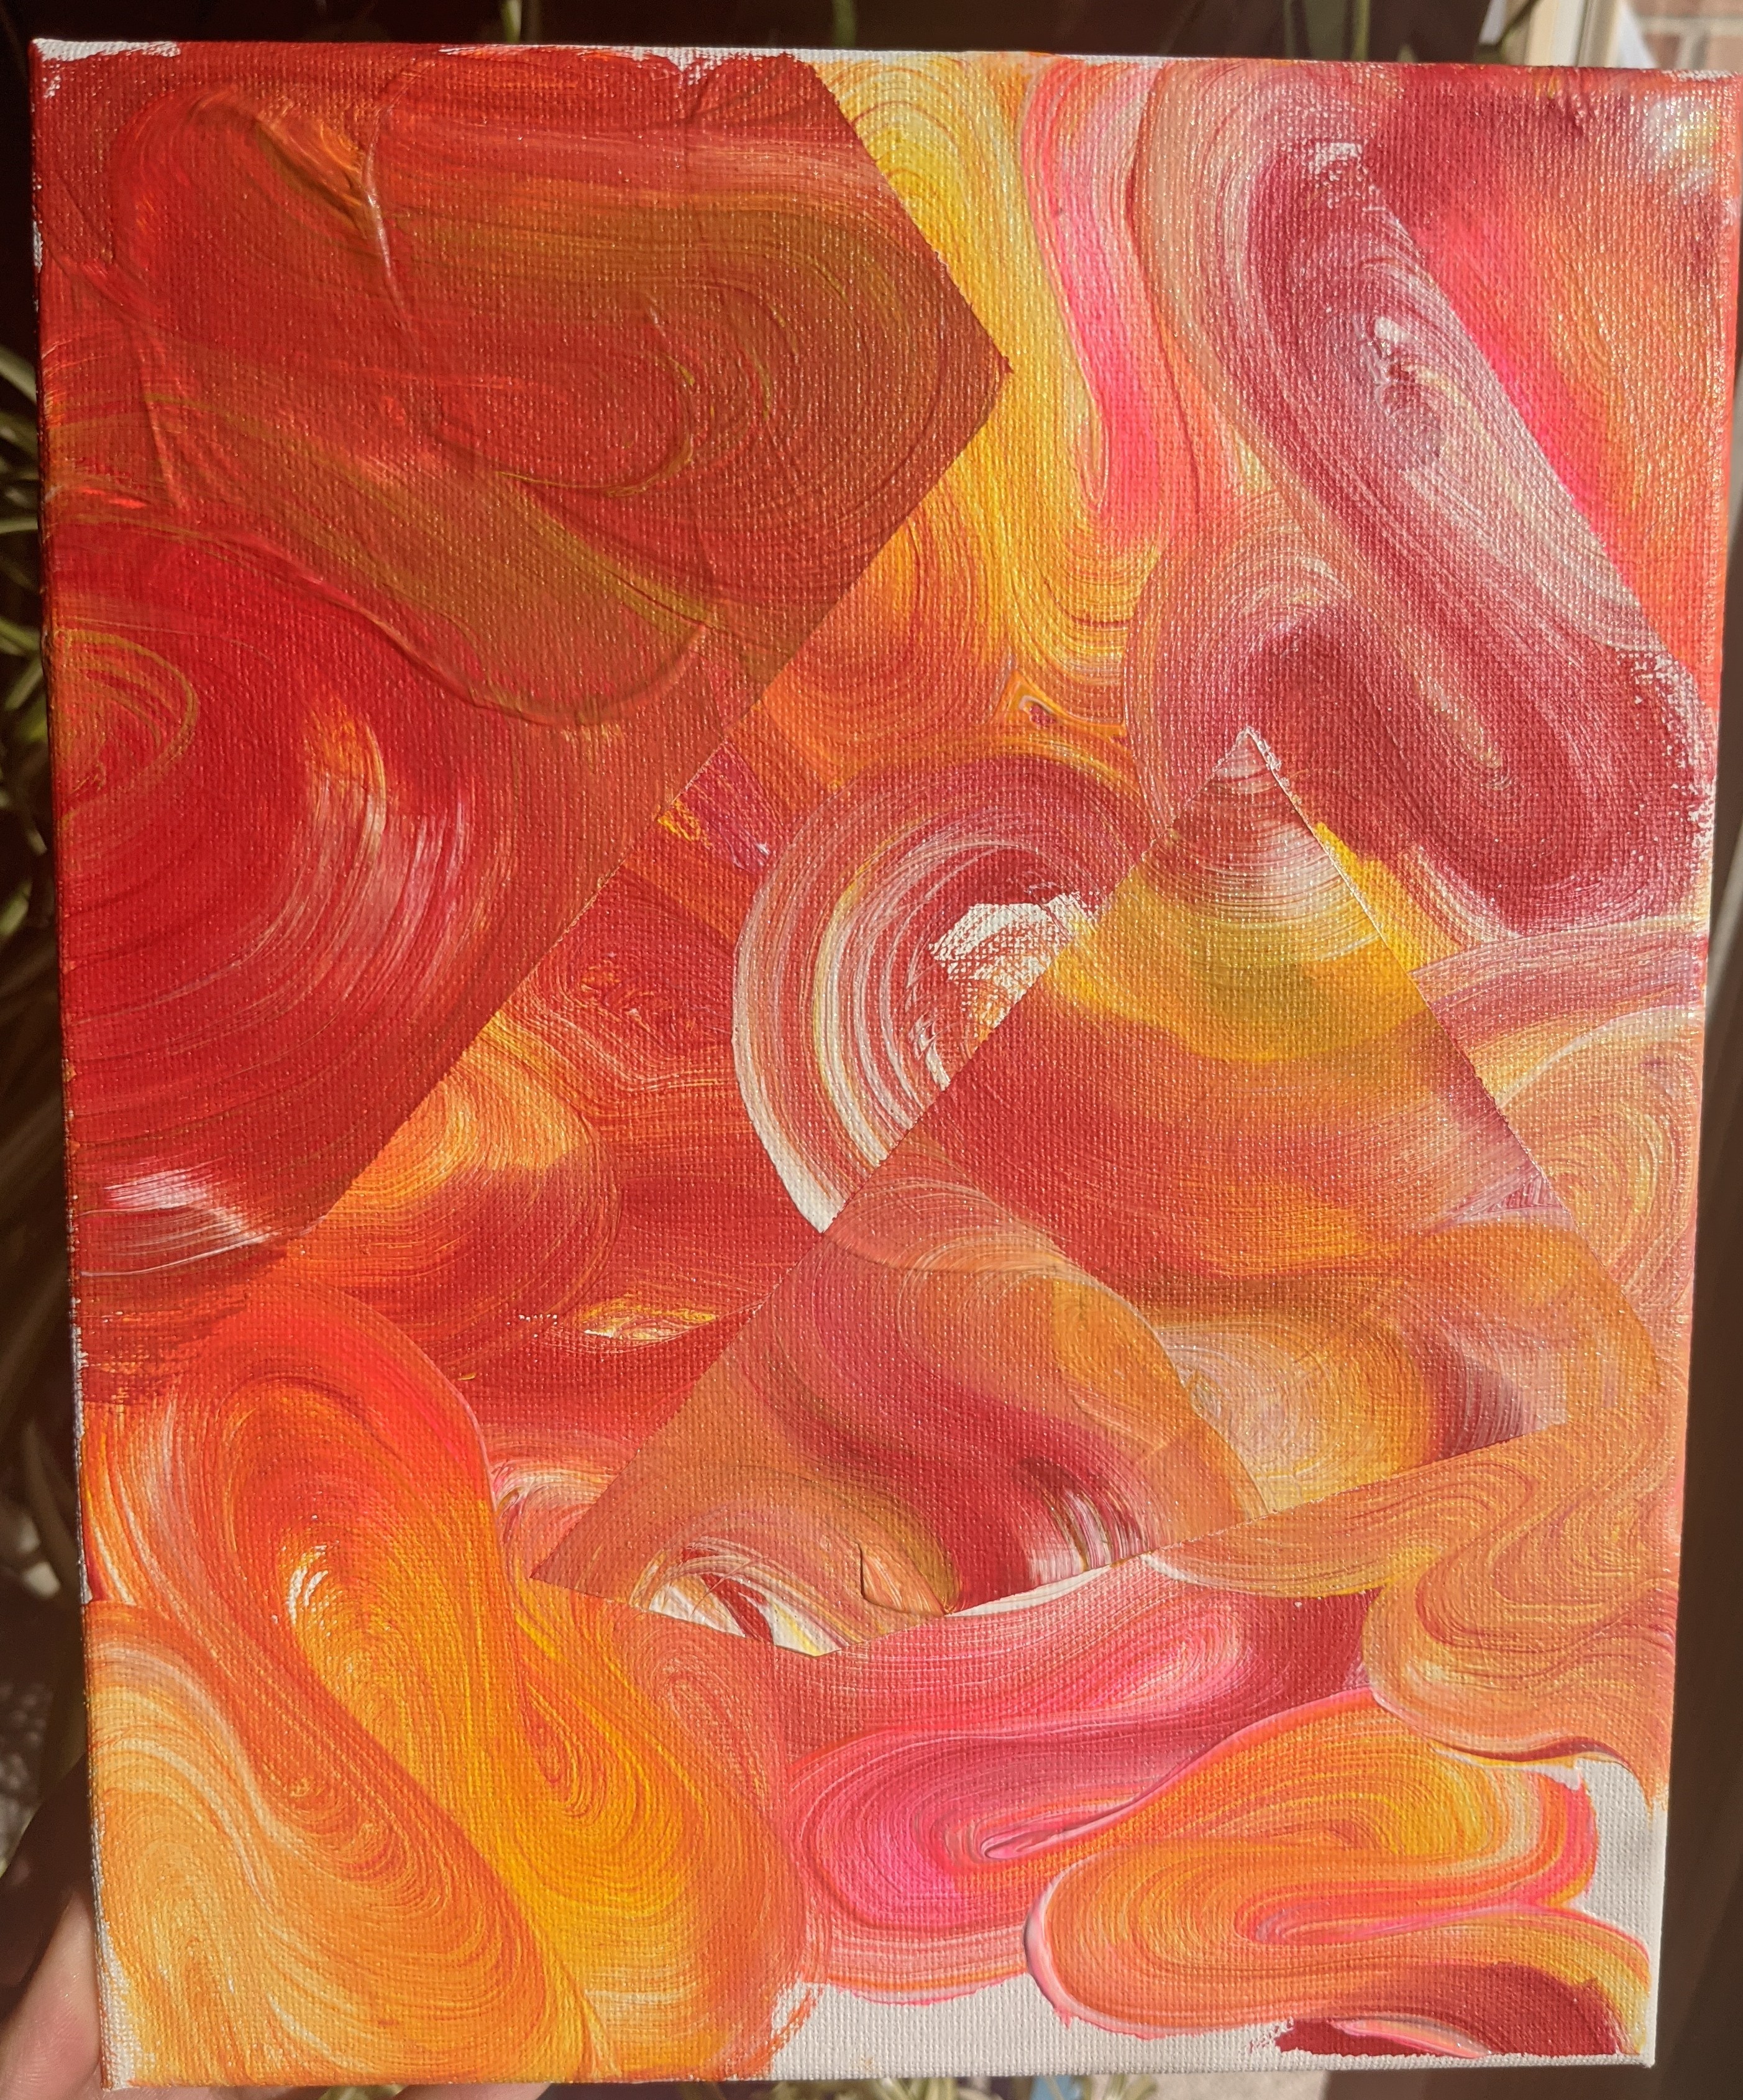
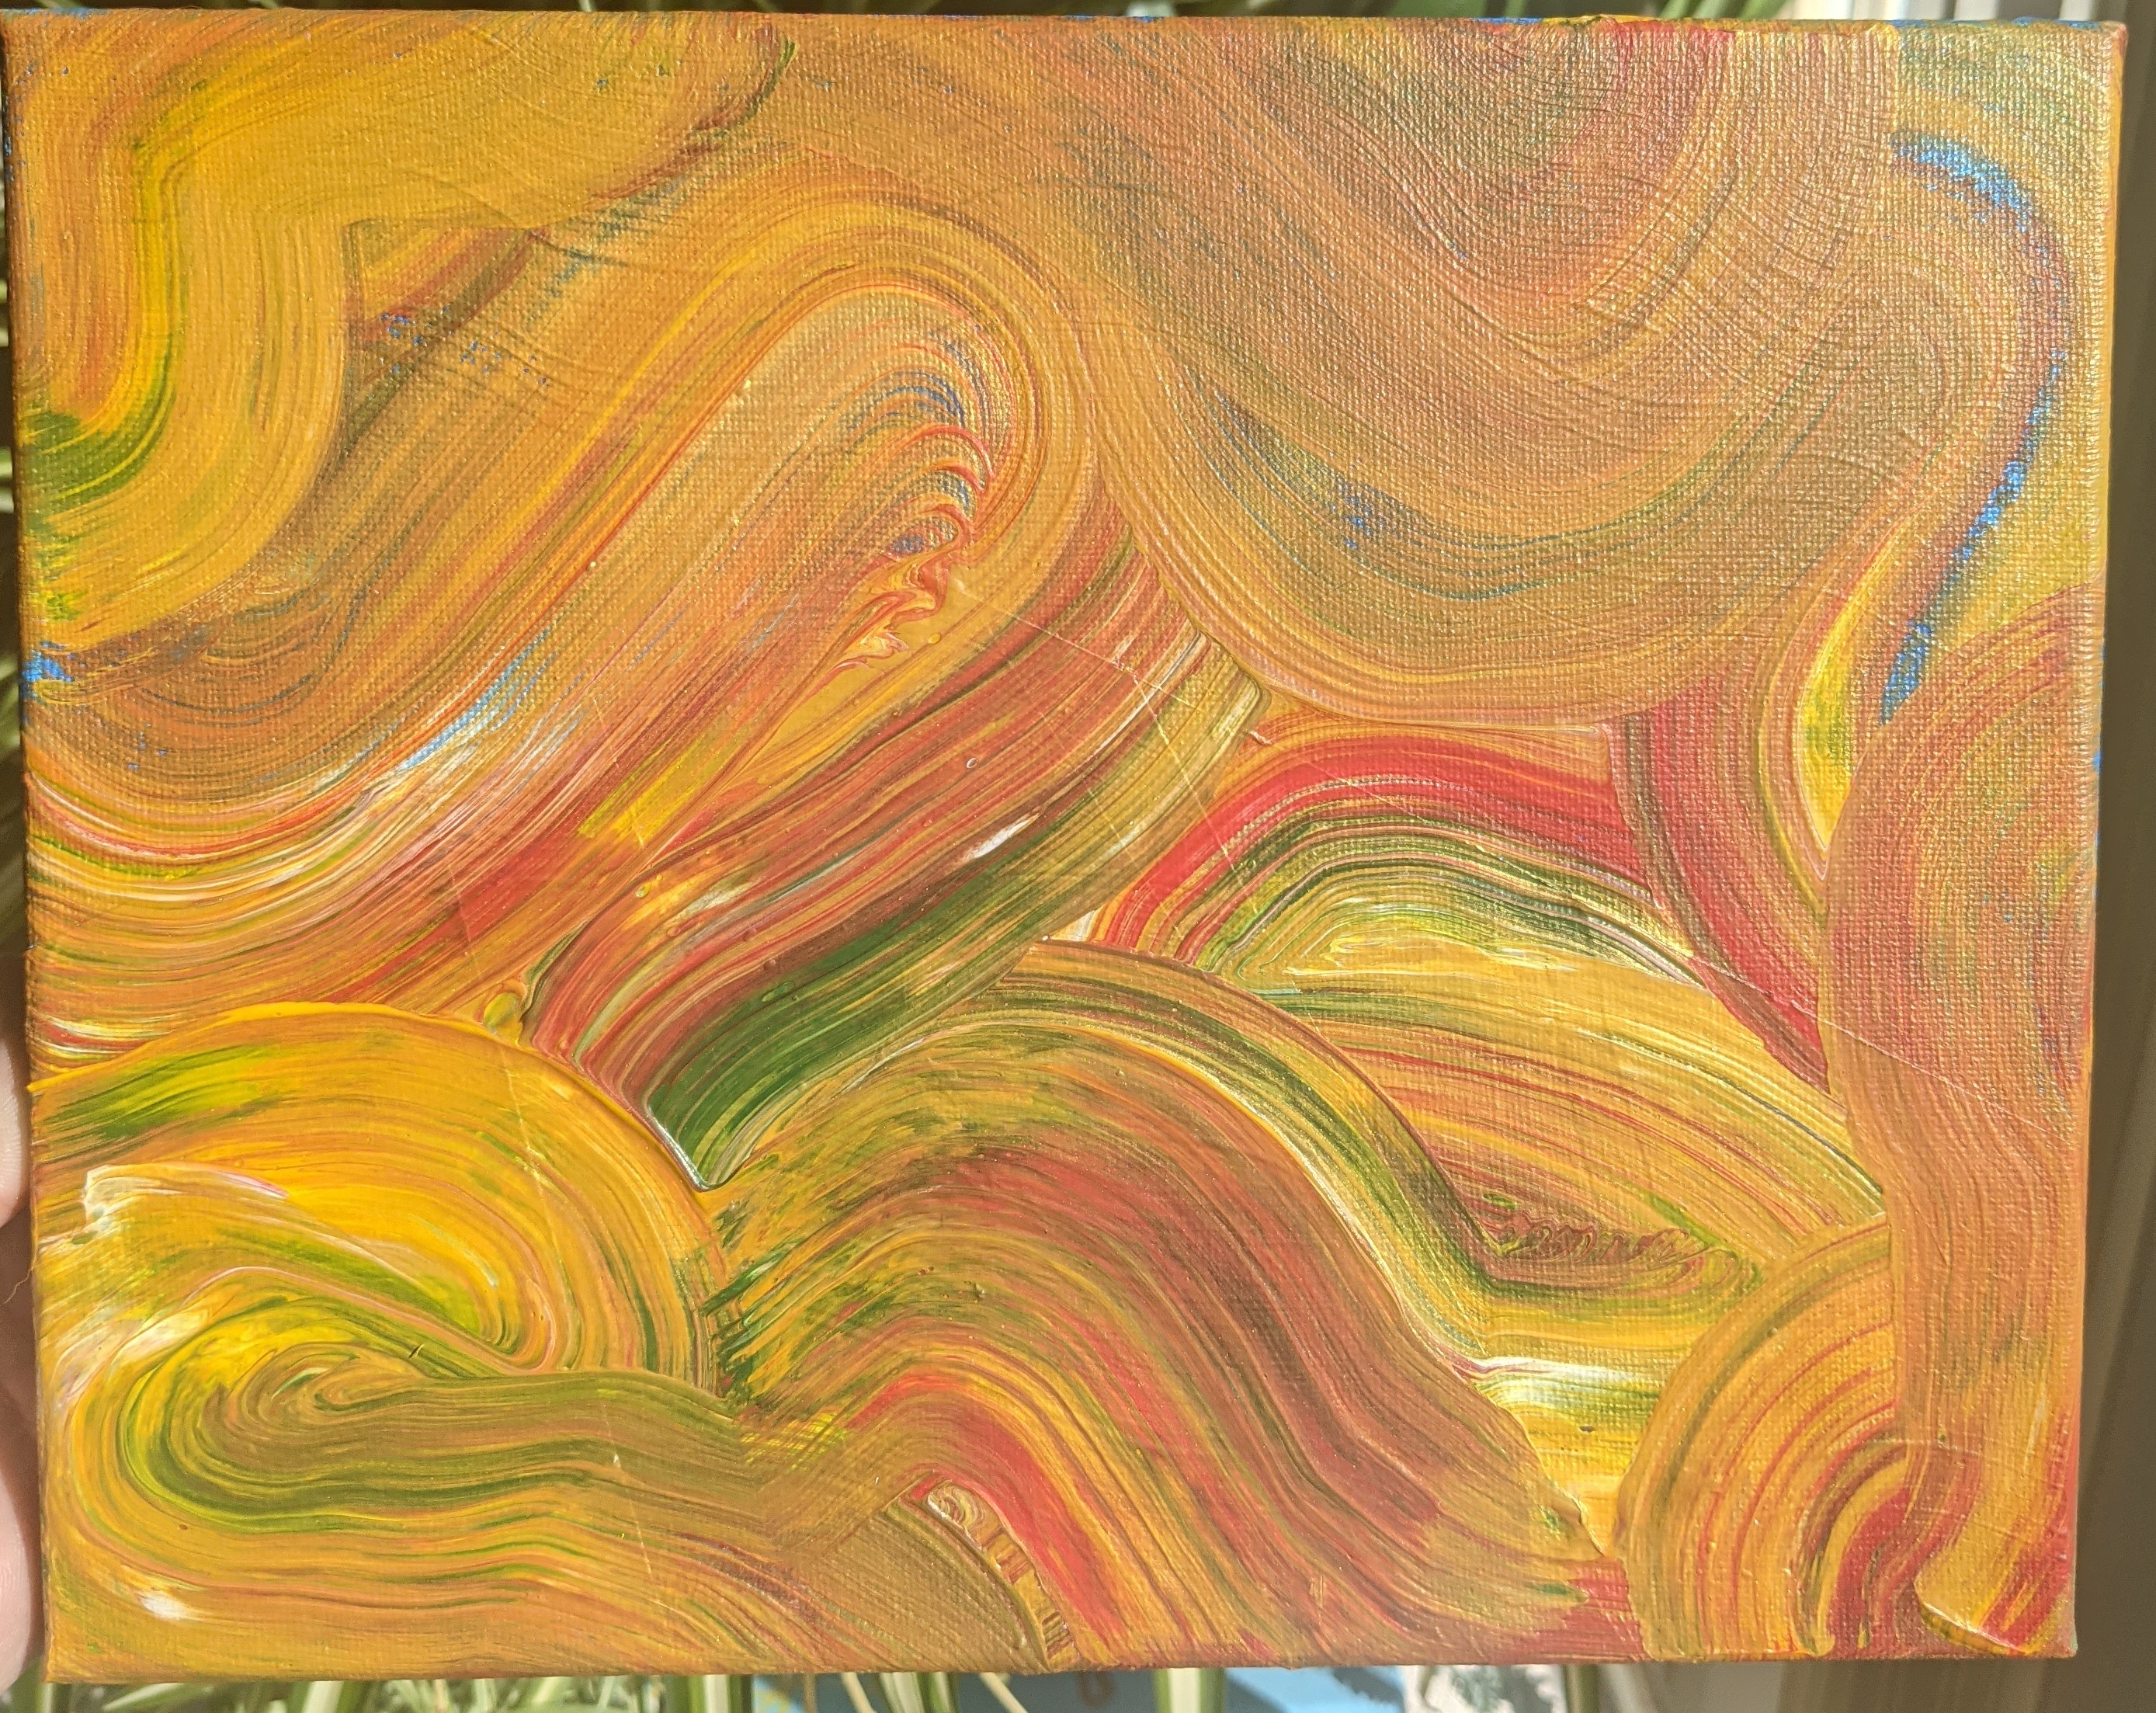
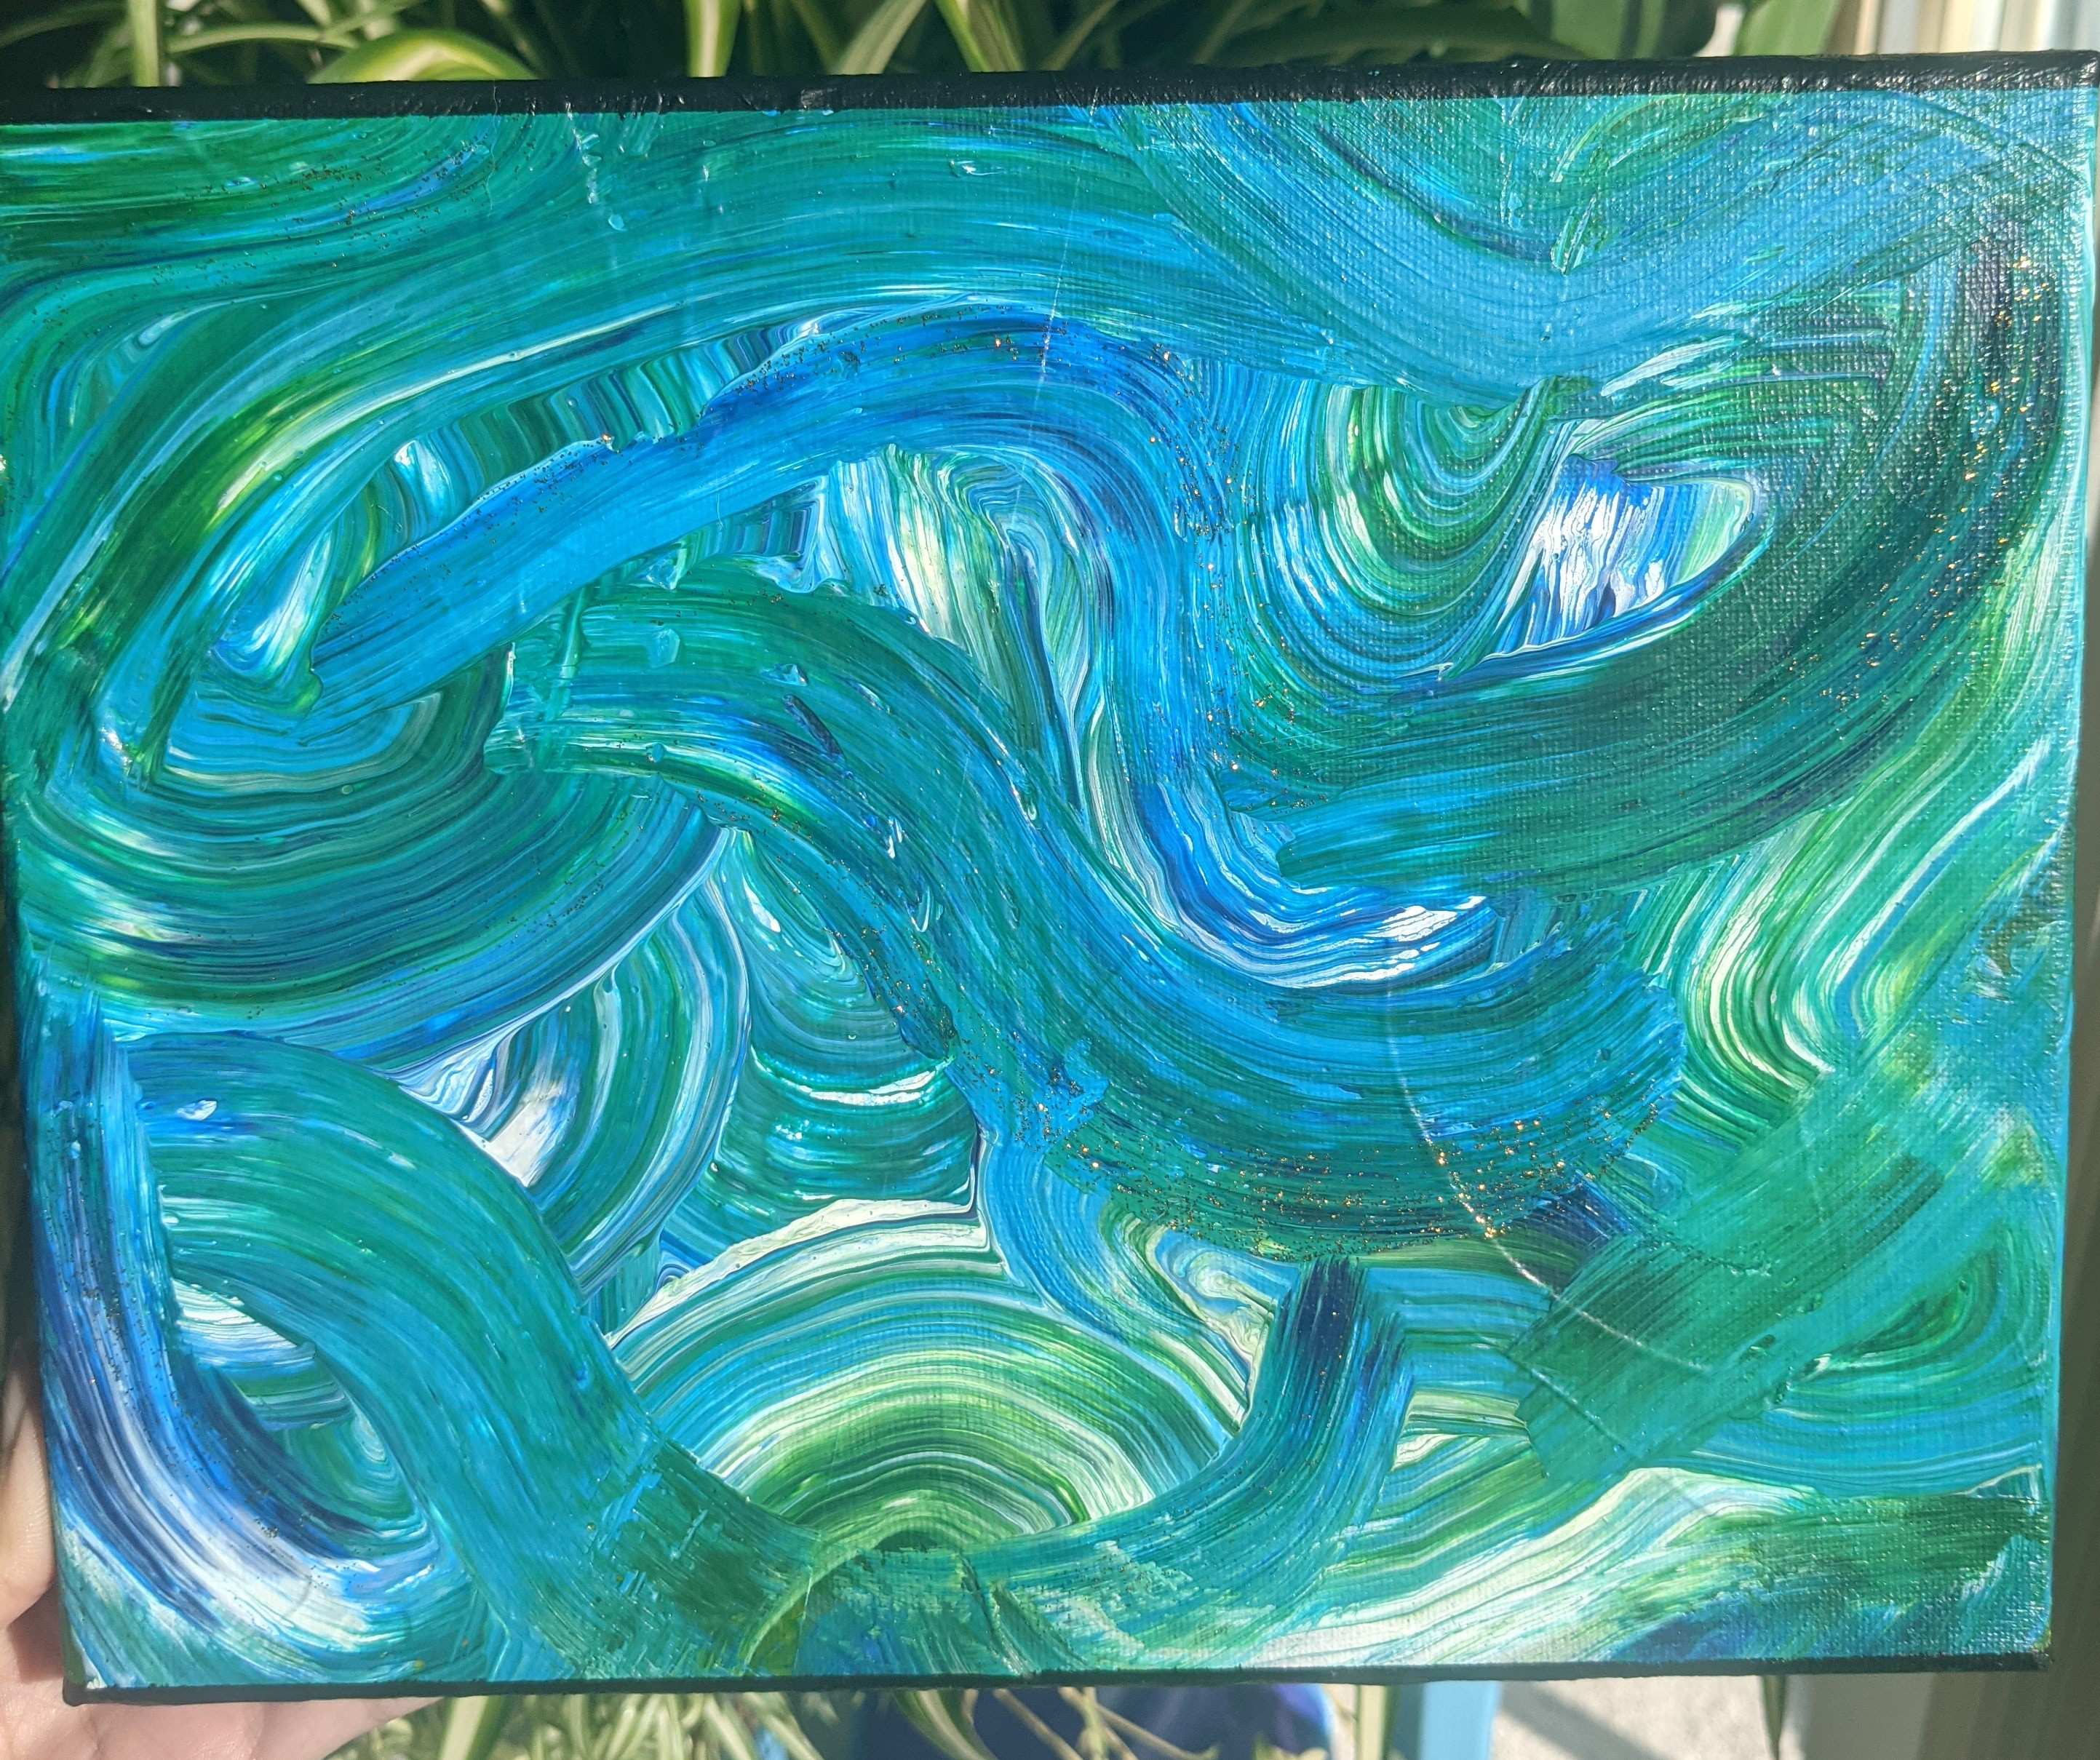
Then I wanted to take this color blending kick over to my embroidery, because I already have variegated thread in lots of colors (shout out to Walmart for the thread).

An of course my next question is… how can i incorporate this into my quilting? I’ve been thinking about trying more detailed pieces and more “thread painting”, and I think this abstract color blending mood could bring me into that. 🙂
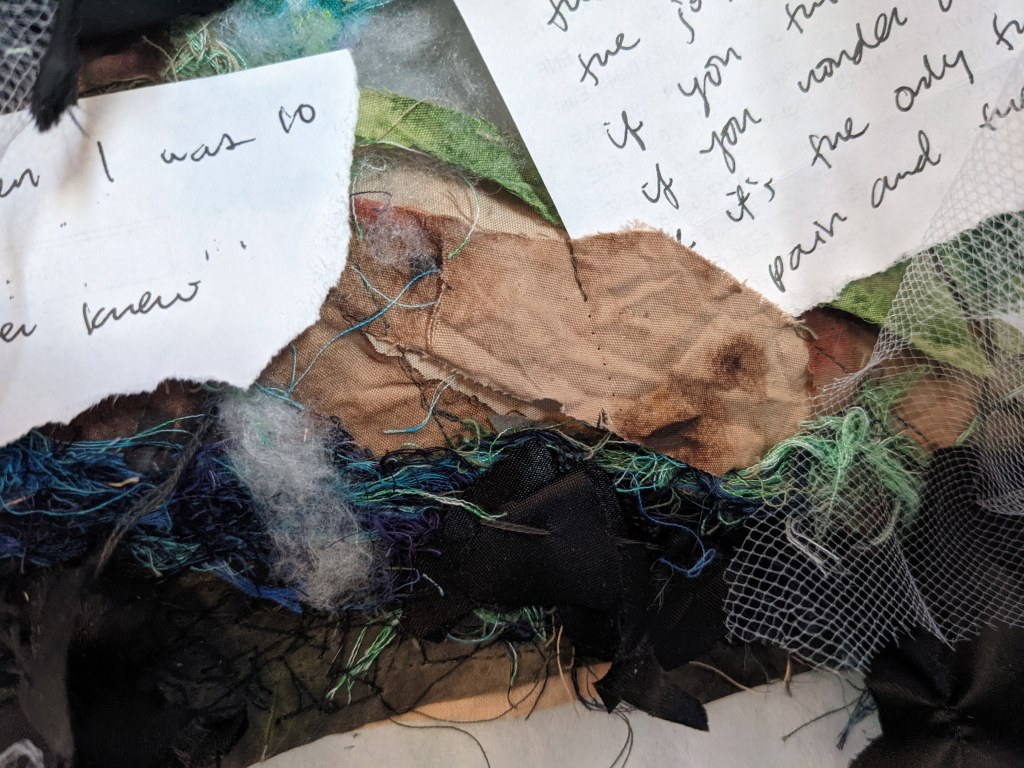
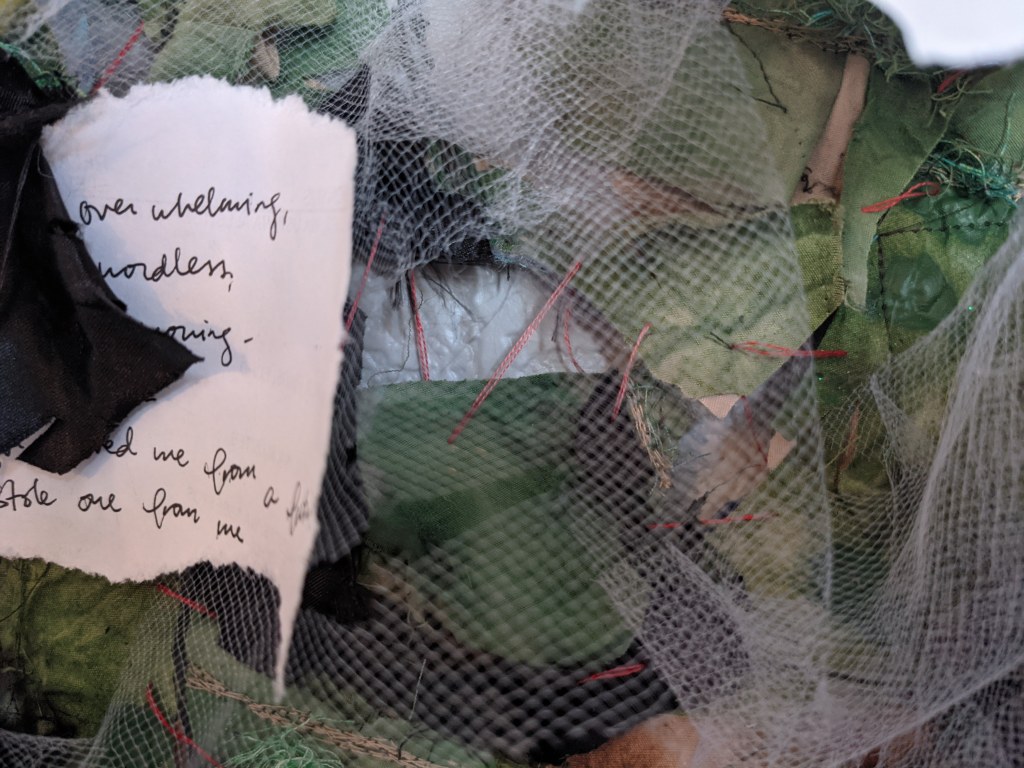
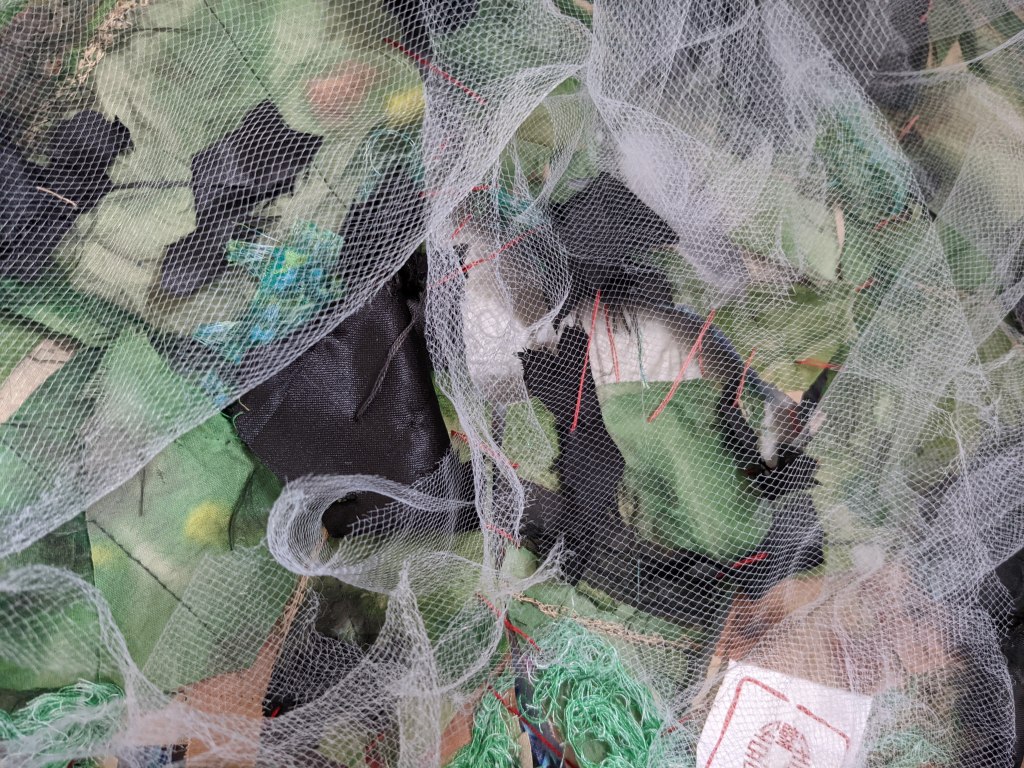
Over the past year, I’ve been exploring my feelings and memories and thoughts about my adoption. And with the support of my therapist and adoptee support group, I have created something that really encompasses this nebulous, complex…. experience I’ve had.
This is my attempt at telling, creating, authoring part of my story, and trying to communicate what it’s felt like to have this story and move into writing it myself.
I bought white fabric, dyed it with tea, and then painted it. Created the colors and used scissors and my hands to create the shape.
I took already made fabric and pulled it apart into bundles of thread and pieces with holes and frayed edges.
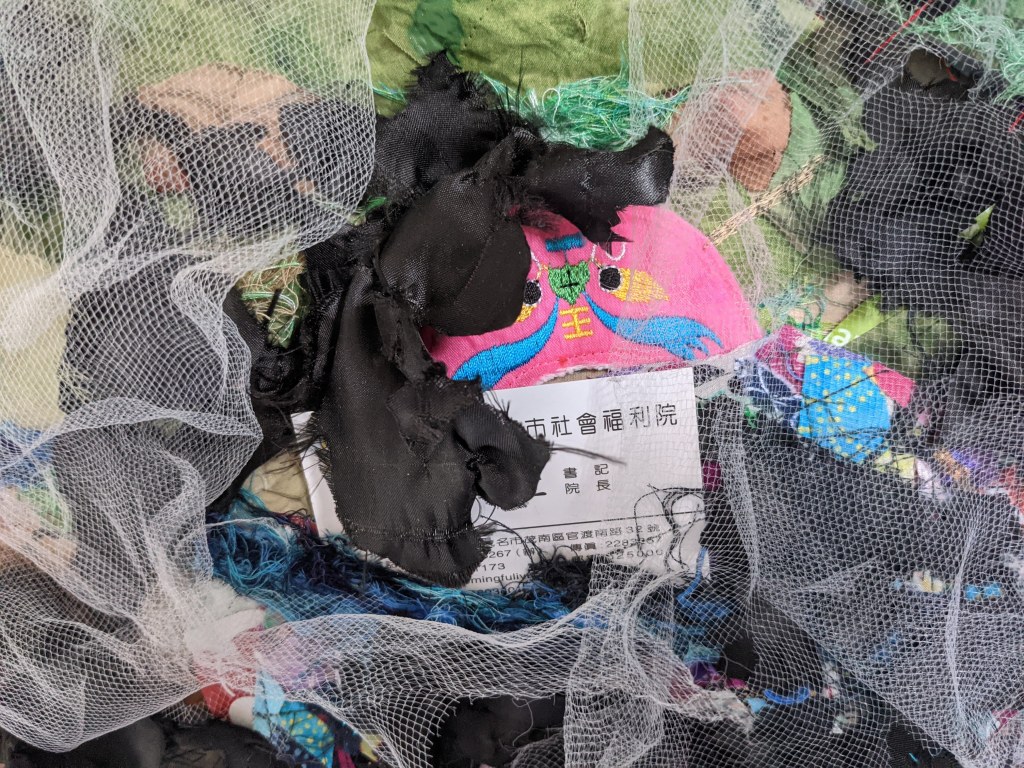
I incorporated the business card from the orphanage I spent time at, and little baby shoes I found in my parent’s basement. And some tea wrappers, as drinking tea is one of the ways I’m engaging with my heritage right now.
I created a landscape based on research from Google Earth of the surrounding hills and the city I was found in using this imprecise, bits-and-pieces applique.
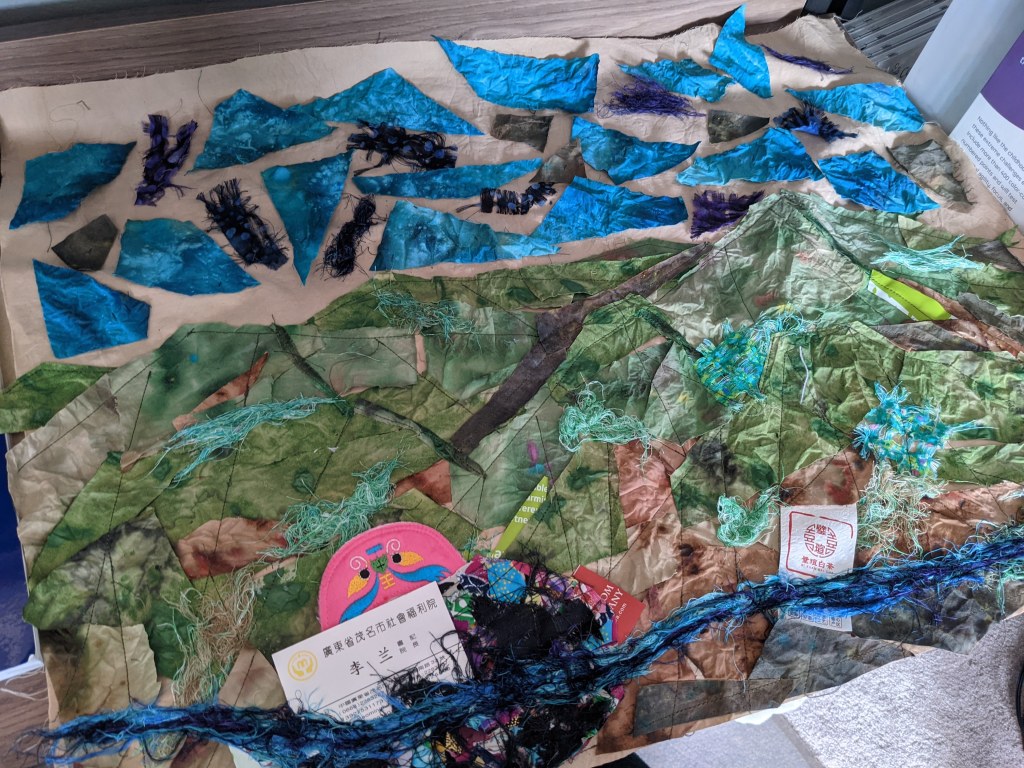
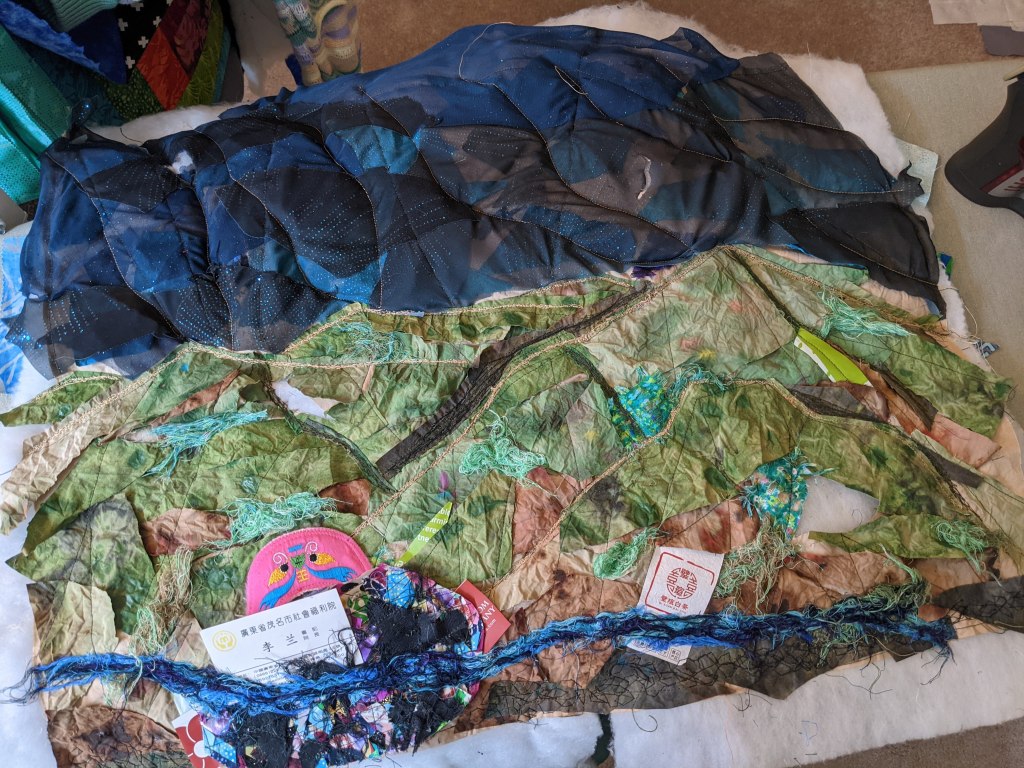
I wanted to stop here. I had a piece I liked looking at, and it was what I had imagined. But it wasn’t the story I want to tell, the whole story, the true story. So I made it messy and complicated and disjointed, like adoption is, how adoption feels. To be cut off from the first person you ever met and knew, who grew you, to be separated from people who look like you, who you heard while you were waiting to be born. To have an origin story you can’t remember and can’t ever know. To be out of context, displaced… Displaced to somewhere nice, with good people, but to always be a branch grafted onto the family tree.
And so I covered it with black bits of fabric, obscuring it.
And cut it up and fit it together in the wrong places and stitched it together again.
And undid stitches and pulled pieces of fabric up and cut into it.
And covered it with ripped pieces of mesh tulle, covering it in more haze.
And, finally, fit the pieces of a poem I amalgamated from my bits of writing about adoption into the shredded edges. It doesn’t feel like closure, but I did need to express it. It was so strange to make a quilt that is not a grid and angles and 1/4″ seams. In the beginning it was daunting, and I instinctively tried to make it pretty, but that’s not what I feel and not what I wanted it to be.
Feel free to take a listen to the poem while you look.


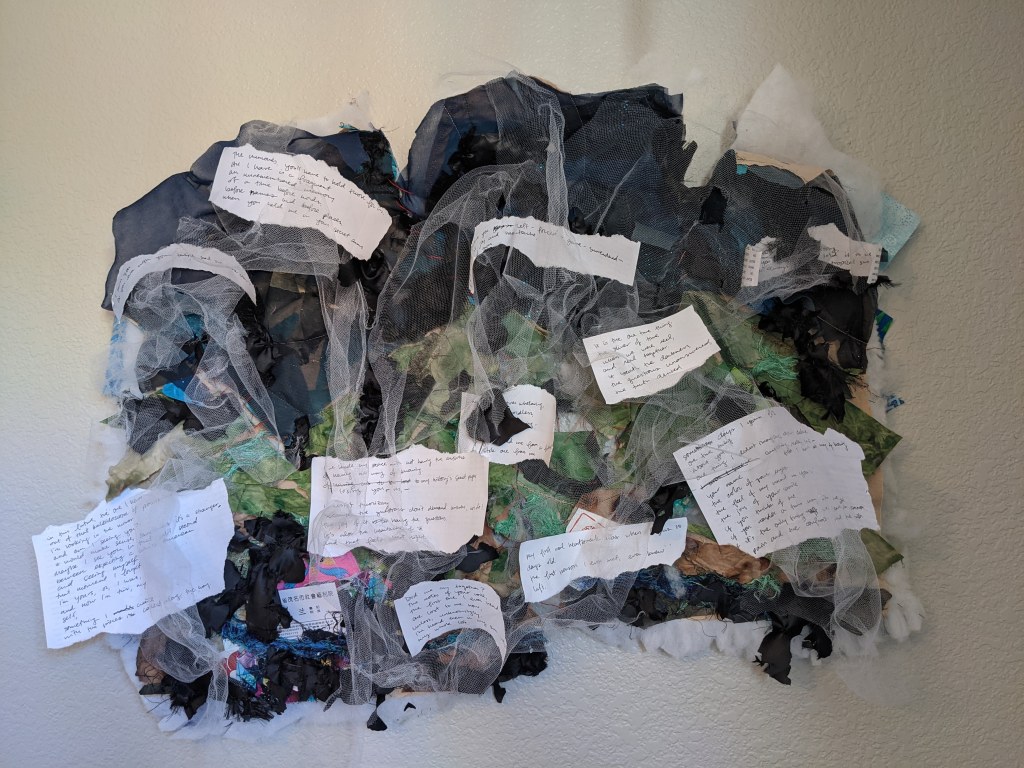
Project completed May 23, 2021.
Dyed and painted muslin, scraps from previous projects, blue dresses, gray tulle, embroidery thread, and paper.
A year ago, some friends and I went to Hawaii and I bought these really cool ocean beads for an embroidery project. I wanted to have a humuhumunukunukuapua’a with Maui in the background to honor all our snorkeling adventures 🙂
I pieced some scraps together to make the background, and appliqued the black lava flows on. Using lots of layers made the whole thing a bit thick, plus I sewed a backing stabilizing layer onto the back to help with limiting stretch from the embroidery hoop. Luckily I didn’t have to do much embroidery over the thickest parts.

This was my first time doing beadwork, and it was very labor intensive but fun. I used blue and white beads to make seafoam. For whatever reason, I have a stockpile of random beads that’s lived in my craft box forever, so it was nice to use some up. Plus, since I used scraps and thread I already owned, the only cost of this project was the beads themselves.
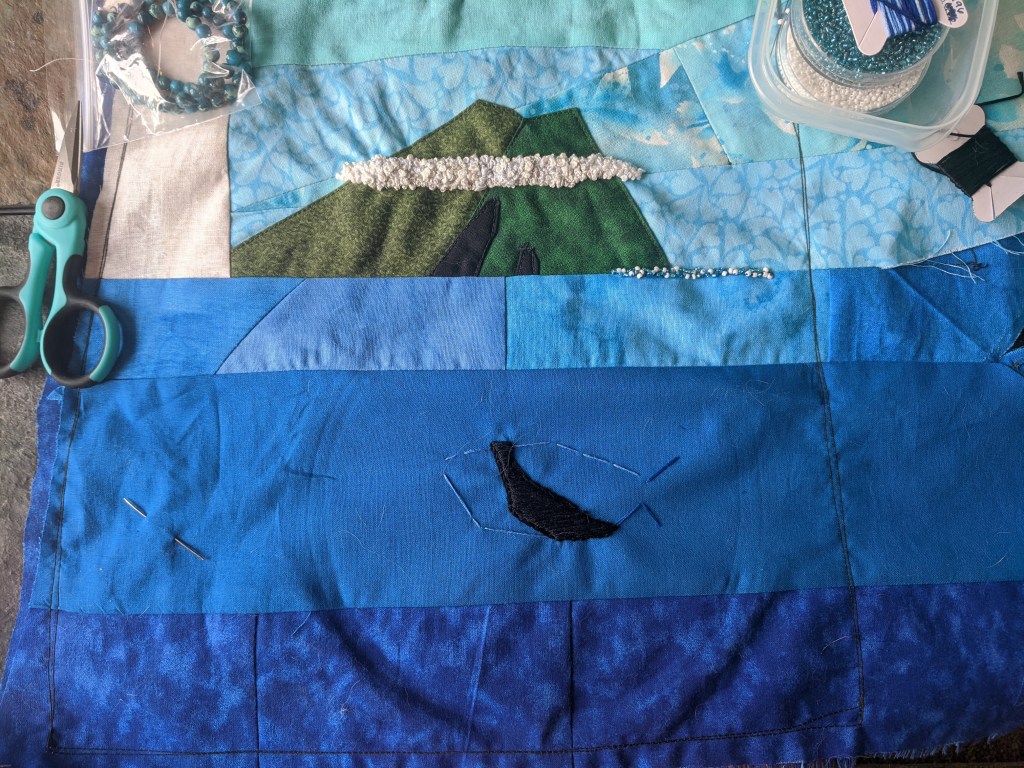
I used French knots for the ever-present cloud layer around Haleakala, mixing some white and gray threads.
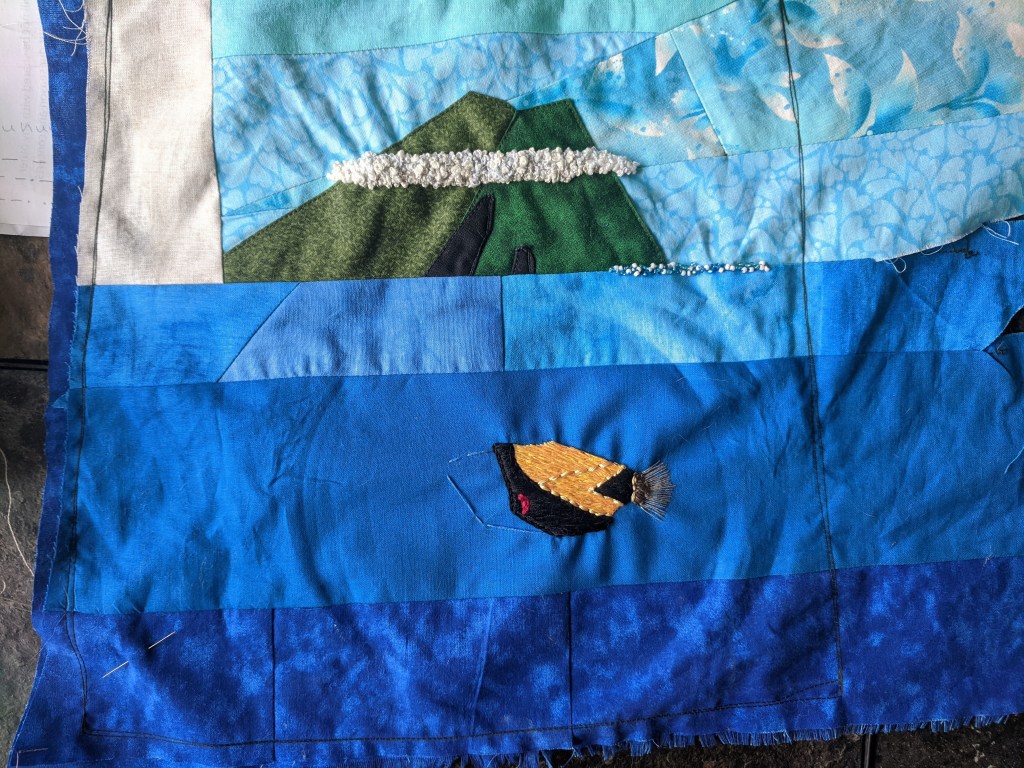
Once upon a time I bought some gradient thread, which finally came in handy for giving the humuhumu texture in the orangey-yellow portions.
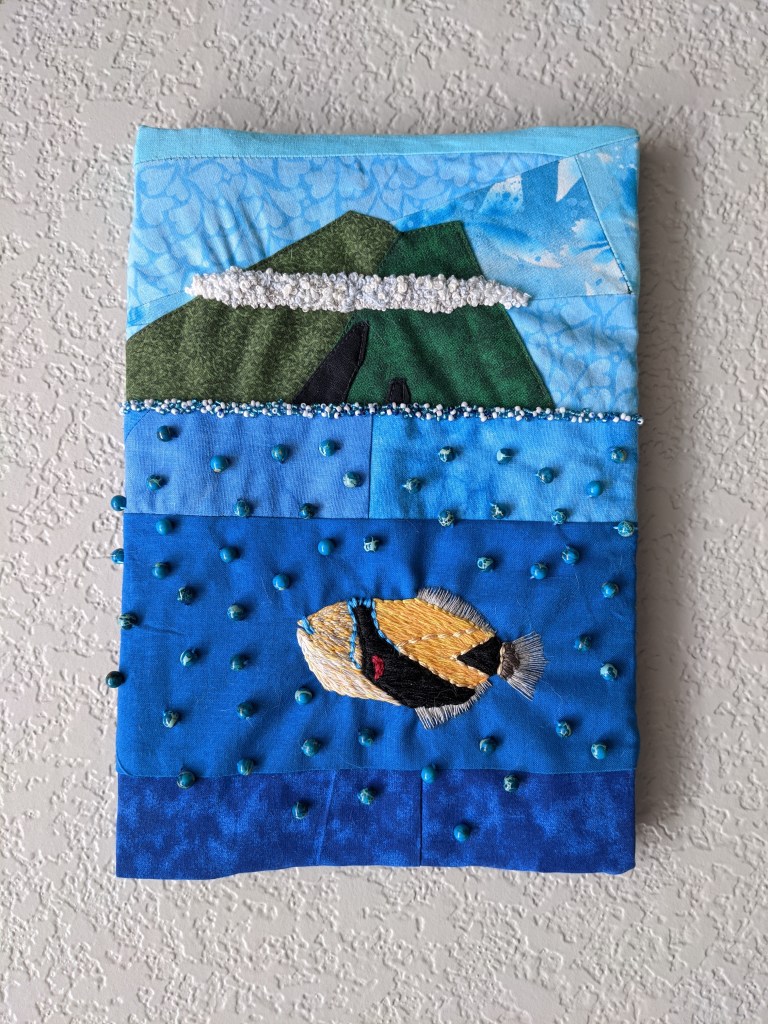
And then I added all my ocean/bubble beads! I tried to be as random as possible and the back of this looks like complete chaos 🙂 I cut some yardsticks to size and glued them into a frame. Embroidery often gets displayed in a circle hoop, but I knew from the beginning this piece was meant to be a rectangle. It sits next to my bird embroidery on my stairwell 🙂
Project completed September 2020.


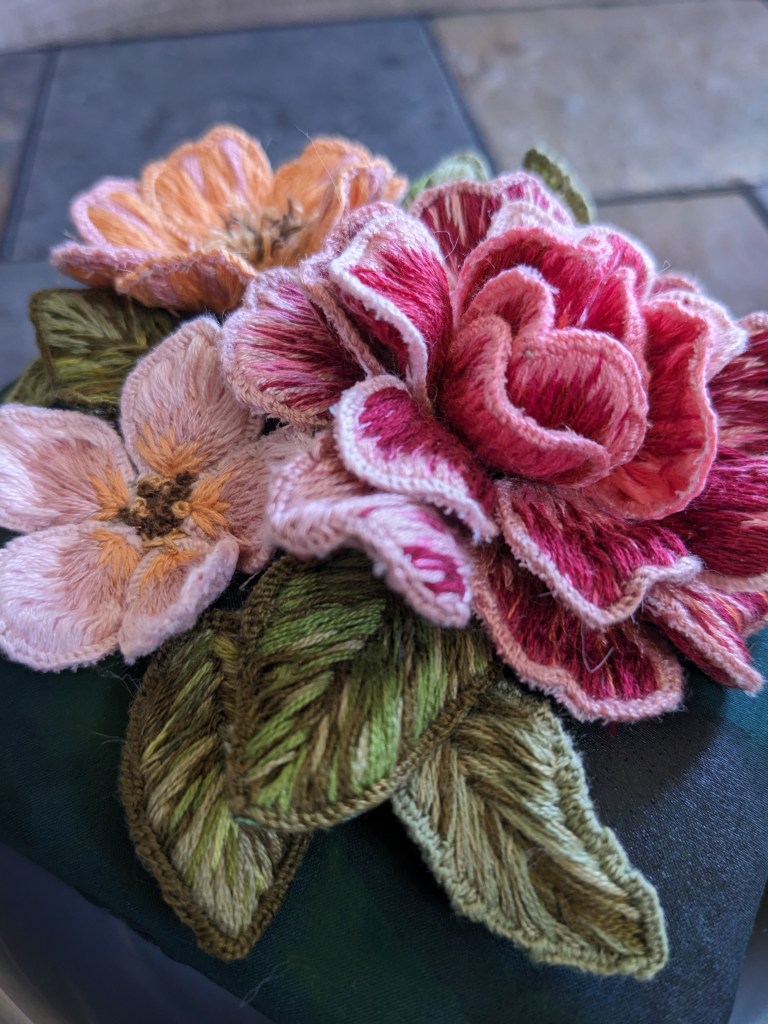
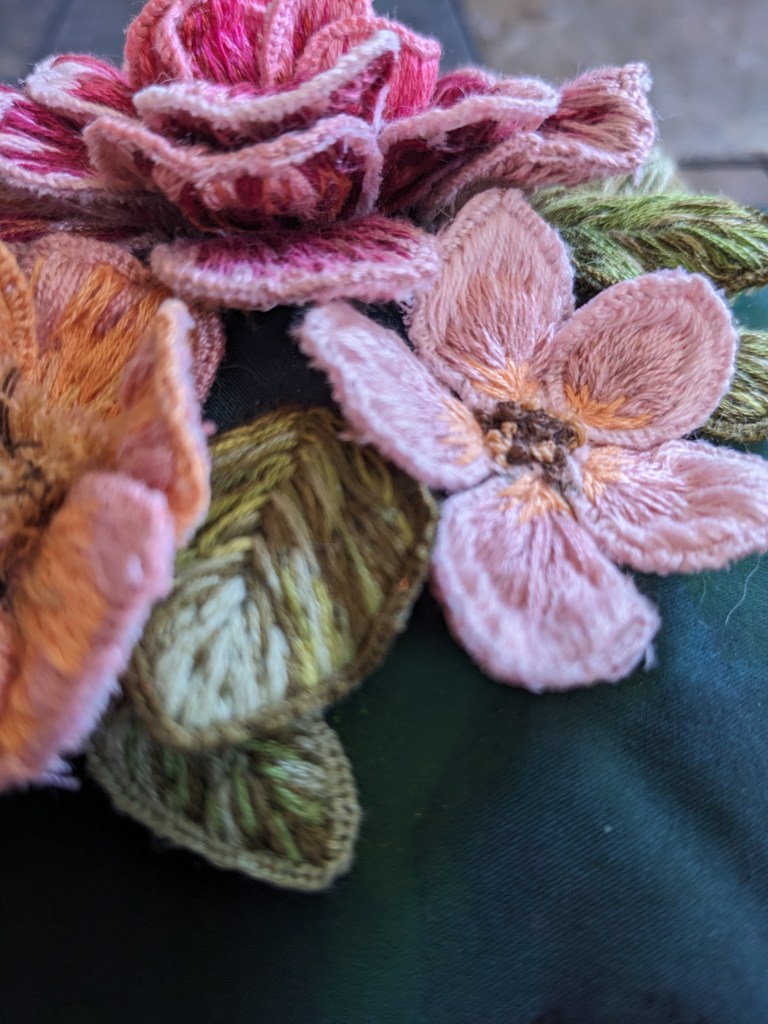
As you know, I get most of my embroidery patterns from Namaste Embroidery. She also has a YouTube channel where she posts long-form videos of her working on the projects. I was inspired by her stumpwork tutorial and had to order the modified Anna embroidery kit. After doing the “Flowers in Her Hair” 1-ply satin stitch, I wasn’t super interested in doing the face, so I ordered the version with just the flower, leaves, and hummingbird. I was transitioning between living spaces and my sewing room wasn’t set up, so coming back to embroidery was a fun “sit in front of the TV and relax” project.
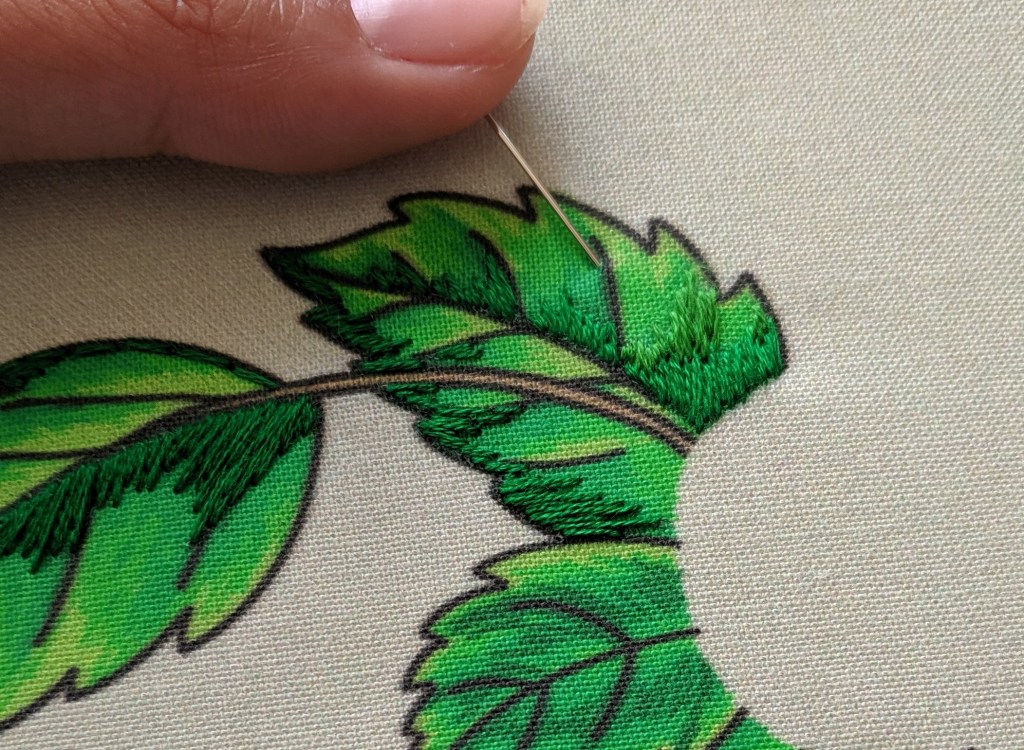
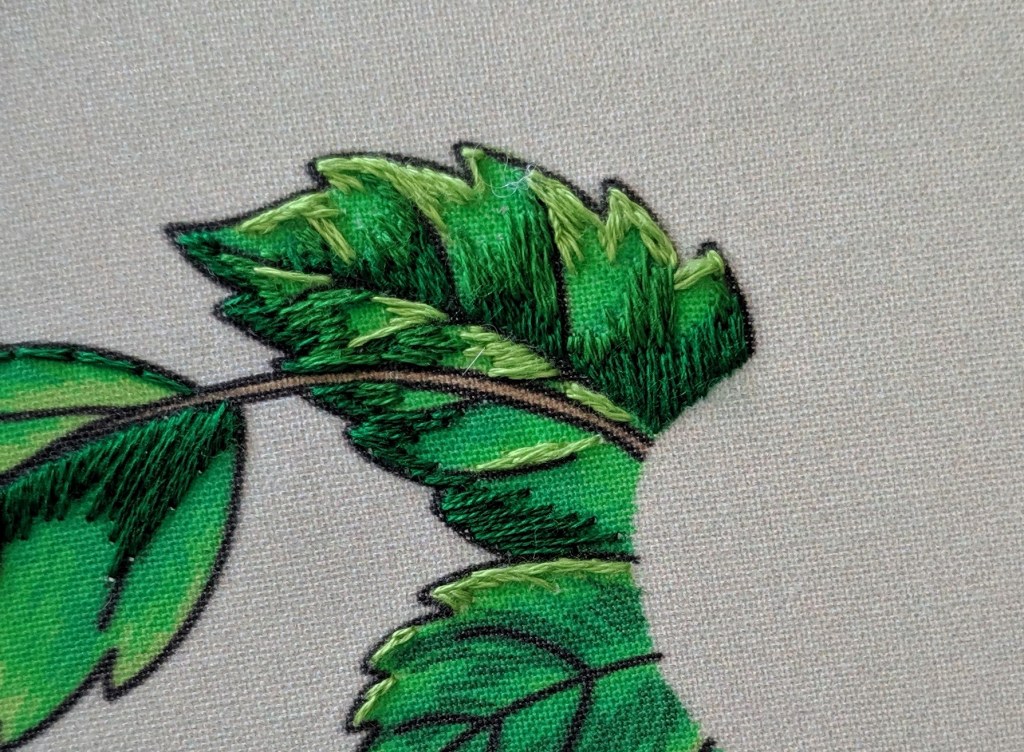

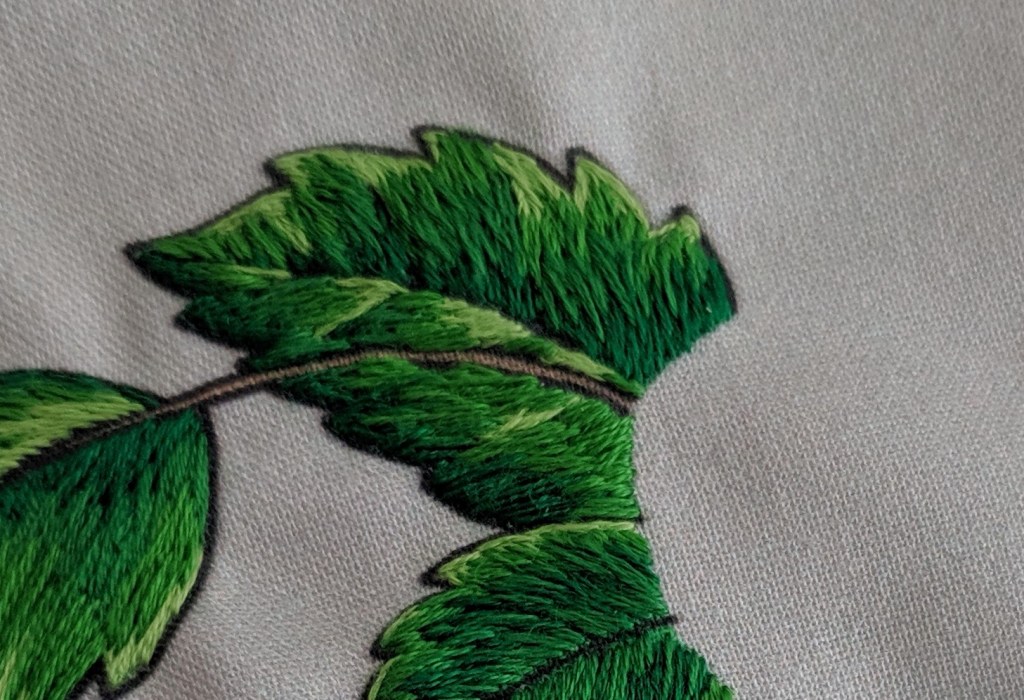
This was my first big project with long and short stitch. I’ve tried it before, but it’s looked weird and awkward, and I wanted a larger project to give me the chance to learn it many times over. Long and short stitch is a technique used to blend colors and do “thread painting”. You use different lengths of stitches with different shades of the same color to create a gradient and blended effect. It requires a bit of preplanning but it’s well worth it. My leaves don’t match, but that’s the nice thing about stitching natural things – they don’t match anyway.
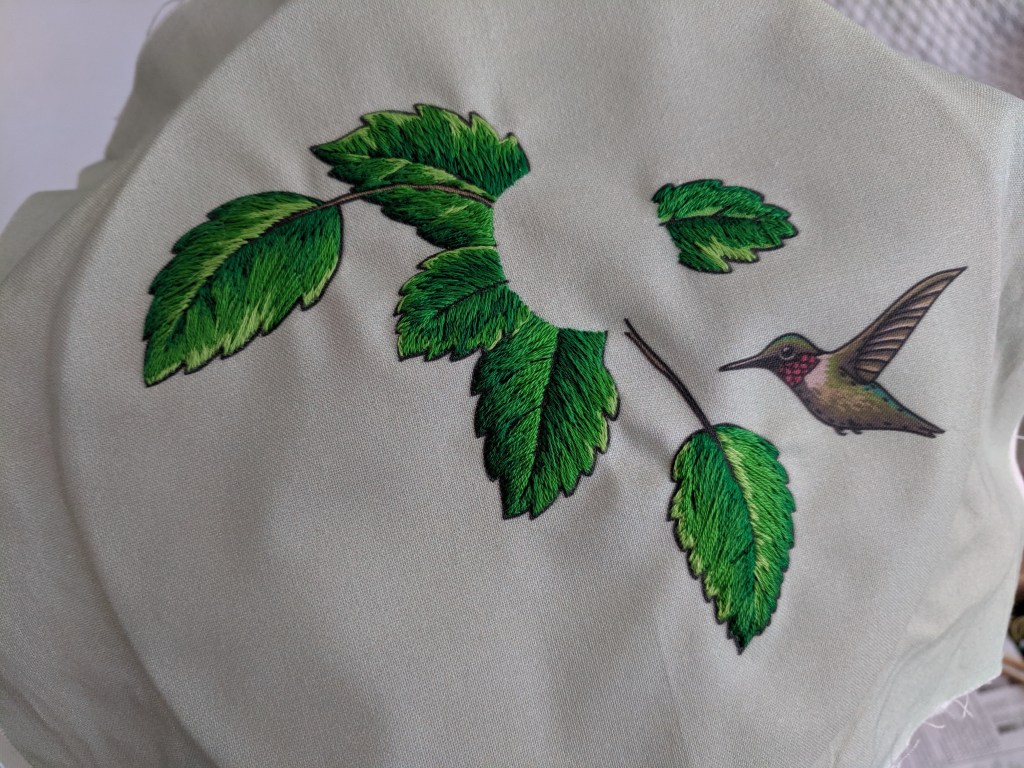
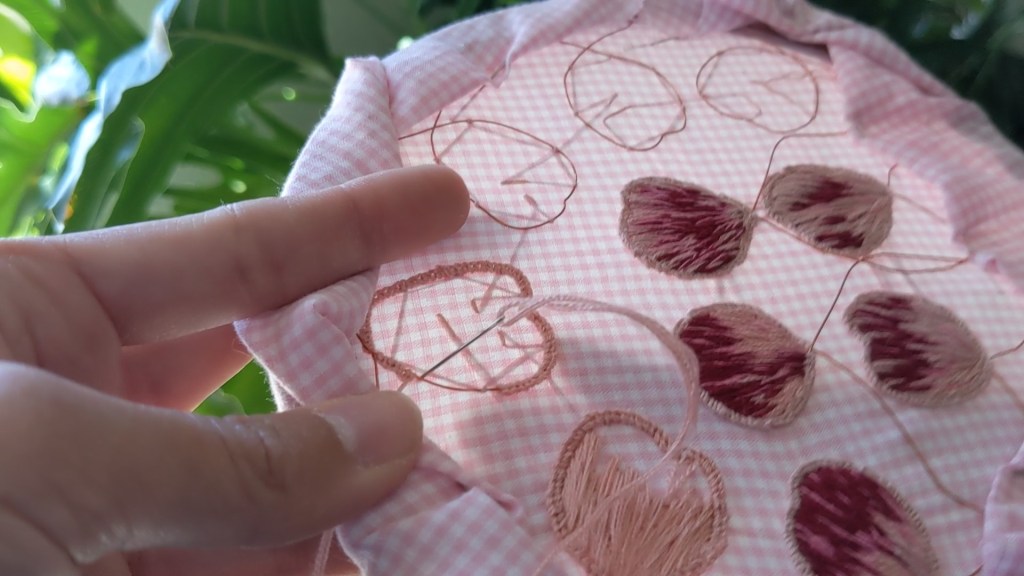
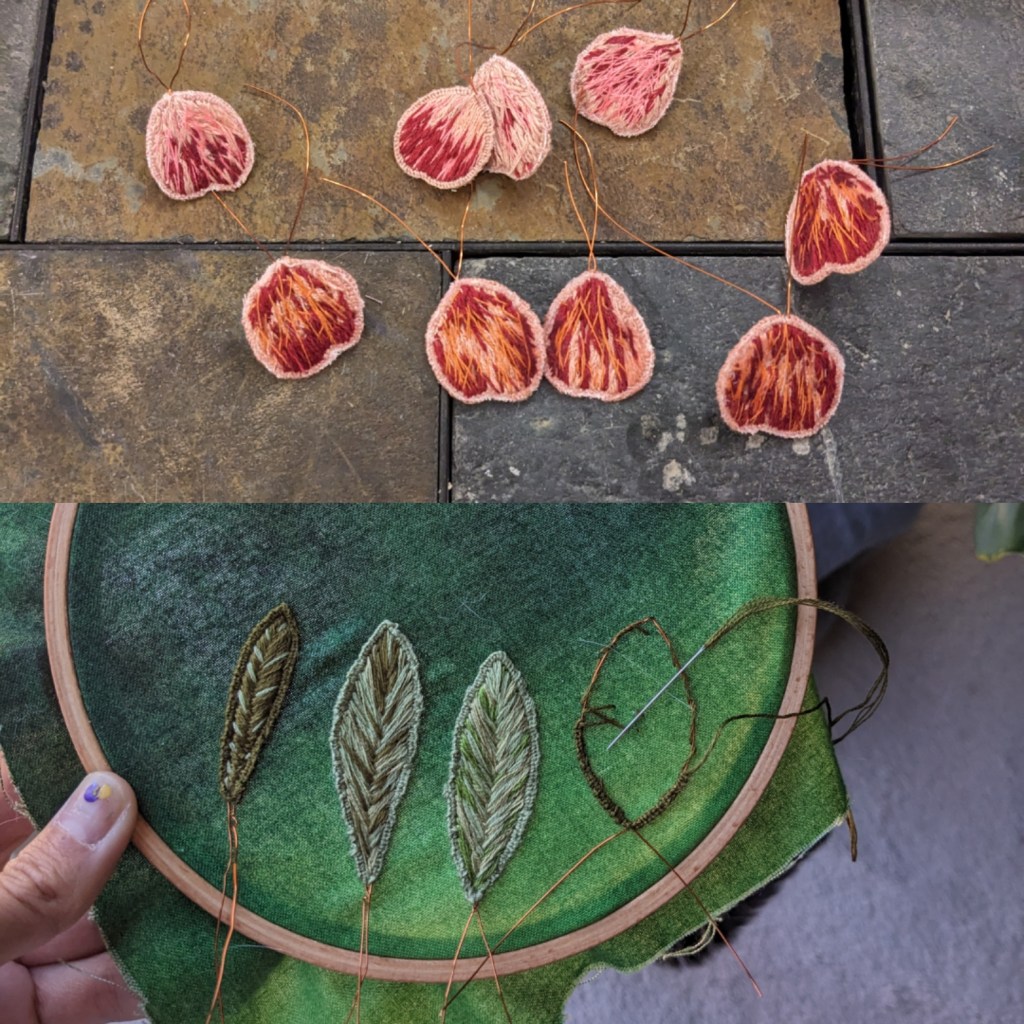
Stumpwork is a type of 3D embroidery where you use wire around the outline of the shape to give it another dimension after stitching. The wire is embedded in the work as it is stitched on a flat piece of fabric, and then the shape is cut out of the fabric. Then you can bend the wire to make it 3D!
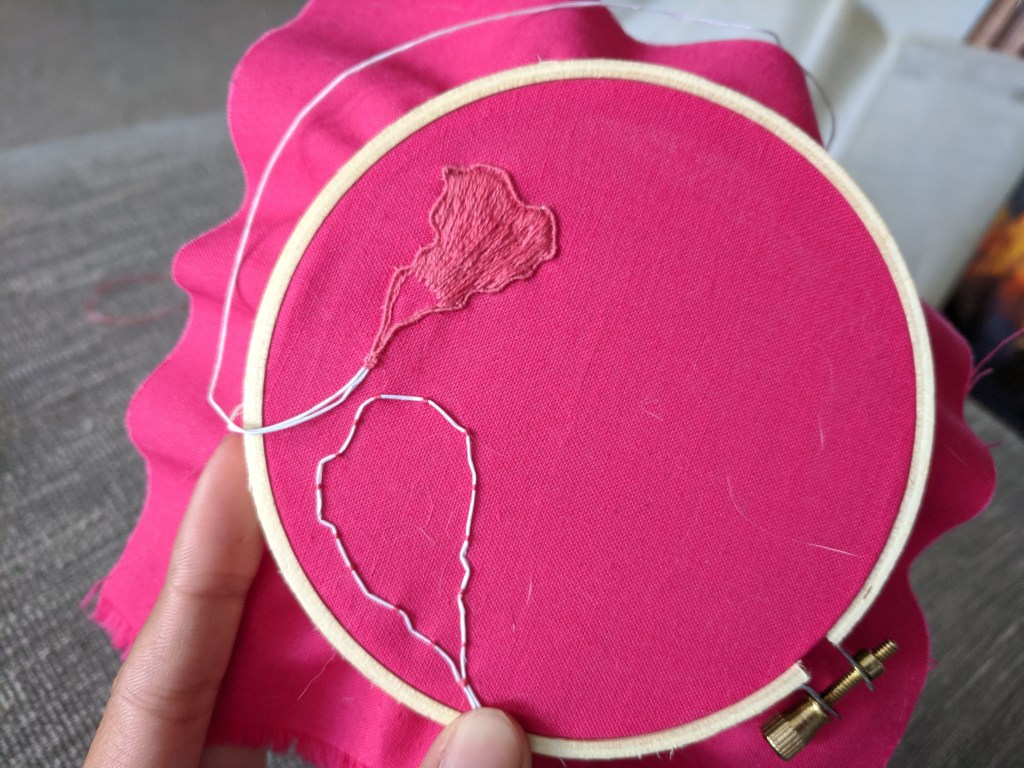
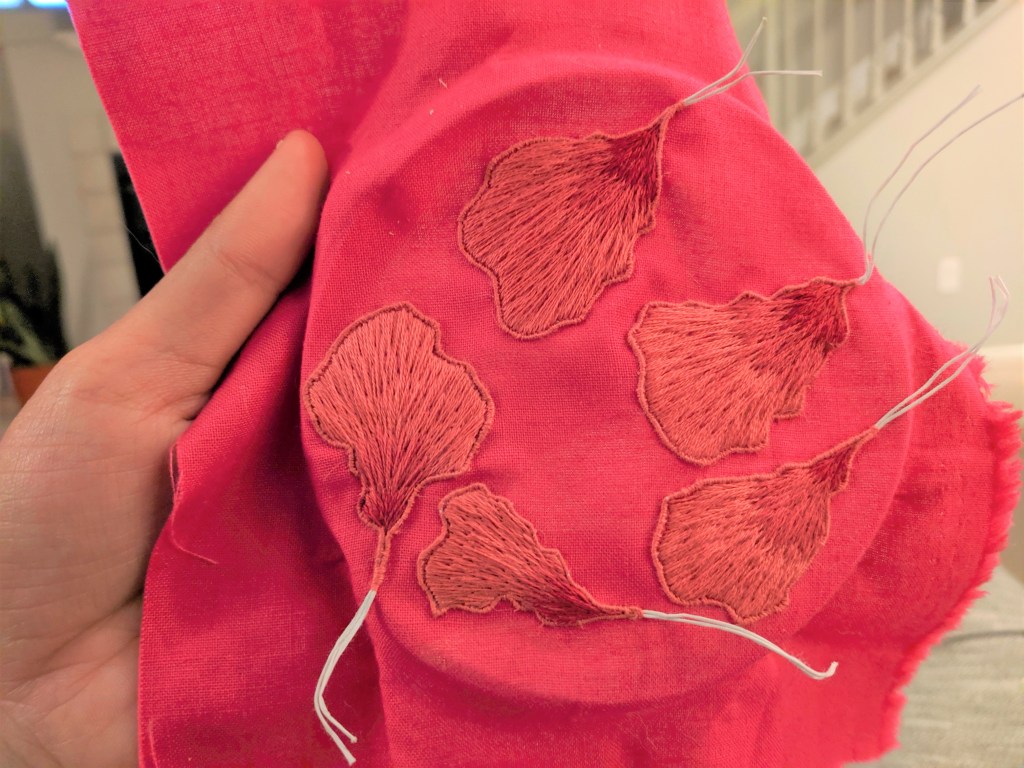

After stitching the leaves, I started in on the flower petals. I enlarged them a bit because I wanted to cover up some leafy mistakes, and also modified the directions because one of the stitches wasn’t working out for me. I ended up using 2-ply floss to wind around the wire, and then filled with long and short stitch. The hummingbird was more 1-ply long and short stitch work, and he came out quite cute. My petals are a bit large, but so very fun. I have this hung on a wall where you can see it from the front and the side.
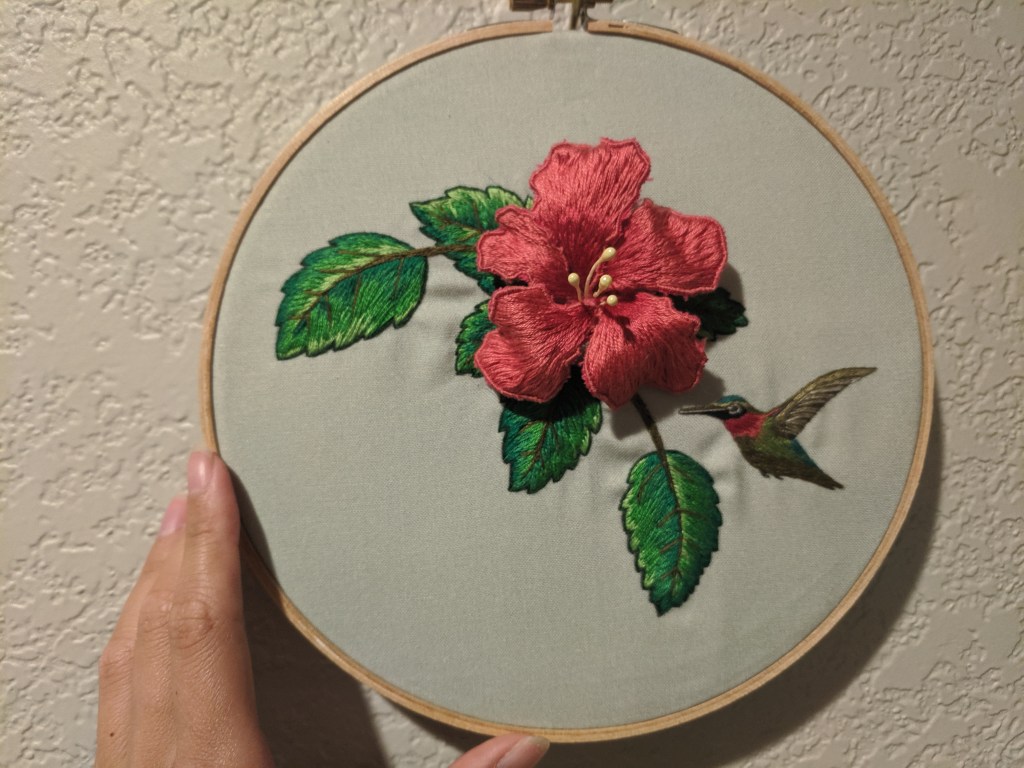
Project completed October 9, 2019.

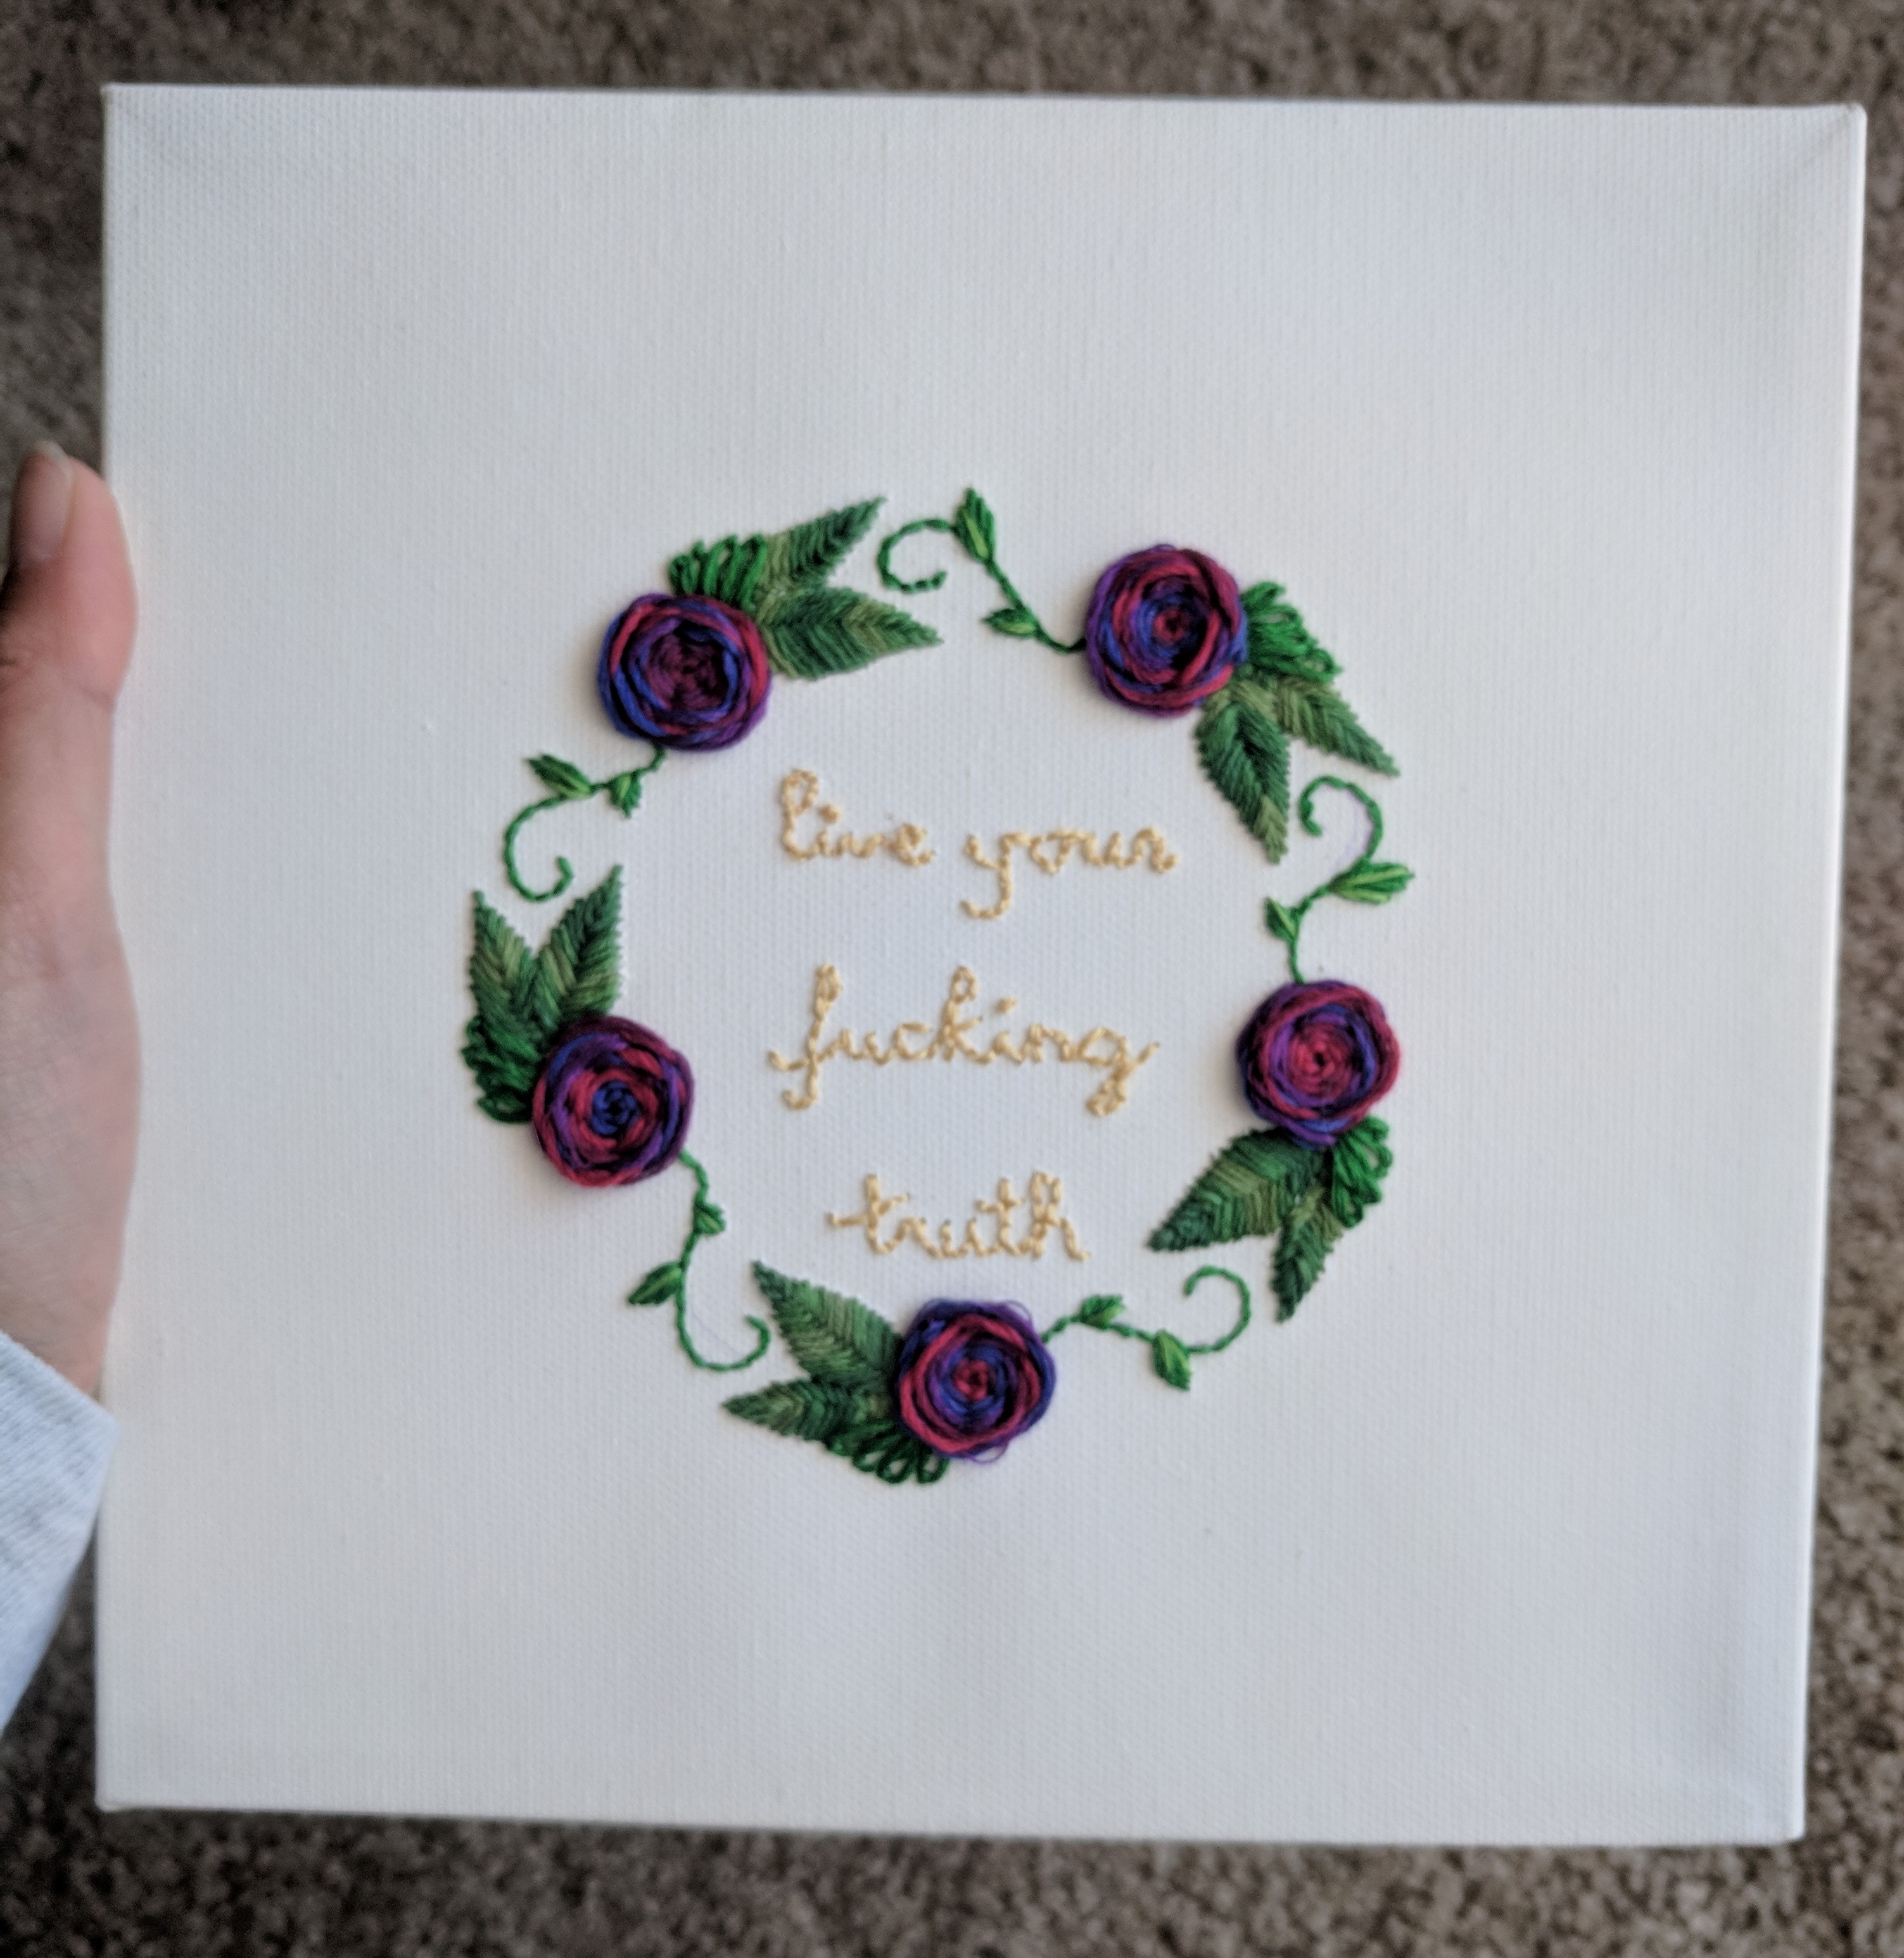
I made this for a friend who loves this saying 🙂 There’s a trend of doing embroidery and cross stitch type crafts with pretty designs and swearing, so I absolutely jumped on the train. This is done on a canvas, which was a bit tricky because the canvas doesn’t seal up the hole made by the needle in the same way that fabric does. But I did fishbone leaves with some lazy daisy embellishments and wagon wheel flowers based off Namaste Embroidery’s “Woven Rose Border” pattern.
Project completed April 22, 2018.

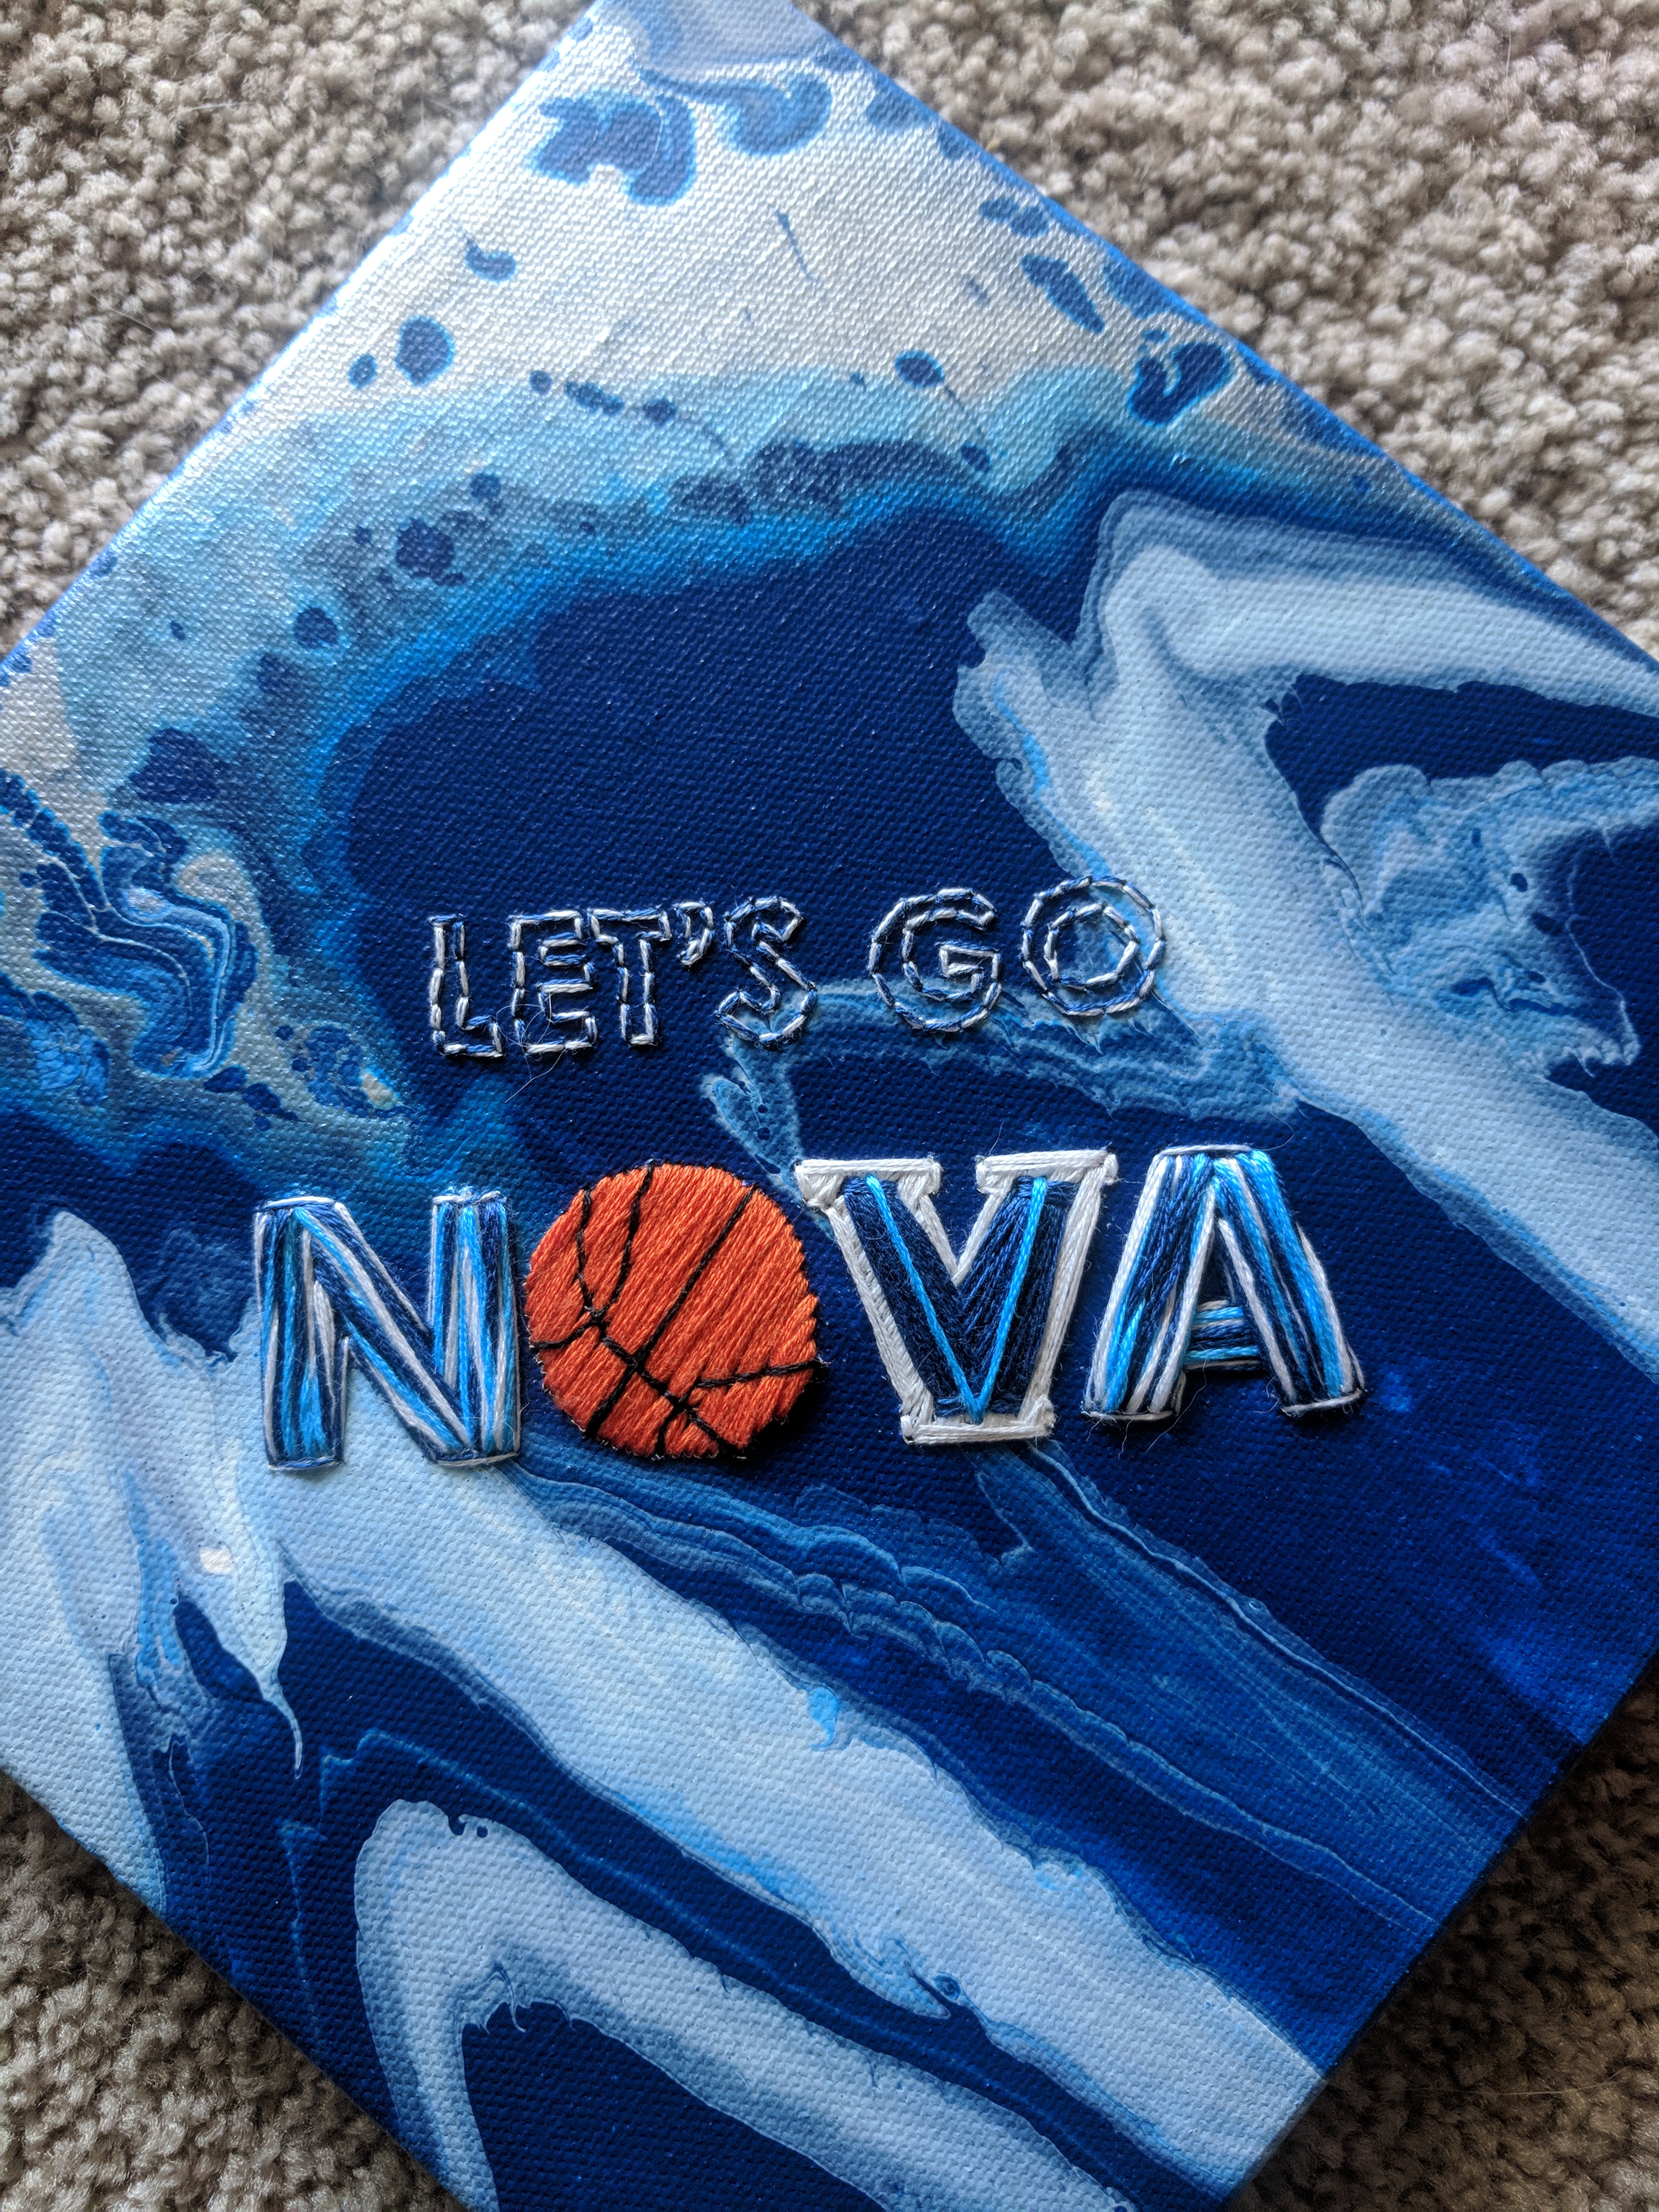
Go Wildcats! I went to Villanova for a time, and made this for a fellow Villanovan in celebration of their win in the NCAA March Madness tournament. I used a canvas from Joann and some acrylic paints to do a paint pour with the Villanova colors. Paint pours are super simple and usually turn out awesome (if you stop while you’re ahead instead of messing with it too much). You just mix paint with some water or flow acrylic (a special product to make paint move easier), and pour it on the canvas. Then you tilt the canvas around to make the paints move and mix together.
After the canvas dried, I traced my pattern onto the back of the canvas so I would know where to stitch. The pattern is mainly backstitches and satin stitch, with 6-strand thread for maximum fluffiness and volume. Canvasses are a bit tricky to stitch in since the holes don’t close up as easily as with fabric, but I was dedicated to the paint pour background so I stuck through it.
Project completed May 4, 2018.
