Tag Archives: fmq

Rest Quilt

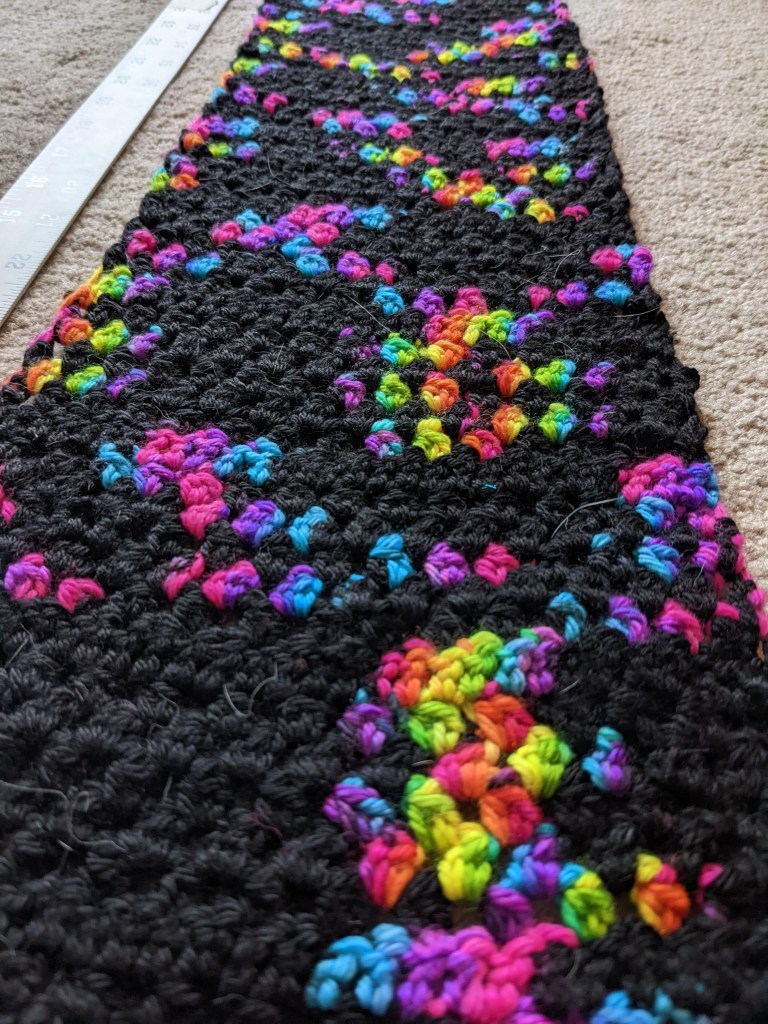
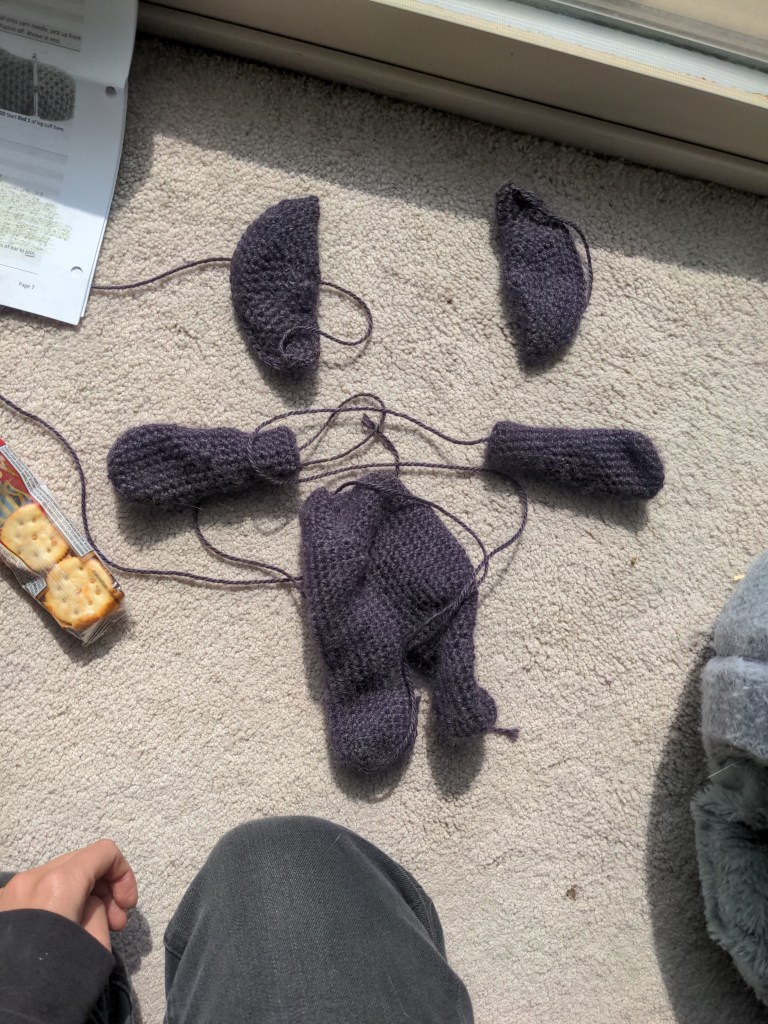
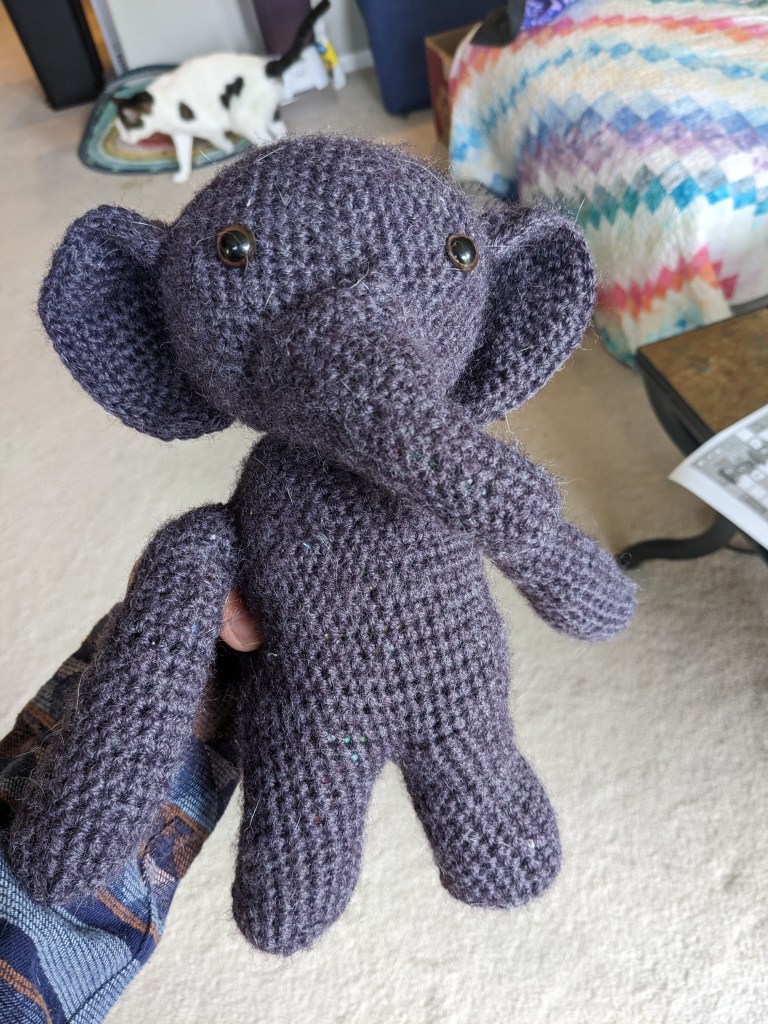
My front door is not completely airtight. I tried getting some foam strips to put inside the doorframe, but then I couldn’t close the door. I thought about, and started, a crochet tube that I could hang on the hinges to block the most air from getting in…

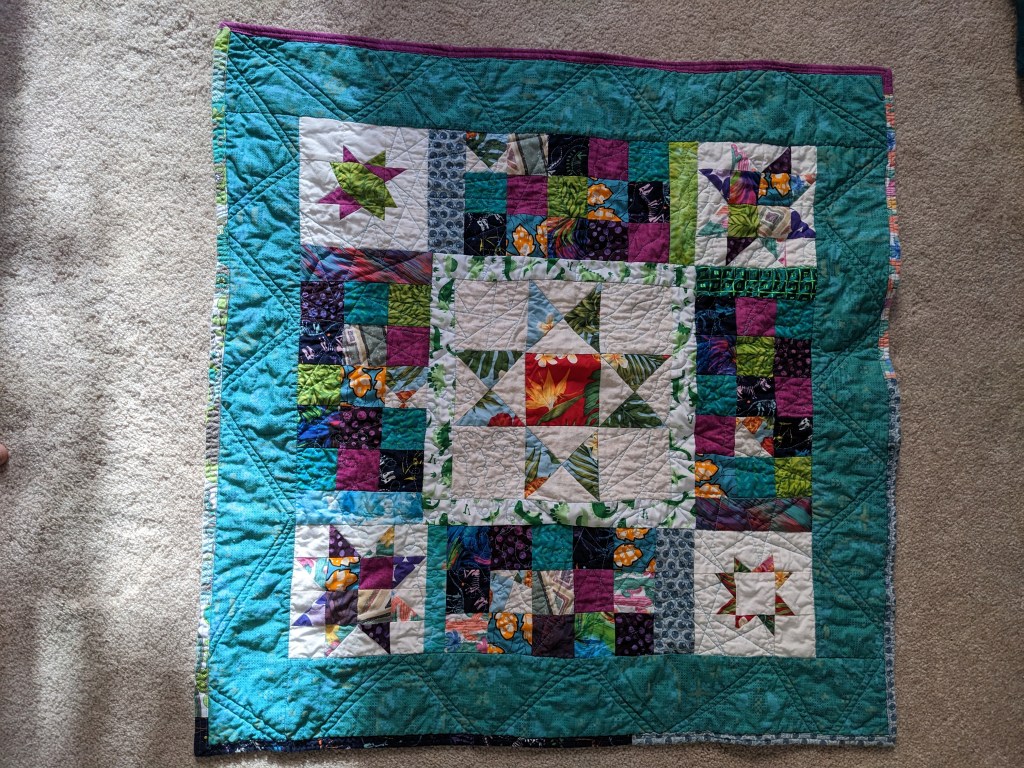
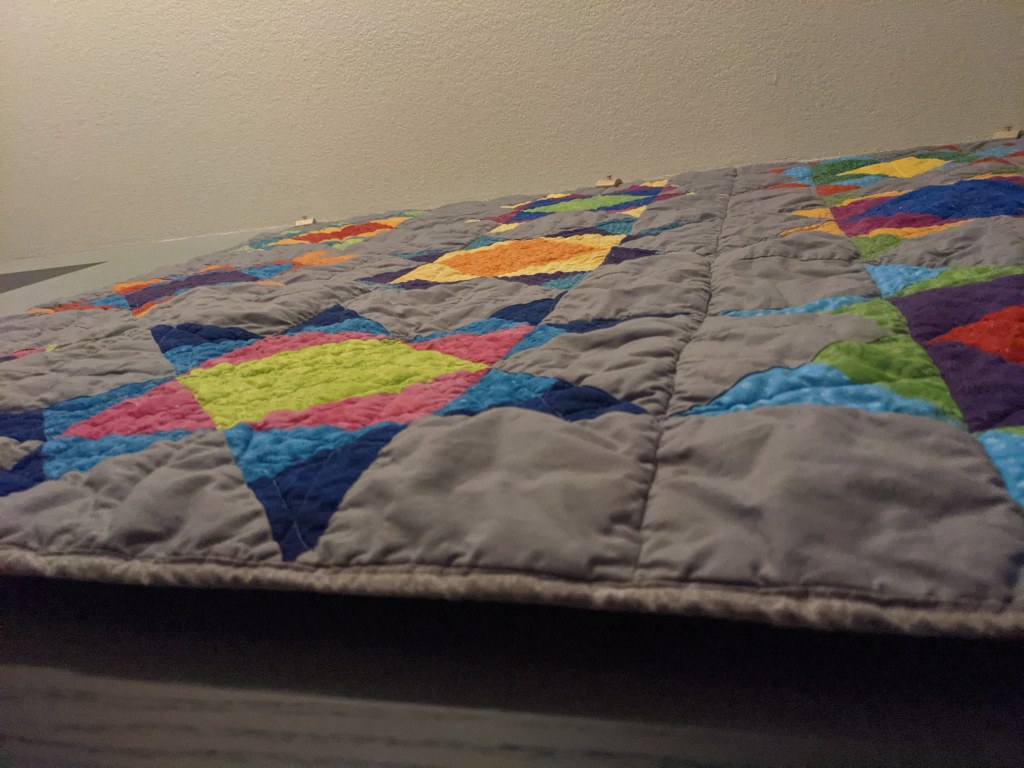
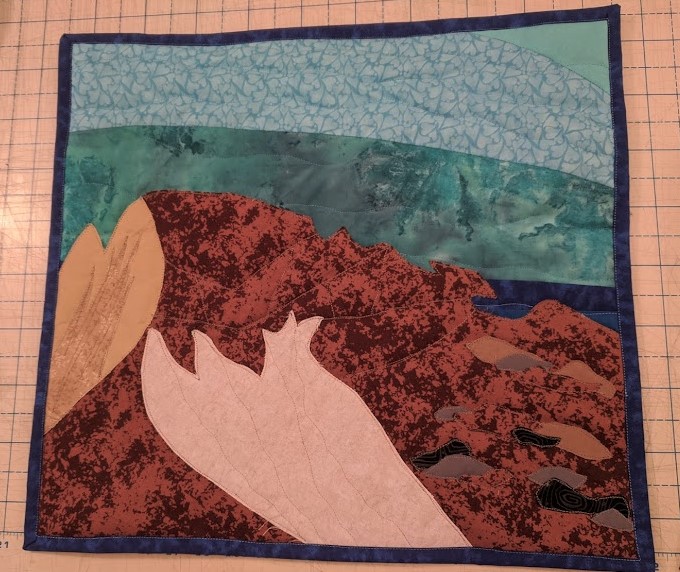
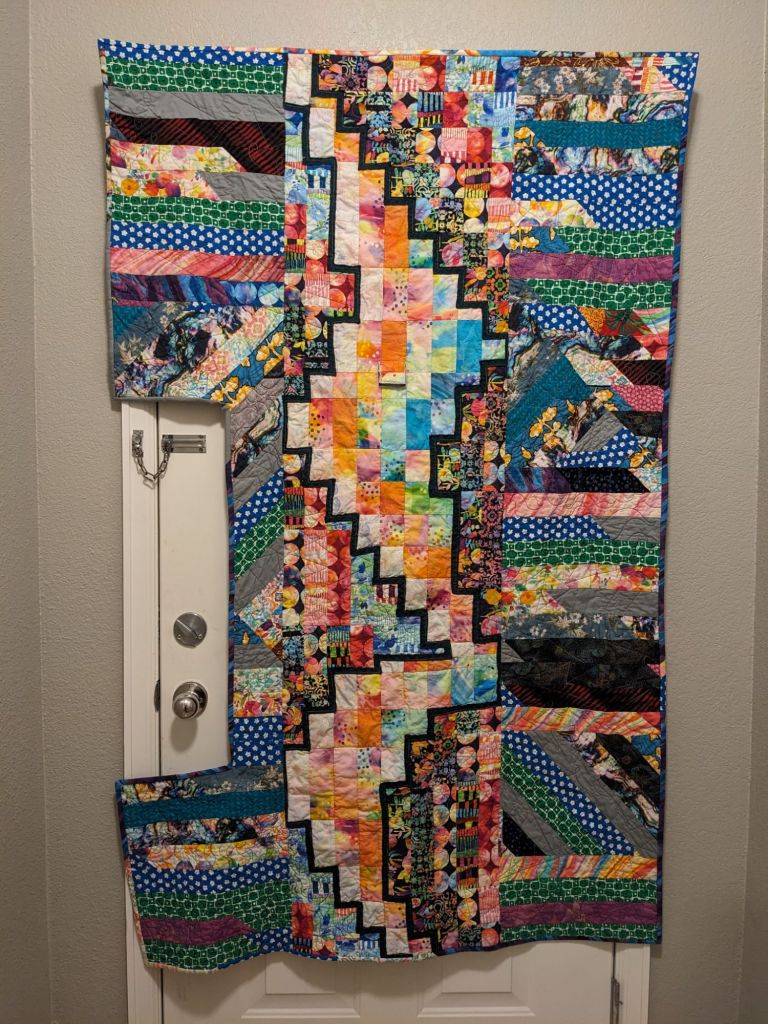
But in the end, I decided a quilt that could cover most of the frame/door gap would be the most effective, most fun, and most aesthetically pleasing. I had a jelly roll from Moda Fabrics and decided to do a bargello-ish quilt. I wanted to depict a quarter rest, since I am a musician and I want my home to be a place of rest. A place between all the noise and chaos and effort-giving to rest, restore, relax.

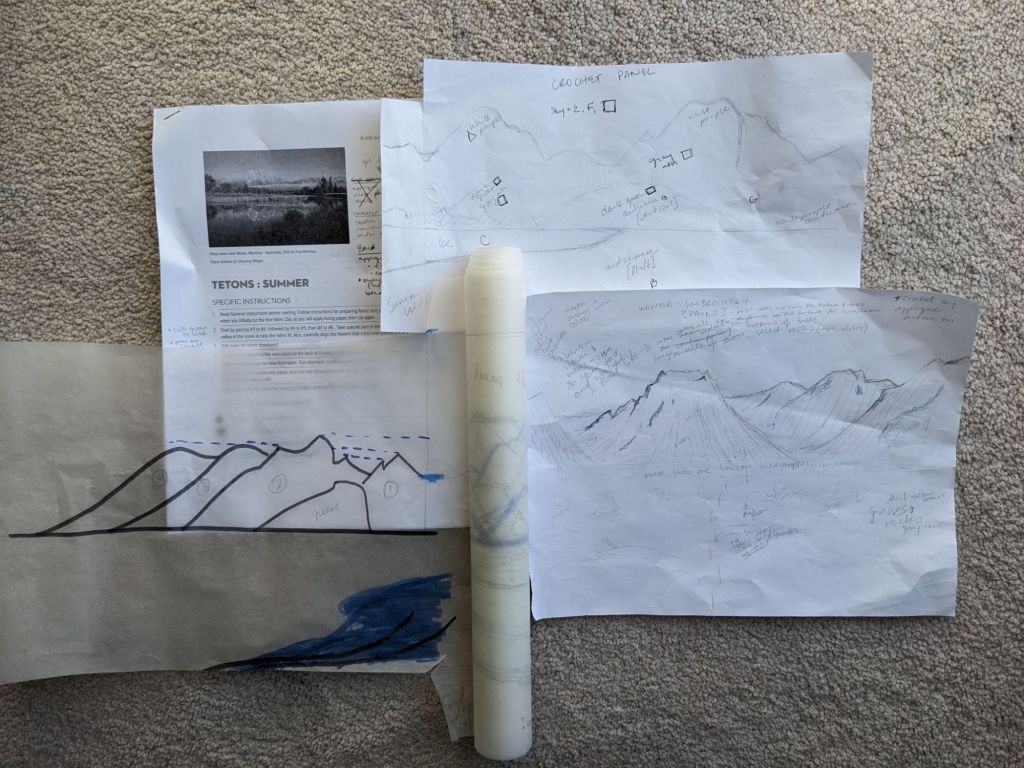
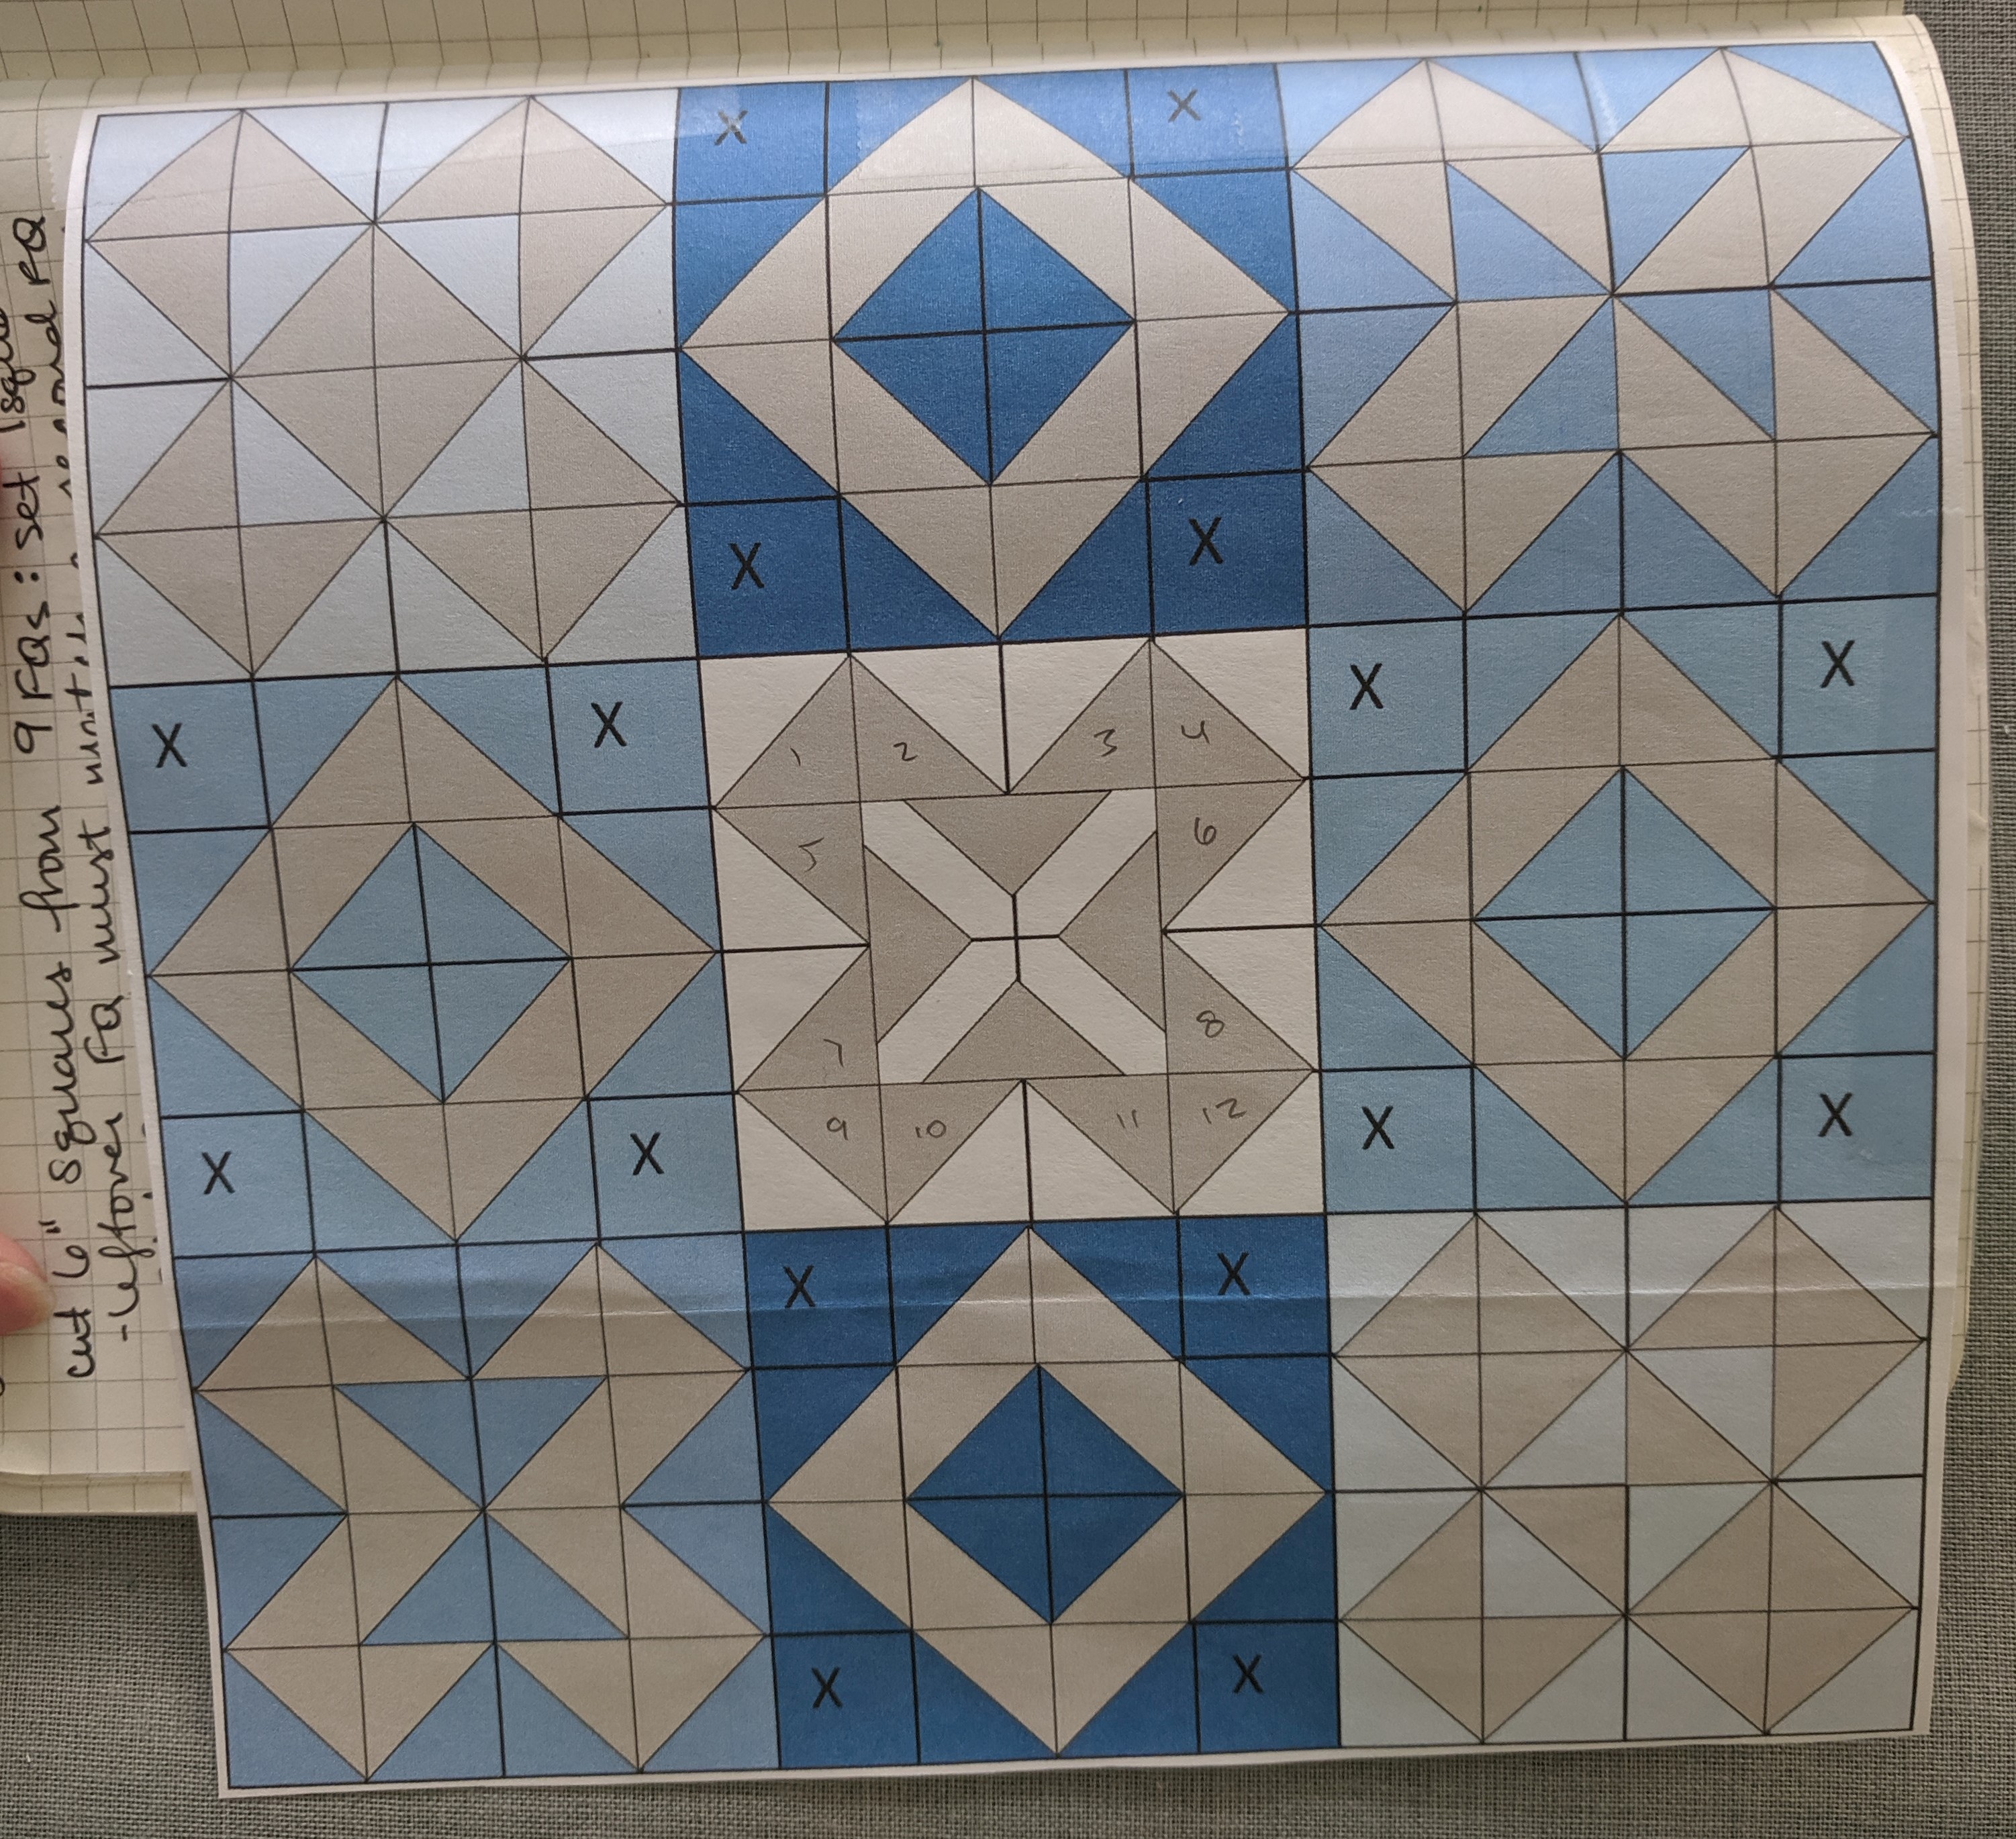
I sketched out the shape on graph paper and determined the widths of the strip sets. I used two “leading edges”, one for the left side of the rest (white) and one for the left side of the background that bounds the rest (dark flowers). I used lighter and less busy prints for inside the rest, and the darker and busy prints for the background.

The blue and purple edges are the rest, so the top edge in the picture is the left edge of the rest, and the gray blocks below the bottom edge are the background strips
Rest fabric in the middle, with the busy background fabrics to both sides

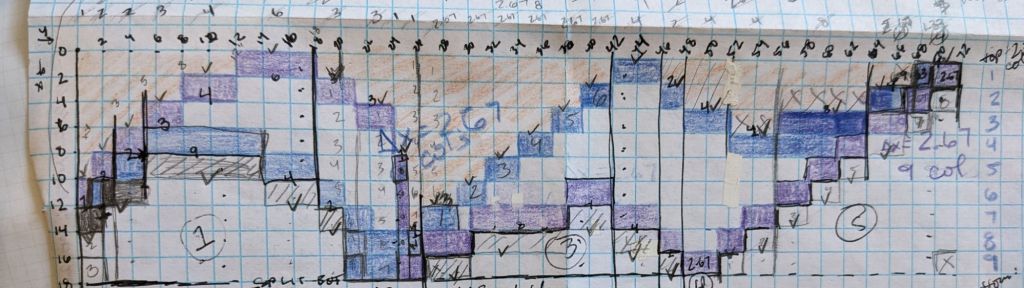
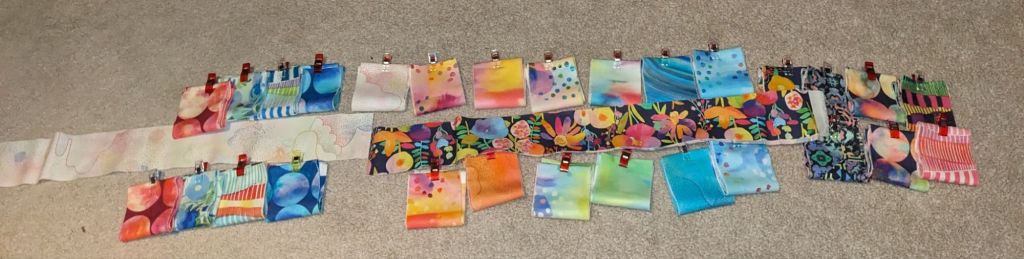
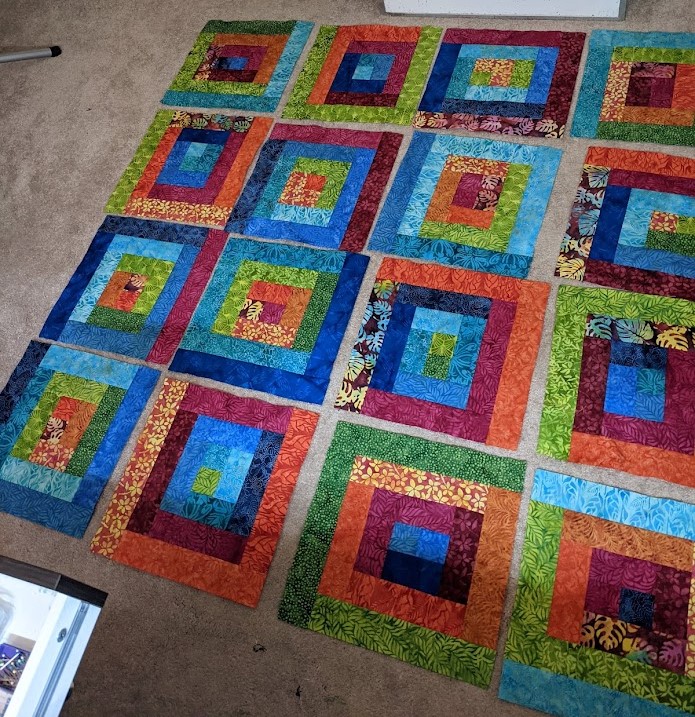
As with a normal bargello, I assembled the strip sets and then cut them to the corresponding widths. The jelly roll didn’t have duplicates of all the fabrics, so I alternated the ones that didn’t have exact matches. Then I pressed the seams to alternate, and sewed the strip sets back together.

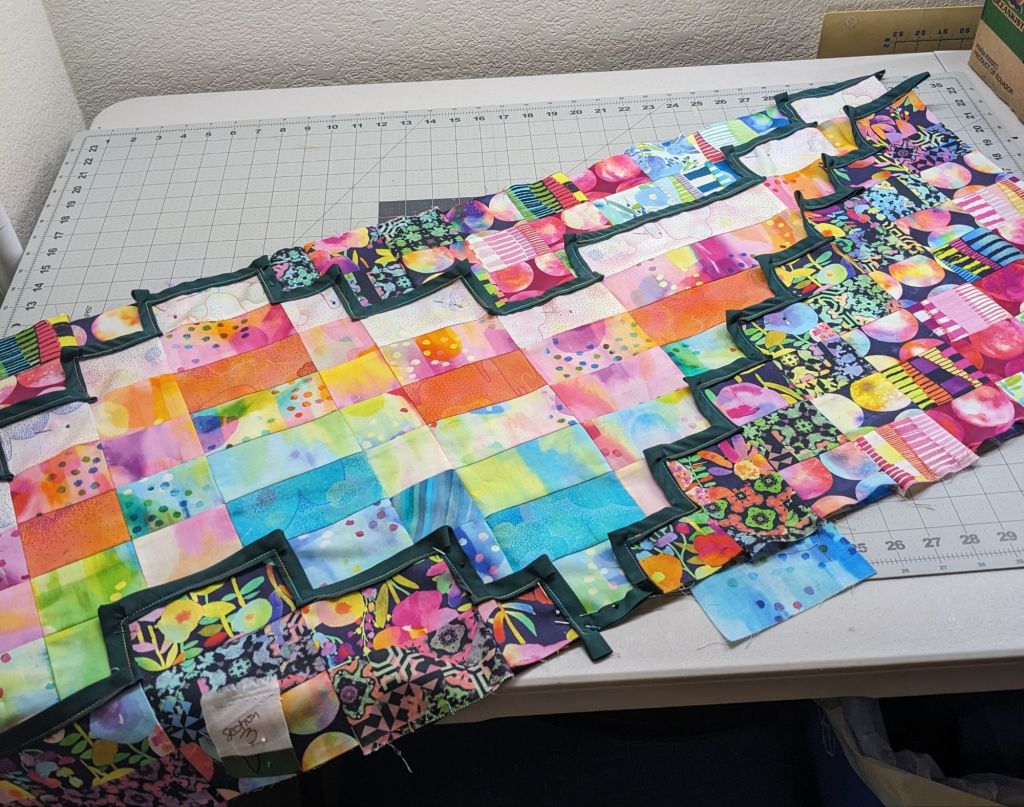
After some consideration, especially using a black and white filter on my camera, I decided the edges of the rest needed a tiny border to really make it stand out. I attached a strip of dark green as if it was bias tape, sealing the raw edges of the strip sets inside. Then I appliqued the background onto the right side of the rest, ripped off the unneeded background, and appliqued the rest into the extra background.

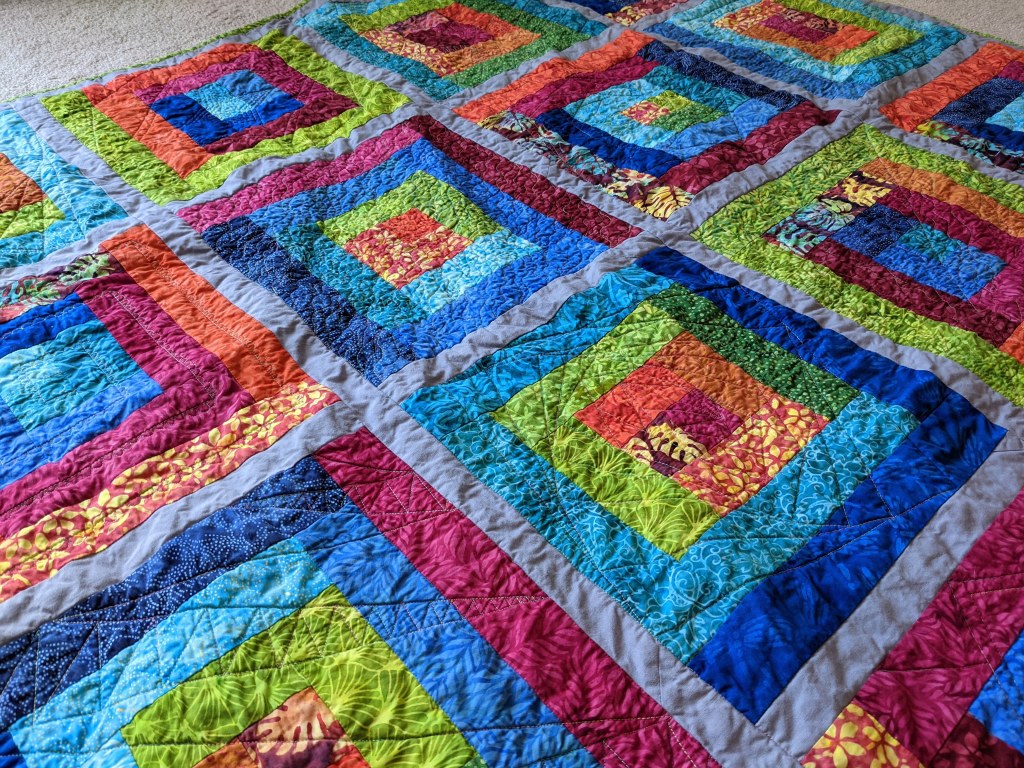
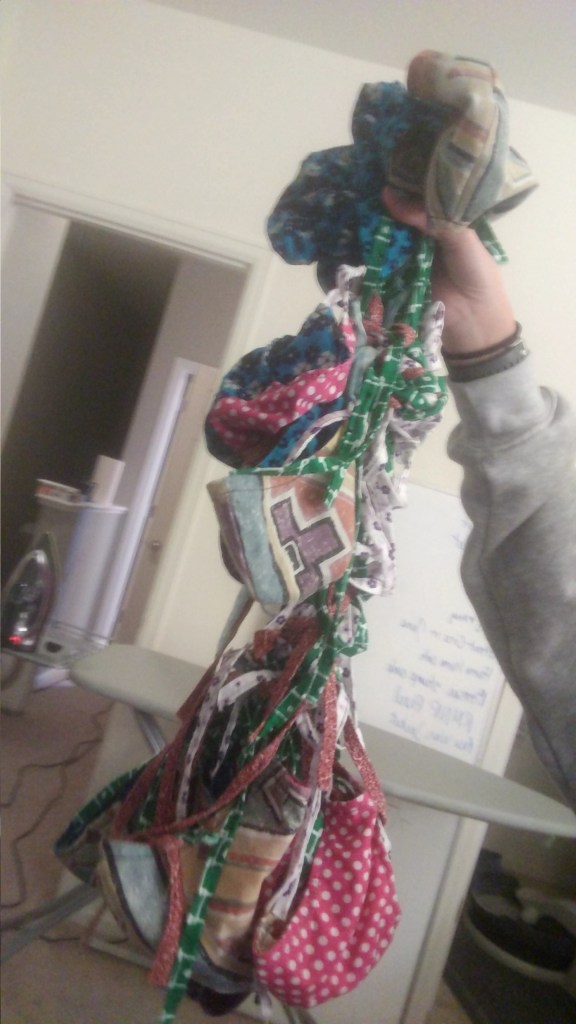
So that was the rest part, the middle part, done. I still needed two sides to make the quilt large enough. I cut a bunch of 2.5″ strips out of scraps and did a “jelly roll race” type of construction to make a big panel of stripes. Seeing as this area was meant to be busy and chaotic, I cut the panel and re-sewed it together on an angle a couple times. Then I split the panel in two for the two sides, and sewed them onto the middle rest panel.

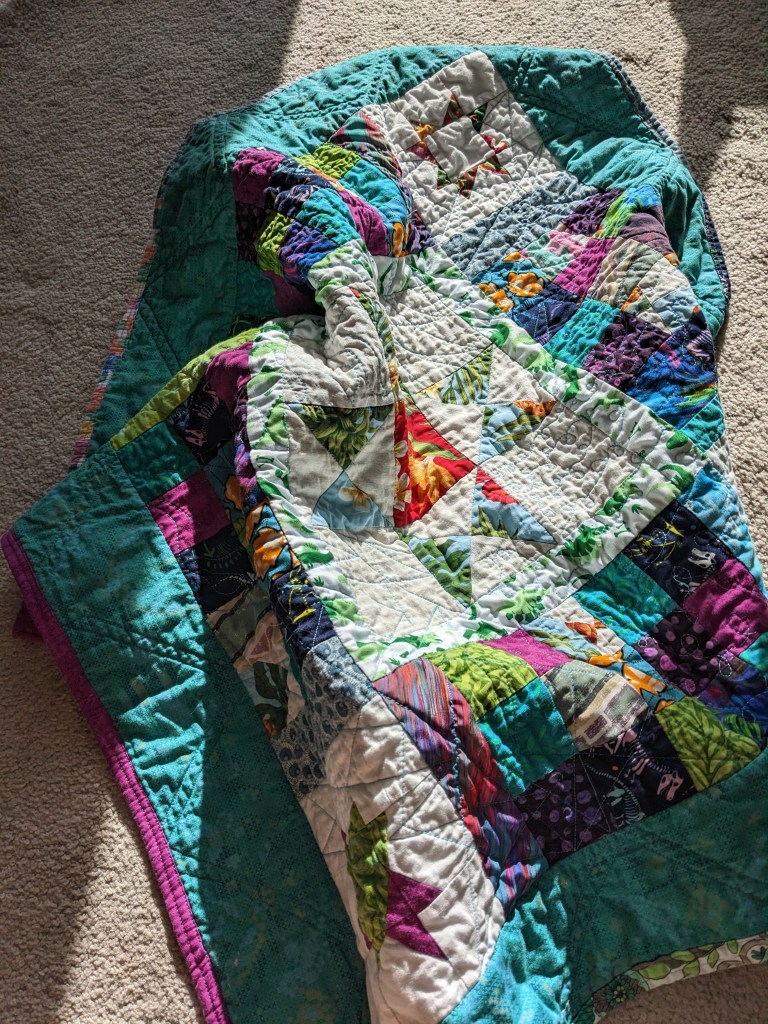
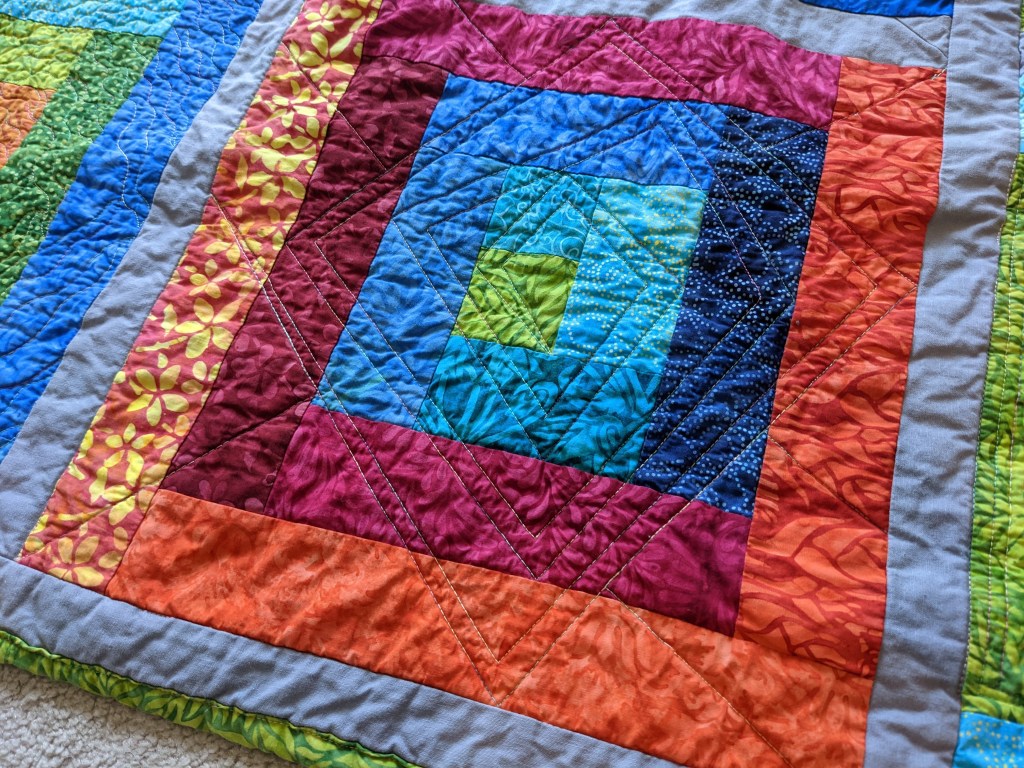
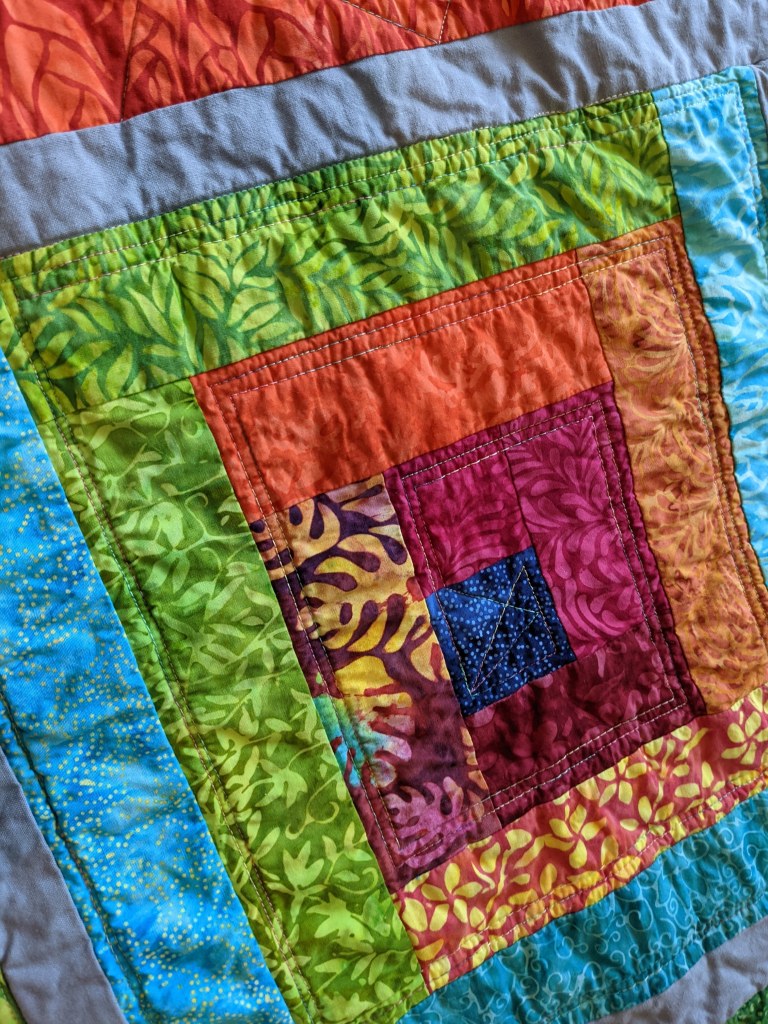
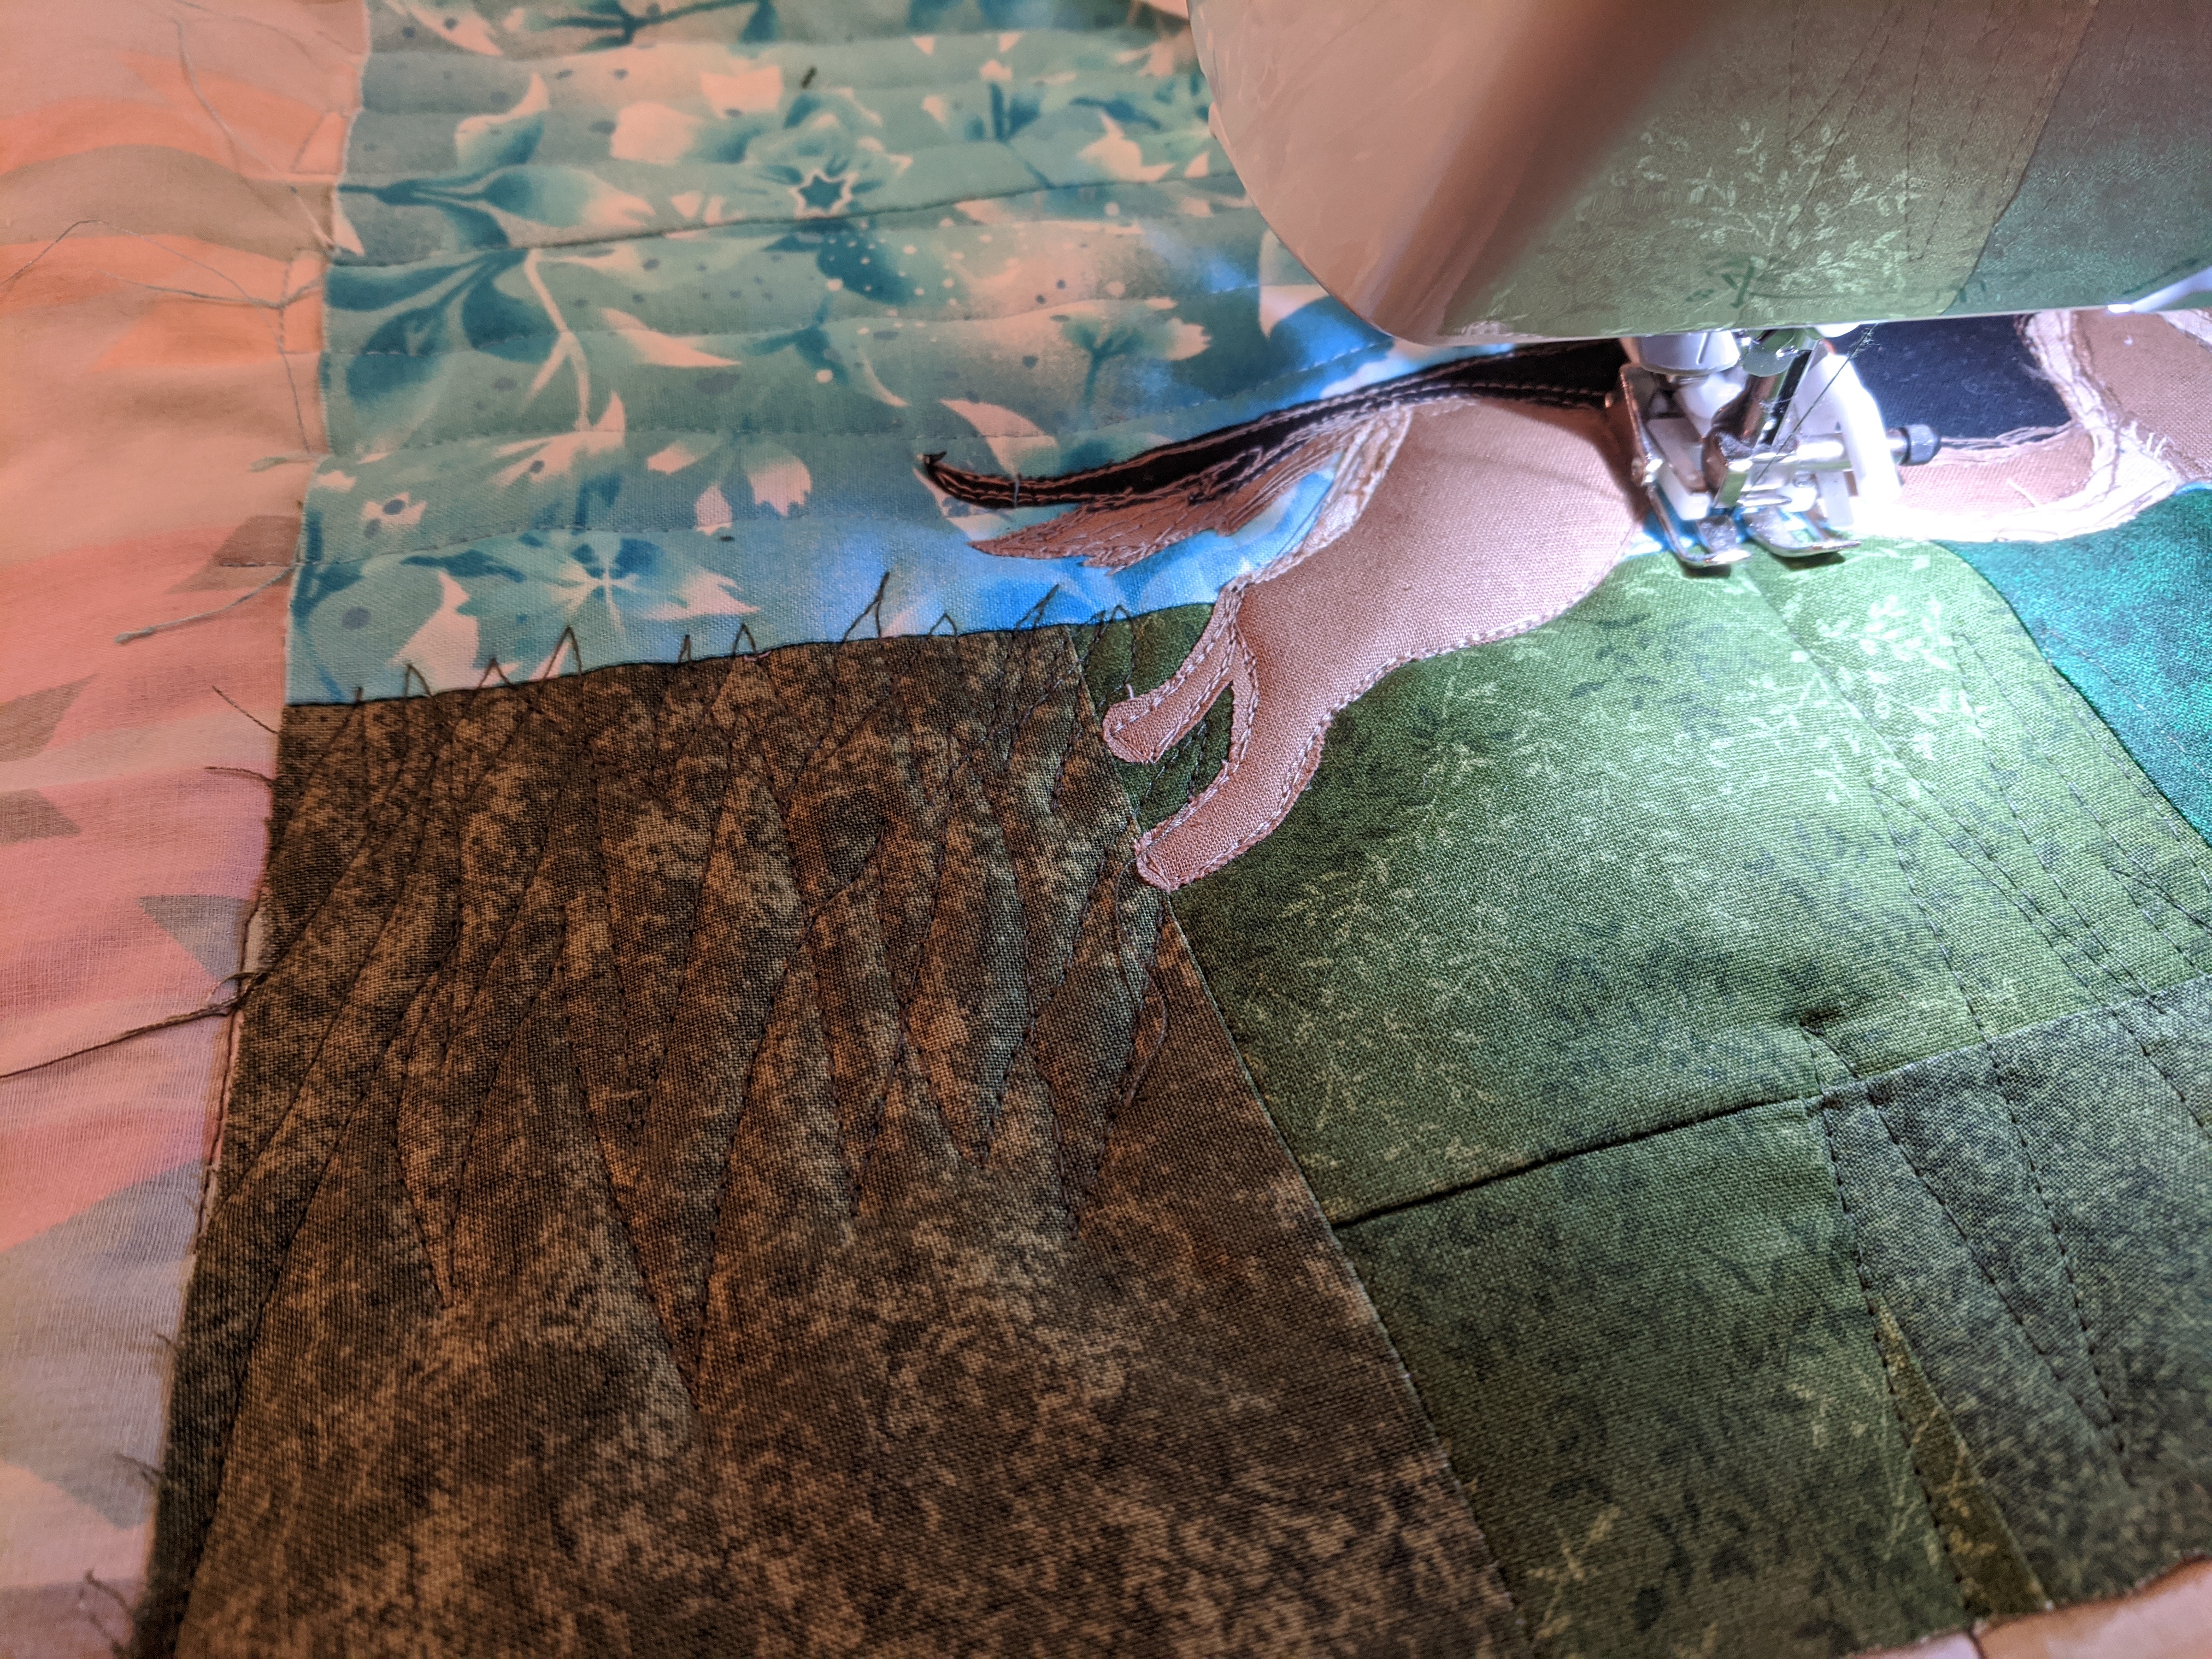
Then it was time to quilt! I did my most confident free motion motifs: loops, “toothpaste”, and abstract geometric, and switched thread throughout. I liked just doing some freeform, unstructured quilting and filling the space with whatever I wanted. For the rest, I did free motion stitch in the ditch because I needed to change angles often and didn’t want to deal with moving the whole quilt 90 degrees every few inches.

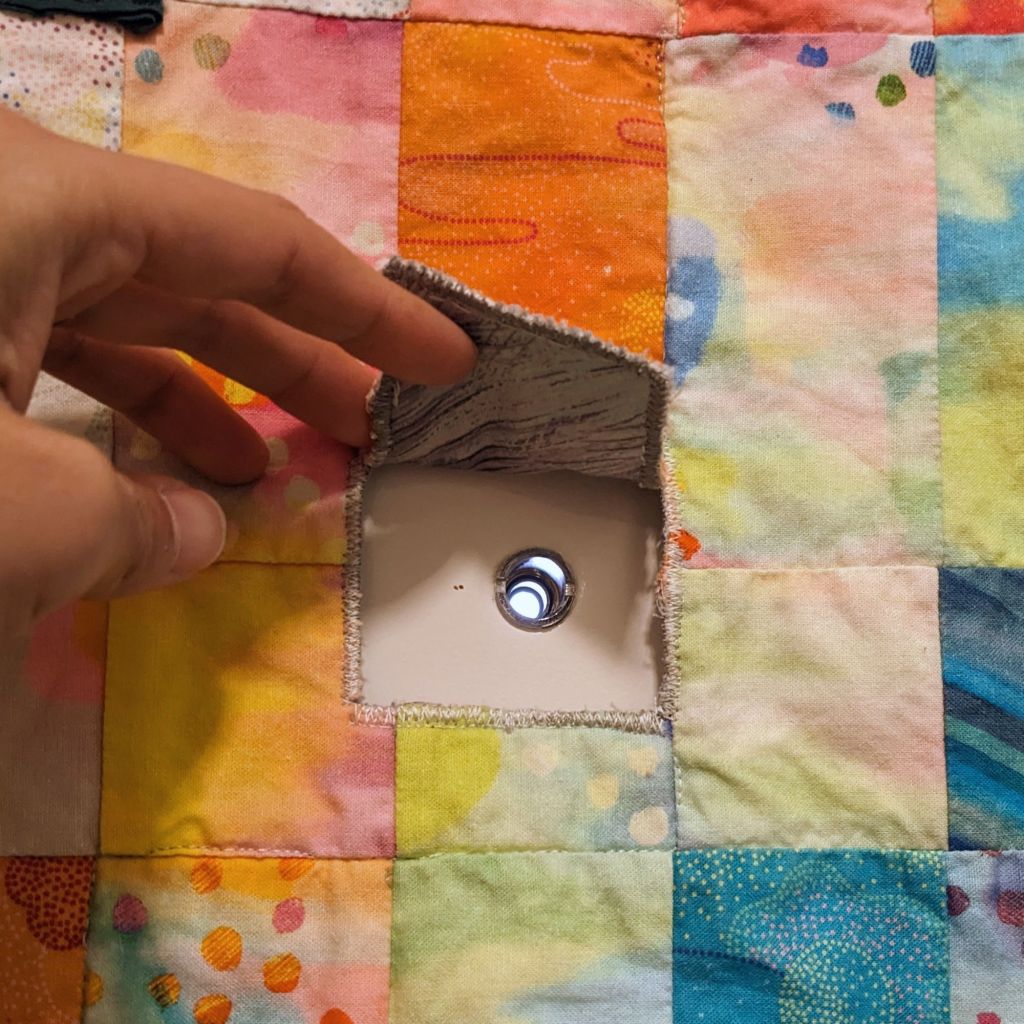
I had to do two nerve wracking cutouts – one for the door handle and chain, and another for the peephole. I measured multiple times and then bravely cut once. 🙂

Peephole cutout 🙂 so strange to take the scissors to a finished quilt
Hand sewing the binding to the back with the friendly helper

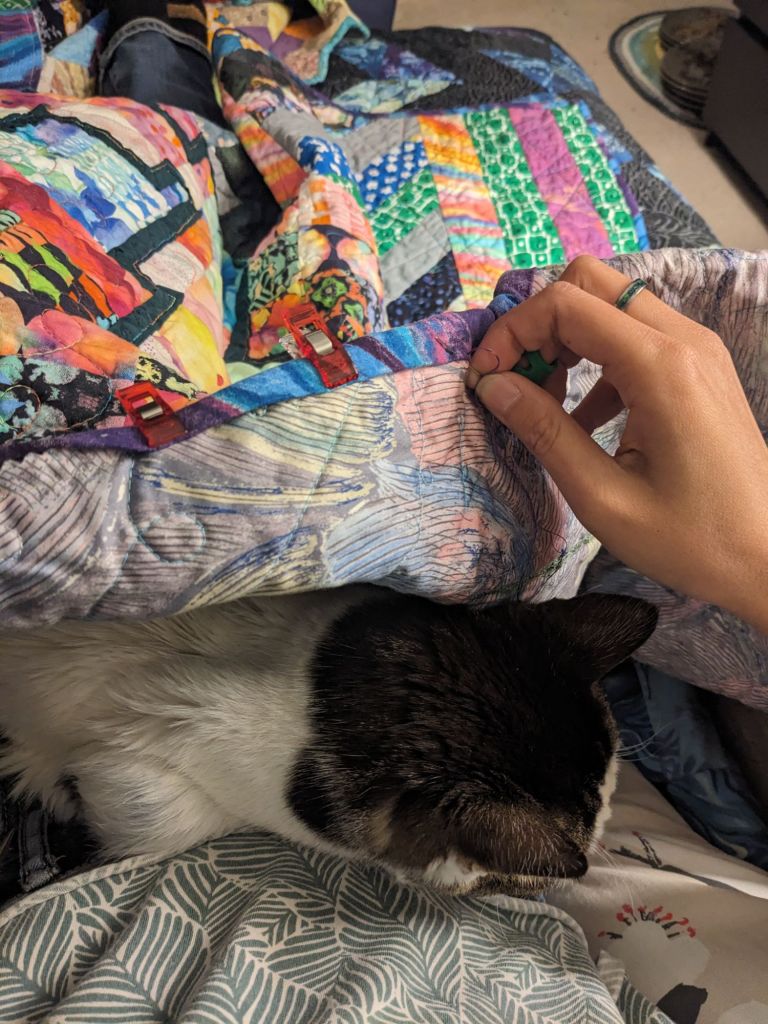
To affix the quilt to the door, I made a little frame out of wooden yardsticks (my quilt hanging devices of choice) and screwed it into the door. I used fabric loops to hang the quilt on the frame. And thus, it was done, ready for the tail end of this winter and many winters to come.

Project completed March 2025.

Mixed Media Extravaganza

So I’ve collected a lot of skills 🙂 and after picking up a “summer” quilting kit from the Grand Tetons last year, I wanted to expand that project into a Whole Big Thing. The kit references the possibility of doing the same scene but with different fabrics for different seasons, but I wanted to do a full panorama with different peaks, depicting as much as I could of the Teton Range. I used some tracing paper to plan out panels for each of the four seasons, scaled so they’d match up with the quilted panel. My main reference photo is from Willow Flats Overlook when I visited in 2023. The perspective of the quilt is a bit different, but I kind of… made it work.

Main reference photo from Willow Flats Overlook
Plans! The tracing paper rolls out into the whole panorama but having individual pieces was better while I worked.

I started off with the applique quilting kit and added some free motion quilting for details. It was really fun to work on things on a smaller canvas and be able to do details without getting overwhelmed. I also added some hand embroidery for the flowers because I wanted them to pop out 🙂

My first instinct for the next panel was to use crochet, using some funky colorwork and textured stitches. I spun up yarn for each of the different sections: sky, lake, mountains of various white and gray mixes, and autumn-y colors for the sagebrush.

a yarn I called “Autumn” 🙂
fiber blends I made at a workshop
I added some weird bumpy parts and extra stitches in the foreground to mimic the fluffy sagebrush 🙂
I struggled with getting enough contrast between the gray of the mountains and the blue of the sky, so I took a black and white picture and spun up some darker blue that I could blend into the existing sky.

After I had summer and autumn, I struggled with what to do next. I knew I wanted an embroidery panel and a woven panel, but I wasn’t sure which should be spring and which should be winter. I talked it over with a friend and we decided that the crochet shouldn’t be next to the weaving, since they have similar textures and detail resolution. So winter was embroidery! I started by needle felting the background sky and foreground, to automatically add texture that I didn’t need to stitch. I spun some thin yarns of cream/white and rock gray, which was a fun challenge to spin thin enough and consistently enough that I could use it with a normal sized needle. I also thought some beads would be fun for the shininess of the snow 🙂

Winter embroidery in progress

I was planning to do the winter foreground details with embroidery, but I realized I wanted to incorporate paint into this project, so I used acrylic paint to add trees, bushes, and rocks. It was difficult to paint onto the felted surface because the brush strokes pick up fibers from the felt, but it was doable.

Then I needed a tapestry weaving for spring. Just like with the crochet, I only used yarns I’ve spun, and spun up a few more just for this. I had four different mountain-y layers that I wanted to represent, so I spun four different grays with graduated levels of light gray. In hindsight, I made WAY TOO MUCH, but it was fun. And now I have more mountain gray for later.

I took a weaving class where we were able to take the loom home for a week, and capitalized on this moment to (a) finish this project, and (b) see if this type of loom is useful for tapestry weaving (that’s not its primary use). It was a successful proof of concept for using this type of loom for tapestry, but I think I’m going to pursue purchasing a different kind of loom for some more flexibility and growth potential.

upside down on the loom! I wove the sky first because I knew it would be a solid weaving instead of doing a bunch of color changes… and weaving upside down made me less stressed about getting it perfect
this is the first time I saw all four panels together, they’re pinned to a mini ironing board 🙂

I used some extra fiber to needle felt over the seams between the panels, and then did a border to secure everything together.

My main challenge in finishing this up was getting the crochet to sit the way I wanted it to. I ended up gluing it to some stiff scrap fabric to stabilize it, which went well…. Until I started sewing the fabric frame on. Hot glue and sewing machine needle is not a good pair. 🙂 But I took my time, learned my lesson, and got it done.

Spring! My favorite part to make was the field in the foreground, I improvised all of the color changes and just had a good time
Summer 🙂 so glad I bought this and kicked off this project. I really like the wavy lake quilting with variegated thread
Autumn! I really enjoyed spinning all this yarn, and I have a lot left over for future projects. I’m pretty happy with the shading on Mt. Moran (on the right) and the weird bumpy texture of the sagebrush in the foreground
Winter! I really like the contrast between the line-y-ness of the embroidery and the fuzzy needle felting, and I proved to myself that I can spin yarn to embroider with
🙂 finished

Project completed October 2024

Celebratory T-Shirt Quilt

I made this quilt as a commission for my friend’s mom, for my friend 🙂 Their mom supplied me with a bunch of t-shirts from my friend’s childhood that otherwise weren’t being used, and I got to work!

First, the idea was to have these shirts in a different format that my friend could actually appreciate and use. I did an inventory of the shirts, most of which only had designs on the front, but some had a front and back design. There were a couple repeats, so I figured I could put them in different areas on the quilt or exclude them, depending on how many squares I needed. Below I’ve included some of the calculations I did for this quilt – I had about 50 things I could make into squares, so I thought about different grids and calculated the dimensions for each. I settled on a 6 by 7 grid using 13.5″ squares, with a 3″ border for the quilt top (on the right of the picture).

For the back, their mom and I decided on a three colors in a stripe format, and I had to figure out what the widths of each panel would be. I thought about doing the stripes on a diagonal, but the math just didn’t work out that way (bottom left). I ended up doing straight stripes with a 6″ border (bottom right), using the same fabric for all the borders and the binding.

I think one of the main calculations I do for quilts is trying to figure out the correct aspect ratio, based on the square shape, the desired size, and the border. I also wanted to make sure the three stripe colors were equally represented; I originally thought the seams could be diagonal but I found I wouldn’t have enough fabric.

Then it was time to start cutting squares! I cut them out and lined them up in the order I wanted to sew them into the grid; I sewed the squares into columns and then the columns into the entire quilt top.

Lined up squares and the friendly helper!

After constructing the quilt top, I added some borders – to add size to the quilt and to stabilize the entire thing. Most of the shirts were made of stretchy woven fabric (honestly, very difficult to sew, I had to use tissue paper to make the edges stay flat so I could piece them together) so I wanted to have that non-stretch cotton around the edges to lock everything together.

I quilted the whole thing with zigzags across the row seams, and then went back to do some wiggly lines up and down and around the different designs to stabilize and add some fun.

Project completed February 2022

Follow your art heart

Been making a lot of different kinds of things! I’m reaching into multimedia and experimenting with new materials and techniques. 🙂

Colorful Log Cabin

This was a gift for two of my best friends who got married last summer! For their gift, I was inspired by the log cabin block, since our friends often gather at their home. I’d never done a log cabin quilt, and it’s a very traditional quilt, constructed by sewing strips of (usually) the same width to a “rotating” block.

I wanted to minimize my cutting, so I used pre-cut 2.5″ strips define my block and calculated the lengths from there. My idea was to put the strips in rainbow order and have each color “march” around the block so that, say, red would start in the first position, then for the next block, purple would be in first position and red would be in the second position. (see below) This meant I cut all of the lengths from all of the colors, with some finagling (also, see below).

Log cabin blocks are constructed by adding strips to a center square (marked as 1). My idea was to have an approximate rainbow order moving clockwise around the block.
Cutting strips to the correct length

Then I was able to assemble my blocks, which I did one by one because I wanted to stay super organized with the color order. They weren’t all perfect but I am super pleased with the results.

Originally I wanted to arrange the blocks in the order I made them, with red in the first position in the first block, second in the second block, but that didn’t look that good 🙂 so I mixed them up and tried to design it by keeping busy prints scattered throughout and no prints touching each other.

This was my first quilt with sashing, the borders around the blocks. Sashing can make a quilt bigger without the need for more print fabric, and gives the eye places to rest between the busy blocks. I used a nice gray for the sashing, which ended up being really nice with such vibrant, saturated colors in the blocks.

As usual, I vamped on a few motifs for the quilting – as illustrated below.

swirling polygon
swirl with echoing
echoing the strip lines
zigzag; echoing strip lines; curvy swirling polygon; curvy lines within strips

Overall, I’m really pleased with the final result and I was so happy to make a traditional quilt in a modern, bright way.

Completed June 2021.

Print: Punch Batiks by Kathy Engle for Island Batik
Binding: Wilmington Essentials – Crackle Stone by Wilmington Prints
Backing: Punch Batiks – Fern Green Apple by Kathy Engle for Island Batik

Missouri Star :)

For the longest time…. I have wanted to do a Missouri Star quilt. And finally, I have. I used the pattern from the Block of the Month, although I did figure out halfway through that I could have done it an easier way (less cuts), but it was fine. I wanted to do something bright and colorful to hang up in my bedroom.

Pressing my triangles and squares open
Squaring up my blocks – I like to trim my half-square triangles while they’re still a triangle, since it’s two cuts instead of the four I’d have to do if I ironed them open first. Squaring blocks is so tedious but it does make for an easier, flatter, and better finish. All the blocks are the same size, so they fit together the way they’re supposed to, no crookedness or extra fabric.

I did my normal stitch in the ditch for all of the vertical seams, and then did free motion quilting in each of the stars. In my layout, I put similarly-colored center squares across the quilt from each other, so I decided the do the same with my free motion designs. I did a radial pattern for the red center stars, an echo in the center for the dark center stars, an outside echo for the yellow center stars, my “abstract” design with straight lines bouncing around for the green center stars, and then a full echo swirl from the outside to the center for the center star.

I used the foot as an approximate guide to follow the outline of the star, and then follow that line, and then follow that one…. all the way to the middle. 🙂 As I got closer to the middle, I started making the space between the lines wider. You’ll see me fix a broken thread a few times in there. Anticipating those threads is why I sew with the end of my machine open now, since it’s easier to retrieve the broken thread.

As I expressed in my last post with the Plant Wall Hanging, I think I’m still moving too fast with my free motion quilting, which causes the thread to fray and then break. I had that happen less often with this quilt, since I was keeping it in mind, but it was still happening. I think it’s a combination of moving too fast and not moving at a consistent speed, which I want to work on with my next quilt.

I used hangers from The HangUps Company
View looking up at it from my pillow 🙂

Overall, I’m really happy with how it turned out. I love the Missouri Star block and I have wanted a quilt like this for a while. I made 10 stars and used one as the label for the back. As usual, I hand sewed my label on. I like having that time under the quilt as it’s in progress – a sneak peek of what it will turn into. The backing is a purple flannel which did not hold up that well in the wash, but I didn’t worry about it since it’s a wall hanging anyway. 🙂

Completed March 2021.

  • Print: Wilmington Essentials – Magic Colors by Wilmington Prints
  • Background: Kona Cotton – Medium Grey by Robert Kaufman Fabrics
  • Binding: Wilmington Essentials – Crackle Stone by Wilmington Prints
  • Backing: Comfy Flannel – Tossed Unicorns Purple by A E Nathan Co INC

Plants Wall Hanging!!

So I’m a big plant person. I love plants. I have had an ongoing collection of succulents for a couple years, and last summer my cousin (who I made the memory quilt for) gifted me a bunch of mature houseplants like pothos, monstera, and colocasia. So I’ve wanted to do a plant quilt for a long time, and I actually bought half the supplies I needed for this quilt in early 2020. At that time, I was planning on doing the entirety of Elizabeth Hartman’s “Greenhouse Quilt”. Hartman creates incredible patterns of actual animals and objects, all pieced, not applique. This means there’s a lot of cutting itty bitty pieces of fabric, sewing itty bitty pieces of fabric… and a lot of mental effort to stay organized and on track. I had done one block of hers a while ago as a pillow, and used one of the plant blocks as a bag for a friend (below).

Flower block from Elizabeth Hartman

And then I saw MSQC’s “Cactus Carnival”, which is applique, and I knew I could combine both these patterns to create something that wasn’t too hard, and had hard angles and soft curves.

I attempted to standardize the sizes of the blocks, since MSQC’s pattern has a 10″ block, and Hartman’s pattern is based on a 6.5″ wide block with varying heights. I ended up adding borders to the Hartman blocks to make them 10″ wide and 15″ tall, so they could work in columns with the MSQC blocks.

I made four blocks of each of the five general plants from MSQC, and used Heat N Bond for all the applique, which ended up going a lot faster than anticipated. I used my rainbow variegated thread (kind of my favorite thread, let’s be honest I’ve used it for probably half my projects) to outline all my applique’d plants with blanket stitch. I didn’t even have to use Heat N Bond for the pot pieces, and laid those gently on top of my applique’d plants.

I’m only applique-ing the plant pieces here, the pot was a placeholder because the fabric hadn’t come in yet
Here I’m going around the main piece, but I come back later to go around every piece. The Heat N Bond doesn’t stay sticky through the washer and dryer, so you have to secure the pieces in another way.

Then I made two versions of each Hartman block – a standard size and an enlarged size. I used the normal pattern for the standard size block, and adjusted the plant to be 8″-9″ for the enlarged size block. The whole time I was kind of stressing because I didn’t think I had enough background fabric to all the blocks, but it ended up totally fine!

I put all the blocks together in a landscape orientation, which is kind of different for quilts! But I intended this to be a wall hanging in my room, behind where I Zoom/video chat from, so that it could be my background! So I arranged my blocks and sewed them together in columns. My first pass of quilting was just straight lines, stitch in the ditch up and down the columns, and then across horizontally.

Then, I did free motion quilting on the pots! I started off using this white thread I got, but it kept breaking, so then I switched to a shiny gray that I’ve had for a while, and that kept breaking too… Finally I figured out the problem was the needle! But that kind of just made the problem happen less often.

[Future Finch, who is writing this post, has completed the Plant Quilt and is working on the next quilt and running into the same problem while free motion quilting. I am now convinced that it’s because I was pushing the quilt through the machine too fast, which pulls the thread too tight and then it snaps. I have been working on slowing down and having patience, which is difficult! The machine is running very fast, so it’s kind of loud and the needle is moving quickly, but I have to move slowly and steadily. I’ve gotten to the point where it’s happening even less often than during the pots, but I’m still working too fast. I don’t know if I want to turn up the machine speed, although I think that could help. It just stresses me out because it’s so loud, which makes me go faster.]

But I persevered through my mistakes and the pots ended up so fun. I had six different “motifs”: swirls, abstract, wavy, rainbow, zigzag, and dots. Each pot, I rolled a die to decide which motif I’d use – as long as it wasn’t the same as the pot I just did or any adjacent pots. It was so fun to vamp on different motifs and find new ways to represent them. It was nice to not have to come up with an entirely new idea, but just a new take on the same motifs. So it was fun to do and fun to look at 🙂

As I was finishing up, I wasn’t sure if it needed more quilting or if I should quit while I was ahead. The applique plants and pots had their own blanket stitch outlines, and the pots had the FMQ, but the Hartman blocks were kind of empty. I called a friend and we decided that I should do limited quilting on the Hartman plants so they blended in with the whole quilt. I matched the designs between the standard and enlarged blocks, so the small cactus has the same quilting as the large catcus, etc. I think it really brought everything together! Last up was the binding and putting it through the washer and dryer. Since I found them at Target, I throw in a “color catcher” sheet with all my new quilts (and some of my more brightly colored clothes), which did come out a gray-ish green.

And now it’s hanging up behind my desk, courtesy of some quilt hanging clips my parents got me for Christmas a couple years ago. 🙂

Project completed February 11, 2021.

  • Colorful plant pieces: Artisan Batiks – Aviva by Lunn Studios for Robert Kaufman
  • Ombre Green: Wilmington Essentials – Ombre Washart Forest by Wilmington Prints
  • Brown pots: Bella Solids – Earth by Moda Fabrics
  • White background: Kona Cotton – Snow by Robert Kaufman Fabrics
  • Backing and binding: Painterly Petals – Textures Mint by Studio RK for Robert Kaufman

Random Updates!

With COVID-19, I’ve struggled to get into the sewing room as often as I’d like, but I wanted to share some of the things I’ve worked on / am working on right now.

Currently in progress: 3 memory quilts for family and a skirt for a friend.

Fabric bought but project not started: another spiral rug and a cactus quilt.

Tangled masks straight out of the dryer before I discovered you can use hair ties to tame the strings, PLEASE COMMENT OR EMAIL ME IF YOU WANT MASKS, I WILL SEND THEM TO YOU
Pillow for my mom for her birthday using scraps from the bed runner I made her
Entryway paintings made with masking tape and acrylic paint

(above): Wall hanging of my mom’s dog for Mother’s Day, I used applique for the dog and FMQ to make grass texture which was really fun.

Friendly sewing helper blessing one of the memory quilts
Update of my Christmas cat pillow with the cat who inspired it!

Christmas Pillows

This year I did a bunch of little pillow projects for my friends and family 🙂 I got to learn some different techniques like fusible applique and paper piecing. I used lots of different fat quarters from Joann and scraps from previous projects. I generally used envelope backs and a little label to keep them closed. I stuffed them with some extra stuffing I had from pillows I’d bought previously, unfortunately none of them finished at a normal pillow form size.

MSQC Crown Jewel with stitch in the ditch
Self drafted mountain-y landscape applique loosely based on Boulder Valley with quilting around each piece
Self drafted paper pieced leaf with stitch in the ditch and straight line accents
The Quilt Block Cookbook “Spin The Bottle” pattern with stitch in the ditch and some straight line accents
Self drafted cat applique with hand embroidered eyes and mouth, quilted around each piece
Self drafted bargello with FMQ
Self drafted applique of Long’s Peak with quilting around each piece and some straight-ish line quilting (wall hanging, not pillow)

Projects completed December 19, 2019.

XOX Quilt

I made this quilt for my wonderful coworker whose wife had a baby 🙂 It is self drafted out of (primarily) HSTs. I based the pattern off “hugs and kisses XOXO” and used a fat quarter bundle from Joann. It ended up ~60″x60″, which is a bit large for a baby quilt but I don’t care.

HSTs ready to be laid out

I ended up quilting the whole quilt with “stitch in the ditch”, where you quilt between units along the seam lines. For this to work, you have to iron both seam allowances to one side (instead of open). This makes one side of the seam a bit taller than the other, and the quilting goes on the lower side – the ditch. I used some scraps and the same background for the border, and quilted little heart shapes around the entire thing.

Stitch in the ditch on the left in the main blocks, heart shapes in the border on the right
Patchwork backing with quilt label

Project completed July 4, 2019.