Tag Archives: english paper piecing

Colorado River Art Retreat

Watercolor of hills held in front of the hills; horizontal line of tan on the hills and watercolor represents the Grand Ditch

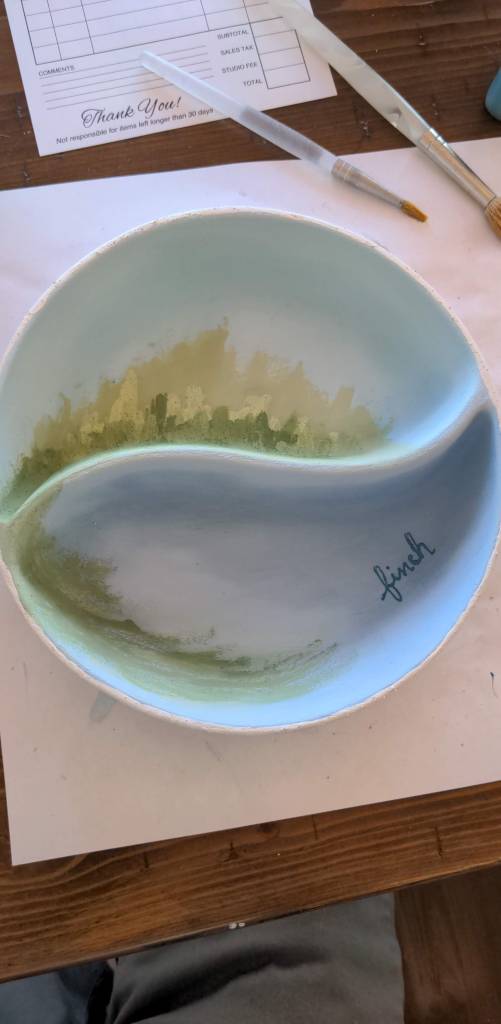
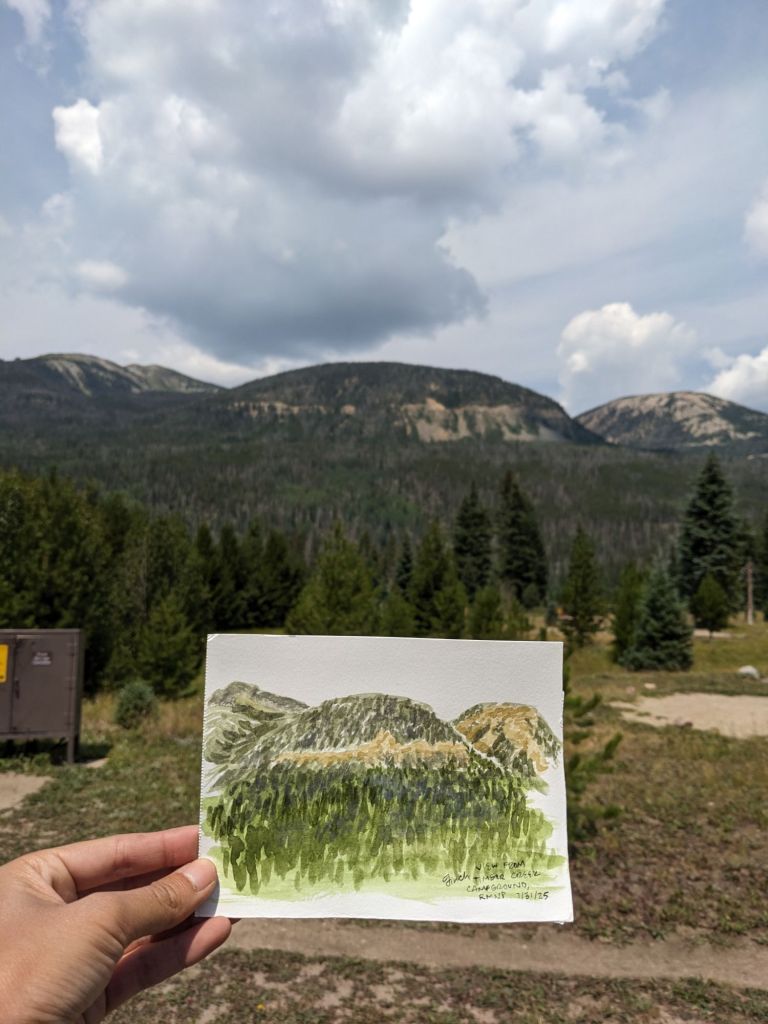
This lil postcard features the Grand Ditch, a water diversion structure that takes water from the tops of the Never Summer Mountains on the *west* side of the Continental Divide and ports it to the Cache la Poudre River, leading to the South Platte River. Part of this trip was dedicated to feeling some civil-engineering-and-climate-change-related feelings about the Colorado River and the development of Colorado. The Grand Ditch and Colorado-Big Thompson project enabled and continue to supply water for agriculture, industry, and municipalities on the *east* side of the Continental Divide, and these diversions have significant impacts on the Colorado River watershed by reducing the flow that would have been there.

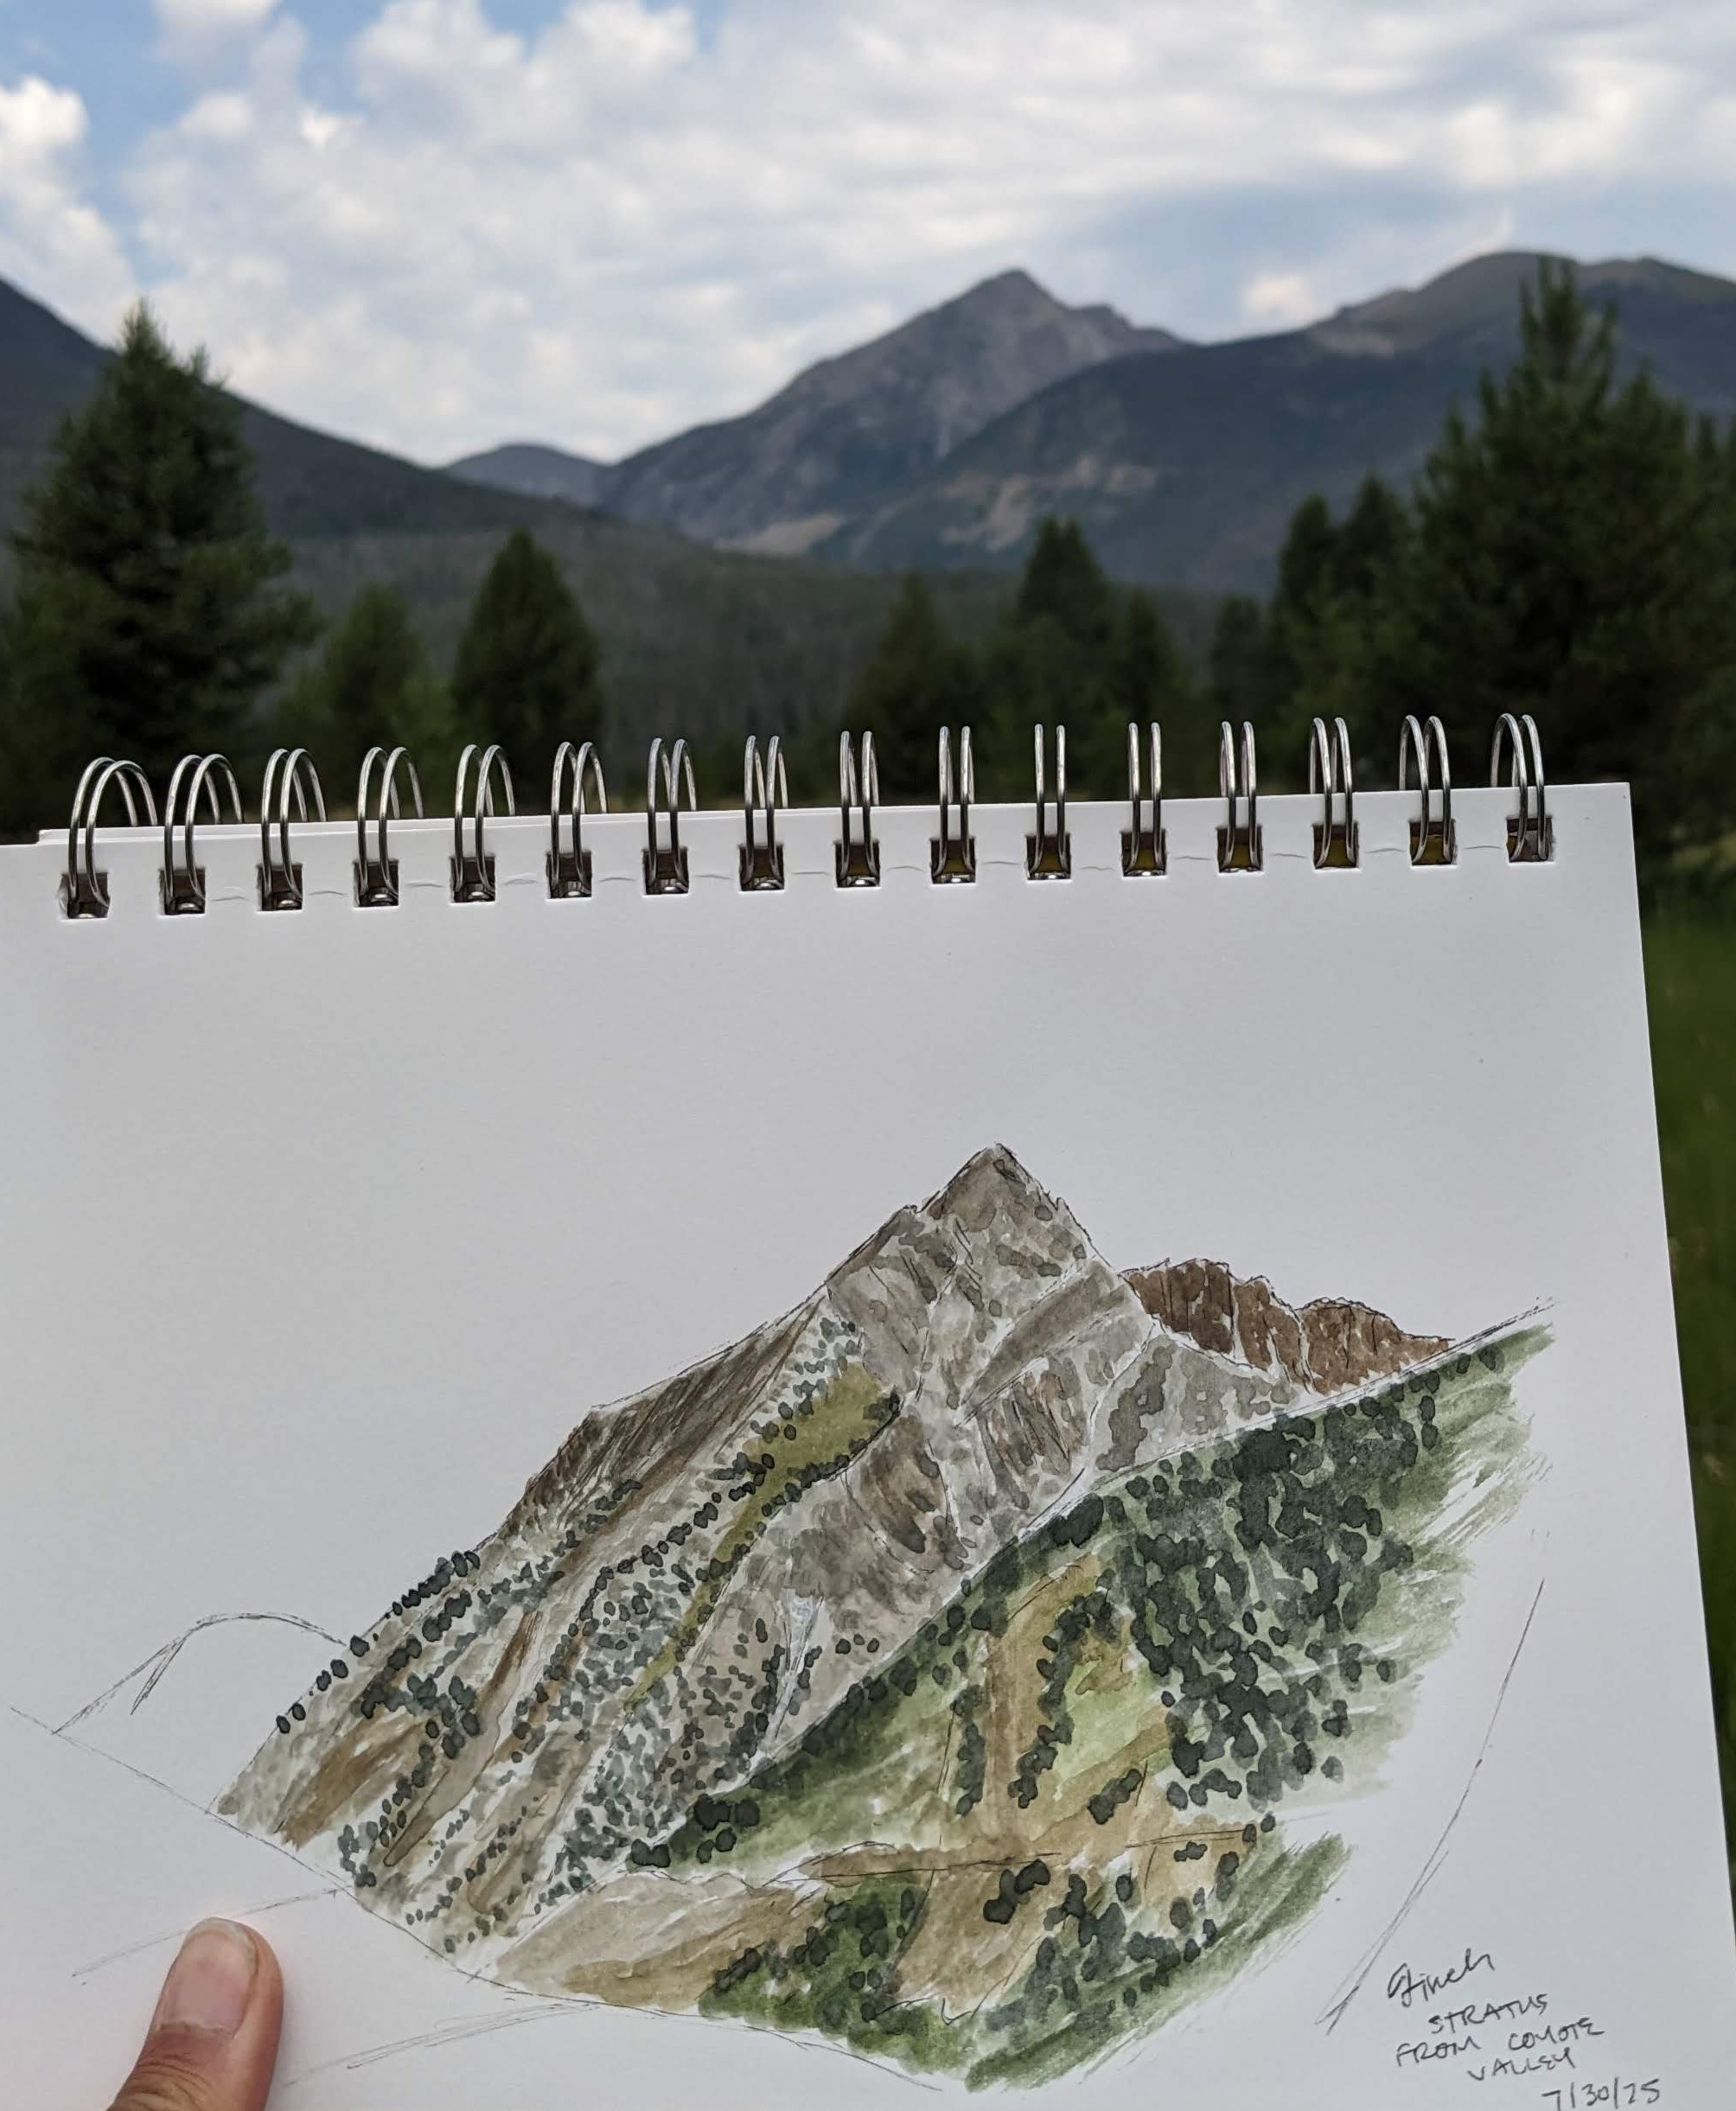
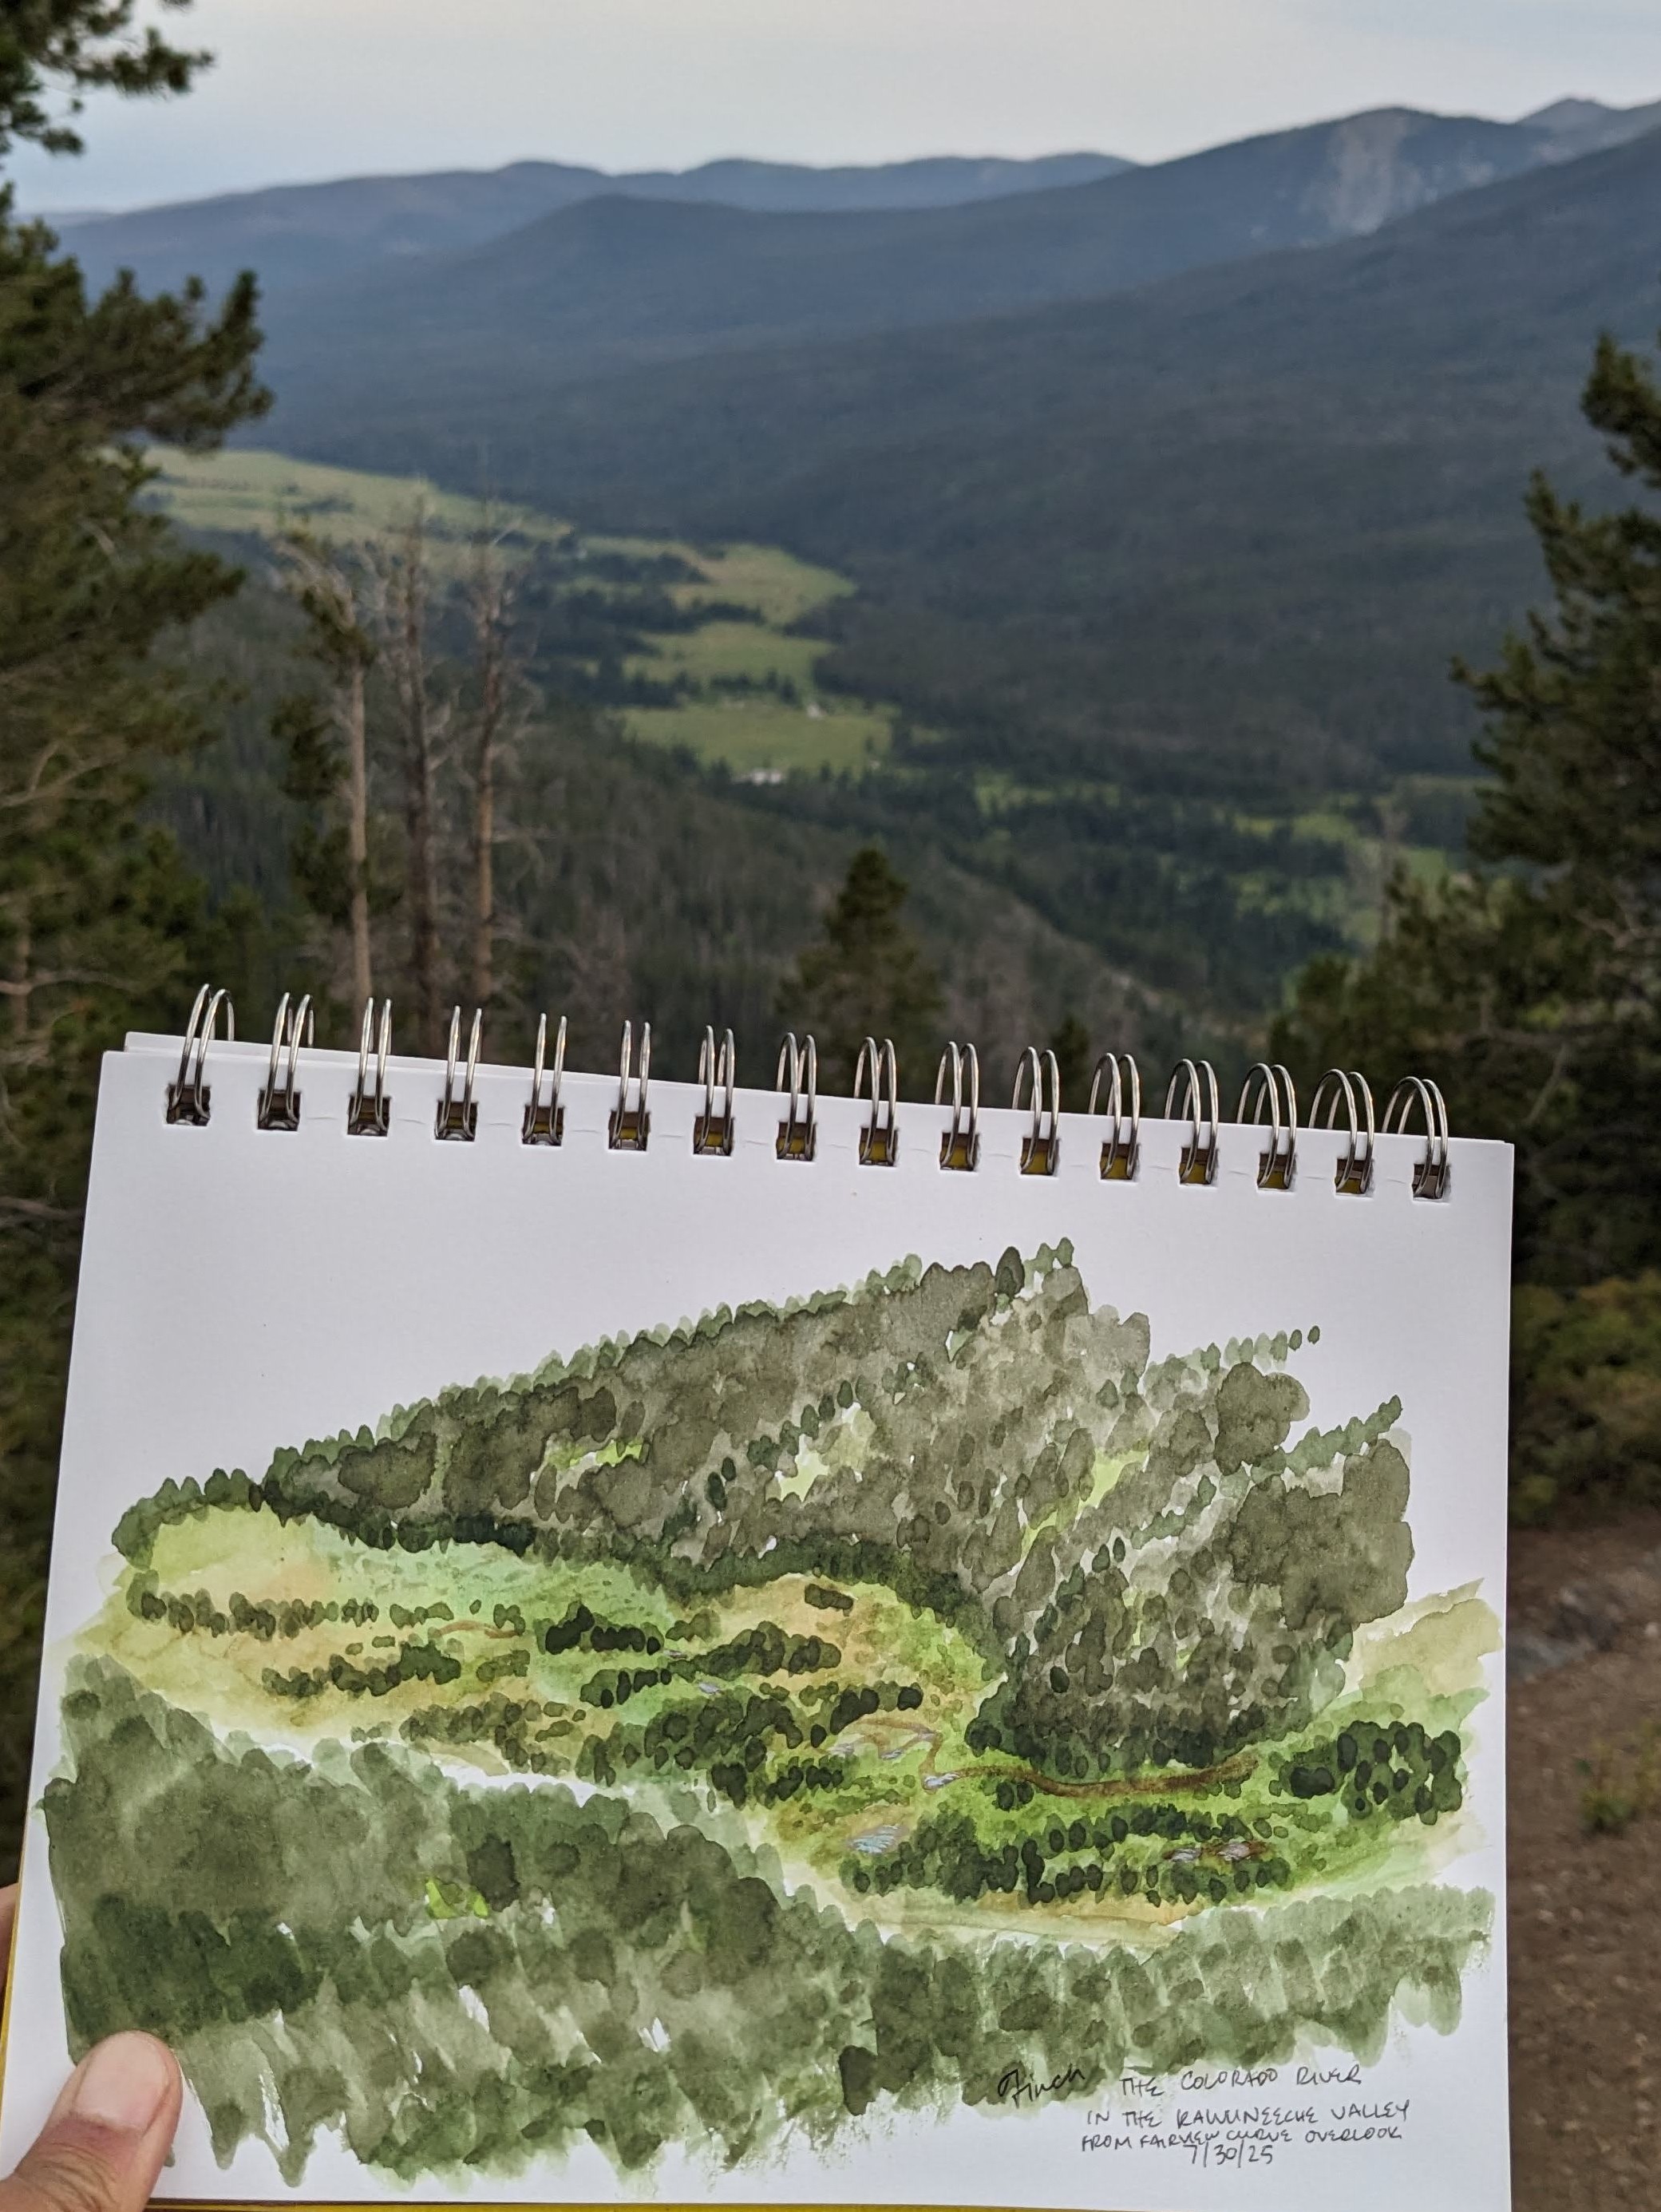
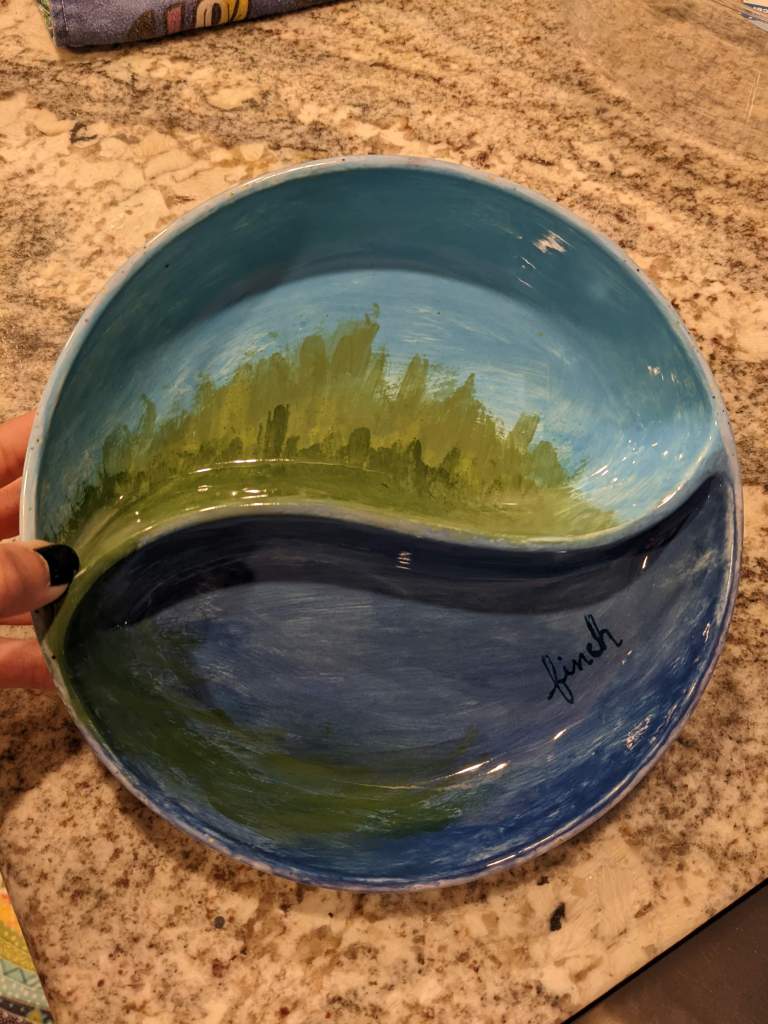
On the left, I did the pen sketch first, and then the watercolor – I kind of like the differences between the paintings I do with pen and without, the pen ones end up more… tiny and detailed? But somehow feel restrained, or constrained? On the right I did a watercolor sketch underneath the color, and it ends up bold, and colorful, and not quite “accurate”, I focus more on color zones instead of lines.

I wanted to do a painting that had less detail and focused on big blocks of color to minimize all the painting of trees (my least favorite and least satisfying step). From the initial marker drawing (top right), it took me 2 minutes to add the pen details, and then 16 minutes to add the watercolor.

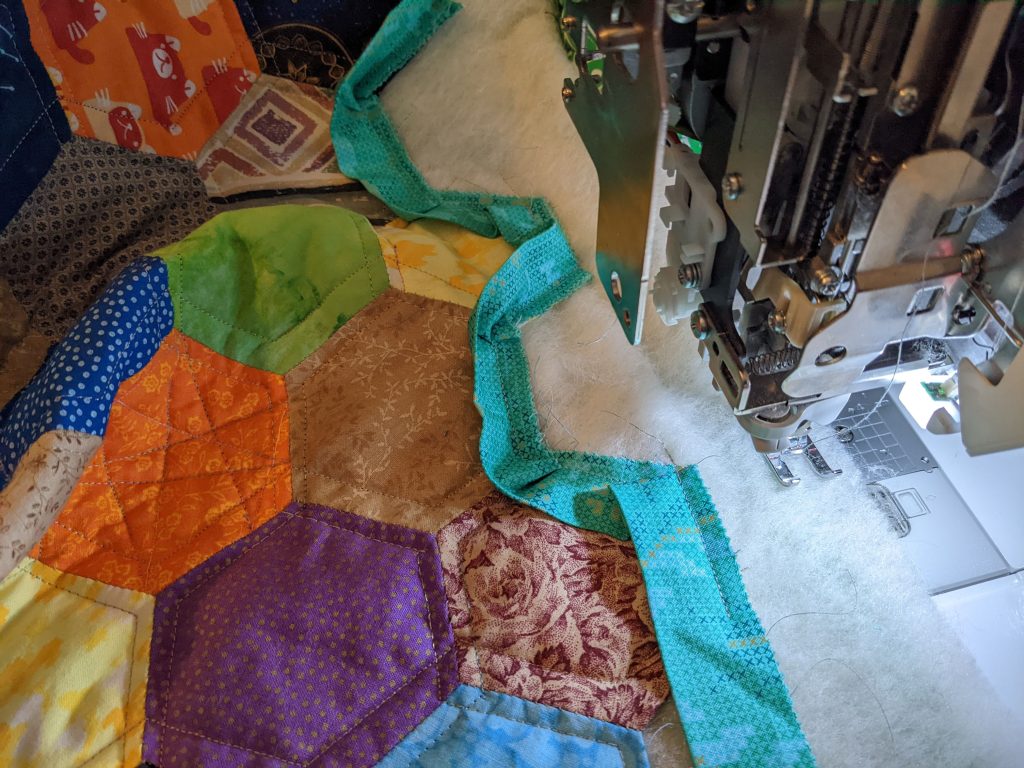
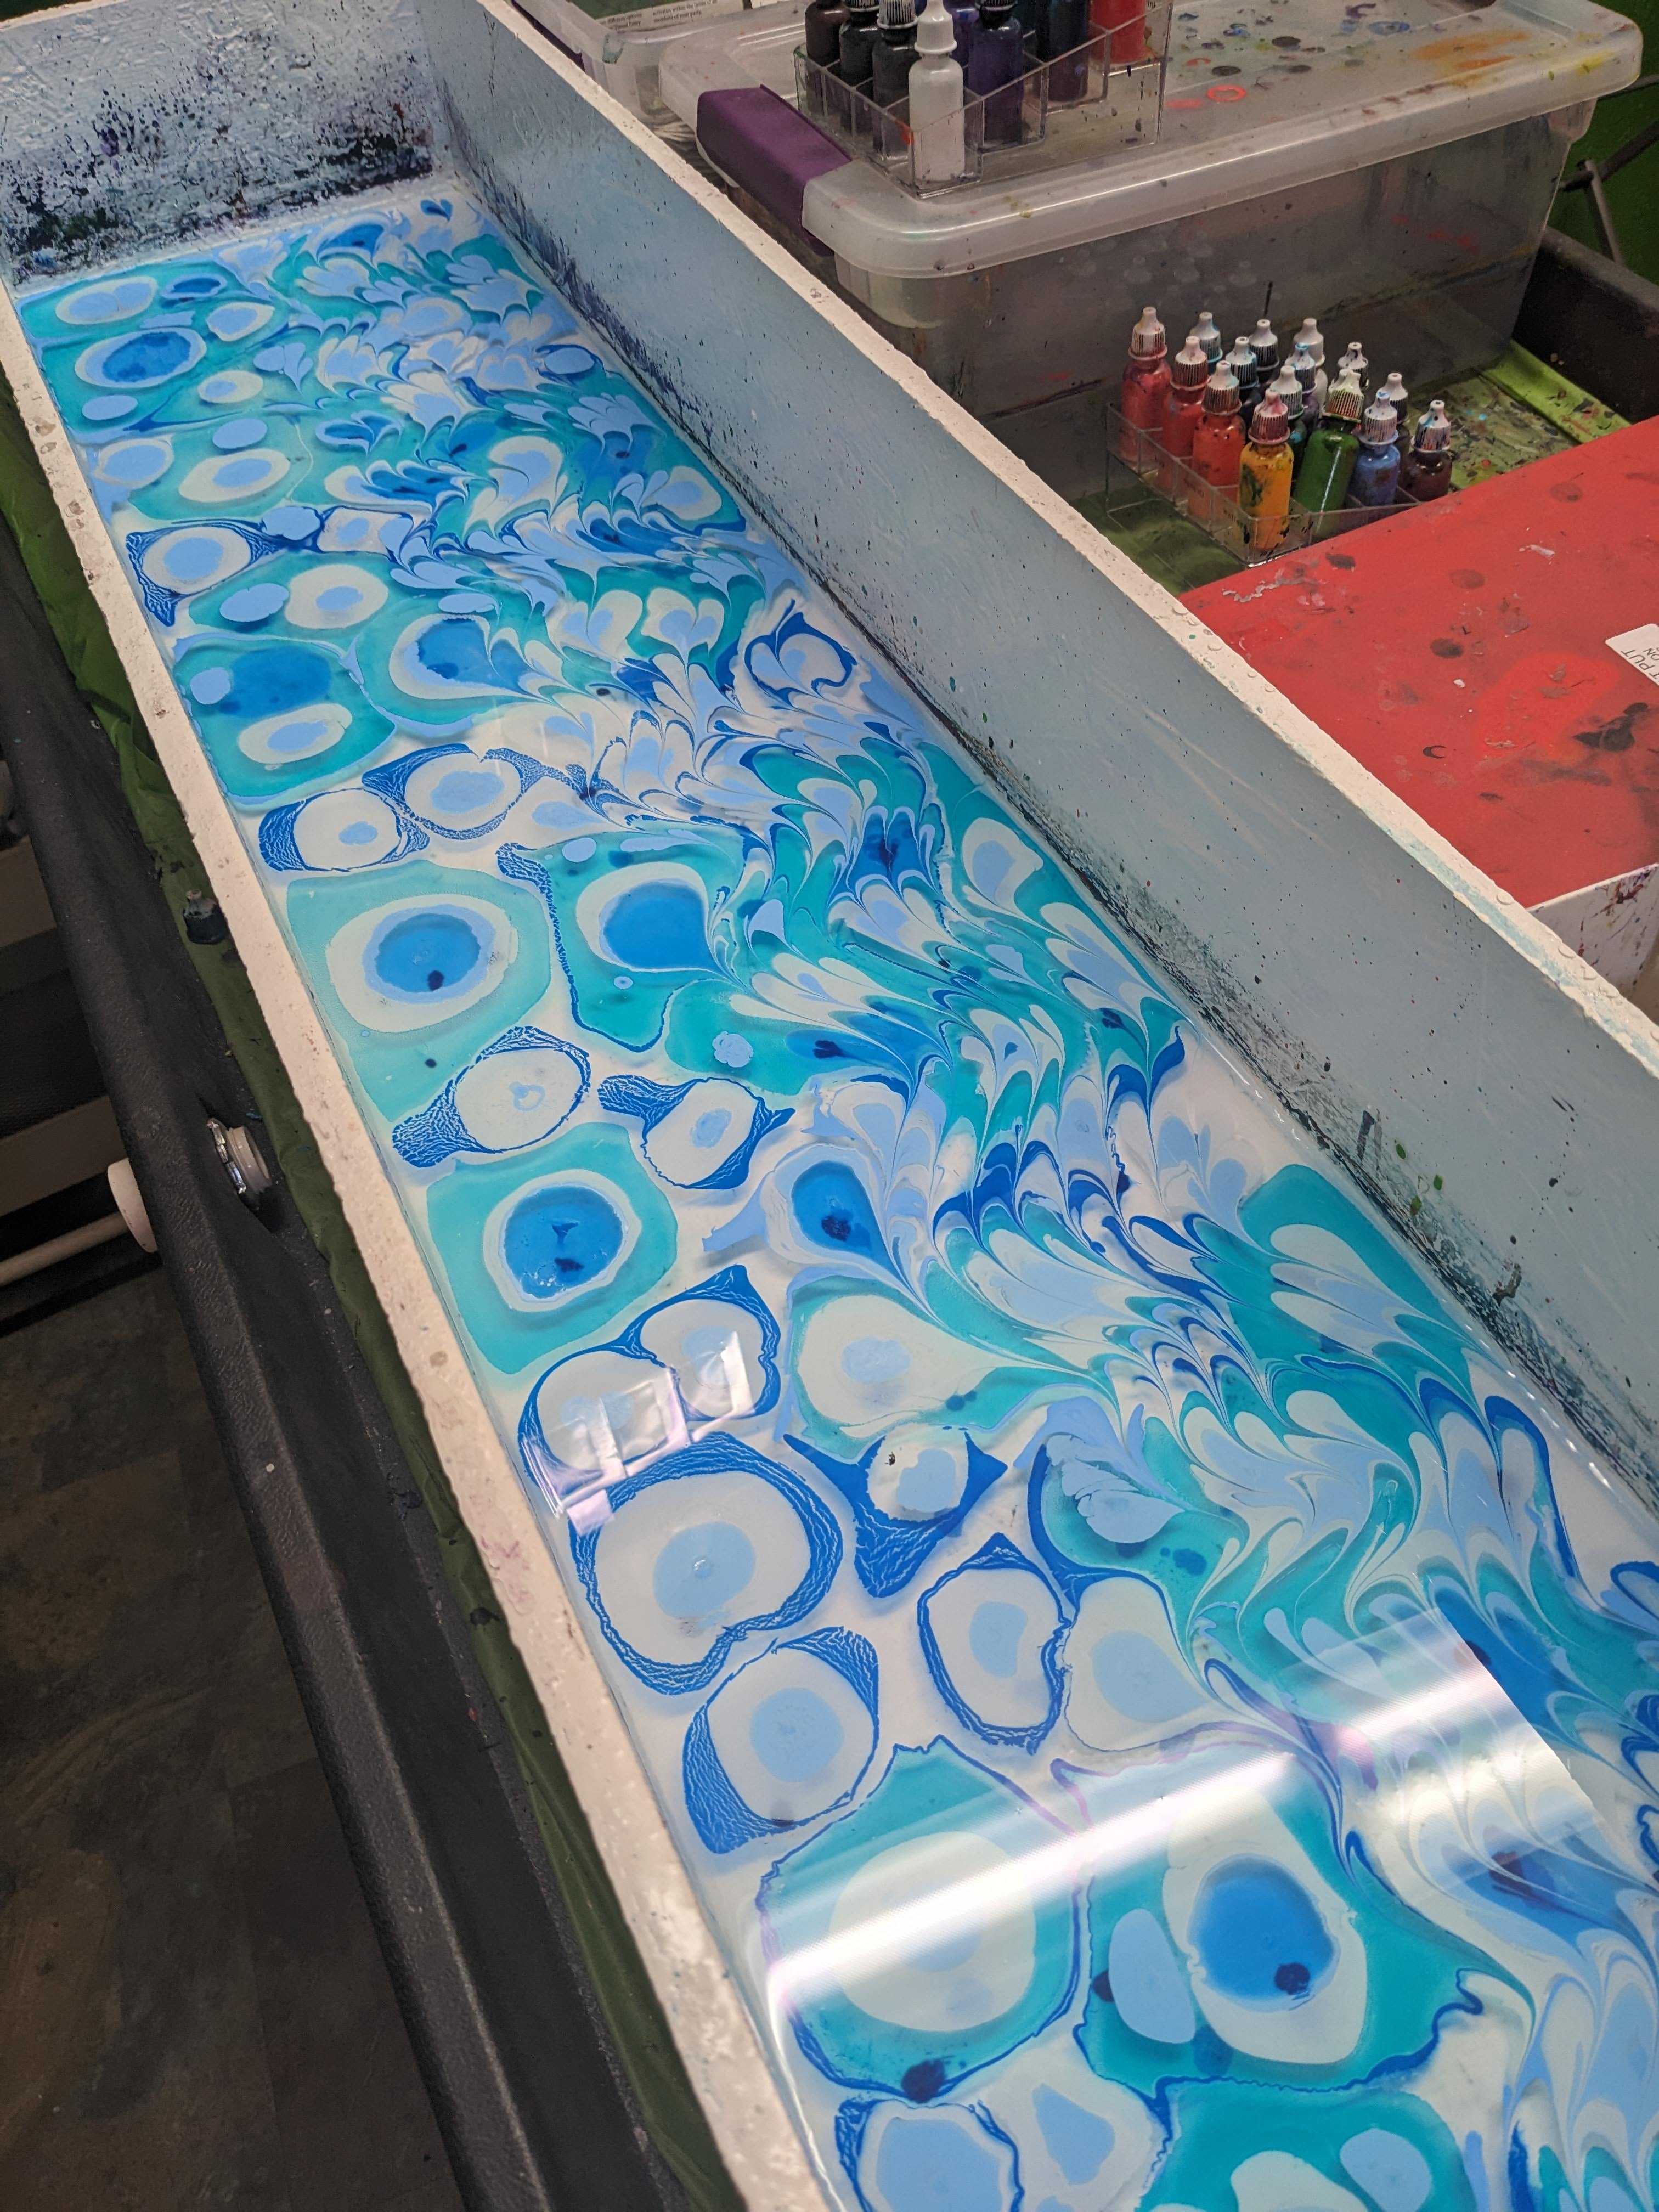
After visiting the quilt store in Grand Lake and picking up some fabric, I decided my trip to Inspired Art Experiences in Estes would be a fabric acquisition trip as well! I chose to do a batik again, silk marbling, and tie dye.

Sign with quote: the artist is not a special kind of person; rather each person is a special kind of artist. -Ananda Coomaraswamy
I loved this sign they have in their back room.

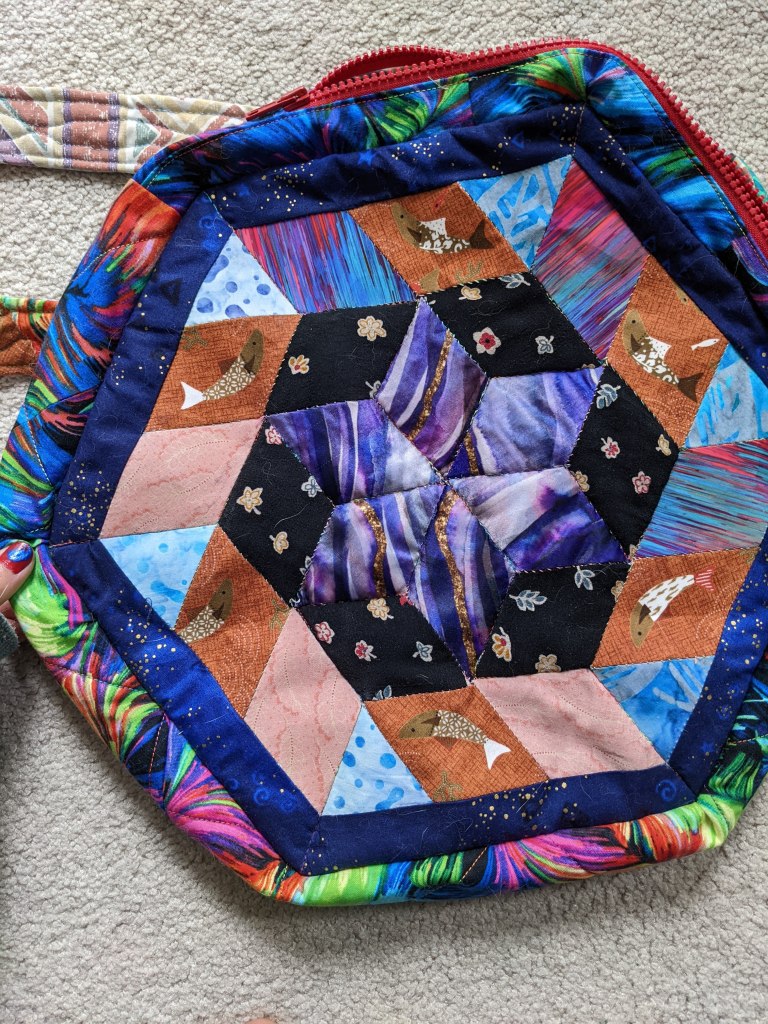
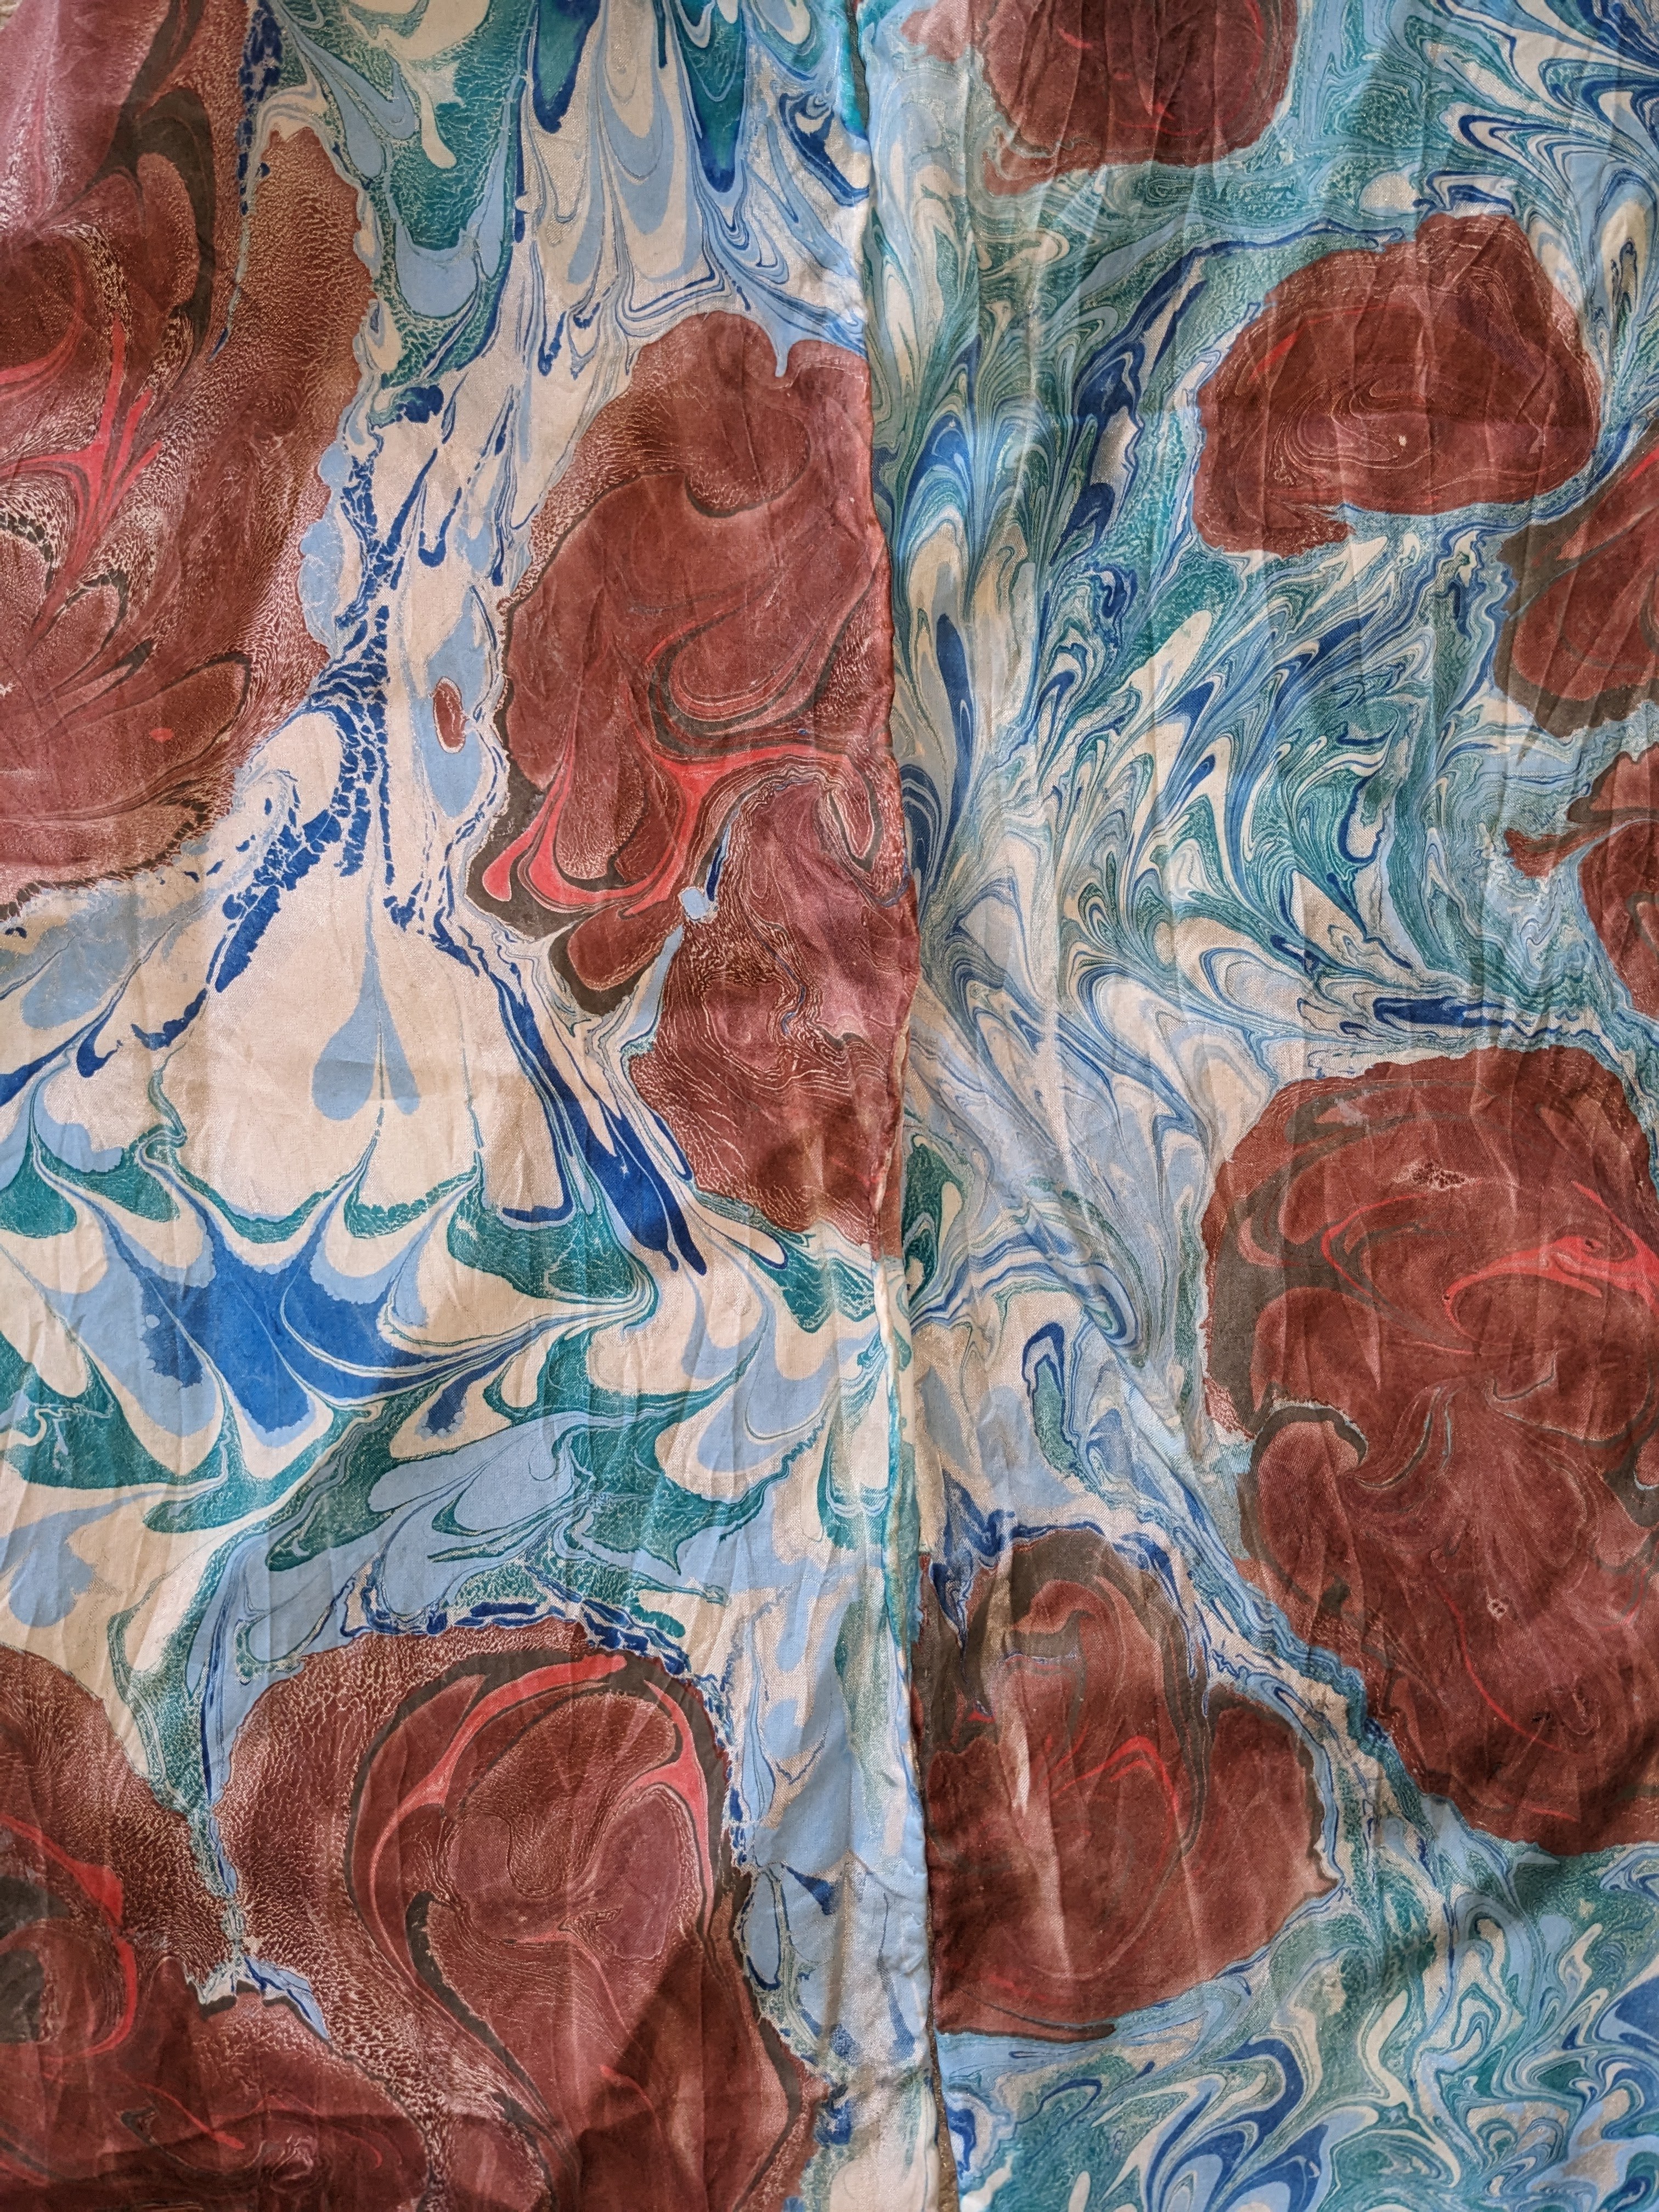
The silk marbling was incredibly meditative and calming, just dropping in the colors and swirling them together. I was going for a “river rocks” type of design and I think I really got it.

Many different fabrics
Finished river rocks marbling on the top and right, sleeve of the tie dyed shirt on the left, batik inspired by the Grand Ditch in the middle, fabric from Grand Lake on the bottom left, and the RMNP map bandana on the bottom right.

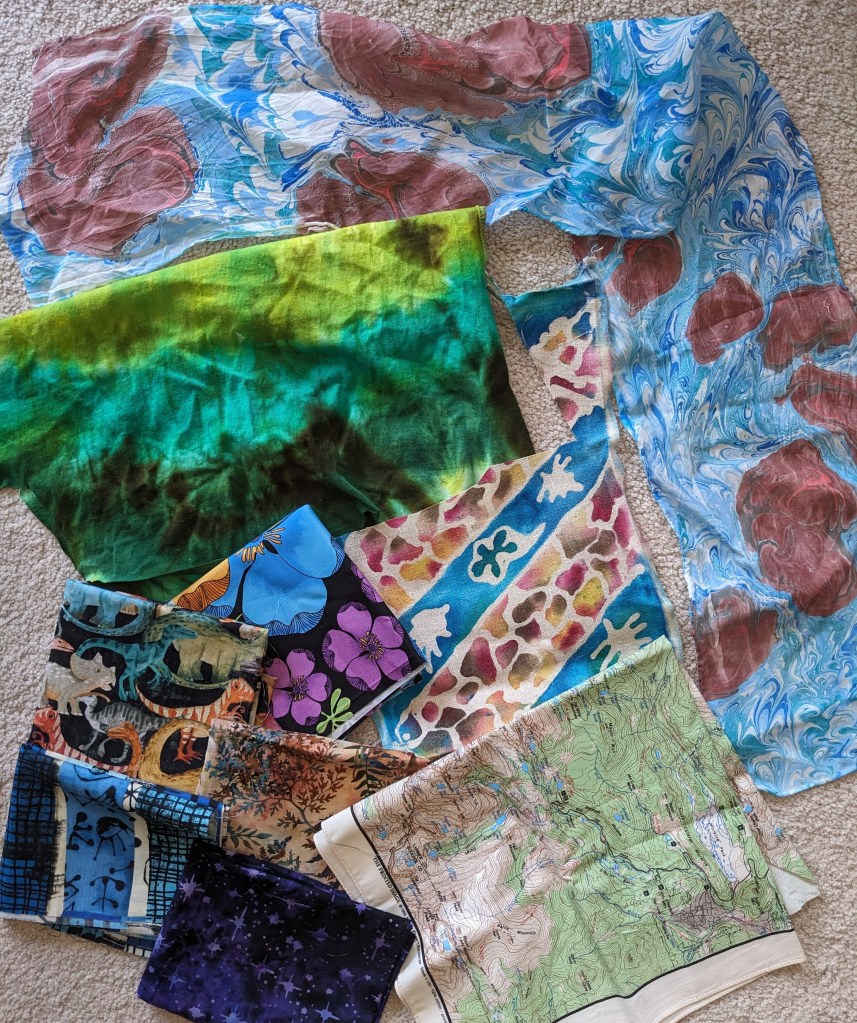
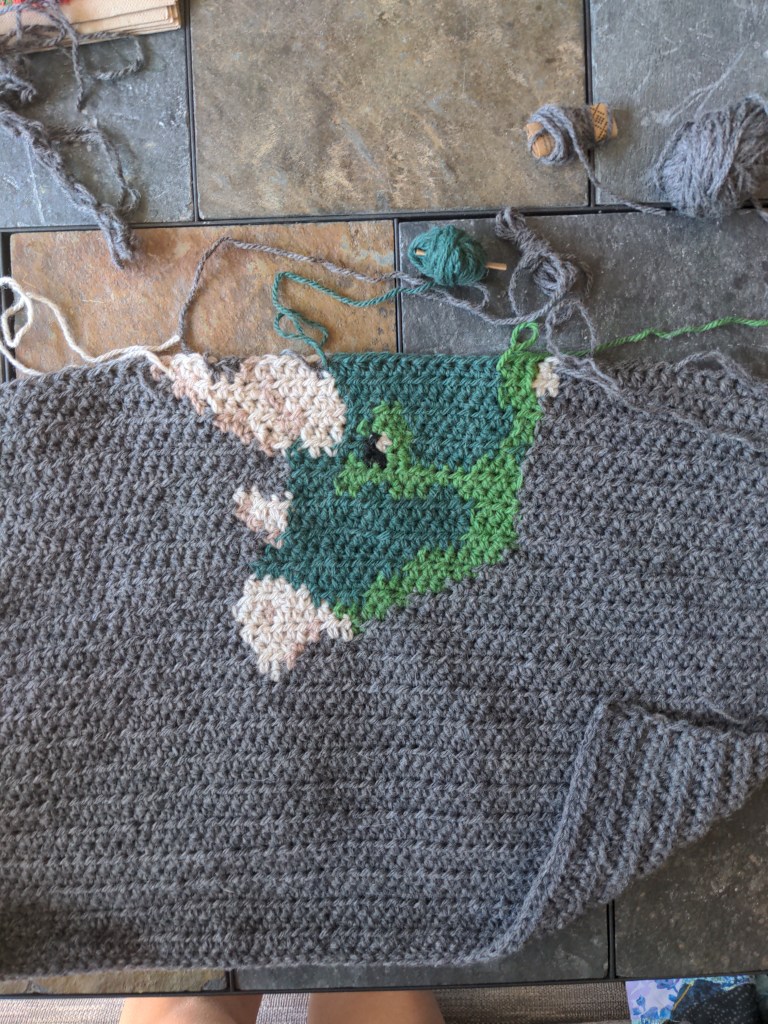
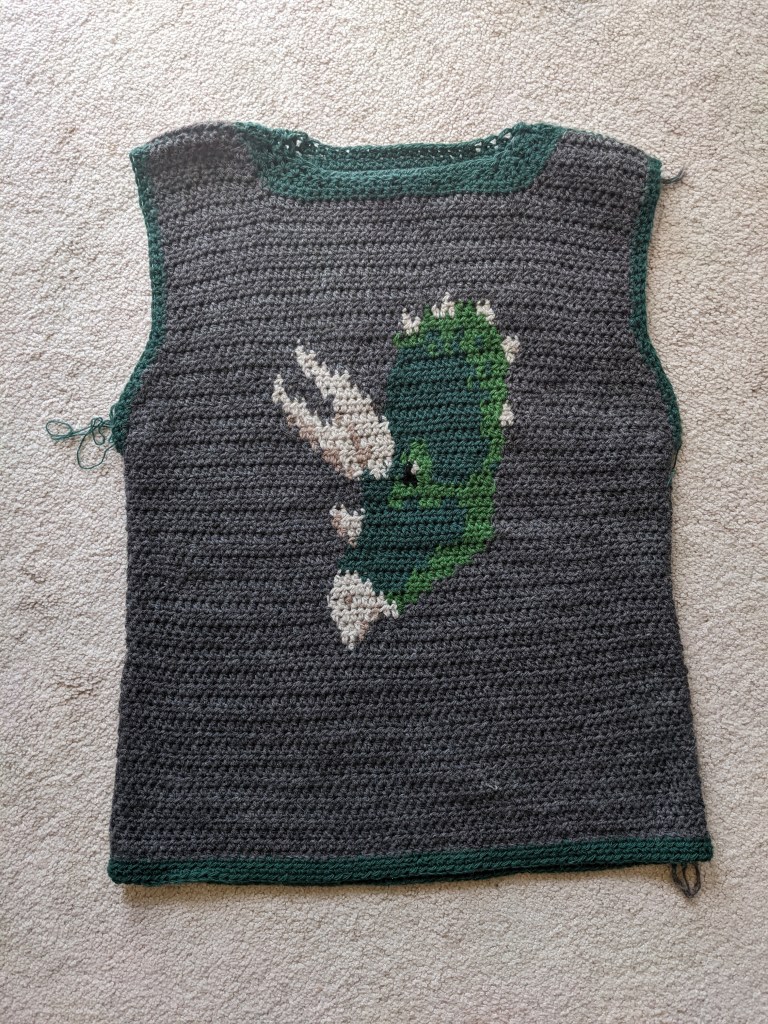
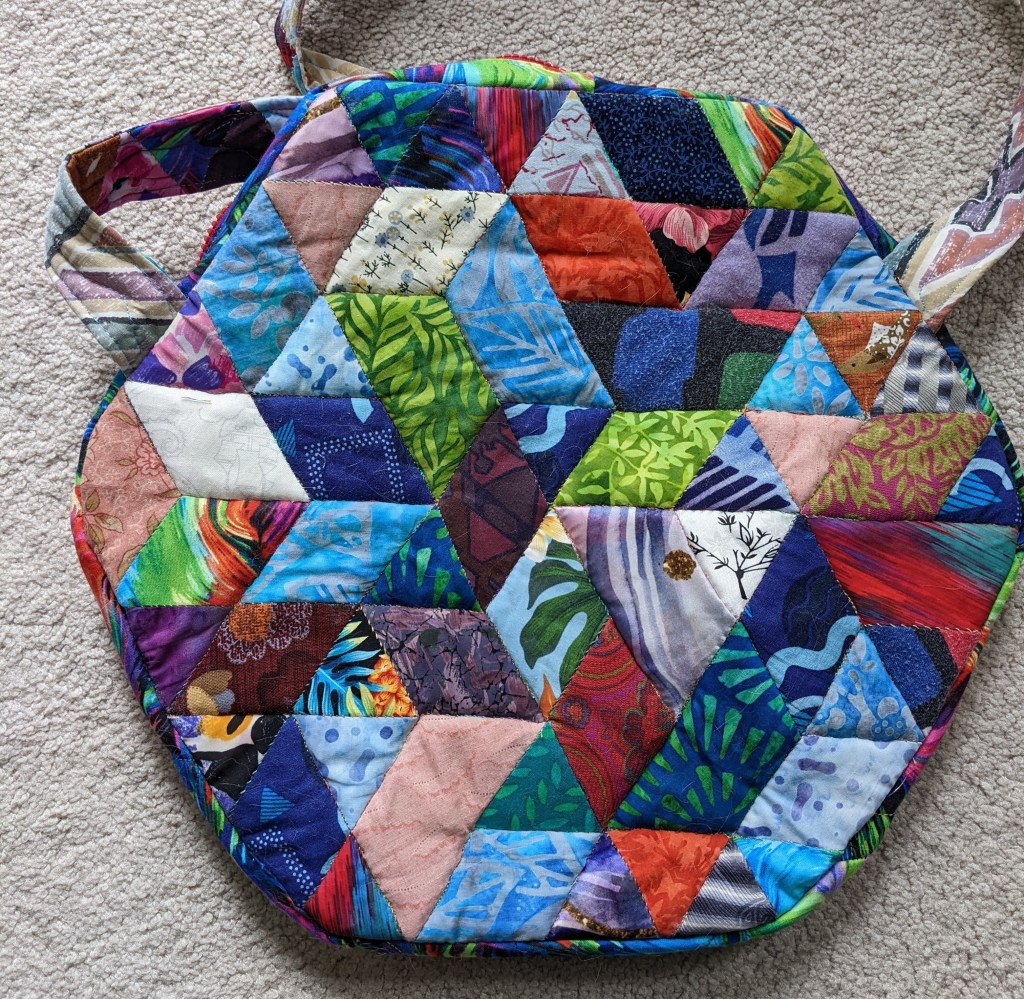
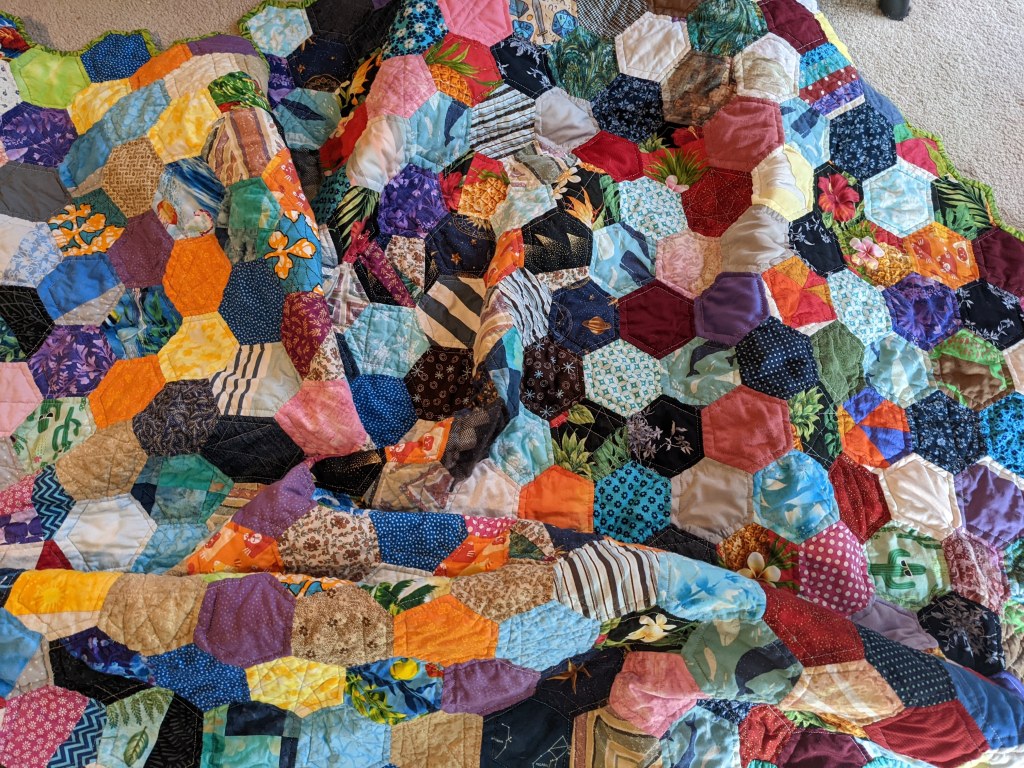
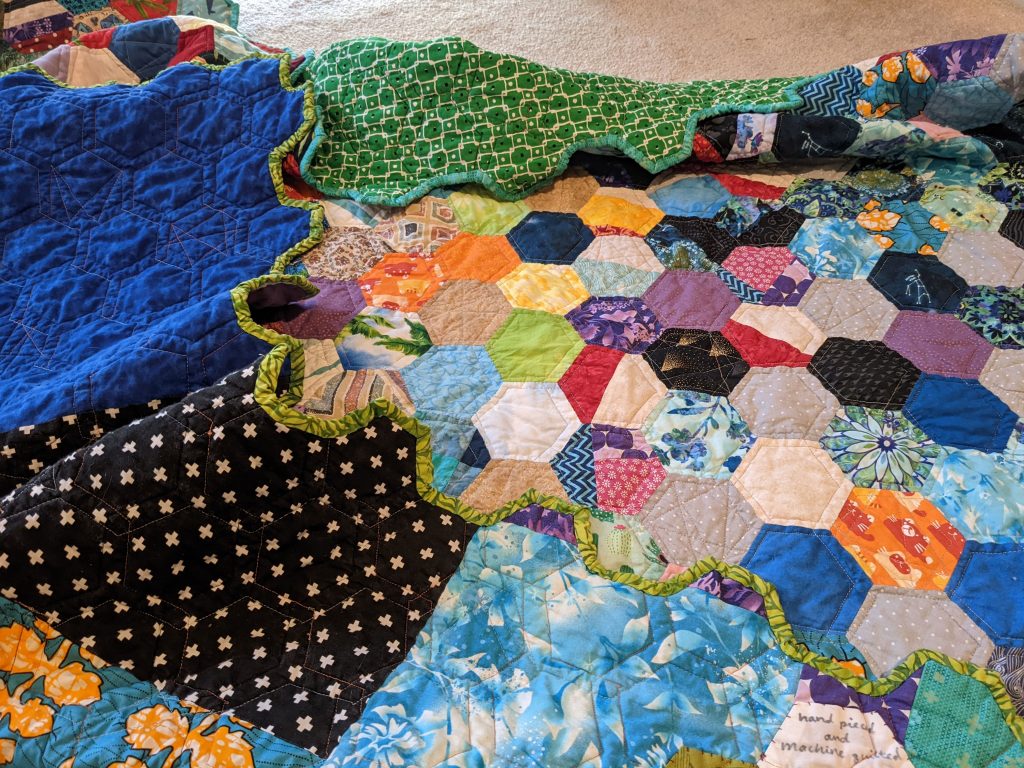
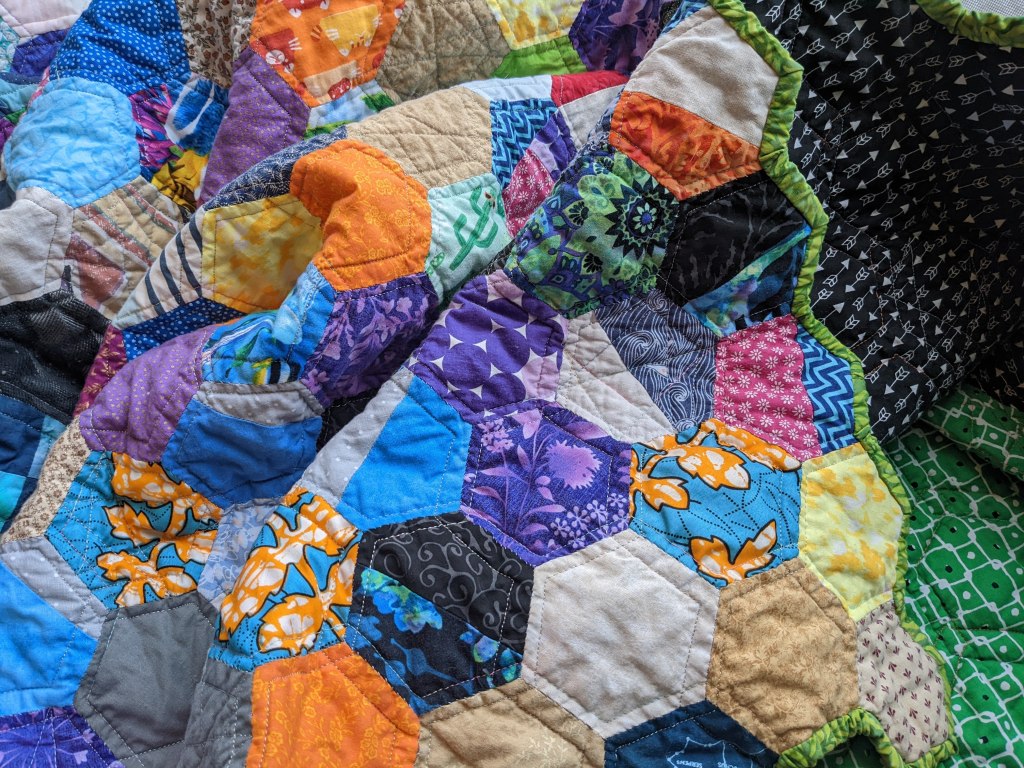
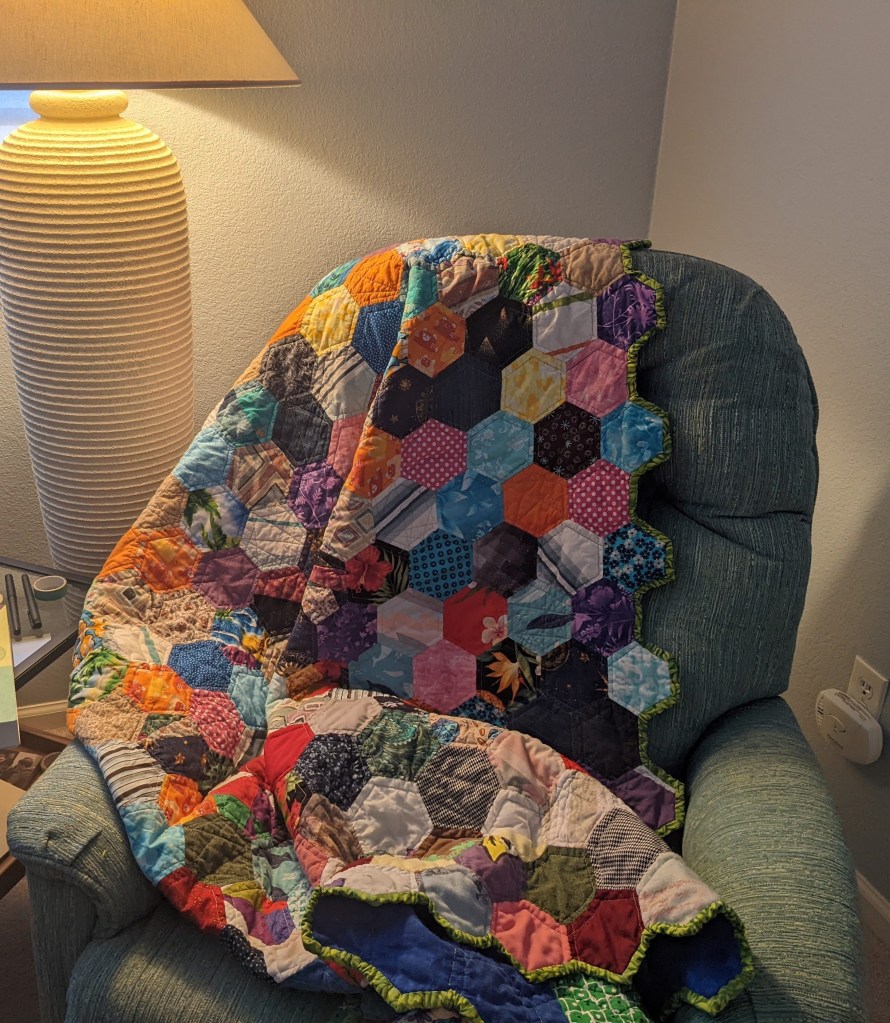
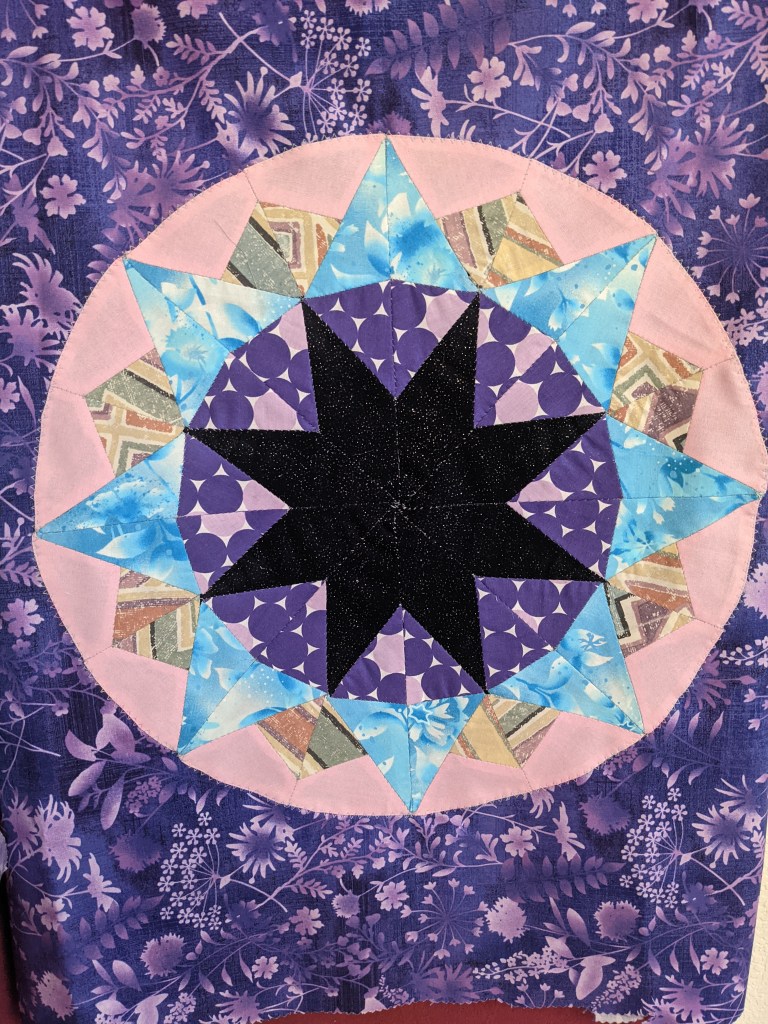
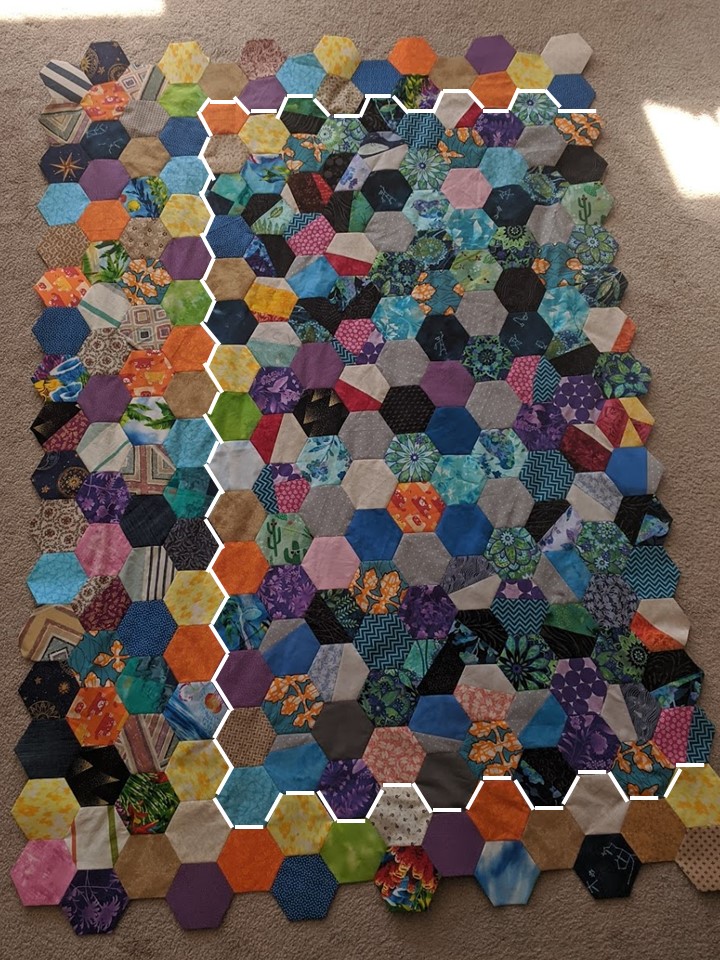
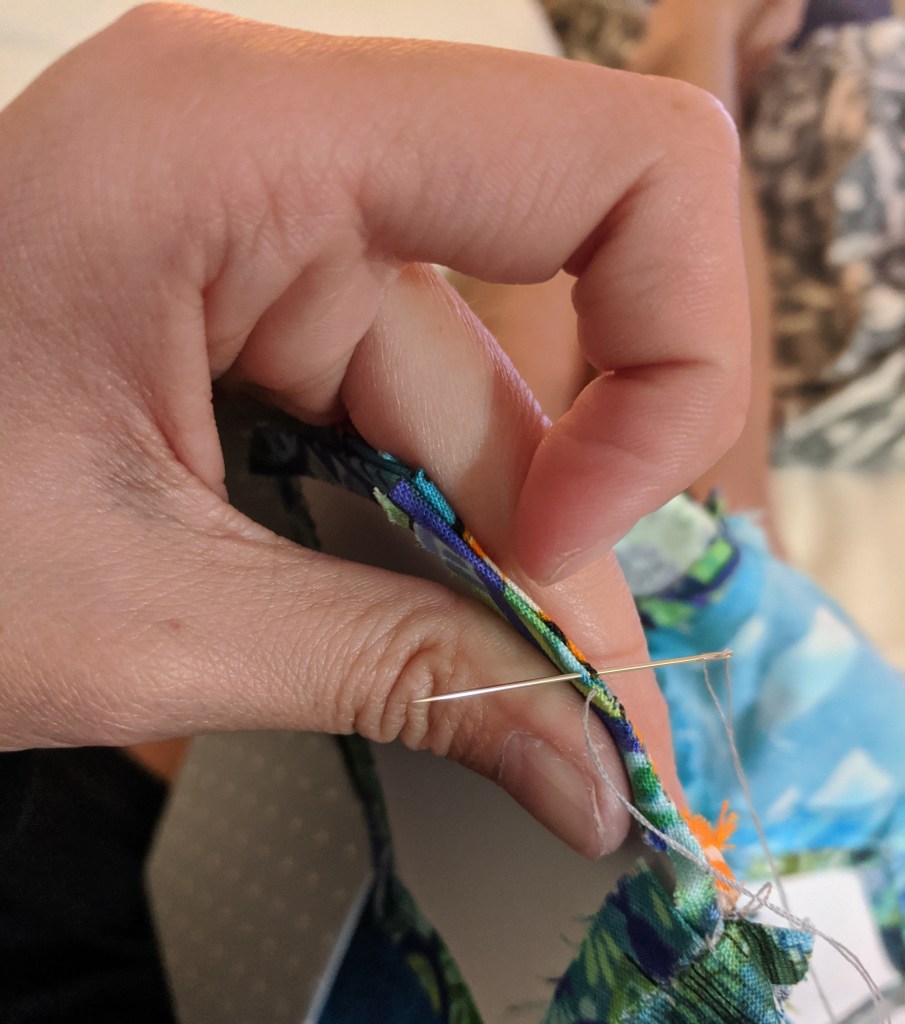
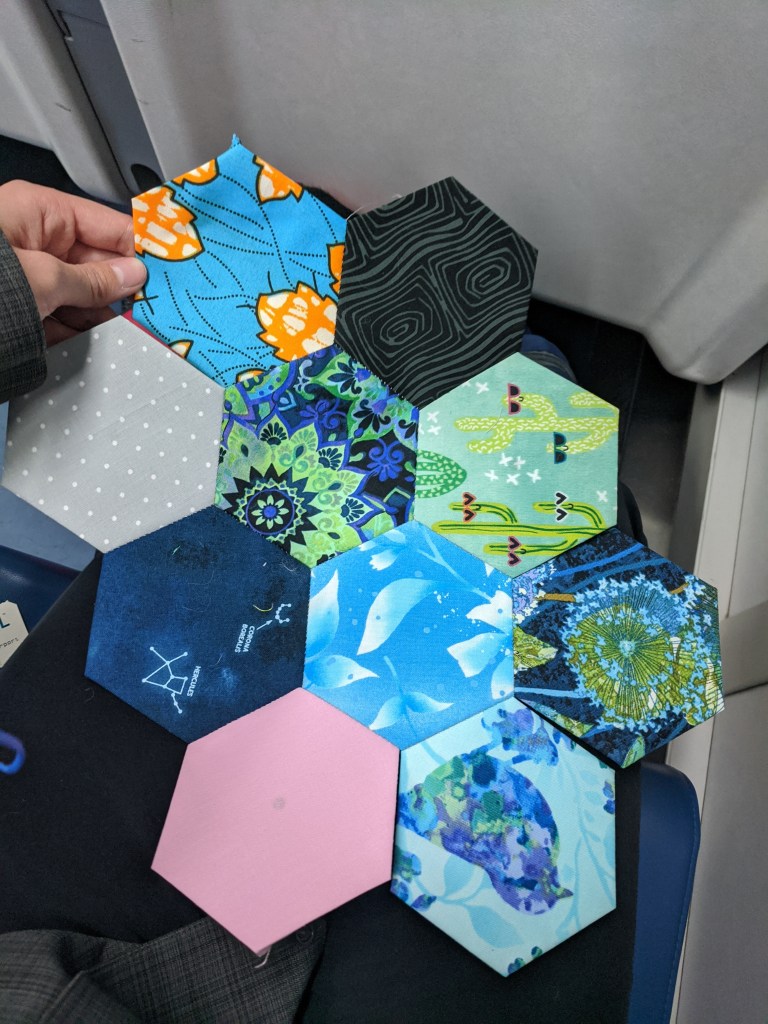
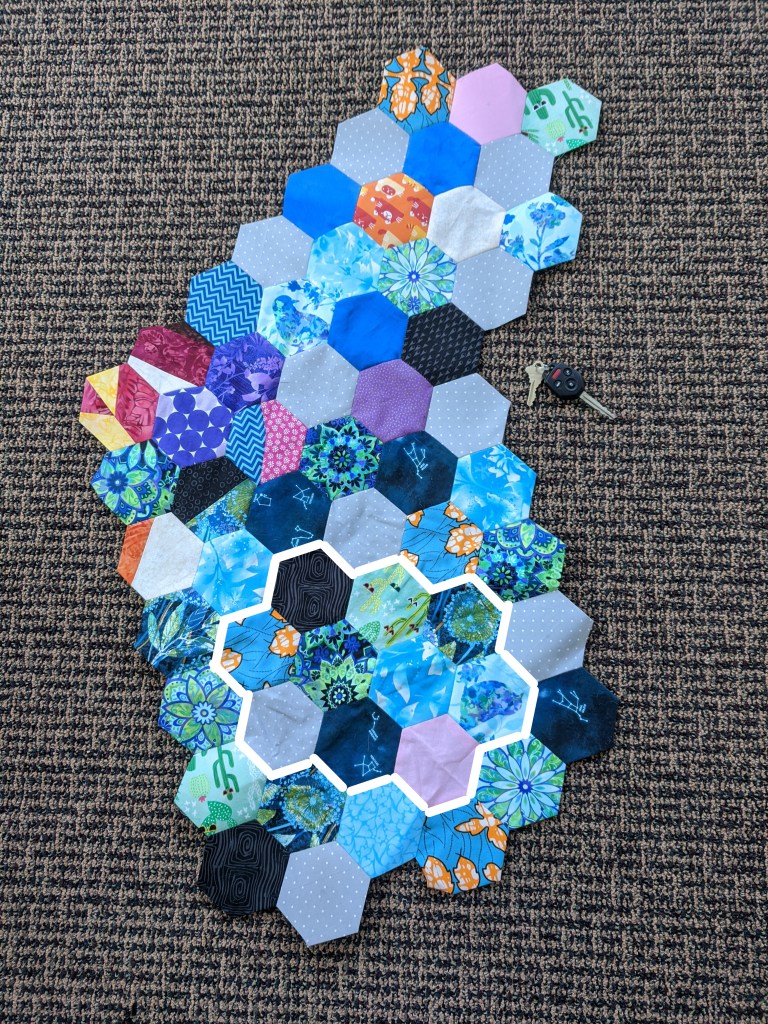
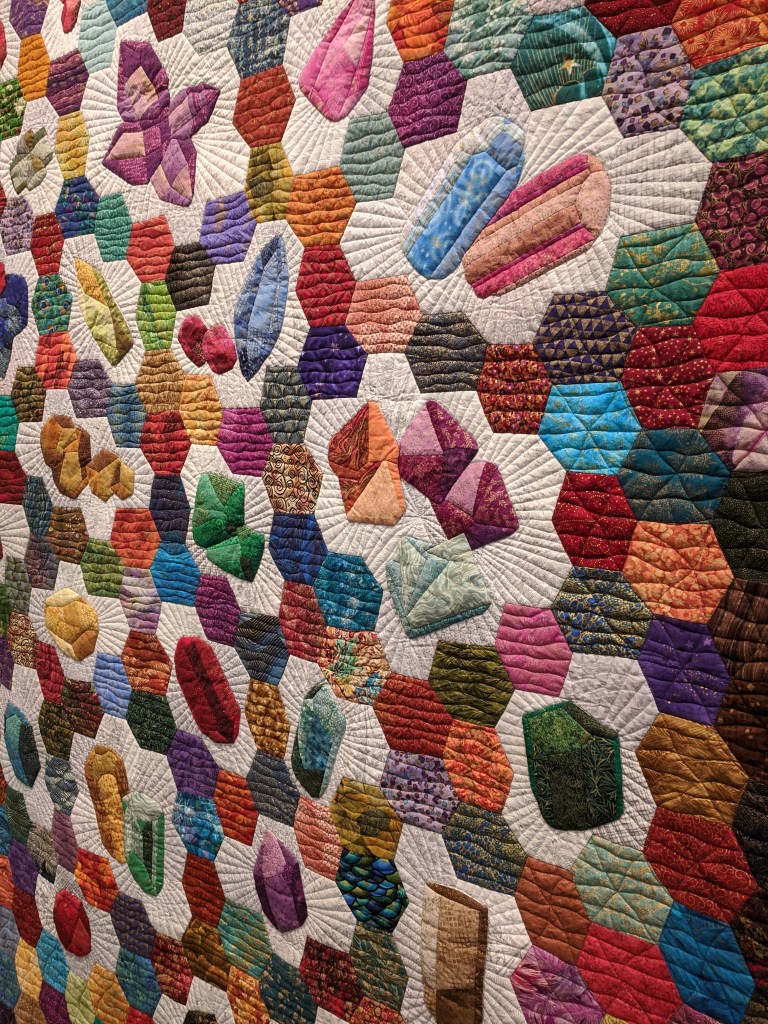
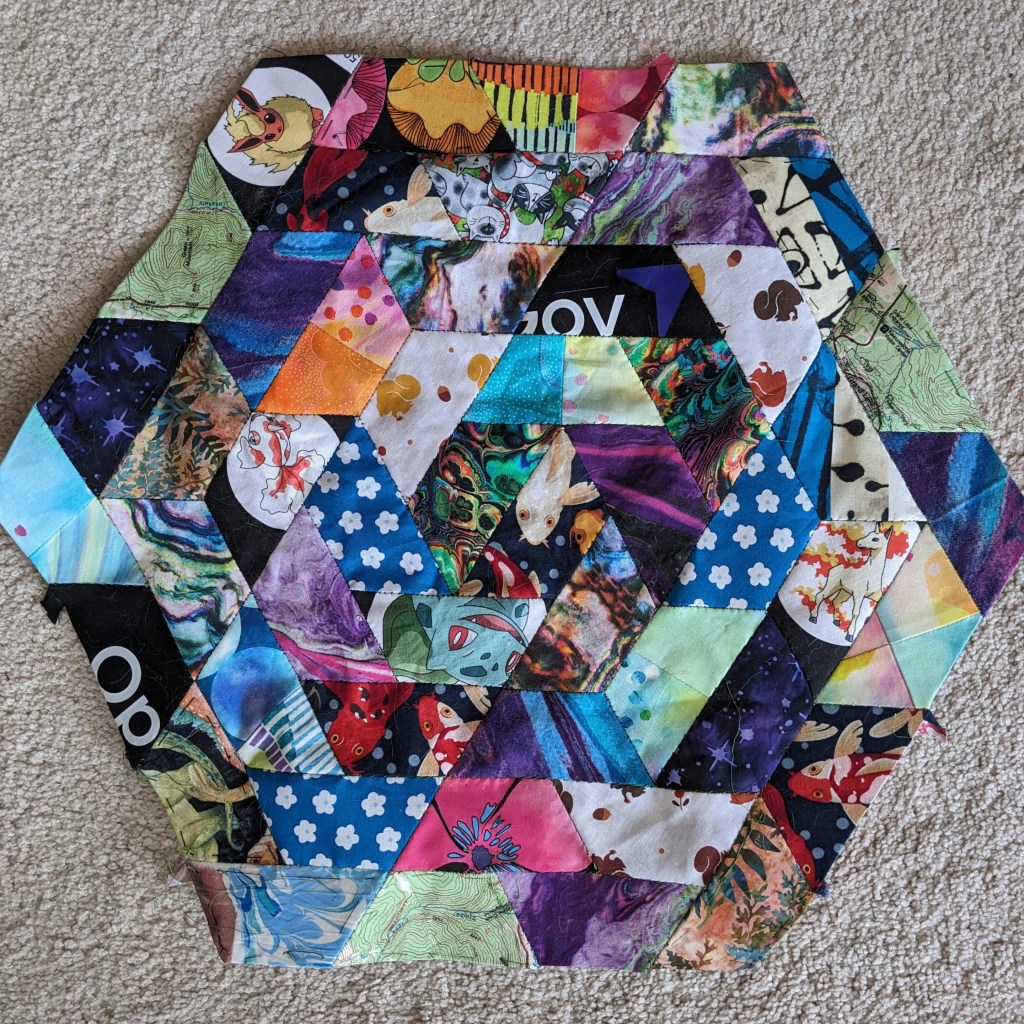
And I added my new fabric into my current project, an English Paper Piecing quilt of trapezoids for my bathroom 🙂 which now, of course, vaguely smells like campfire, but that’ll fade.

Hexagon made of trapezoids of many different fabrics, it is colorful and mismatched. Some fabrics are repeated but not next to each other.

This is the painting I went to do, and I hiked a new trail to do it! Adding the color to the sketch from the left took 40 minutes 🙂 And a few people stopped to comment and talk to me, which I usually appreciate as long as they are respectful and treat me like a person instead of content.

… and then I learned to crochet!

After the most recent quilt I made, I didn’t spend much time in the sewing room for various reasons, and picked up crochet! I’ve been trending towards things that are more “by hand”, like English paper piecing, and embroidery, so it made sense for me to get into crochet or knitting. I chose crochet because it seemed easier to get into and has the capability for making three dimensional objects.

I started off as I usually do, on YouTube and with books from the library, and immediately gave myself tendonitis from crocheting for too long and holding the yarn too tight. Now, I try to cap crochet sessions at two hours, or else I’ll go on crocheting forever and hurt my hands and wrists.

I started off with granny squares and little flower motifs 🙂 and a catnip ball for my friendly helper
The three dimensional granny squares were really fun 🙂

Then I wanted to make a sweater, but a super easy one. This sweater is based off a blanket sweater pattern, which consists of a rectangle with the corners folded in to make sleeves 🙂 I used two yarns at the same time to create a textured/blended effect.

Closeup for the texture 🙂

Then I saw this TikTok and needed to make my own dinosaur sweater, so I did. The pattern was really straightforward, and it’s made to measure instead of a set row/stitch count. I started doing the back and (a) got nervous I would run out of yarn, which I did not and I have a lot left over, and (b) thought it would be fun to do some color changes for the aesthetic and for practice. Practicing the color changes and learning how different techniques (such as tapestry and intarsia) create different looks was very helpful in planning and executing the front. Also, now I know that I can crochet any colored design that can be made with a grid (some artists use crochet to do 8bit art, and a crazy dedicated artist is using crochet to make an early-2000s-wordart piece).

Crochet colorwork like this uses a grid to tell you what colors to use.

The color work wasn’t technically difficult, but required a lot of care to keep the different yarns in their own space and not tangled. I tried to weave in the ends as I went, but then I had to undo some of it because I forgot to adjust for the arm holes, and that didn’t go very well. After that, and in the future, I’ll keep the ends loose until I’m positive that everything is correct and I don’t have to undo anything.

I didn’t do ribbing, because I don’t like it, but I think the green border does add a little something. A finishing touch.

I think crochet has reopened the door to making my own clothes because it’s more forgiving than sewing, especially with non-stretch fabric. There’s much more precision and care necessary for sewing garments, and I enjoy playing with crochet’s many textures. Plus, there’s the “by hand” aspect, which is fun and compelling for me. And I do love a good sweater 🙂

Other crafts I’ve been up to recently:

EPP bag to celebrate my new job (front)
EPP bag (back)

EPP Update!

IT IS FINISHED!!!!! And oh, I do love it. When I look at it, I’m reminded of the hard work and enjoyment that sewing and quilting have given me, and that I’ve given myself. It reminds me that I enjoy hand sewing and machine sewing for different reasons, and they both have their place in my creative endeavors.

It was a lot of work, but it was spread out. And very worth it. This project brought me back to college when I was only doing hand sewing, since I didn’t own a machine. It was a slow and relaxing project, which was wonderful – I’d work on it whenever I felt like it, whether that was on the train to the city or sitting on the couch with my cat.

gluing fabric to hexagons

I wanted to keep the quilting really simple and highlight the fabrics themselves, since there are so many fun ones in this quilt! I decided to echo the hexagons, and made three passes across the quilt, echoing two sides at a time (three passes, two sides at a time – all six sides covered!). This allowed me to quilt long, uninterrupted lines, which is most effective. Quilting is pretty AND increases the structural integrity of the entire sandwich, so long lines are preferable to “isolated” designs that require cutting the thread. For a little fun, I added in my “random geometric” design in some hexagons.

Quilting by aligning the ruler against the edge of the hexagon and following it, creating a quarter-inch echo line. You can see here that I’m on my third pass, four of the sides are already echoed and I’m following the last two sides (easiest to see in the light blue heart block or light pink on the left).

I decided that I would keep the hexagons on the border instead of cutting the quilt to rectangular, so I looked up how to apply binding to all the angles. It was a bit fussy, and I realized that I would have to then hand sew the binding to the back, but… it looks really cool. And it was nice to finish the quilt by hand, honoring the work I put in to the top.

Applying the binding with the machine
Hand sewing the binding to the back, with my friendly helper.
scraps from the back
This quilt’s resting place – the analog room / reading chair ❤ It is wonderful and warm and cozy… and a project for me, of me, from me.

Project completed January 9, 2022.

  • Fabrics – so many. Sourced from MSQC, Joann, Bluprint, Etsy, eBay, thrift store, Spoonflower, memory quilt scraps
  • Batting – scraps, mostly cotton and cotton/poly blends
  • I didn’t buy any supplies for this quilt except machine needles. Which!! I figured out why my thread kept breaking all those times. Just need to use a bigger needle. 🙂 But it was a true joy to create something “for free”.

EPP Update!

I’m still working on my scrappy hexagon quilt – it’s been a while since I laid it out, and I’m pleasantly surprised it’s so big now! Honestly it’s getting to the point where I should start adding to the sides so it doesn’t become too rectangular!

I’m still not sure what I want this quilt to be – a wall hanging? A couch quilt? I’m not sure. I started this back in January and it’s fun to see the scraps of my projects all in one place. It’s a sort of historical record, an archive of projects past.

I also bought an English paper piecing kit for a star pattern, and whipped it up in a couple days. They provided the papers and plastic templates to make it easier to cut your fabric, which was nice.

Star has approximately 16″ diameter

It was weird to work with acute angles and smaller pieces, but I like how it turned out! This was my tester version, so I just used random scraps, but I think a sunset would be really cool, a nebula type shape, maybe fabric that looks more like stained glass? Some of the intersections aren’t perfectly aligned, so I want to work on that next time.

Whoops! I got inspired

And now I’m working on my own English Paper Piecing project. 🙂 I was just so in awe of the projects at the museum, and although I’m not doing tiny pieces – just 2″ hexagons, which are actually bigger than the size of my palm. I like the idea of an on-going project that uses up scraps over time, truly a quilt of projects past. I have a bunch of scraps that I want to get rid of, so I’m also hoping this will help me with that.

I also have a habit of getting places very early, so I’m thinking this could be my “I’m waiting in the car” project or “I’m on the train” project, stuff like that. It’s definitely very satisfying to put together and I’m surprised at how fast it goes!

I bought a pack of 50 precut cards to start. It took me about an hour to rough cut and glue 50 hexagons to their cards, and the cards are reusable so I’ll just add more hexagons as I pull them out. I’m not concerned with fabric placement as long as no fabric touches another of the same, so it’ll be scrappy and wild and random!! I love the idea of not over-designing this like I usually do and just letting it happen.

Little stitches!! Just grabbing a couple threads on each pass. I’m thinking of using some variegated thread because you do see some thread on the front, and I think it would be fun to have that little rainbow.
Progress after about 2 hours.
One week later – keys for scale and previous picture outlined. I started cutting up excess blocks too, hence the multiple fabrics in one hexagon off to the left. It’s been super enjoyable. I had a doctor’s appointment and since I had something fun to do, I didn’t even care that I had to wait. I find myself spending less time scrolling on my phone too which is nice. I did order more cards because you have to keep the cards in until all six sides are sewn, so more and more cards have to stay in as the perimeter grows.

My upcoming project list includes: quilt made out of ties, red and white skirt, turtle applique, embroidered and pieced Hawaiian fish, memory quilt, mountain panel, jacket repair, blazer… I’ve got a lot in my queue so keep an eye out 🙂

Rocky Mountain Quilt Museum (Jan 2020)

I went to the museum again! Their exhibition was all English paper pieced quilts, which are pieced by hand. Traditionally, only hexagons are used: a paper hexagon is cut out, the fabric is wrapped around it and basted (or glued), then each hexagon is sewn to the others. Mostly the older ones are cute flower designs, with the modern ones (as you’ll see below) branching out into all different directions with more shapes and sizes. The paper template (we use cardstock now because it’s reusable) helps all the seams to be perfect and sharp, and then the paper is removed before quilting.

I have great respect for the people who make these large scale hand pieced quilts! Now that I have a sewing machine, hand sewing is extremely low on my priority and desire list, and I can’t even imagine the work and time (and stabbed fingers, probably) necessary to get quilts like these finished. I’ve heard that people like to work on EPP on road trips or plane rides, which makes a ton of sense. Also, just the sheer organizational nightmare putting this together must be – all those tiny pieces! I suppose it would be a great way to get rid of tiny scraps – they make hexagon templates down to 1/4″ on each side.

Below is G’Ma’s English Garden by Beverly Miller, it’s a full grid of hexagons, but the center of each flower or star is a different color. This layout is not super interesting at first glance, but the quilting truly makes this quilt pop. The wavy lines give so much movement and texture, and take this colorful quilt to the next level. I also love the embroidered details on the top and bottom rows.

Long wavy lines and some pebbles in the quilting; here you can see the hexagons that have been pieced together (by hand, remember)

This next quilt, Sentimental Journey by Bonnie Offerle, features trapezoidal pieces instead of hexagons! I love the explosive star-like effect this creates, and she topped it off with swirly quilting.

Take a look at the trapezoidal pieces but also – she took 21 years to make this!! A great lesson to us all that you don’t have to finish things on anyone’s timeline but your own.

Subterranean Trove by Karen Fisher, below, totally captivated me. I love the bright colors, the fabrics are so bold and unique. It isn’t a squared up quilt, it has an organic shape. Even the hexagons aren’t perfect, some are tallish, some are fatter, but they all fit together. It’s so cool that the border is just as bright and bold as the “main body” of the quilt, I like that it is just as visually important. Each of the gems has many different fabrics that showcase the crystalline faces, and the quilting highlights every gem so much. The gems pop out of the texture because Karen used the trapunto technique to stuff each gem with more batting than the areas around it, plus she quilted those great lines that radiate from the gems to squish that batting down.

I spent a while with this quilt and met some other nice quilters in the process! We were all kind of drawn to the irregularities in this quilt together with the really fun crystals (especially the heart at the top!). One of the women suspected each of the gems might be based on a real mineral, but we were hard pressed to guess any other than the bluish quartz crystal towards the center right (and below).

Detail for the trapunto! Loved the texture so much.

And finally, my favorite quilt of the exhibition – chaotic, wild, striped, and so, so bold: La Passacaglia Unravels by Randa Mulford. She writes that this was her first time doing English Paper Piecing, and she produced a truly incredible result. Passacaglia quilts are EPP in a circular design, using hexagons, triangles, parallelograms, and other shapes to make a symmetrical sort of radial design.

I love how she used striped fabric in such a brave way – it’s so much detail for the eye, but it really adds to the explosive “unraveling” or firework effect. We use the term “fussy cutting” to explain that she cut out her tiny pieces in very specific parts of the fabric, she didn’t just cut a row and divide it into pieces like we usually do. She targeted specific elements of the fabric design to include. This adds a ton of time while you’re cutting things out, as you have to cut each piece by itself instead of subdividing strips.

Yes, I’m telling you that she had to cut out each of those cute swirly pentagons by finding that element in the fabric and cutting the tiny pentagon out.
Then she hand sewed each pentagon to each triangle, to each diamond…. and on and on…. 🙂

English paper piecing can be done in traditional ways with hexagons, or as a way to create mosaics 🙂