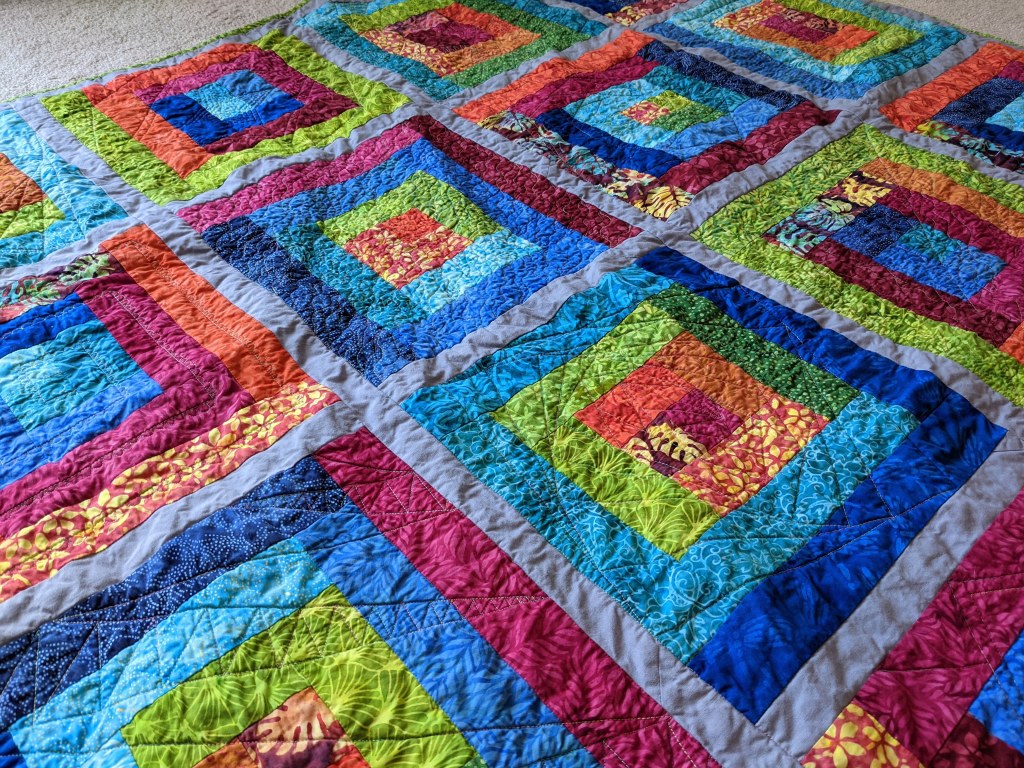
This was a gift for two of my best friends who got married last summer! For their gift, I was inspired by the log cabin block, since our friends often gather at their home. I’d never done a log cabin quilt, and it’s a very traditional quilt, constructed by sewing strips of (usually) the same width to a “rotating” block.
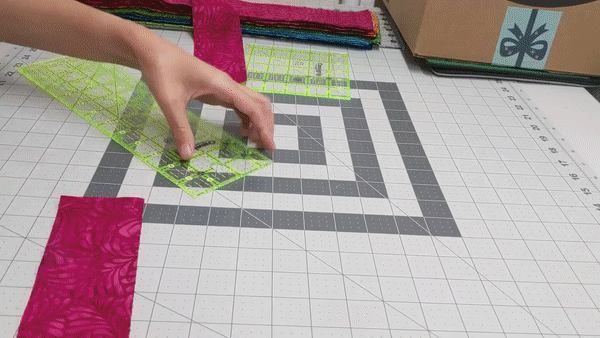
I wanted to minimize my cutting, so I used pre-cut 2.5″ strips define my block and calculated the lengths from there. My idea was to put the strips in rainbow order and have each color “march” around the block so that, say, red would start in the first position, then for the next block, purple would be in first position and red would be in the second position. (see below) This meant I cut all of the lengths from all of the colors, with some finagling (also, see below).
Log cabin blocks are constructed by adding strips to a center square (marked as 1). My idea was to have an approximate rainbow order moving clockwise around the block.
Cutting strips to the correct length
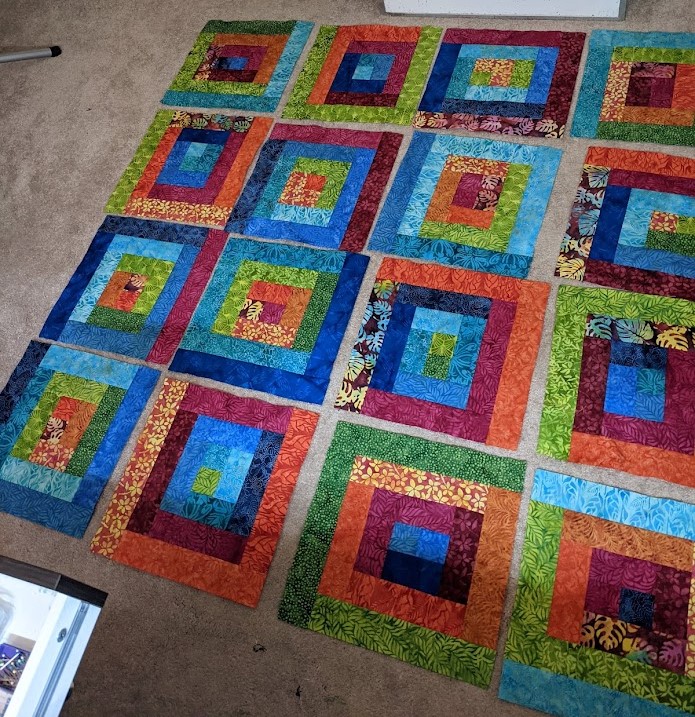
Then I was able to assemble my blocks, which I did one by one because I wanted to stay super organized with the color order. They weren’t all perfect but I am super pleased with the results.
Originally I wanted to arrange the blocks in the order I made them, with red in the first position in the first block, second in the second block, but that didn’t look that good 🙂 so I mixed them up and tried to design it by keeping busy prints scattered throughout and no prints touching each other.
This was my first quilt with sashing, the borders around the blocks. Sashing can make a quilt bigger without the need for more print fabric, and gives the eye places to rest between the busy blocks. I used a nice gray for the sashing, which ended up being really nice with such vibrant, saturated colors in the blocks.
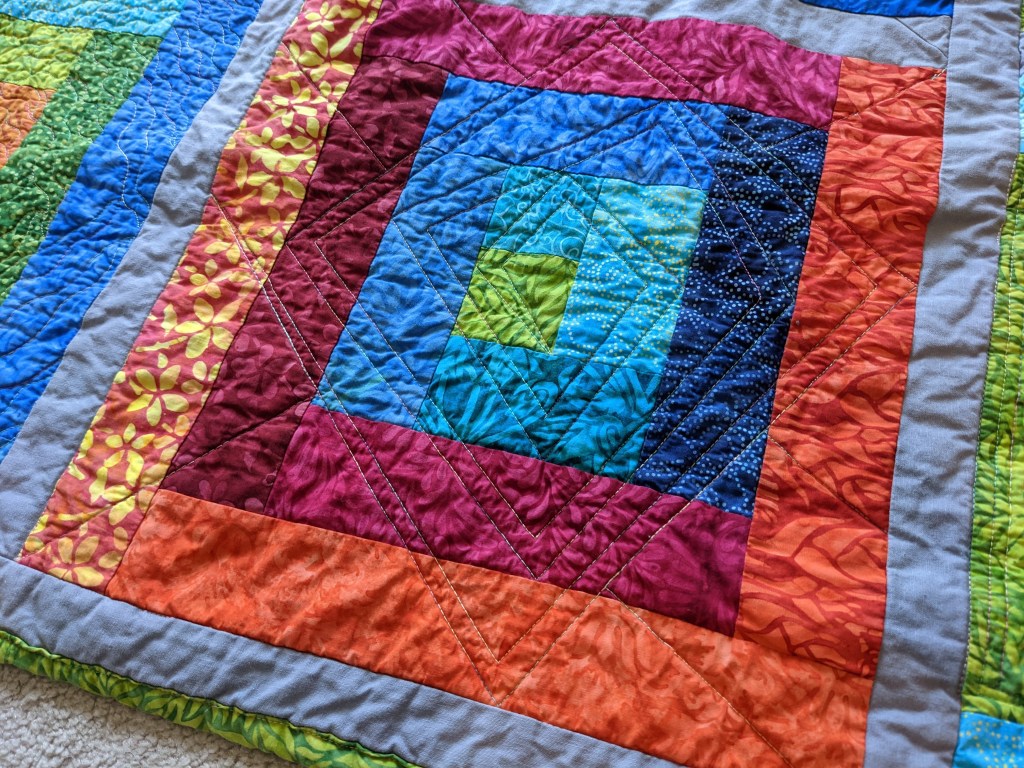
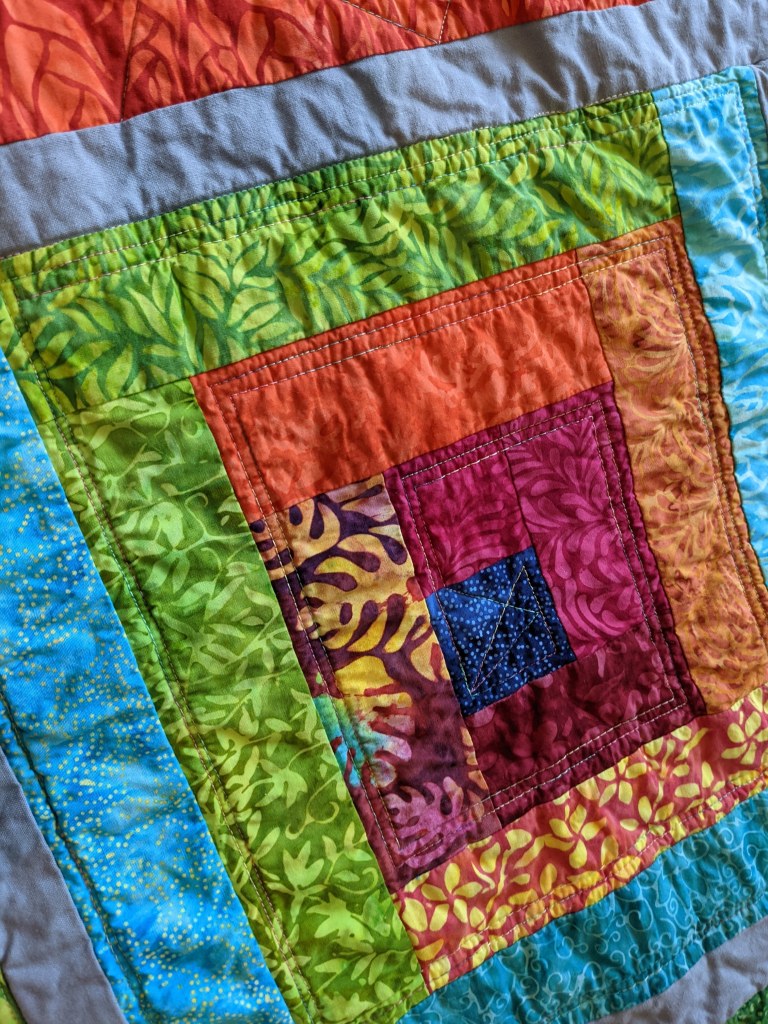
As usual, I vamped on a few motifs for the quilting – as illustrated below.
Overall, I’m really pleased with the final result and I was so happy to make a traditional quilt in a modern, bright way.
Completed June 2021.
Print: Punch Batiks by Kathy Engle for Island Batik Binding: Wilmington Essentials – Crackle Stone by Wilmington Prints Backing: Punch Batiks – Fern Green Apple by Kathy Engle for Island Batik
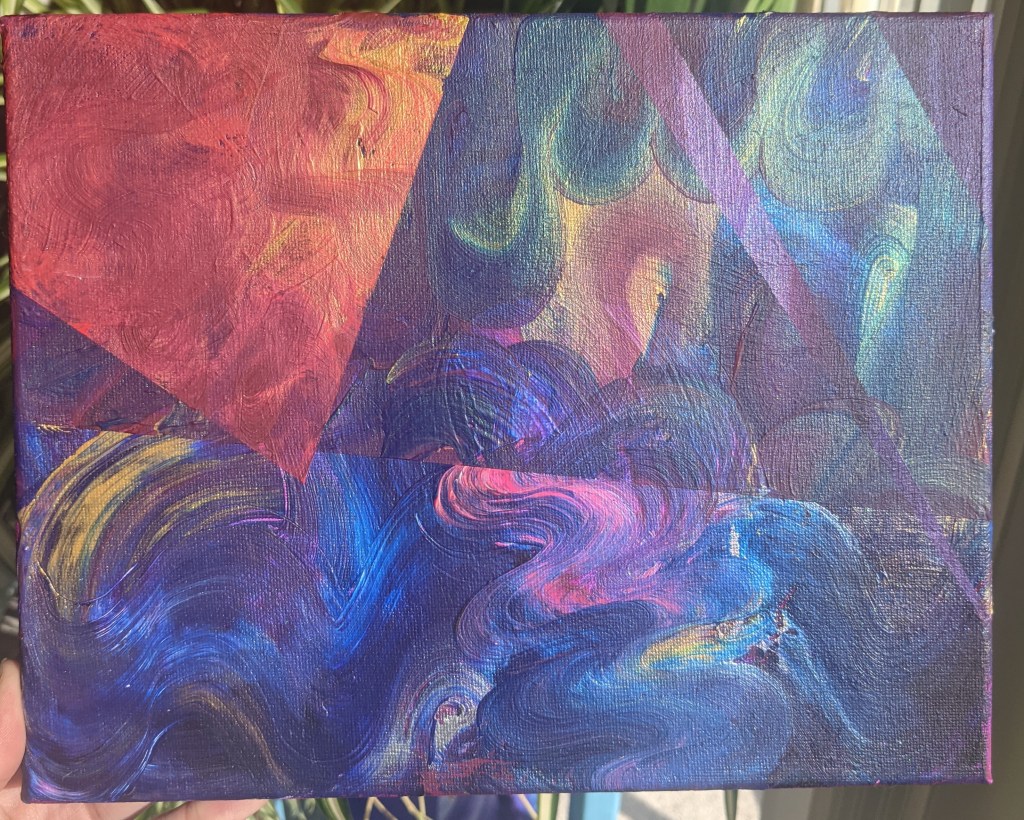
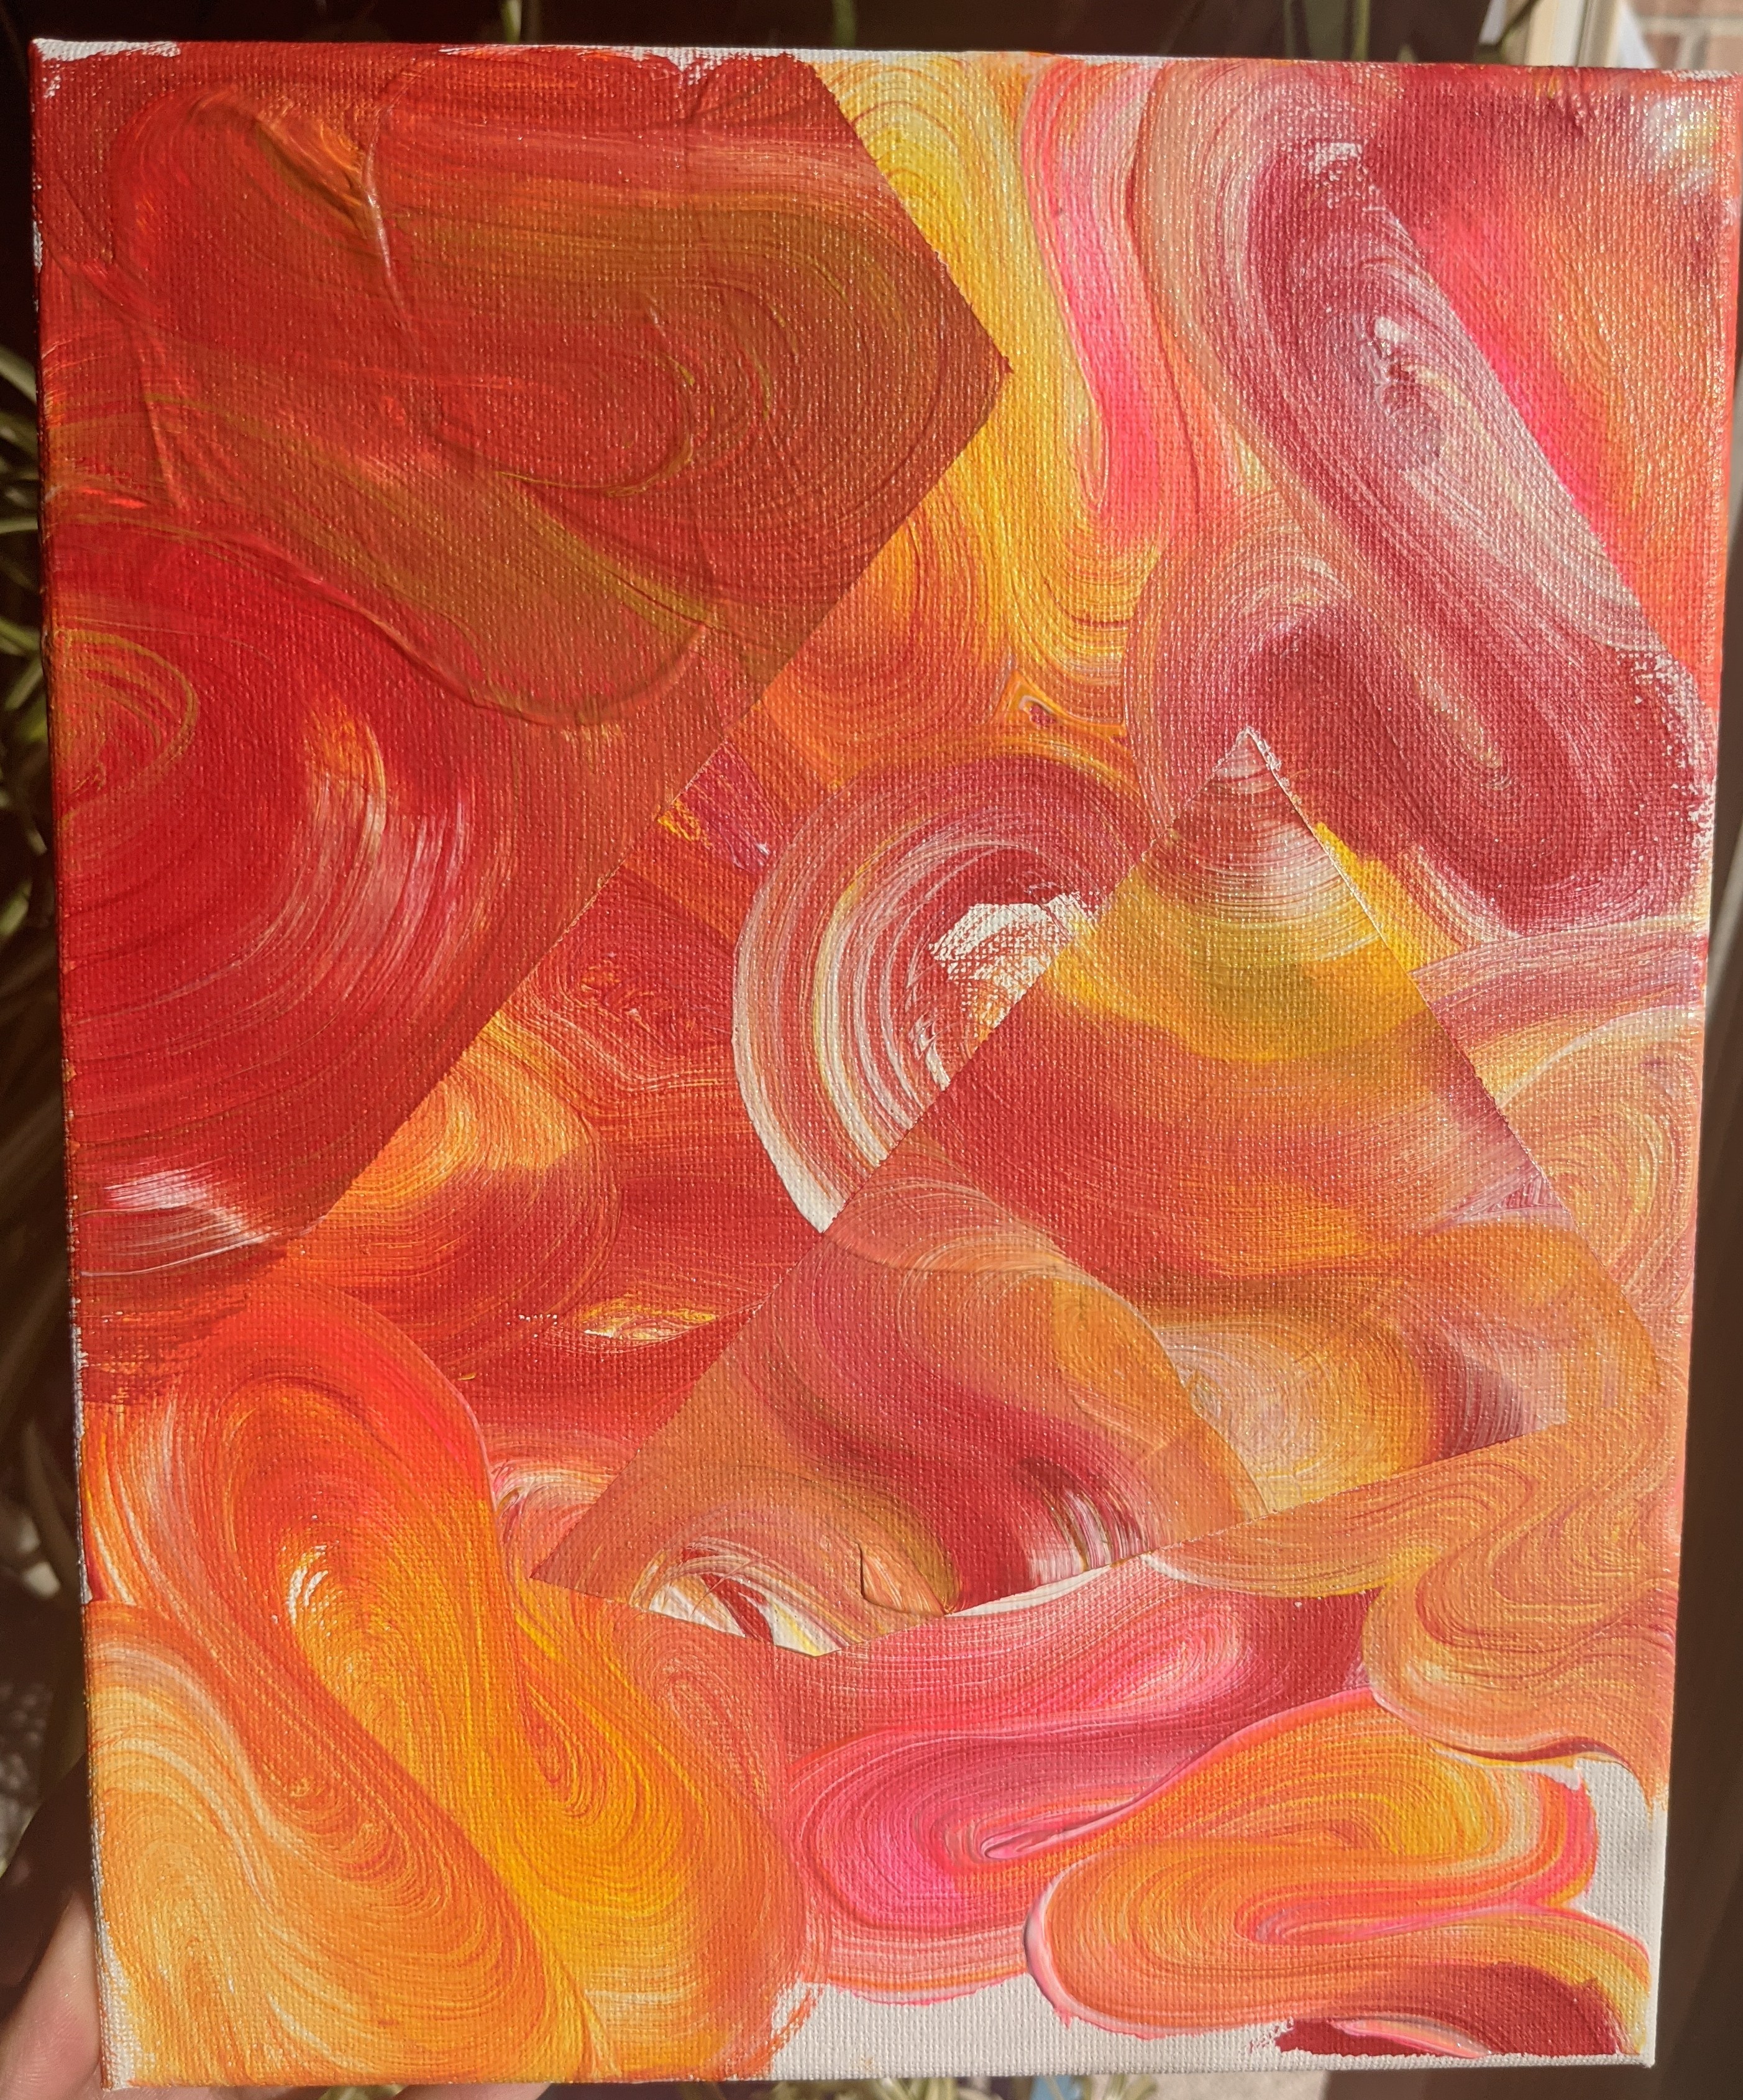
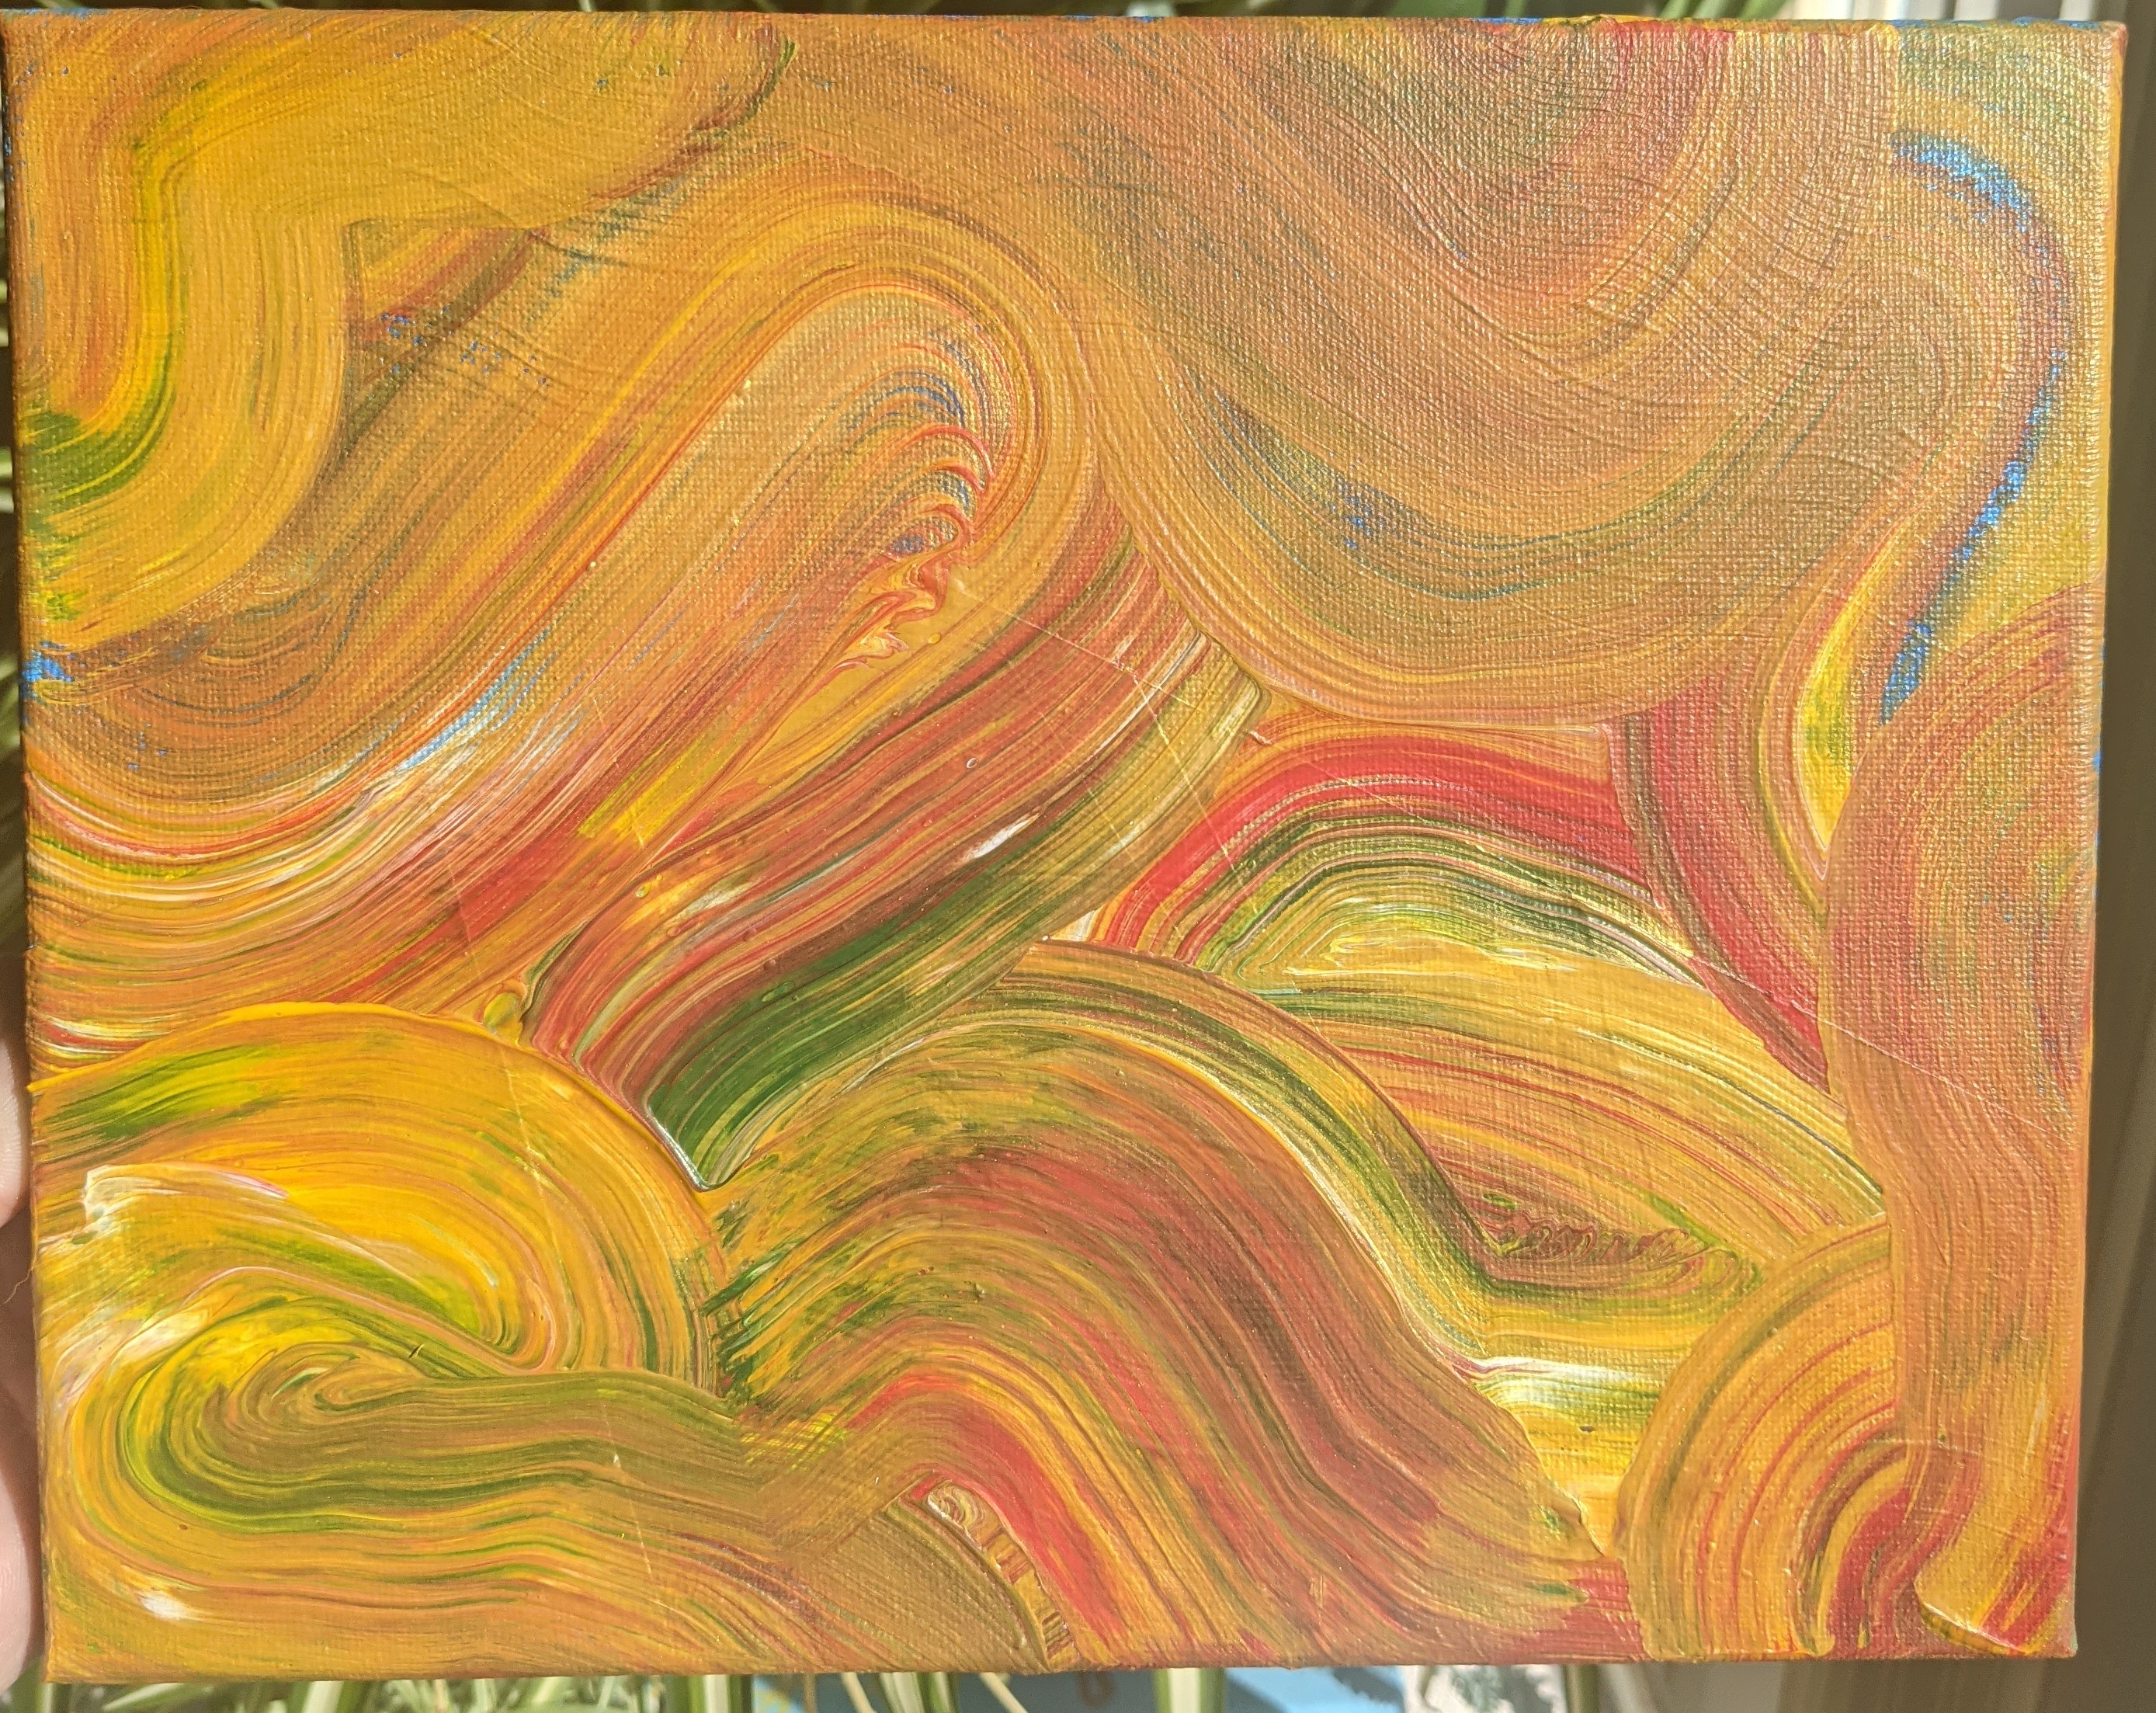
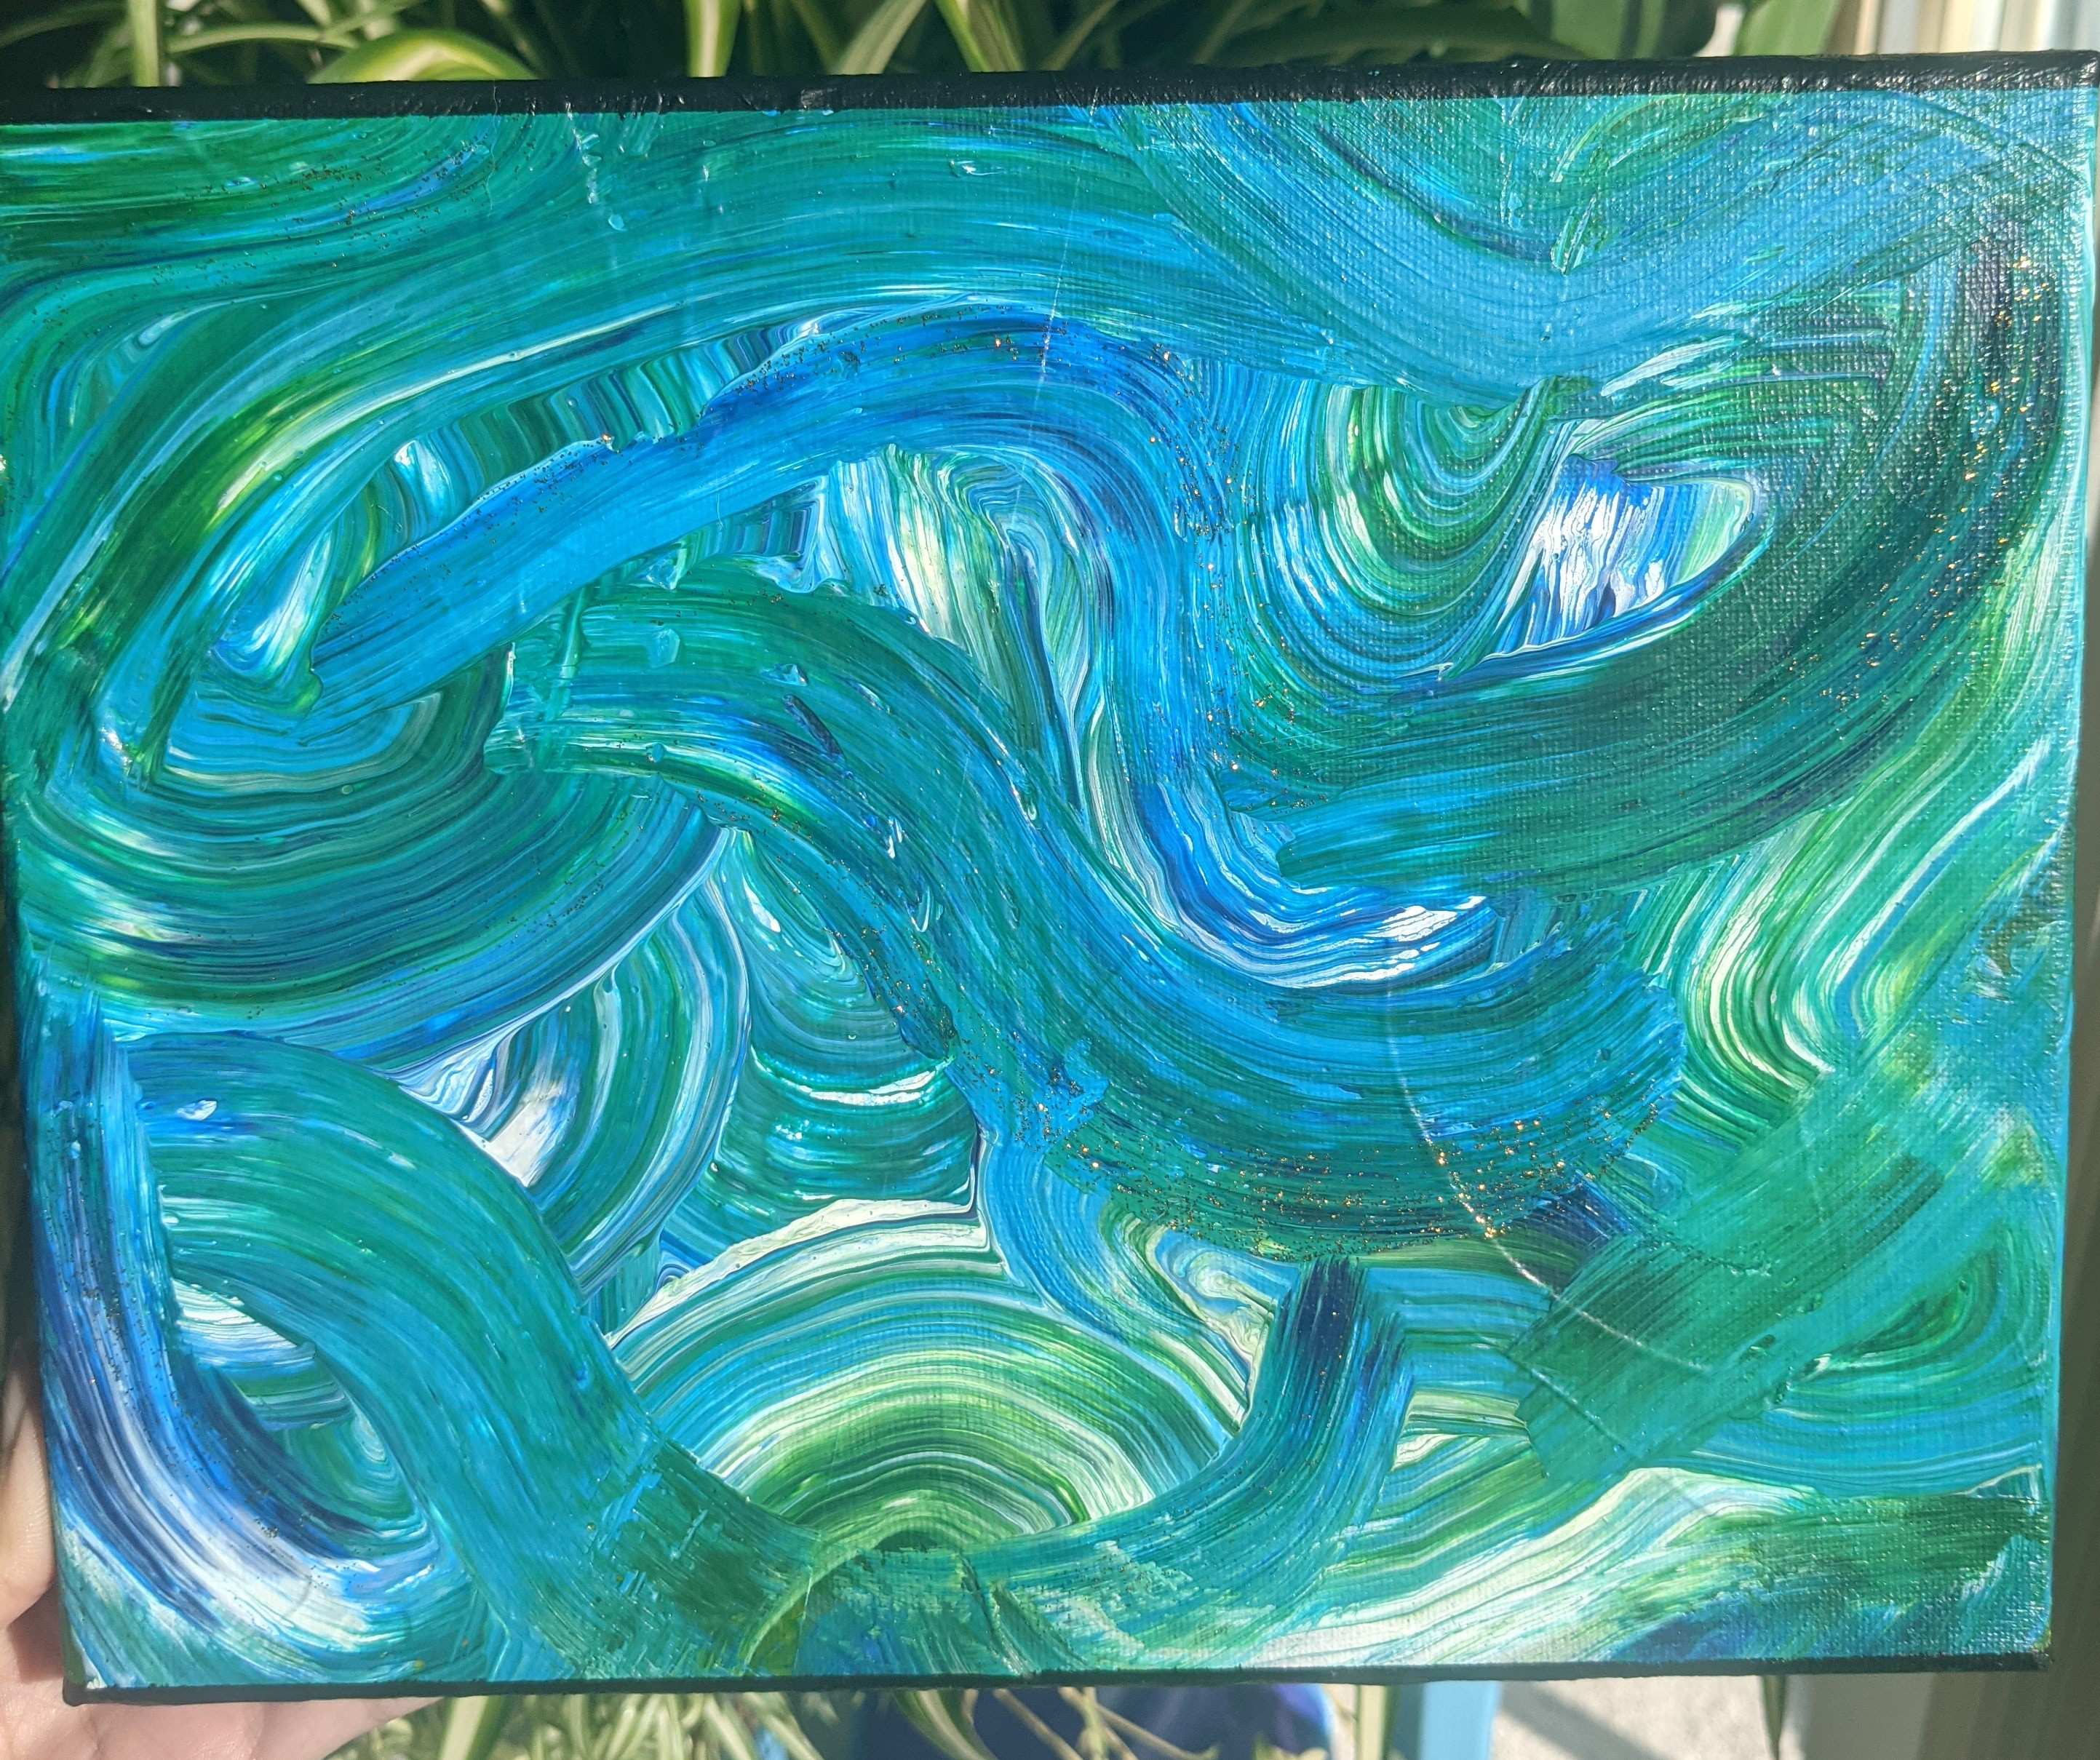
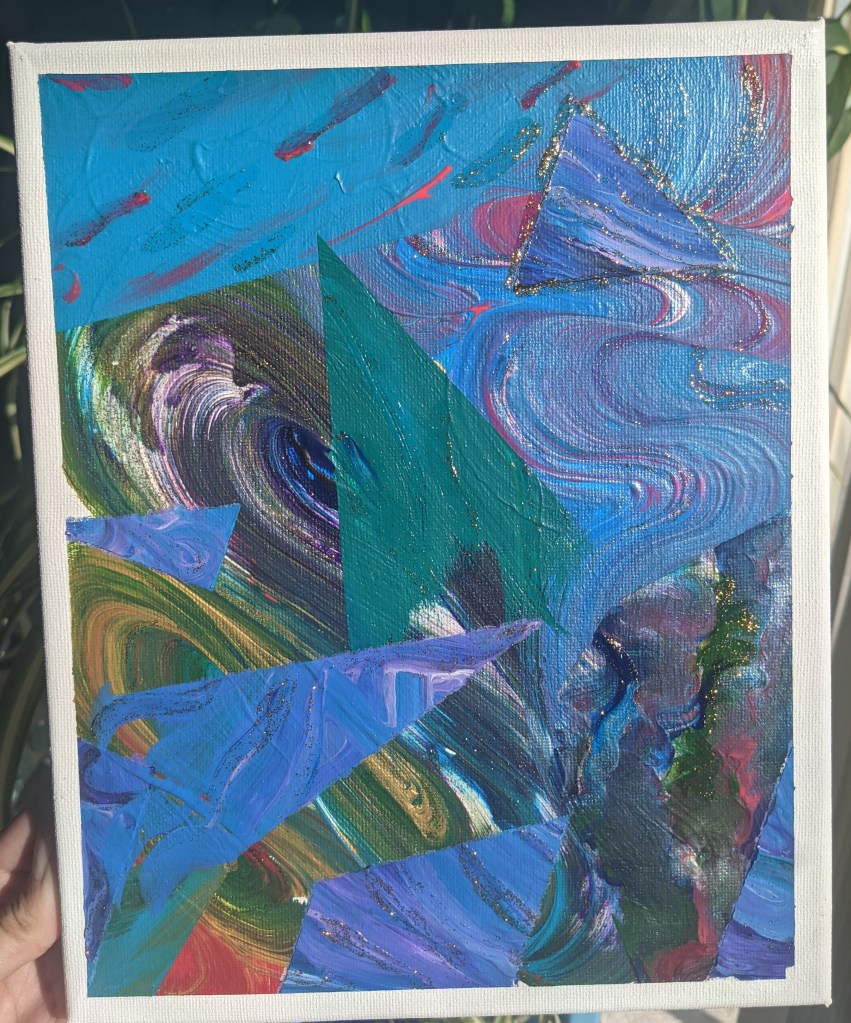
I was inspired to pick up the brush again by katiesstudio on TikTok; I wanted to try out their “swirl the blobs” technique of moving and mixing color across the canvas. And of course, I brought my masking tape techniques with me.
Then I wanted to take this color blending kick over to my embroidery, because I already have variegated thread in lots of colors (shout out to Walmart for the thread).
I use this as my choir bag now 🙂
An of course my next question is… how can i incorporate this into my quilting? I’ve been thinking about trying more detailed pieces and more “thread painting”, and I think this abstract color blending mood could bring me into that. 🙂
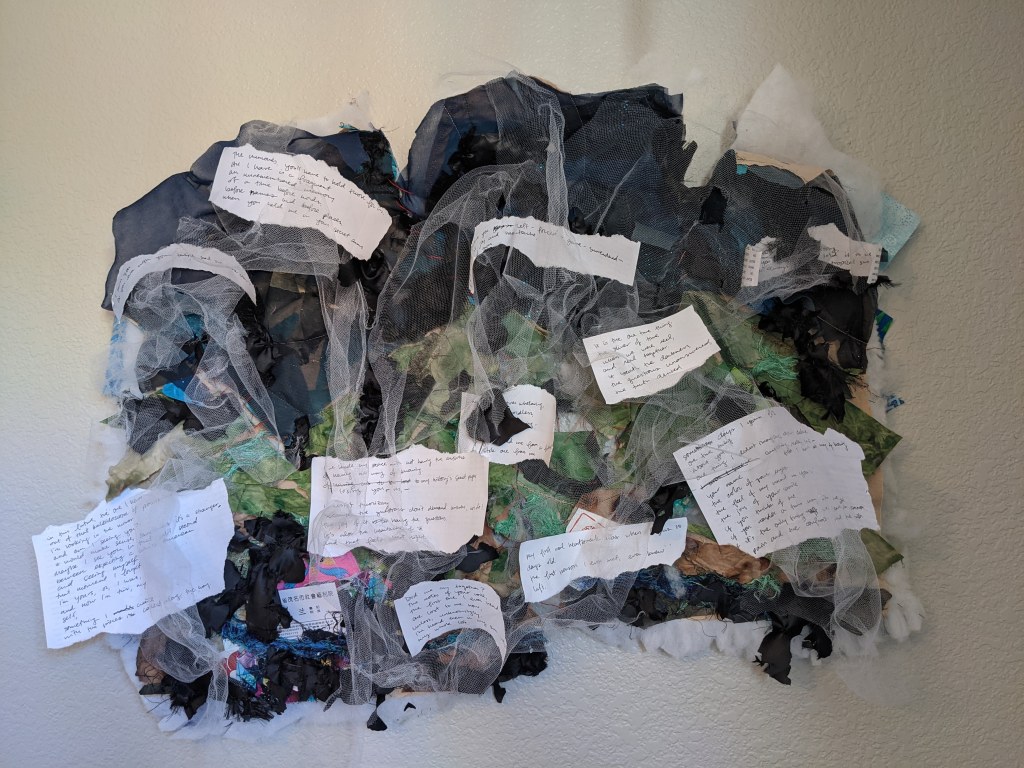
Over the past year, I’ve been exploring my feelings and memories and thoughts about my adoption. And with the support of my therapist and adoptee support group, I have created something that really encompasses this nebulous, complex…. experience I’ve had.
This is my attempt at telling, creating, authoring part of my story, and trying to communicate what it’s felt like to have this story and move into writing it myself.
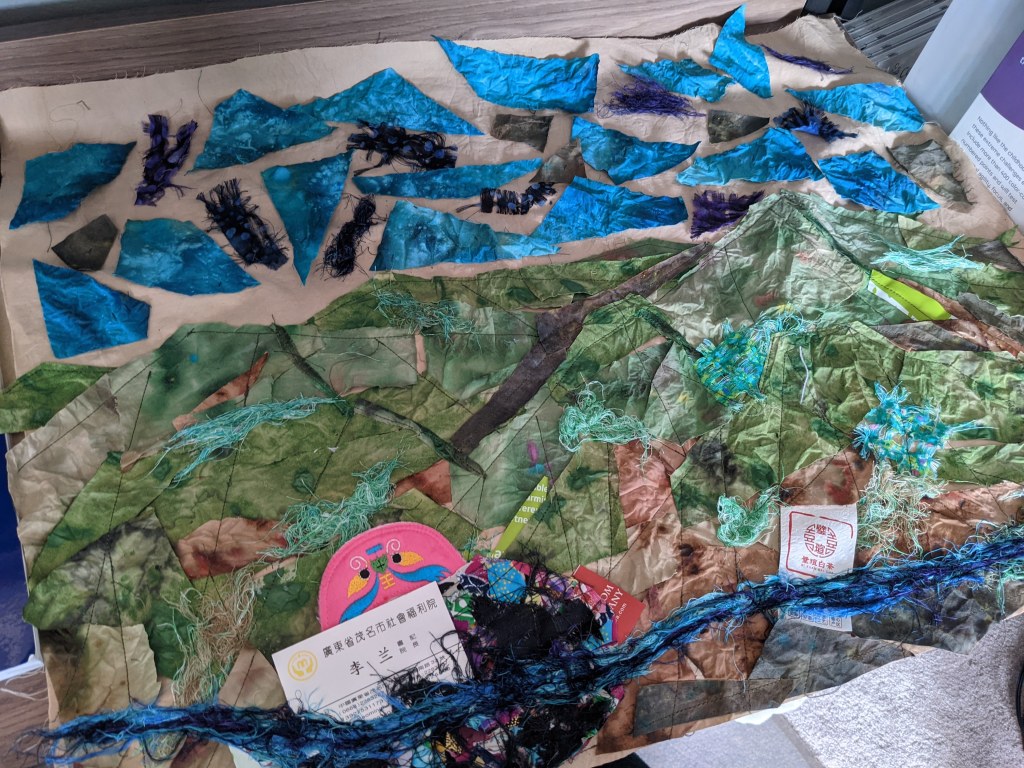
I bought white fabric, dyed it with tea, and then painted it. Created the colors and used scissors and my hands to create the shape.
I took already made fabric and pulled it apart into bundles of thread and pieces with holes and frayed edges.
I incorporated the business card from the orphanage I spent time at, and little baby shoes I found in my parent’s basement. And some tea wrappers, as drinking tea is one of the ways I’m engaging with my heritage right now.
I created a landscape based on research from Google Earth of the surrounding hills and the city I was found in using this imprecise, bits-and-pieces applique.
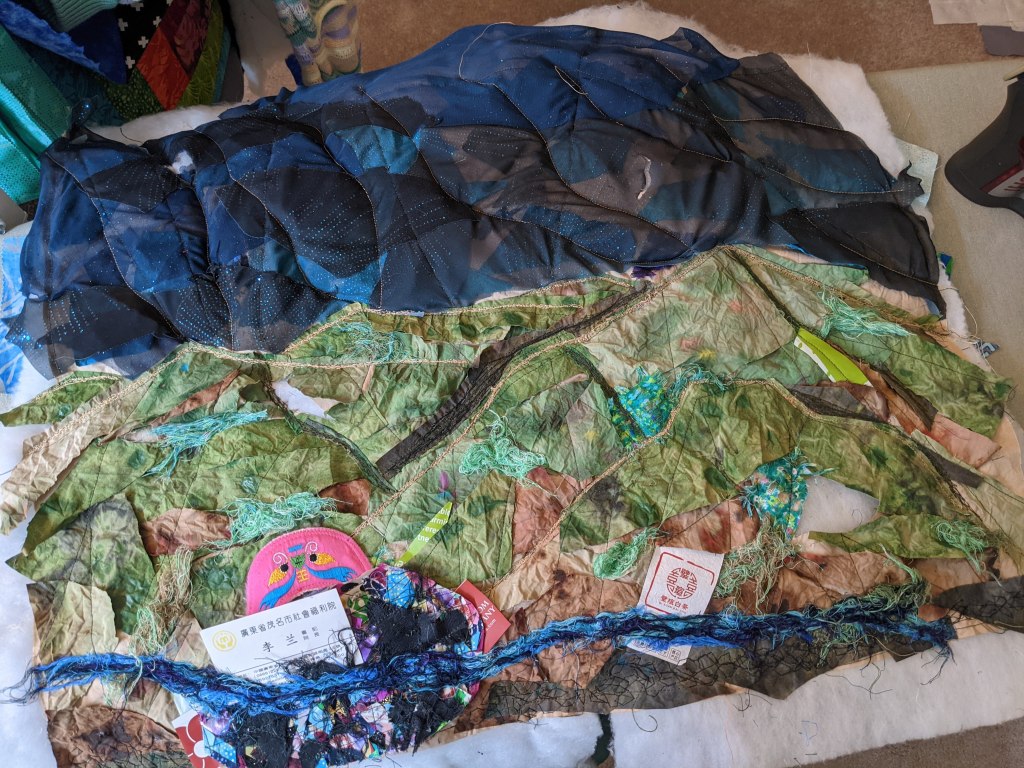
I wanted to stop here. I had a piece I liked looking at, and it was what I had imagined. But it wasn’t the story I want to tell, the whole story, the true story. So I made it messy and complicated and disjointed, like adoption is, how adoption feels. To be cut off from the first person you ever met and knew, who grew you, to be separated from people who look like you, who you heard while you were waiting to be born. To have an origin story you can’t remember and can’t ever know. To be out of context, displaced… Displaced to somewhere nice, with good people, but to always be a branch grafted onto the family tree.
And so I covered it with black bits of fabric, obscuring it.
And cut it up and fit it together in the wrong places and stitched it together again.
And undid stitches and pulled pieces of fabric up and cut into it.
And covered it with ripped pieces of mesh tulle, covering it in more haze.
And, finally, fit the pieces of a poem I amalgamated from my bits of writing about adoption into the shredded edges. It doesn’t feel like closure, but I did need to express it. It was so strange to make a quilt that is not a grid and angles and 1/4″ seams. In the beginning it was daunting, and I instinctively tried to make it pretty, but that’s not what I feel and not what I wanted it to be.
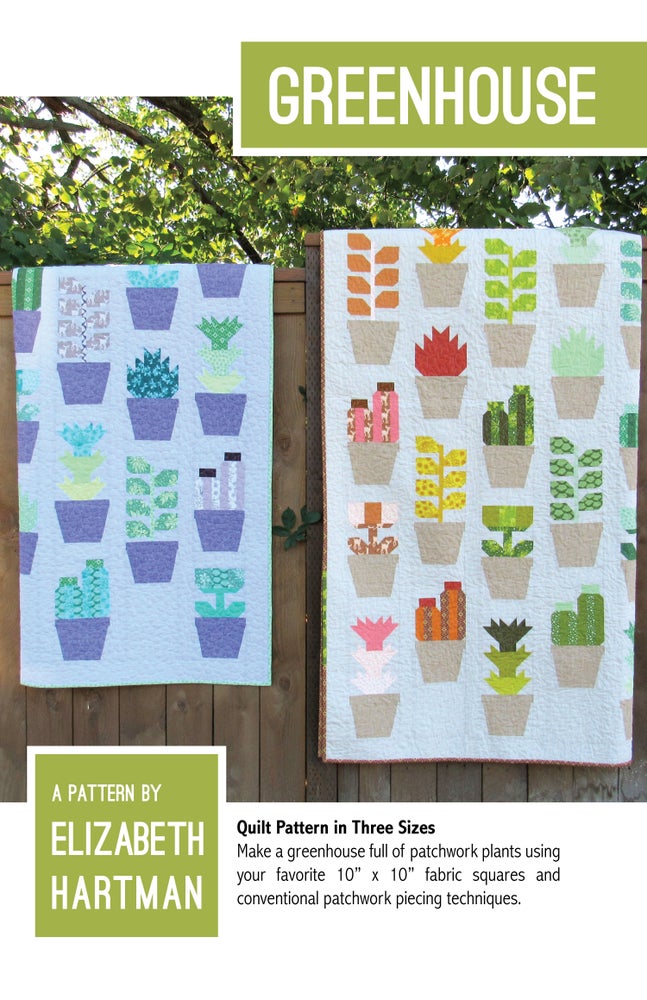
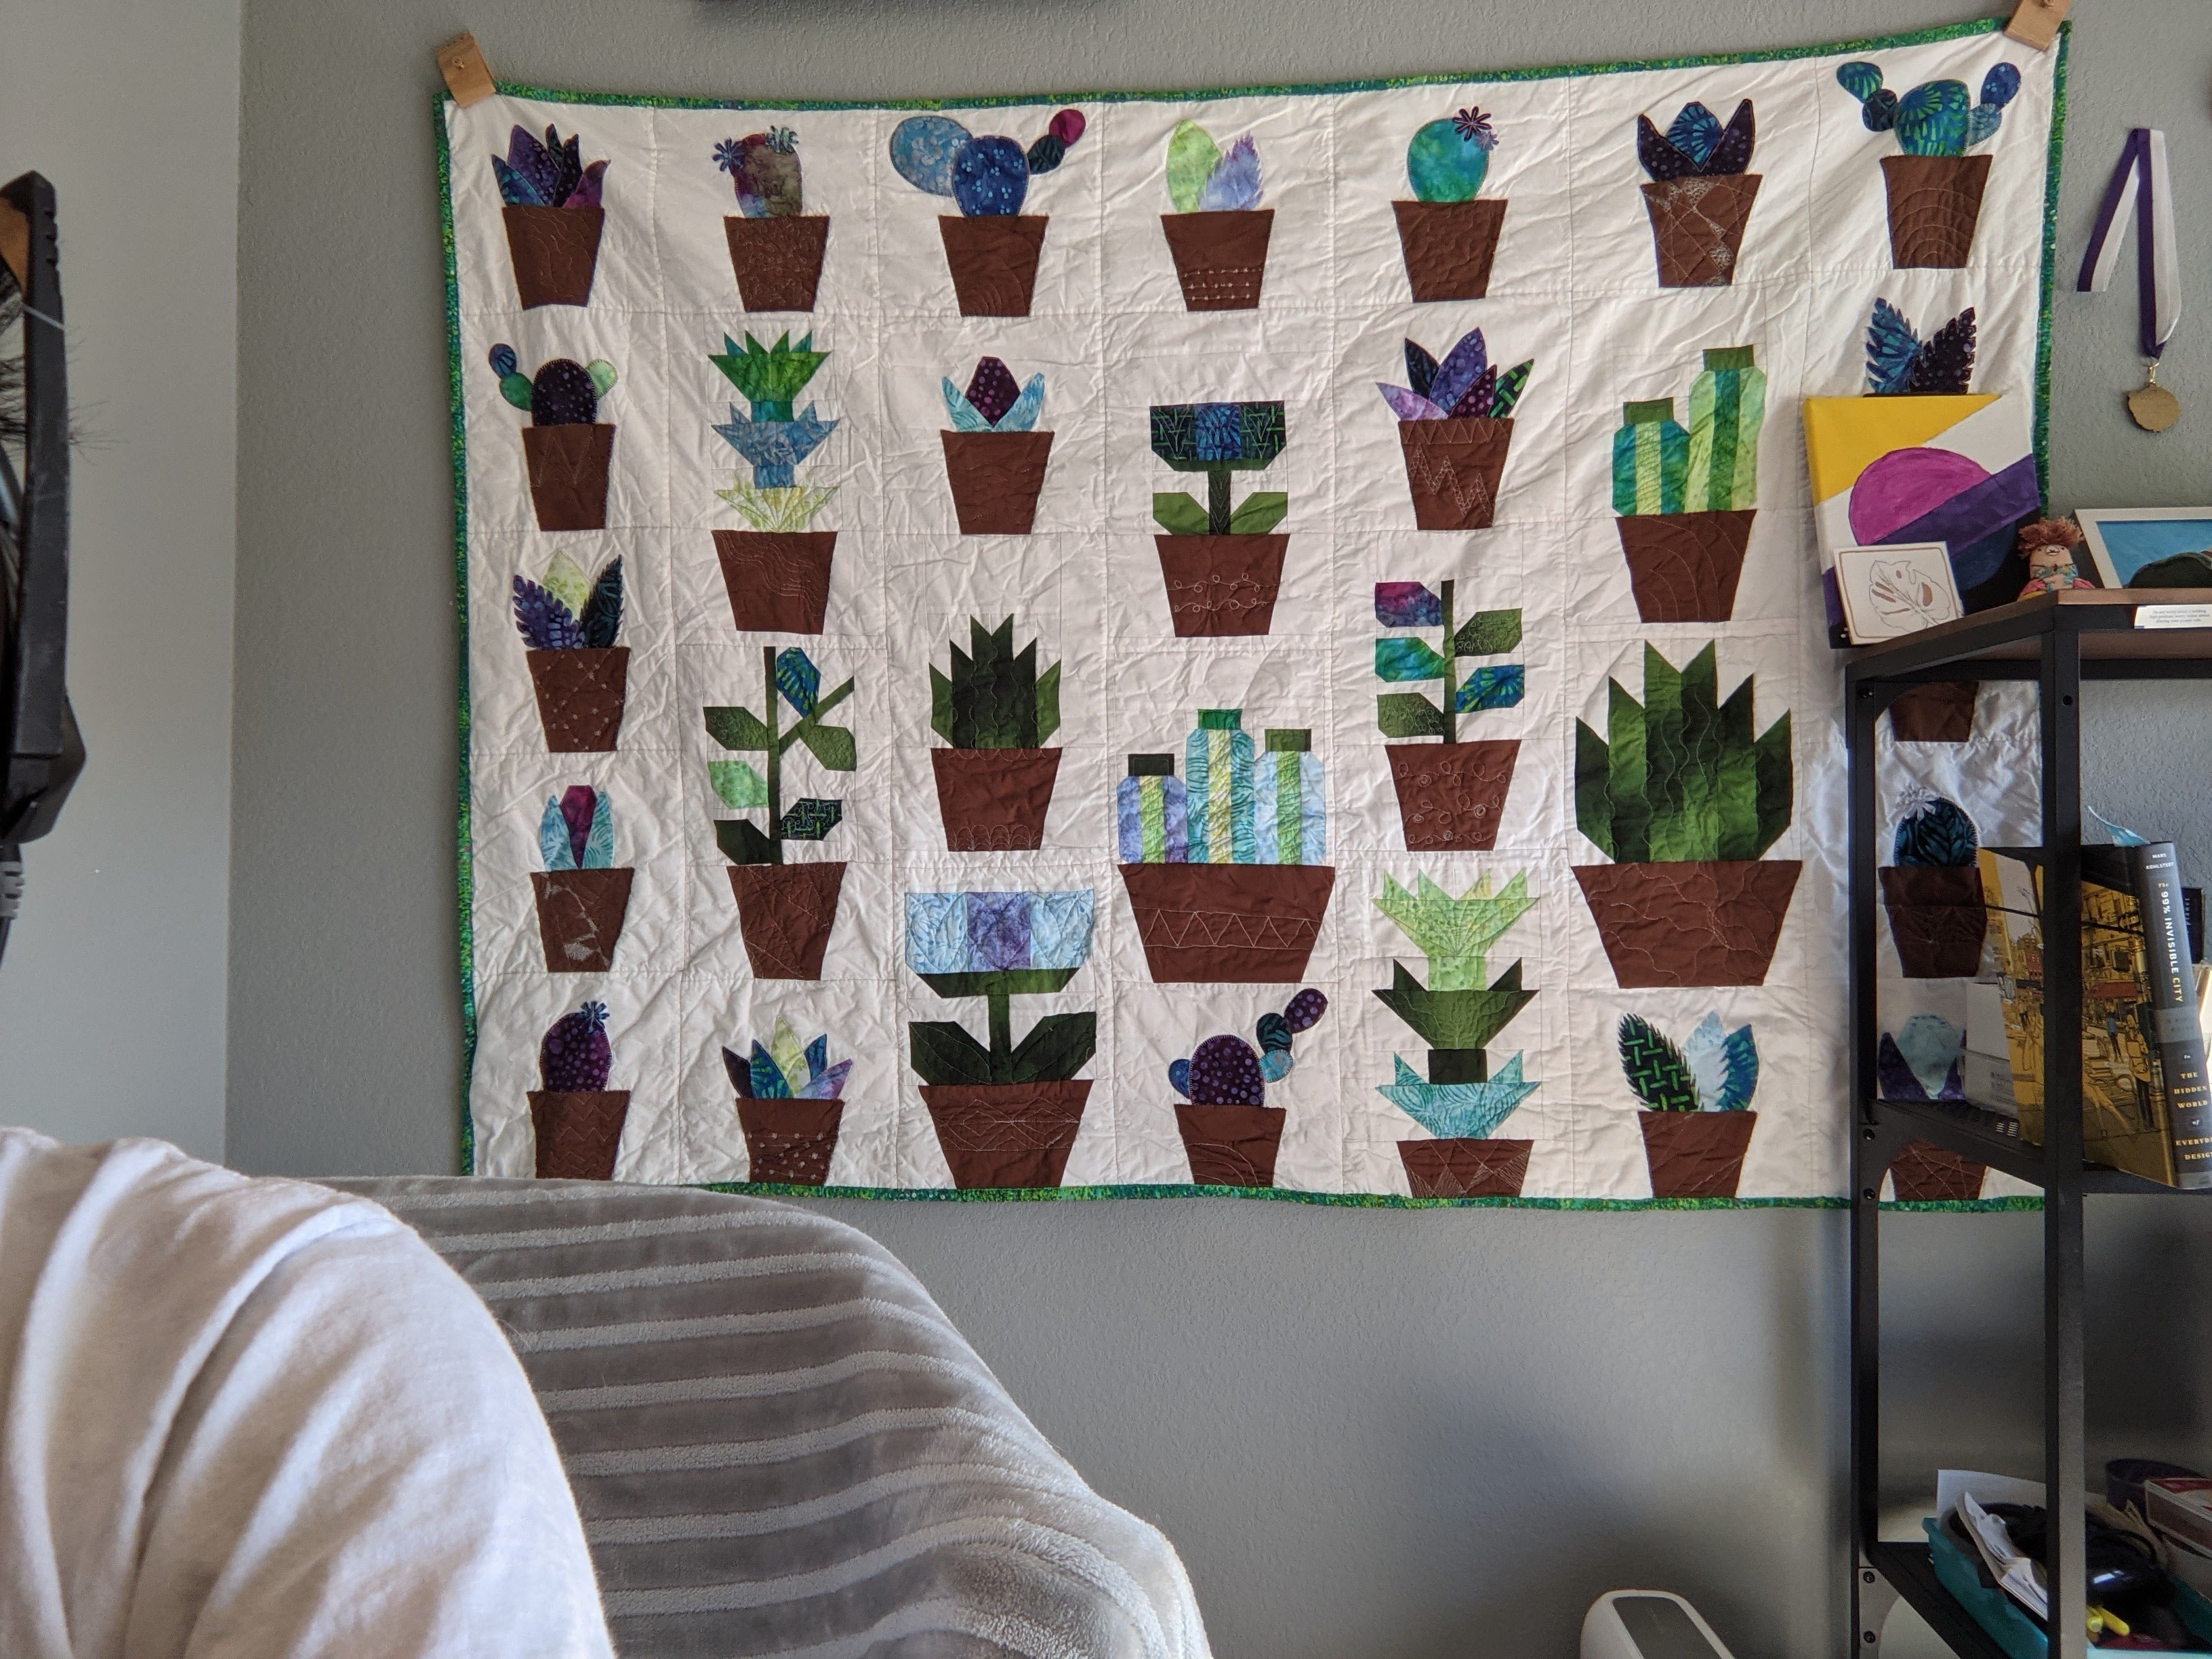
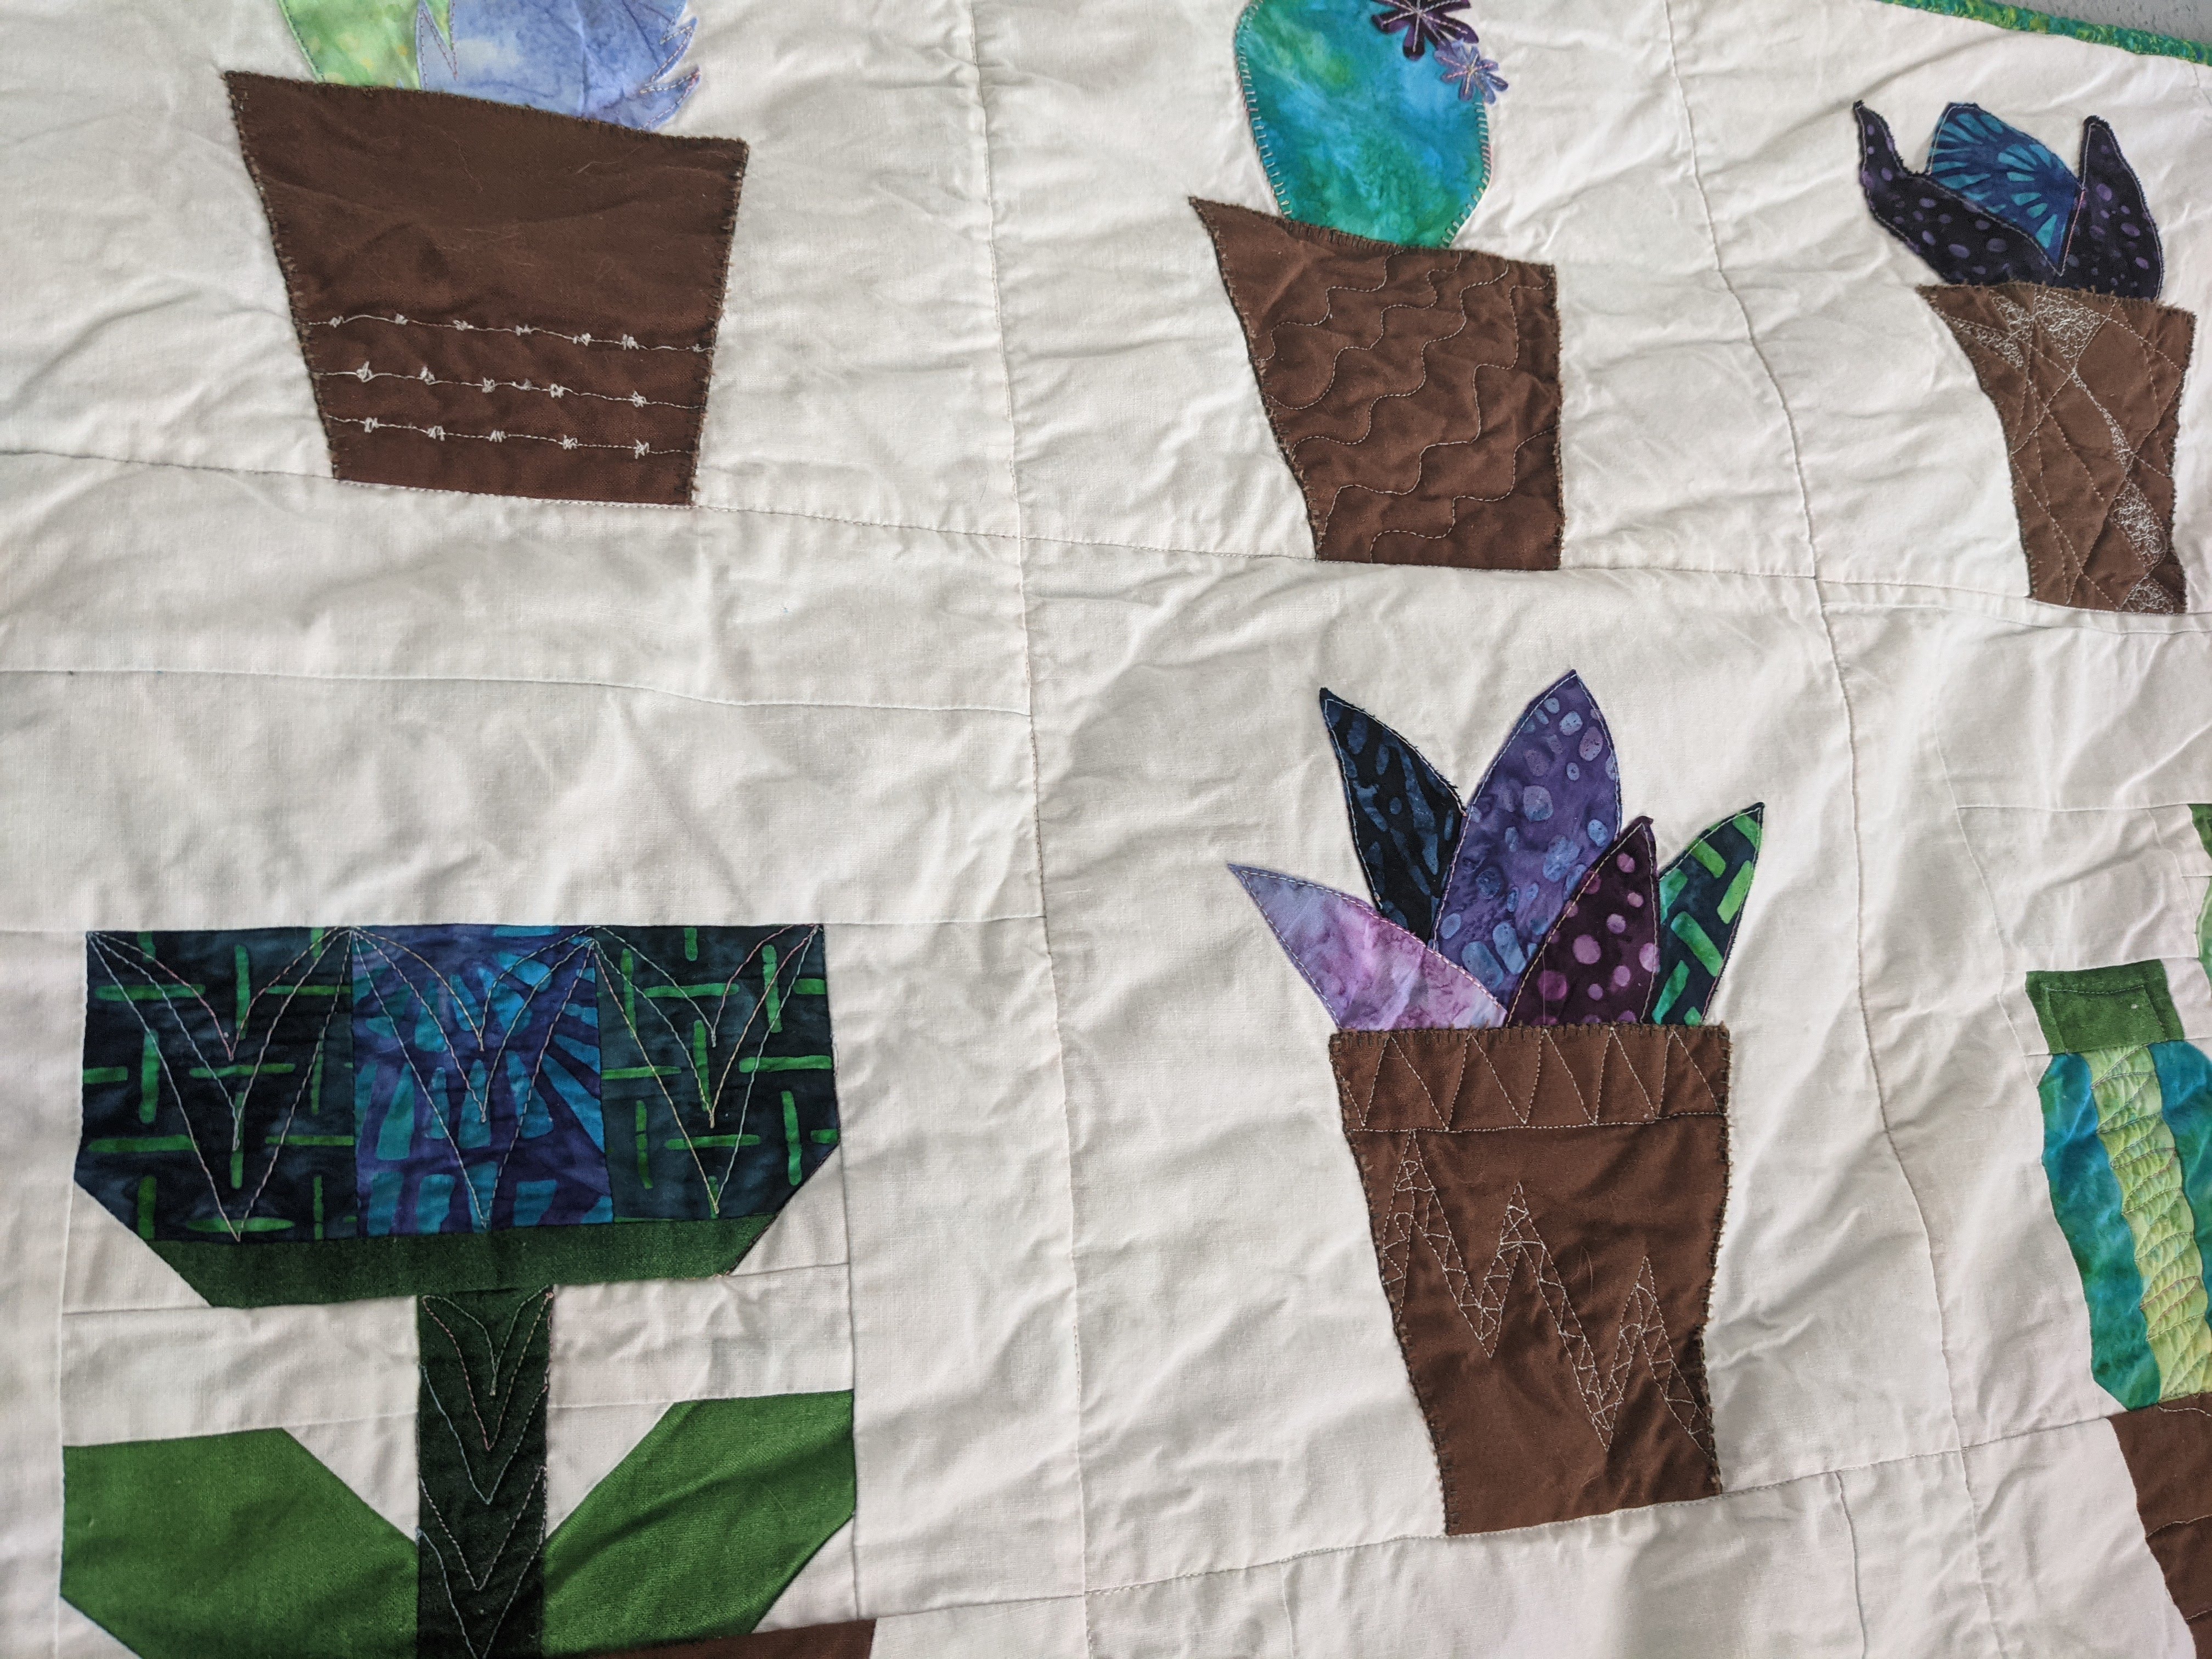
So I’m a big plant person. I love plants. I have had an ongoing collection of succulents for a couple years, and last summer my cousin (who I made the memory quilt for) gifted me a bunch of mature houseplants like pothos, monstera, and colocasia. So I’ve wanted to do a plant quilt for a long time, and I actually bought half the supplies I needed for this quilt in early 2020. At that time, I was planning on doing the entirety of Elizabeth Hartman’s “Greenhouse Quilt”. Hartman creates incredible patterns of actual animals and objects, all pieced, not applique. This means there’s a lot of cutting itty bitty pieces of fabric, sewing itty bitty pieces of fabric… and a lot of mental effort to stay organized and on track. I had done one block of hers a while ago as a pillow, and used one of the plant blocks as a bag for a friend (below).
Flower block from Elizabeth Hartman
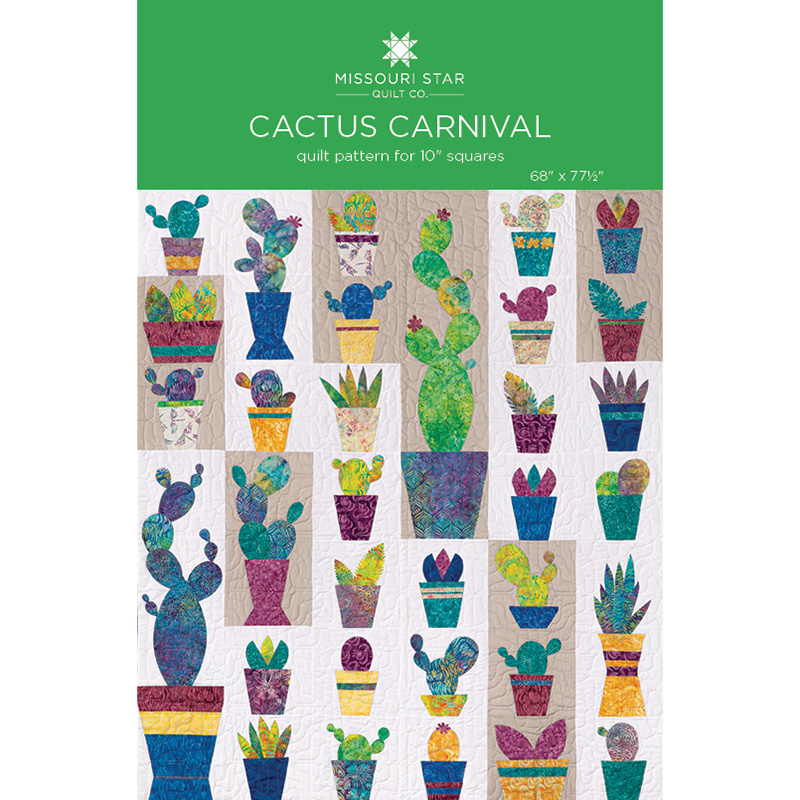
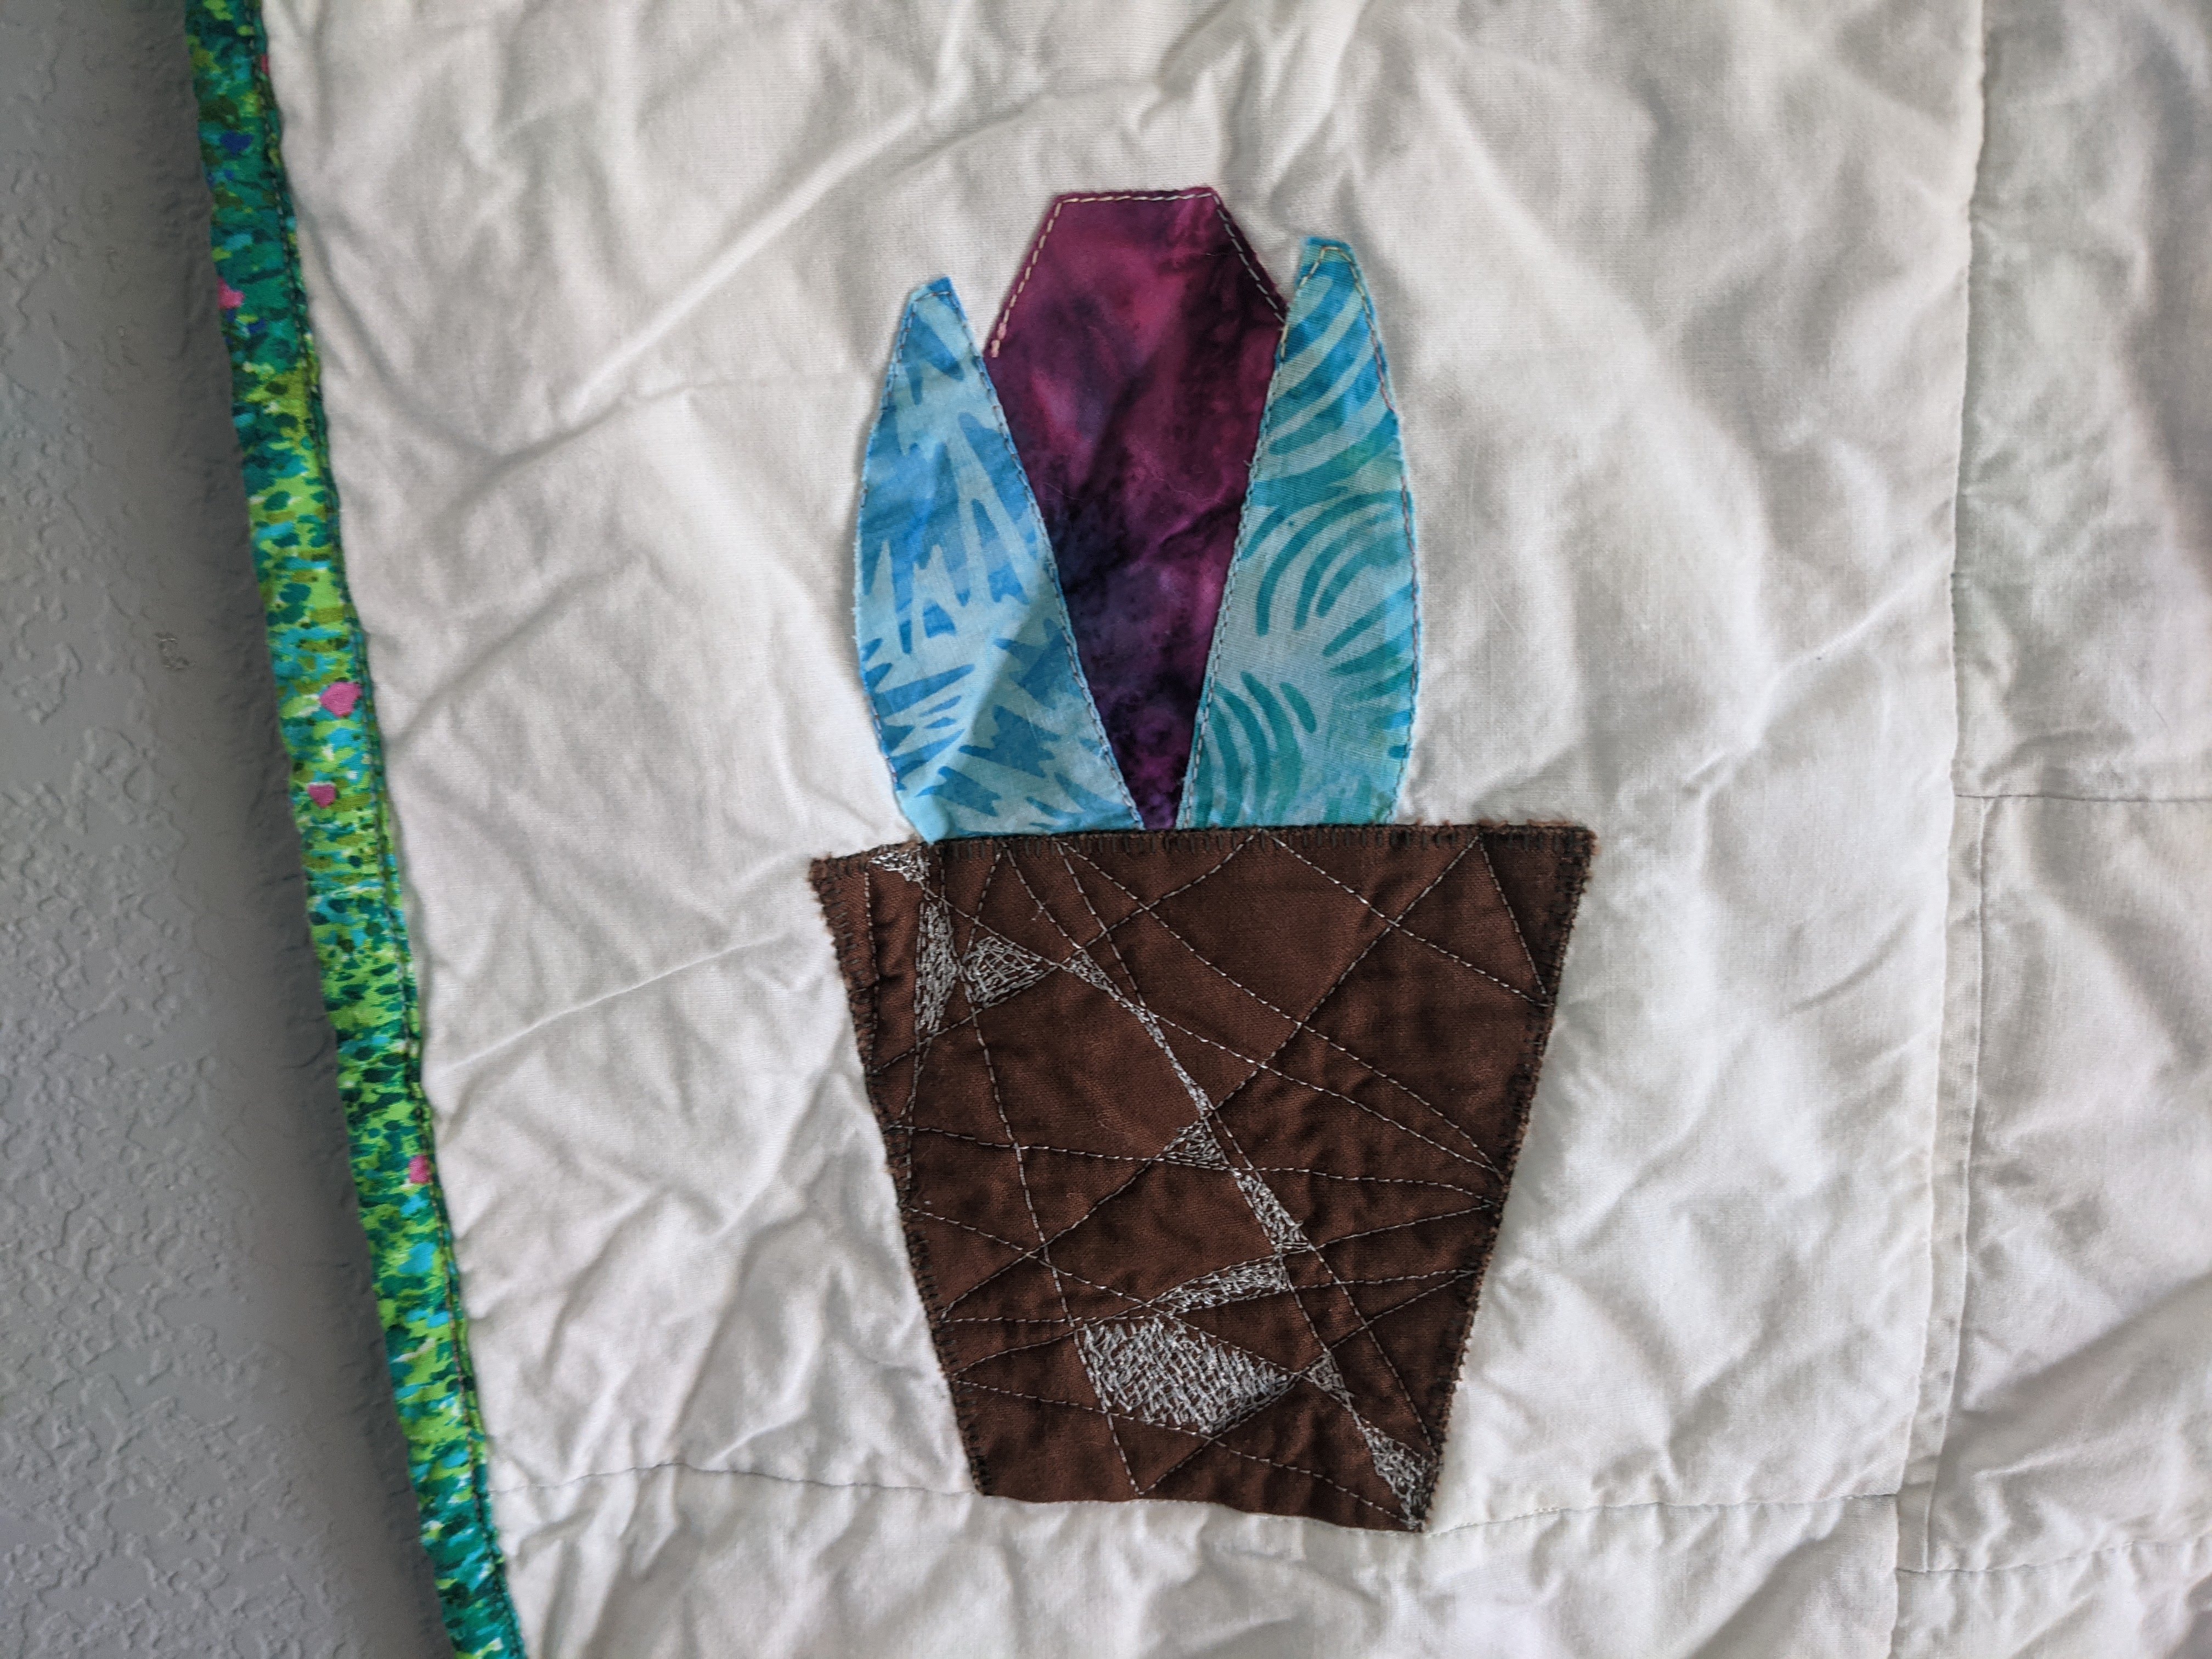
And then I saw MSQC’s “Cactus Carnival”, which is applique, and I knew I could combine both these patterns to create something that wasn’t too hard, and had hard angles and soft curves.
I attempted to standardize the sizes of the blocks, since MSQC’s pattern has a 10″ block, and Hartman’s pattern is based on a 6.5″ wide block with varying heights. I ended up adding borders to the Hartman blocks to make them 10″ wide and 15″ tall, so they could work in columns with the MSQC blocks.
I made four blocks of each of the five general plants from MSQC, and used Heat N Bond for all the applique, which ended up going a lot faster than anticipated. I used my rainbow variegated thread (kind of my favorite thread, let’s be honest I’ve used it for probably half my projects) to outline all my applique’d plants with blanket stitch. I didn’t even have to use Heat N Bond for the pot pieces, and laid those gently on top of my applique’d plants.
I’m only applique-ing the plant pieces here, the pot was a placeholder because the fabric hadn’t come in yetHere I’m going around the main piece, but I come back later to go around every piece. The Heat N Bond doesn’t stay sticky through the washer and dryer, so you have to secure the pieces in another way.
Then I made two versions of each Hartman block – a standard size and an enlarged size. I used the normal pattern for the standard size block, and adjusted the plant to be 8″-9″ for the enlarged size block. The whole time I was kind of stressing because I didn’t think I had enough background fabric to all the blocks, but it ended up totally fine!
I put all the blocks together in a landscape orientation, which is kind of different for quilts! But I intended this to be a wall hanging in my room, behind where I Zoom/video chat from, so that it could be my background! So I arranged my blocks and sewed them together in columns. My first pass of quilting was just straight lines, stitch in the ditch up and down the columns, and then across horizontally.
Then, I did free motion quilting on the pots! I started off using this white thread I got, but it kept breaking, so then I switched to a shiny gray that I’ve had for a while, and that kept breaking too… Finally I figured out the problem was the needle! But that kind of just made the problem happen less often.
[Future Finch, who is writing this post, has completed the Plant Quilt and is working on the next quilt and running into the same problem while free motion quilting. I am now convinced that it’s because I was pushing the quilt through the machine too fast, which pulls the thread too tight and then it snaps. I have been working on slowing down and having patience, which is difficult! The machine is running very fast, so it’s kind of loud and the needle is moving quickly, but I have to move slowly and steadily. I’ve gotten to the point where it’s happening even less often than during the pots, but I’m still working too fast. I don’t know if I want to turn up the machine speed, although I think that could help. It just stresses me out because it’s so loud, which makes me go faster.]
But I persevered through my mistakes and the pots ended up so fun. I had six different “motifs”: swirls, abstract, wavy, rainbow, zigzag, and dots. Each pot, I rolled a die to decide which motif I’d use – as long as it wasn’t the same as the pot I just did or any adjacent pots. It was so fun to vamp on different motifs and find new ways to represent them. It was nice to not have to come up with an entirely new idea, but just a new take on the same motifs. So it was fun to do and fun to look at 🙂
As I was finishing up, I wasn’t sure if it needed more quilting or if I should quit while I was ahead. The applique plants and pots had their own blanket stitch outlines, and the pots had the FMQ, but the Hartman blocks were kind of empty. I called a friend and we decided that I should do limited quilting on the Hartman plants so they blended in with the whole quilt. I matched the designs between the standard and enlarged blocks, so the small cactus has the same quilting as the large catcus, etc. I think it really brought everything together! Last up was the binding and putting it through the washer and dryer. Since I found them at Target, I throw in a “color catcher” sheet with all my new quilts (and some of my more brightly colored clothes), which did come out a gray-ish green.
And now it’s hanging up behind my desk, courtesy of some quilt hanging clips my parents got me for Christmas a couple years ago. 🙂
Project completed February 11, 2021.
Colorful plant pieces: Artisan Batiks – Aviva by Lunn Studios for Robert Kaufman
Ombre Green: Wilmington Essentials – Ombre Washart Forest by Wilmington Prints
Brown pots: Bella Solids – Earth by Moda Fabrics
White background: Kona Cotton – Snow by Robert Kaufman Fabrics
Backing and binding: Painterly Petals – Textures Mint by Studio RK for Robert Kaufman
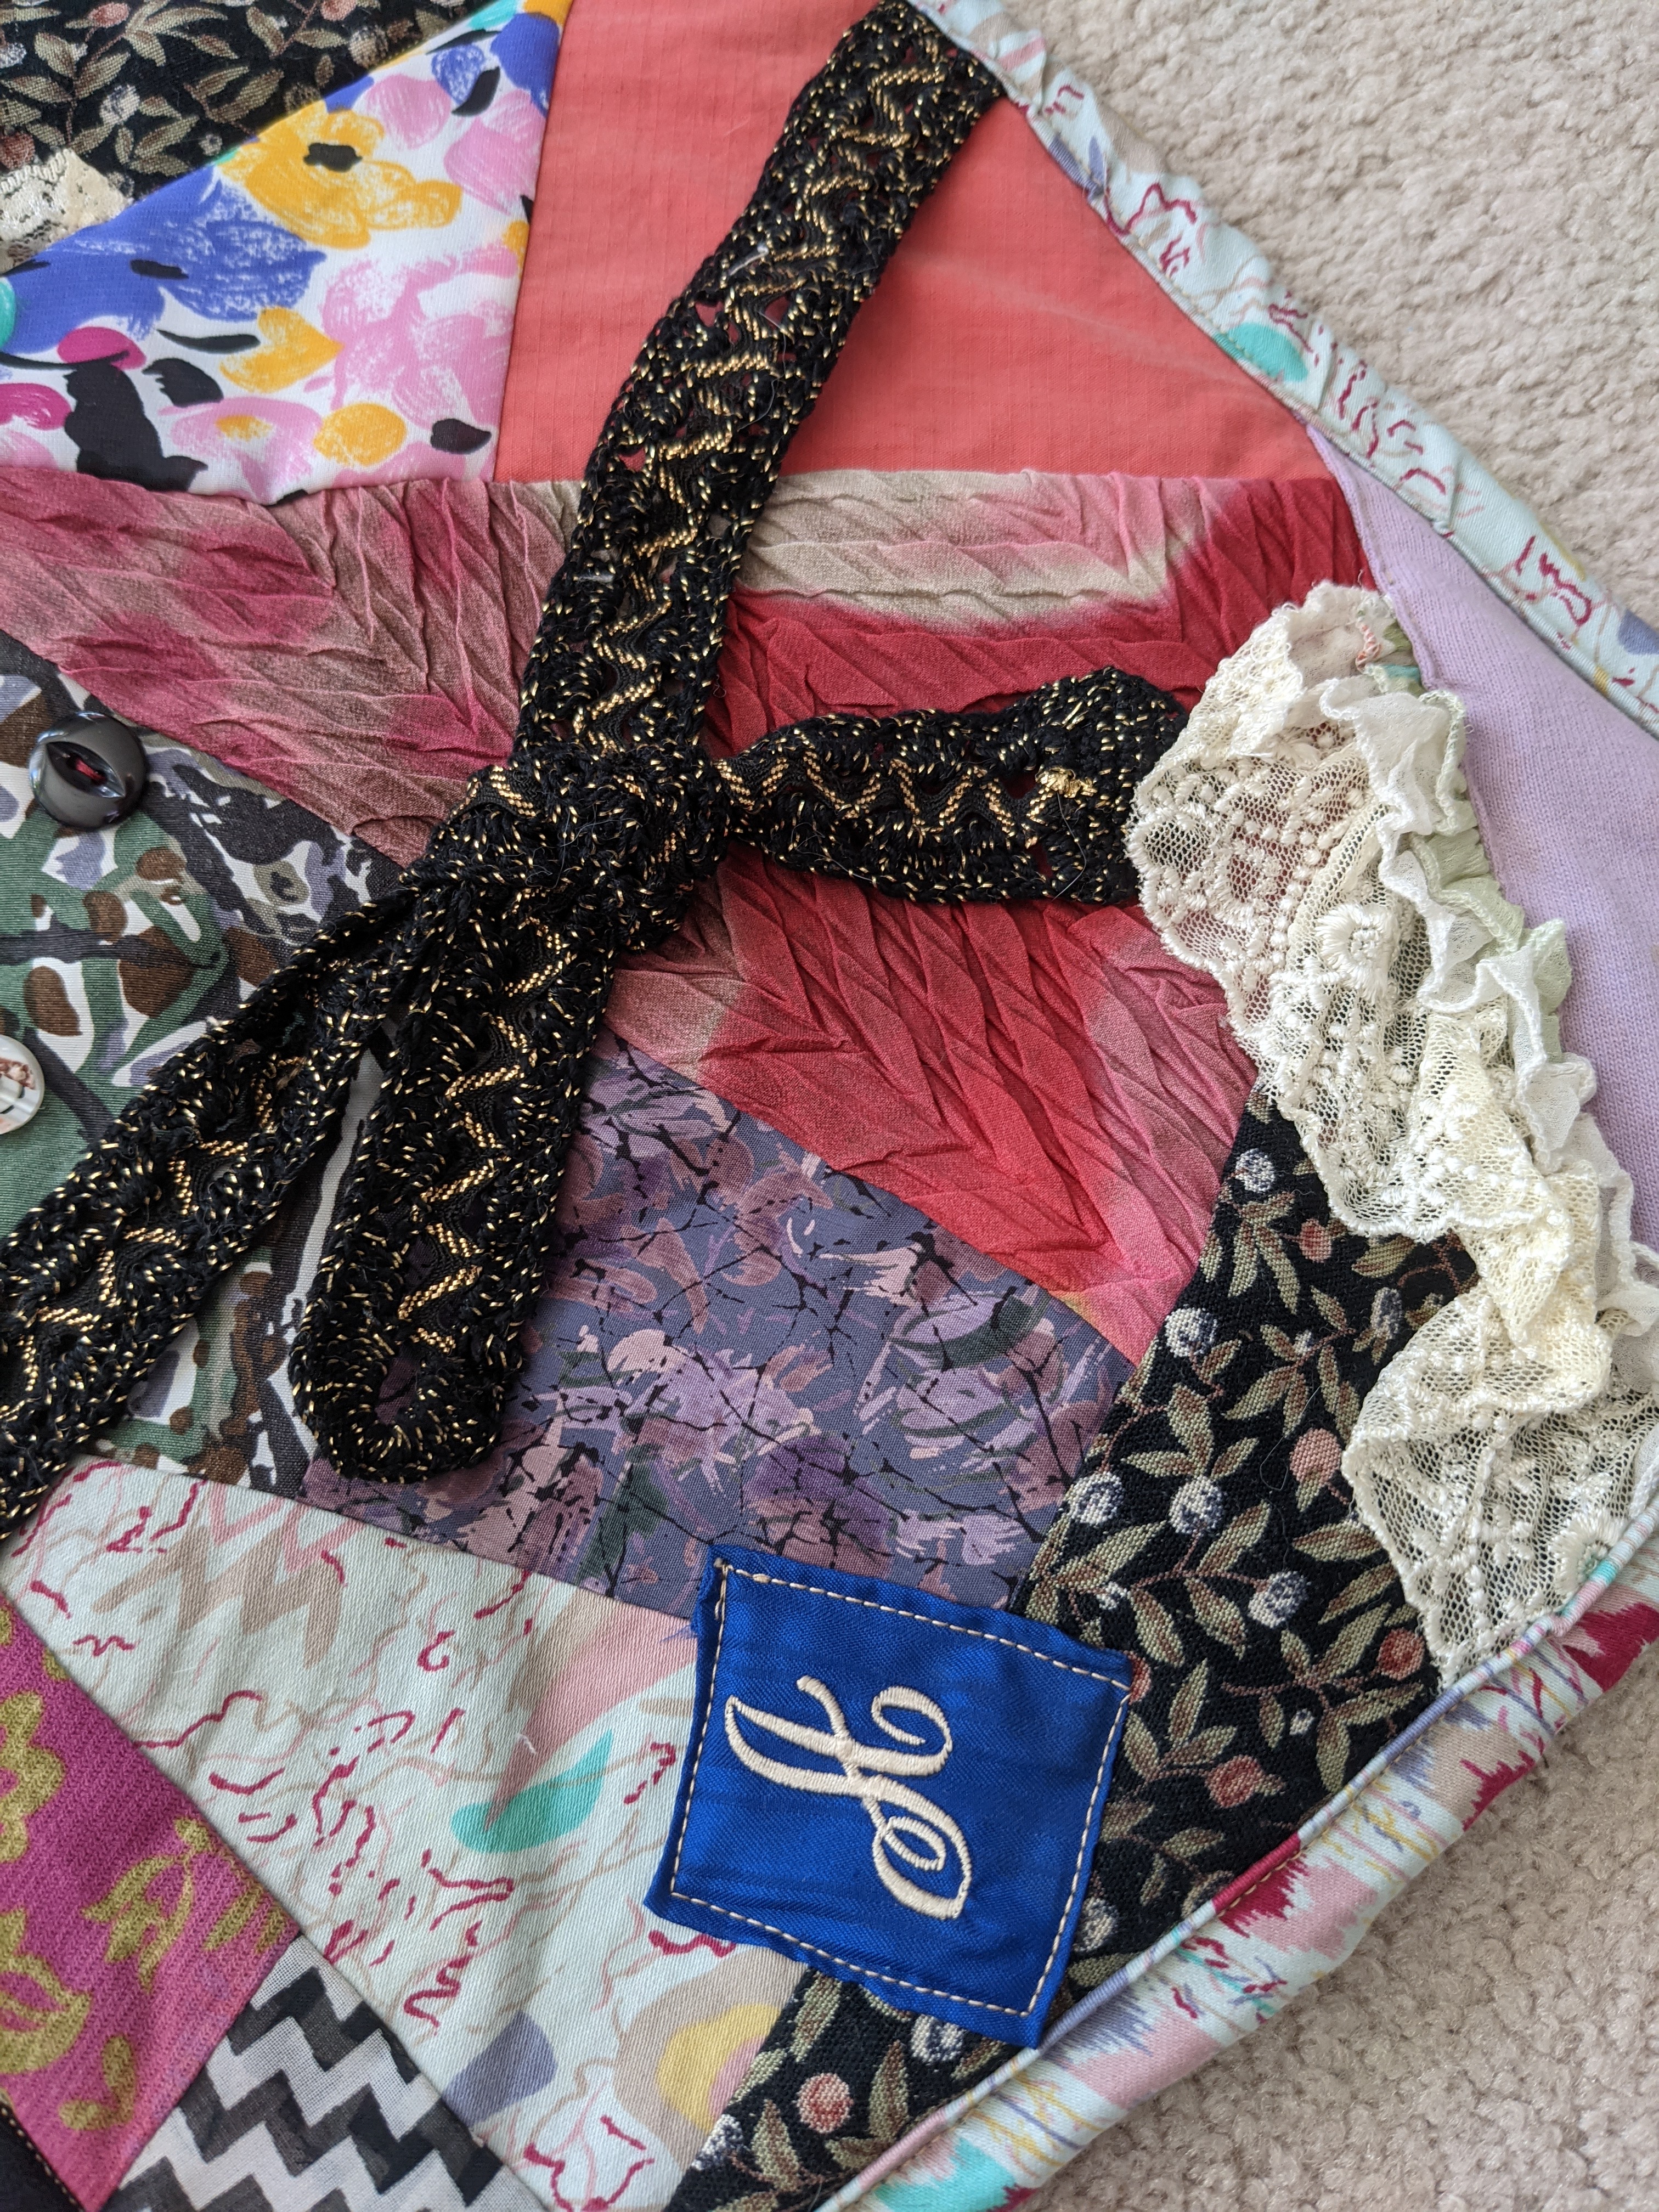
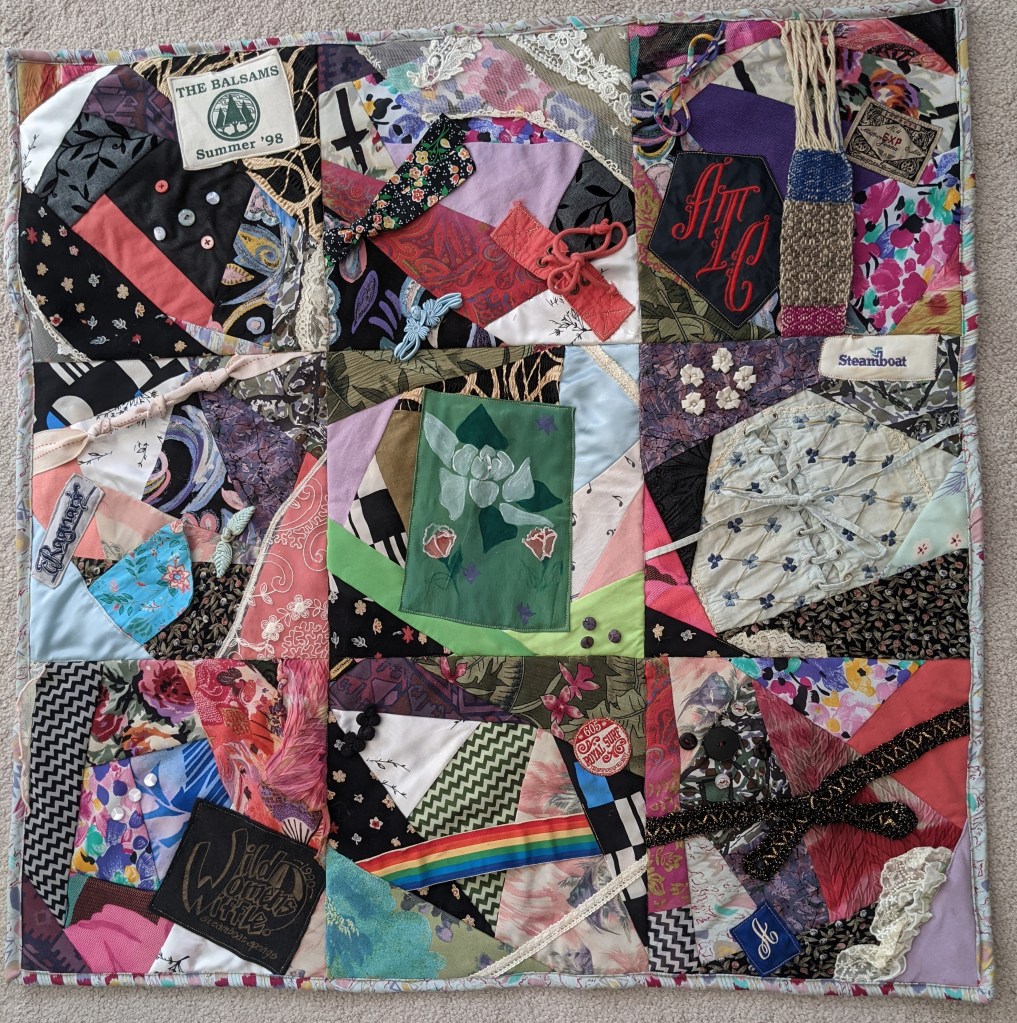
This memory quilt for my cousin was my other big project of 2020, finished in this first month of 2021. My cousin provided her mother’s clothes, which are incredibly fun and colorful. I knew I wanted to do a crazy quilt for my cousin, since she didn’t want something too big, and her mom’s clothes are truly too fun to do something simple with.
First, I inventoried all the fabric and cut off buttons and fasteners and other 3d elements I wanted to include. I chose a 3×3 layout for the back of 9 graphic t-shirts, and figured I’d do the crazy-pieced blocks to match on the front. Through the process, the front blocks ended up a bit smaller but it wasn’t a big deal.
For the piecing, I cut pieces with an uneven number of sides (a tip from the museum employee) for the center piece. Then I added on new fabric to each side, and continued until it was the right size. Since a lot of the fabric was stretchy and textured itself, I used some scrap fabric behind the block to stabilize everything.
I chose some logos to applique, just like my other memory quilt. I appliqued them on the blocks, prior to piecing the 9 blocks together. At this point I also added some lace, belts/scarves, and other ties by machine.
Black and gold belt, some lace, and appliqued logo
Then I pieced it together because I wanted to add the buttons and fasteners between some blocks. I added the buttons and such by hand, since they’re a bit fiddly on the machine.
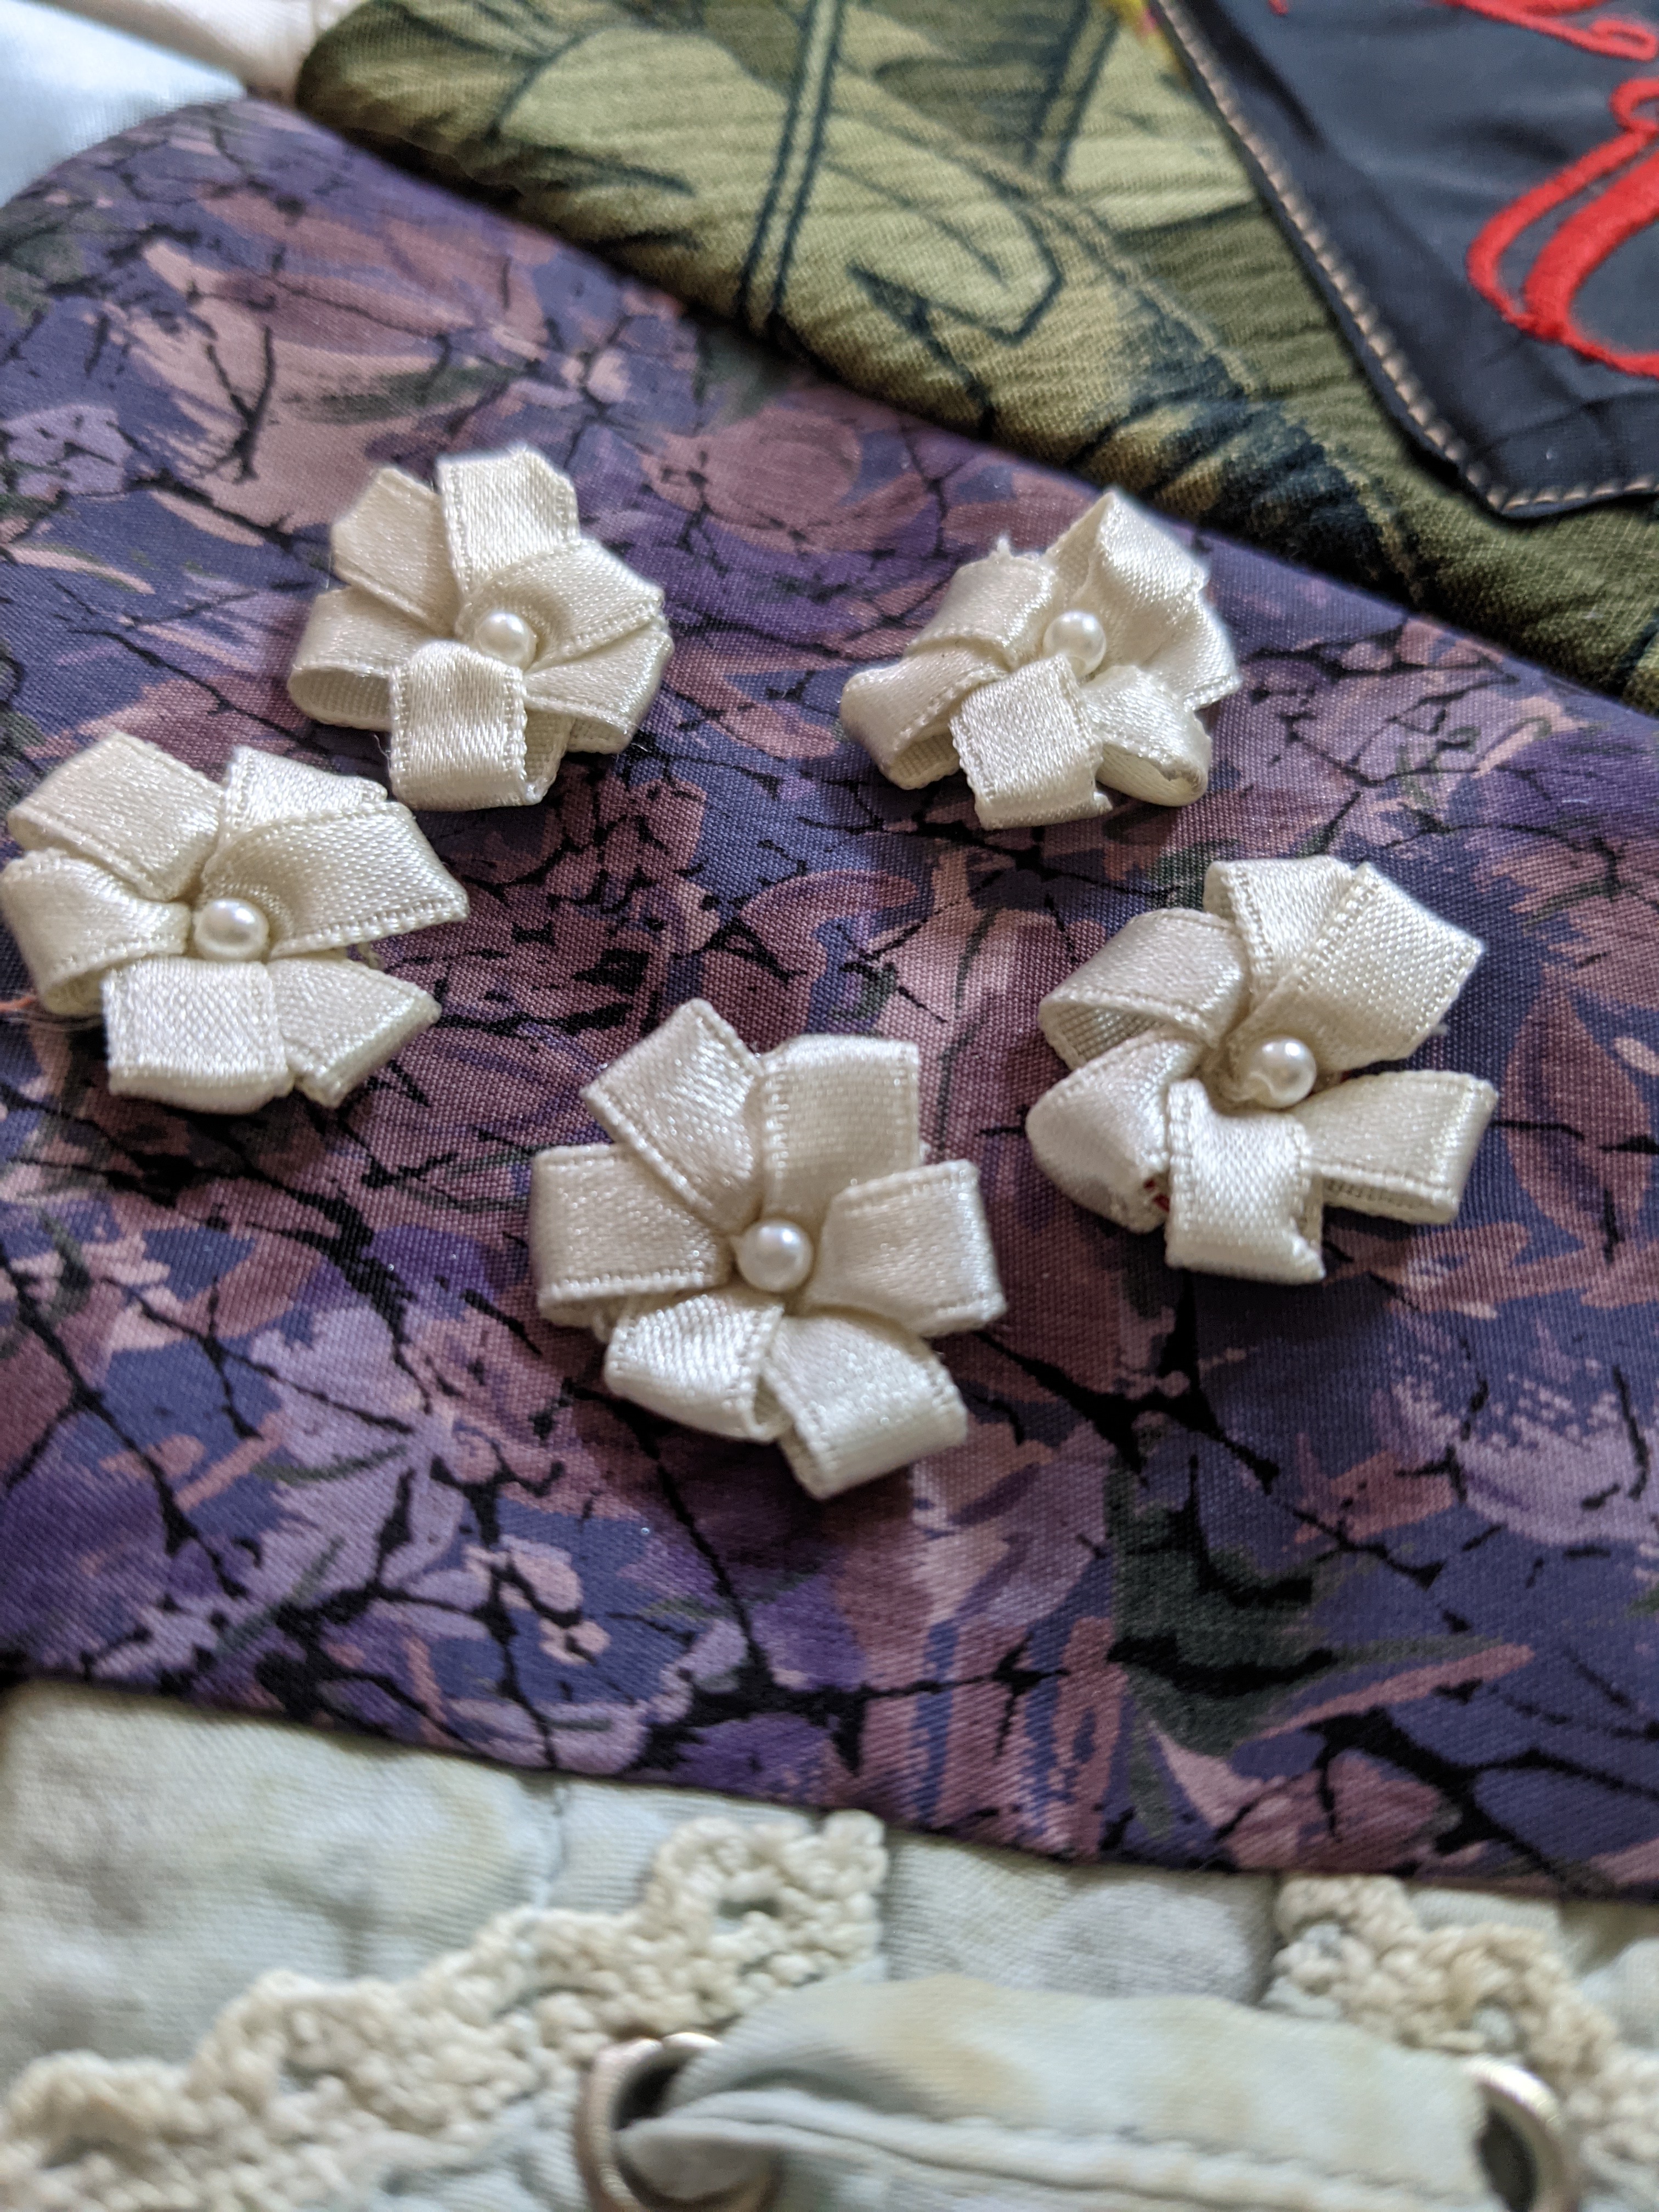
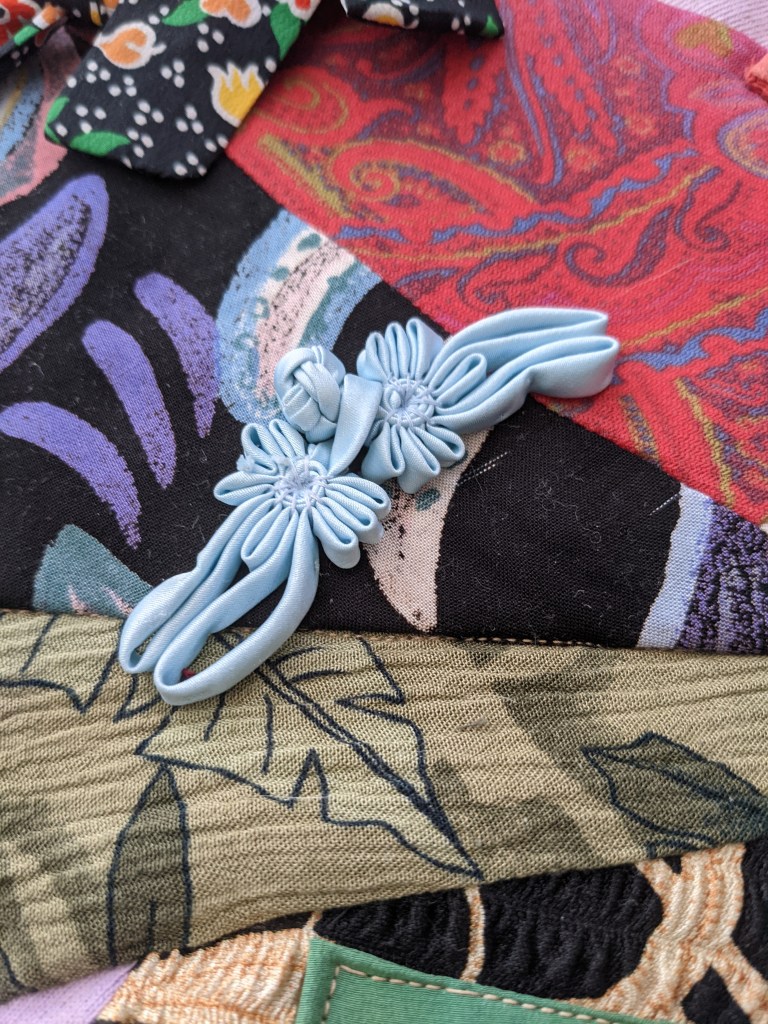
These were the buttons of the shirt seen in the background of the picture below 🙂These ribbon flowers were already part of a sweater, so I extracted them from the sweater and sewed them on! Cute little fastener from the leg of pajama pants
My cousin wanted to feature her mom’s beautifully hand painted wedding dress, so I appliqued one of the main flowers on the middle block and on the back of the quilt. I did simple stitch in the ditch quilting, since the top was already very busy.
I used jean pants pockets to allow my cousin to hang up the quilt if she ever chooses.