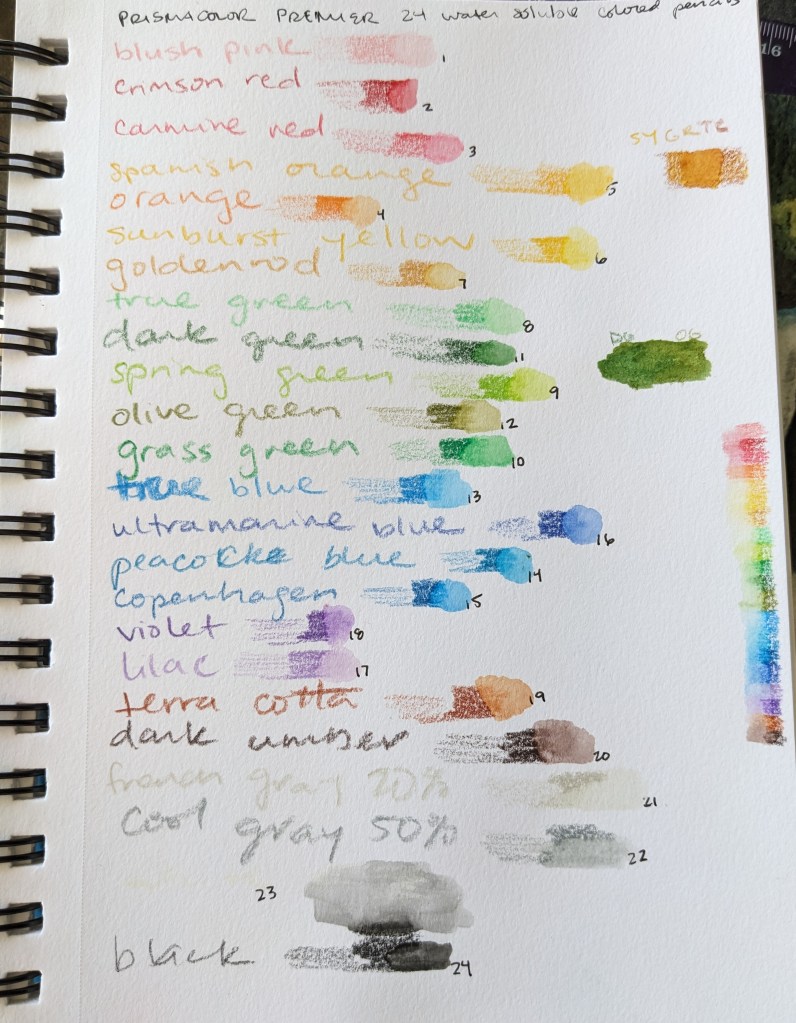
Ah, weaving. One of the last textile arts on my learn list. 🙂 Weaving is all about patterns. And I like playing with the color blending with different patterns, and it also satisfies my mathematical side in a similar way to quilting. It’s a grid, but it’s a soft, colorful, fun grid. 🙂
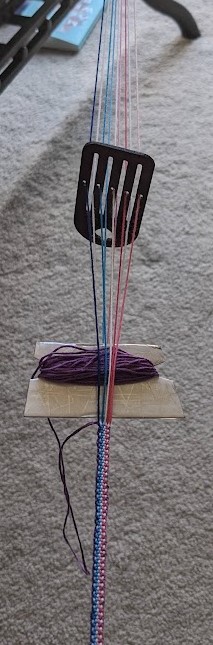
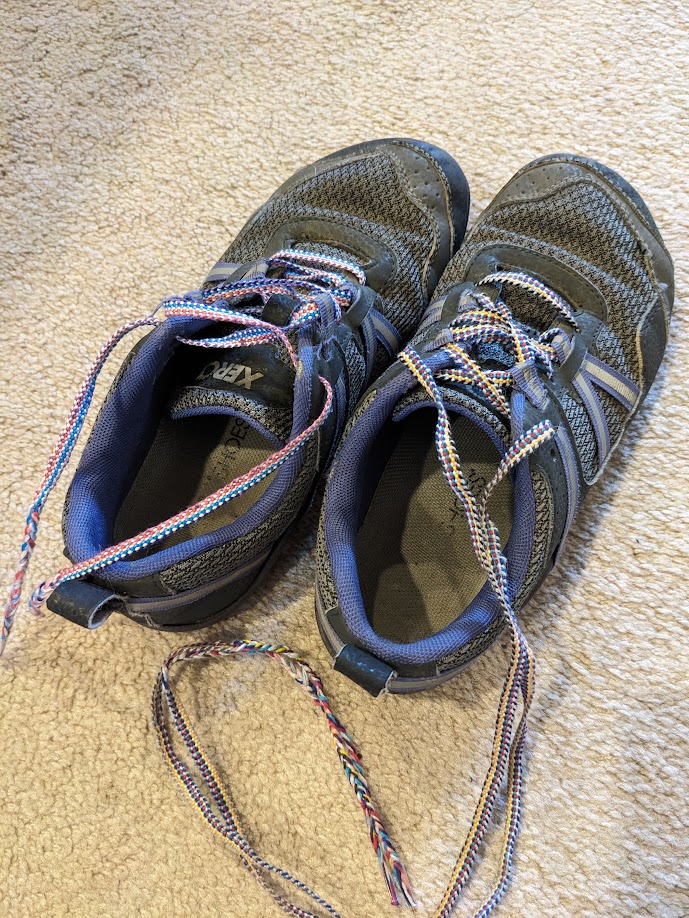
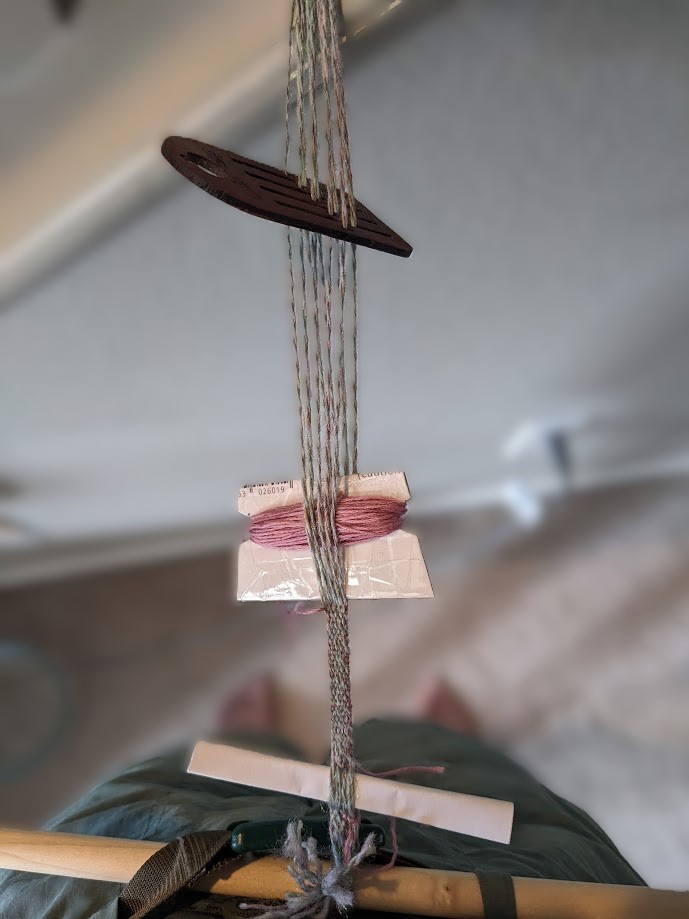
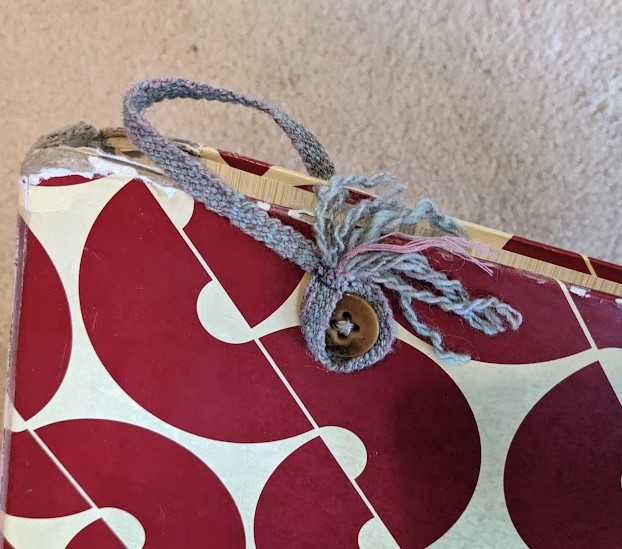
I started small – backstrap rigid heddle and a hexagon loom. I saw this video about band weaving and just couldn’t get it out of my head. So I made some shoelaces and a little strap for my music binder to help me hold it open.
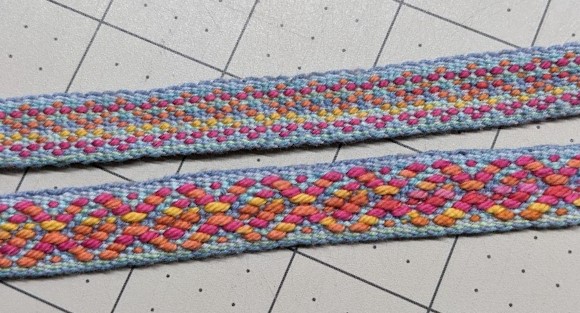
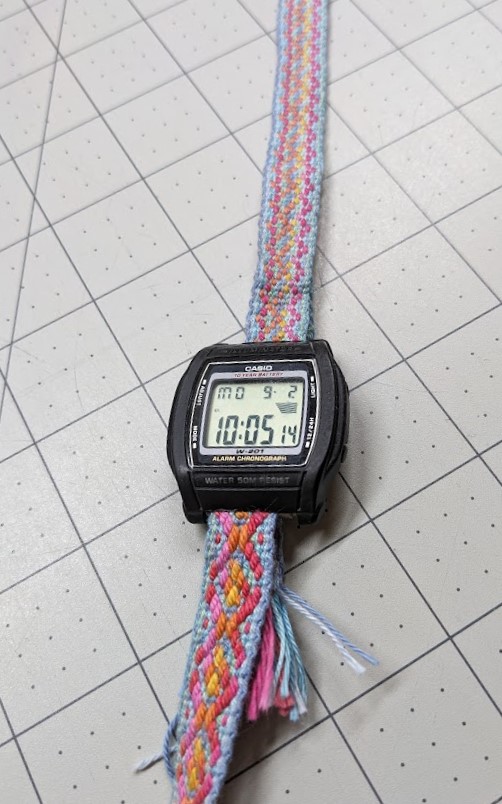
And then I broke my watch strap and I was like… wait, I could weave myself a new one.
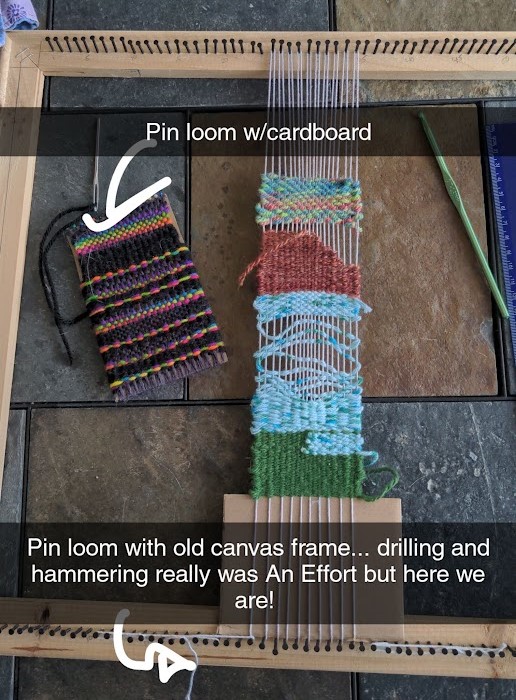
And of course, made my own little frame tapestry loom so I could start doing larger things and testing this whole thing out (to see if I wanted to invest in an upgrade).
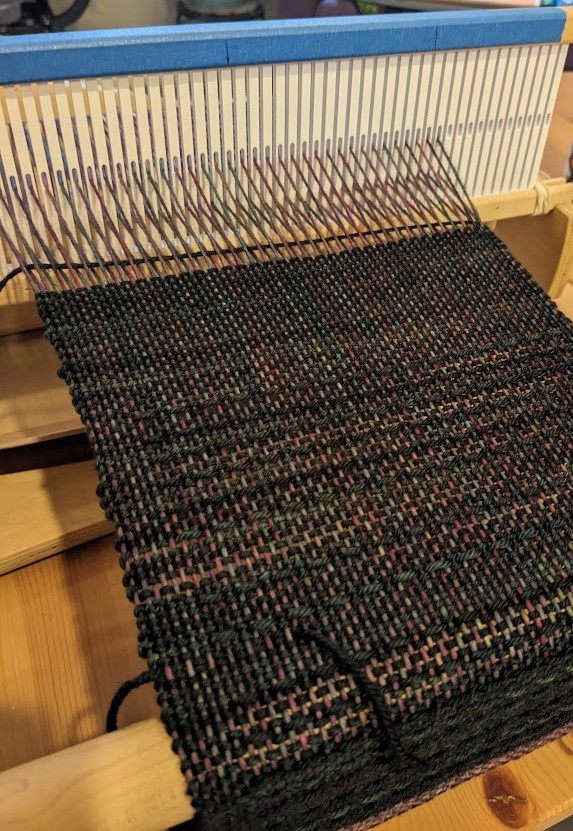
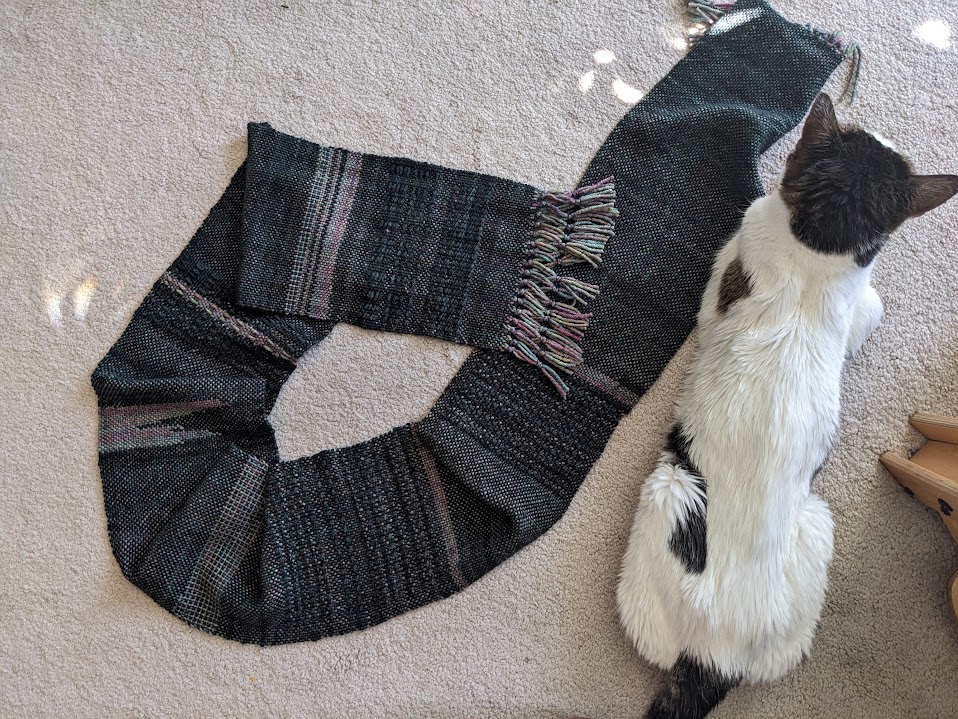
I ended up taking a weaving class to see what a different loom would be, and to make a bigger project – we made plain weave (under over, under over) scarves on a rigid heddle loom. The heddle has holes and slots in it, and you move the heddle up and down to lift and lower the threads in the holes. The threads in the slots stay at the same elevation, so as you pass the weft thread through the opening between the threads, you’re alternating going over or under each set of threads.
Threads in the holes are lifted, weft is passed under the hole-threads and over the slot-threads. When the heddle is moved down, the hole-threads go down, and the weft passes over the hole-threads and under the slot-threads.
I used the opportunity of having a rigid heddle loom in my house for a week to do some additional weaving, including the tapestry weaving for the Teton Extravaganza. It was a wonderful proof of concept and convinced me I would really enjoy a loom with more abilities.
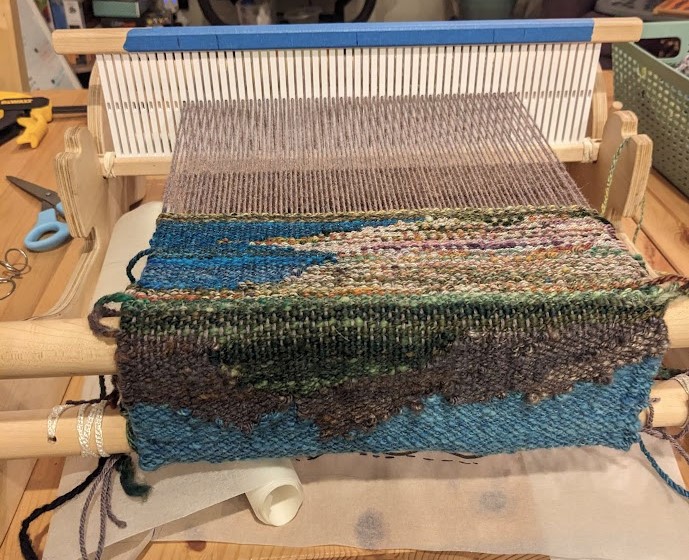
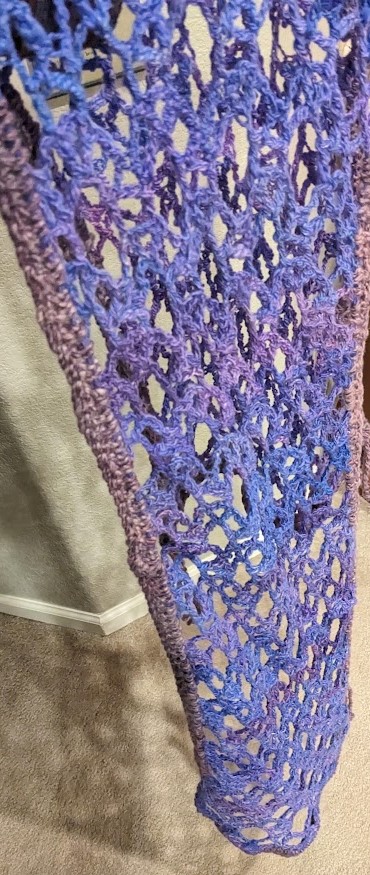
Tapestry weaving on a rigid heddle loom – totally possible and a huge upgrade from the frame loom
Late 2023 I was in a yarn store with a friend, and they had “learn to spin” kits with a drop spindle on a table display. She gestured to me and said “look, you could learn how to spin!” and I said, immediately, “I DON’T NEED ANOTHER CRAFT!!!!”
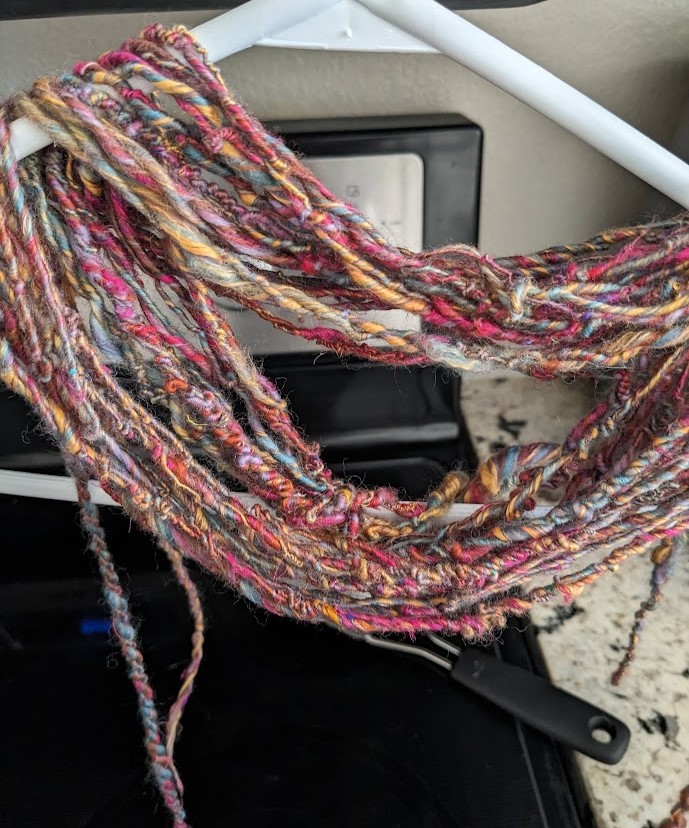
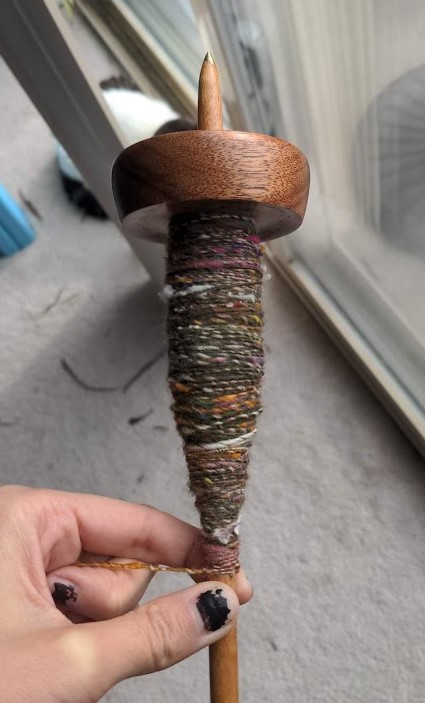
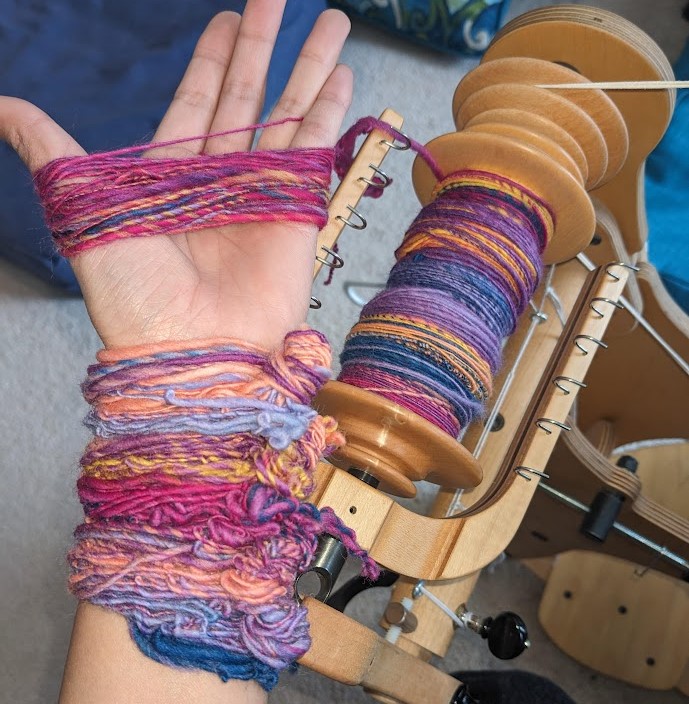
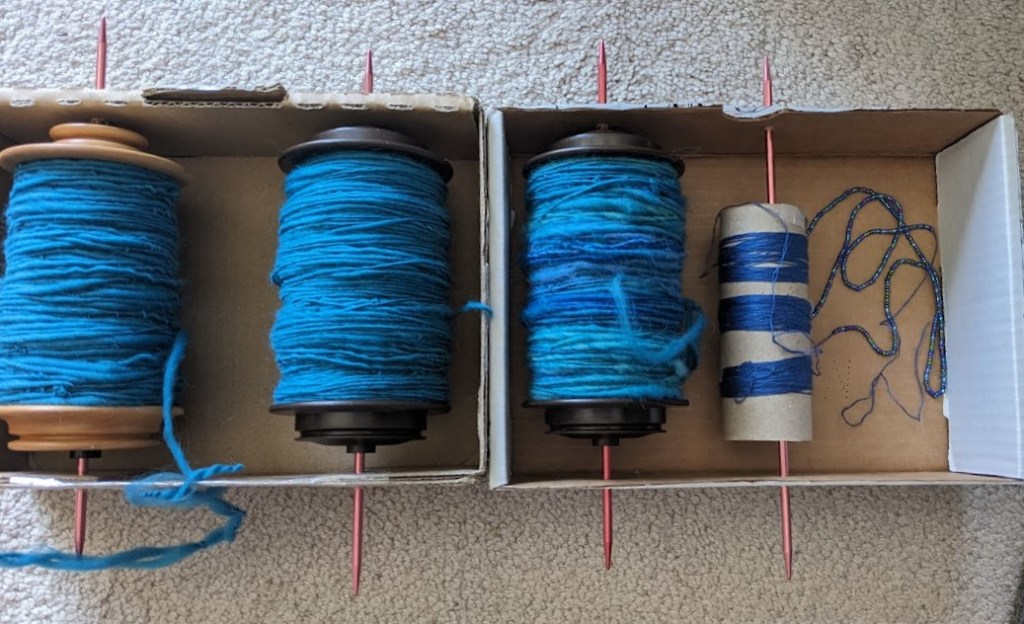
Yeah so I have four spindles, a spinning wheel, and I’ve completed whole projects with my handspun yarn ❤
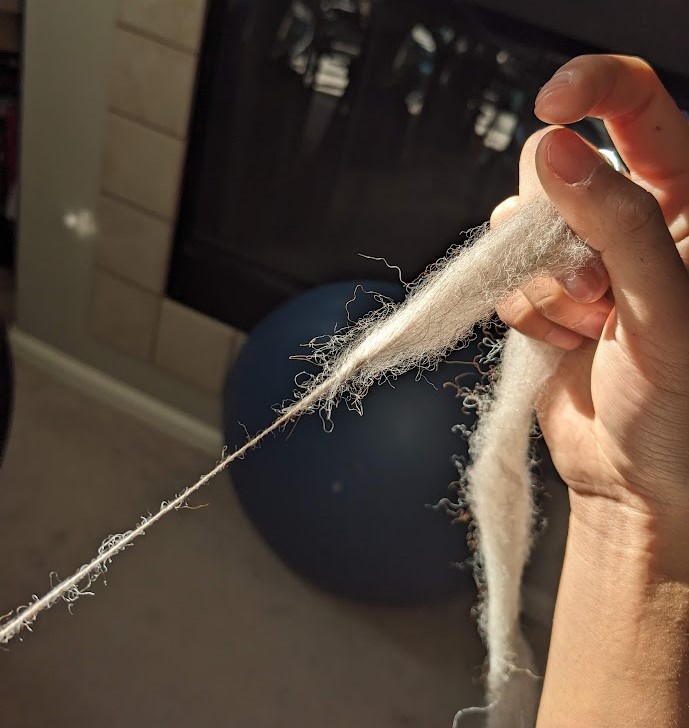
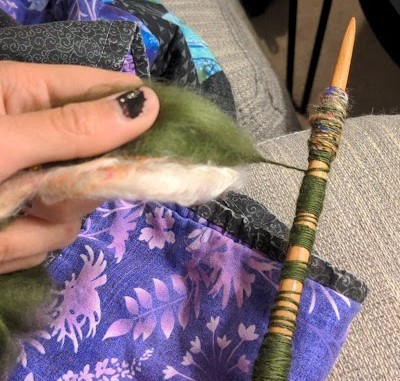
Spinning yarn is simply… simple. It’s putting twist in some strands of fiber, and holding that twist “energy” in the yarn. And it’s ancient. We’ve been spinning as long as there have been nets to hold and trap things, clothes to wear, and bags to weave. I find spinning with the spindle to be the ultimate, original fidget spinner (literally), and with a bonus that I’ve created something! It’s a great hand activity for podcasts and audio media.
Twist (left) travels up to the fiber (right)
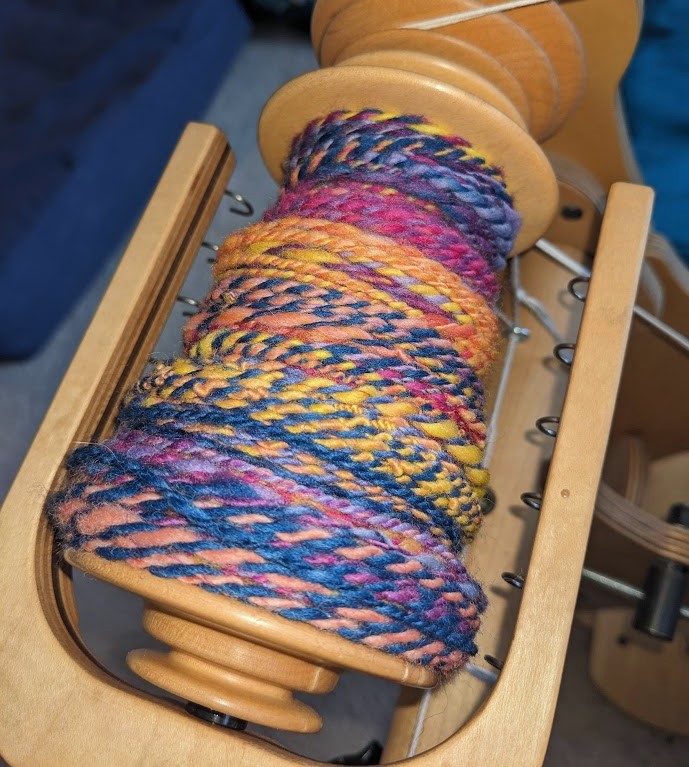
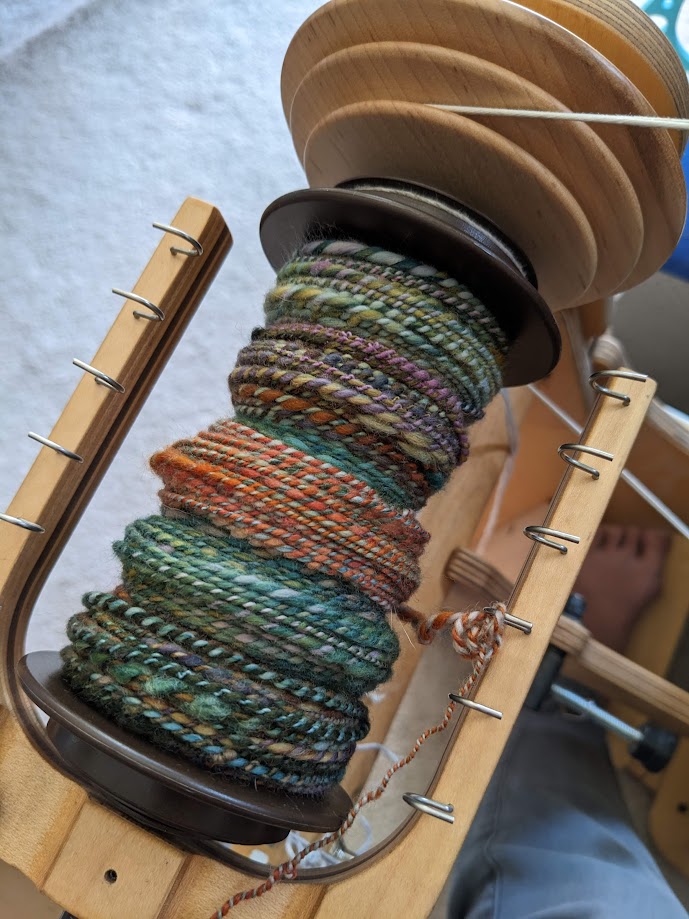
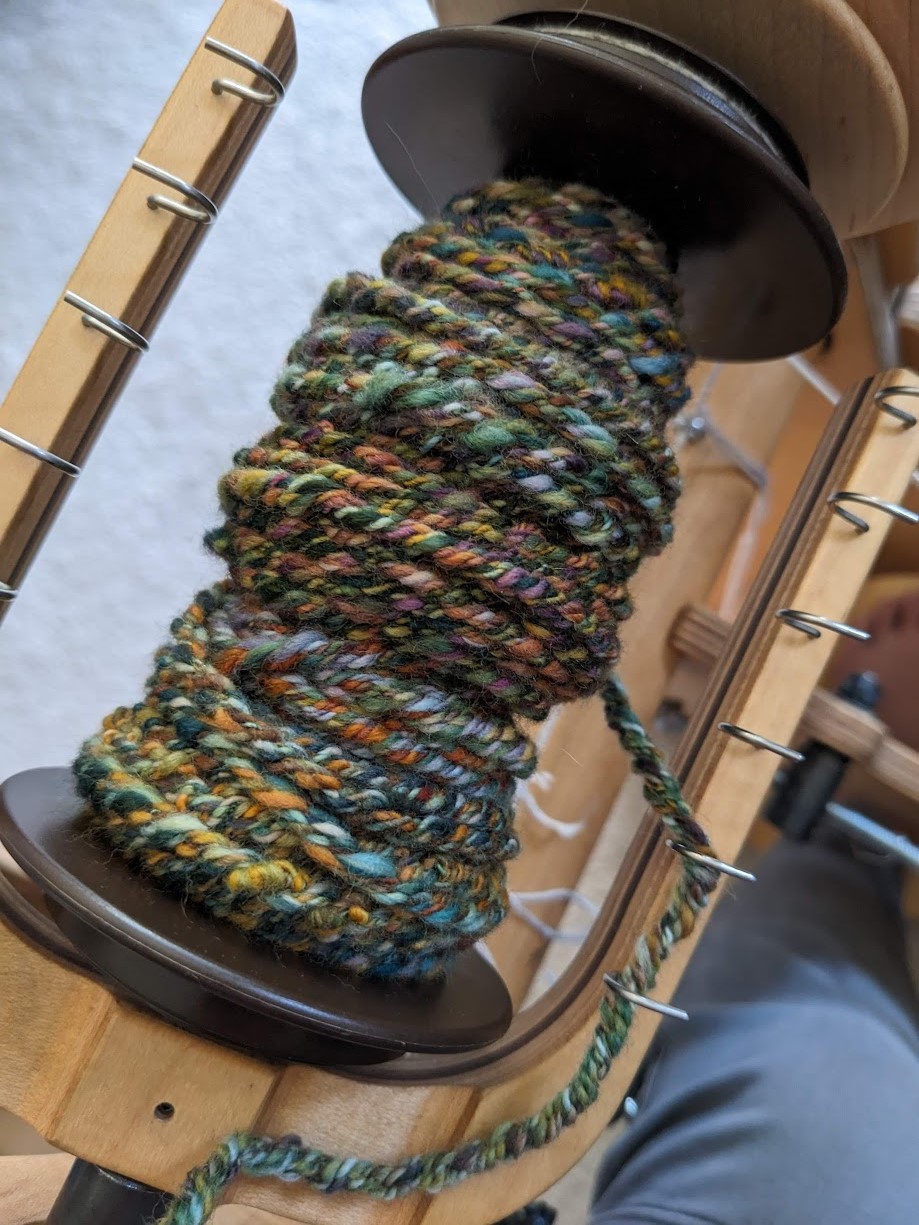
I find the color blending is like doing watercolor “wet on wet” – you can have plans, but the medium itself executes the plan and introduces beautiful randomness that I couldn’t have made myself. This is especially true when doing a two-ply yarn – I spin one long string and (systematically) fold it in half, not knowing what the middle is going to look like at all!
Plus, I can make a lot of different textures – wiry, fluffy, thick, thin, varied, consistent… just a lot of experimentation and fun.
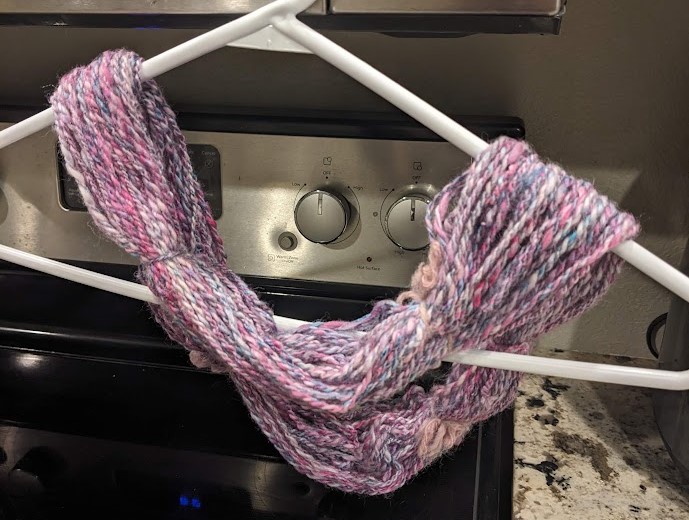
Fluffy yarn from my early spinning days
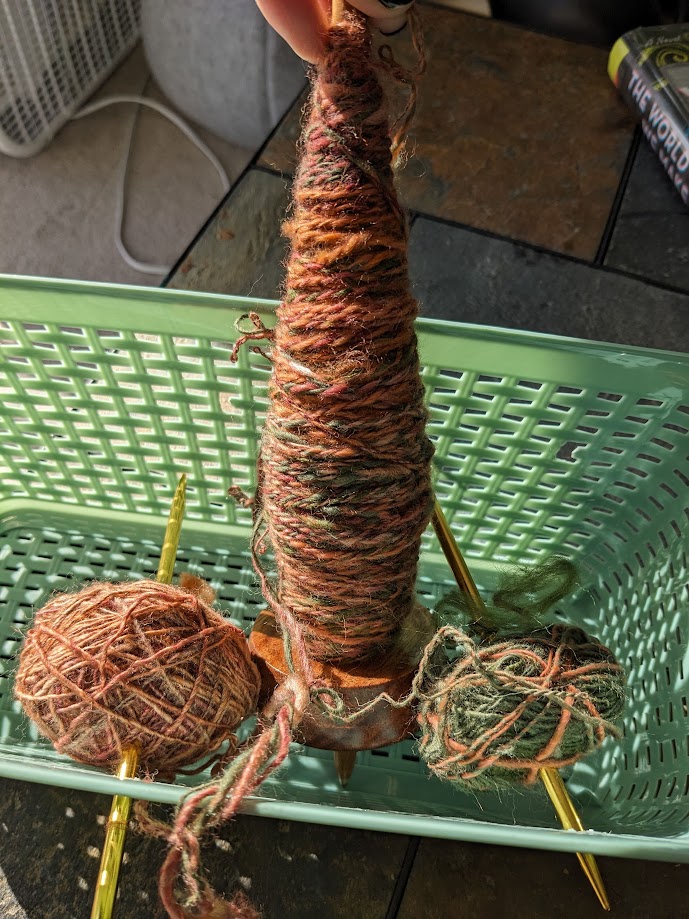
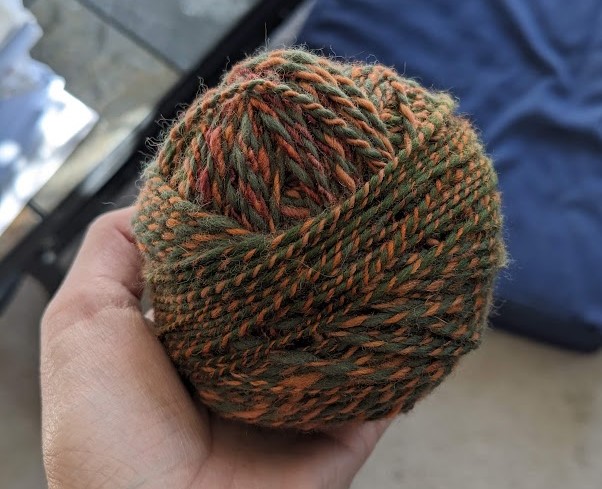
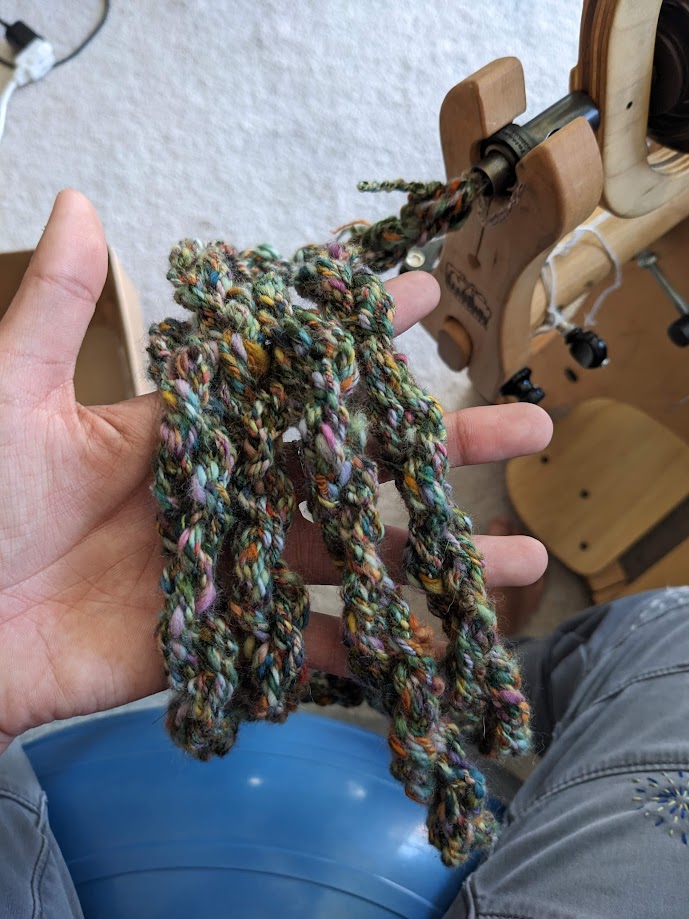
I plied this yarn a bunch of times to make a strap for a bag 🙂 It was some leftover fiber from my Tetons Extravaganza and it was just so colorful and green/flowery that I wanted to use it in a different way.
And then I got crazy and started adding beads!! 🙂 So shiny and fun. It was kind of annoying putting all the beads on the thread, but super worth it.
Plying setup with three normal plies and beads!
And of course, making things with the yarn I make. 🙂 crochet, weaving, I have even spun yarn thin enough to embroider with.
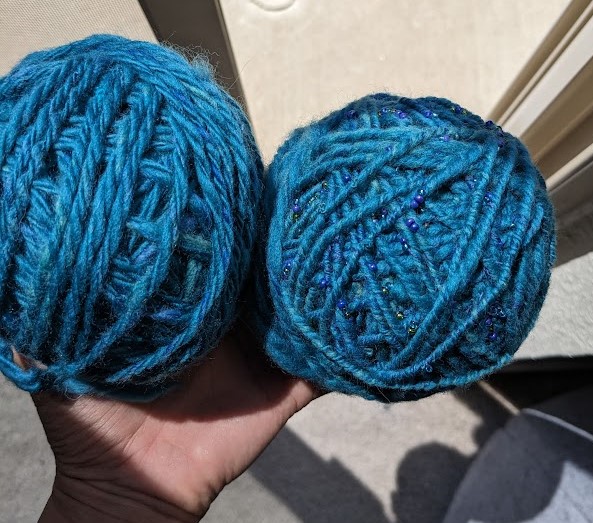
I’m figuring out how to walk around my house and spin, and my next data metric is figuring out how much yarn I can get from a given weight of fiber – which is a test of consistency, and makes the final fabric more even and less lumpy.
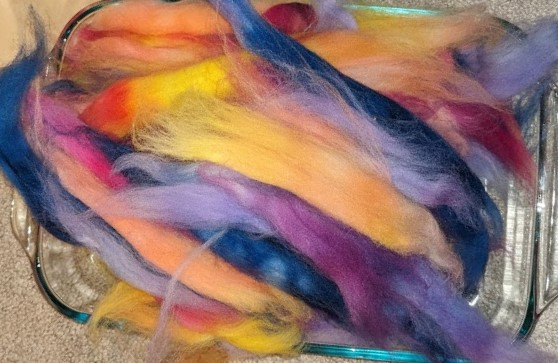
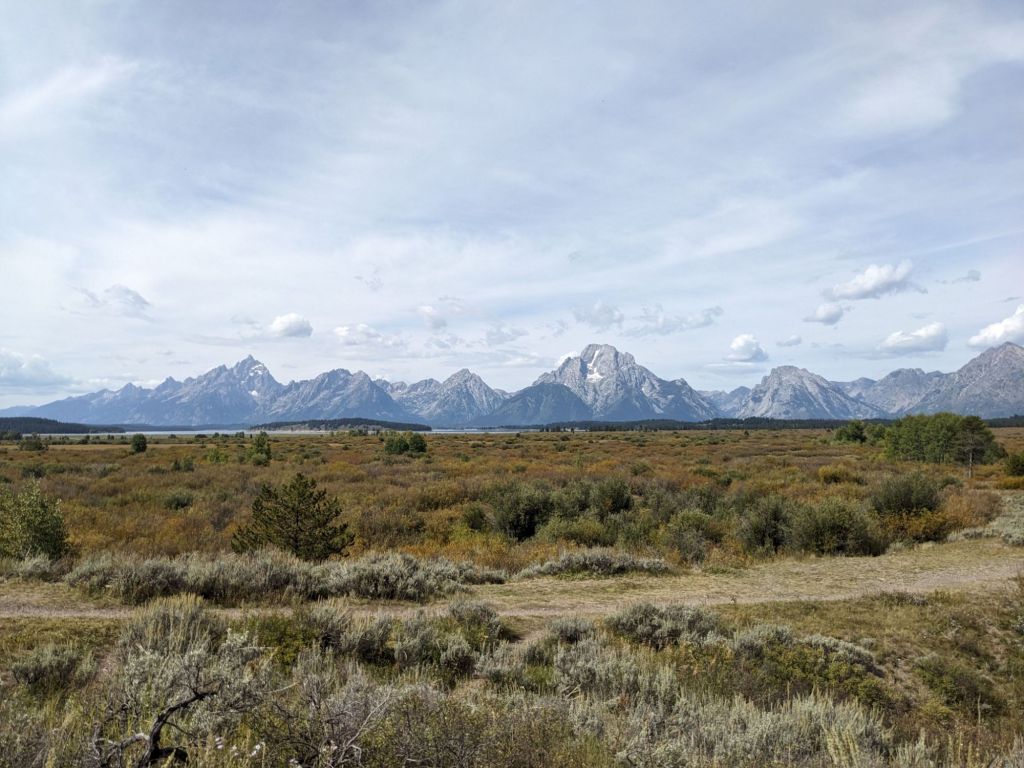
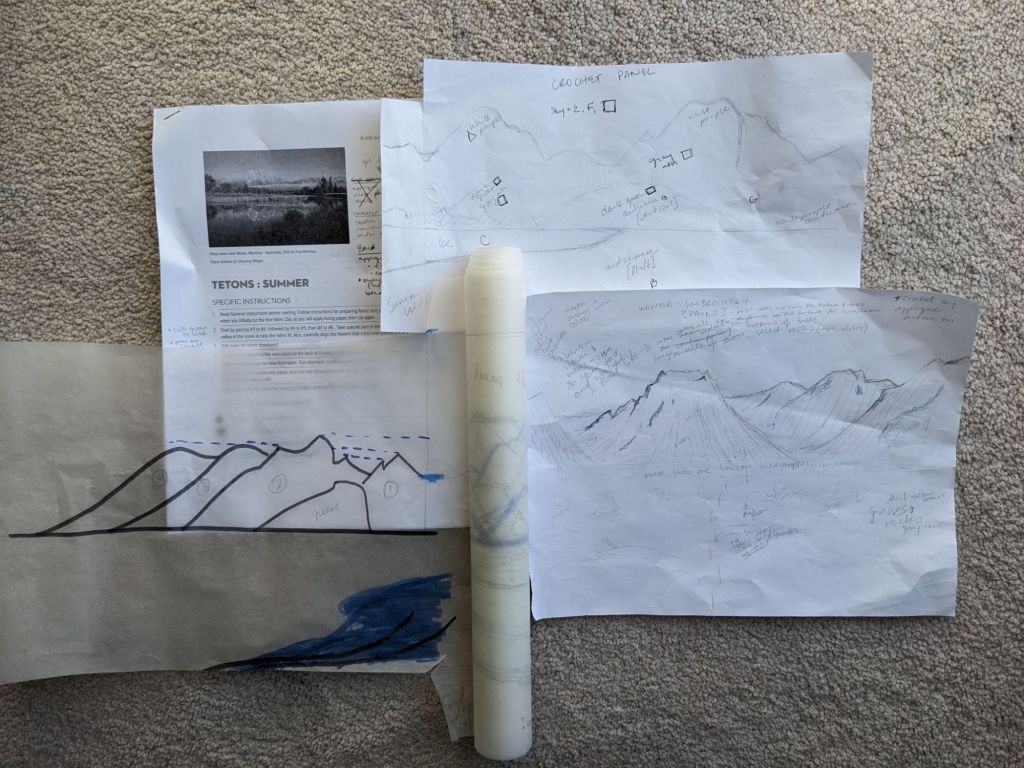
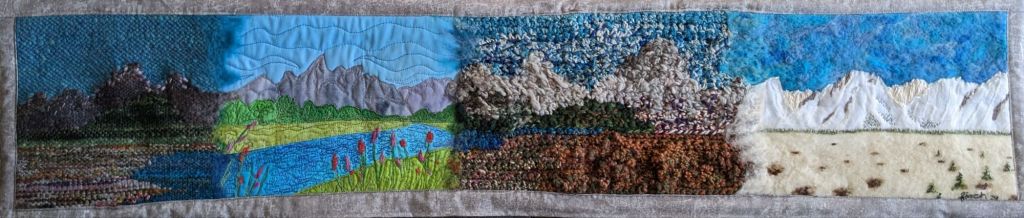
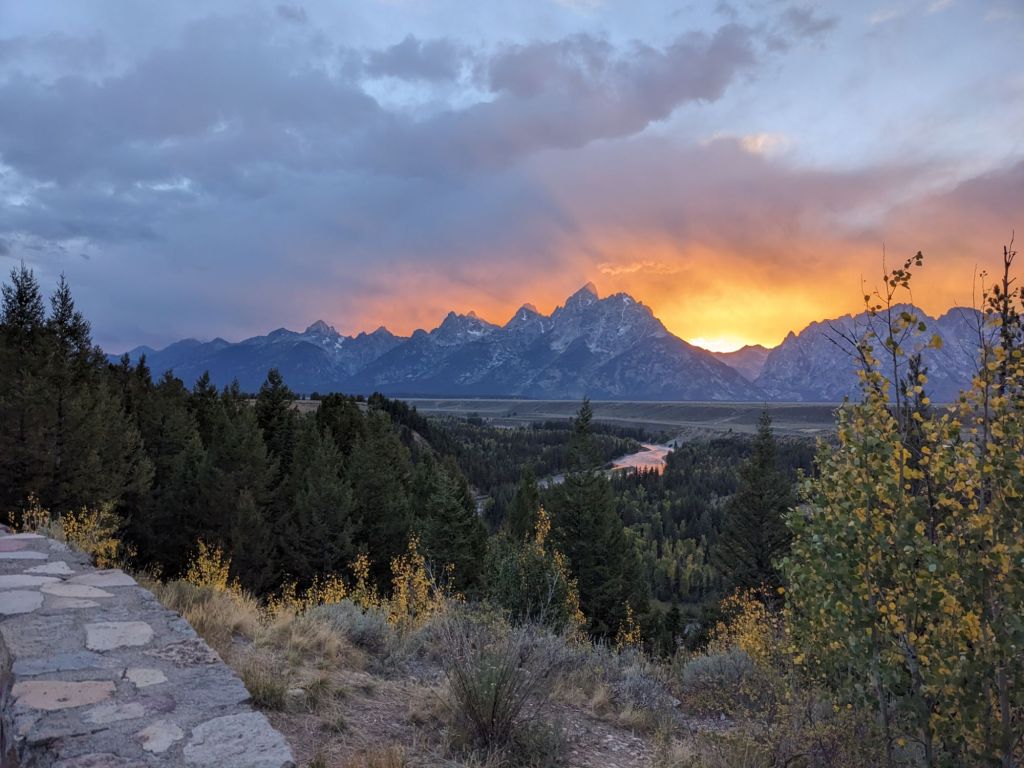
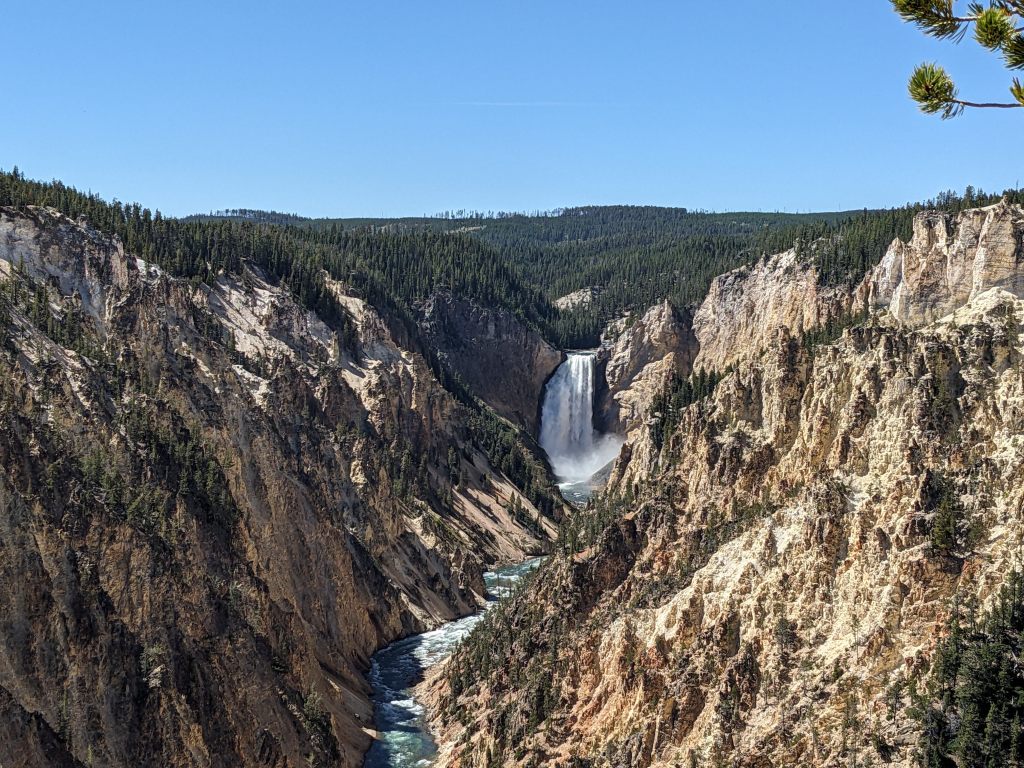
So I’ve collected a lot of skills 🙂 and after picking up a “summer” quilting kit from the Grand Tetons last year, I wanted to expand that project into a Whole Big Thing. The kit references the possibility of doing the same scene but with different fabrics for different seasons, but I wanted to do a full panorama with different peaks, depicting as much as I could of the Teton Range. I used some tracing paper to plan out panels for each of the four seasons, scaled so they’d match up with the quilted panel. My main reference photo is from Willow Flats Overlook when I visited in 2023. The perspective of the quilt is a bit different, but I kind of… made it work.
Main reference photo from Willow Flats OverlookPlans! The tracing paper rolls out into the whole panorama but having individual pieces was better while I worked.
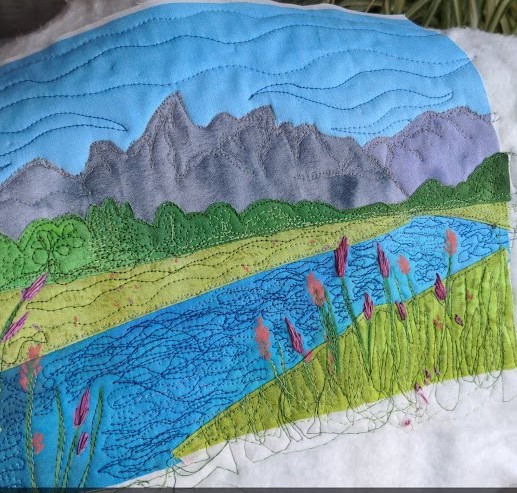
I started off with the applique quilting kit and added some free motion quilting for details. It was really fun to work on things on a smaller canvas and be able to do details without getting overwhelmed. I also added some hand embroidery for the flowers because I wanted them to pop out 🙂
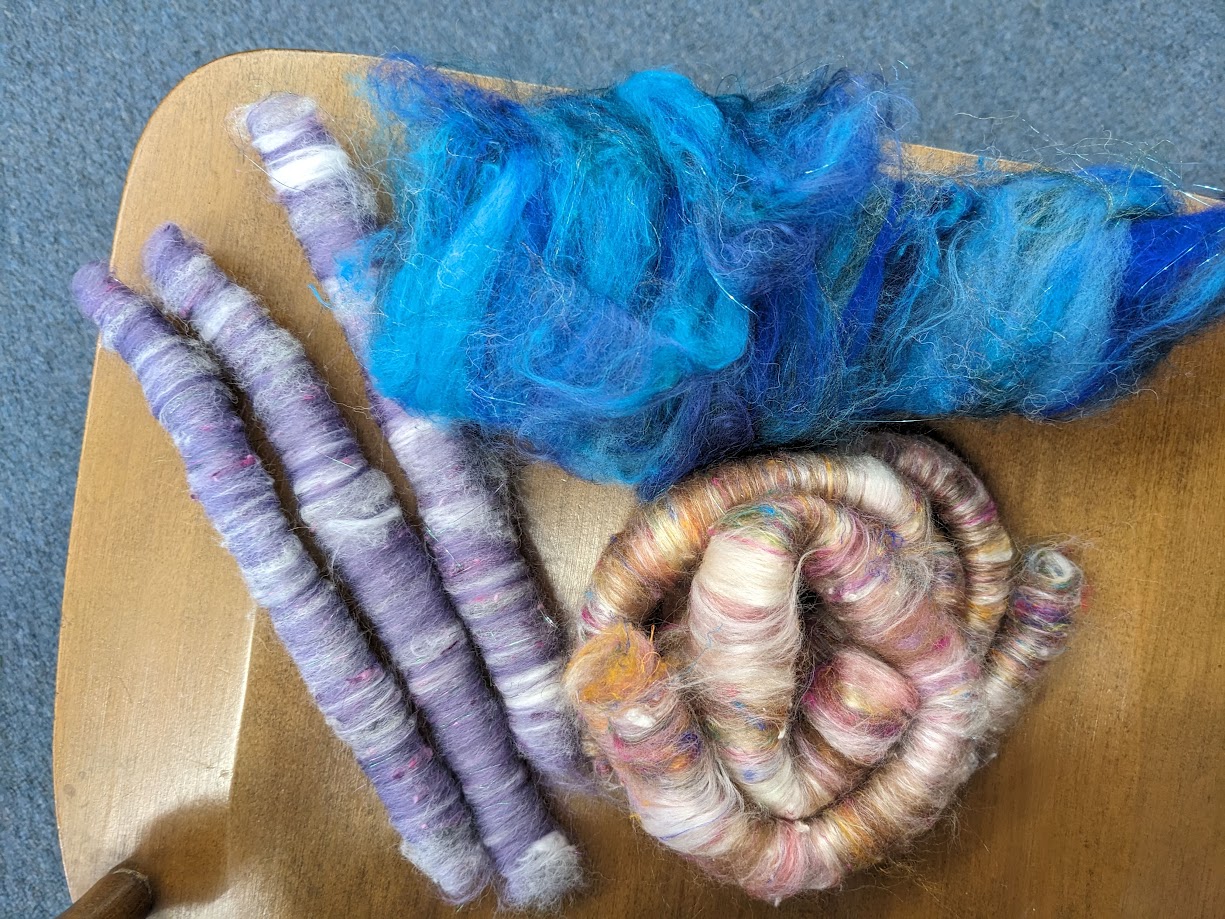
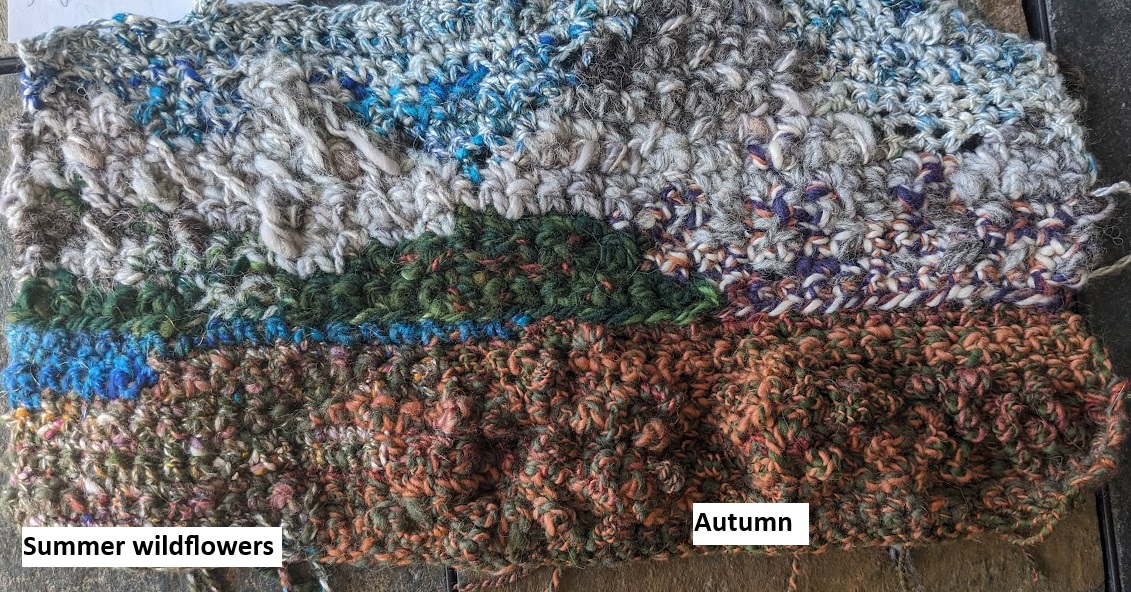
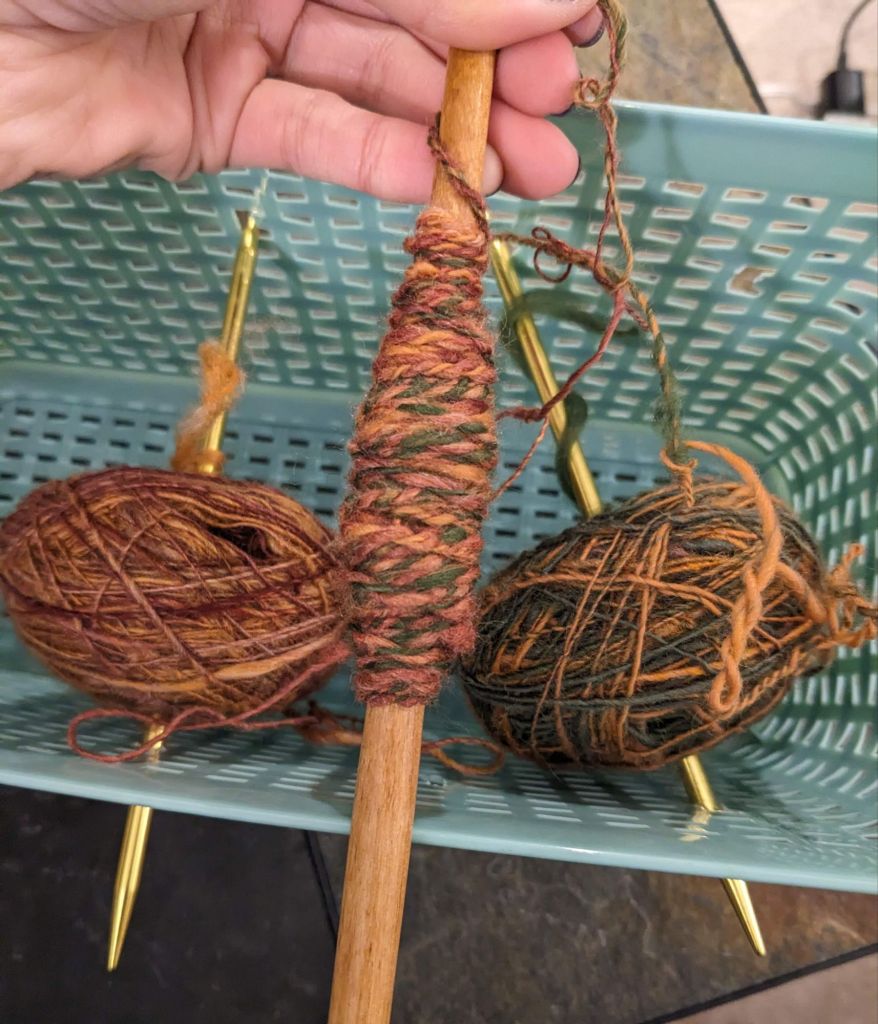
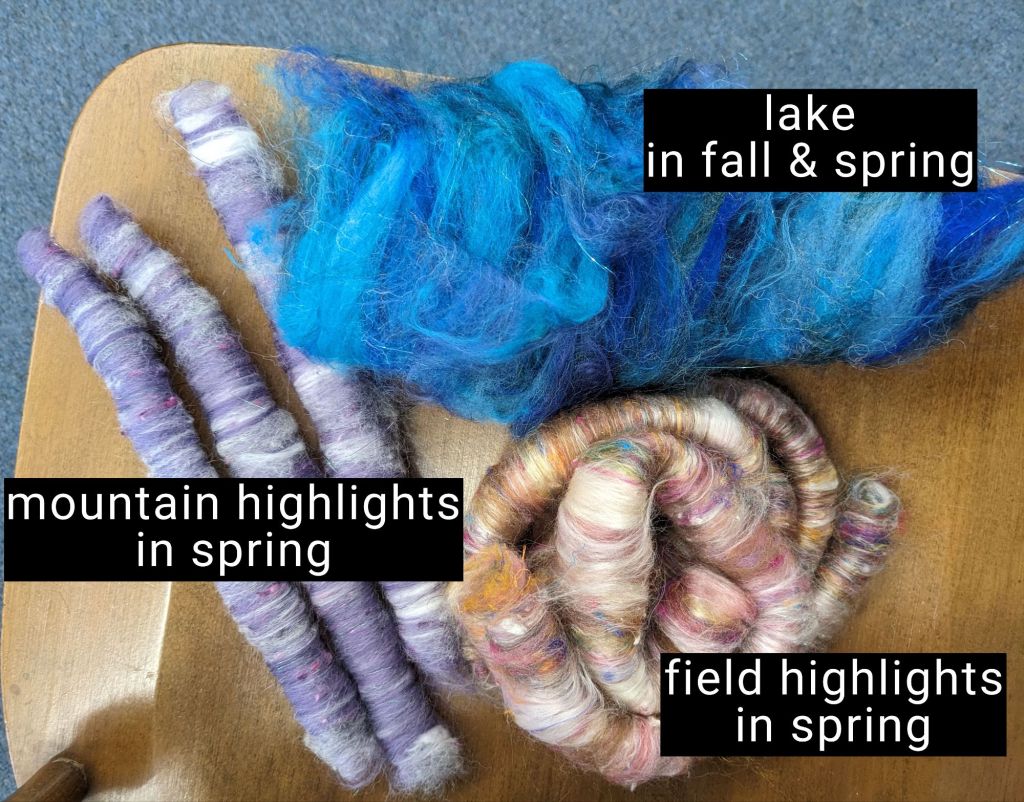
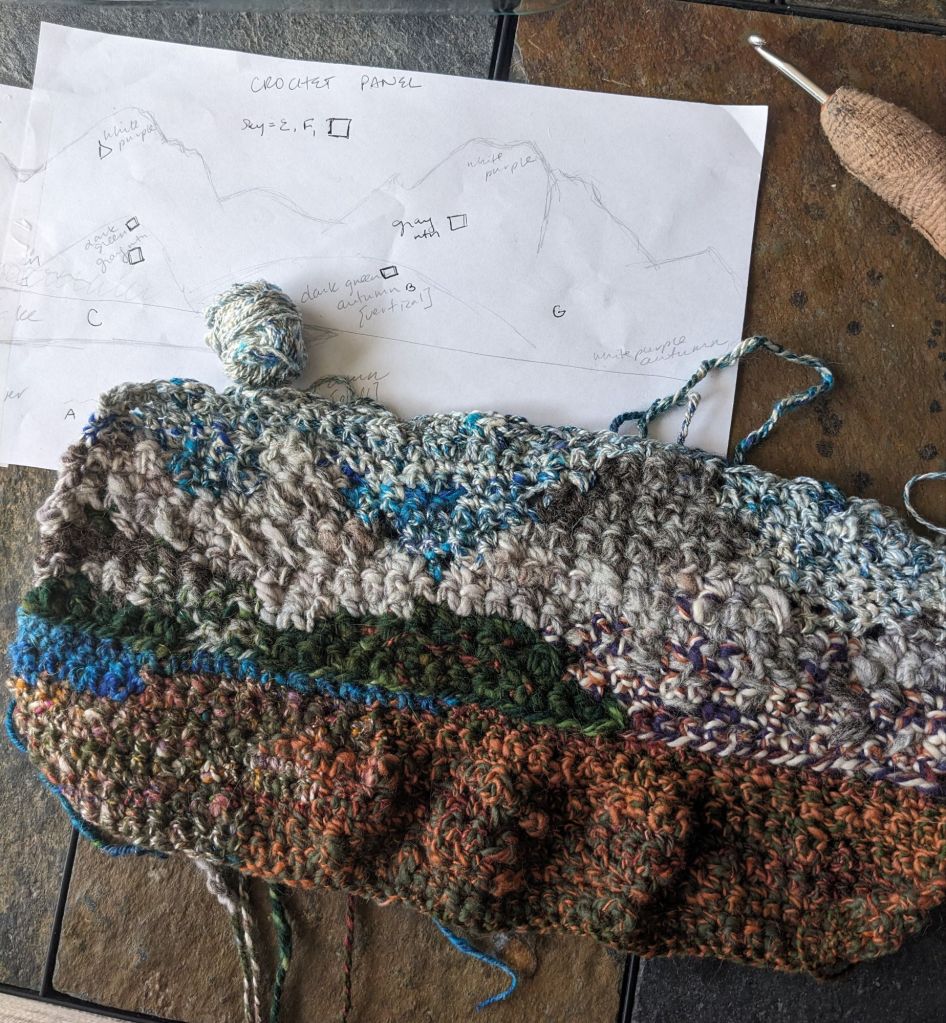
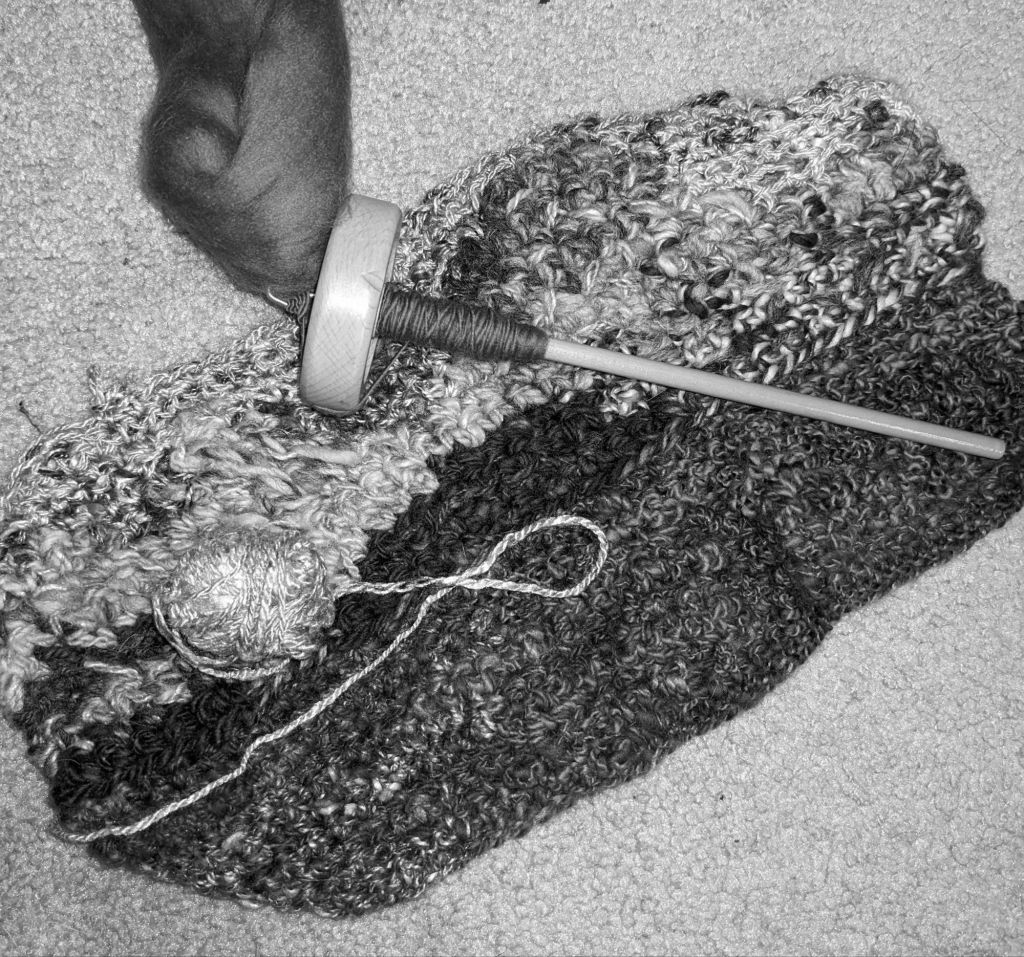
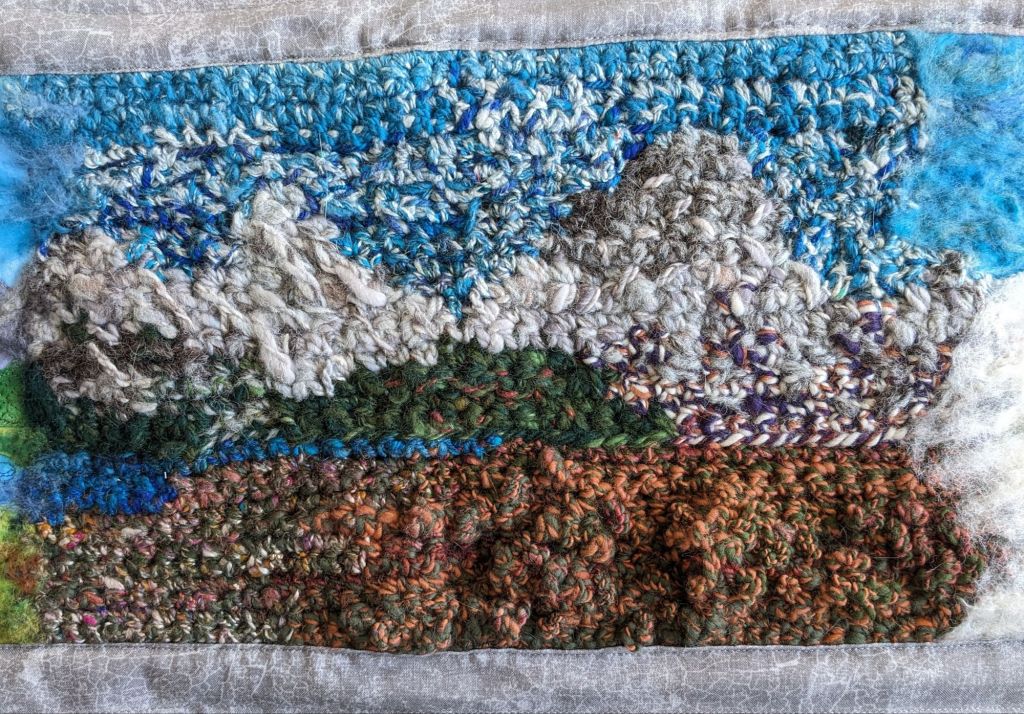
My first instinct for the next panel was to use crochet, using some funky colorwork and textured stitches. I spun up yarn for each of the different sections: sky, lake, mountains of various white and gray mixes, and autumn-y colors for the sagebrush.
a yarn I called “Autumn” 🙂
fiber blends I made at a workshop
I added some weird bumpy parts and extra stitches in the foreground to mimic the fluffy sagebrush 🙂
I struggled with getting enough contrast between the gray of the mountains and the blue of the sky, so I took a black and white picture and spun up some darker blue that I could blend into the existing sky.
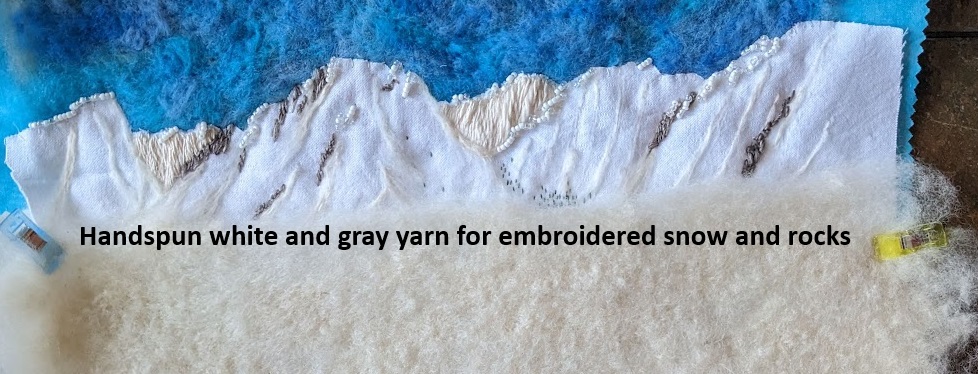
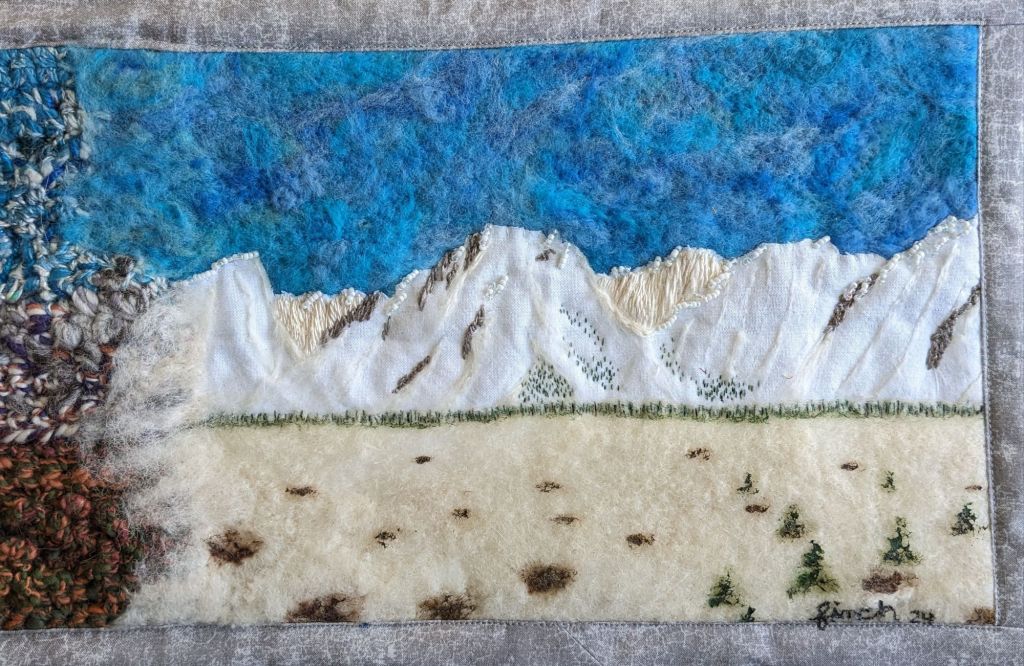
After I had summer and autumn, I struggled with what to do next. I knew I wanted an embroidery panel and a woven panel, but I wasn’t sure which should be spring and which should be winter. I talked it over with a friend and we decided that the crochet shouldn’t be next to the weaving, since they have similar textures and detail resolution. So winter was embroidery! I started by needle felting the background sky and foreground, to automatically add texture that I didn’t need to stitch. I spun some thin yarns of cream/white and rock gray, which was a fun challenge to spin thin enough and consistently enough that I could use it with a normal sized needle. I also thought some beads would be fun for the shininess of the snow 🙂
Winter embroidery in progress
I was planning to do the winter foreground details with embroidery, but I realized I wanted to incorporate paint into this project, so I used acrylic paint to add trees, bushes, and rocks. It was difficult to paint onto the felted surface because the brush strokes pick up fibers from the felt, but it was doable.
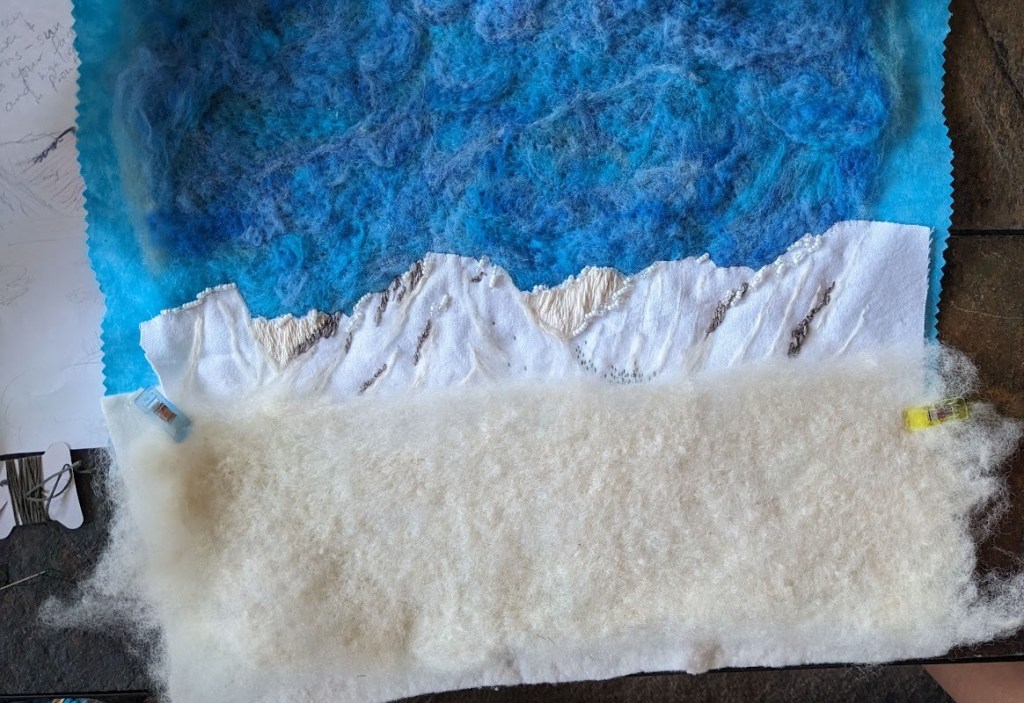
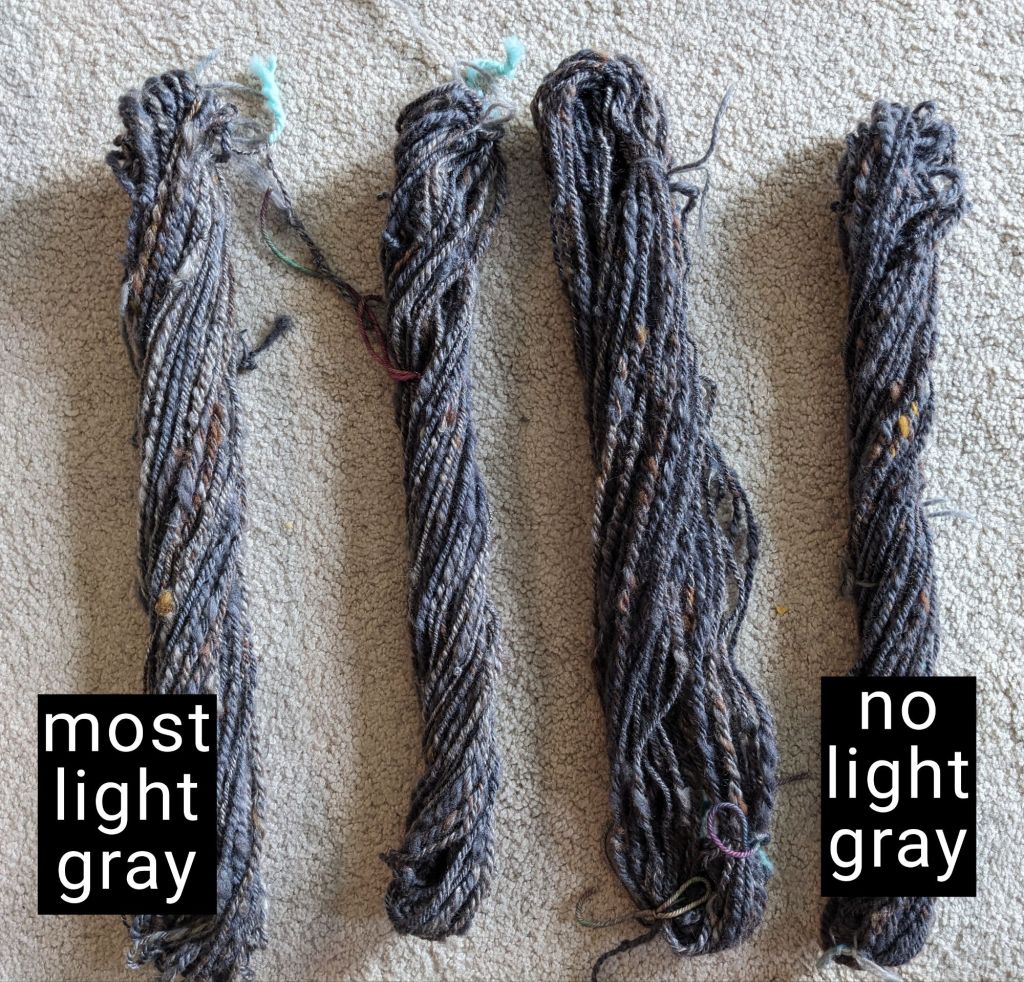
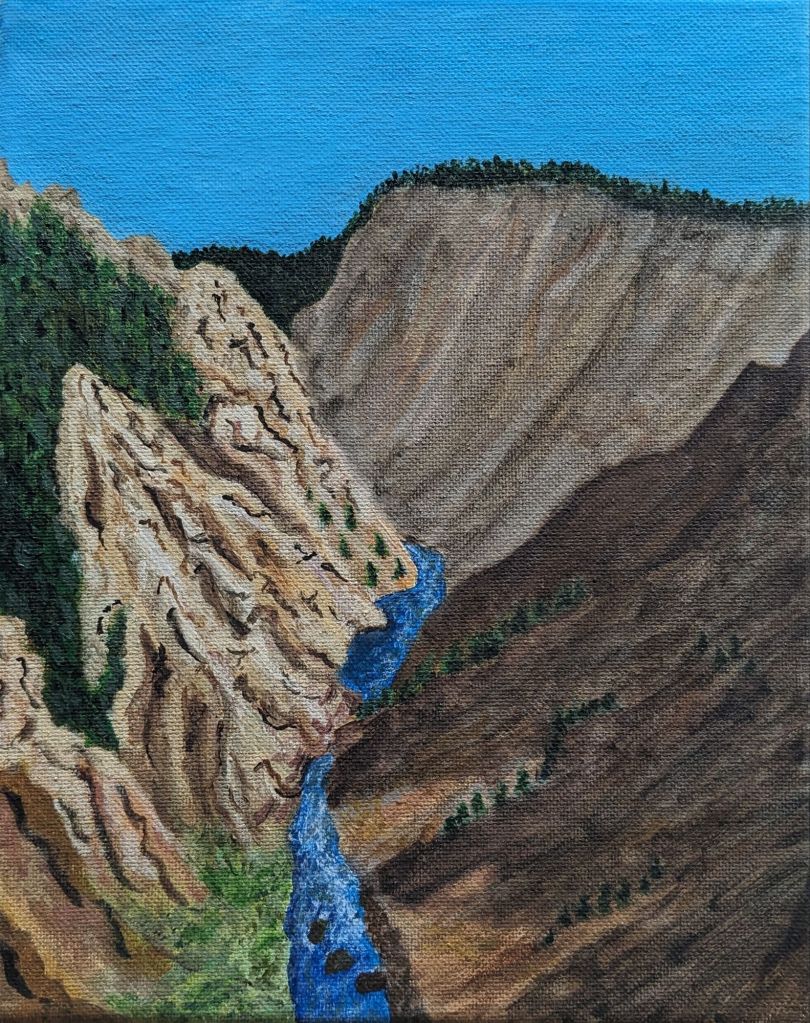
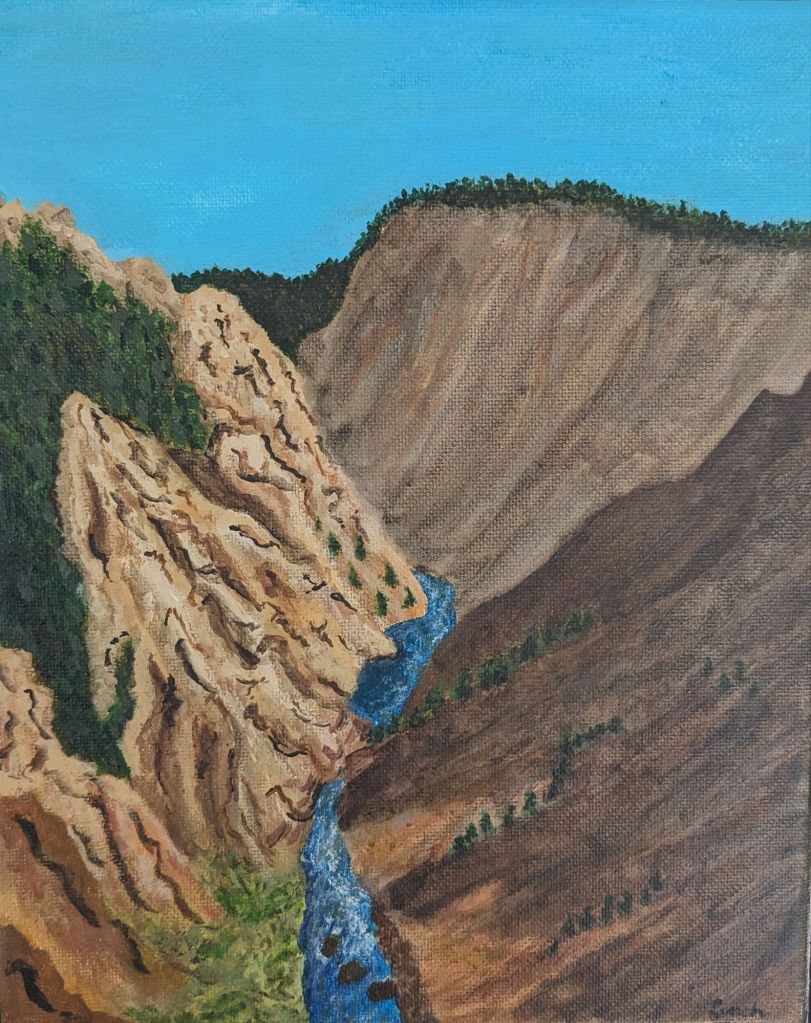
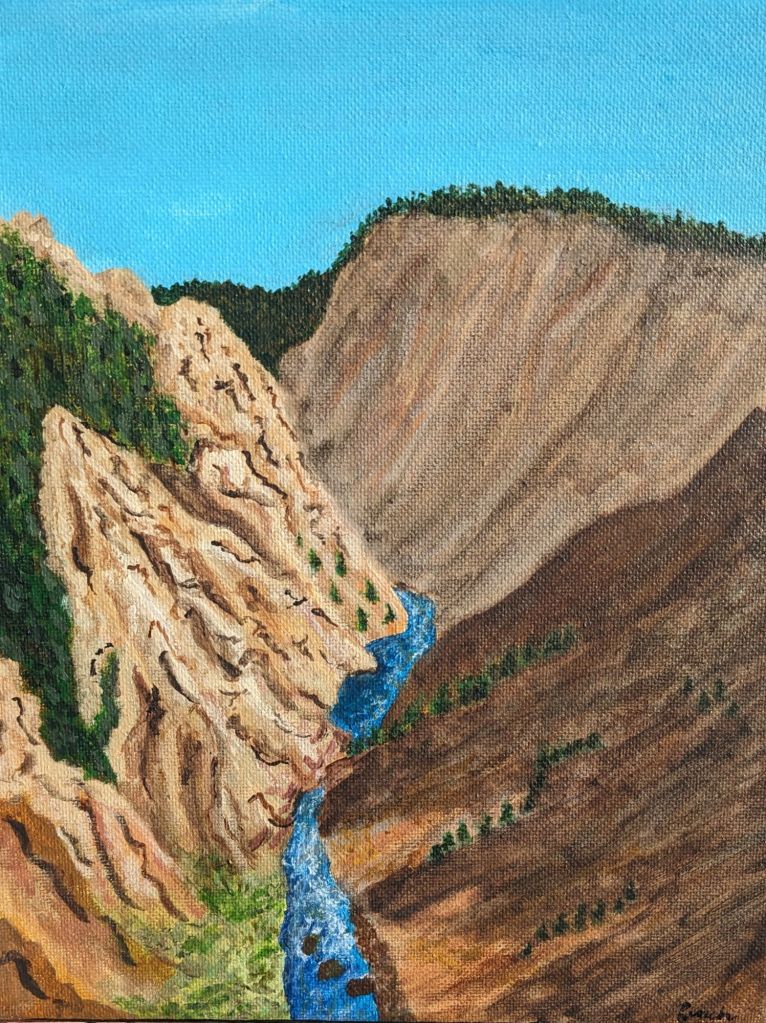
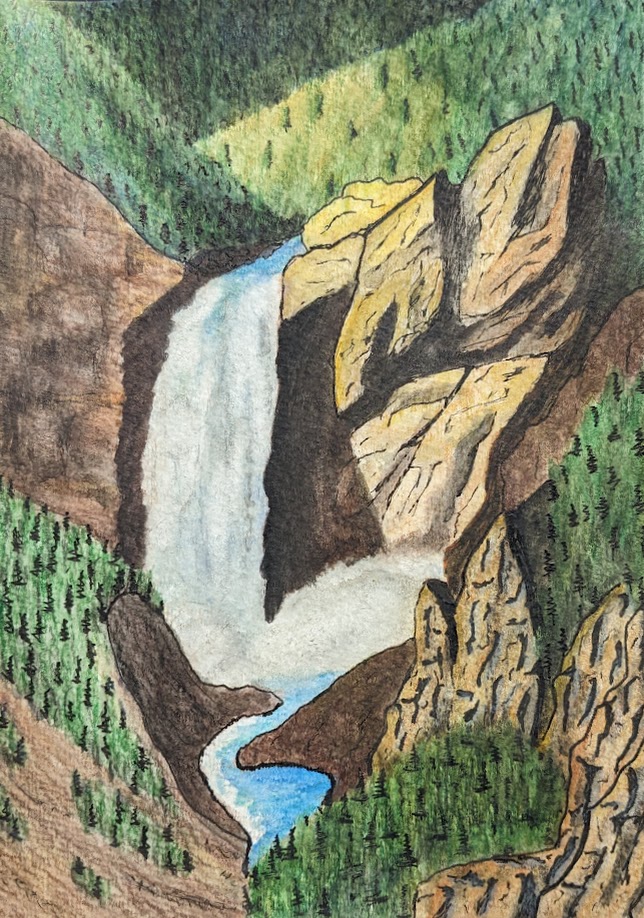
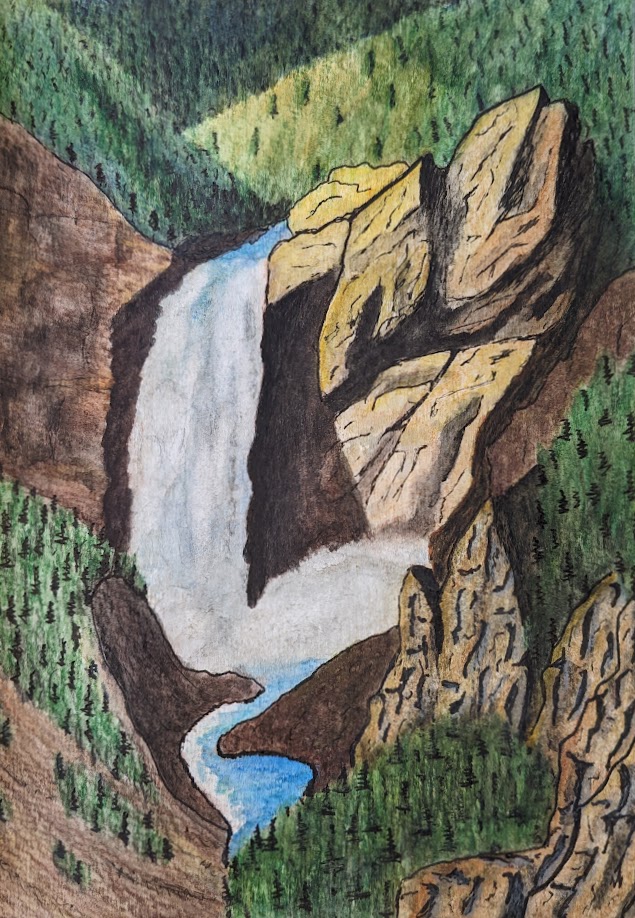
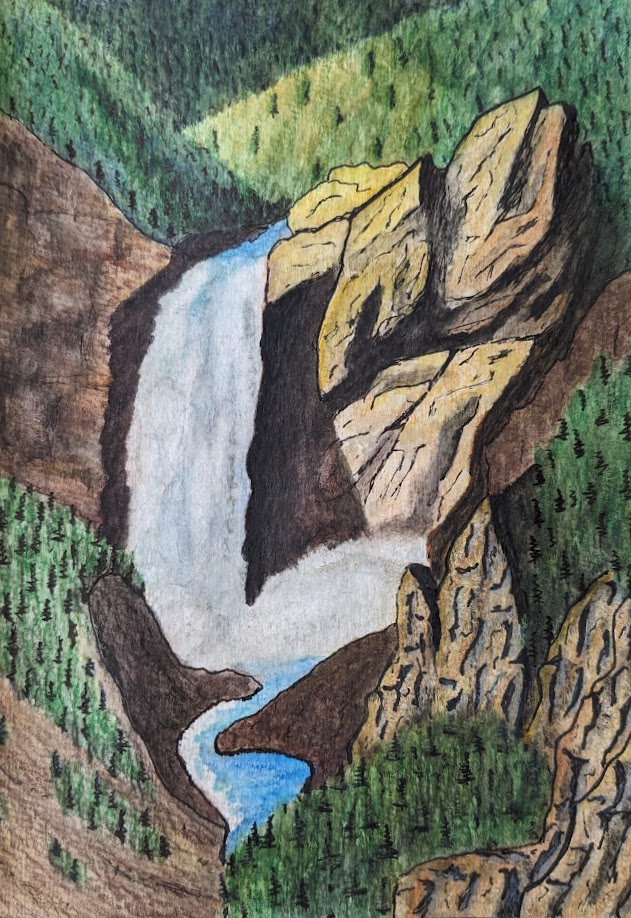
Then I needed a tapestry weaving for spring. Just like with the crochet, I only used yarns I’ve spun, and spun up a few more just for this. I had four different mountain-y layers that I wanted to represent, so I spun four different grays with graduated levels of light gray. In hindsight, I made WAY TOO MUCH, but it was fun. And now I have more mountain gray for later.
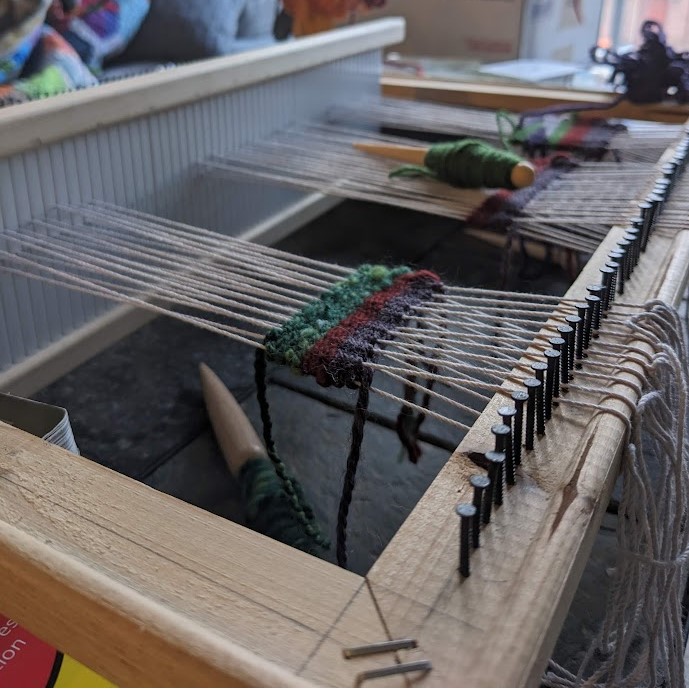
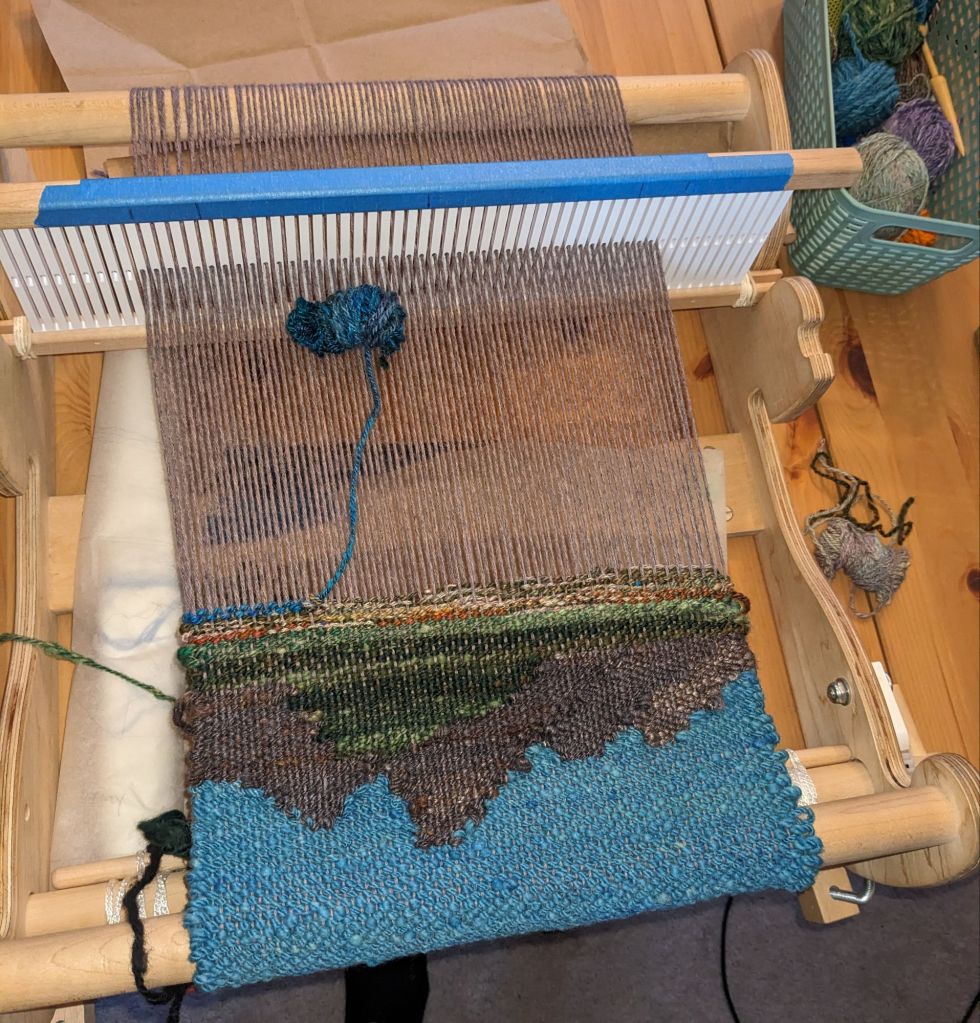
I took a weaving class where we were able to take the loom home for a week, and capitalized on this moment to (a) finish this project, and (b) see if this type of loom is useful for tapestry weaving (that’s not its primary use). It was a successful proof of concept for using this type of loom for tapestry, but I think I’m going to pursue purchasing a different kind of loom for some more flexibility and growth potential.
upside down on the loom! I wove the sky first because I knew it would be a solid weaving instead of doing a bunch of color changes… and weaving upside down made me less stressed about getting it perfect
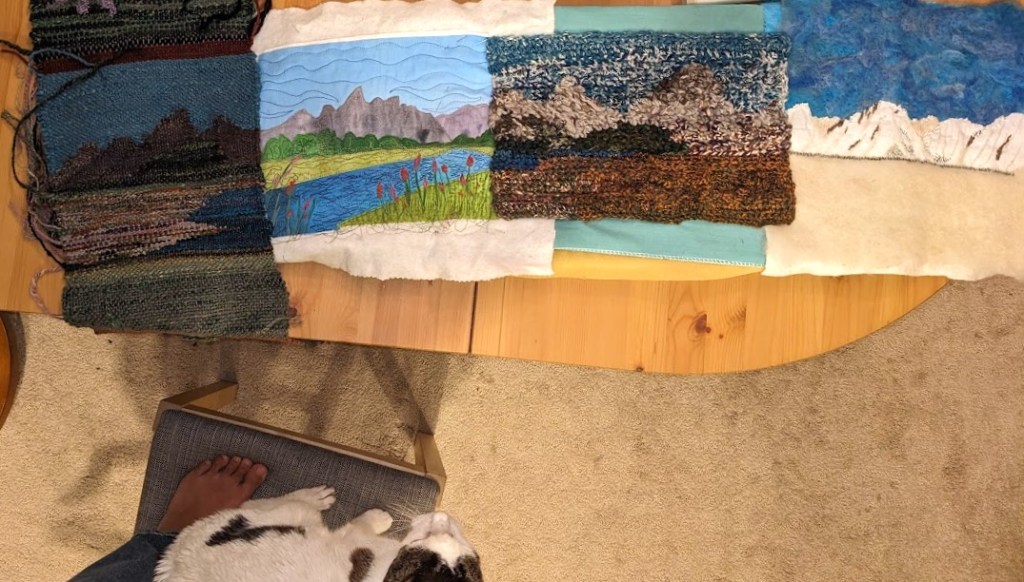
this is the first time I saw all four panels together, they’re pinned to a mini ironing board 🙂
I used some extra fiber to needle felt over the seams between the panels, and then did a border to secure everything together.
My main challenge in finishing this up was getting the crochet to sit the way I wanted it to. I ended up gluing it to some stiff scrap fabric to stabilize it, which went well…. Until I started sewing the fabric frame on. Hot glue and sewing machine needle is not a good pair. 🙂 But I took my time, learned my lesson, and got it done.
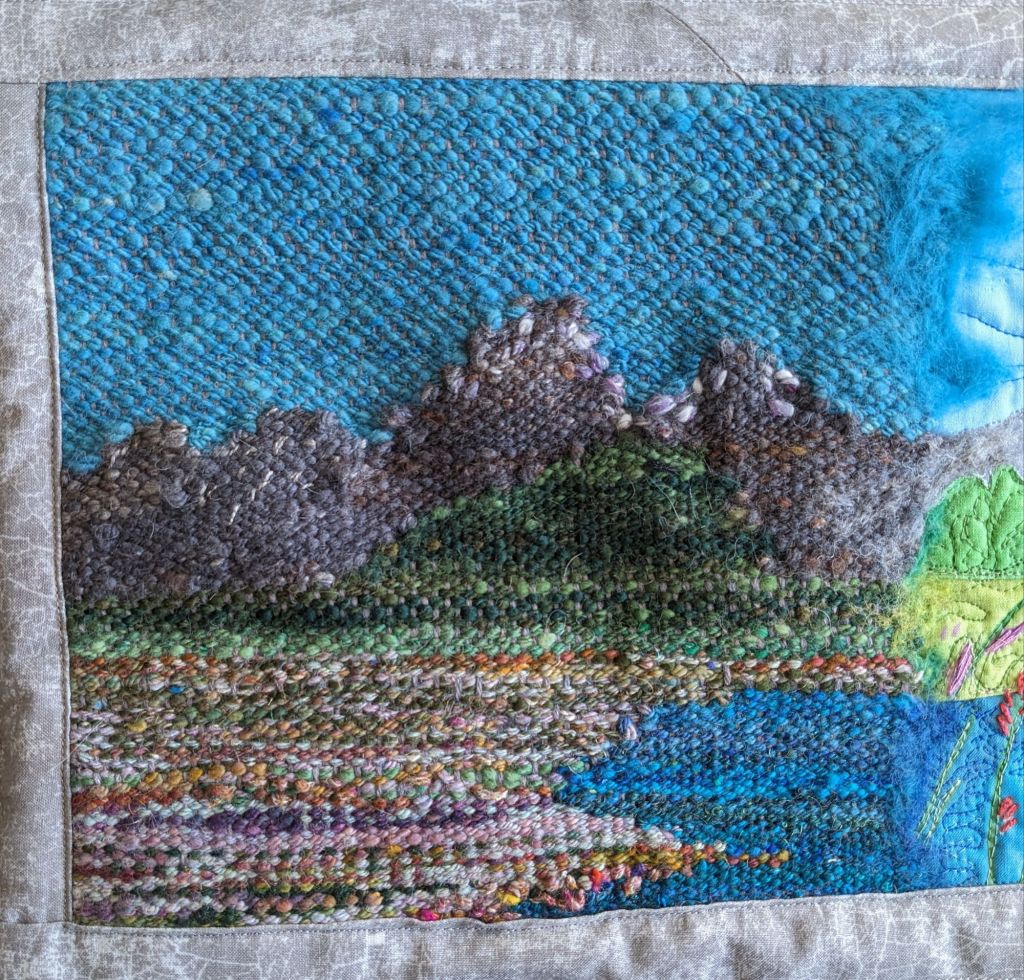
Spring! My favorite part to make was the field in the foreground, I improvised all of the color changes and just had a good timeSummer 🙂 so glad I bought this and kicked off this project. I really like the wavy lake quilting with variegated threadAutumn! I really enjoyed spinning all this yarn, and I have a lot left over for future projects. I’m pretty happy with the shading on Mt. Moran (on the right) and the weird bumpy texture of the sagebrush in the foreground Winter! I really like the contrast between the line-y-ness of the embroidery and the fuzzy needle felting, and I proved to myself that I can spin yarn to embroider with🙂 finished
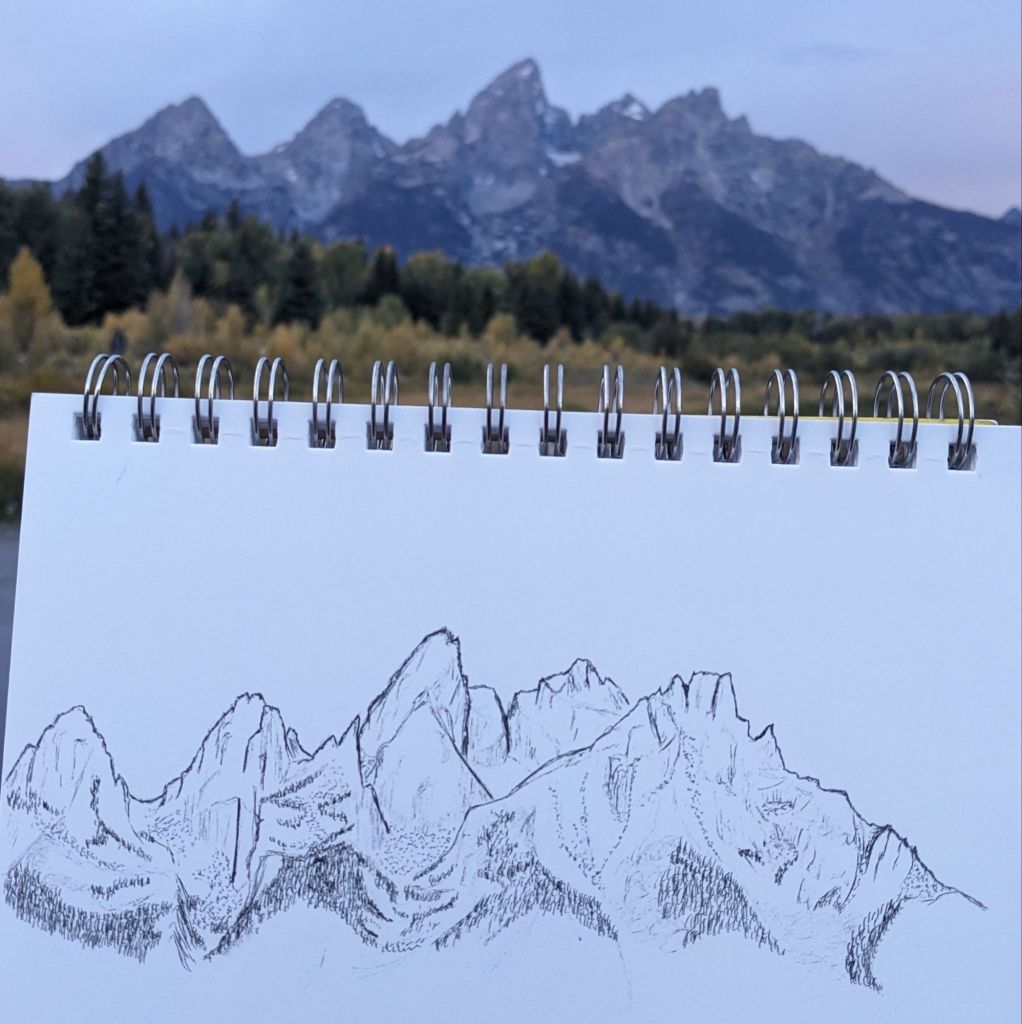
Last year, I spent one day in Grand Teton National Park, most of it yelling and pointing at the mountains… So I had to go back, specifically to sit and enjoy and look and make art 🙂
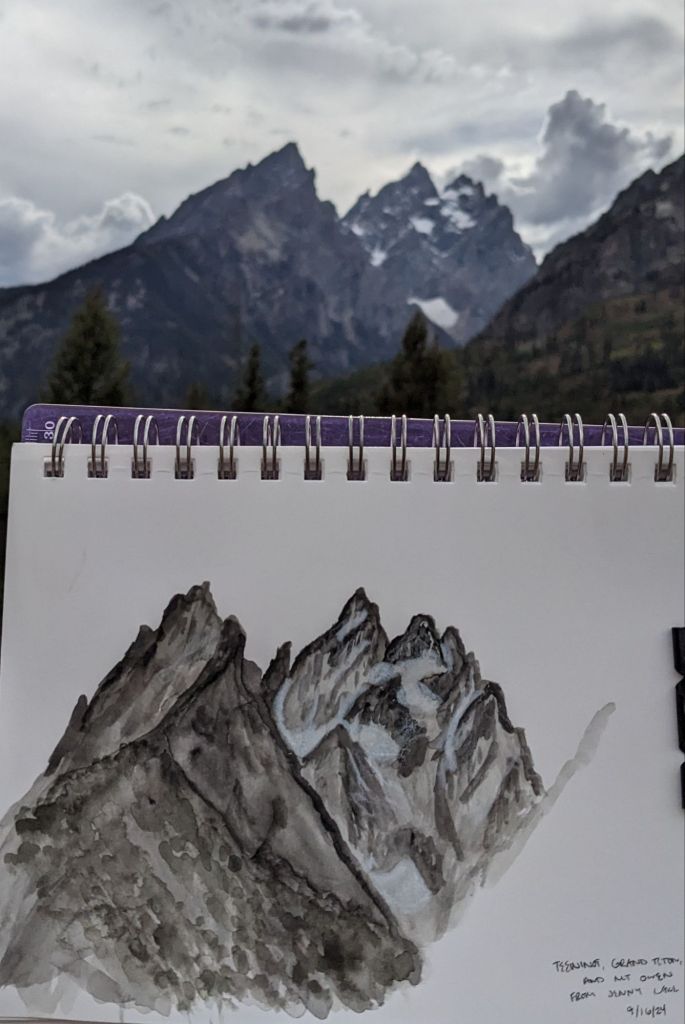
Teewinot is the original Shoshone name for this range and translates to many pinnacles, which I find much more fitting than the French name.
I had vague plans, but let my art heart lead and followed the rising and setting sun. It was stunning. I felt a little like Thomas Moran, walking about doing artwork, though I had the luxury of a car and like… A nice, developed campsite. I also saw two bears and a double rainbow, so it was a very good weekend.
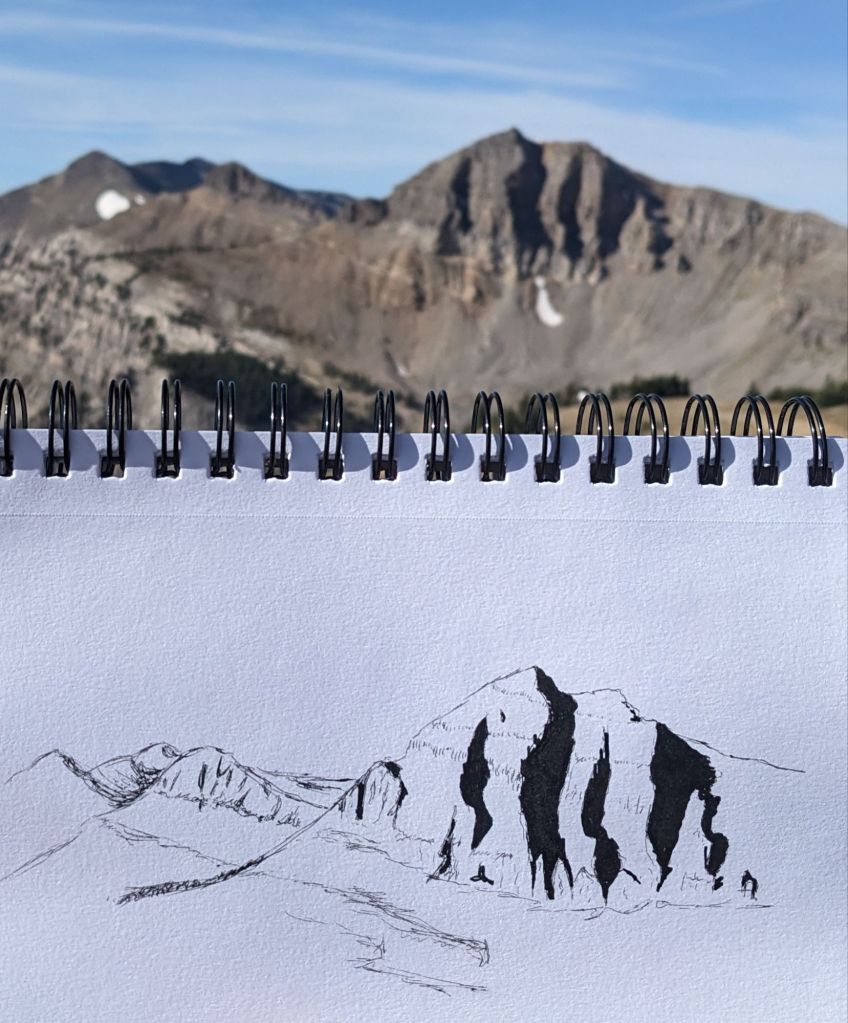
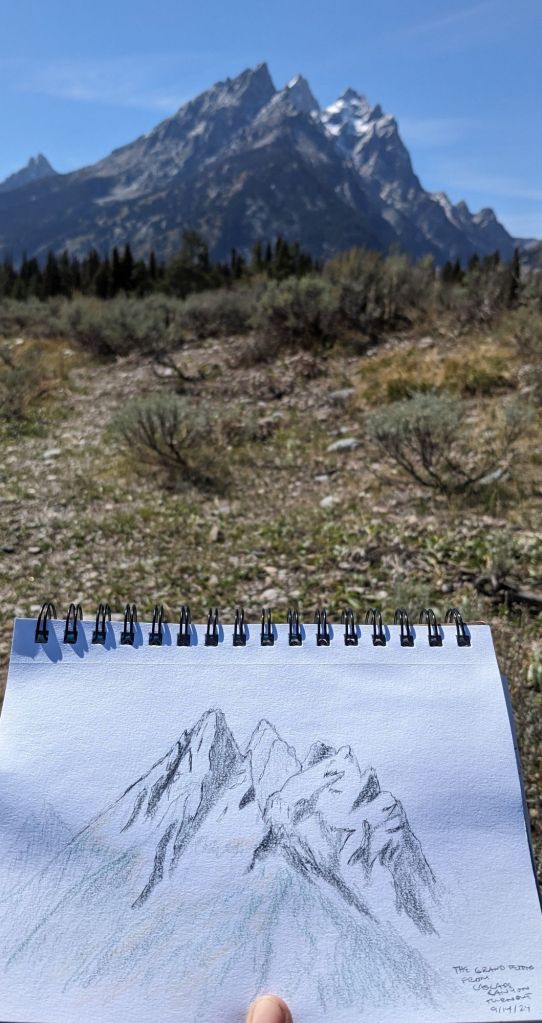
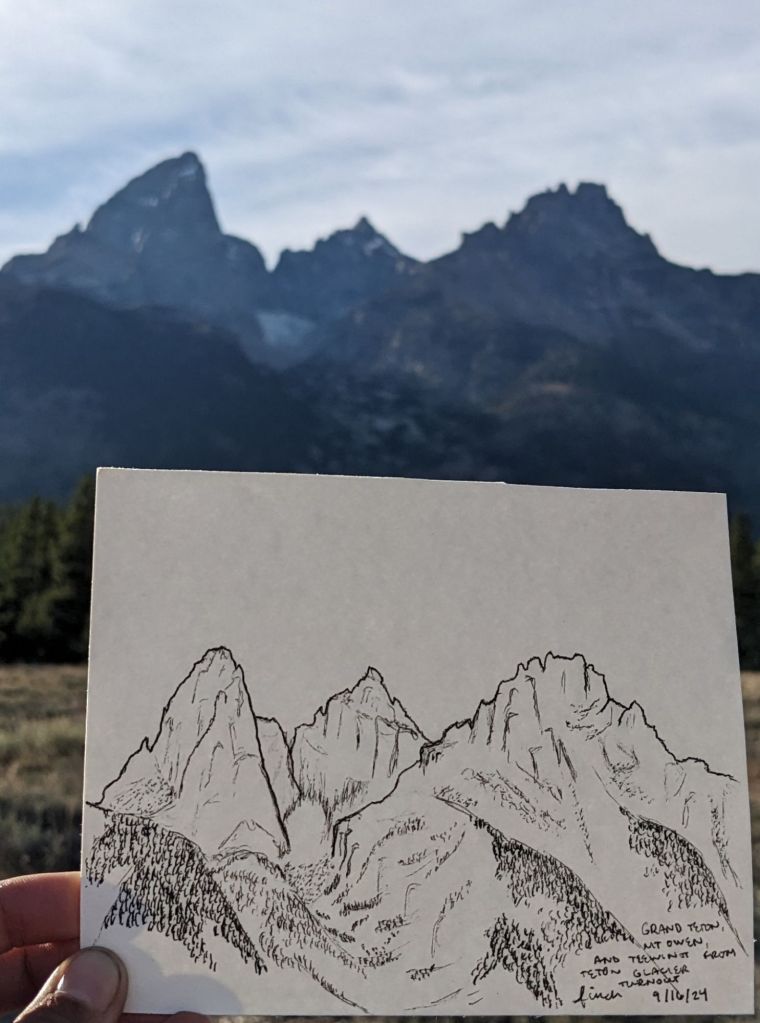
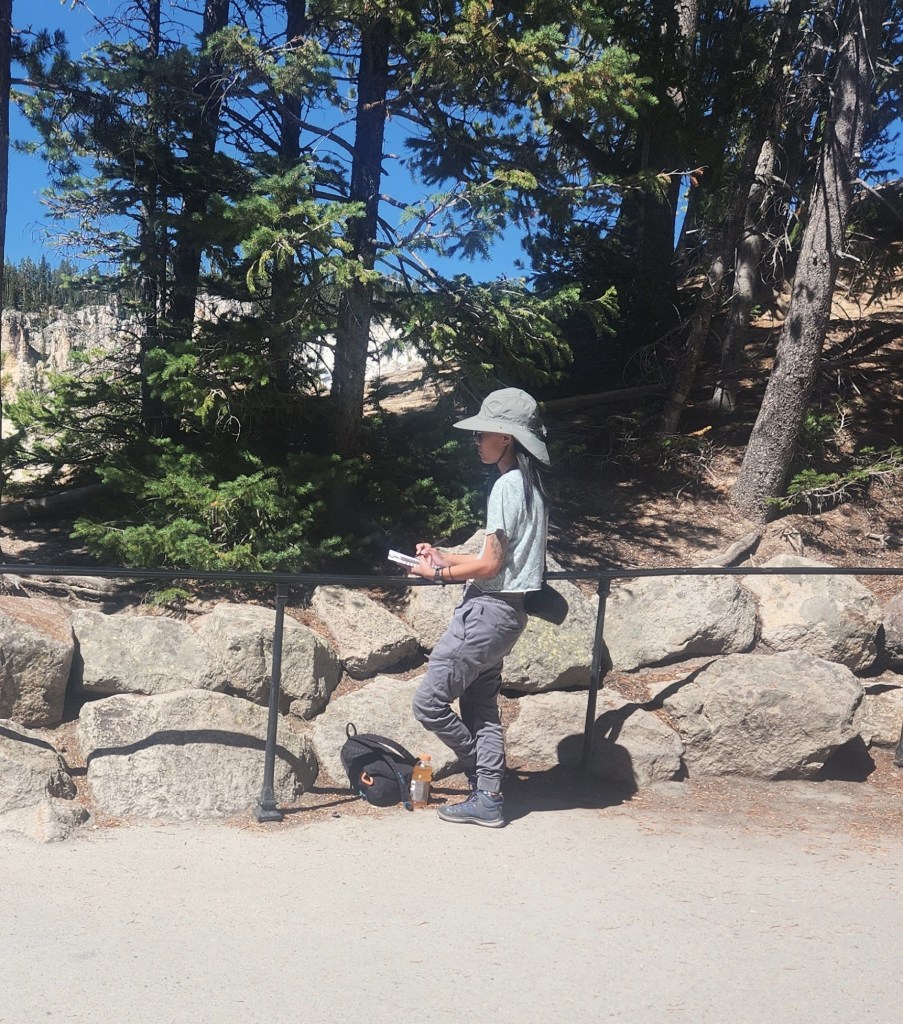
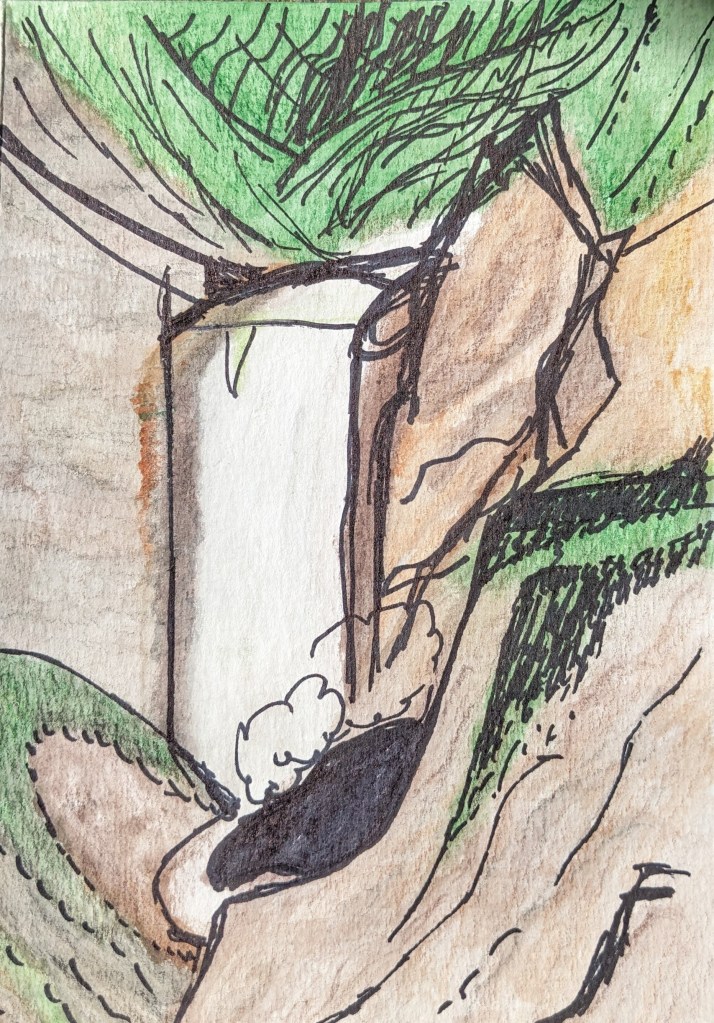
From the Jackson Hole Aerial Tram, which was a bit underwhelming and extremely windy, but there was a great view of the whole valley and I got to see Corbett’s Couloir (the one the pros do backflips off) and I was stunned. It’s much bigger than in videos. From Snake River Overlook, where Ansel Adams took his famous picture. The drama of this sunset lasted about thirty minutes and each moment was just as beautiful as the last. I liked the idea of using watercolor pencils and then maybe going back later with water, but I kind of like it just in pencil. This is also my first piece in my second sketchbook, since I finished the first one I bought in 2021! Not pictured: the lineup of photographers with fancy tripods that I was sitting next to.Bonus: sunset from Snake River Overlook.This one I tried using my watercolor pencils and then going back with pen. I liked it, though my pen didn’t mark over the pencil so well. Maybe the pigment is a bit hydrophobic? Little black and black-green watercolor from Jenny Lake. Plus some white watercolor pencil for the permanent snowfields. I liked the bold style of the watercolors without pen, but it was a bit nerve-wracking to put down so much color at once. One of my favorites of the trip, drawn as a postcard for a friend from Teton Glacier Turnout. I need to figure out how to draw trees in a way that doesn’t hurt my hand though. So. Many. Little. Lines. Not pictured: the couple that got engaged on the other side of the parking lot while I was doing this. From Schwabacher Landing. I kind of knew this as I was starting this piece, but this is the piece I set out to draw, and I spent the weekend working up to it. It took me about an hour as I waited for the sunset, which was pretty but not as dramatic as the other one. Not pictured: the couple who sat and chatted with me as we waited for the sunset.
For my friend who took this trip with me, for Christmas 🙂 I had a lot of fun discovering how to do the shadows and finding out how much detail I wanted on the trees. I’ve been experimenting recently with how I depict trees, there’s usually so many of them that I lose interest and just draw lines, but that’s not really what I want to be doing. I used a bunch of different shades of green for these, and I really like how the ones on the right turned out.
I only used my original sketch as reference, and worked the colors from memory as Thomas Moran did (though some of his sketches have colors written in pencil :)). I think it makes the final product more vivid and oversaturated, more true to how it felt to be there, and less how the camera captured it.
Indirect sunlightDirect sunlightOriginal sketch in situ 🙂
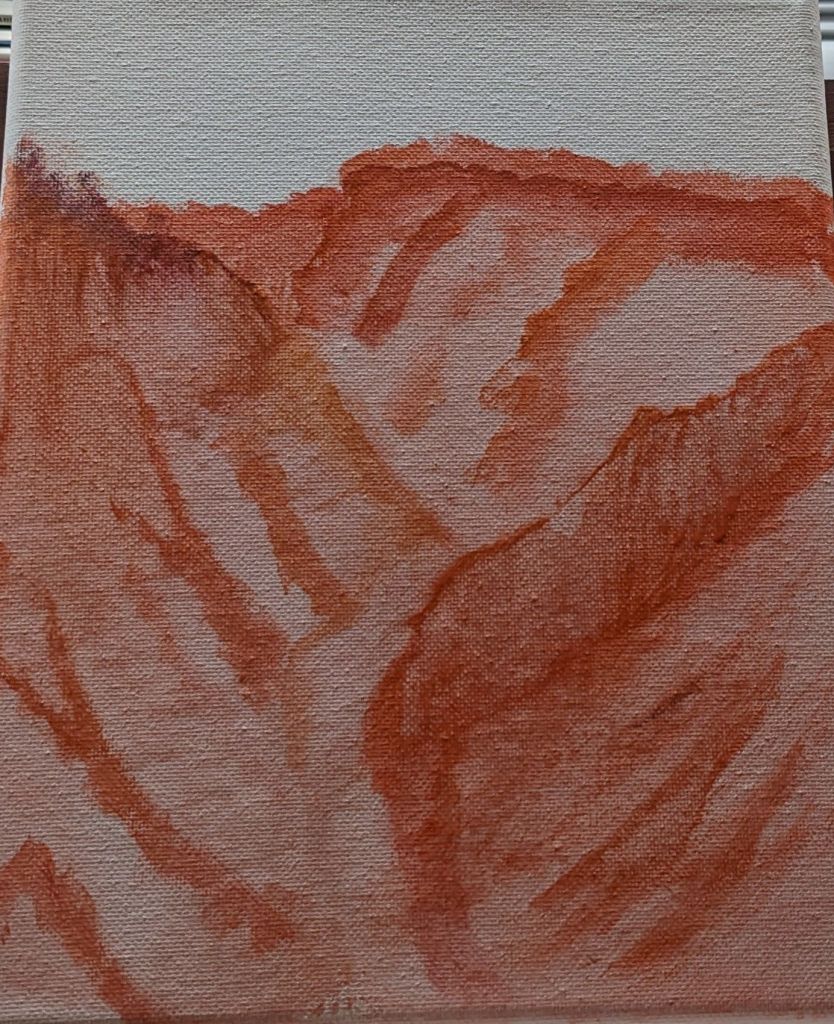
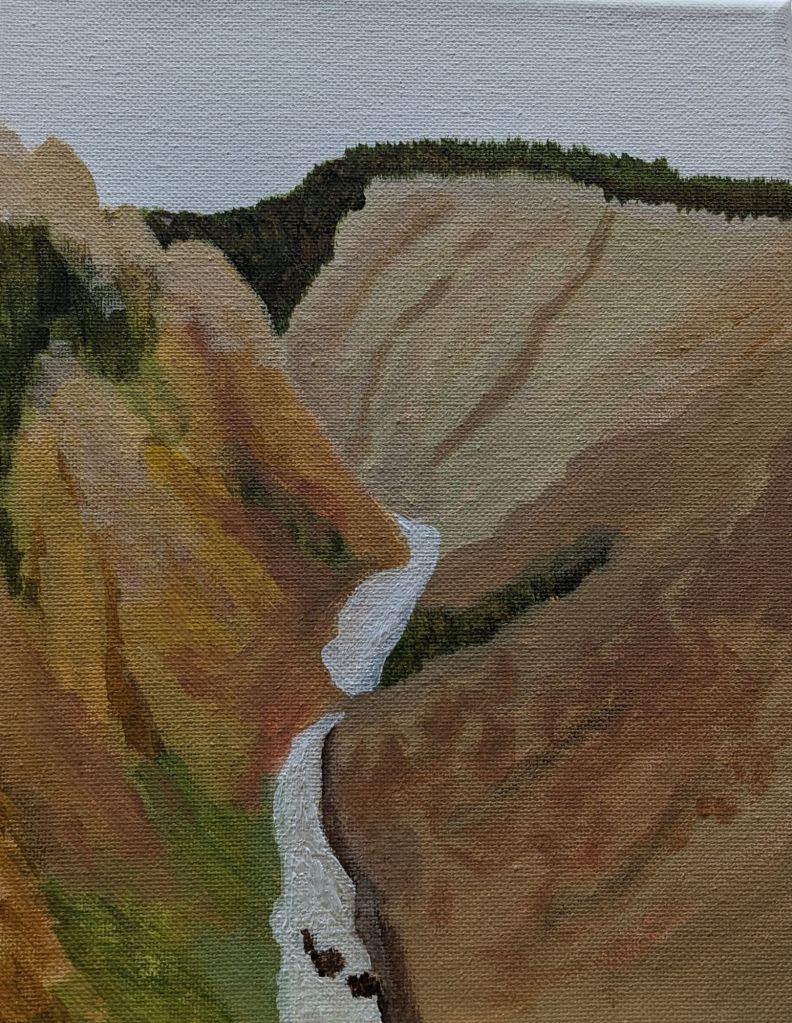
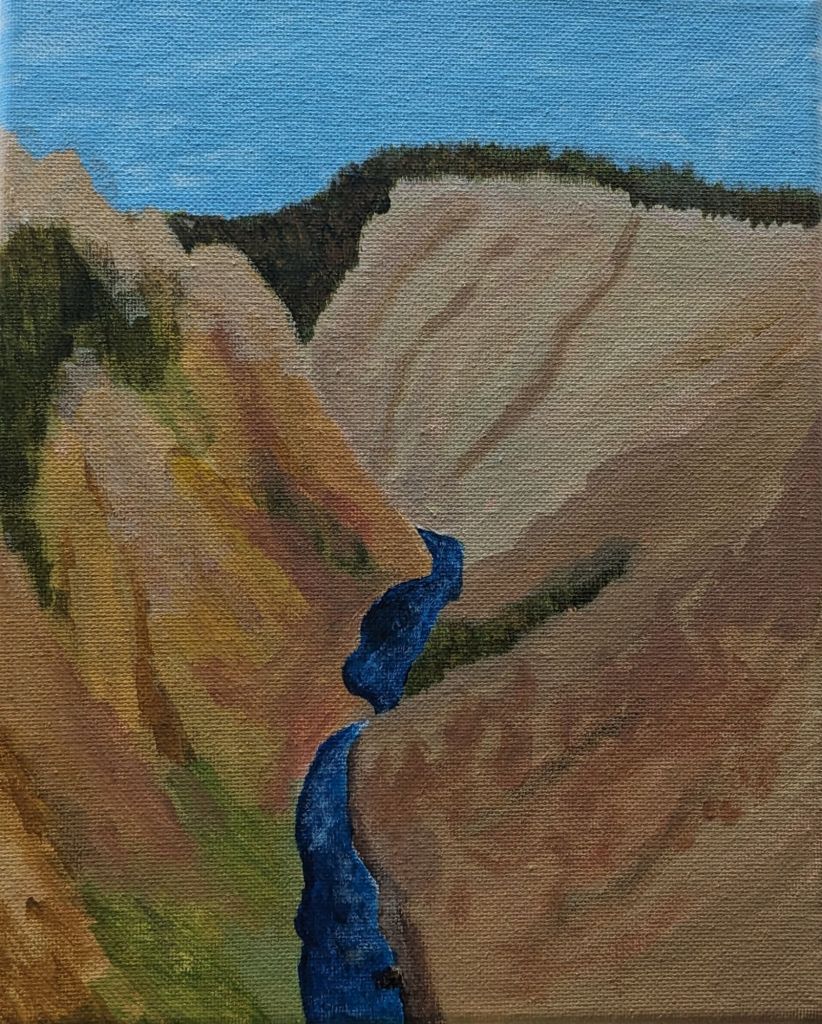
This watercolor piece was inspired by my recent trip to Yellowstone and my newfound love for Thomas Moran. The man truly was an activist artist and helped convince Congress to make this area the first national park in the world – which happened on March 1, 1872. Also… Congress bought his 7 x 8.6 FOOT oil painting (below) for $10,000 ($251,660 in today’s dollars).
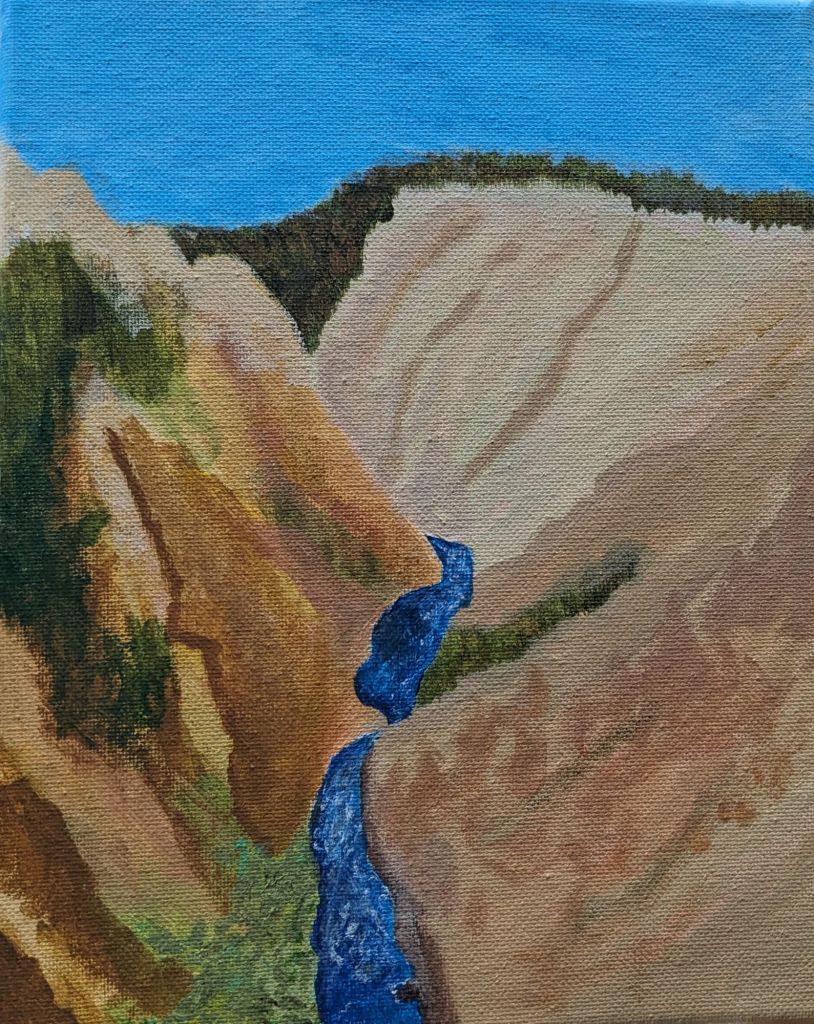
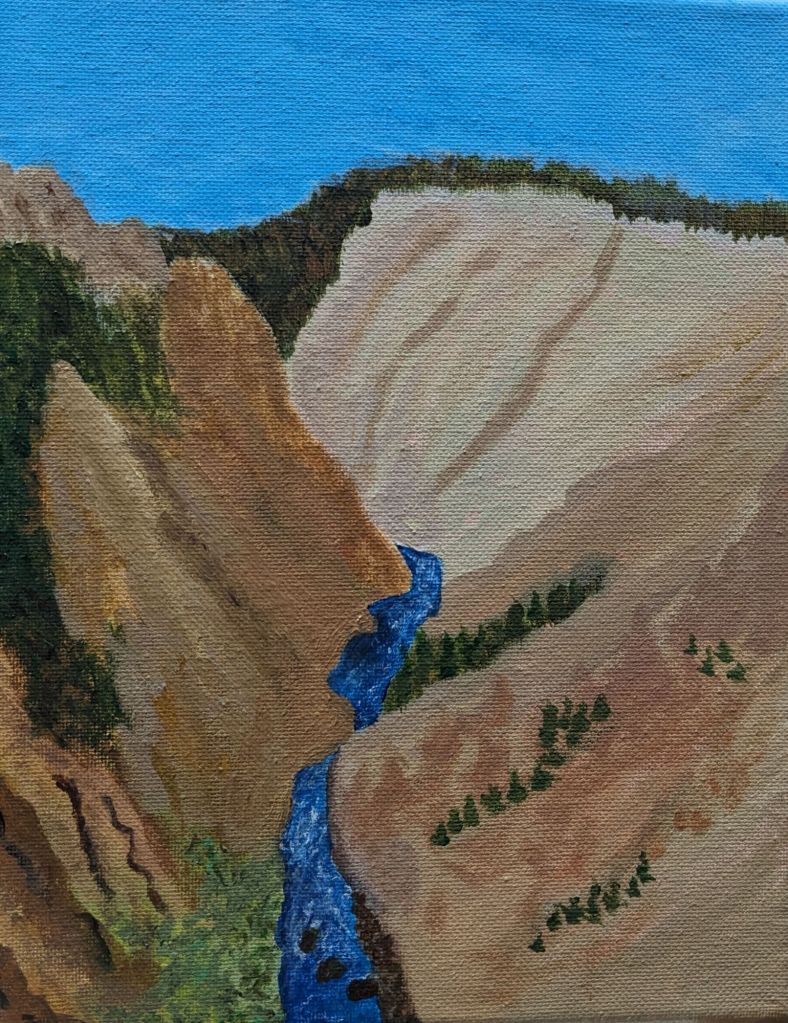
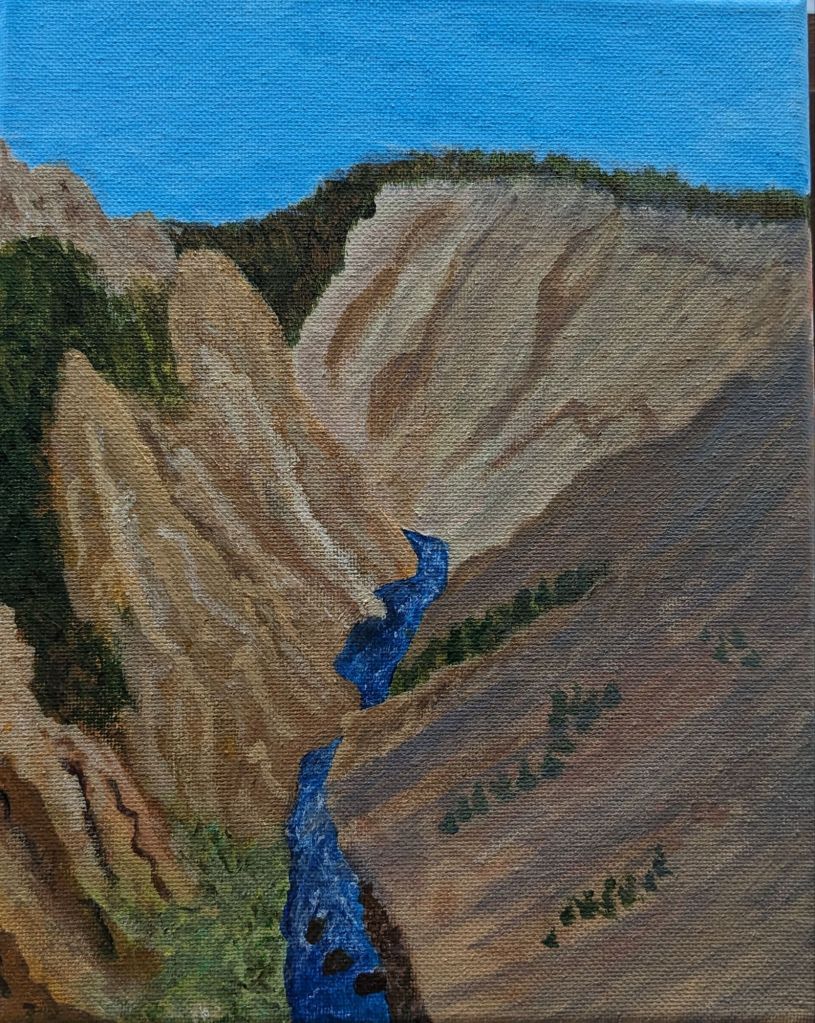
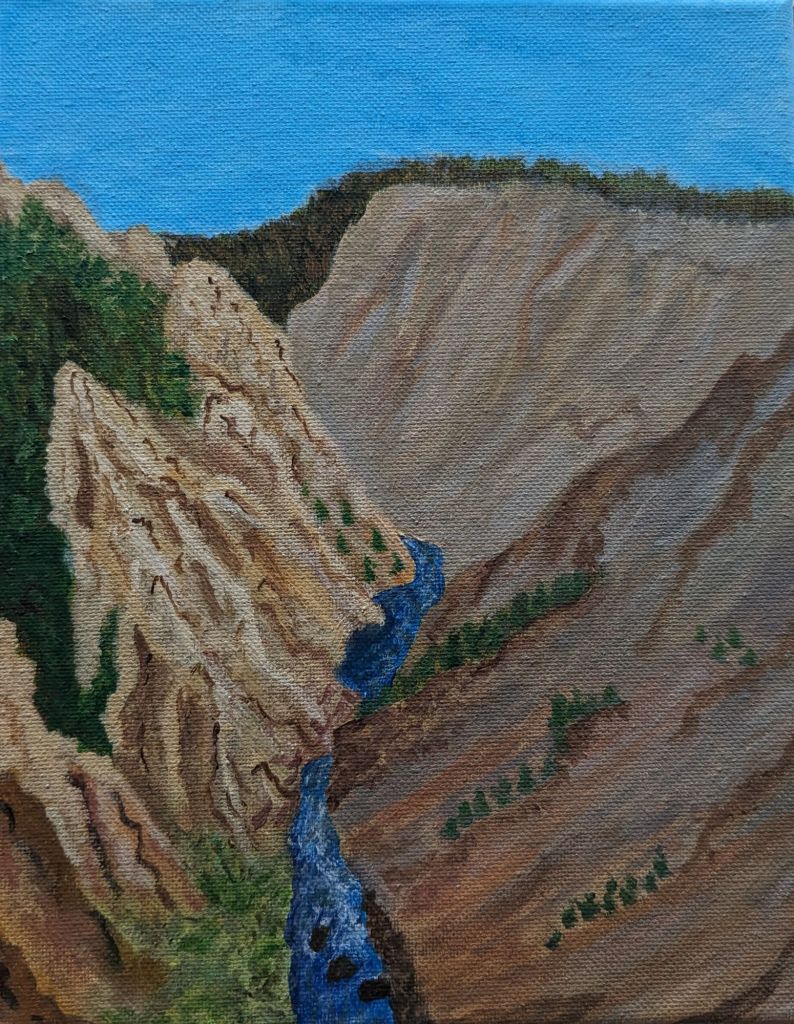
I did this painting for my aunt, using my late uncle’s watercolor pencils 🙂 It was so fun to discover how to use the pencils and bring out the colors of the canyon. I probably should have swatched the colors first, but I did it eventually and it was very helpful.
But… Thomas Moran himself said that the colors of the Grand Canyon of the Yellowstone “were beyond the reach of human art”, so I didn’t stress too much 🙂
my own reference drawingme drawing my reference!my first draft – something happened with the proportions that I just wanted to start over; I used sharpie to sketch out the important shapessecond draft, some color laid down 🙂
I’m so used to black and white pen only drawings that I had to put some ink back on this piece – I wanted those deep, dark shadows and to bring details to the trees and rocks that I couldn’t finesse with the watercolors.
Time lapse of adding some pen and more watercolor layers
I used a lot of color layering, alternating around between pen and watercolor, scraping off paper with the wet brush, letting things dry and coming back.. and eventually decided it was finished. Final piece under different lighting below:
direct, full sunlightindirect sun with camera flashindirect sun, no flash
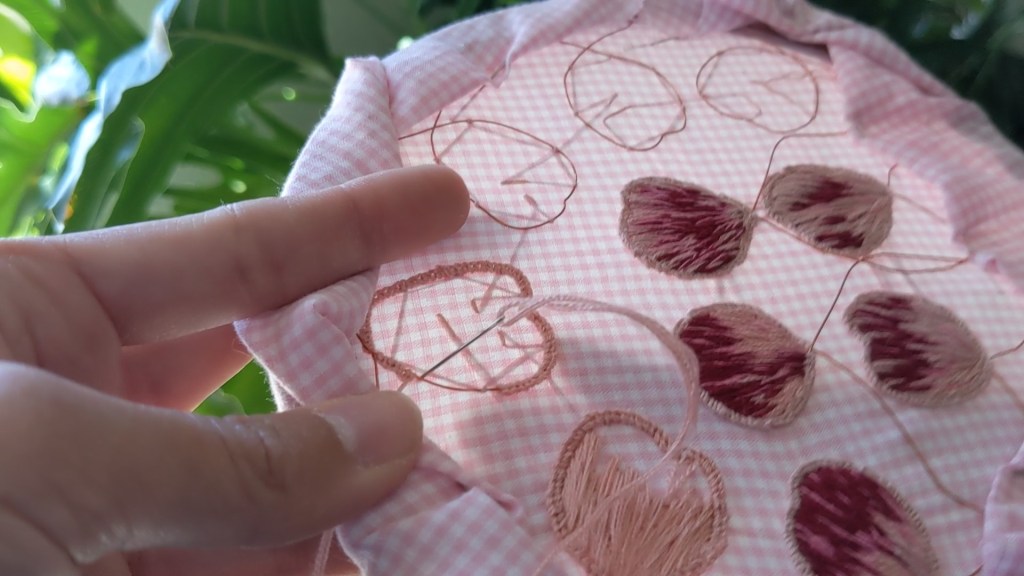
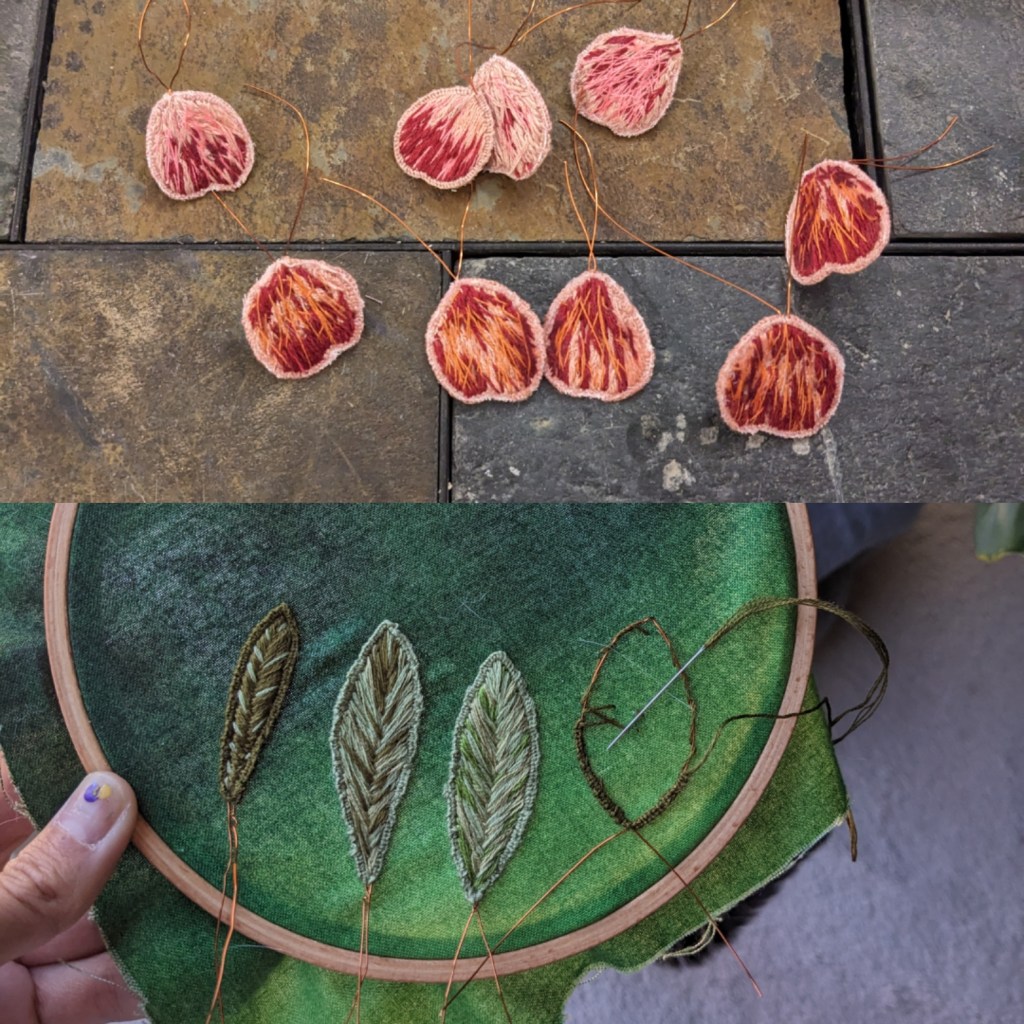
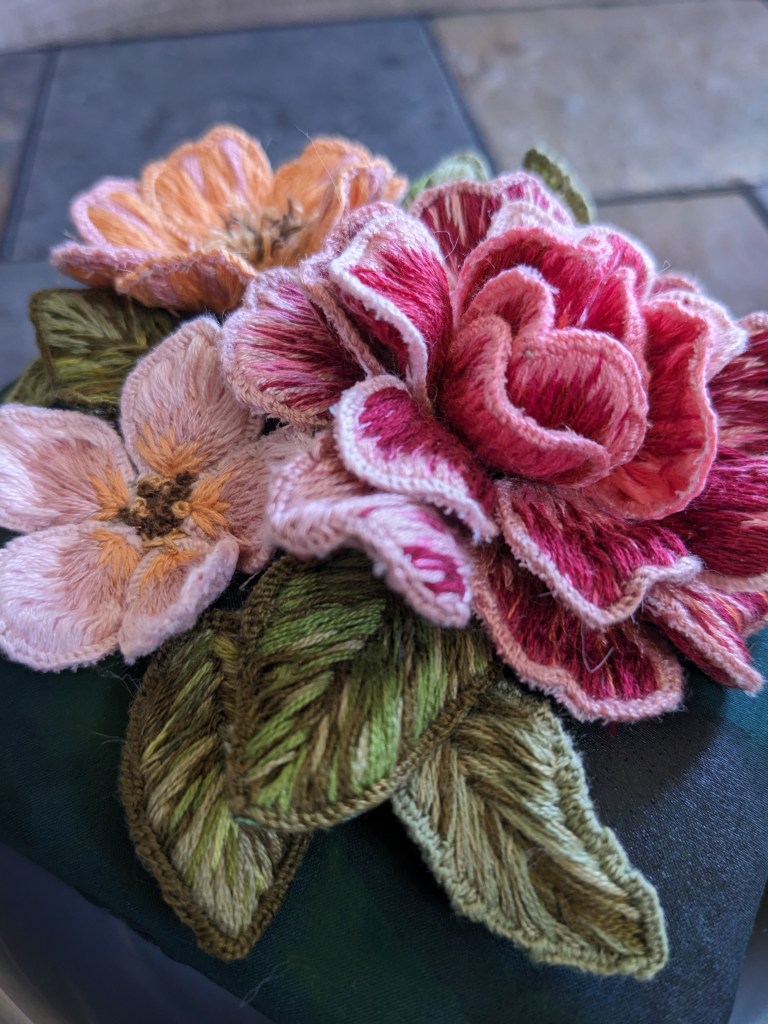
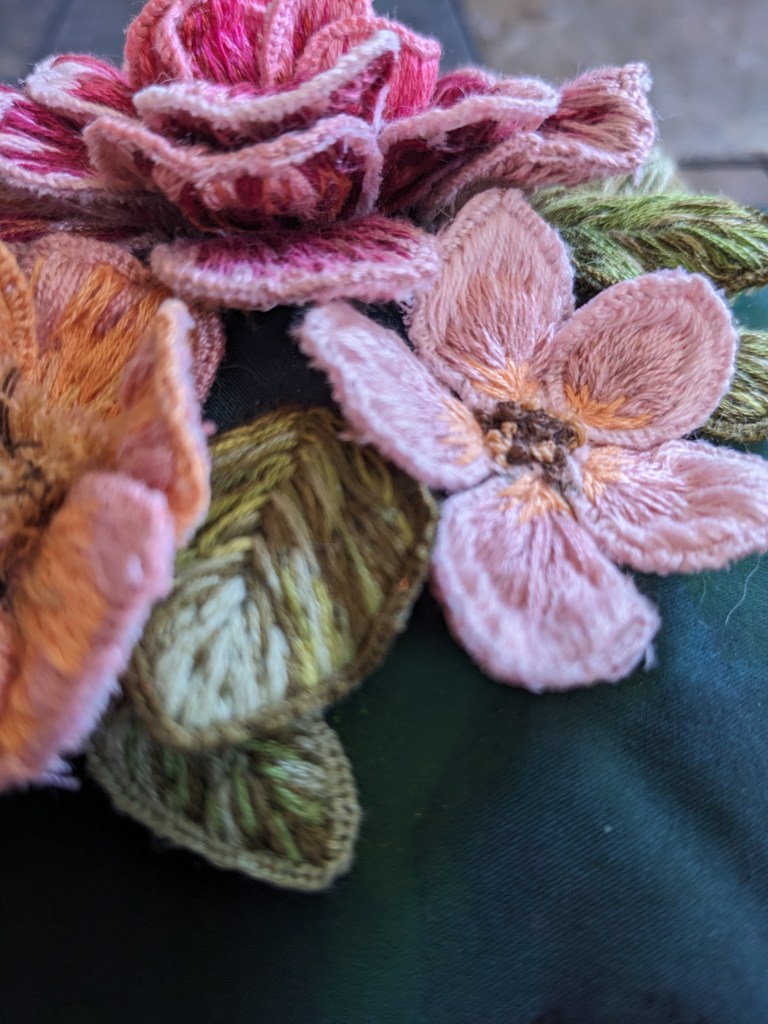
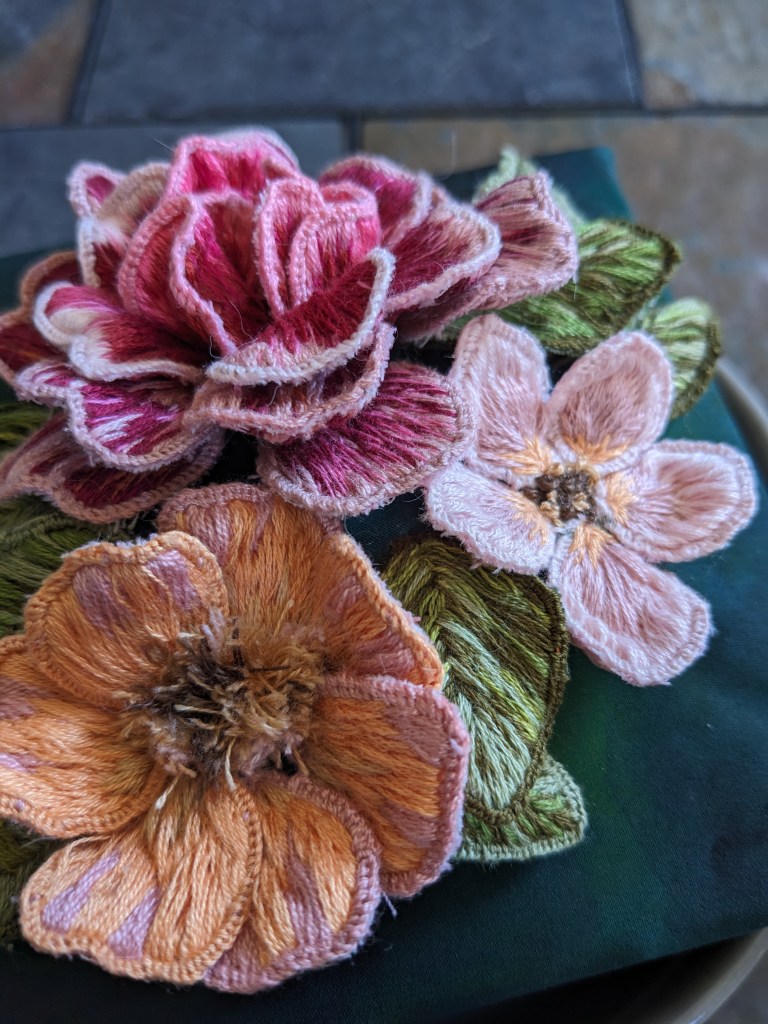
I made these for my friend and her husband, based on their “Save the Date” stationery 🙂 it was super fun to revisit the wired slips technique and bring these flowers to the third dimension.
My reference! I was originally planning to do all the flowers here, plus one from the front of the invitation, but I decided to invest my time in doing three flowers well and being patient with the color blending.
I made three different flowers; one with 5 petals (the one on the right), one with 7 petals (in the middle), and one with 20 petals (bottom left). I wanted to have different colors and textures across the flowers, and different petal shapes. The 5-petal flower has teardrop petals that come to a point, the 7-petal flower has petals with flat tops, and the 20-petal flower has rectangular heart shaped petals.
Working around the border of a petal with buttonhole stitchTop: back of petals that are cut out and ready; Bottom: leaves still on the hoop
I poked the petals into one layer of fabric and folded the ends up, then embroidered the center stamens and pistils onto the fabric and anchored the petals to the fabric. Then I added in the leaves and made tiny stitches between petals and leaves and into the base fabric to secure all the elements together. I added another layer of fabric underneath the base fabric for some structural stability, and glued the entire assembly to a square canvas. The plain background ended up too plain, so I added some watercolor to the background to spruce it up and give it the idea of more leaves in the distance.
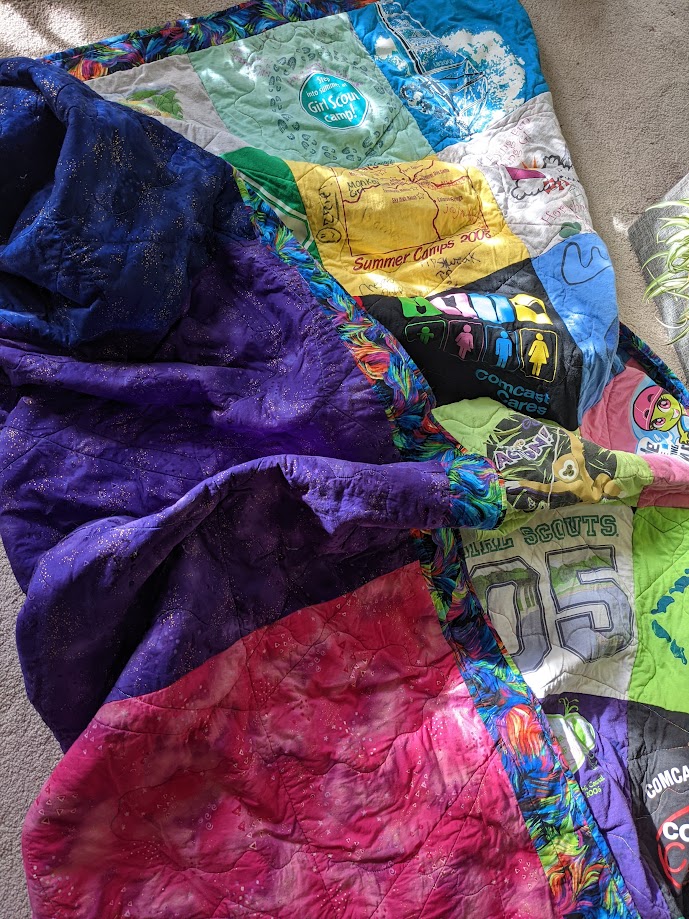
I made this quilt as a commission for my friend’s mom, for my friend 🙂 Their mom supplied me with a bunch of t-shirts from my friend’s childhood that otherwise weren’t being used, and I got to work!
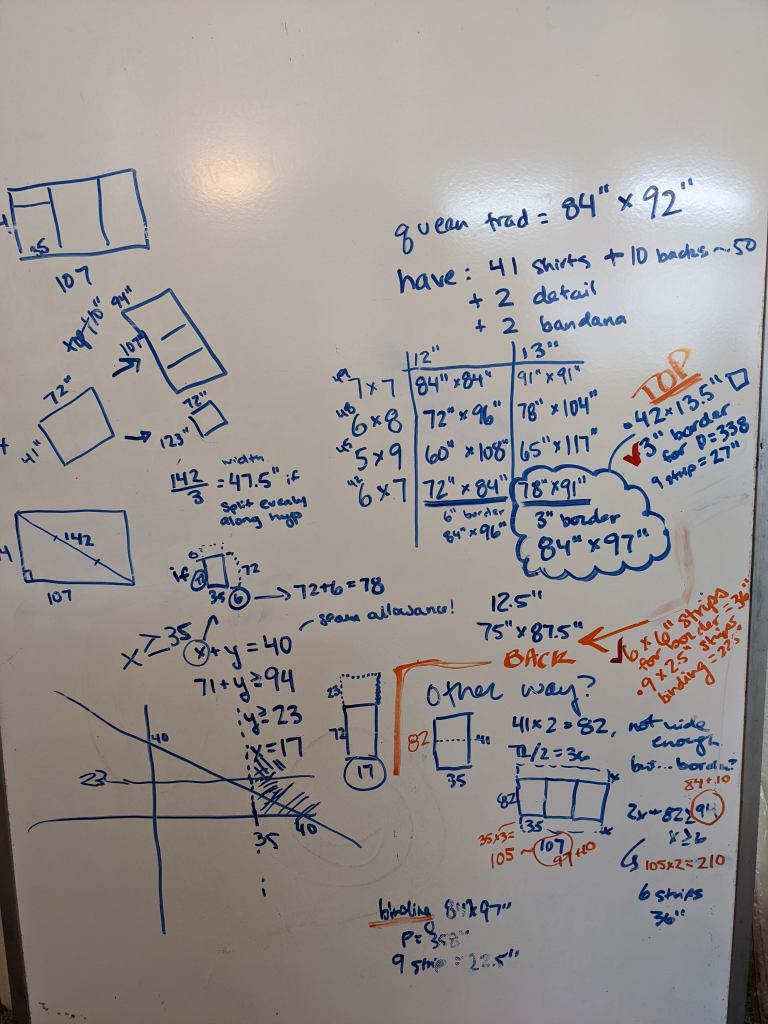
First, the idea was to have these shirts in a different format that my friend could actually appreciate and use. I did an inventory of the shirts, most of which only had designs on the front, but some had a front and back design. There were a couple repeats, so I figured I could put them in different areas on the quilt or exclude them, depending on how many squares I needed. Below I’ve included some of the calculations I did for this quilt – I had about 50 things I could make into squares, so I thought about different grids and calculated the dimensions for each. I settled on a 6 by 7 grid using 13.5″ squares, with a 3″ border for the quilt top (on the right of the picture).
For the back, their mom and I decided on a three colors in a stripe format, and I had to figure out what the widths of each panel would be. I thought about doing the stripes on a diagonal, but the math just didn’t work out that way (bottom left). I ended up doing straight stripes with a 6″ border (bottom right), using the same fabric for all the borders and the binding.
I think one of the main calculations I do for quilts is trying to figure out the correct aspect ratio, based on the square shape, the desired size, and the border. I also wanted to make sure the three stripe colors were equally represented; I originally thought the seams could be diagonal but I found I wouldn’t have enough fabric.
Then it was time to start cutting squares! I cut them out and lined them up in the order I wanted to sew them into the grid; I sewed the squares into columns and then the columns into the entire quilt top.
Lined up squares and the friendly helper!
After constructing the quilt top, I added some borders – to add size to the quilt and to stabilize the entire thing. Most of the shirts were made of stretchy woven fabric (honestly, very difficult to sew, I had to use tissue paper to make the edges stay flat so I could piece them together) so I wanted to have that non-stretch cotton around the edges to lock everything together.
I quilted the whole thing with zigzags across the row seams, and then went back to do some wiggly lines up and down and around the different designs to stabilize and add some fun.
Been making a lot of different kinds of things! I’m reaching into multimedia and experimenting with new materials and techniques. 🙂
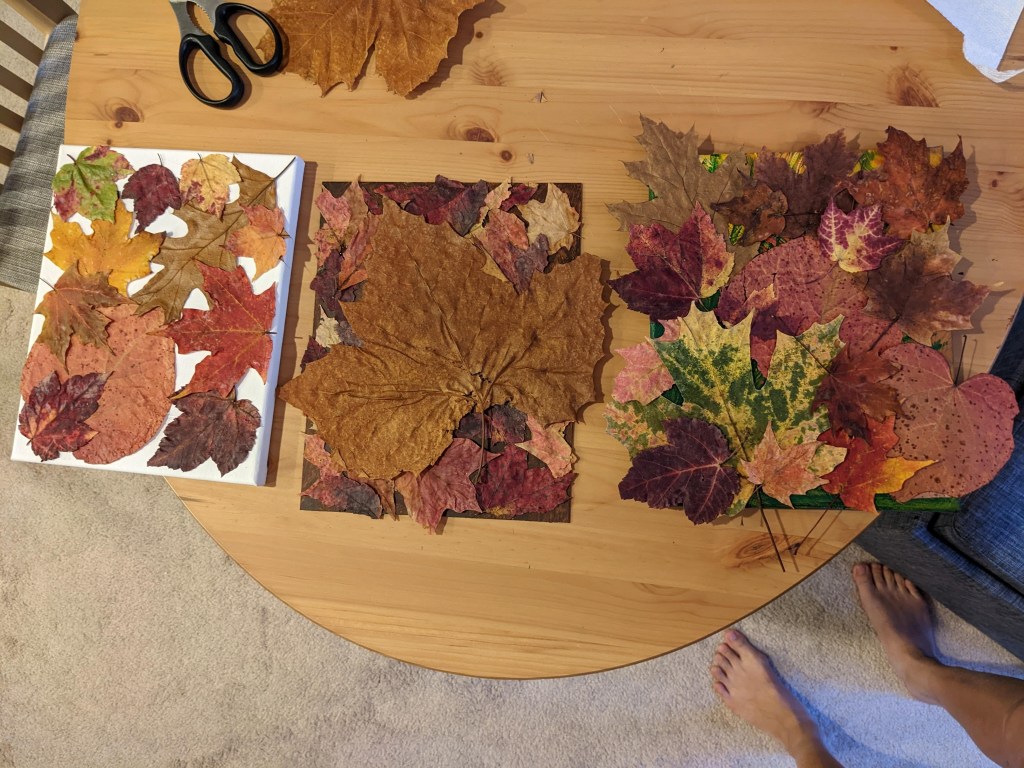
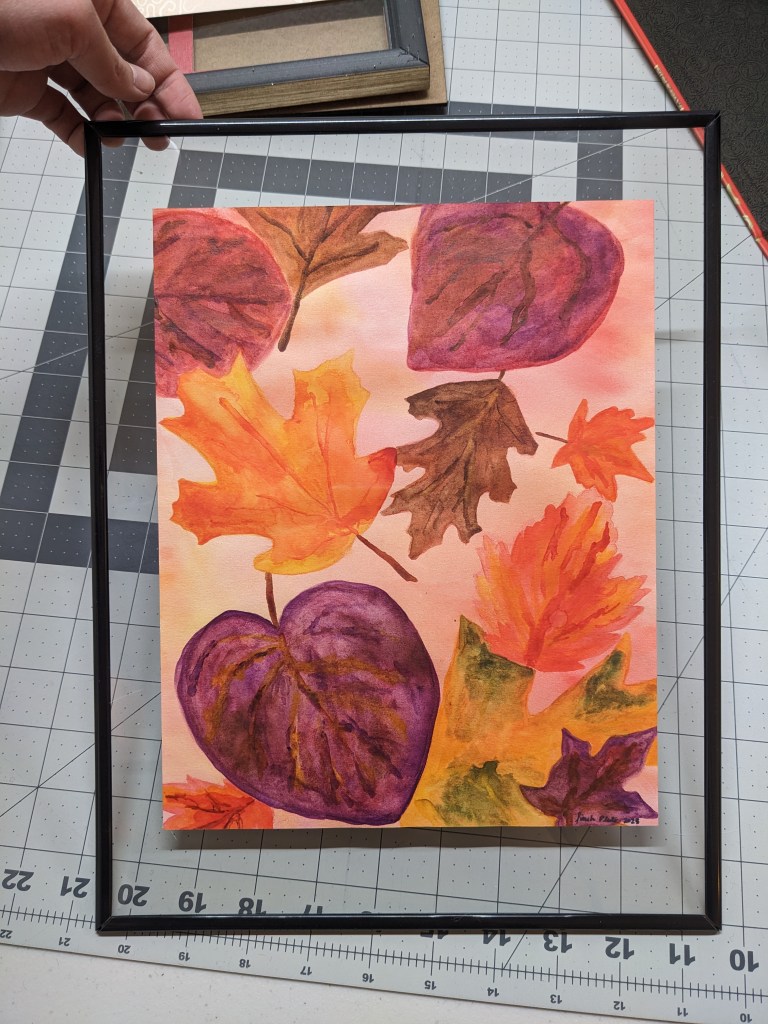
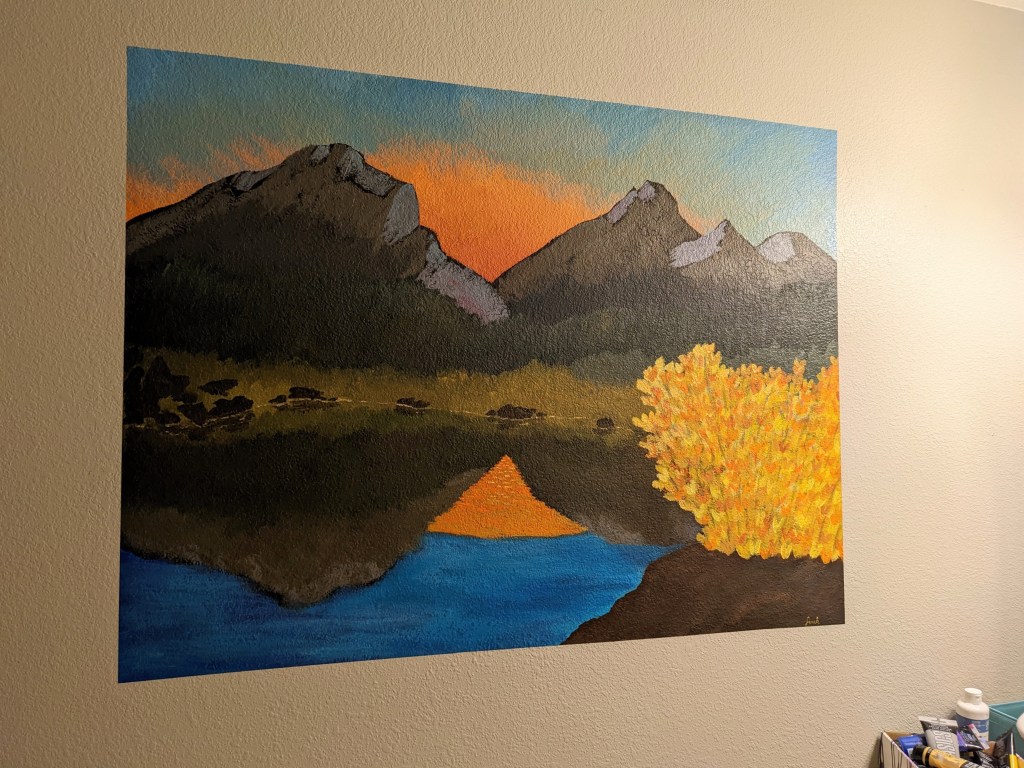
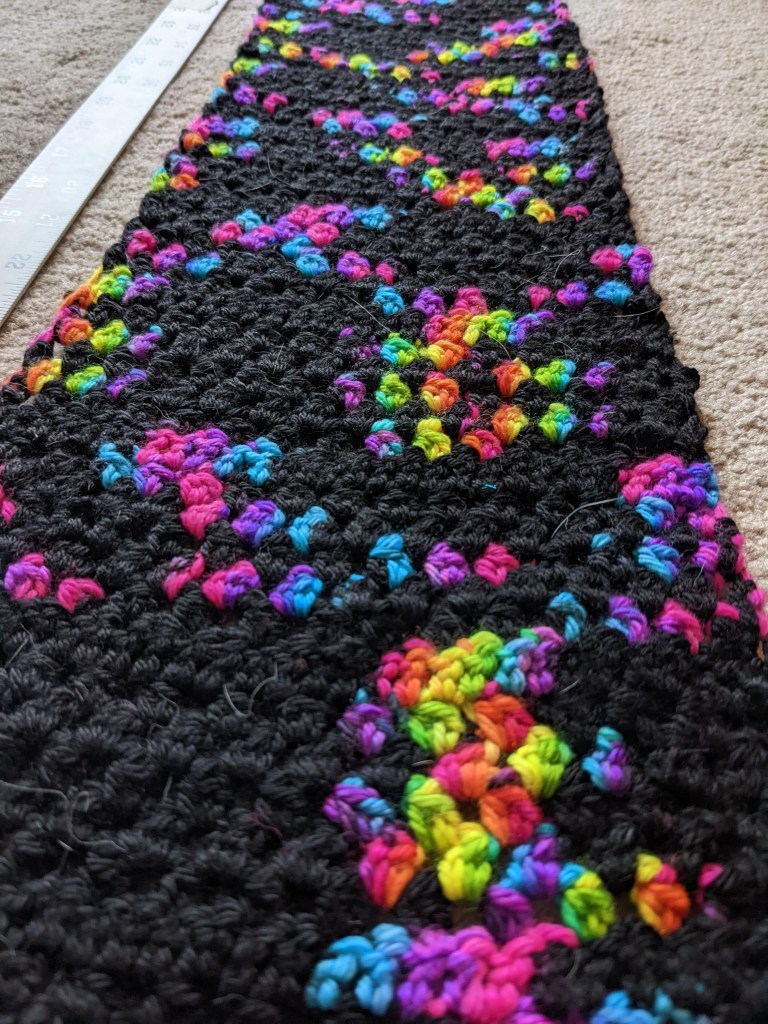
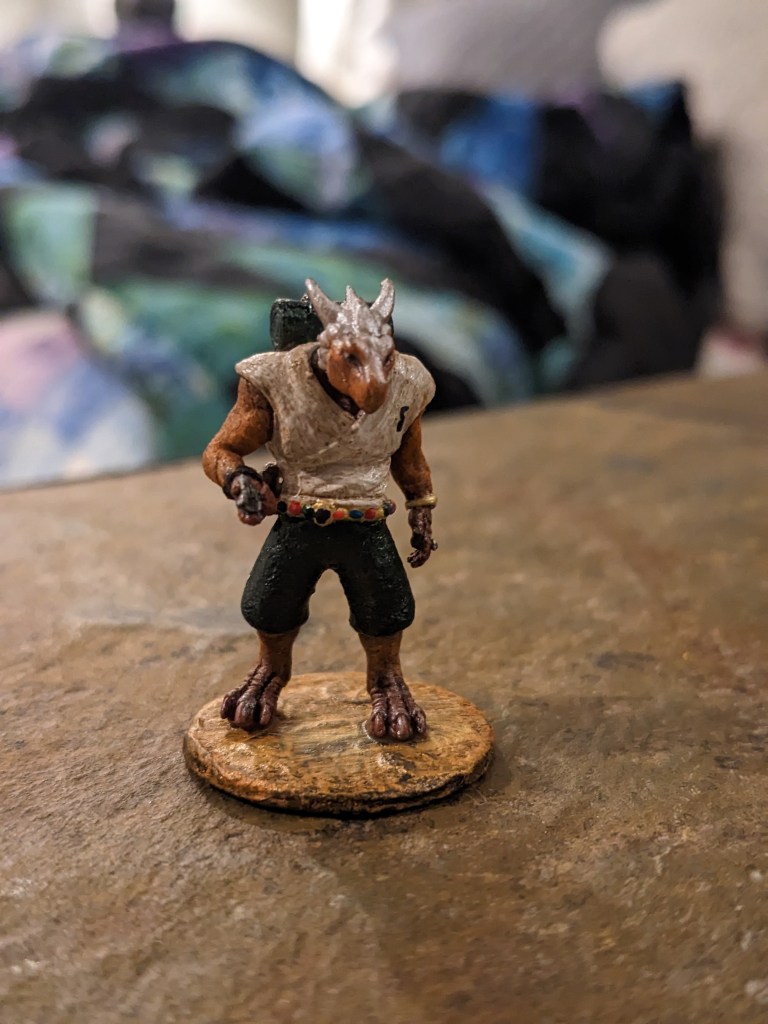
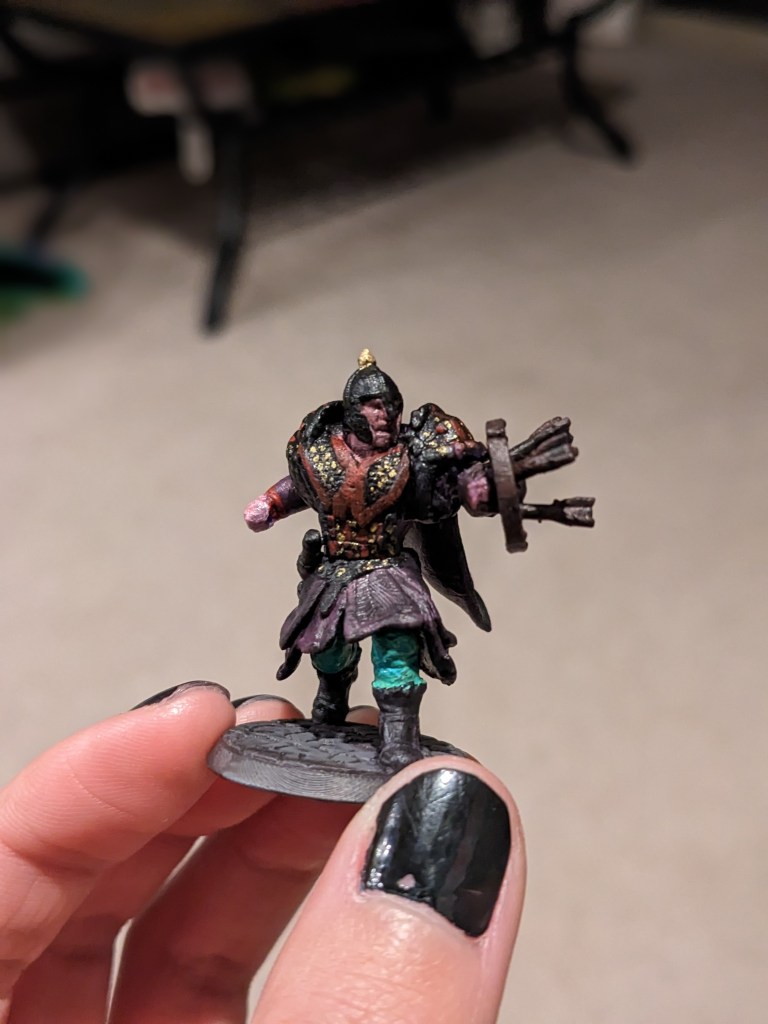
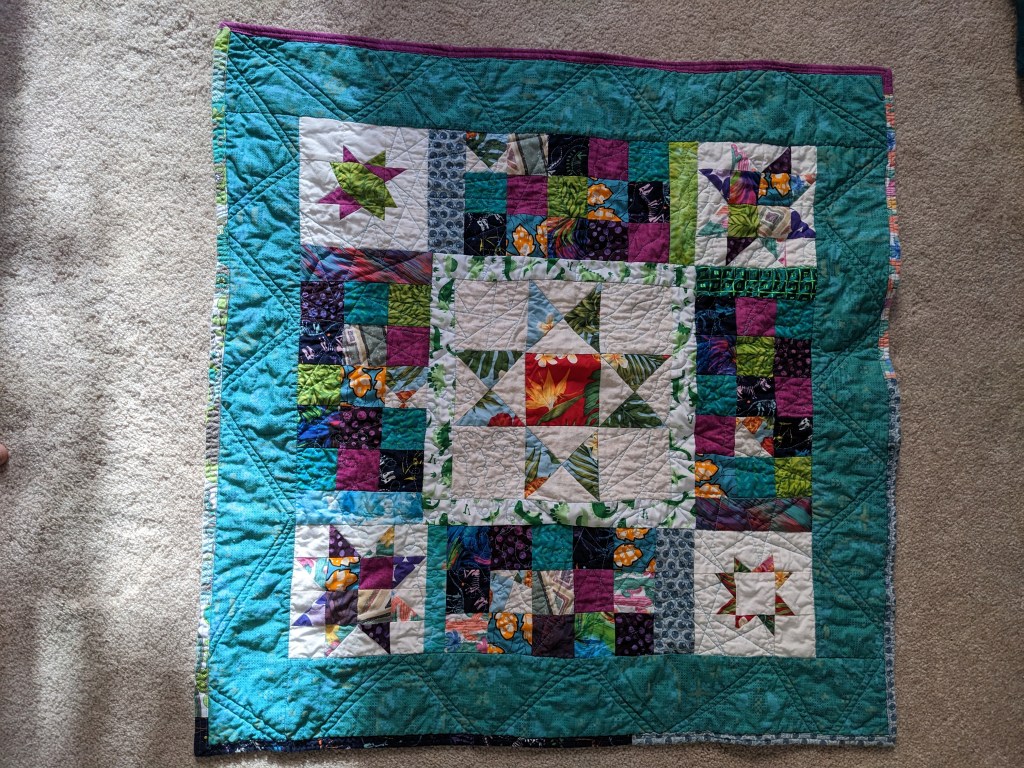
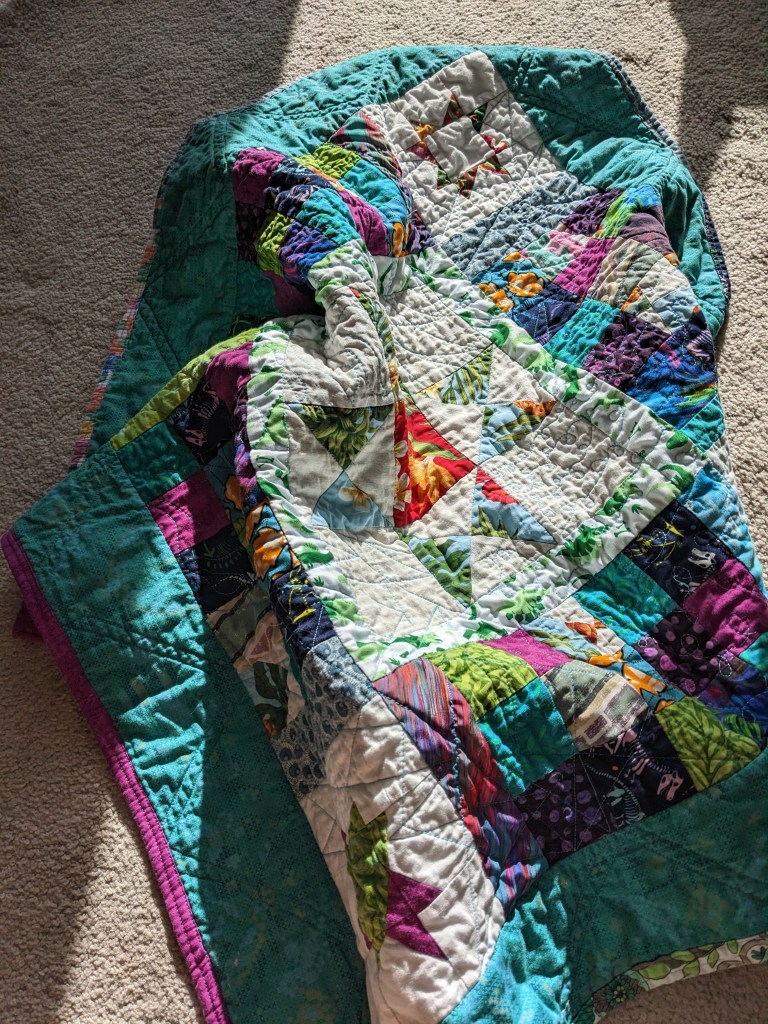
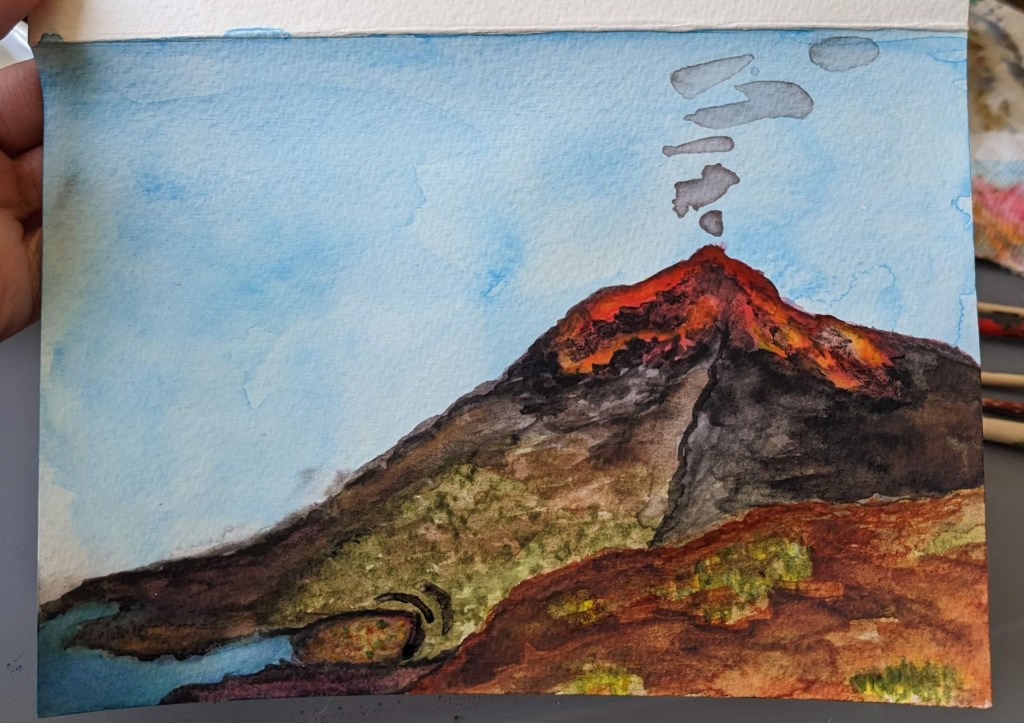
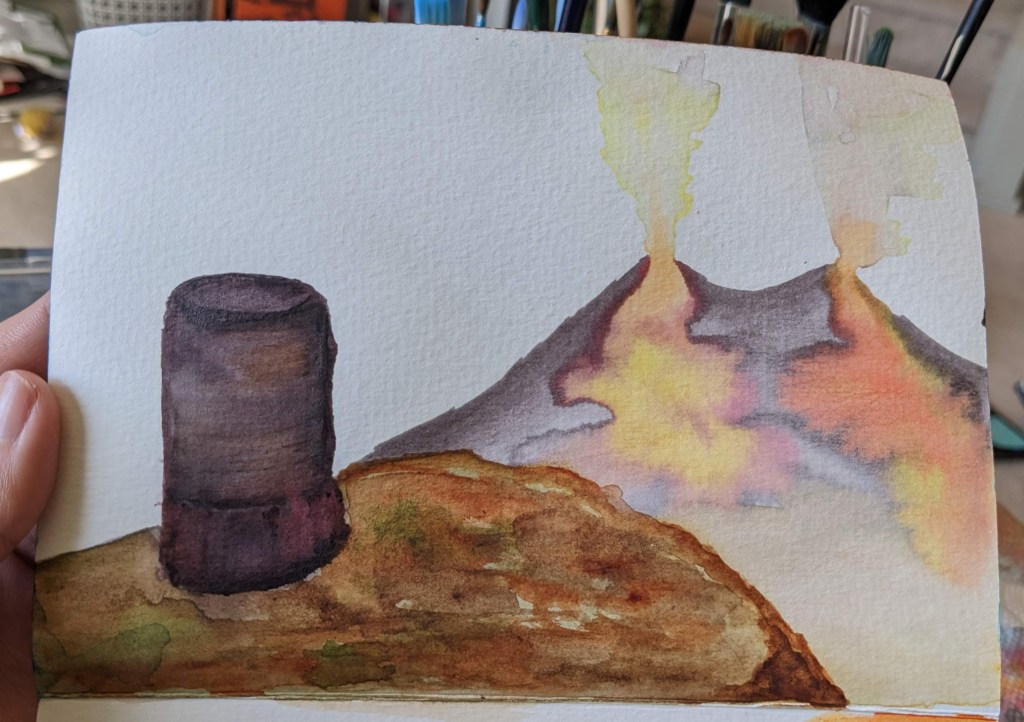
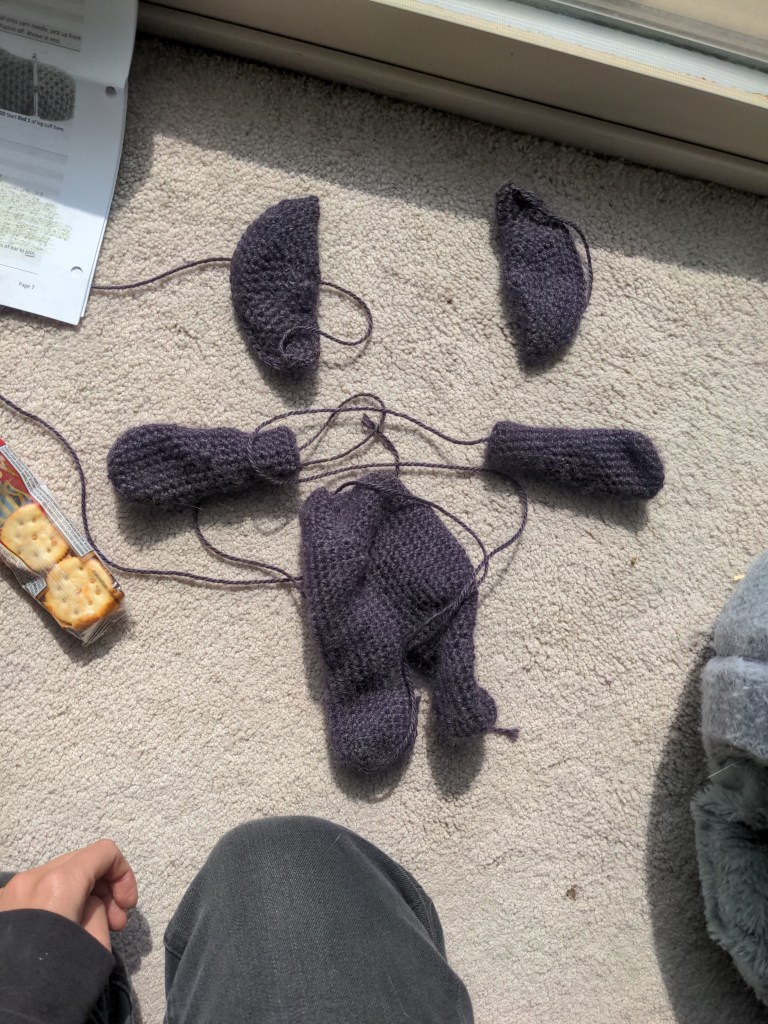
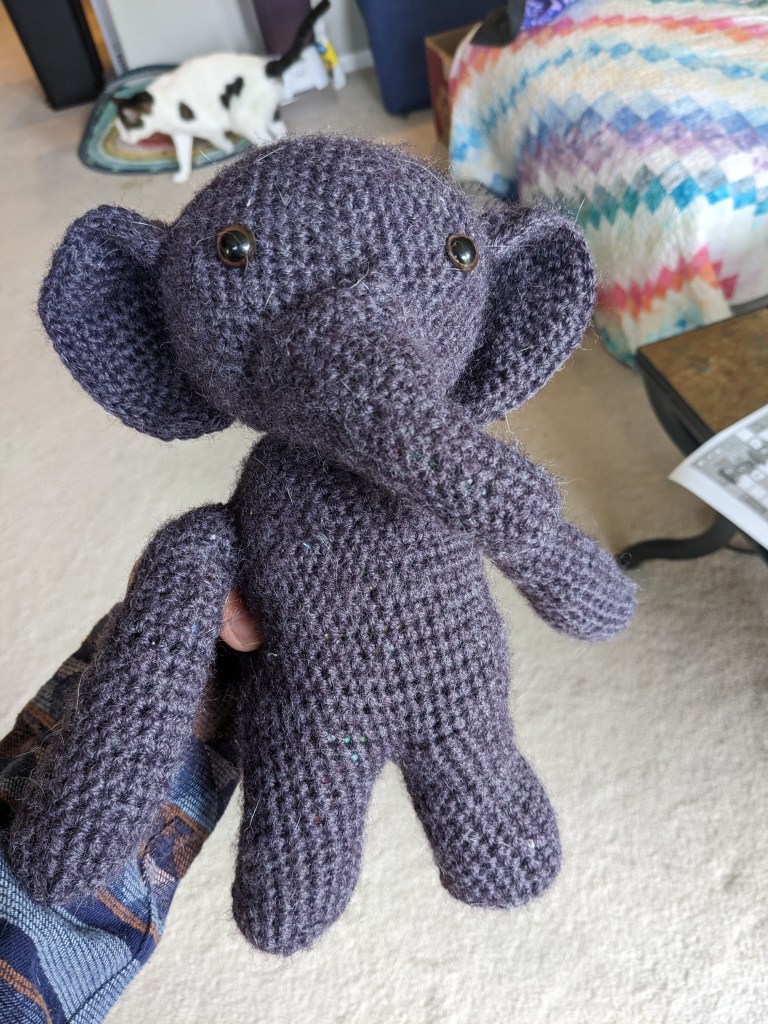
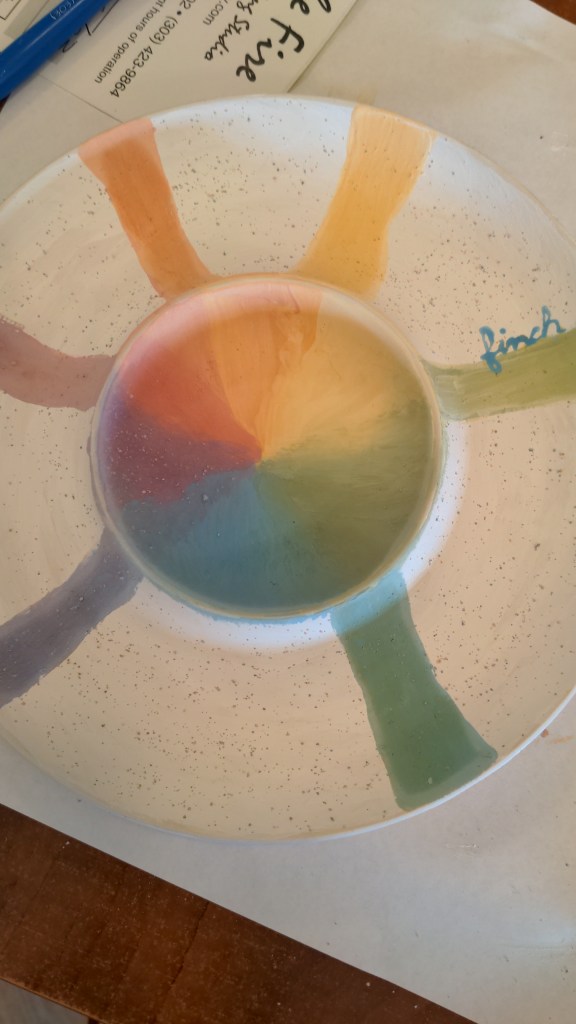
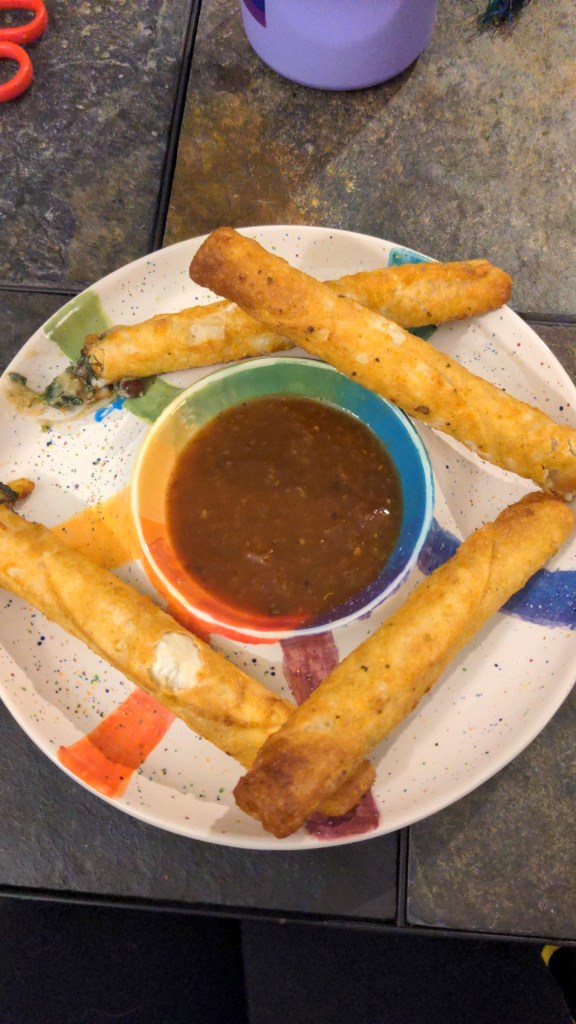
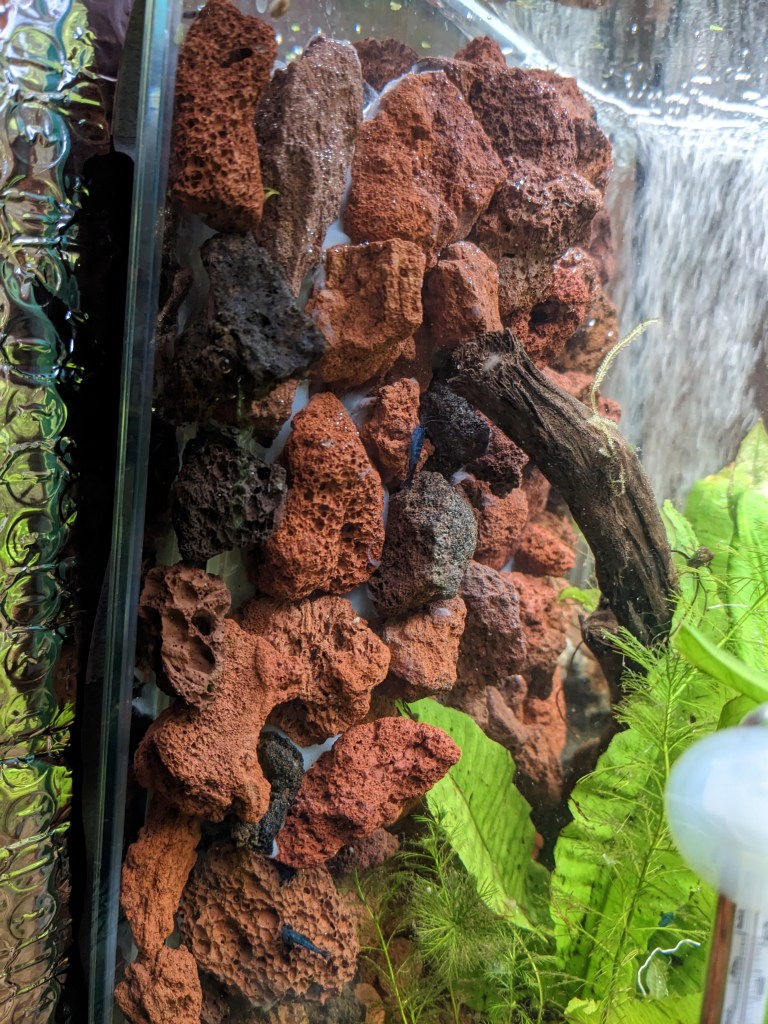
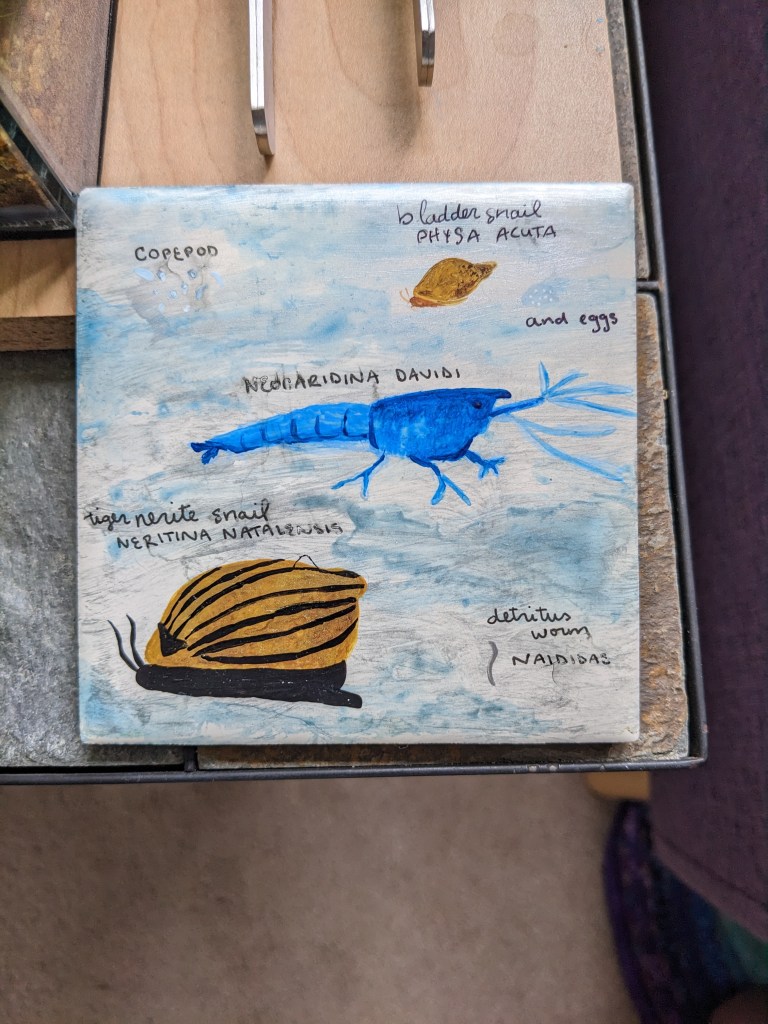
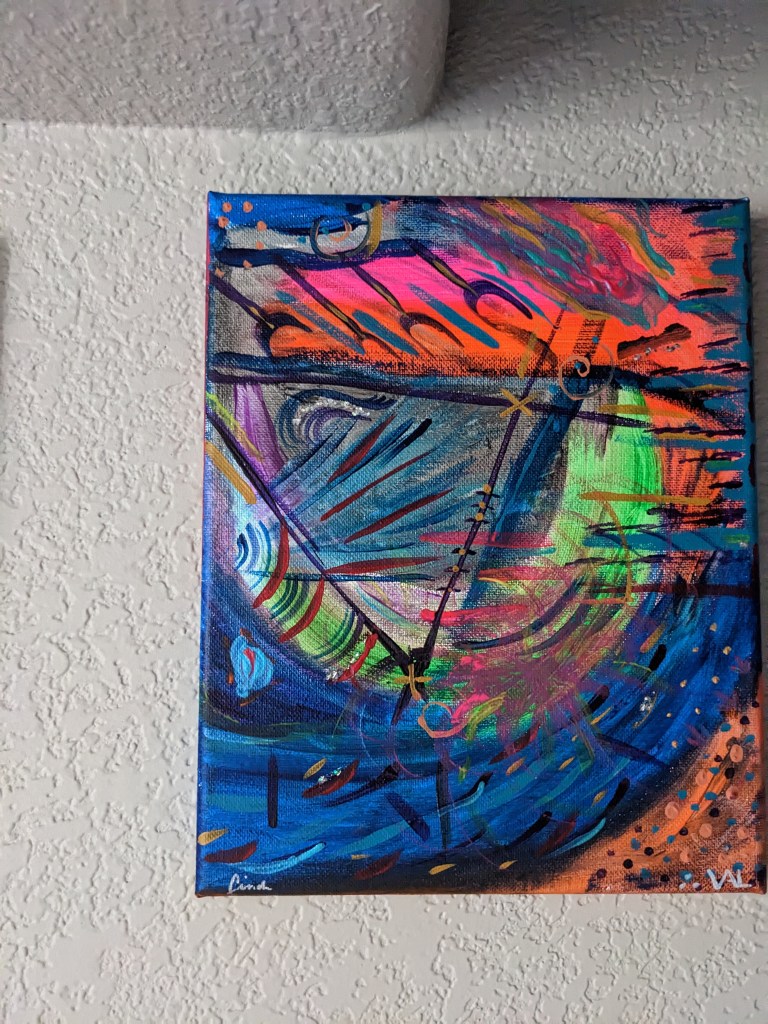
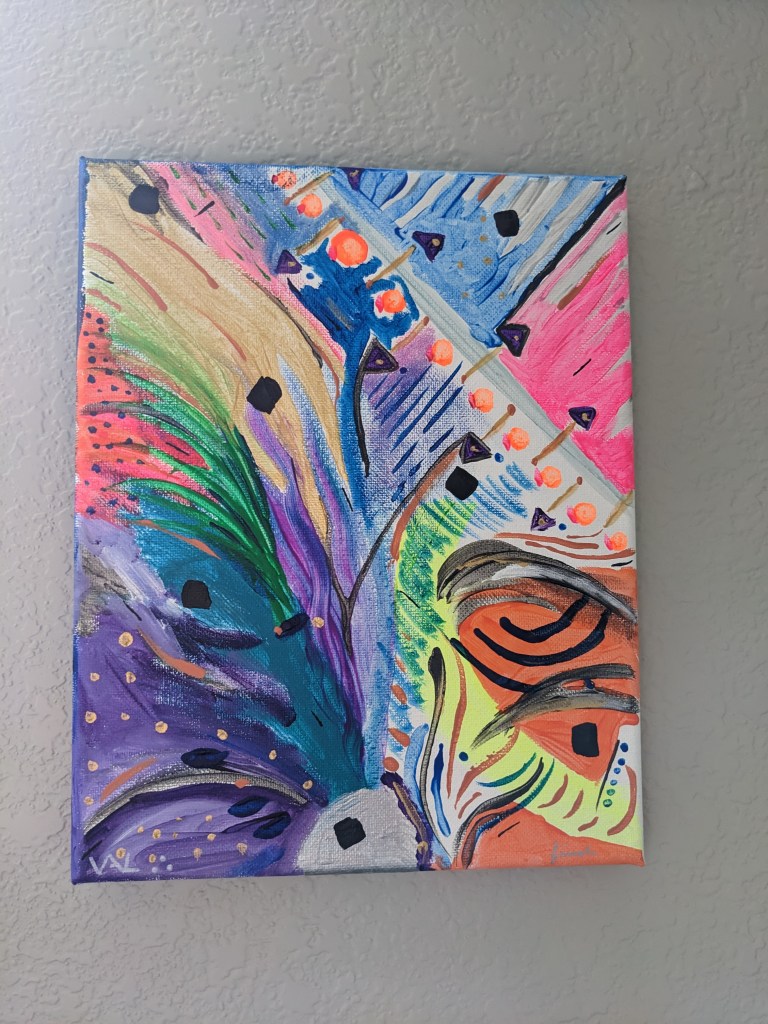
Leaf collages with my cousinLeaf watercolor for my auntAdded the reflection to this muralRainbow crochet scarf for my friendPainted the mini for my character in Dungeons & Dragons (dragonborn sorcerer named Taro)Company sent me this mini on accident, painted it to look like a solider from the Xi’an terracotta excavationBaby quilt for my friendsBaby quilt for my friendsVolcano for a D&D settingVolcanoes and observatory for D&D settingCrochet elephant partsCrochet elephantPottery painting beforeAnd after, featuring taquitosLava rock wall for my shrimp tankSpecies sign for my shrimp tankAcrylic paint collab with my friendAcrylic paint collab with my friend
After the most recent quilt I made, I didn’t spend much time in the sewing room for various reasons, and picked up crochet! I’ve been trending towards things that are more “by hand”, like English paper piecing, and embroidery, so it made sense for me to get into crochet or knitting. I chose crochet because it seemed easier to get into and has the capability for making three dimensional objects.
I started off as I usually do, on YouTube and with books from the library, and immediately gave myself tendonitis from crocheting for too long and holding the yarn too tight. Now, I try to cap crochet sessions at two hours, or else I’ll go on crocheting forever and hurt my hands and wrists.
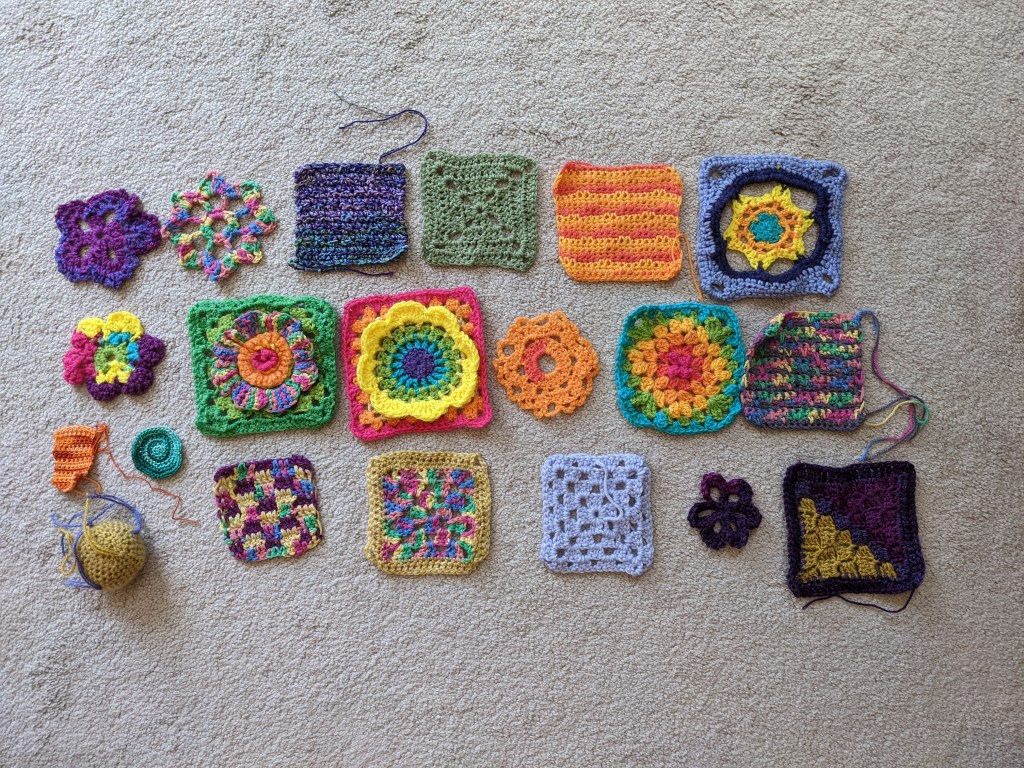
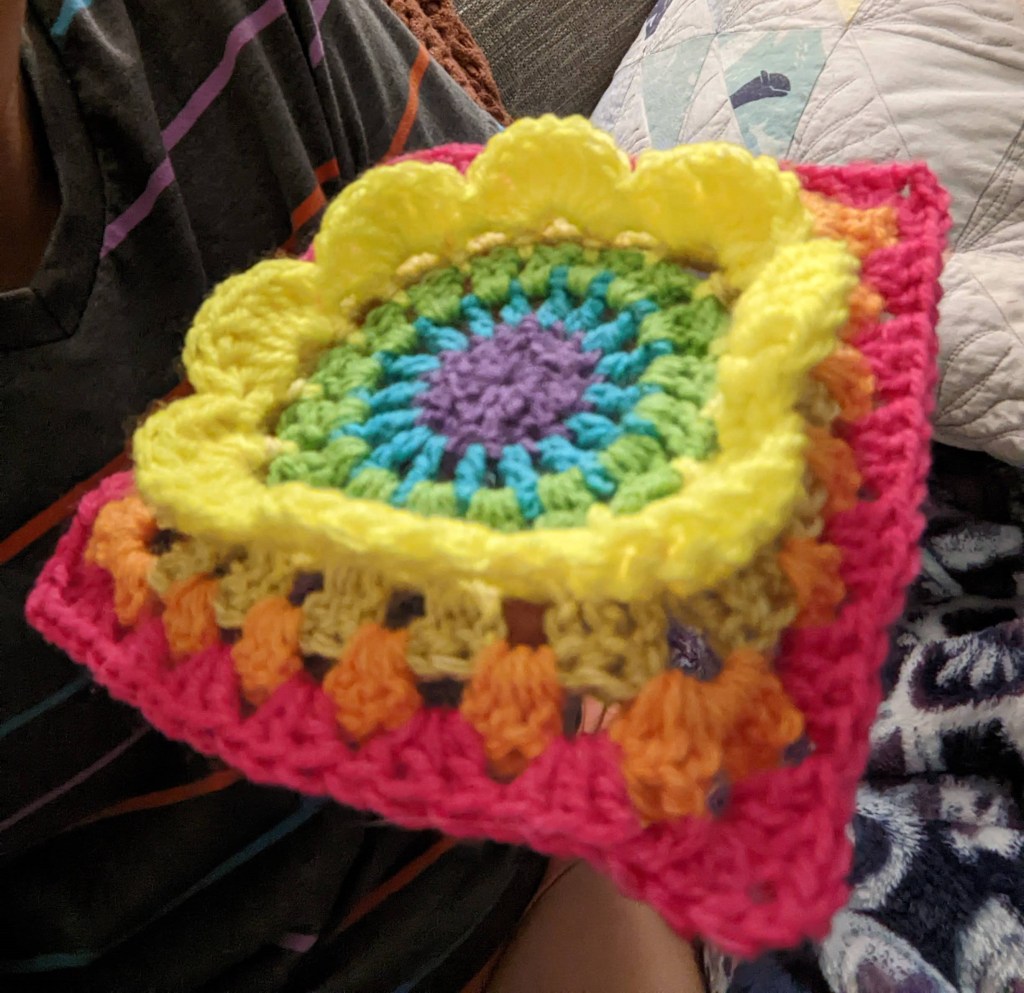
I started off with granny squares and little flower motifs 🙂 and a catnip ball for my friendly helperThe three dimensional granny squares were really fun 🙂
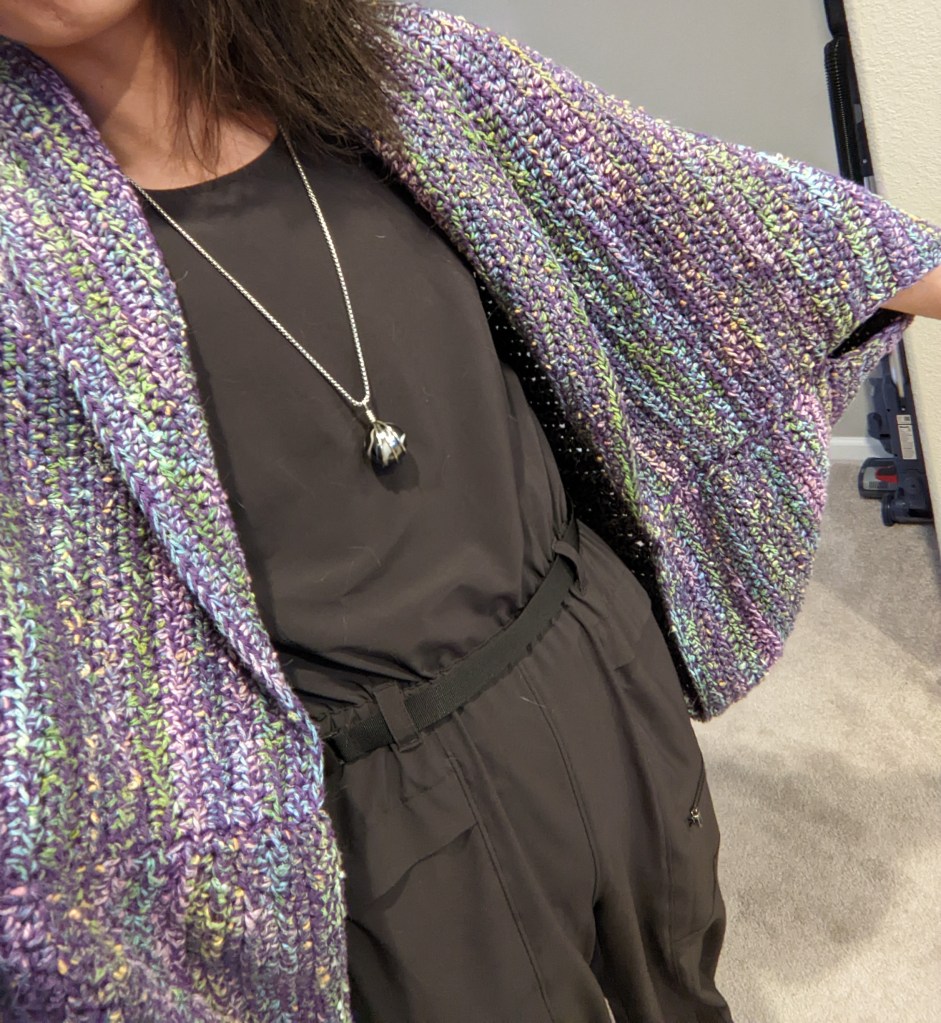
Then I wanted to make a sweater, but a super easy one. This sweater is based off a blanket sweater pattern, which consists of a rectangle with the corners folded in to make sleeves 🙂 I used two yarns at the same time to create a textured/blended effect.
Closeup for the texture 🙂
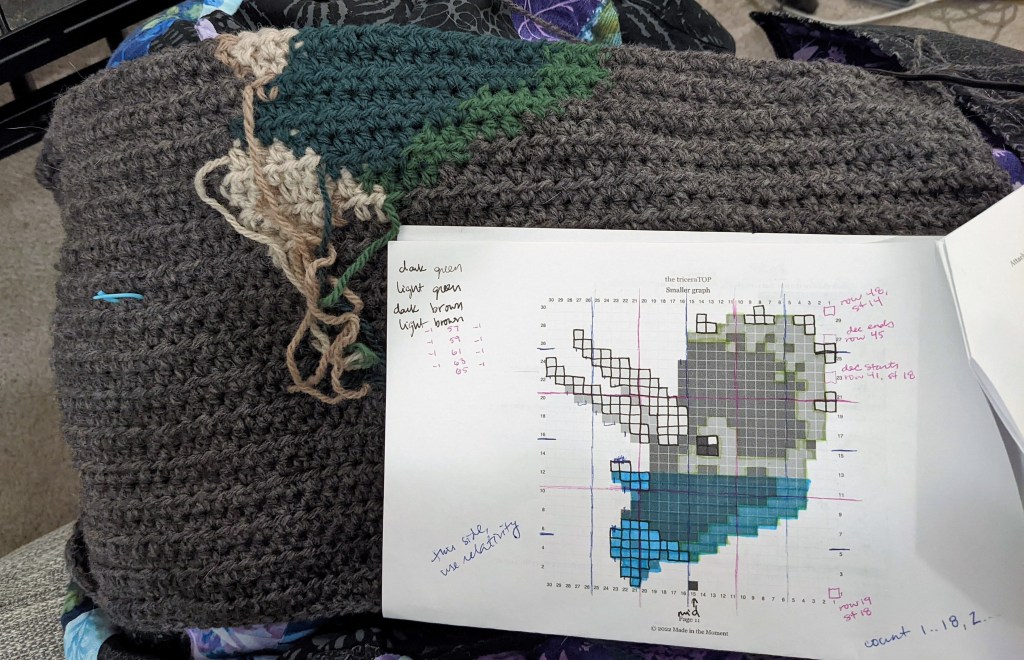
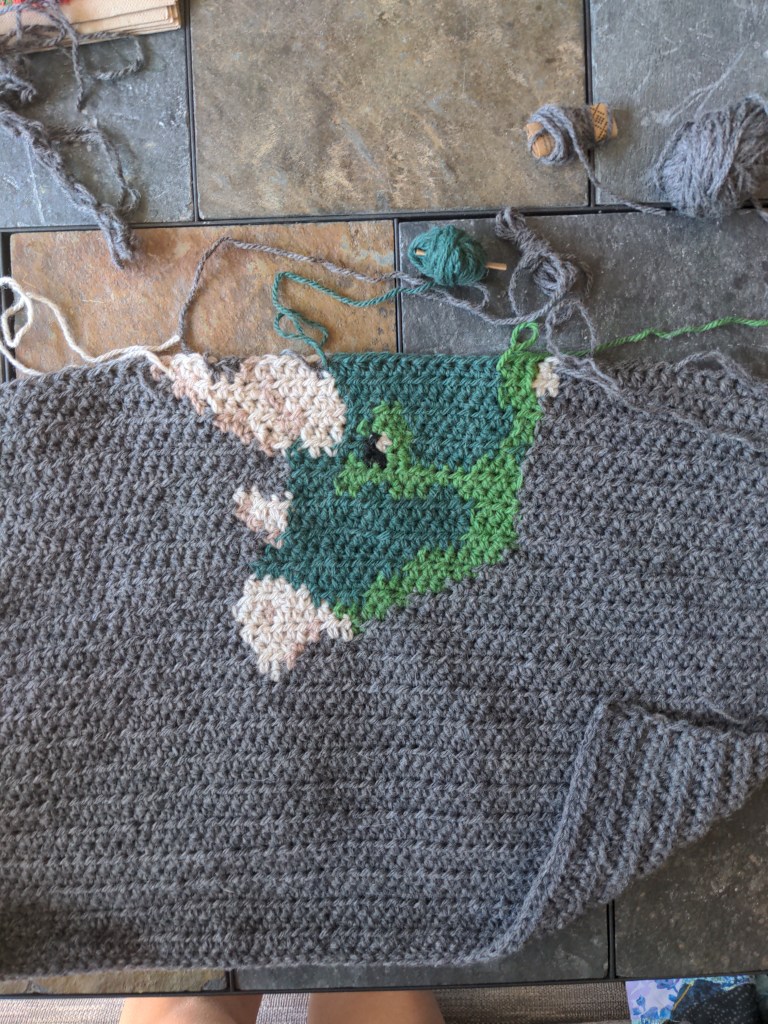
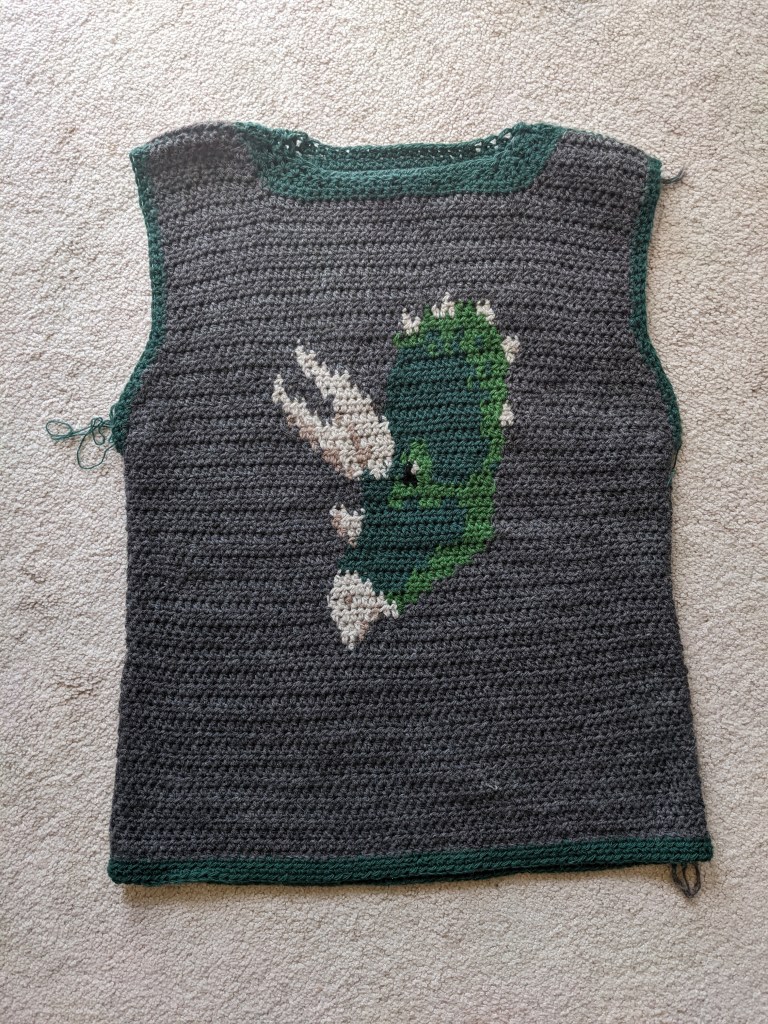
Then I saw this TikTok and needed to make my own dinosaur sweater, so I did. The pattern was really straightforward, and it’s made to measure instead of a set row/stitch count. I started doing the back and (a) got nervous I would run out of yarn, which I did not and I have a lot left over, and (b) thought it would be fun to do some color changes for the aesthetic and for practice. Practicing the color changes and learning how different techniques (such as tapestry and intarsia) create different looks was very helpful in planning and executing the front. Also, now I know that I can crochet any colored design that can be made with a grid (some artists use crochet to do 8bit art, and a crazy dedicated artist is using crochet to make an early-2000s-wordart piece).
Crochet colorwork like this uses a grid to tell you what colors to use.
The color work wasn’t technically difficult, but required a lot of care to keep the different yarns in their own space and not tangled. I tried to weave in the ends as I went, but then I had to undo some of it because I forgot to adjust for the arm holes, and that didn’t go very well. After that, and in the future, I’ll keep the ends loose until I’m positive that everything is correct and I don’t have to undo anything.
I didn’t do ribbing, because I don’t like it, but I think the green border does add a little something. A finishing touch.
I think crochet has reopened the door to making my own clothes because it’s more forgiving than sewing, especially with non-stretch fabric. There’s much more precision and care necessary for sewing garments, and I enjoy playing with crochet’s many textures. Plus, there’s the “by hand” aspect, which is fun and compelling for me. And I do love a good sweater 🙂
Other crafts I’ve been up to recently:
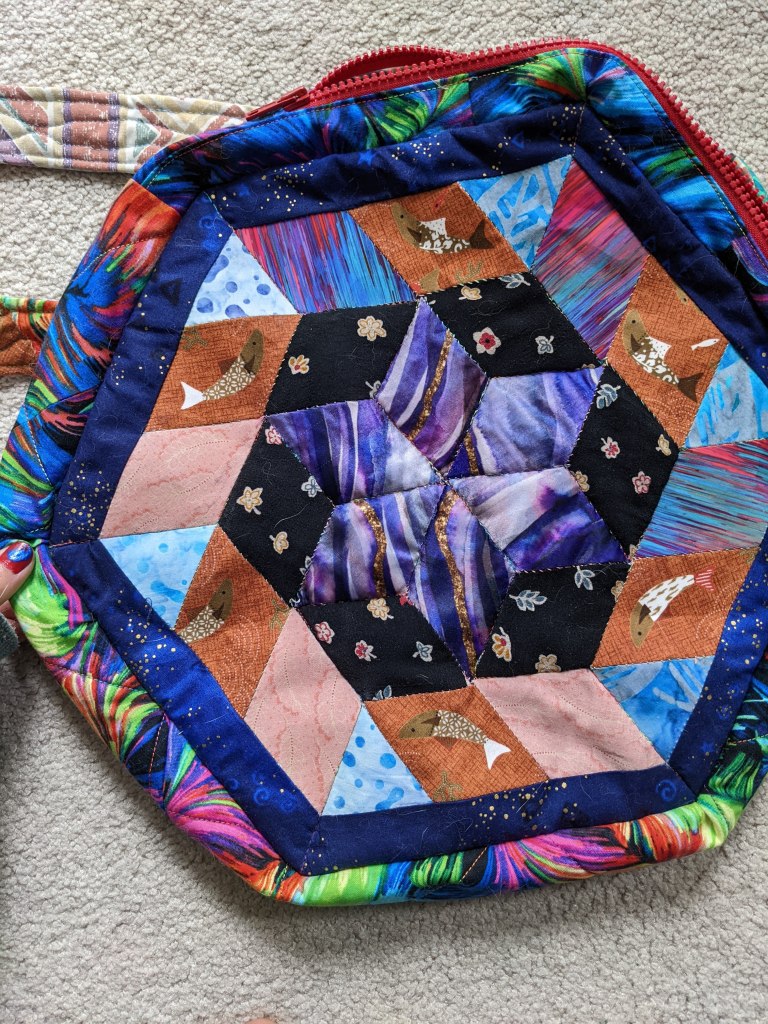
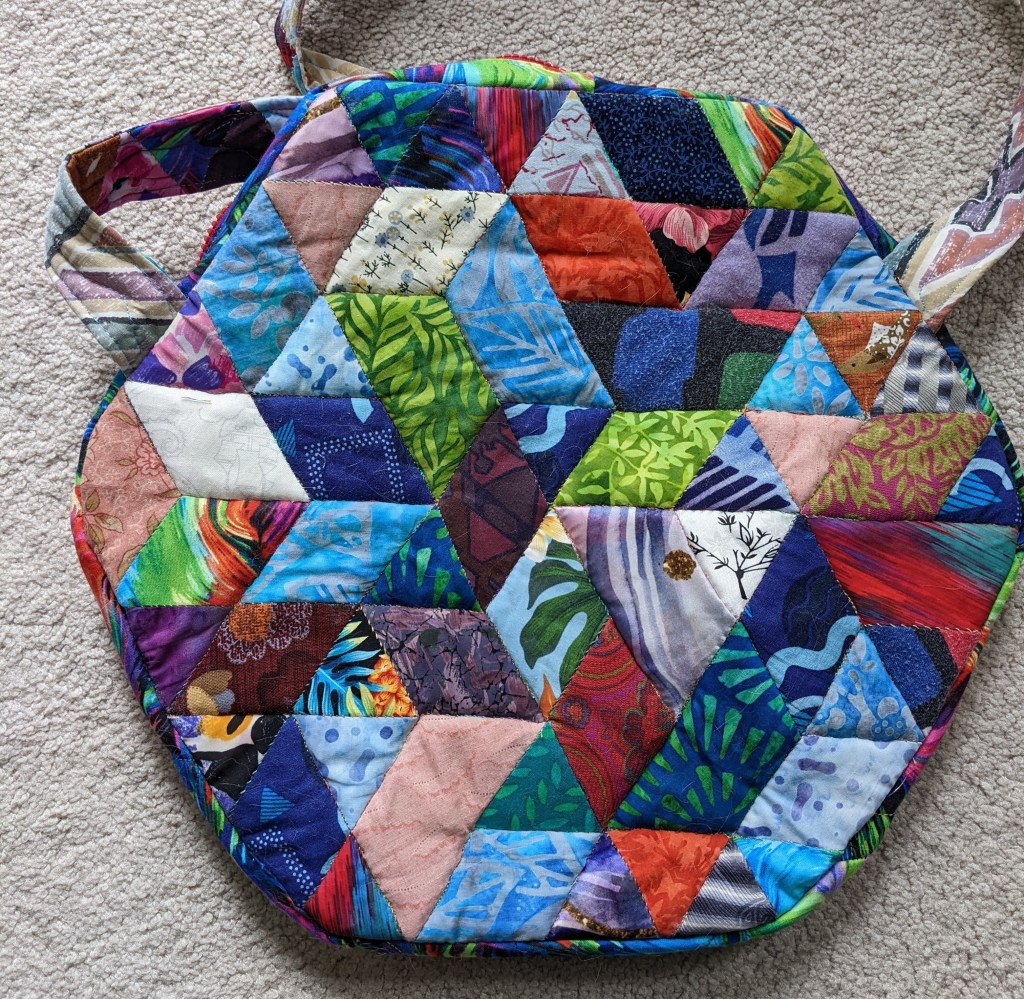
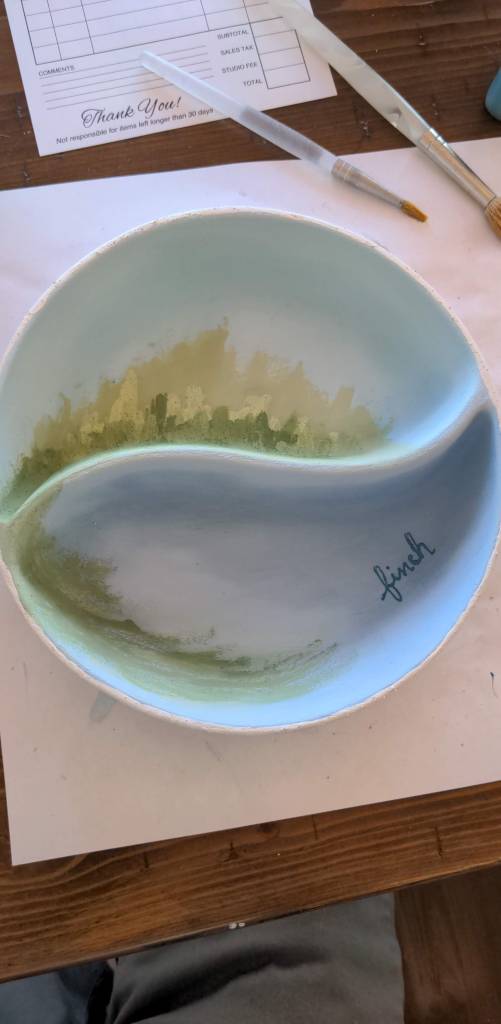
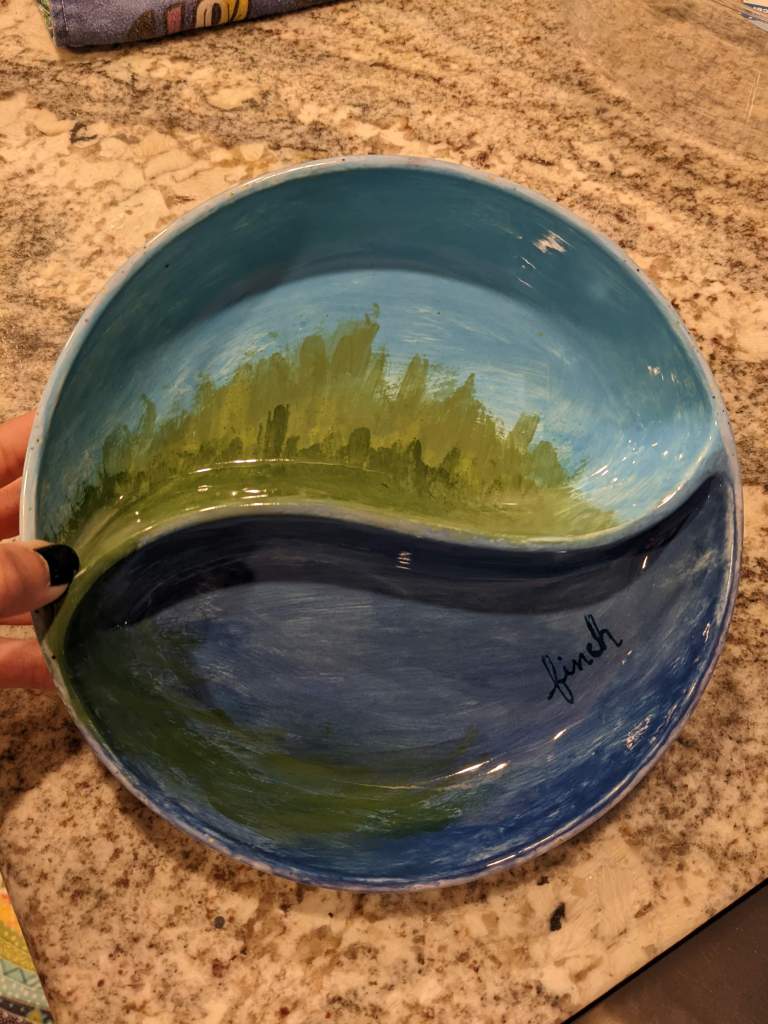
EPP bag to celebrate my new job (front)EPP bag (back)Paint your own pottery – before firingPaint your own pottery – after glazing