Monthly Archives: March 2025

First Overshot Weaving

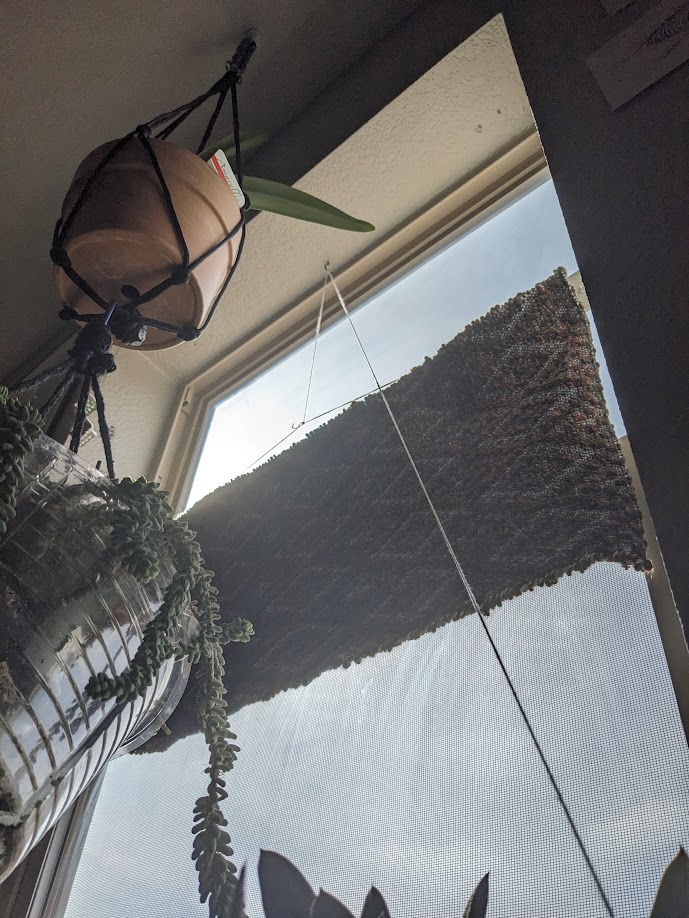
So my desk is under a window, and throughout the day, the sun blinds me. I have a bunch of plants in the window, so I don’t like lowering the entire window shade. I’ve been balancing an umbrella on my windowsill plants and computer monitor… But I needed something better.

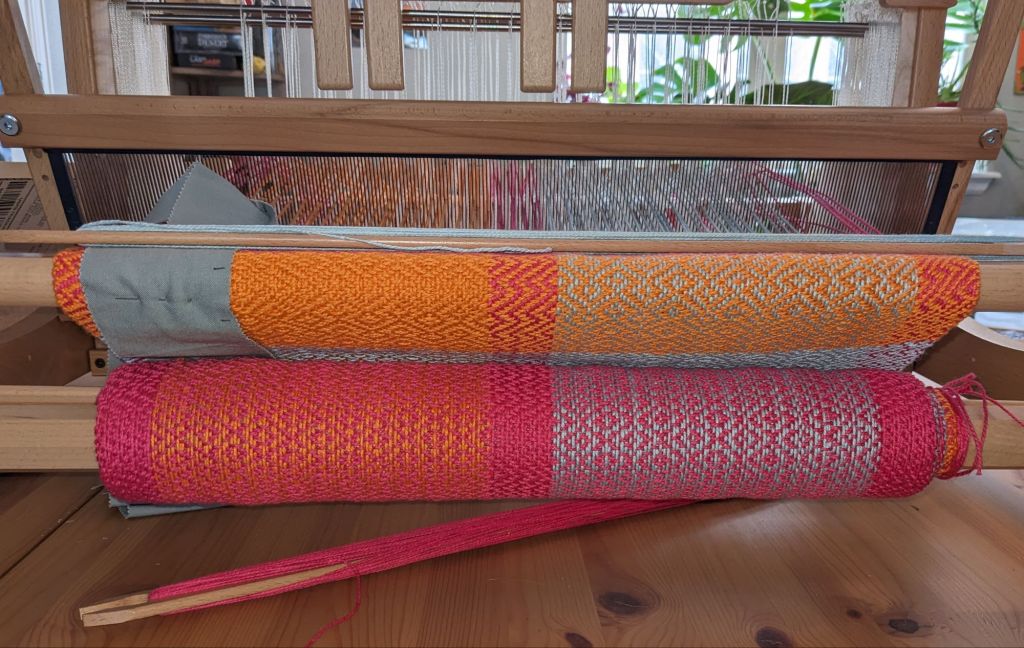
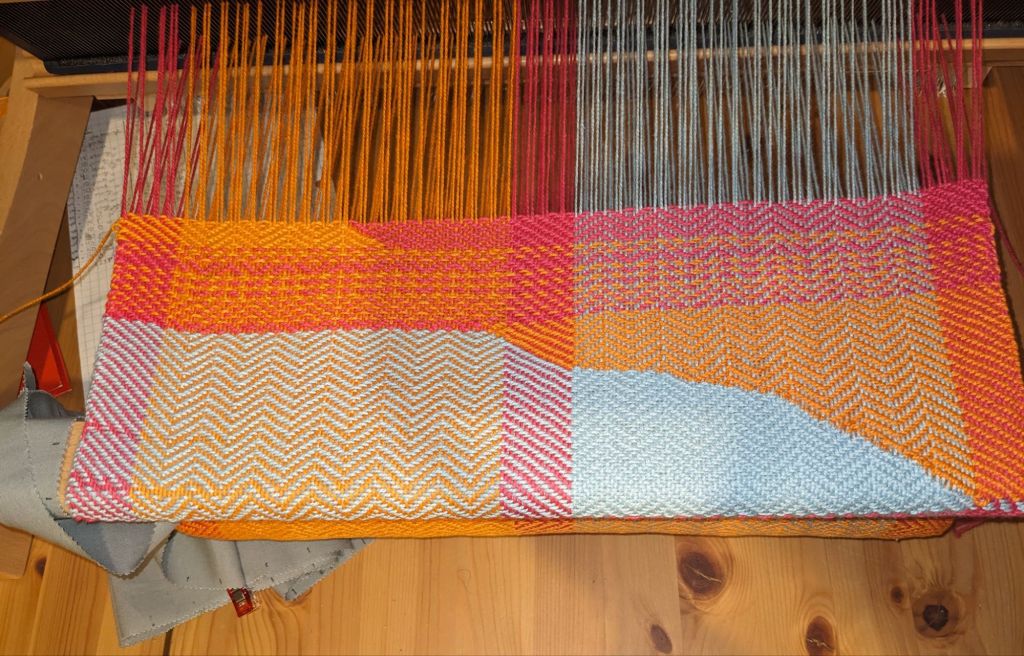
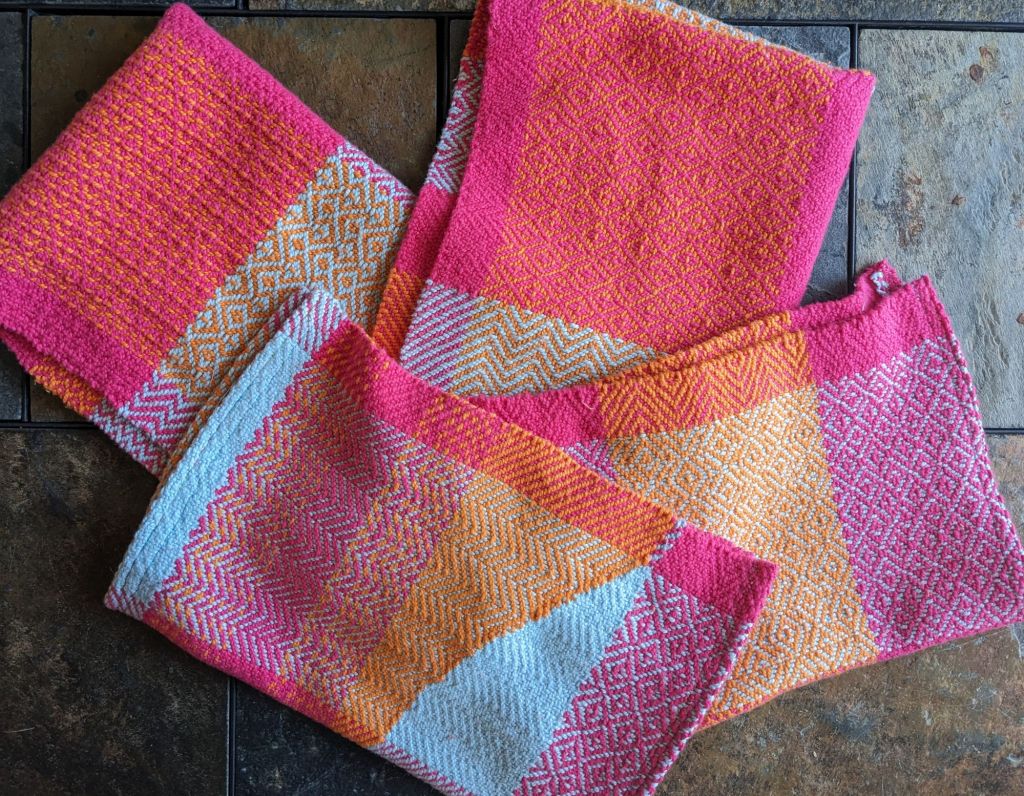
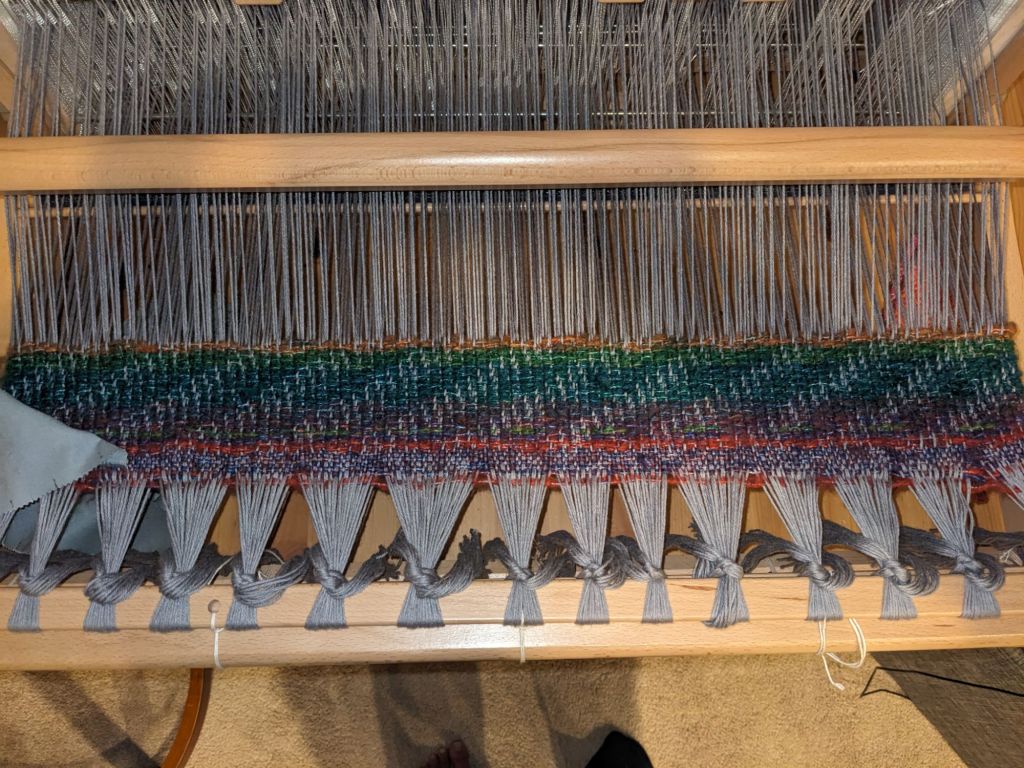
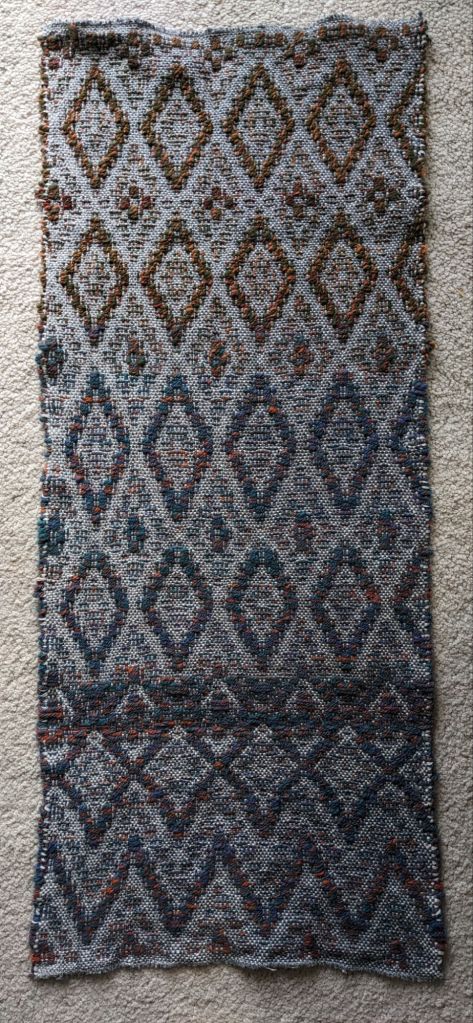
I decided to weave a panel that could move up and down so I could block the sun as it moves across the window. I have been wanting to understand more about overshot weaving, which has two different wefts and makes really interesting blocky patterns. Since this was going to be a small piece, I figured it was a great time to learn an overshot pattern from Strickler’s book.

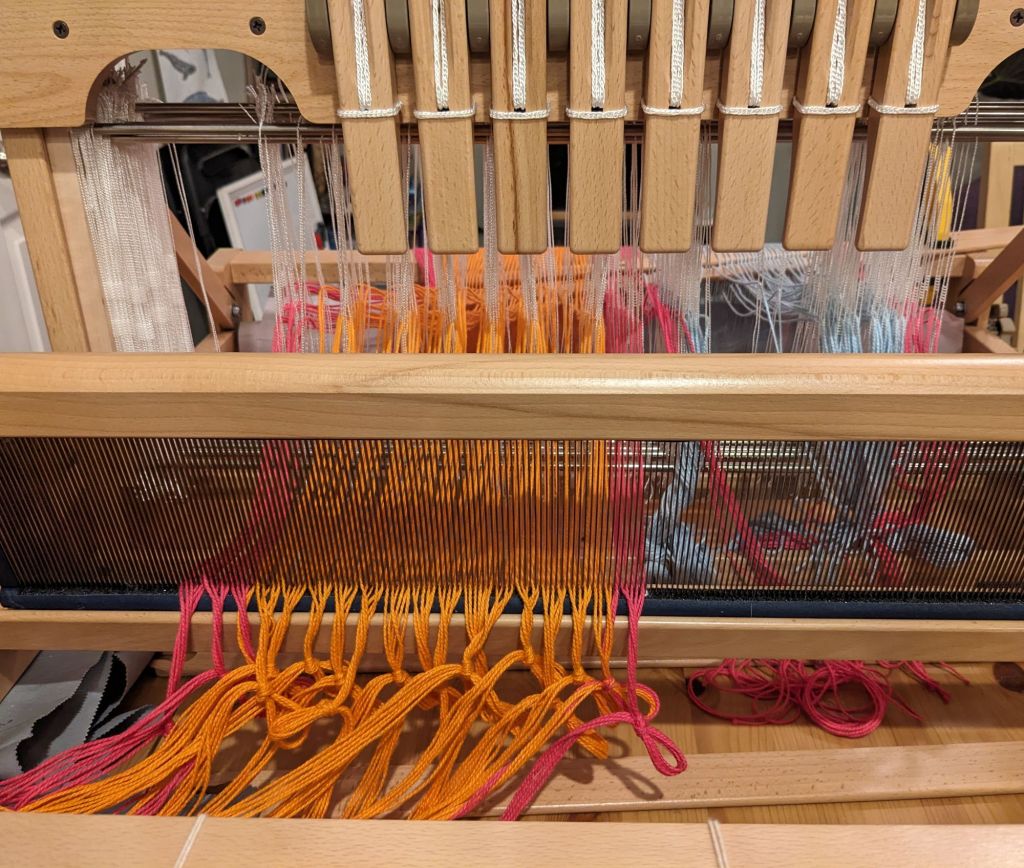
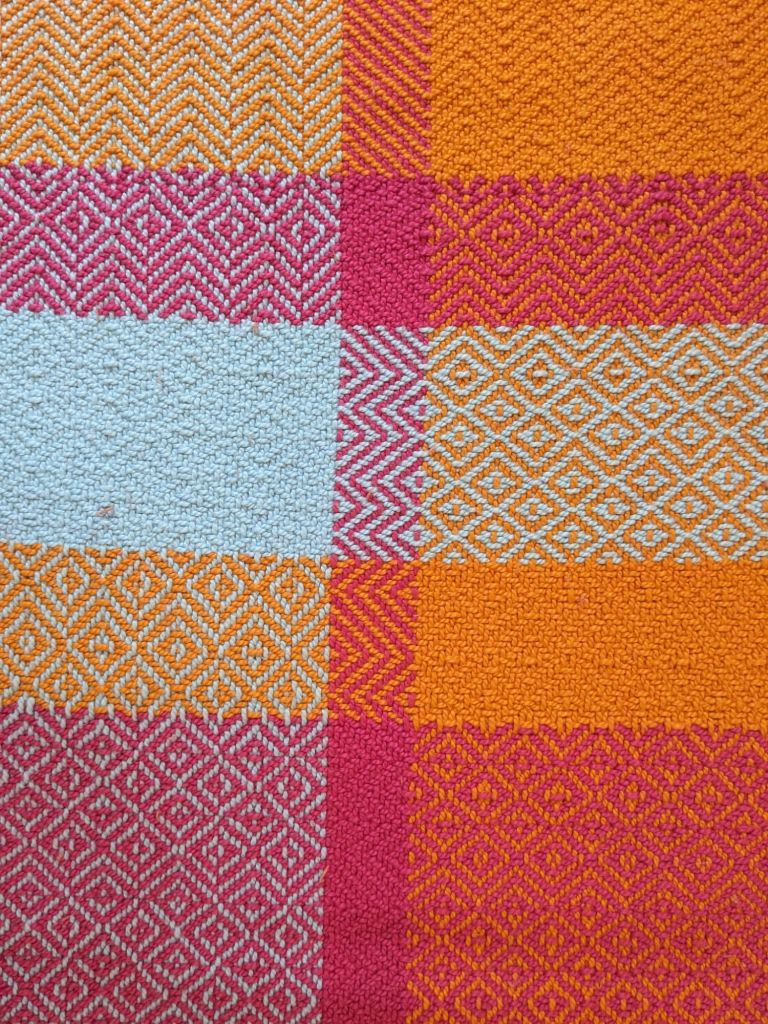
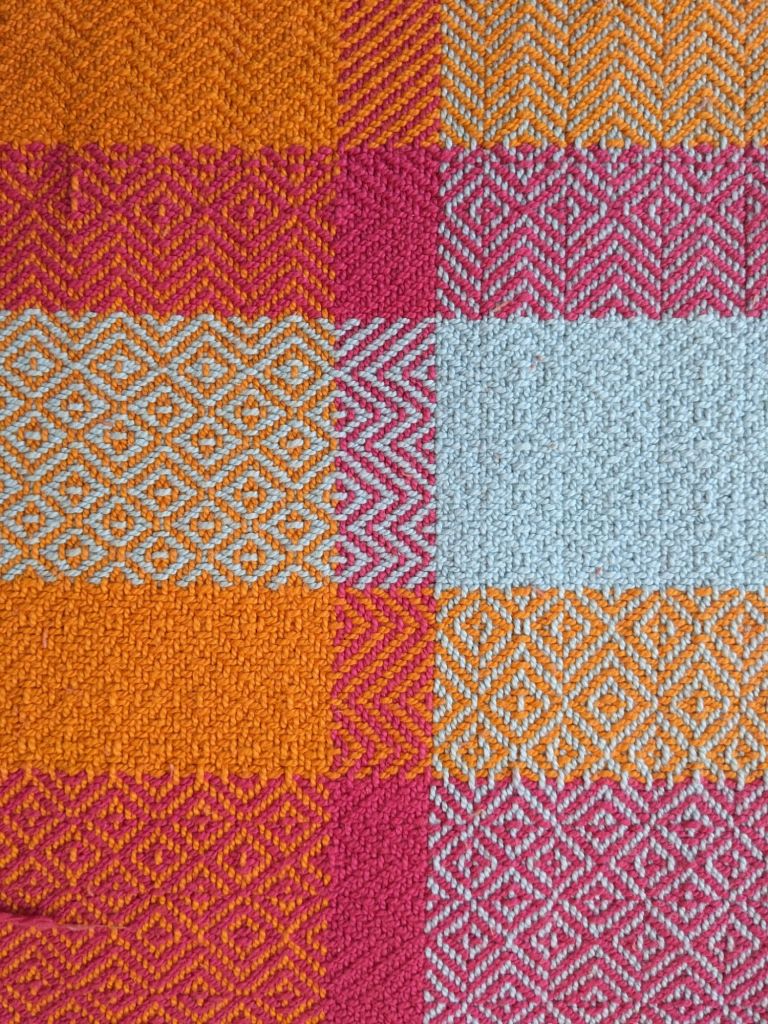
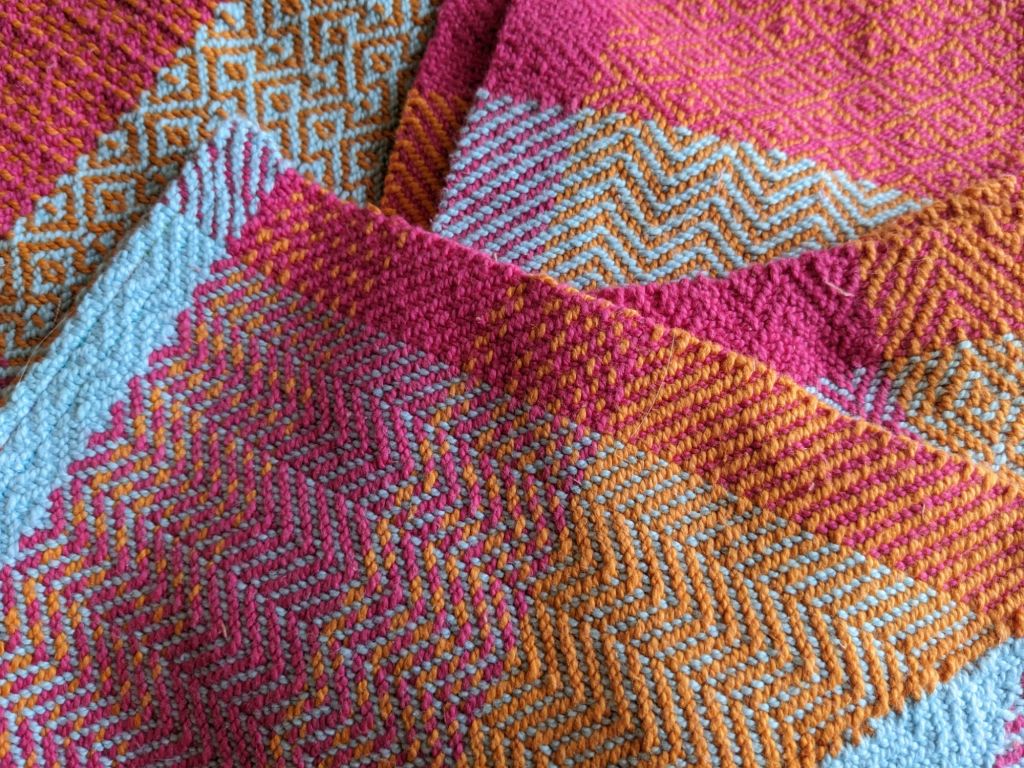
Overshot is a type of weave structure where you raise adjacent threads to create weft floats (long horizontal lines). And you do the same weft floats multiple times in a row, which creates “blocks” of color. Since you can’t do the same floats back to back, a plain “over under” (tabby) weft pick is put between them to secure the threads.

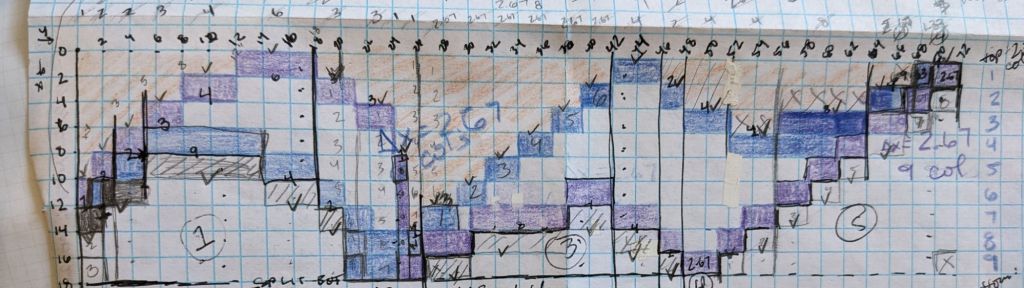
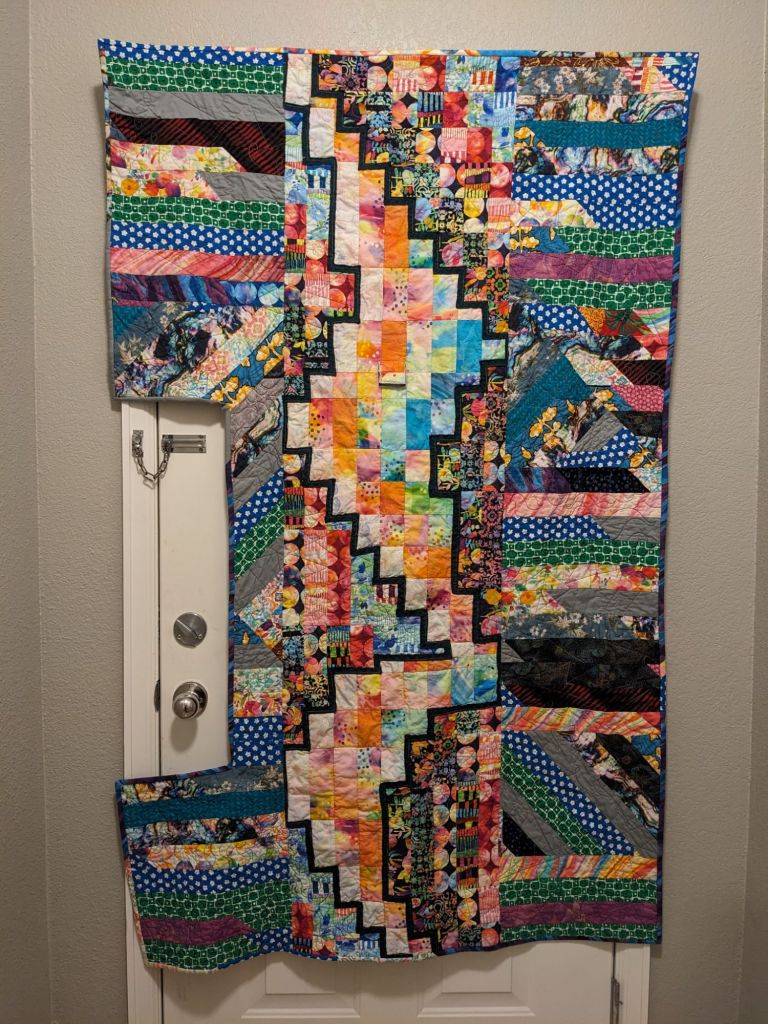
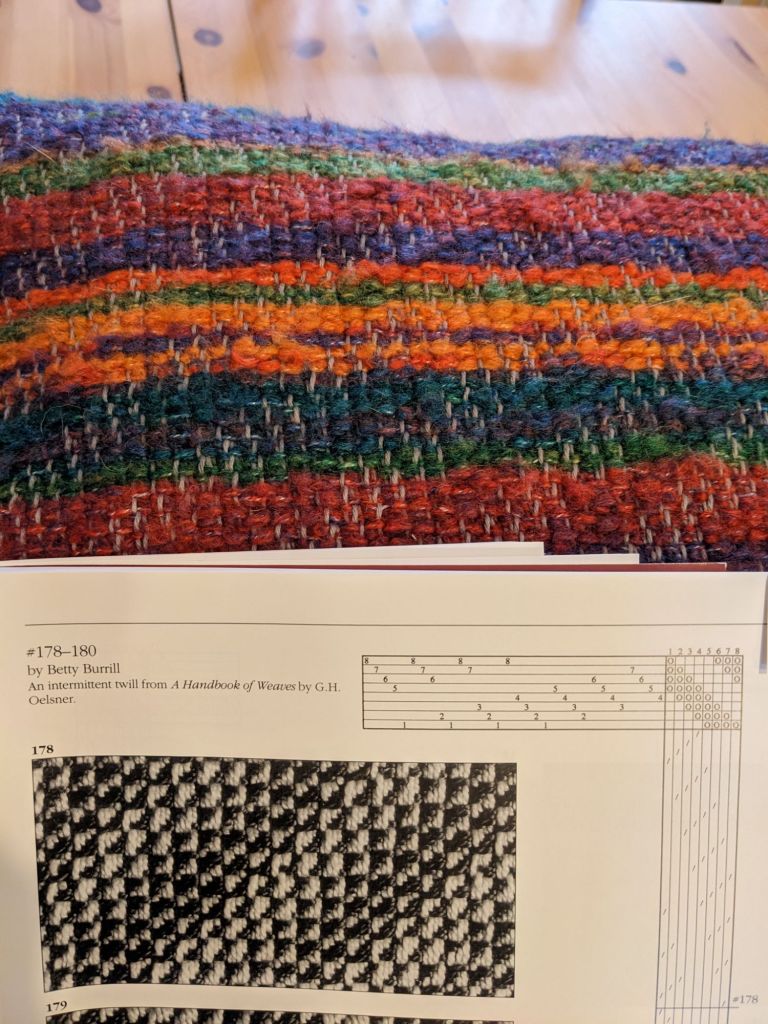
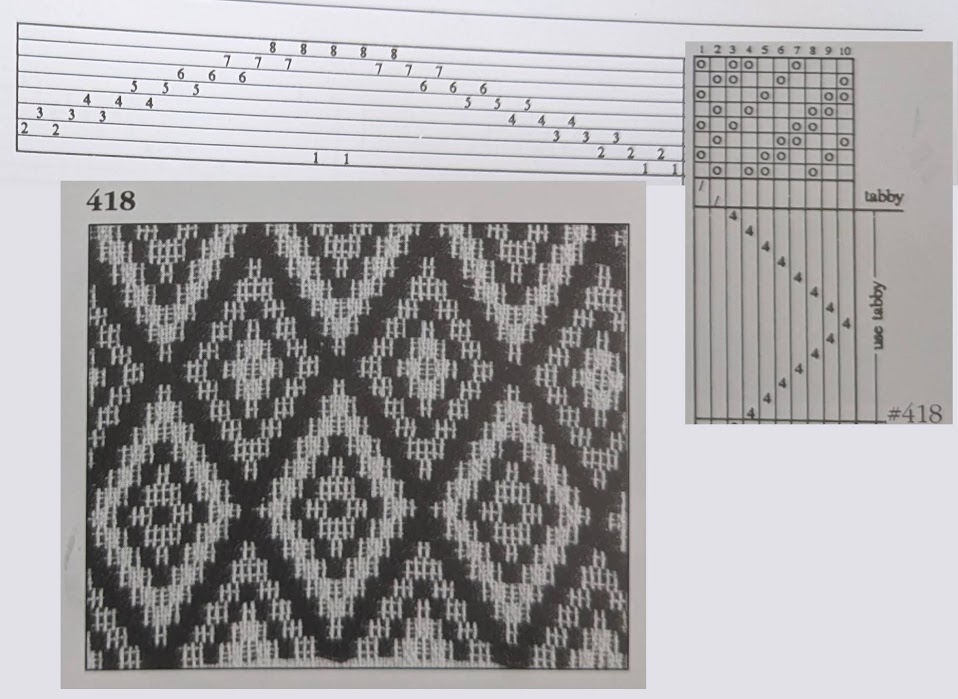
I chose #418 by Ardis Dobrovolny, and “eight-block point repeat twill”, because it’s clearly an overshot version of twill diamonds, which I already love and know about. I had a theoretical understanding of overshot, but didn’t quite understand how the threading diagrams created the pattern I could see – so using a familiar diamond twill helped me compare and contrast overshot with what I already knew.

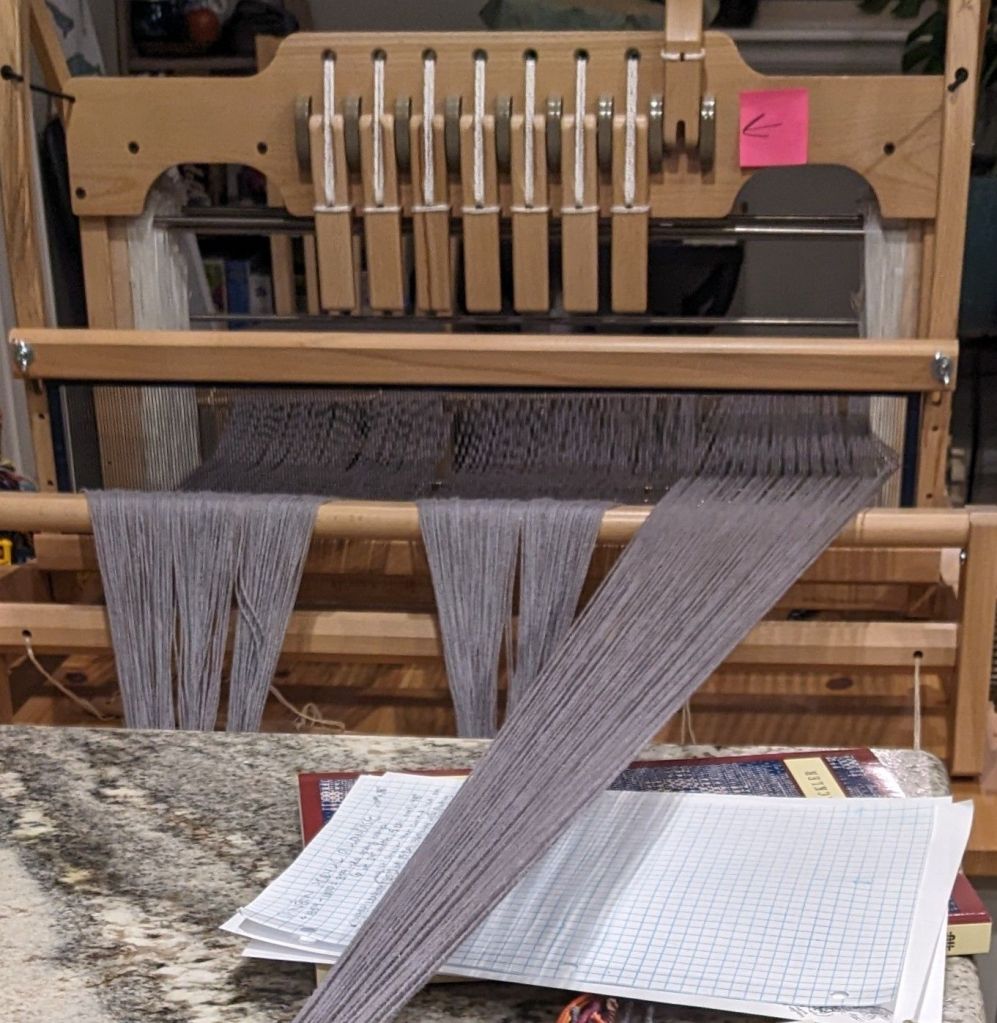
Despite having the pattern, I did some improvising on the order of the sheds and the number of picks on the same shed. I even did a few rows of the inverse sheds, where the threads meant to be raised are lowered.

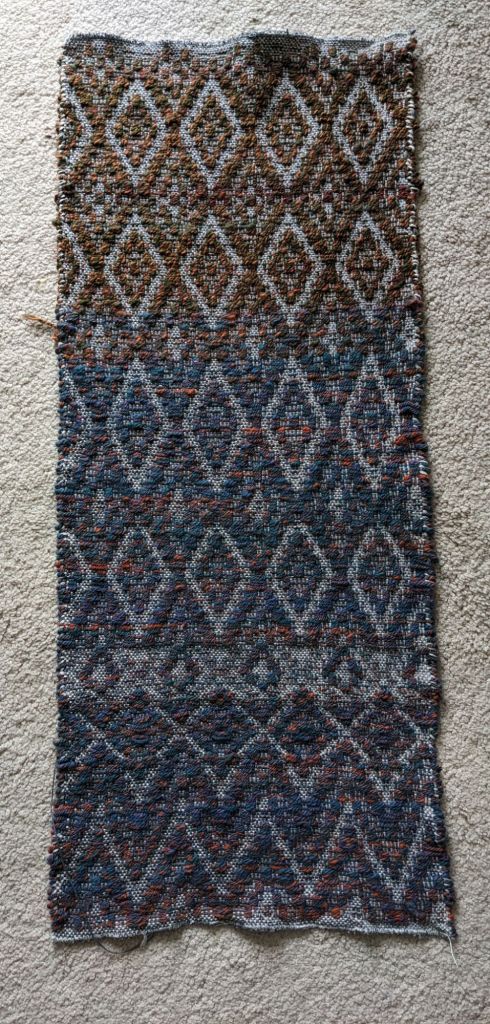
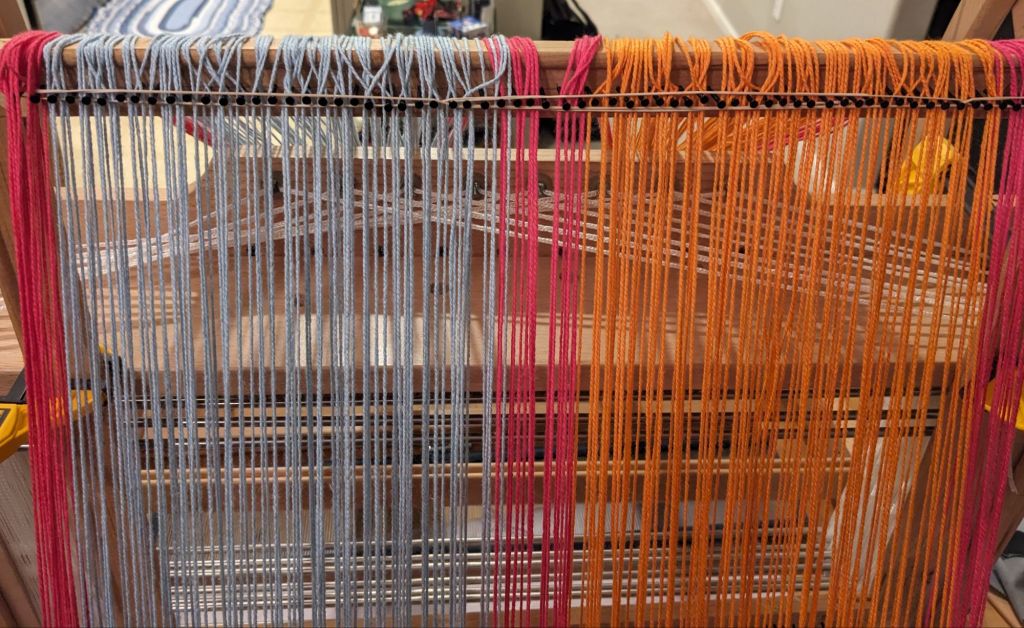
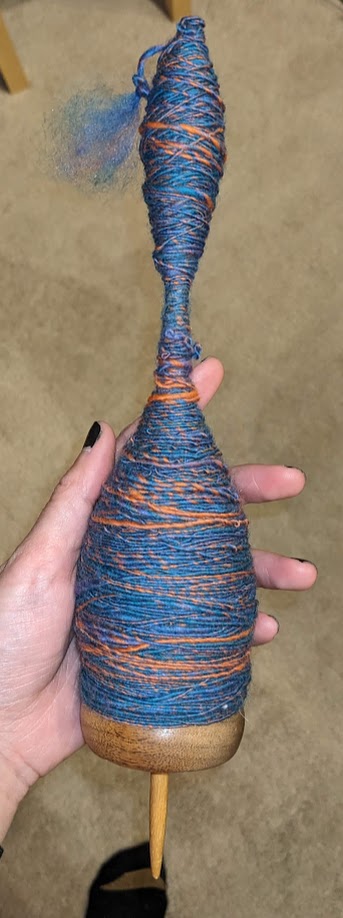
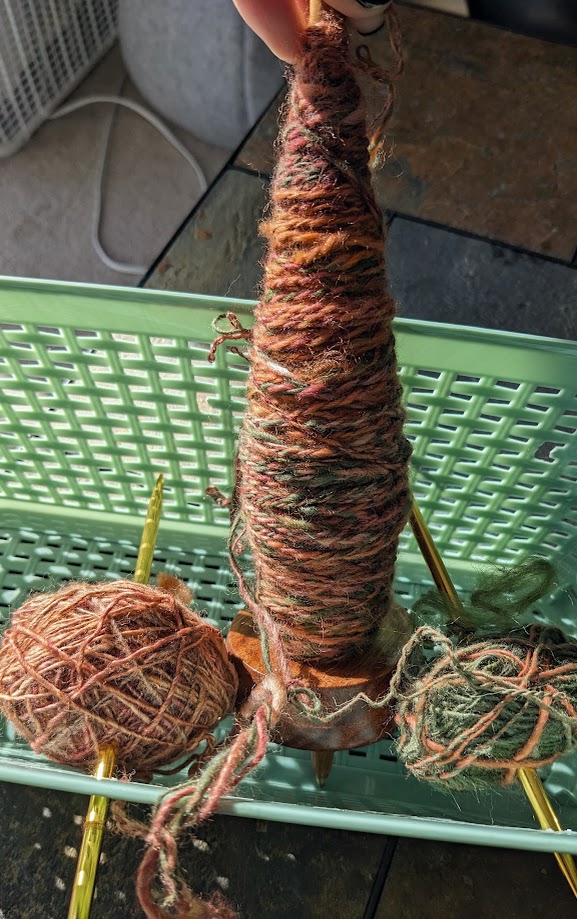
This was also my first time weaving with my own handspun!! I originally tried a different handspun but it didn’t have enough color contrast with the background warp and weft, so I pivoted to this fun blue and orange wool yarn 🙂 I spun this on my bottom whorl drop spindle. Then I ran out of that yarn and added some wool “Autumn”, which I spun on my supported spindle. I used commercial cotton yarn for the warp and tabby weft.

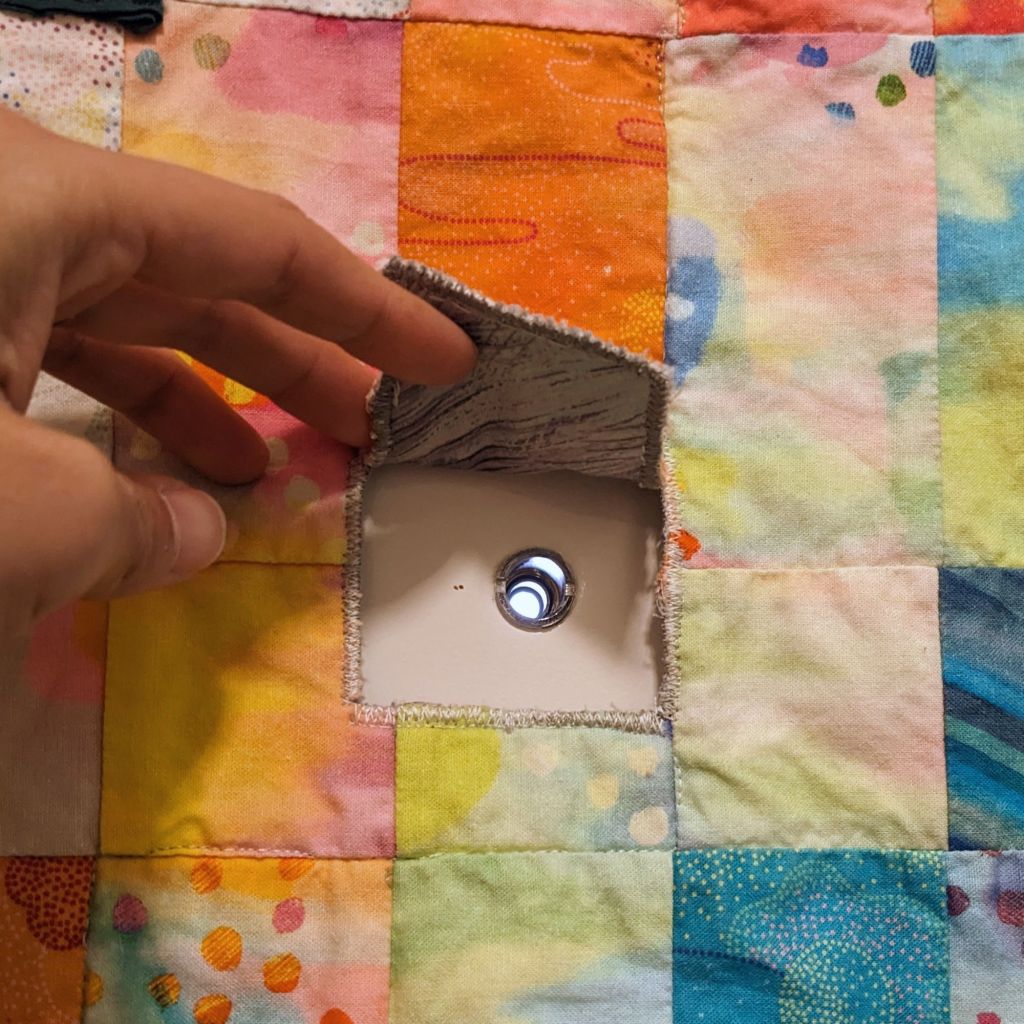
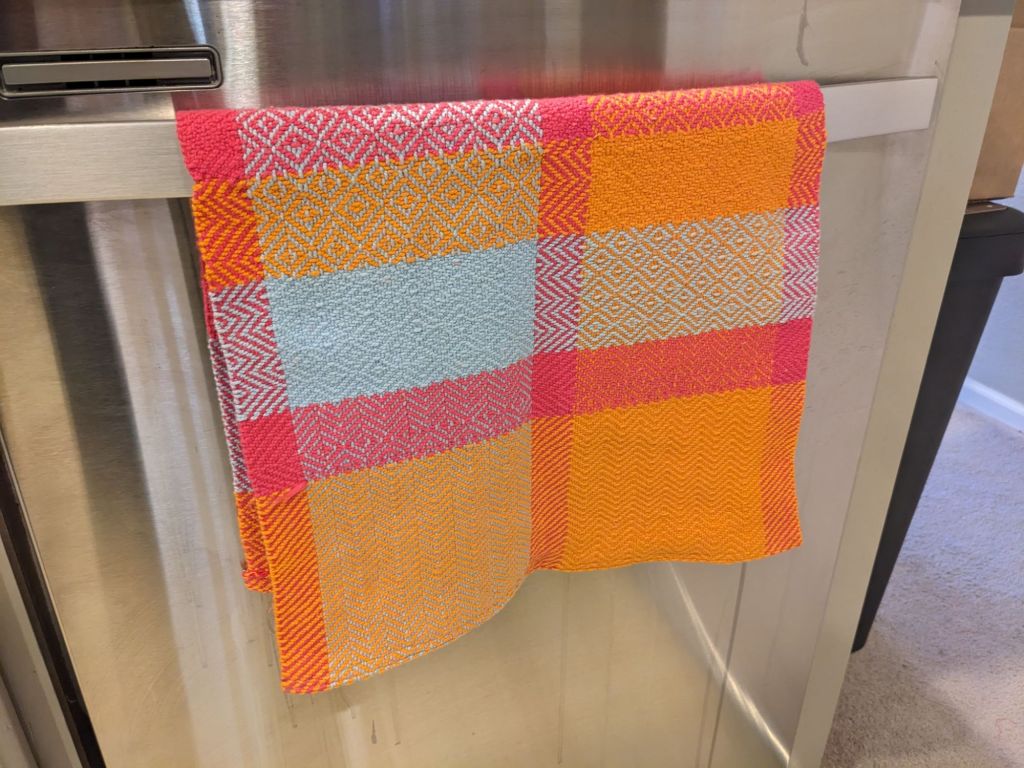
Then I had to do some yardstick-and-hot-glue engineering, and installed it in my window 🙂

blocking the sun 🙂

Project completed March 2025.

Rest Quilt

My front door is not completely airtight. I tried getting some foam strips to put inside the doorframe, but then I couldn’t close the door. I thought about, and started, a crochet tube that I could hang on the hinges to block the most air from getting in…

But in the end, I decided a quilt that could cover most of the frame/door gap would be the most effective, most fun, and most aesthetically pleasing. I had a jelly roll from Moda Fabrics and decided to do a bargello-ish quilt. I wanted to depict a quarter rest, since I am a musician and I want my home to be a place of rest. A place between all the noise and chaos and effort-giving to rest, restore, relax.

I sketched out the shape on graph paper and determined the widths of the strip sets. I used two “leading edges”, one for the left side of the rest (white) and one for the left side of the background that bounds the rest (dark flowers). I used lighter and less busy prints for inside the rest, and the darker and busy prints for the background.

The blue and purple edges are the rest, so the top edge in the picture is the left edge of the rest, and the gray blocks below the bottom edge are the background strips
Rest fabric in the middle, with the busy background fabrics to both sides

As with a normal bargello, I assembled the strip sets and then cut them to the corresponding widths. The jelly roll didn’t have duplicates of all the fabrics, so I alternated the ones that didn’t have exact matches. Then I pressed the seams to alternate, and sewed the strip sets back together.

After some consideration, especially using a black and white filter on my camera, I decided the edges of the rest needed a tiny border to really make it stand out. I attached a strip of dark green as if it was bias tape, sealing the raw edges of the strip sets inside. Then I appliqued the background onto the right side of the rest, ripped off the unneeded background, and appliqued the rest into the extra background.

So that was the rest part, the middle part, done. I still needed two sides to make the quilt large enough. I cut a bunch of 2.5″ strips out of scraps and did a “jelly roll race” type of construction to make a big panel of stripes. Seeing as this area was meant to be busy and chaotic, I cut the panel and re-sewed it together on an angle a couple times. Then I split the panel in two for the two sides, and sewed them onto the middle rest panel.

Then it was time to quilt! I did my most confident free motion motifs: loops, “toothpaste”, and abstract geometric, and switched thread throughout. I liked just doing some freeform, unstructured quilting and filling the space with whatever I wanted. For the rest, I did free motion stitch in the ditch because I needed to change angles often and didn’t want to deal with moving the whole quilt 90 degrees every few inches.

I had to do two nerve wracking cutouts – one for the door handle and chain, and another for the peephole. I measured multiple times and then bravely cut once. 🙂

Peephole cutout 🙂 so strange to take the scissors to a finished quilt
Hand sewing the binding to the back with the friendly helper

To affix the quilt to the door, I made a little frame out of wooden yardsticks (my quilt hanging devices of choice) and screwed it into the door. I used fabric loops to hang the quilt on the frame. And thus, it was done, ready for the tail end of this winter and many winters to come.

Project completed March 2025.

Second Adventures in Table Loom Weaving

Twill towels

  • 3/2 cotton “Beam” thread from Gist Yarn warp and weft in three colors
  • Threading was by color, so I could experiment with different patterns and see the effect of the weave and the color 🙂 I planned to have all patterns be based in 2/2 twill, just different combinations and repeats
    • Pink – straight 12345678
    • Orange – point 12345678765432
    • Blue – broken
  • Warped between two chairs flipped upside down on a counter and table – did not work very well because they slid together over the warp, so the beginning threads were longer than the ending ones.
    • Also learned that I need to put more organizational ties on the warp so the threads don’t get tangled when transferring to the loom
    • I had to use a homemade pin loom as a makeshift raddle to separate the warp threads, and since I didn’t really keep the warp untangled… this was really annoying and I had to keep stopping to untangle the threads so they’d go through the raddle, and also the tension was really uneven throughout the winding of the warp.
  • One floating selvedge on each side to attempt to keep the edges straight and allow patterns that don’t always go over and under the outside threads
Note the tangled threads along the top as they enter the raddle… 😦
Sleying the reed
Blue and orange weft stripes at the bottom are point twill, pink weft at the top is the corresponding treadling to the blue warp threading (called “as drawn in”)
I called this blue weft pattern “ten jellyfish”, it is a 10 pick repeat and I think it looks like a bunch of jellyfish swimming up and down 🙂
I noticed that I was pulling the weft in more on the left passes than on the right passes – my right selvedge gradually comes in more and more, but my left selvedge is pretty consistent. I think this was also due to a lot of threads on my right side becoming looser as I wove, which I tried to weigh down but it wasn’t great.
I tried out some clasped weft – in the middle pink stripe I followed the twill line which was fun
  • Finished in the washer, dryer, and ironed, then used my sewing machine to make two kitchen towels and two napkins. It was a little intimidating to cut into my handwoven fabric, so I did a basting stitch on my machine on both sides of where I needed to cut.
😃

Pillow

  • Cotton warp, acrylic weft that I frogged from a sweater that I didn’t wear
  • Wanted to try my hand at using one pattern for an entire project instead of having fun improvising. I used Carol Strickler’s #178 for threading and “treadling” – which on a table loom is levering, I guess?
  • Direct warped with a clamp on the *opposite* side of my kitchen island, which ensured the clamp couldn’t move or fall off. I warped a couple sets of threads instead of doing all ~360 threads at one time. This was better for me logistically and it reduced the effect of the warp building up on the clamp, making some threads longer because they’re more diagonal than straight to the clamp.
    • I mainly chose to direct warp because using the homemade raddle went so poorly on the towels, but I want to try “normal warping” again.
    • Two floating selvedges on each side just to see if it would help with straighter selvedges.
Two bundles of warp hanging, the right is finished, ready to be wound on using the reed to separate the warp
Since this weft is very fuzzy, the pattern is more muted, but I like the diagonal pattern with the vertical gray warp with the horizontal colored weft stripes. So many types of lines 🙂
Finished pillow next to the pattern and book sample
Finished woven pillow and I transformed my crocheted triceratops sweater into a pillow too!

It was very rhythmic, weaving the same pattern over and over again. I started using an eight-sided die to keep track of which line I was on, and just wove and wove and wove. And I used all the yarn I frogged!

Projects completed early 2025.