
My second quilt! I loved making this quilt. It’s a kit from Bluprint that came with everything I needed to make the quilt top (and I bought yardage of one of the fabrics for the backing, and some 80% cotton/20% polyester batting). A bargello is a type of quilt that’s made using strip sets. This bargello needed 3 jelly rolls (6 strips of each of the 20 colors) and that made the entire 76″x92″ (technically a twin but fits on my queen bed) quilt top and I had some left over for a pillow.
The pattern tells you the order of the strip set, and in this bargello there’s only one set that you make 5 times (the 6th strip was cut up into baby rectangles to make a small portion of the quilt). Other bargellos can be made with more than one strip set to make ribbons that play together. So you sew all those strips together for five big striped rectangles. Then you cut your rectangles into strips of varying widths, each with all 20 colors in order.
- It would be prudent to explain now that some people sew their rectangles into tubes, so the 1st color and 20th color are sewn together. While efficient (see next paragraph), this method didn’t work for me because my strip sets didn’t turn into perfect rectangles and were, in fact, wonky. Very wonky. Like not even close to parallel sides wonky. But! It still worked, I just didn’t sew my rectangles into tubes.
- Also, this video about putting bargellos together may be easier to understand than the paragraph you’re about to read. 😉
Okay, so now you have your long strips and the colors are all in the same order. And you know that the 3″ strip goes first, then a 2″ strip, etc. etc. So let’s say the order of the strips is A, B, C, D (to you know, the width of your quilt or section) and the order of the colors is 1, 2, 3 (to 20). Strip A stays with the top color as 1 and the last color as 20. For Strip B, you cut the seam between fabrics 1 and 2, remove fabric 1, and add fabric 1 to the bottom – so your strip goes 2 to 20 and then 1. For Strip C, you seam rip between 2 and 3, and add the top to the bottom – and your strip goes 3 to 20, then 1, then 2. On an on until you get to Strip T (the 20th strip) that goes 20, then 1 to 19.
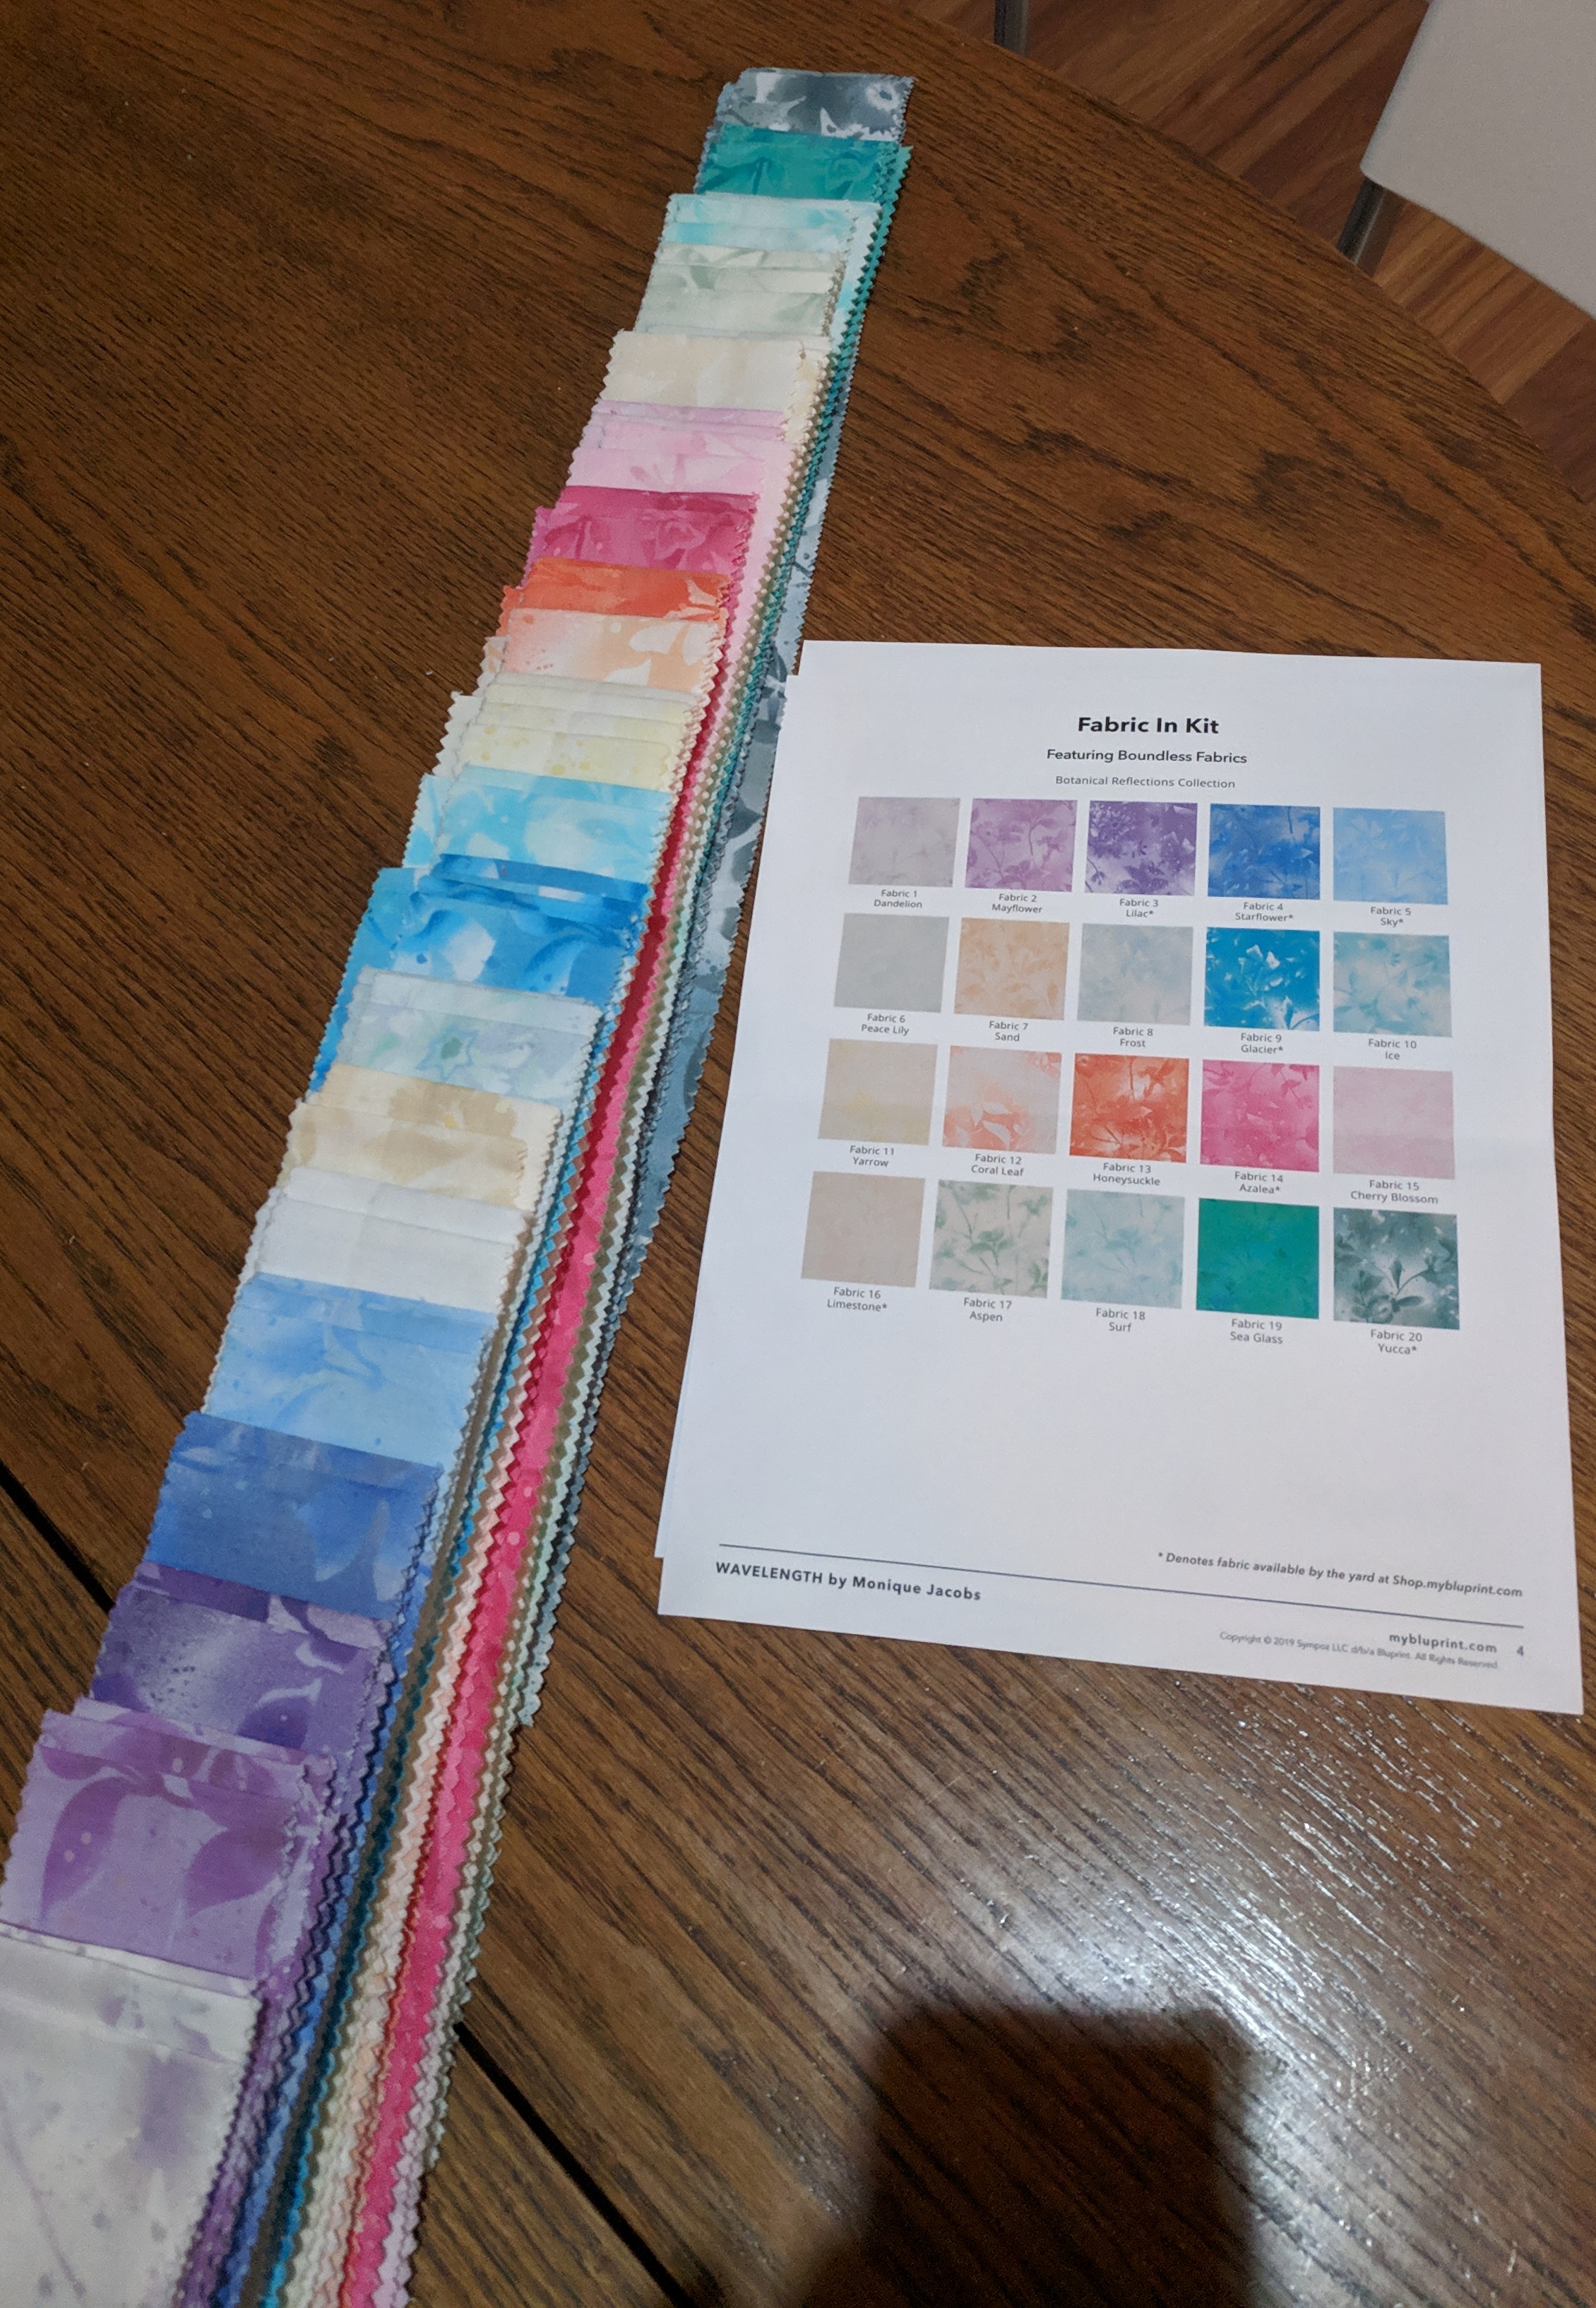
Strips in order per the pattern – 1 is at the bottom, 20 is the dark gray at the top 
Partially constructed block – excuse the furry helper
Then you sew your strips together, and it makes the wonderful bargello effect. The key to making it look wavy is to have the strips be different widths – otherwise it would just be diagonal lines like a checkerboard. I really want to design my own bargello (perhaps on a smaller scale) to look like a river or something, with overlapping waves and stuff.
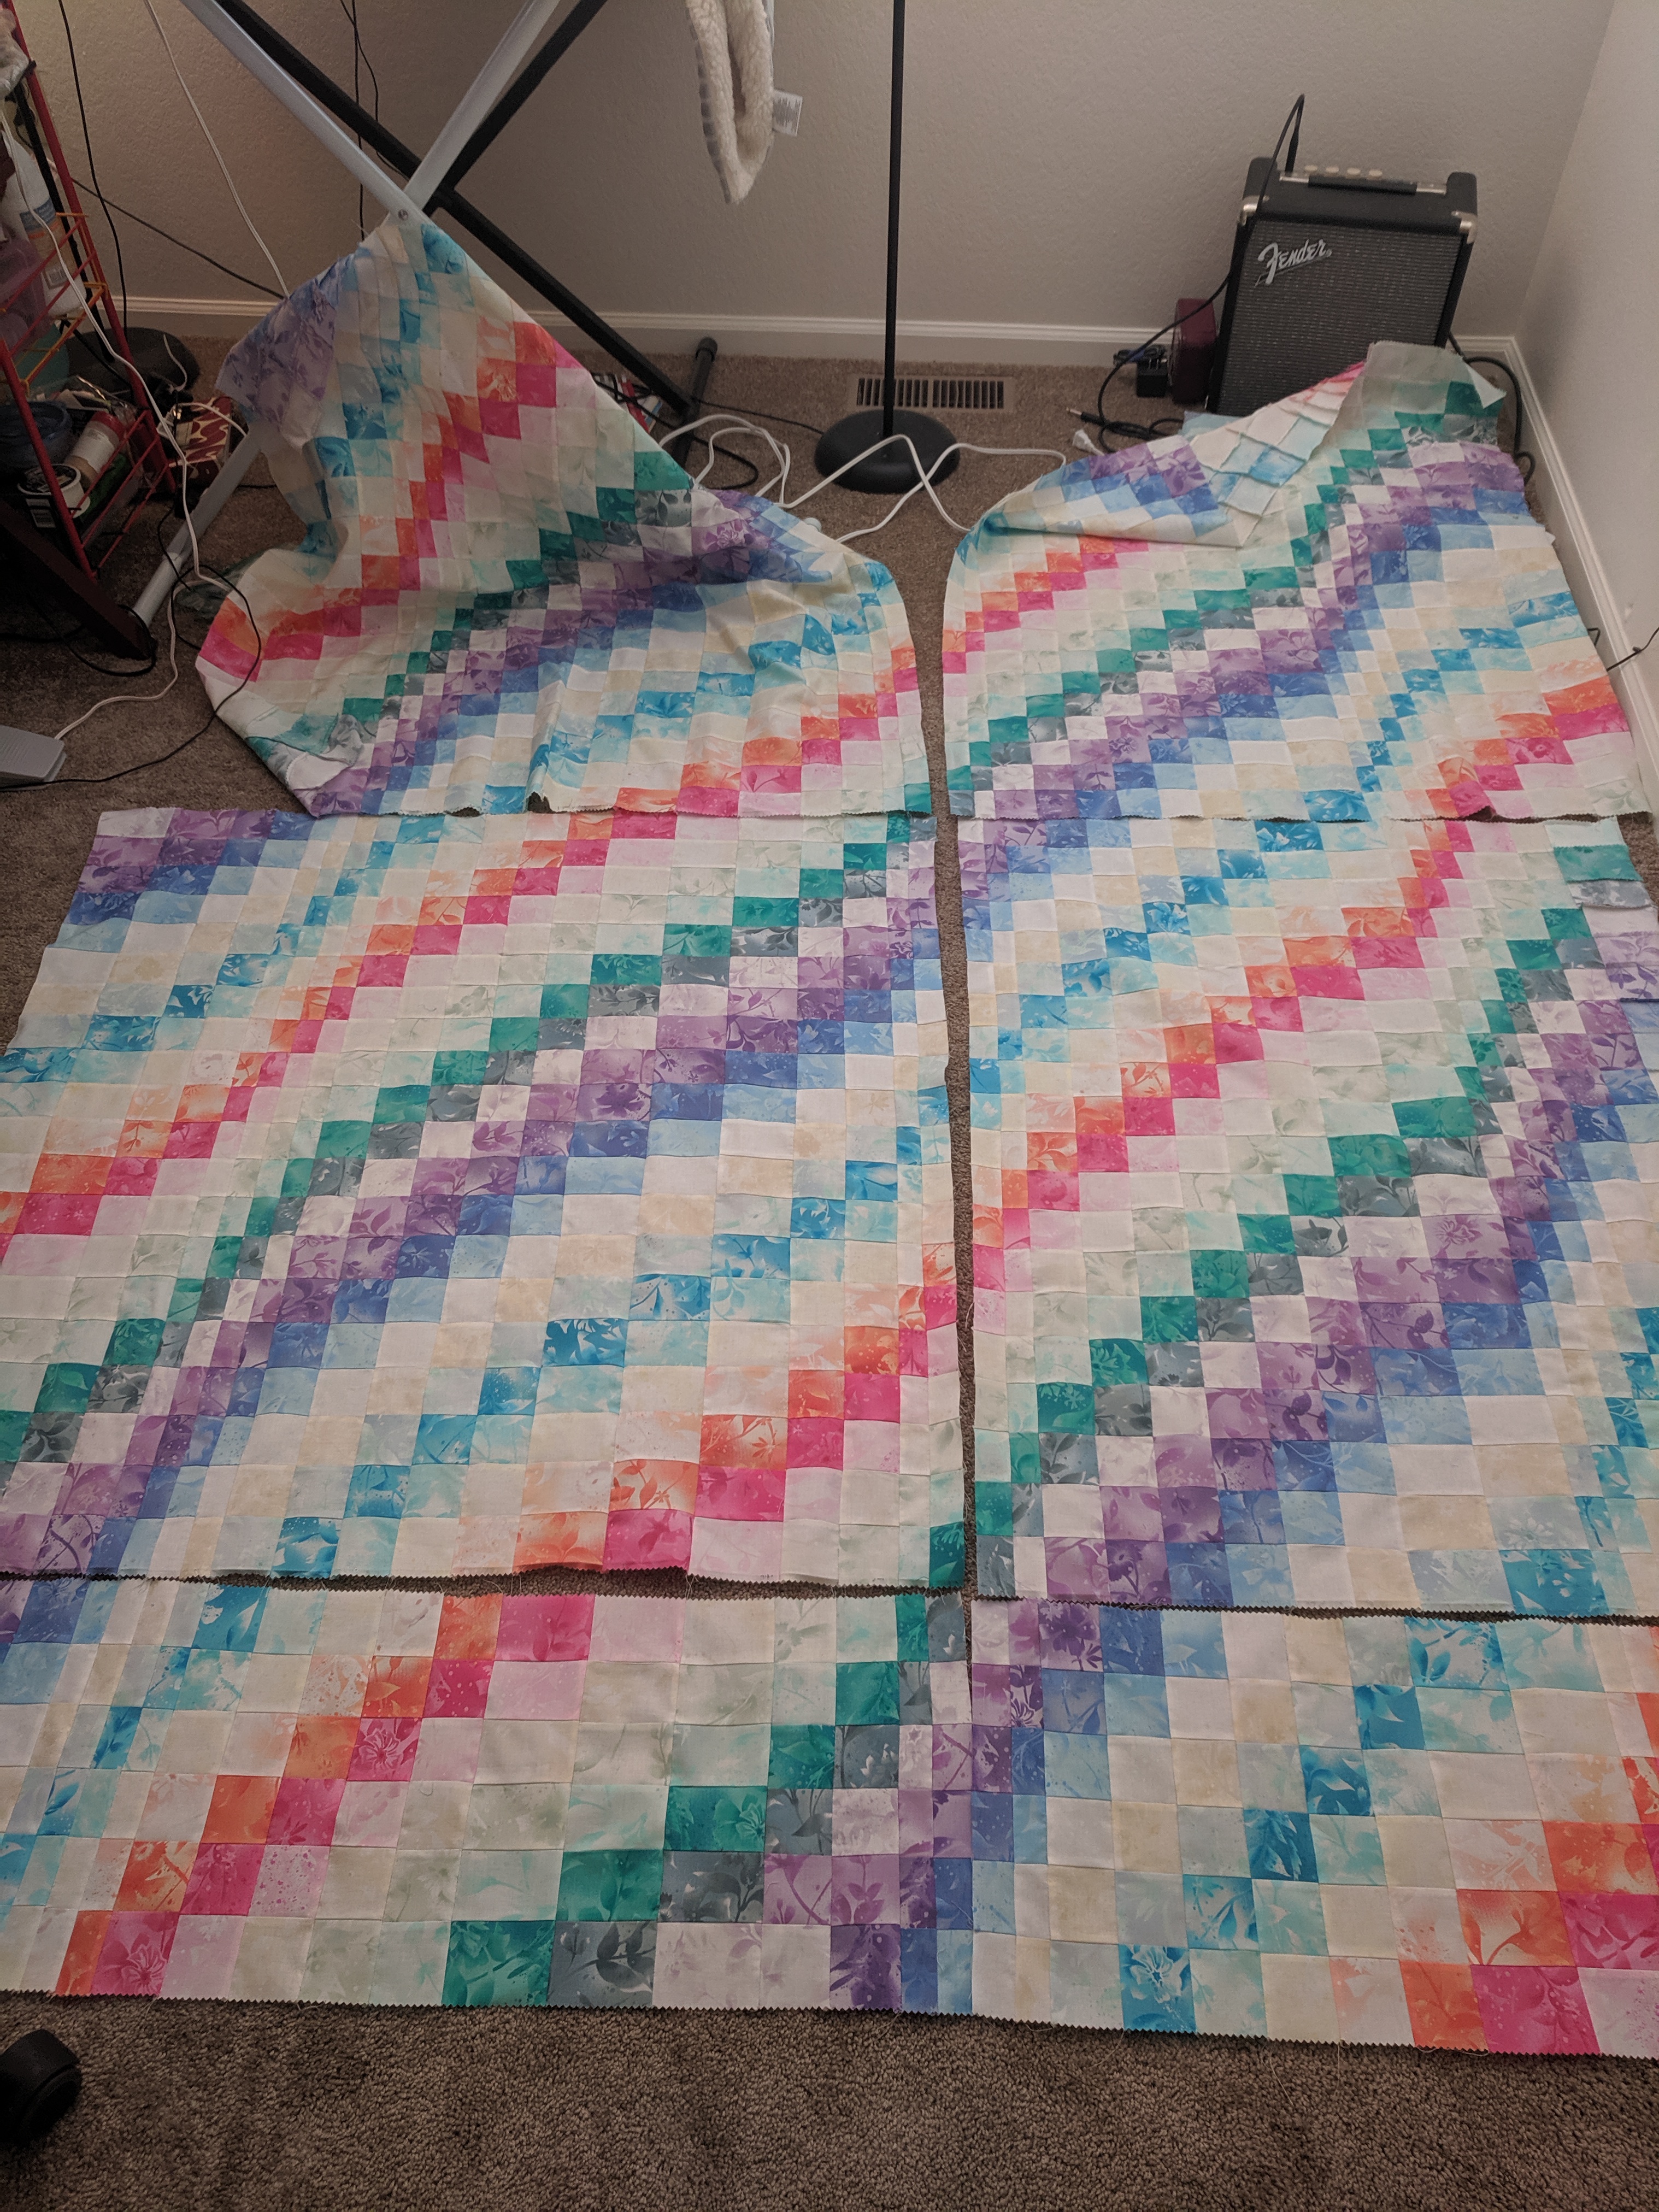
The two blocks at the bottom were made out of individual baby rectangles, the rest is strip sets 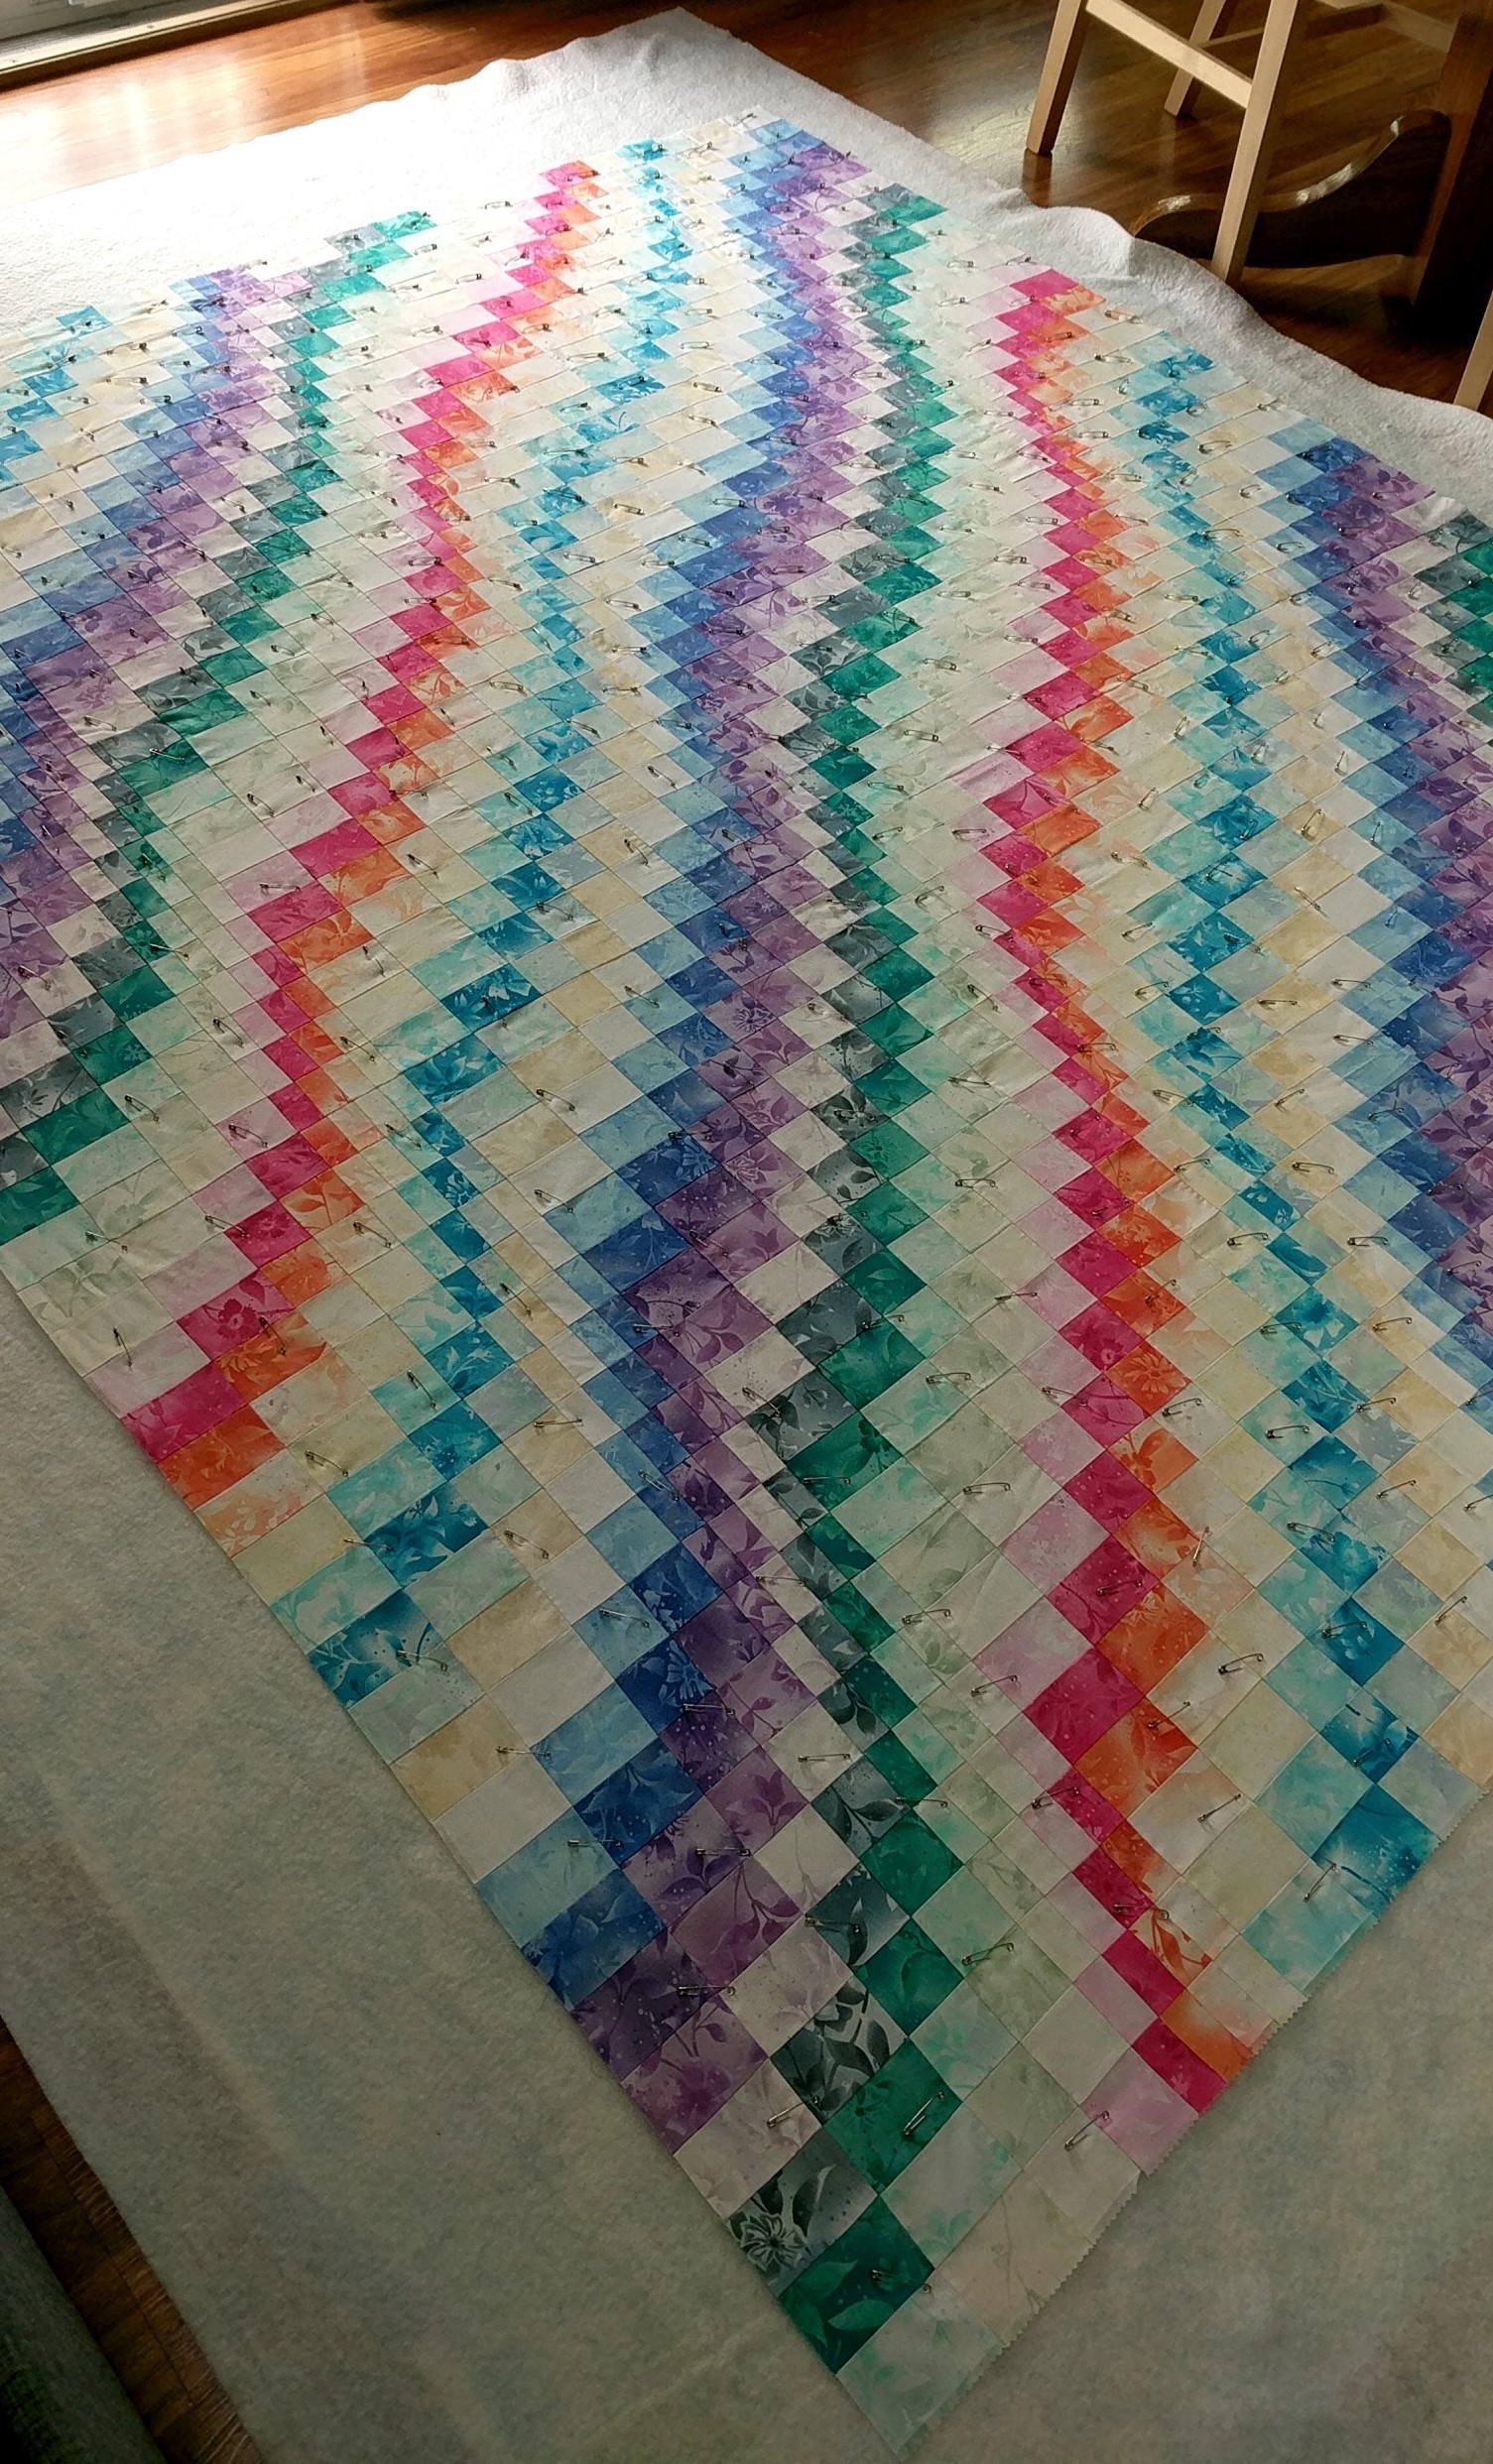
All pinned up in my family/dining room!

Then I basted and quilted it with my little “toothpaste” designs! Doesn’t it look like little squeezes of toothpaste? 🙂 I wanted a design that was flowy like the bargello itself, but possible to do in an all-over fashion. After doing the “custom” quilting on the Green Diamond Quilt, I wanted to see what would happen if I did the same thing on the entire quilt – and save myself some brain energy. I couldn’t decide what color thread to use, so I opted for variegated rainbow pastel thread that blends in pretty well to both the quilt top and the backing. Plus it’s another level of colorfulness that is fun.
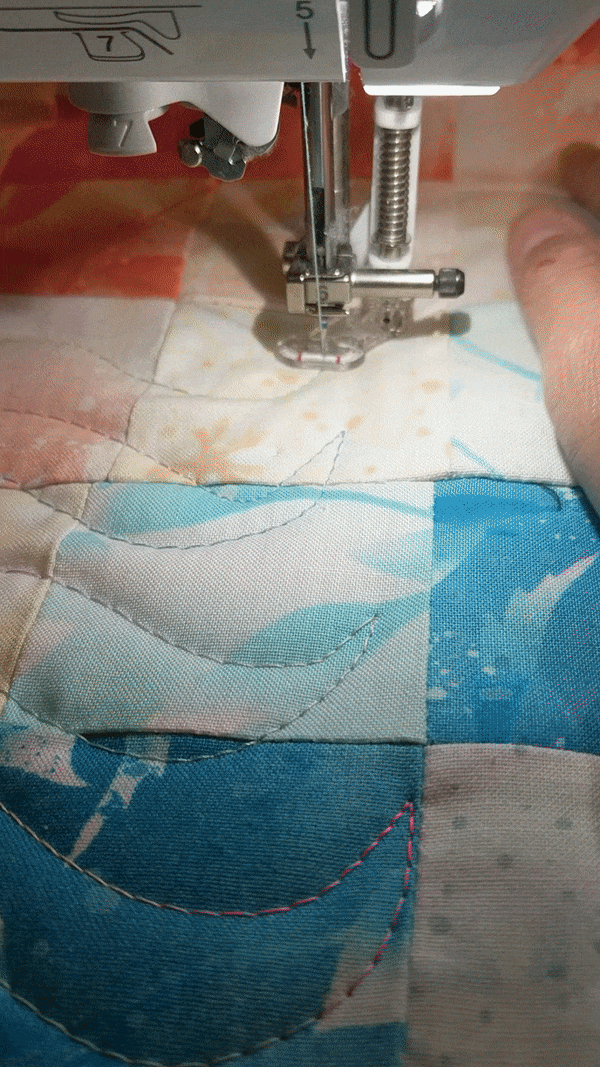
The toothpaste design is done in columns, so I started in the true middle, and worked up and down as I moved to the right (which gradually decreases how much sandwich is in the throat of your machine – between the needle and the case), then flipped it around and did the exact same thing to the other side. Since I’d practiced a lot on pen and paper and with scraps – more practice than last time! – the quilting came together pretty easily. Plus, each intersection is only 4 pieces of fabric coming together instead of 8, so it was significantly less bumpy than the Green Diamond Quilt.
But still, this quilt was a beast to wrangle with my machine. It has decent throat space but a bunch of cotton is heavy, and the quilt would fall into my lap as I moved up, which made it harder to control since I was working against gravity. I was only able to drape so much on myself before it would fall down, but I have a big enough table that the quilt could sit on the table in the other directions. I understood immediately why those set-in sewing machine tables are super popular, and why a longarm would change the game completely. But I’m not there yet – I still have many smaller scale projects I’m excited to work on, and twin-ish/queen-ish size quilts are still possible for me.
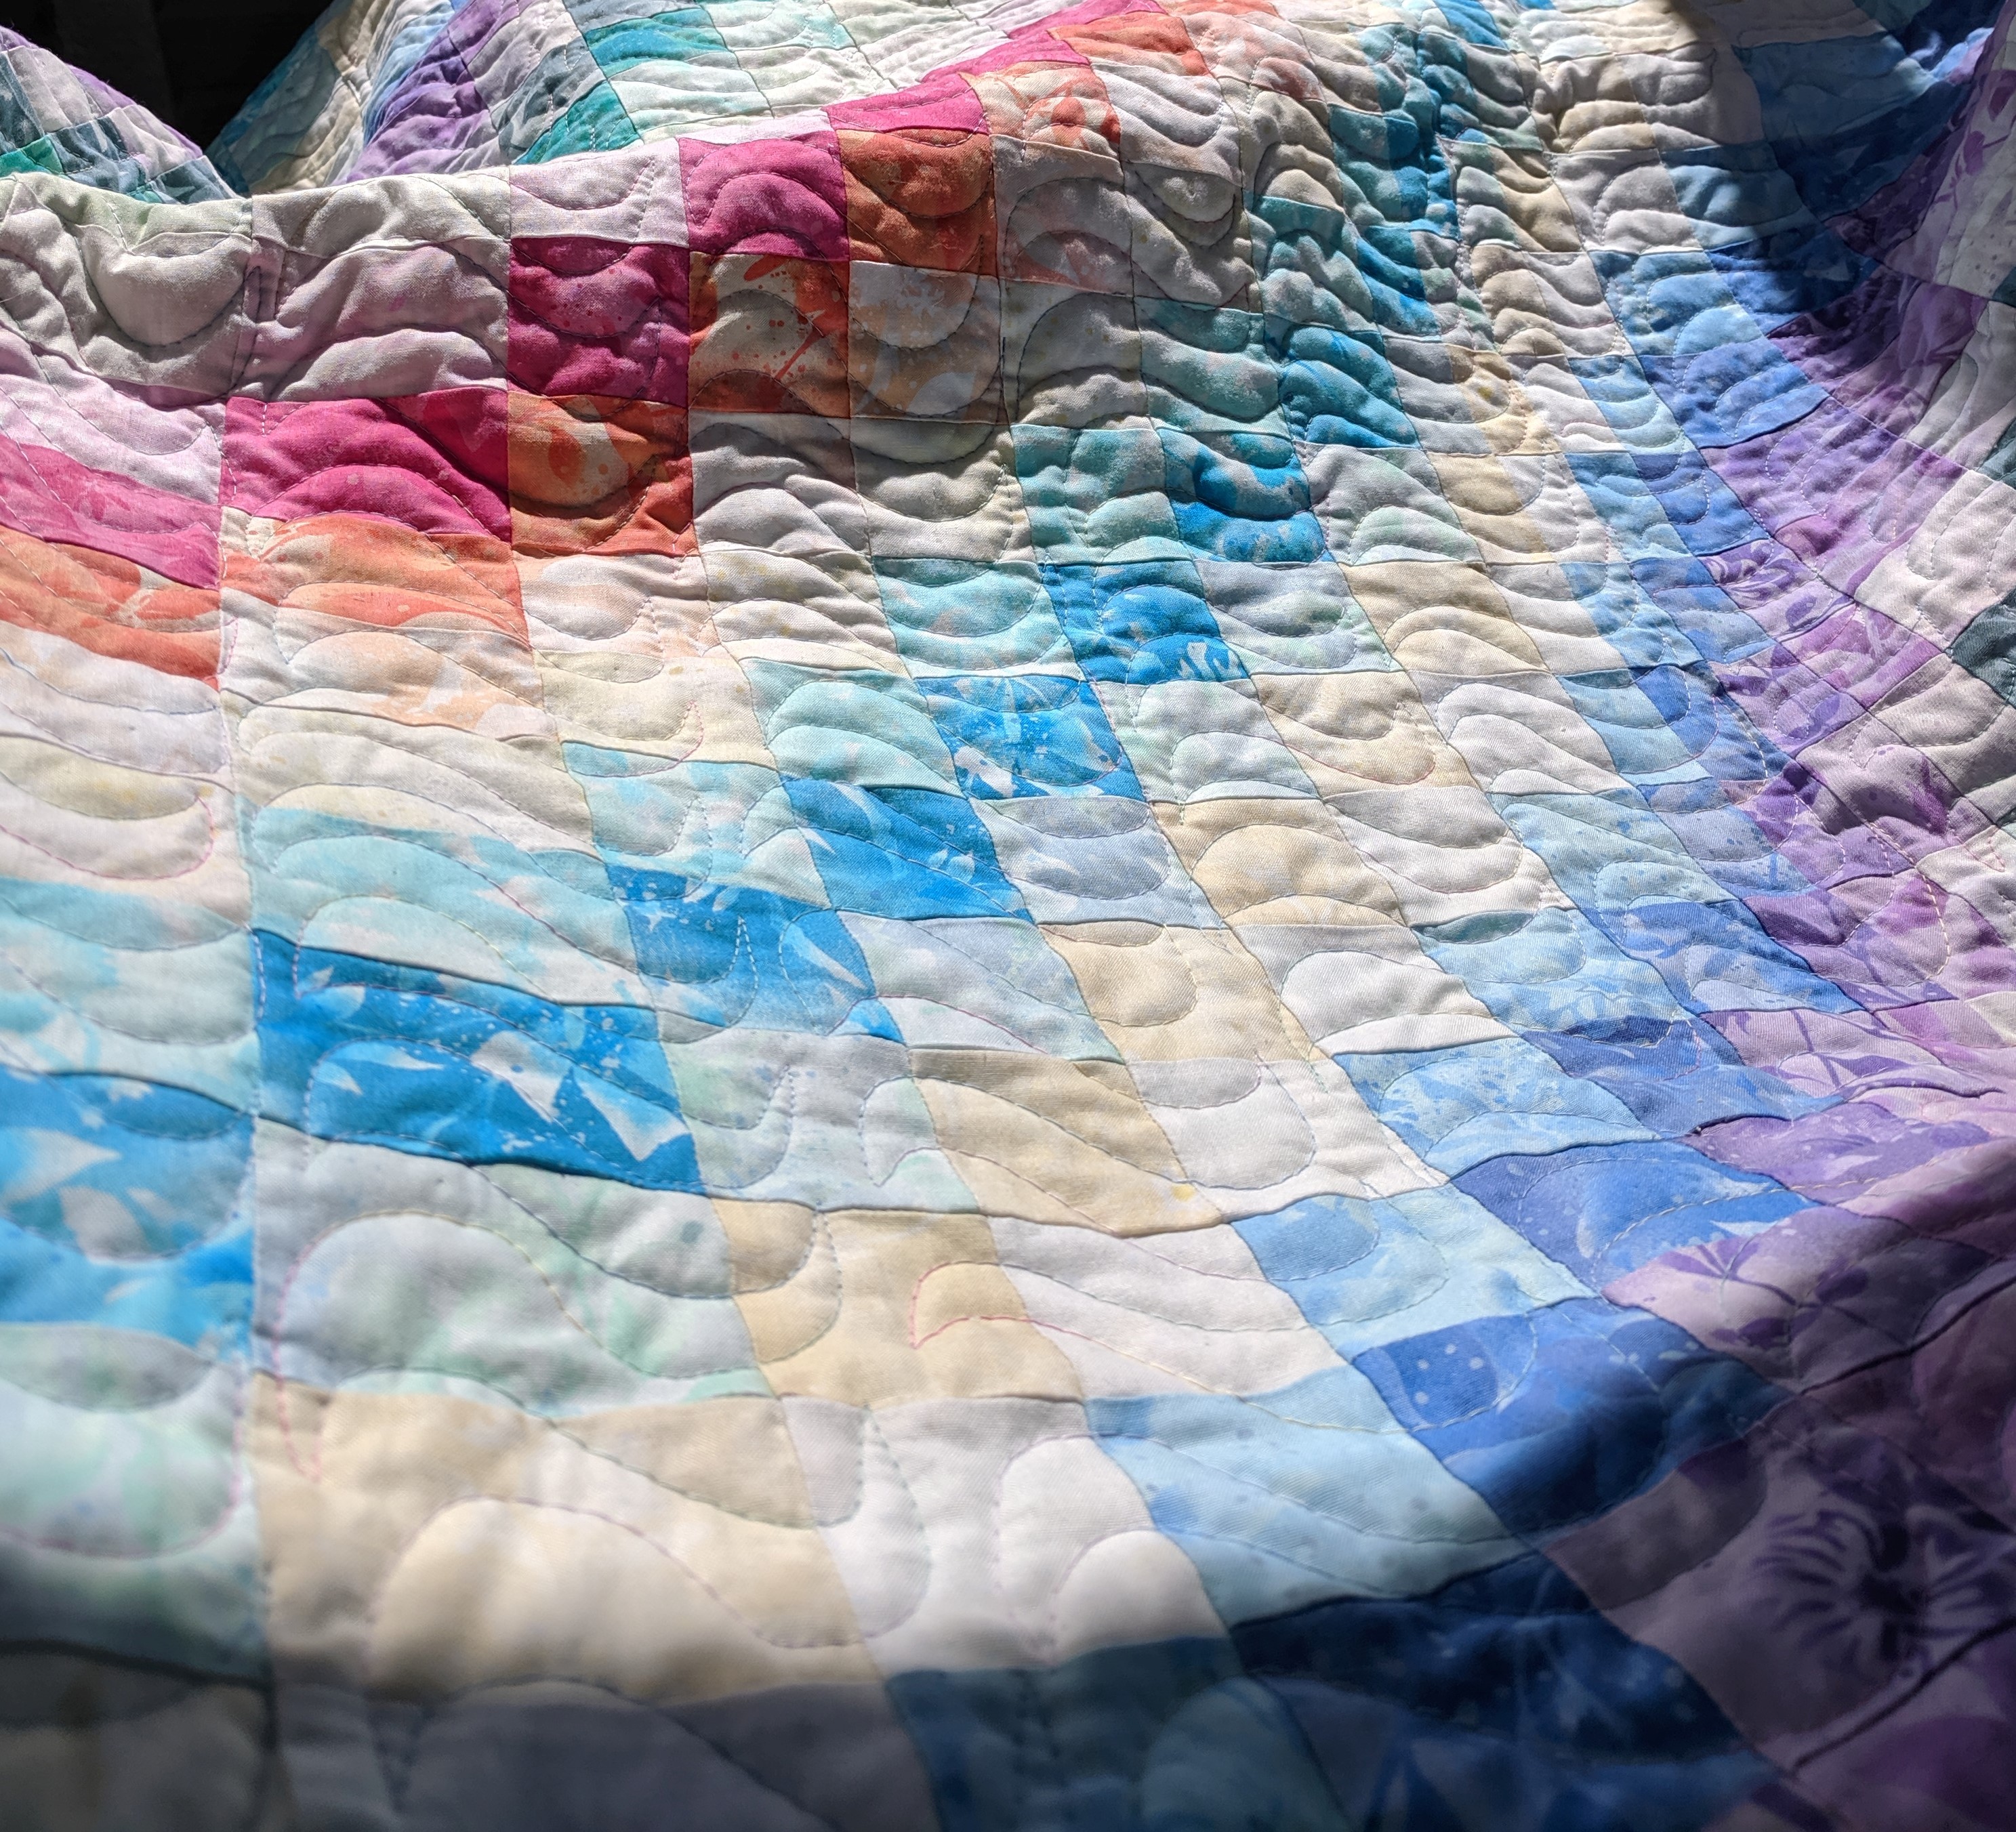
Glamour shot outside before washing – look at the cool shadows! 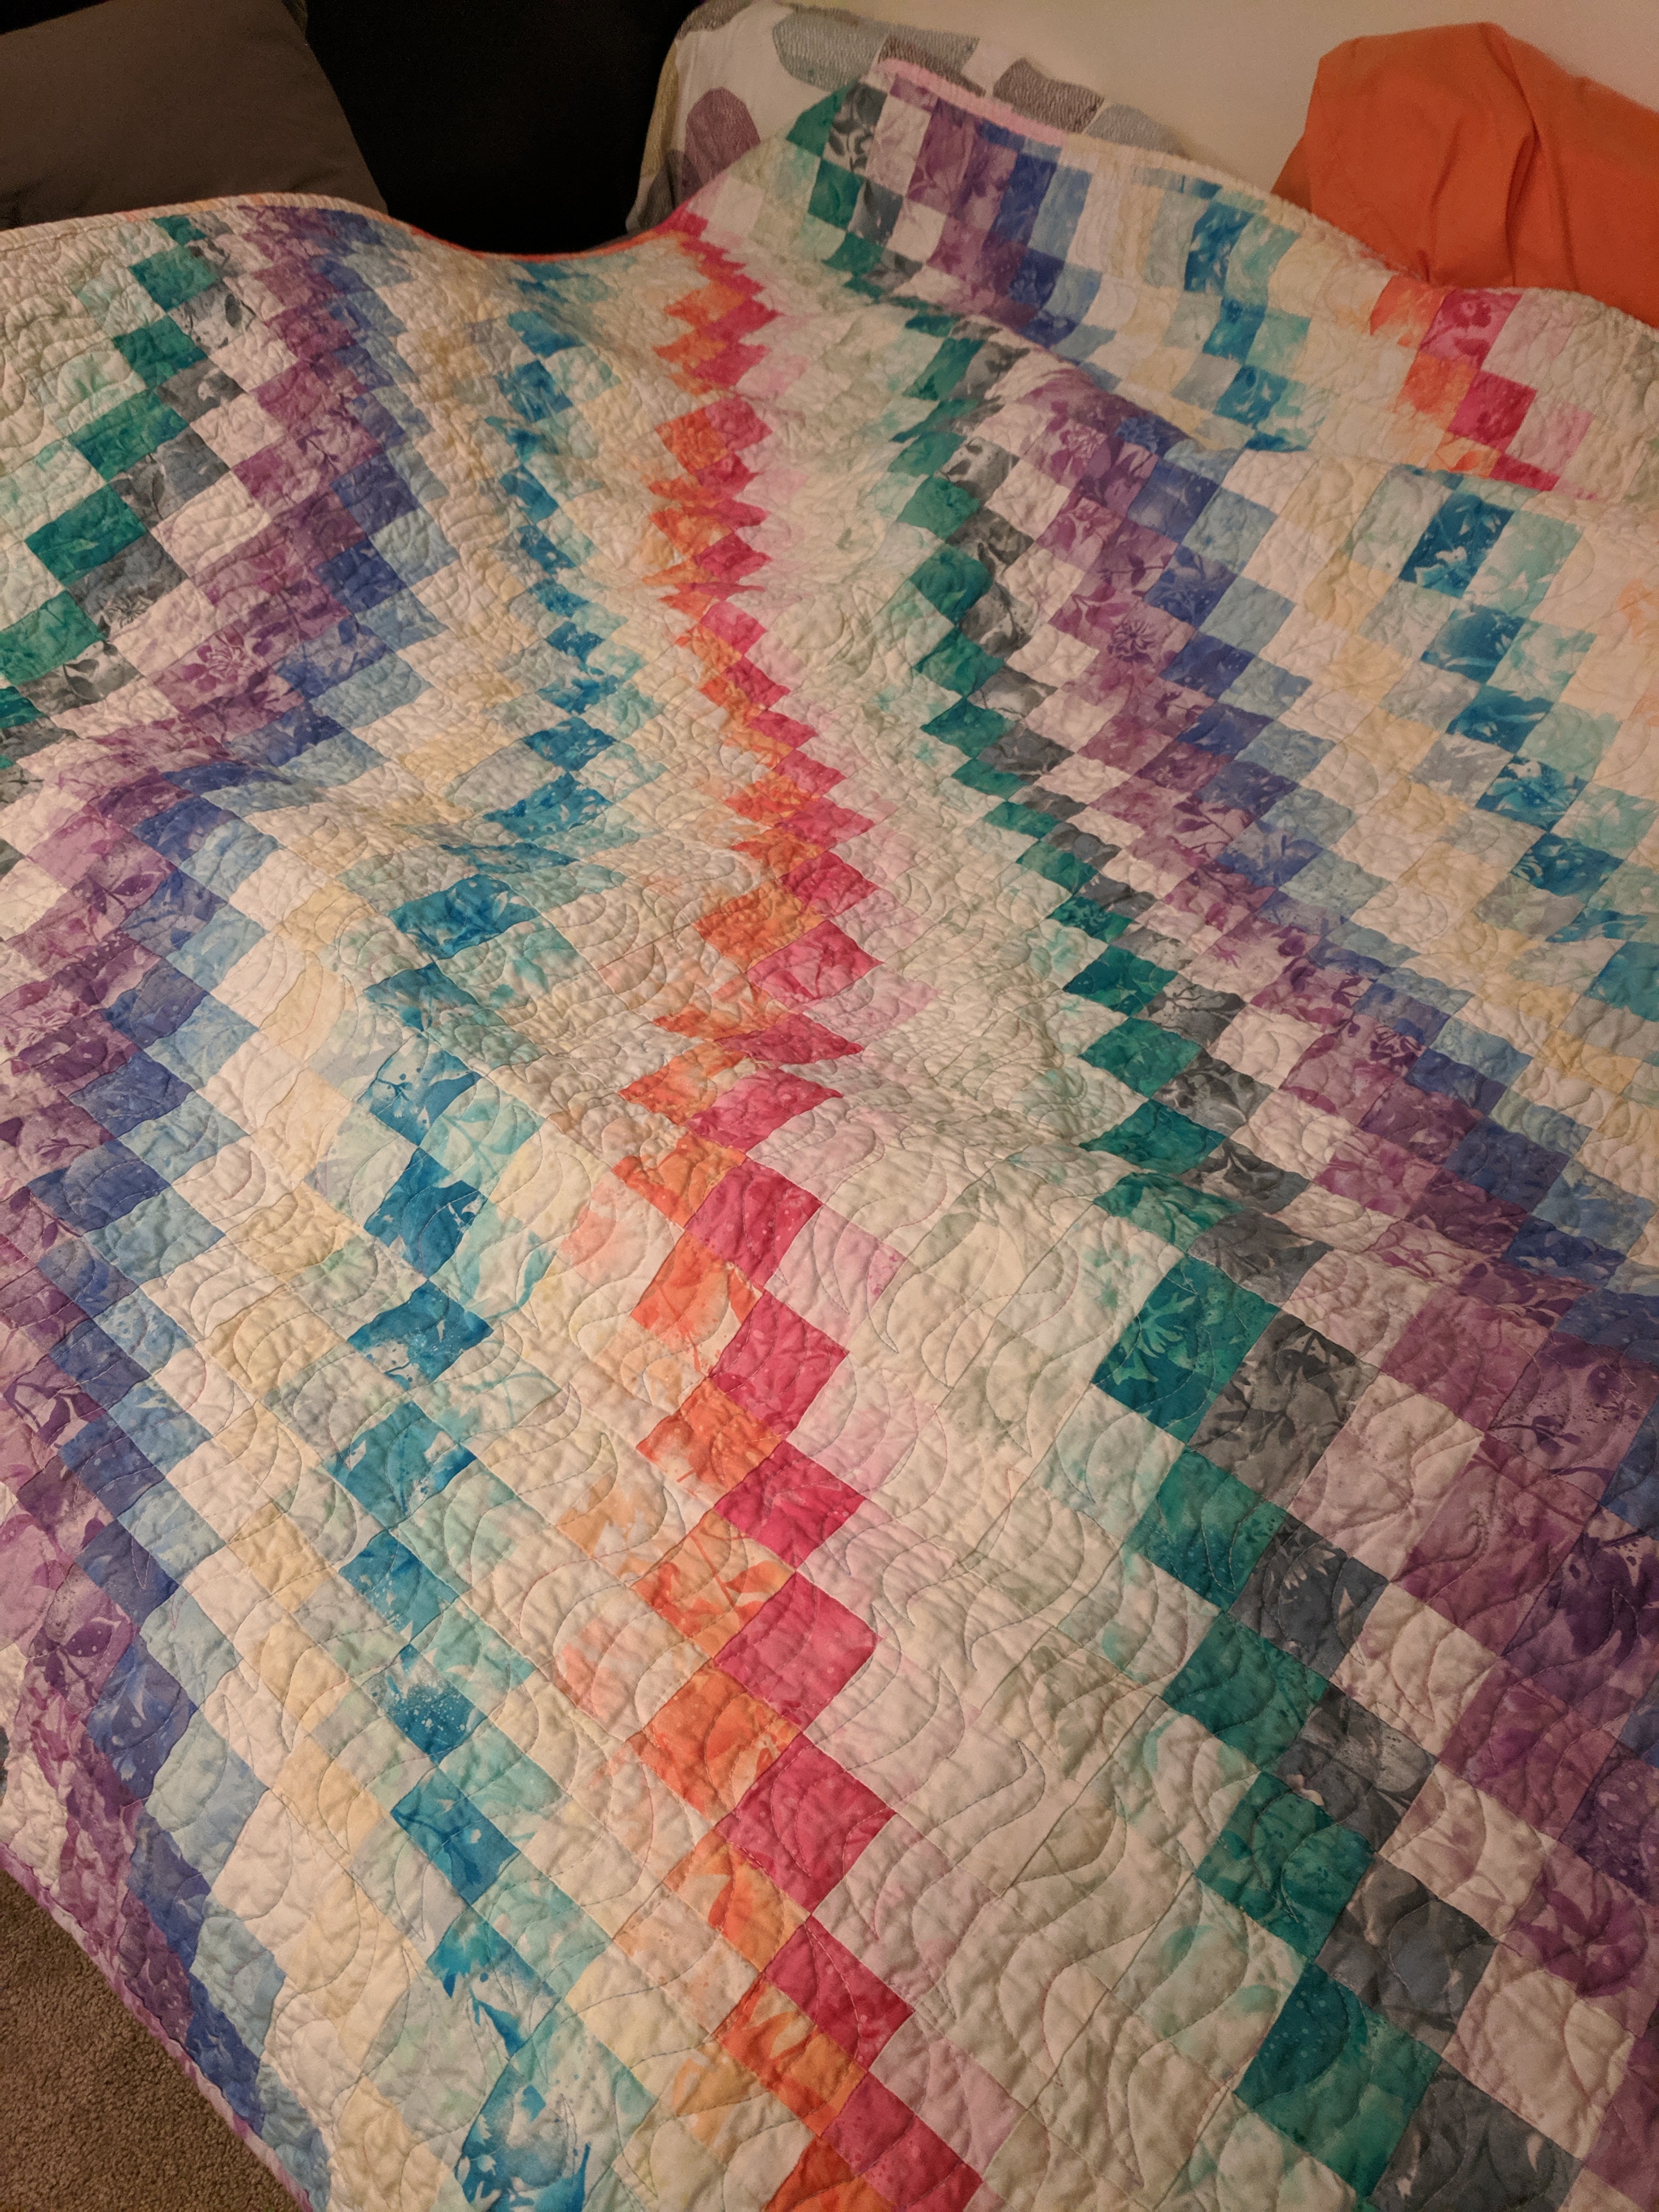
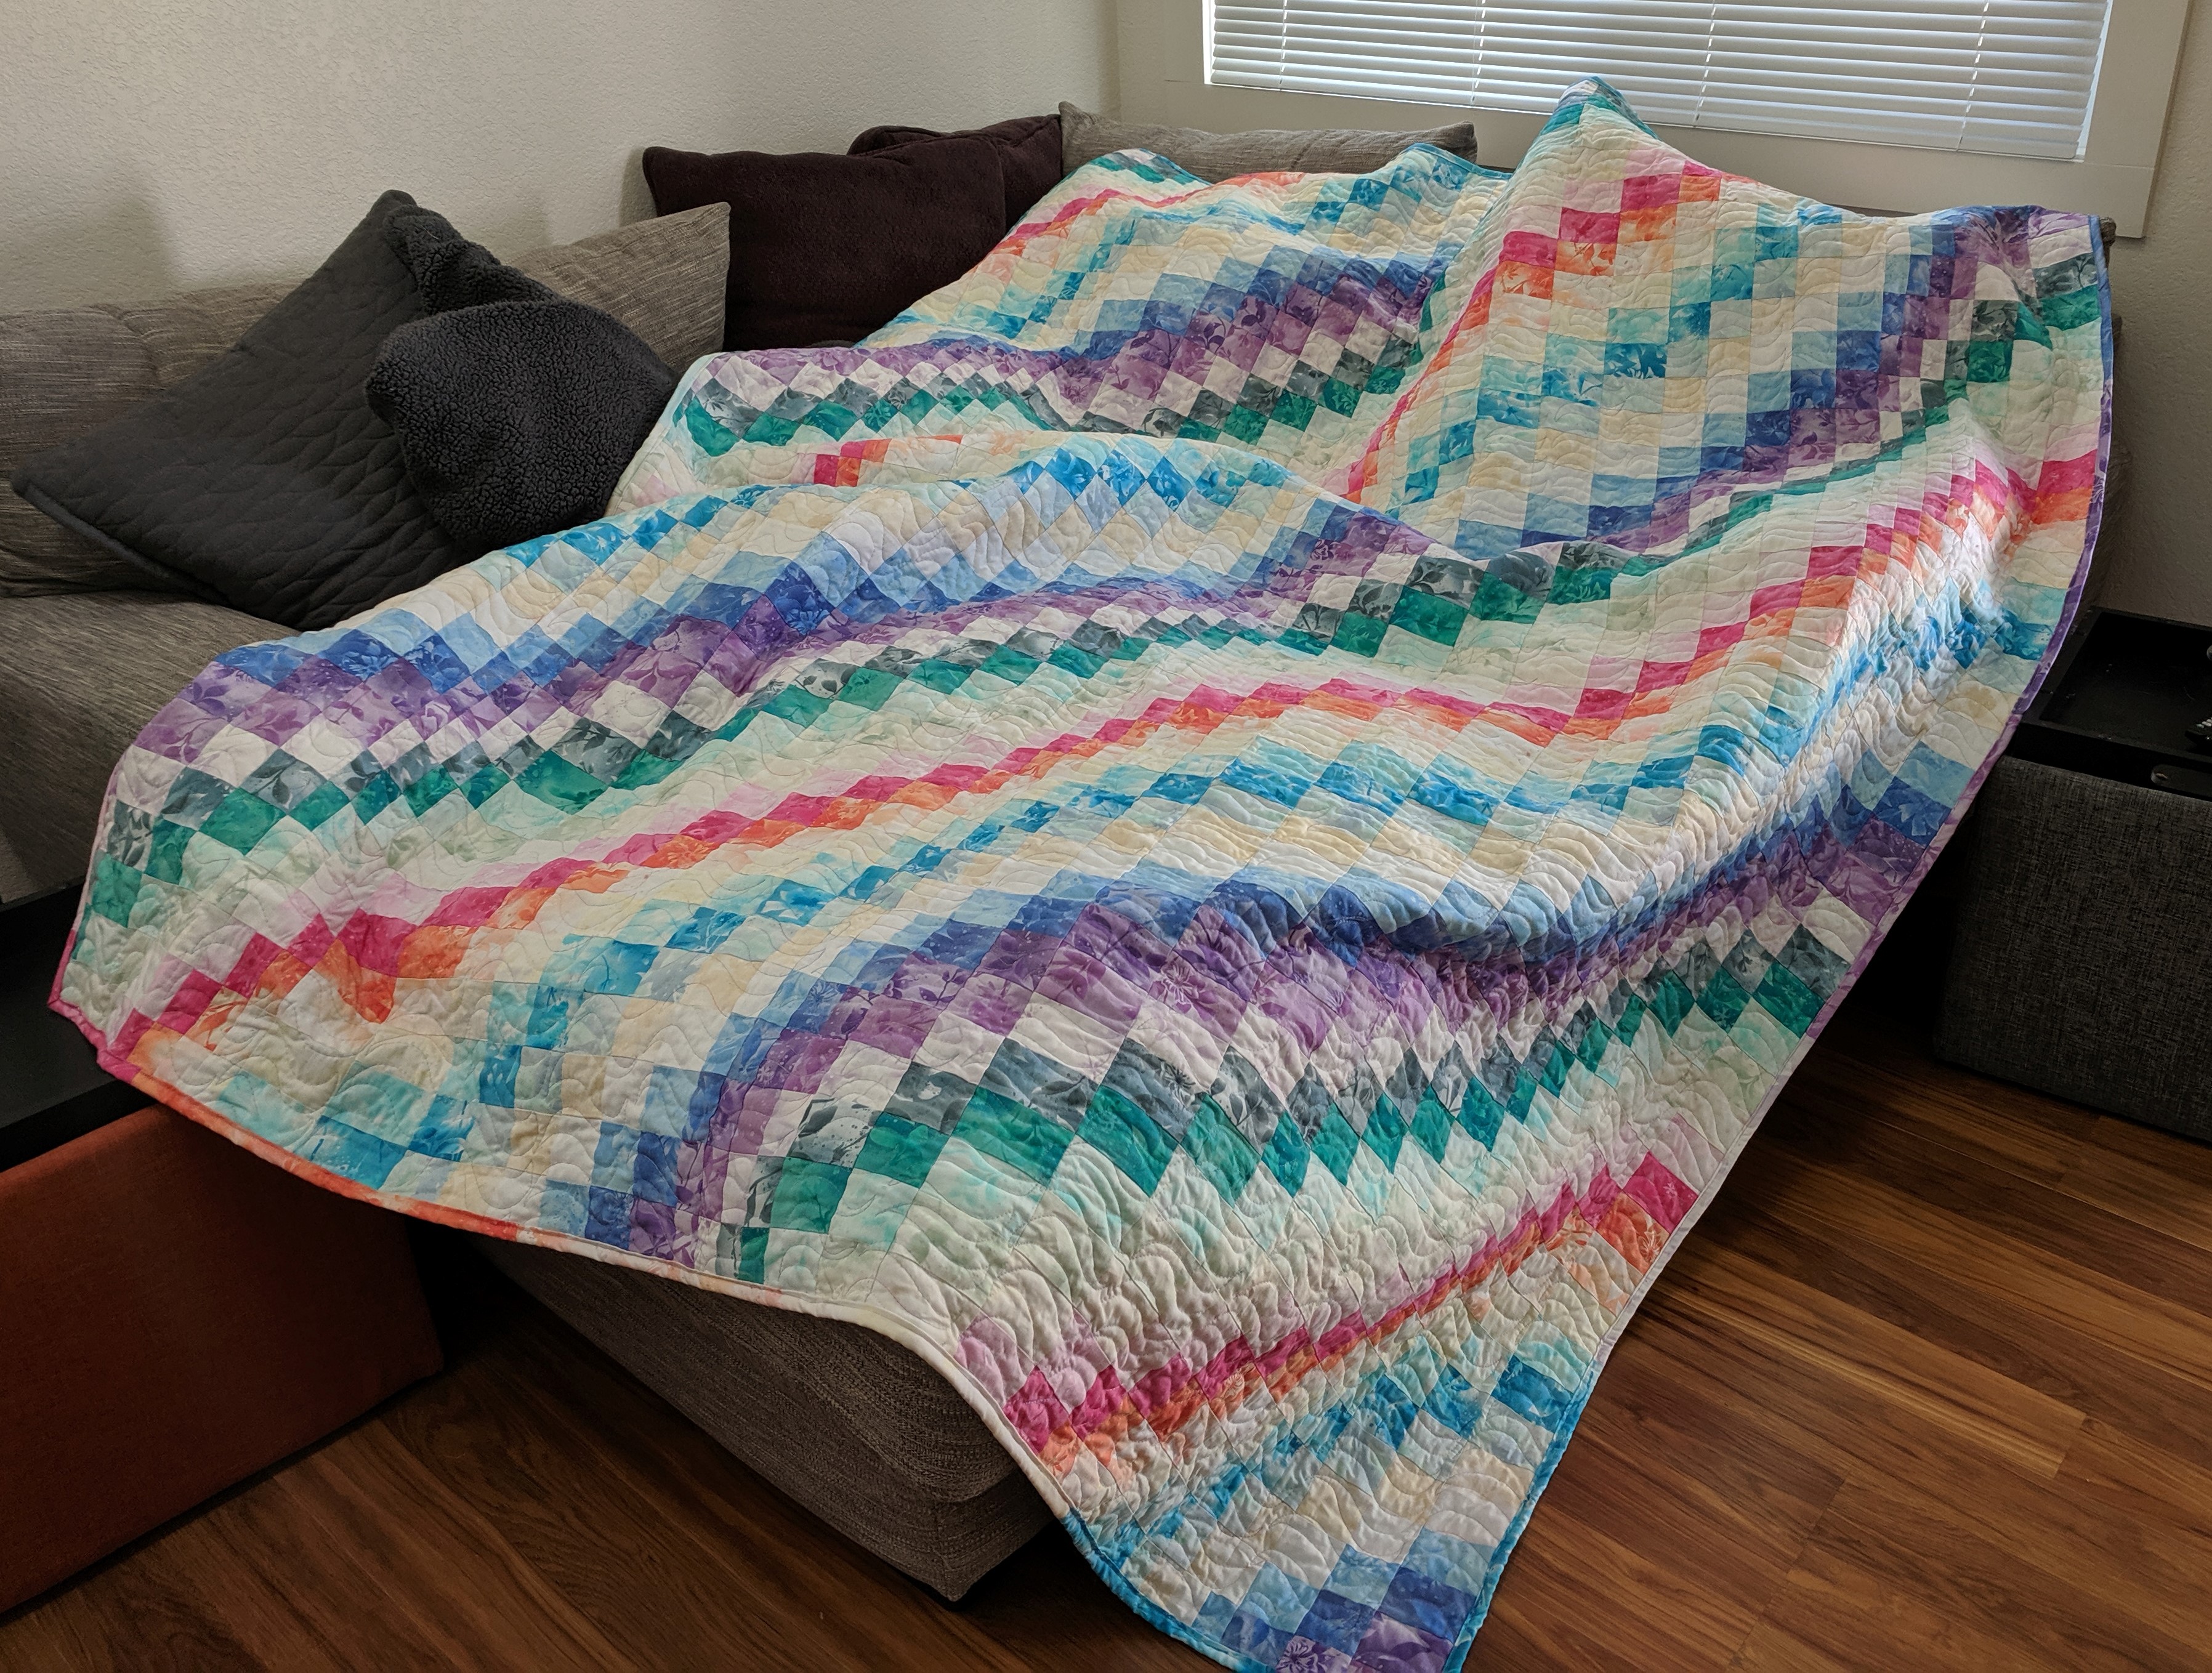
On my bed after washing
That said, I got the quilting done in three nights and am super pleased with the results. After washing my Green Diamond Quilt, I knew it would only look better after washing, and it does. 🙂 It’s crinkly and soft and puffy in all the right ways. Plus because it’s cotton, it feels cool to the touch. I have it on my bed right now, but because it’s primarily thin cotton batting, there isn’t as much warmth as I’d like – I’m naturally a 3 blanket person. So I bought this “dream puff” polyester batting for my next bed quilt that claims it’s twice as warm as down, so we’ll see 🙂
Project completed May 31, 2019.

1 thought on “Rainbow Bargello Quilt”