Kite Fest!
This quilt was for a local art project in my town! It’s the first time I’ve ever made something to be shown publicly. The project gave us fabric printed with original prints from our local historic flour mill to make a quilt with 🙂 The prompt was “a day in our town”, and this year I went to our Kite Festival for the first time so I wanted to depict that. I loved seeing community members having a great time in the sun, and there were so many colorful and beautiful kites in the sky. I even had a go at flying a kite for the first time in a long time, and it went okay! 🙂
This year I wanted to make a project that incorporated my handspun, handwoven, and quilting, and this seemed like a great opportunity. I wove my handspun silk as the background and incorporated the flour mill fabrics as appliqued kites on top. Then I added borders and used free motion quilting to introduce just a few more wavy lines in there.
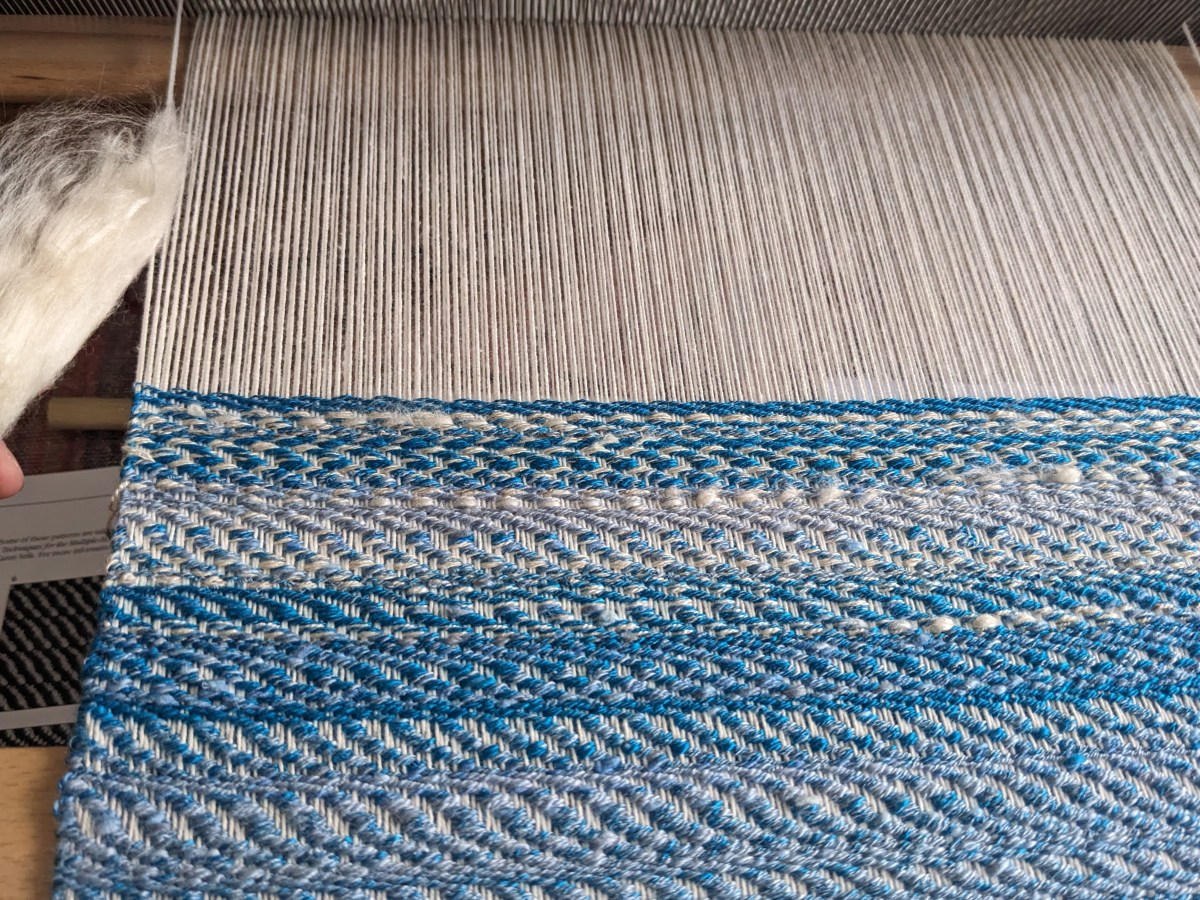
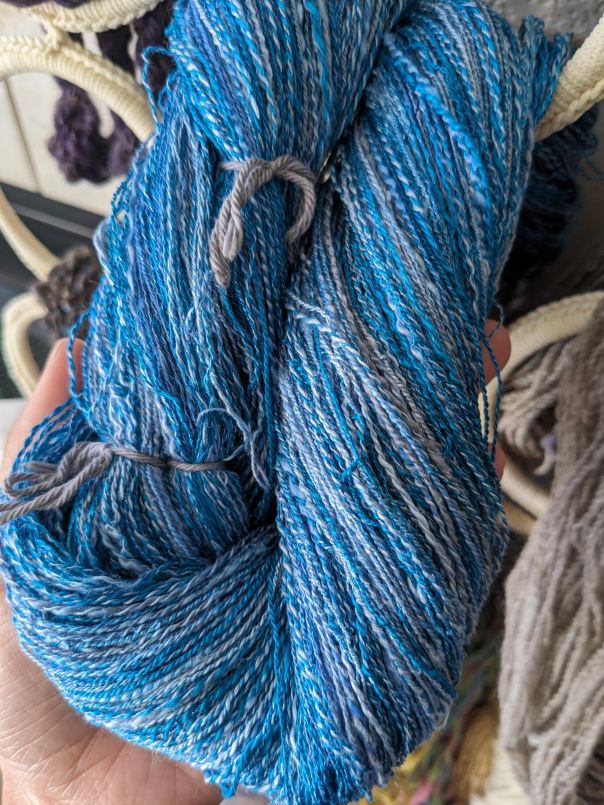
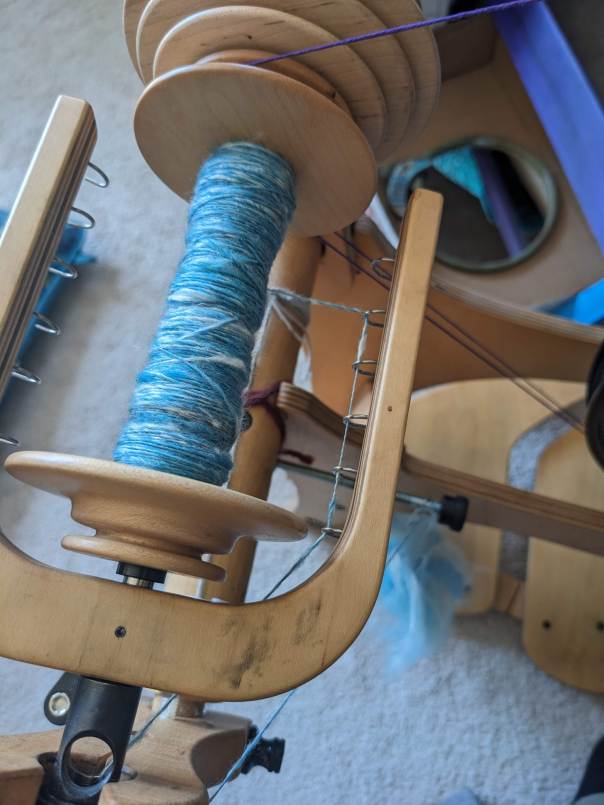
I had bought some silk fiber this summer to try spinning, and I had originally intended to make a sort of abstract sky or ocean project, but this quilt was the perfect place for it! The silk was a joy to spin, so smooth and gentle and easy. I understand why it’s not recommended for beginners, but aspects of it were easier than spinning wool, I was never worried about staple length and my single rarely snapped or flew out of my hand. I used a silk roving/top and hankies; I love the fluffy and irregular texture from the hankies but that shine from the roving is just unbeatable. I ended up buying more silk and I’m spinning it up to do a comparative dye project next year. As I wove the background, I got a bit nervous about running out so I spun up some more blue from a tencel/merino blend I had, incorporating some white mint and gray yak/silk to boost my supplies. I spun these blends as a single to be used as a single, which was my first time doing that. It was strange to not ply the singles after I’d spun them, but I really like the fluffy look this yarn brings to the finished piece.
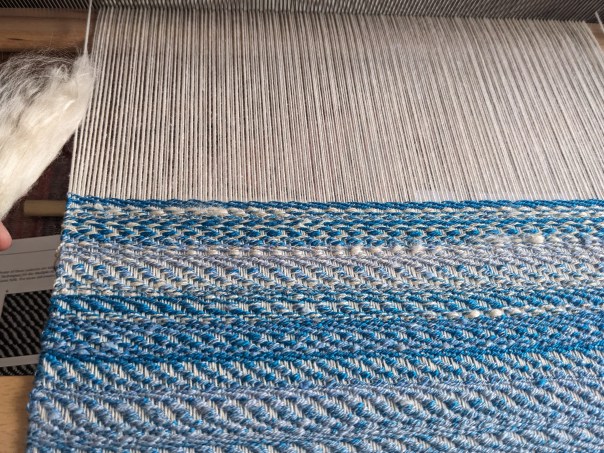
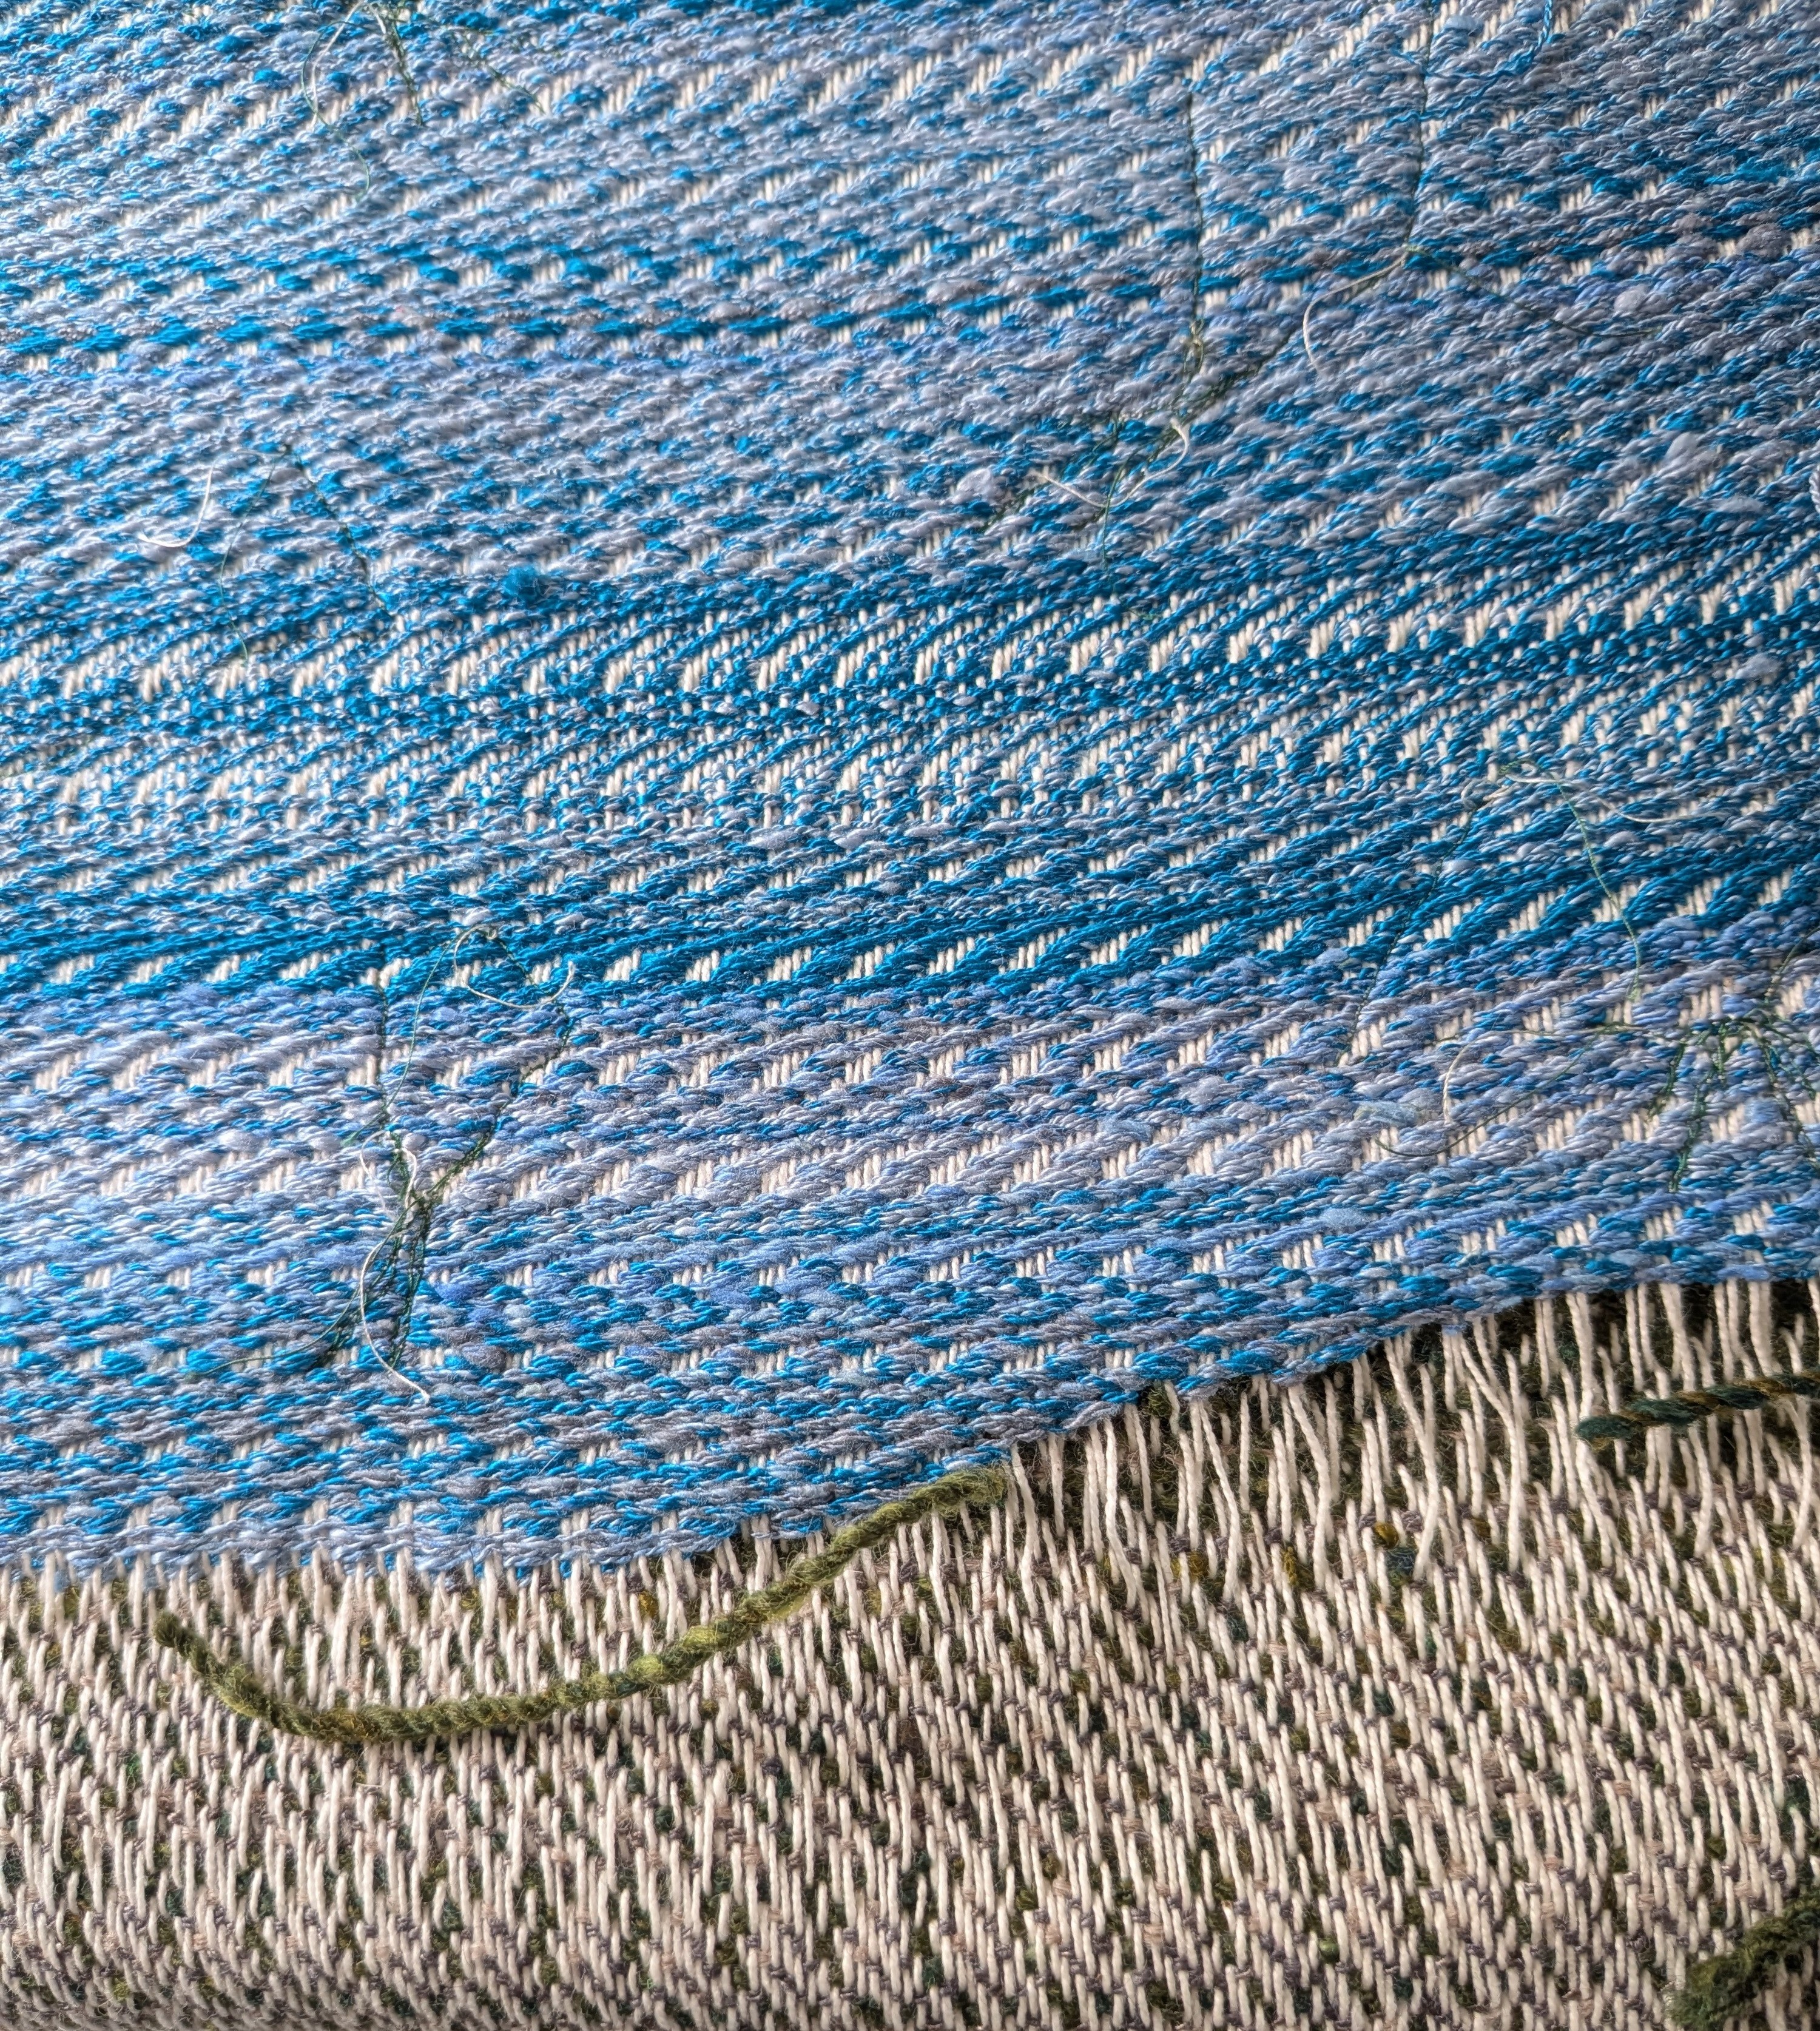
Then it was time to weave! I used a thin cotton warp I already had in my stock (I only used supplies I already had for this project; my only cost was registering for the project :)). I looked in Carol Strickler’s book for some wavy, flowy patterns that reminded me of faraway clouds and air movements, and really like the undulation of #8. I played around with the repeated rows and the length of the floats, but all the sky is based on #8. I used a satin-ish pattern for the green hill at the bottom to make it very weft faced and kind of bury the white warp underneath. I used some unspun mint fiber to create the fluffy clouds at the top, along with some long floats in the body of the piece.
Once I finished the weaving, I moved on to playing with kite shapes and cutting them out of the flour mill fabric. I wanted to capture the different sizes and shapes that I saw at Kite Fest, and I cut a whole variety to place onto the quilt. I appliqued them with my machine, and then attached the double border. I was originally intending to just have the blue border, but it needed something additional and I really like the second border.
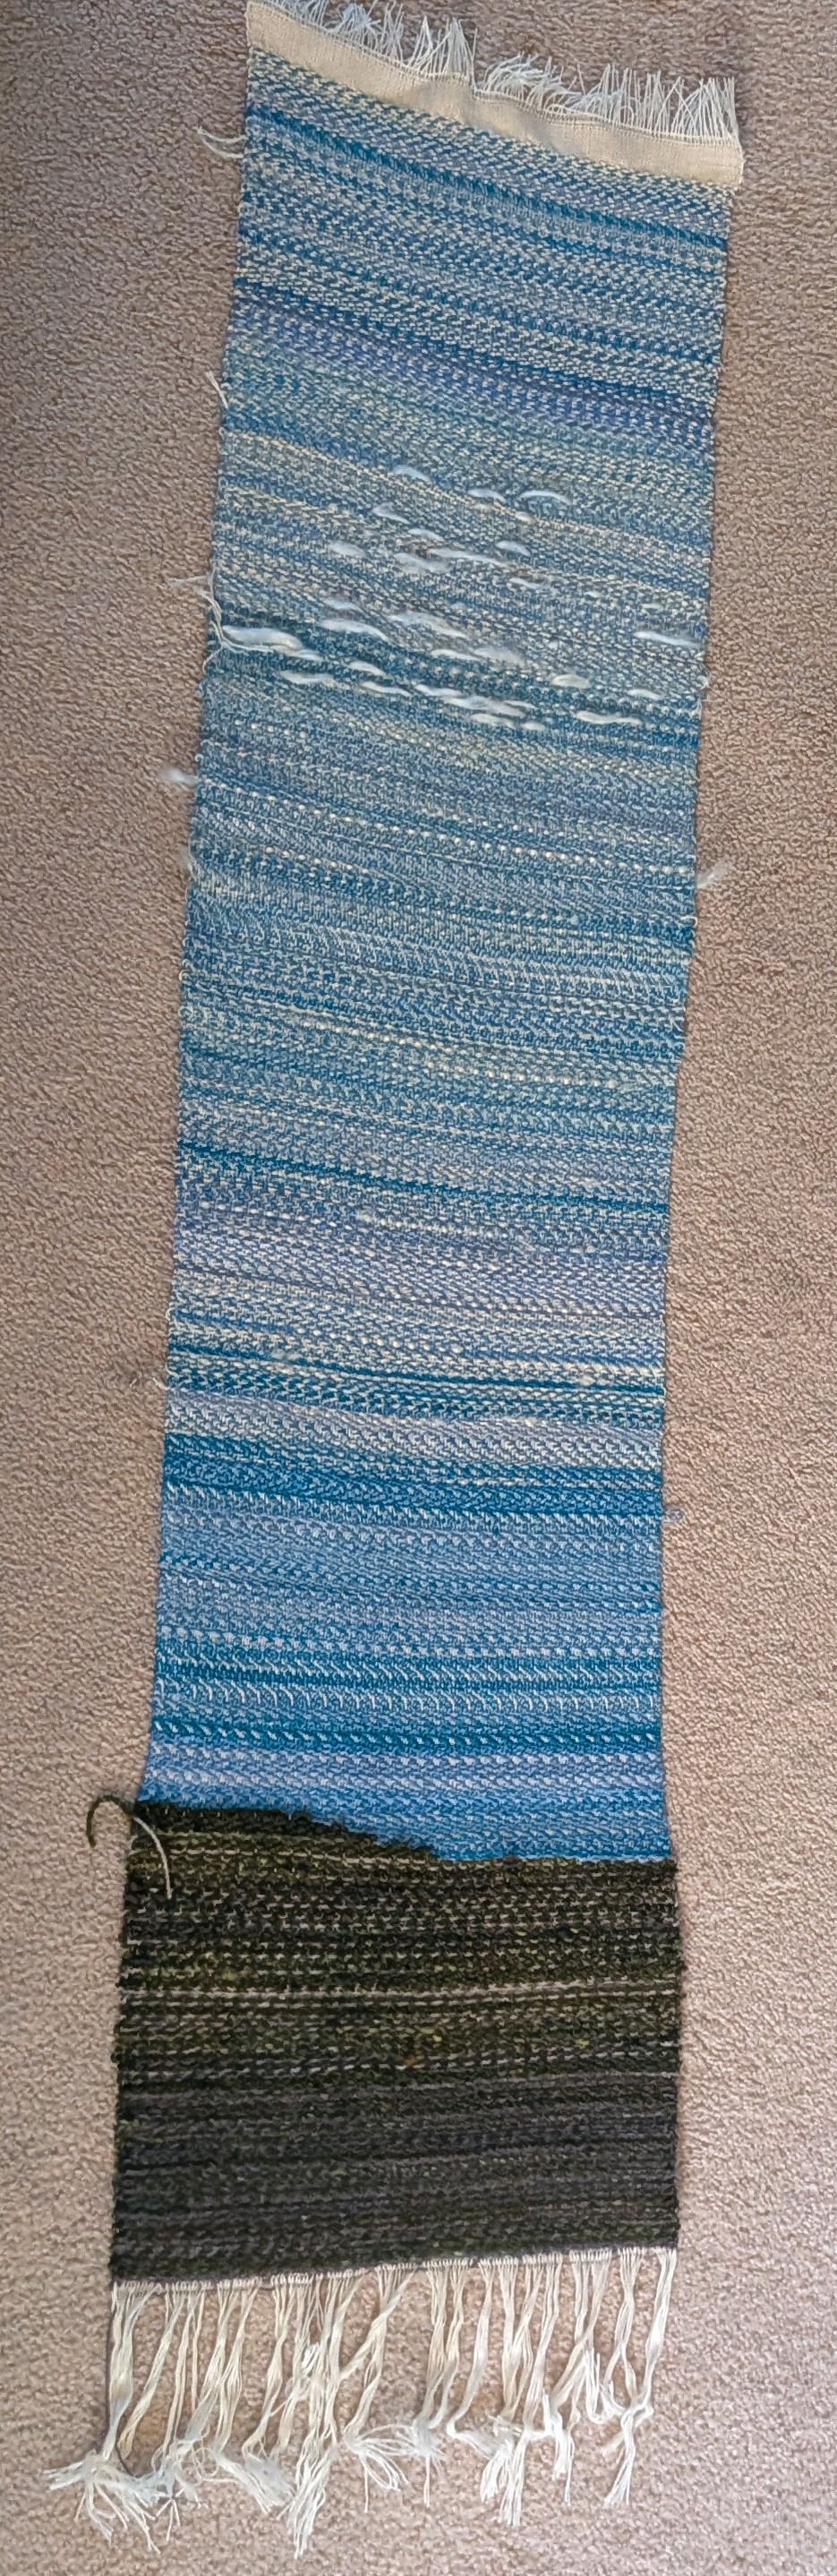
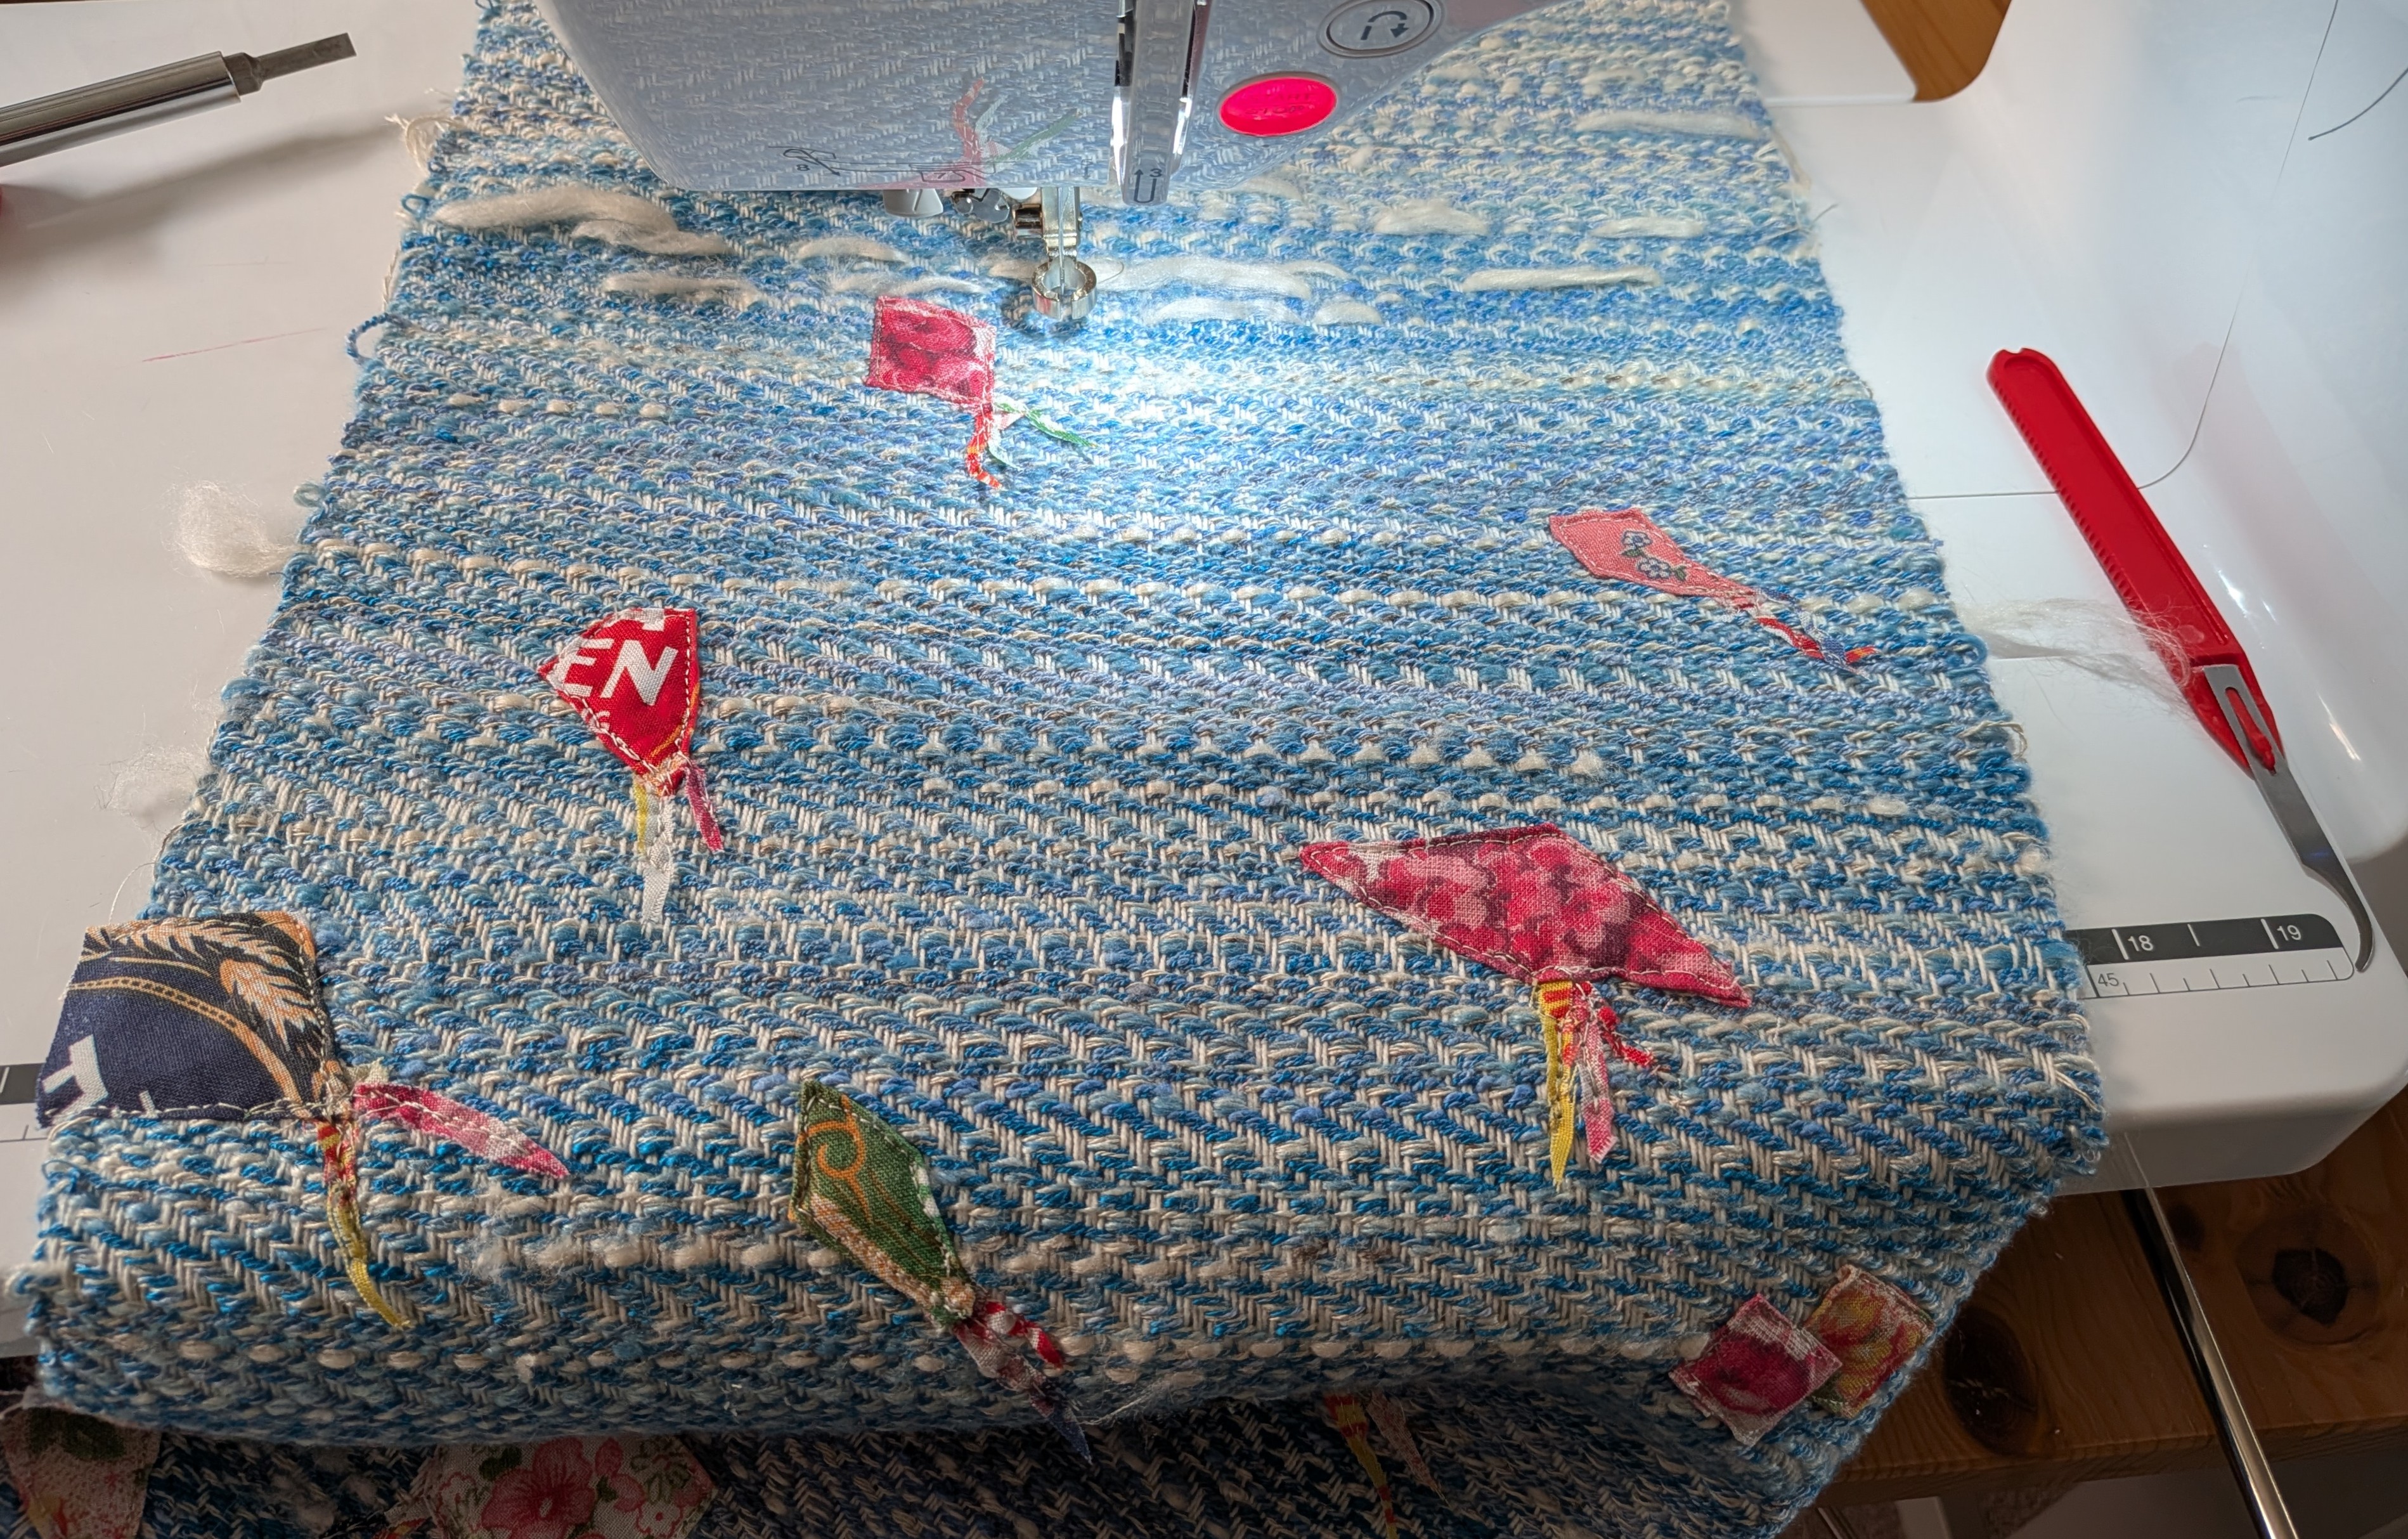
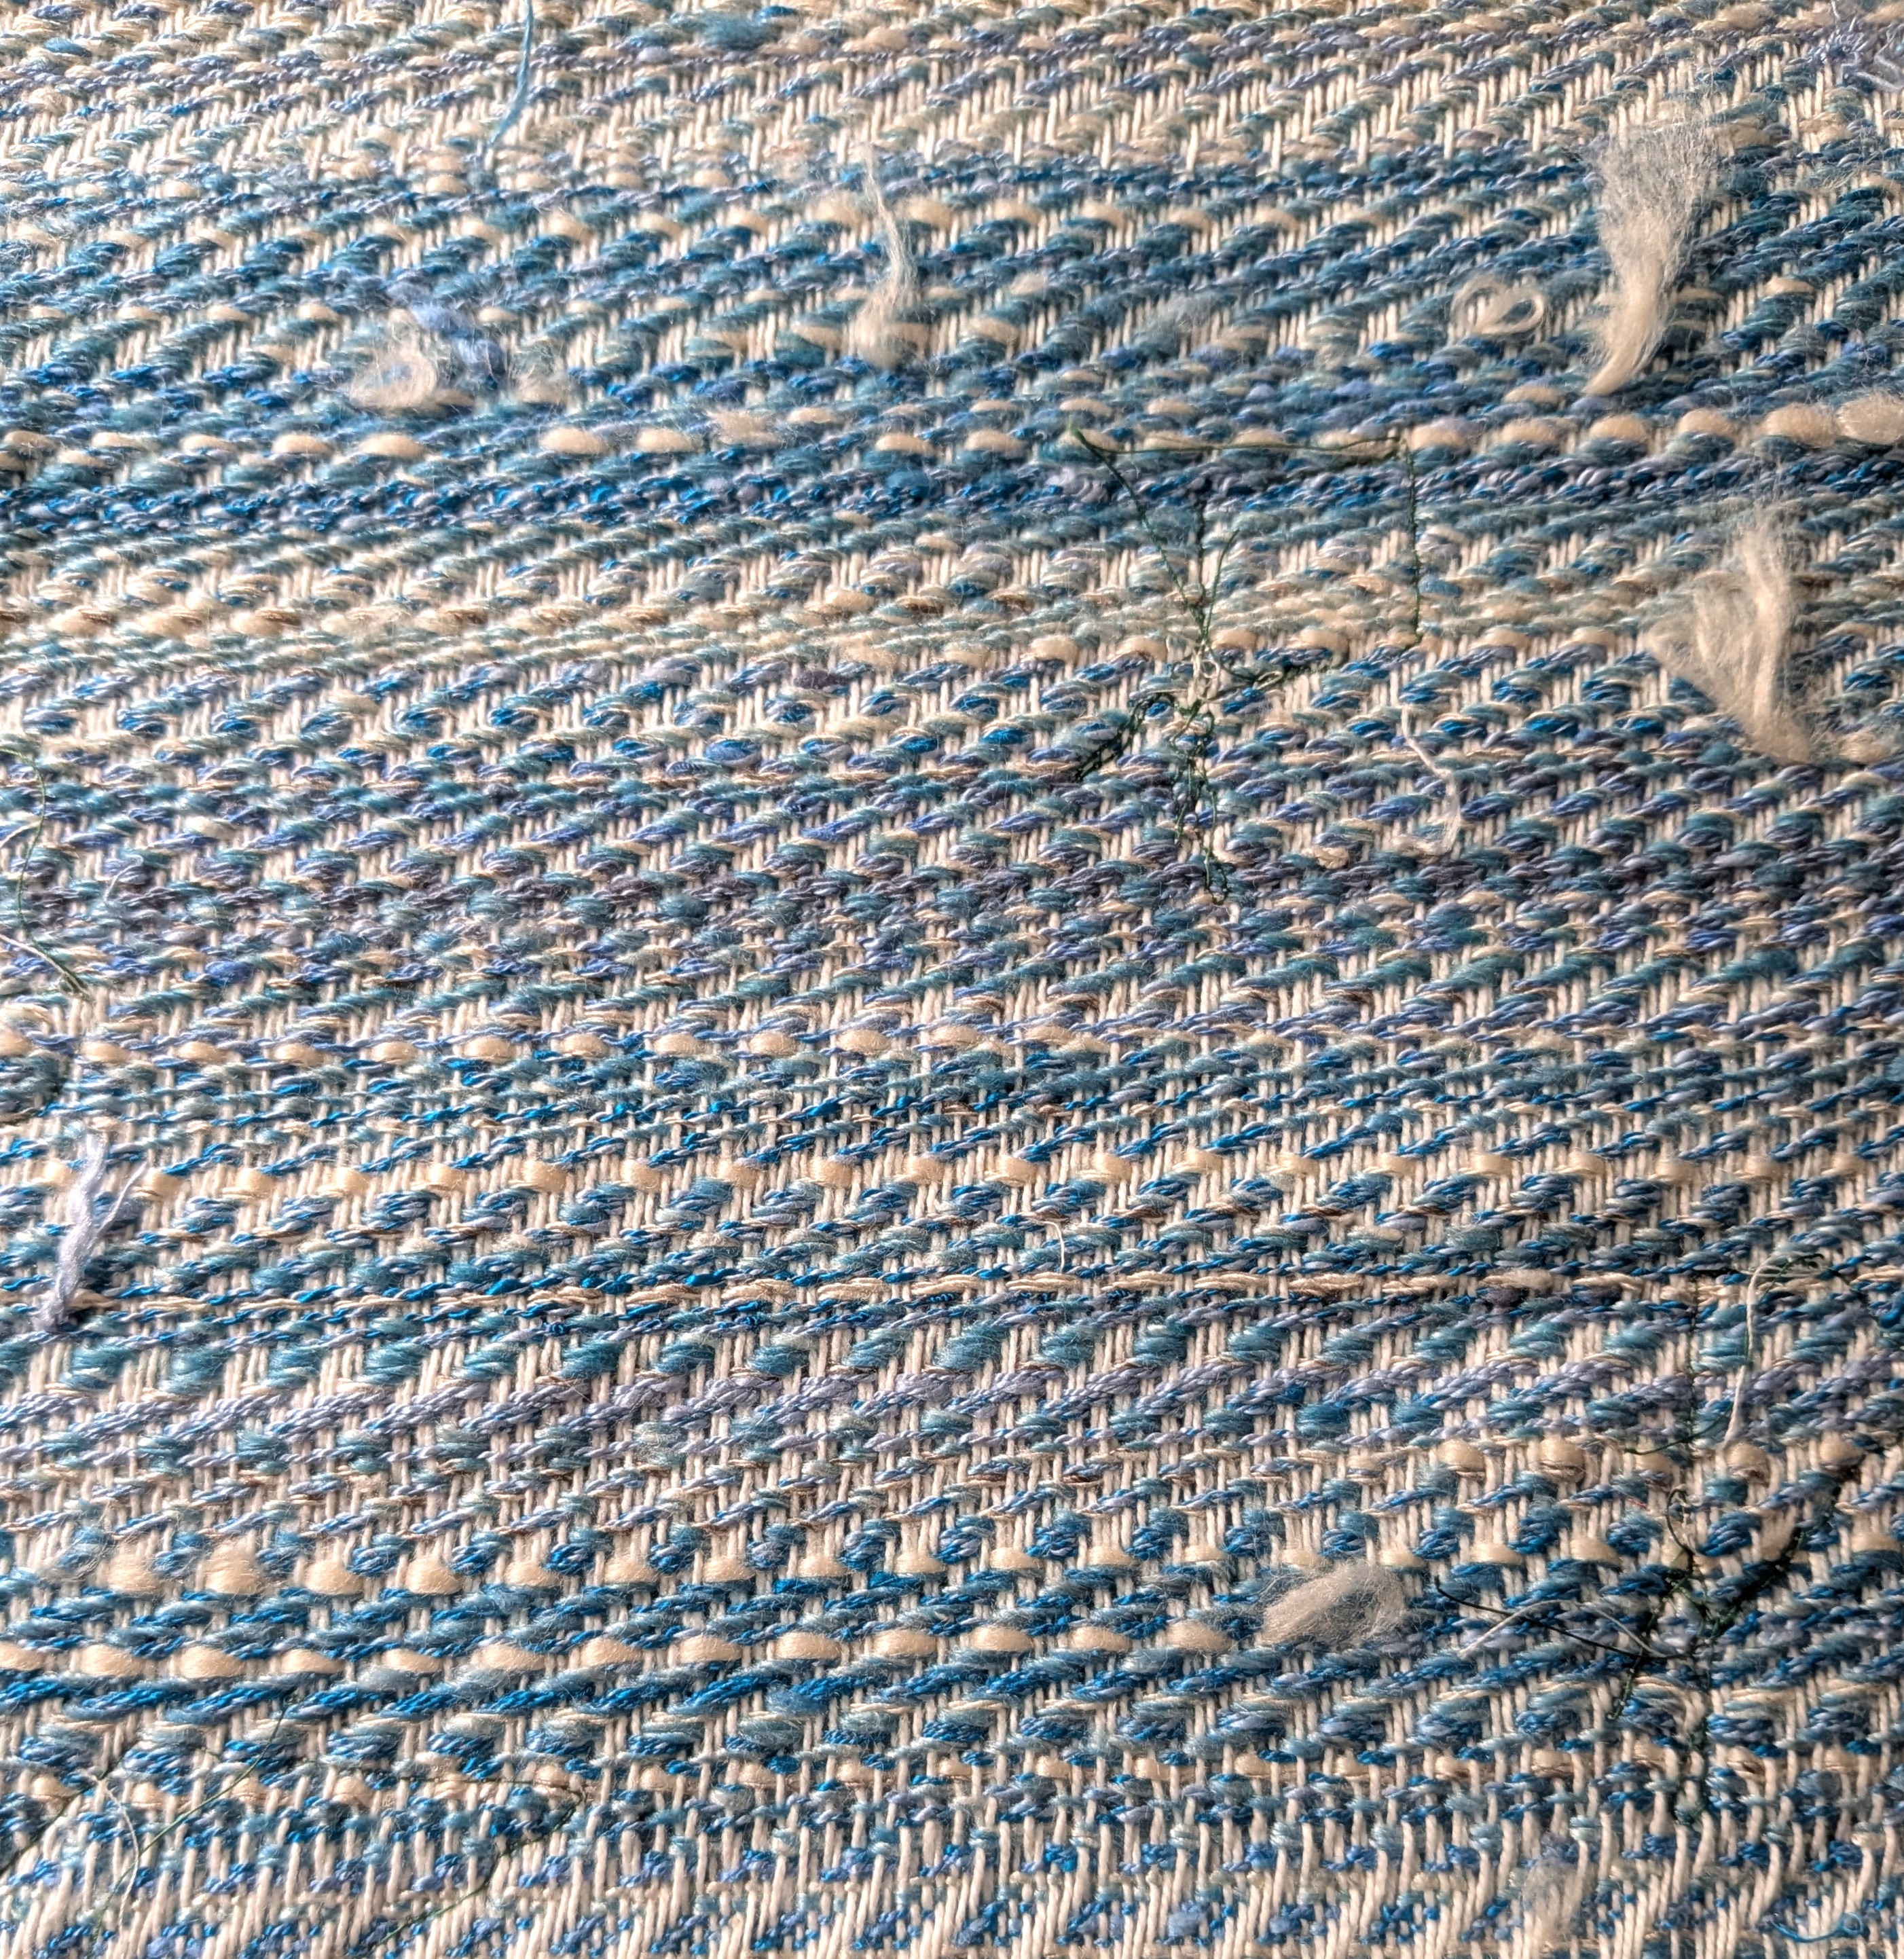
Pictures of the back of the panel after applique below. I do not always tuck in my ends! I also figured there was no need since I’d be quilting it and securing everything afterwards. On the right you can see the warp faced back of the hill.
I pieced together the backing with my scraps from the flour mill fabric and supplemented with some floral fabric from my stash. I used cotton backing and basted with safety pins.
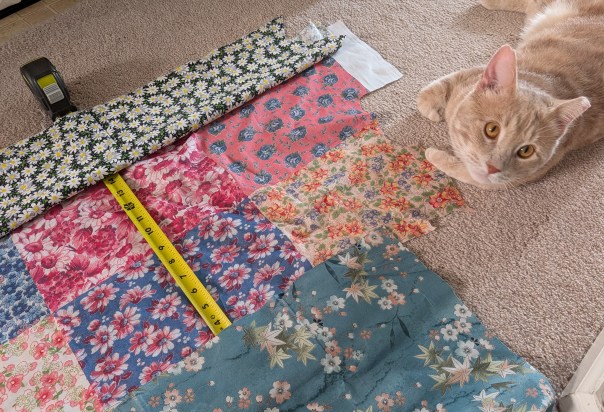
I doodled a lot of ideas for the quilting, but in the end I wanted to keep the attention on the waves in the weaving and keep the quilting simple. I went with flowy undulating lines and used the same gray-ish thread I used throughout the entire construction and applique processes.
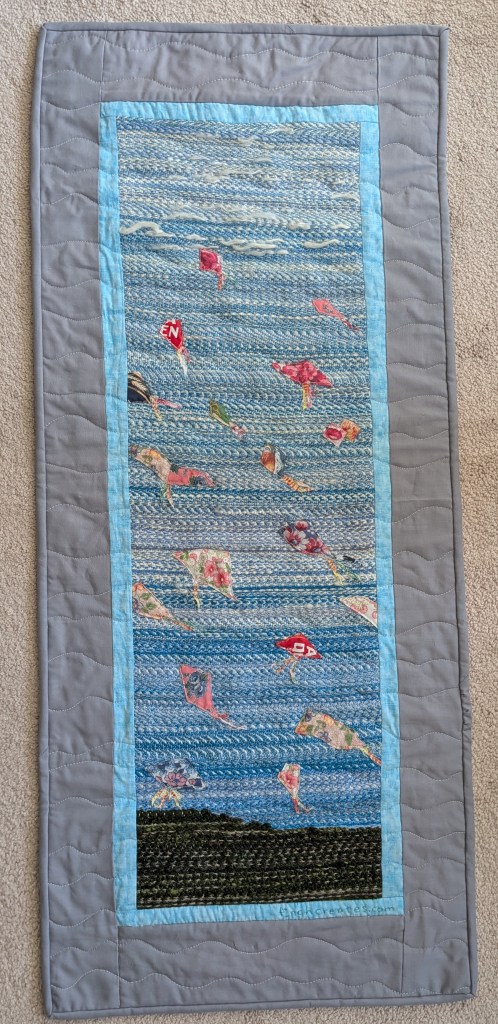
Project completed October 2026.
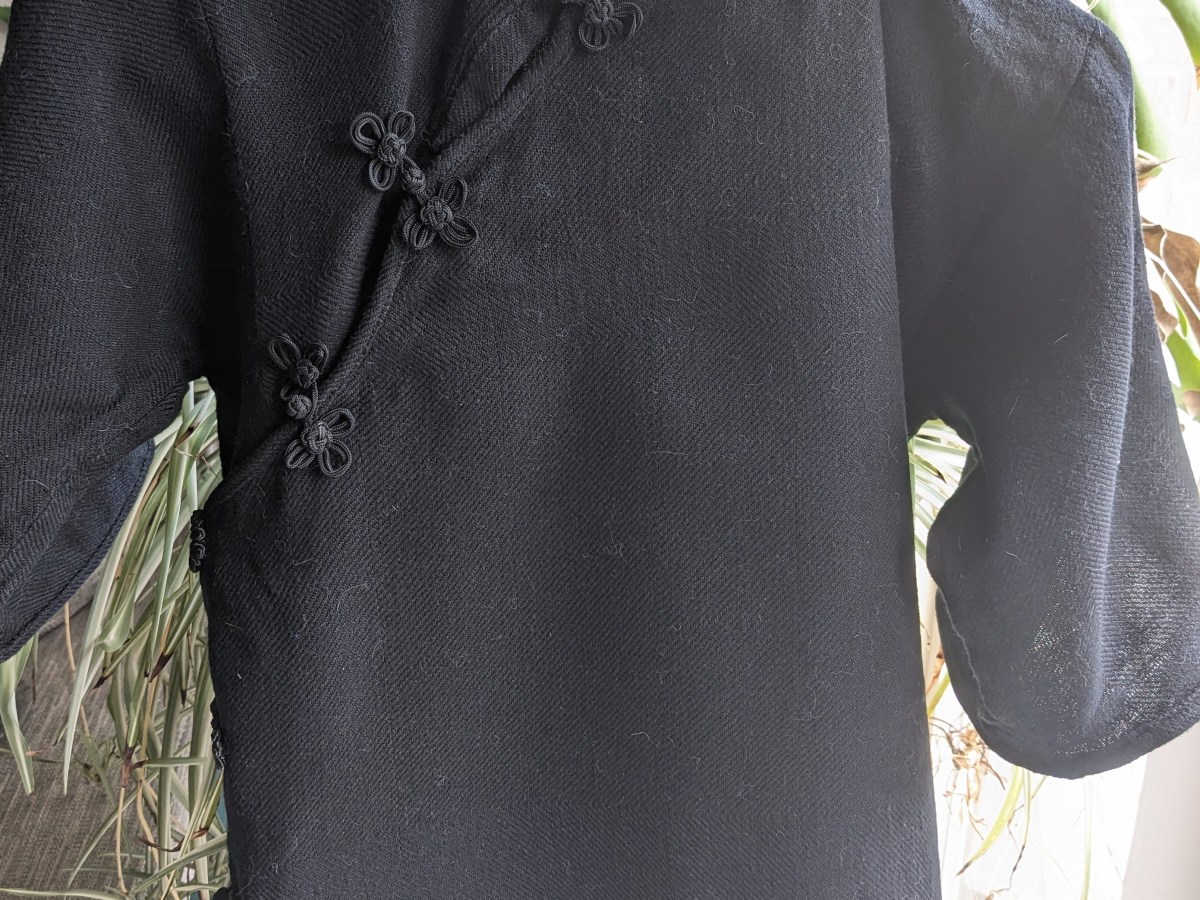
Handwoven Handmade Shirt
My handwoven handmade shirt! I made this shirt to be a little fancy, breathable, with floofy sleeves and frog buttons. I wanted to experiment with cottolin (cotton and linen blend) and mercerized cotton to see if the sheen of the mercerized cotton was detectable at range. I actually wove a sample, and it was not as shiny as desired, but I decided to move forward anyway.
Measuring the warp was exhausting. I used my mini heddle as a warping paddle and measured four threads at a time. But my goal was 720 threads, and that’s just a lot of time at the warping board (mine is a bunch of PVC so I can change the distances easily). Taking breaks allowed me to do more research and find new ways of construction that also enabled me to use thinner warp, so I didn’t have to do as many warp ends. I realized that I could weave a longer, thinner panel and then sew it together instead of using the full width of my loom.
I watched Claire Yixuan Zhang’s qipao video at least six times while making this – once when I found it for research, a couple times while planning how wide the warp really needed to be and making paper models, before cutting out my mockups, and before taking the scissors to my handwoven. One of the things that really stands out to me about this construction method is the value of keeping as much fabric from the panel in the final product. And being handwoven, this shirt is probably the most expensive piece of clothing I have now.
I finally sleyed the reed, set up the heddles, and wound on my warp. I practiced a new way of dressing the loom with a smaller project right before this, and I’m glad I did. Dressing the loom front to back like this was less stressful and more ergonomic for me, and I think I’ll continue using this method.
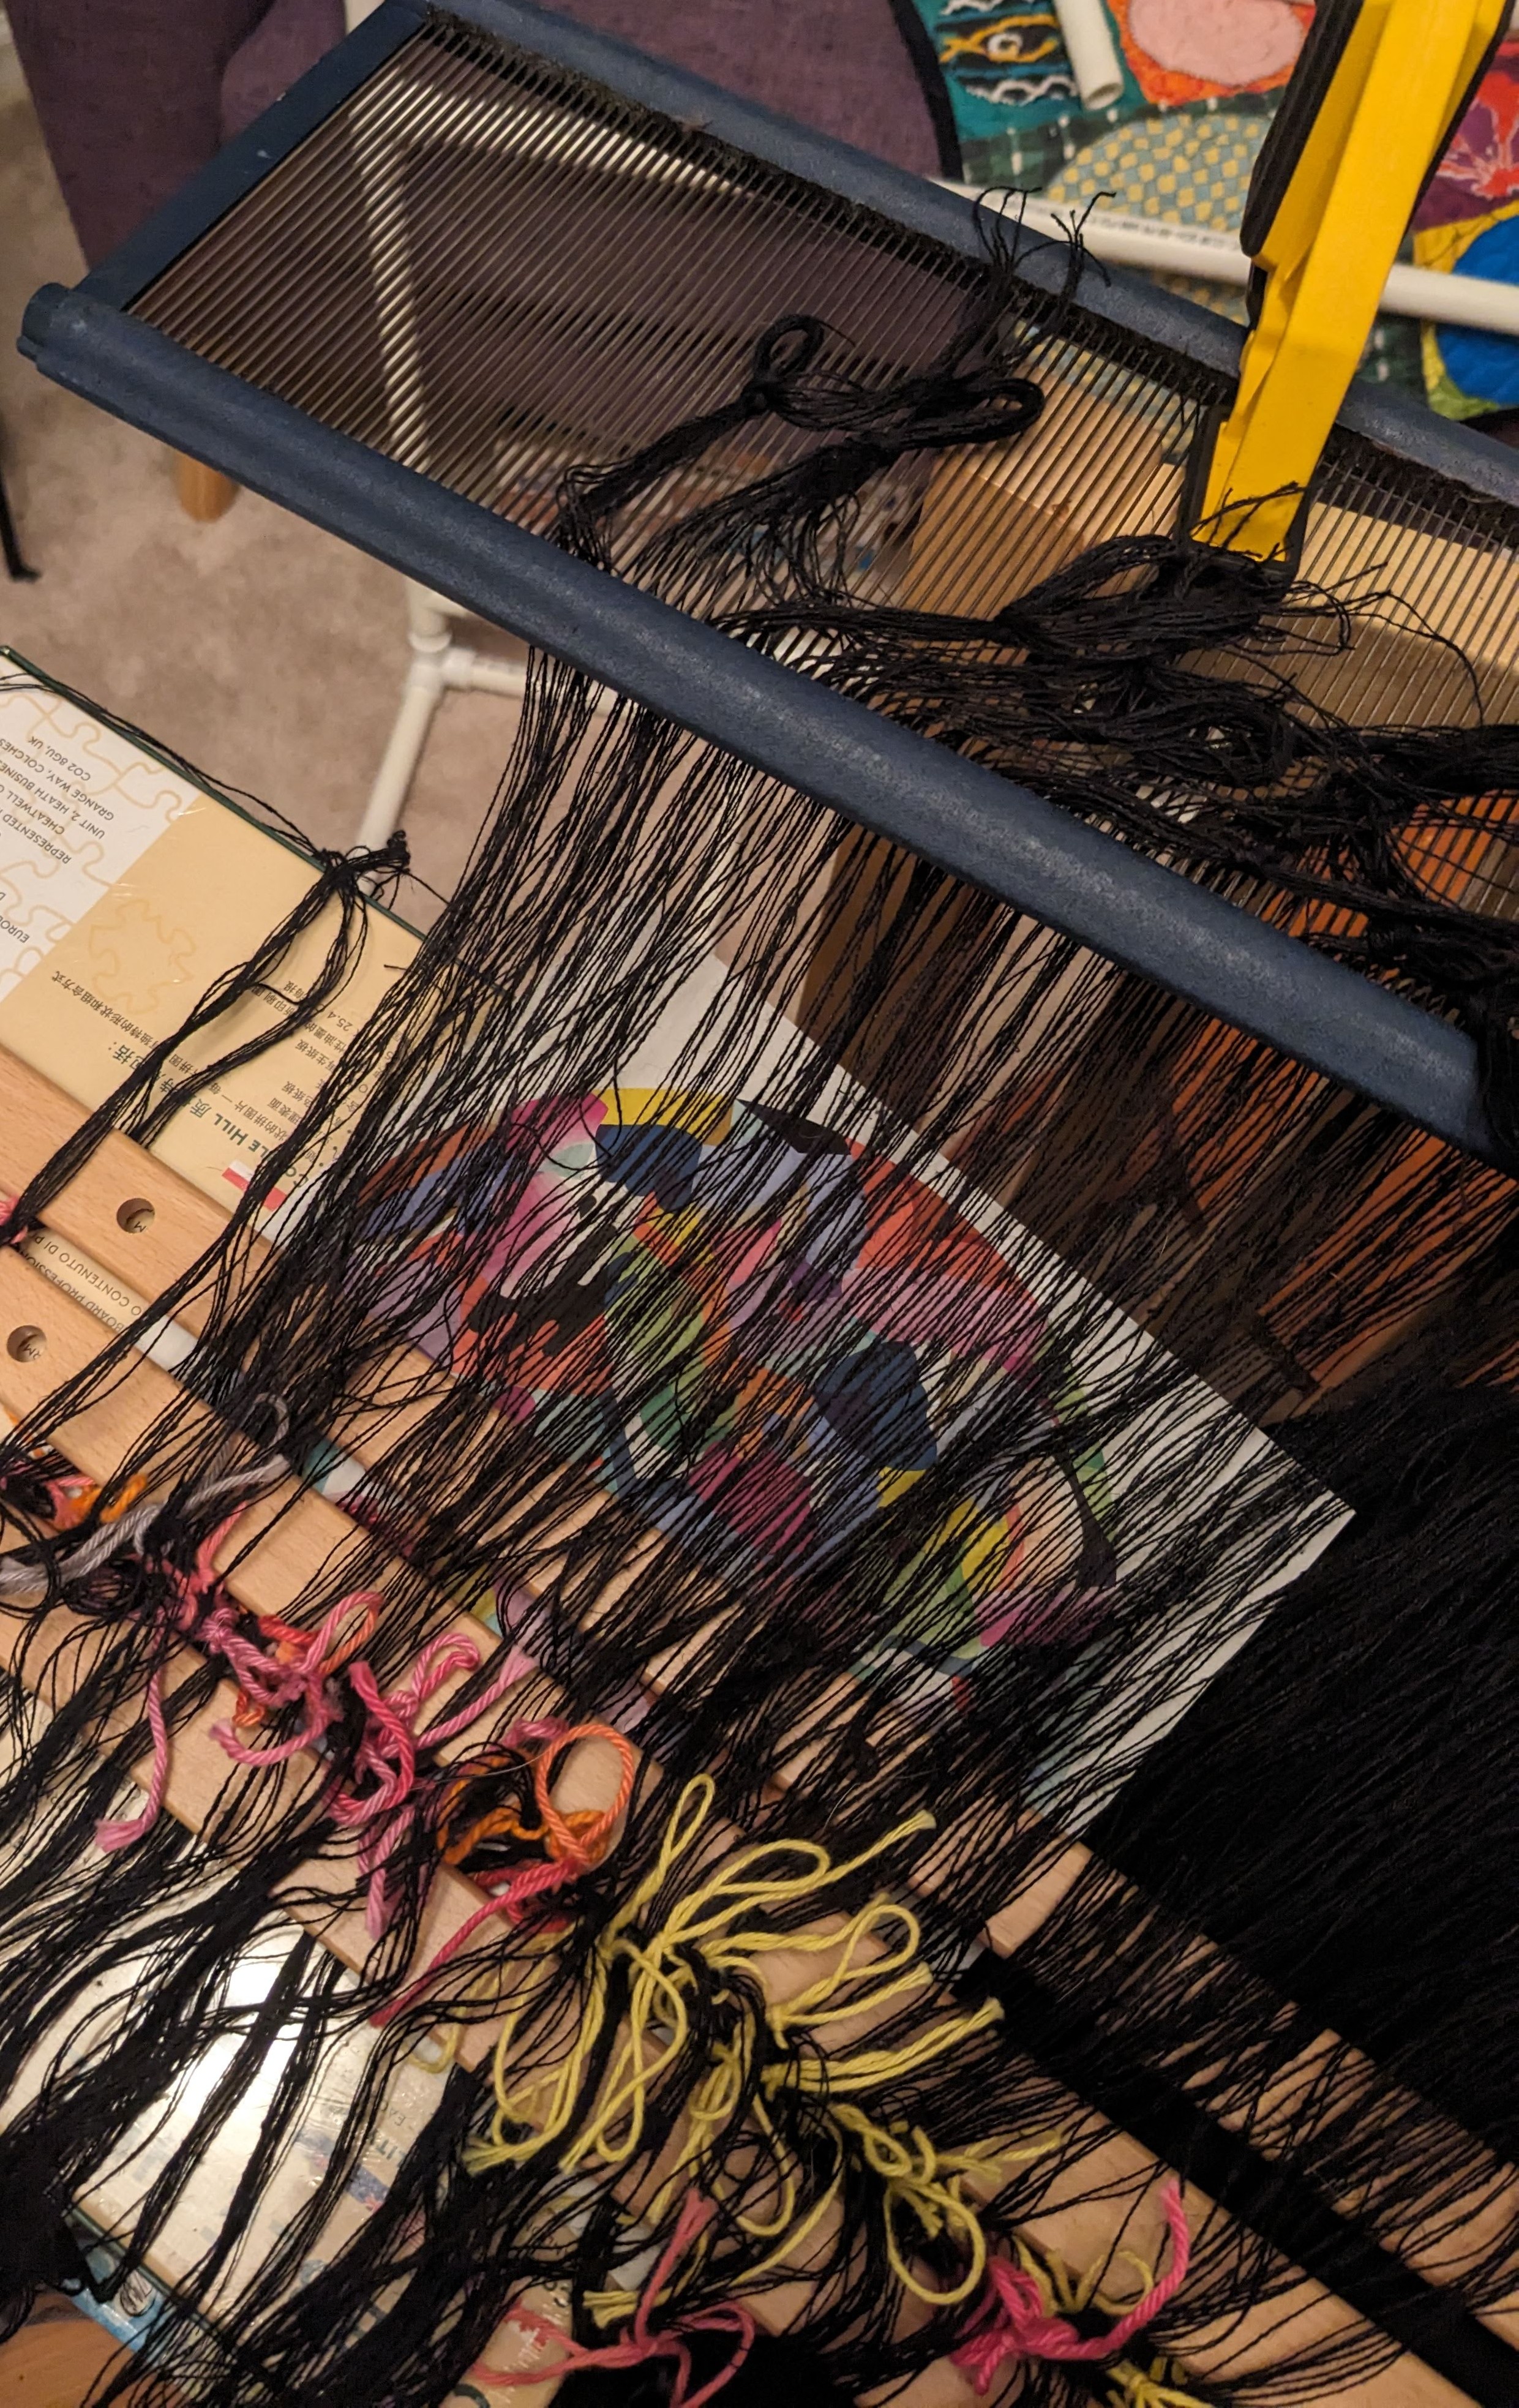
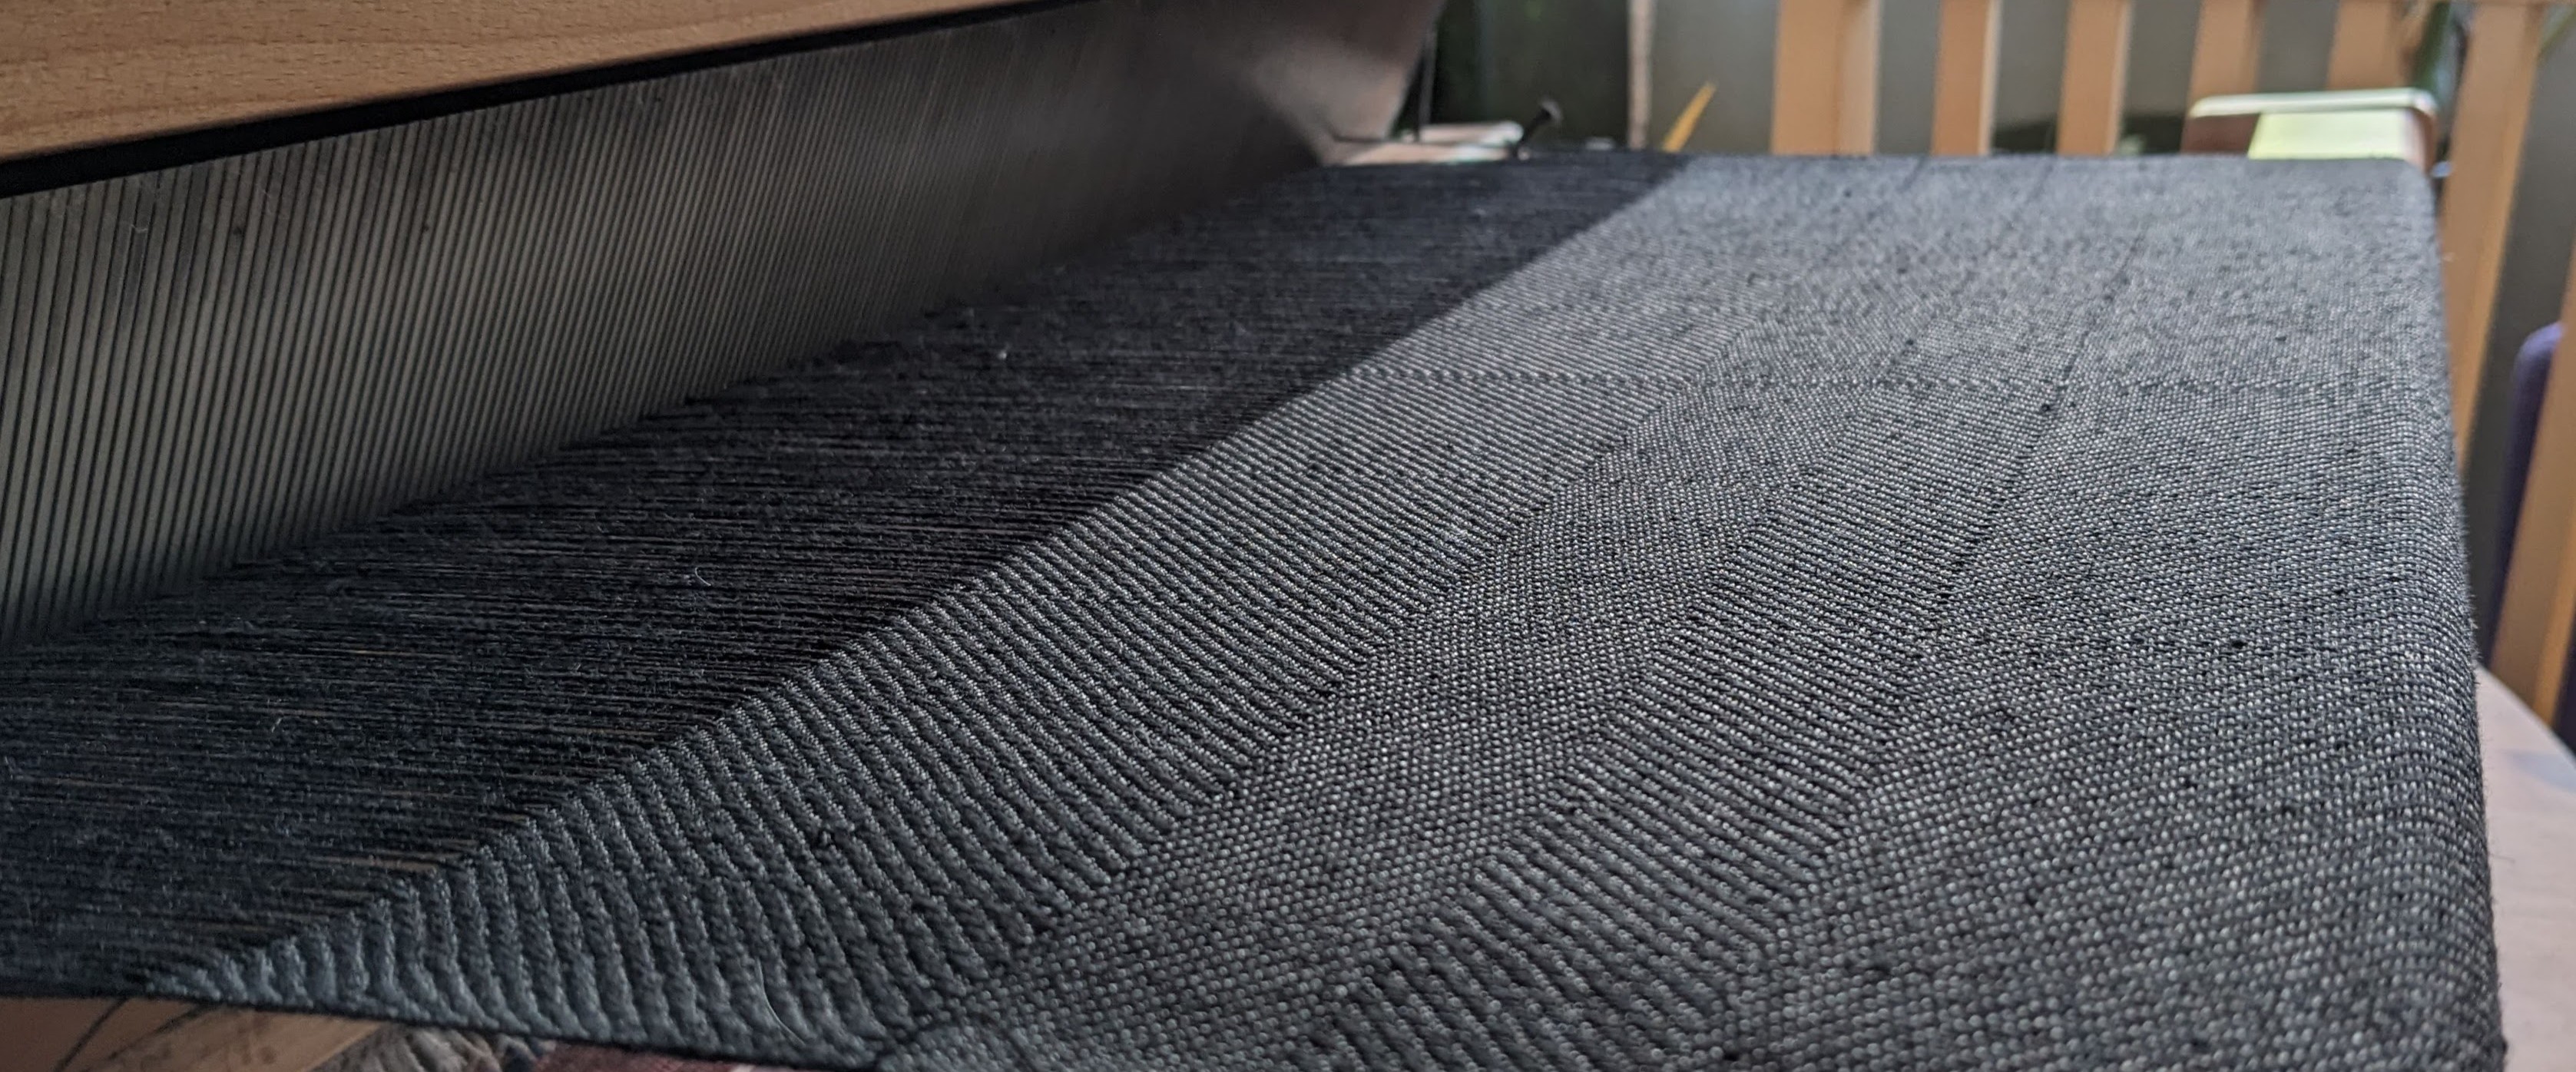
These really obvious stripes happened on both the sample and the final weaving – but only on the loom. I’m still not sure why the twill pattern is so obvious on the loom but not when finished, but I suspect it has to do with the “fuzzing out” of the cottolin during washing and the mercerized cotton (which I used exclusively in the weft) sinking into the structure and becoming less pronounced.
It turns out that weaving all black, simple four shaft twill for, oh, 190 inches is really boring. So in procrastinating on the weaving, I ended up being very responsible and making two mockups with the cutting technique from Claire’s video. The mockups helped me figure out how long and big I wanted the sleeves to be, and what the neckhole should look like. I also learned how to make wheat paste to stabilize the edges of my fabric as I cut into it, which made me much less nervous.
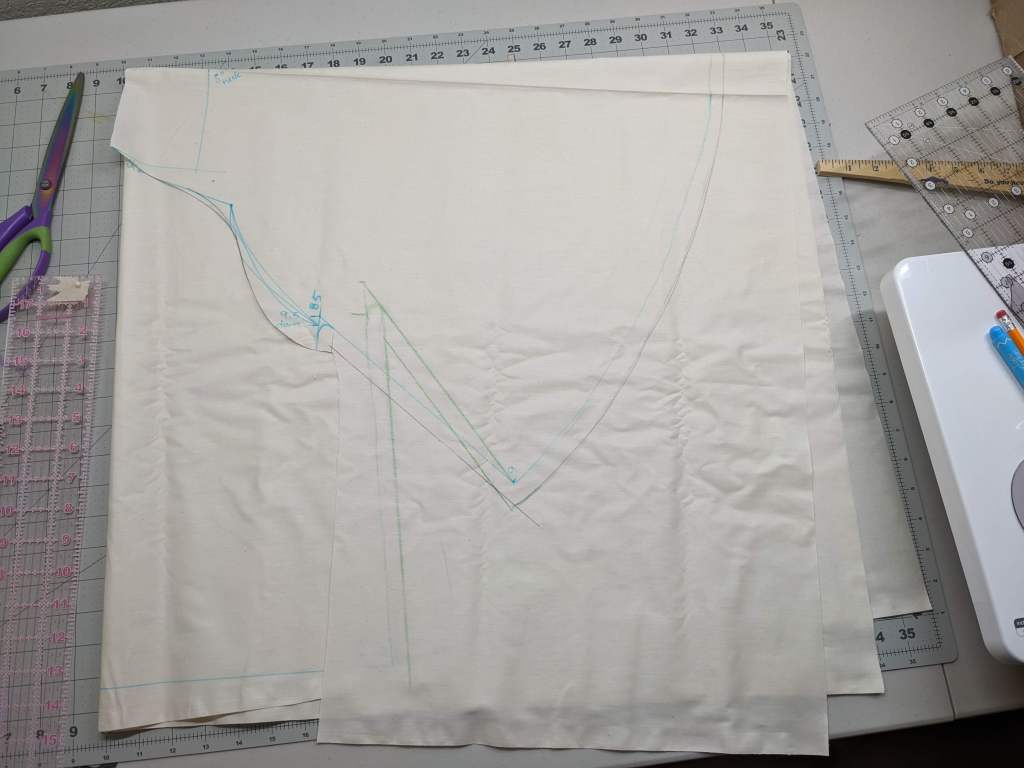
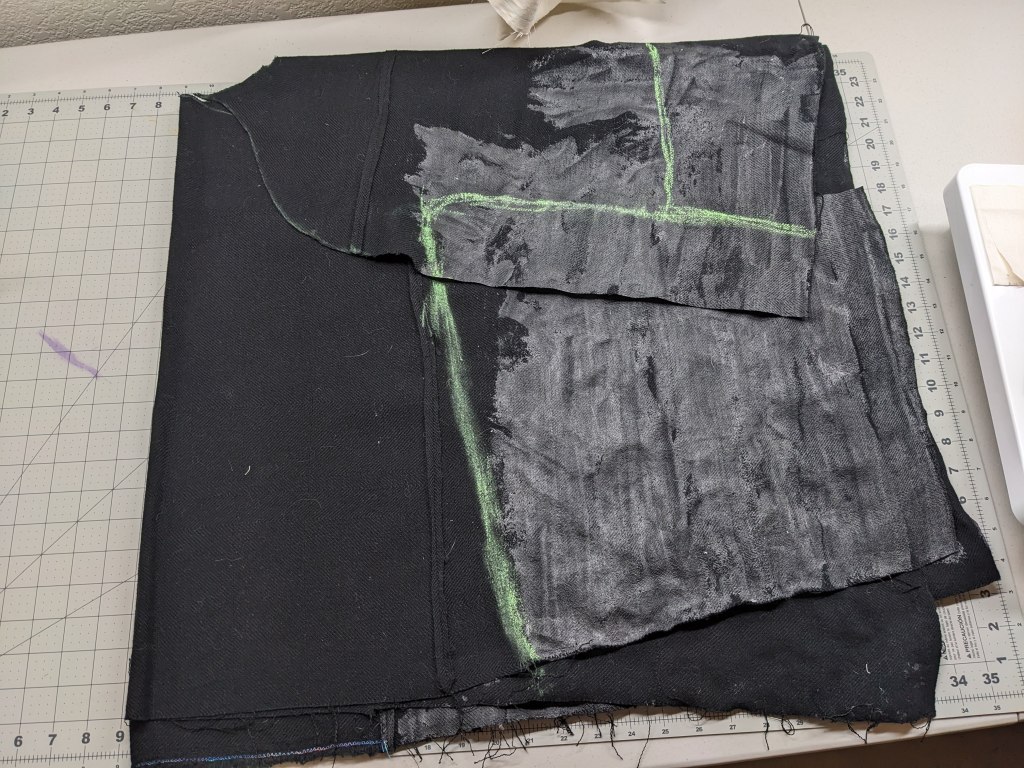
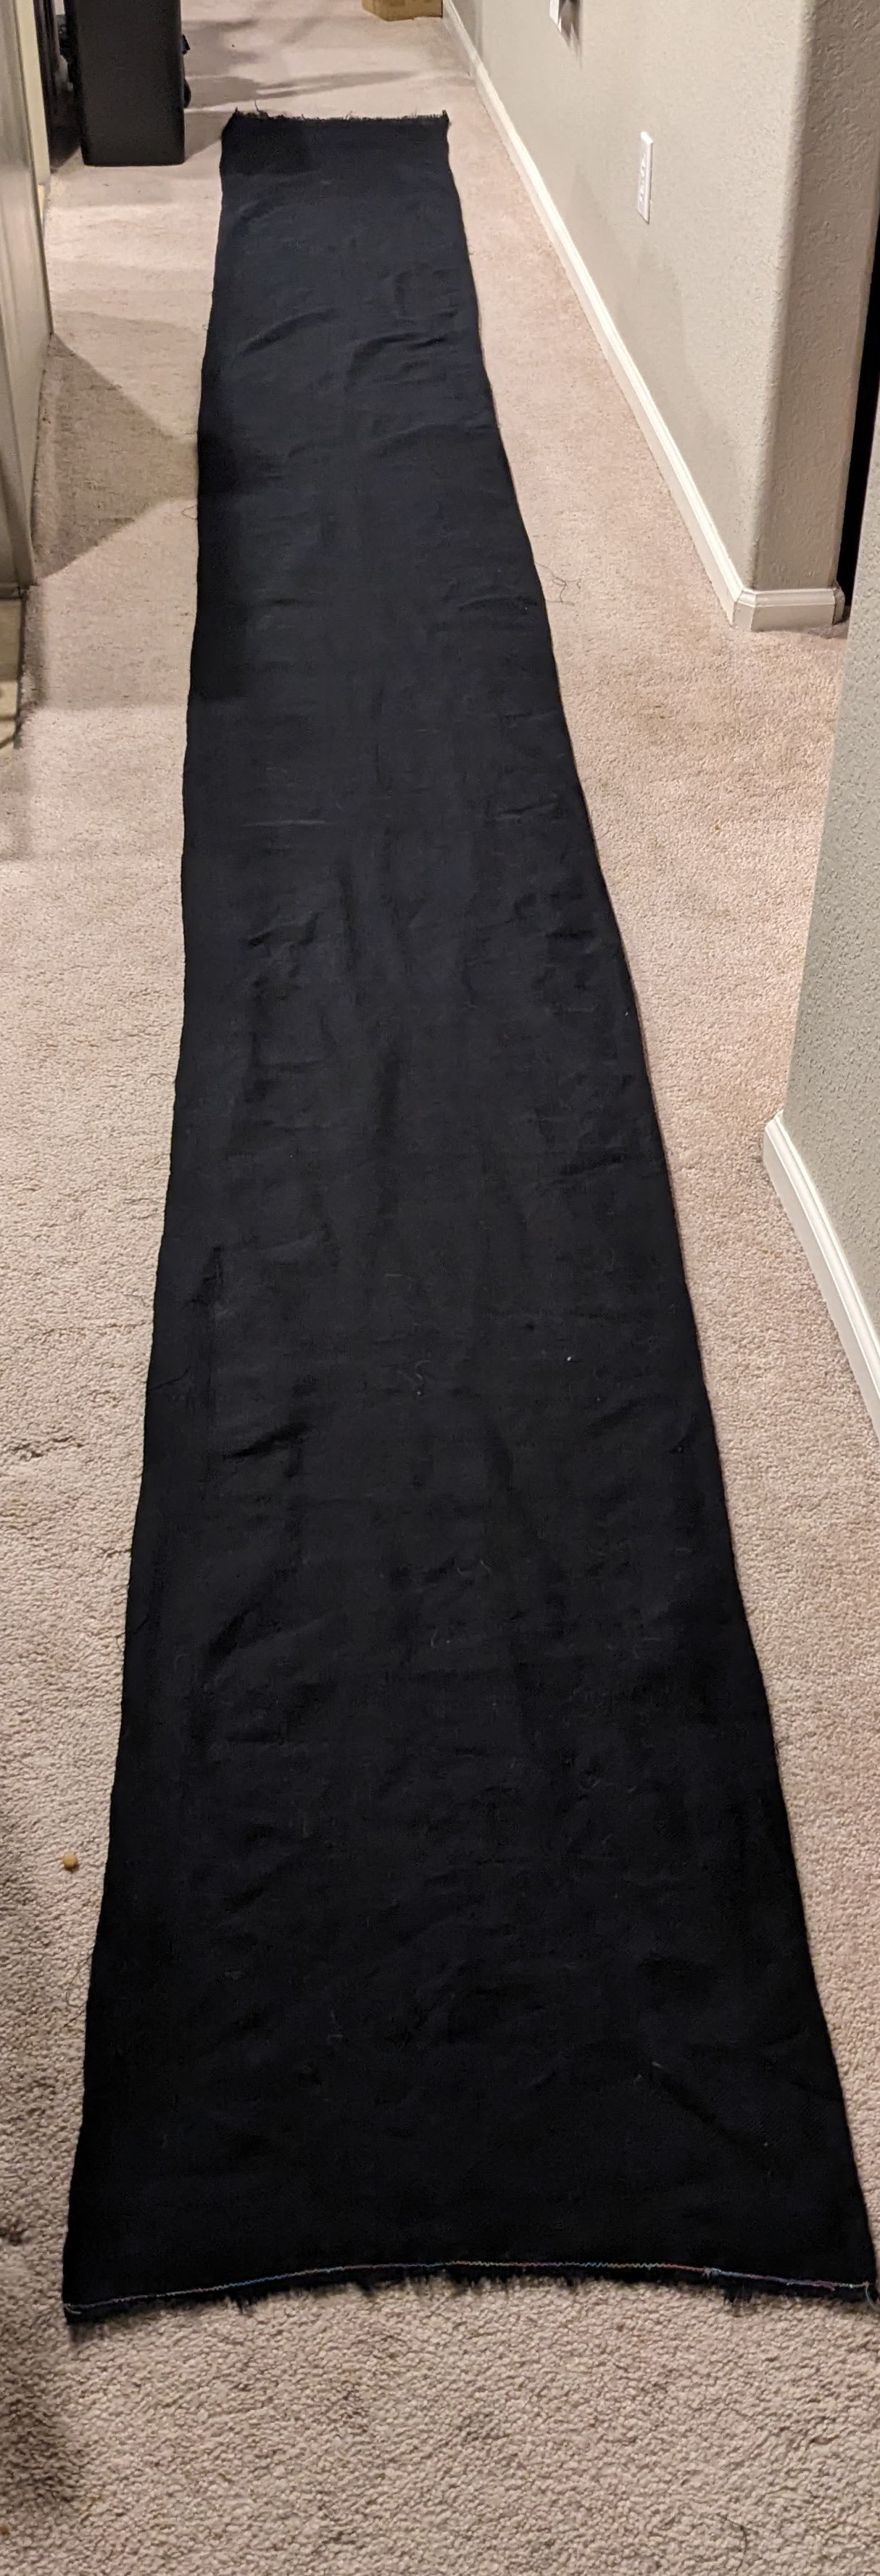
Once I finally finished the panel (left below), I sewed it to be three times the width and one third the length (right) to make an almost-square.
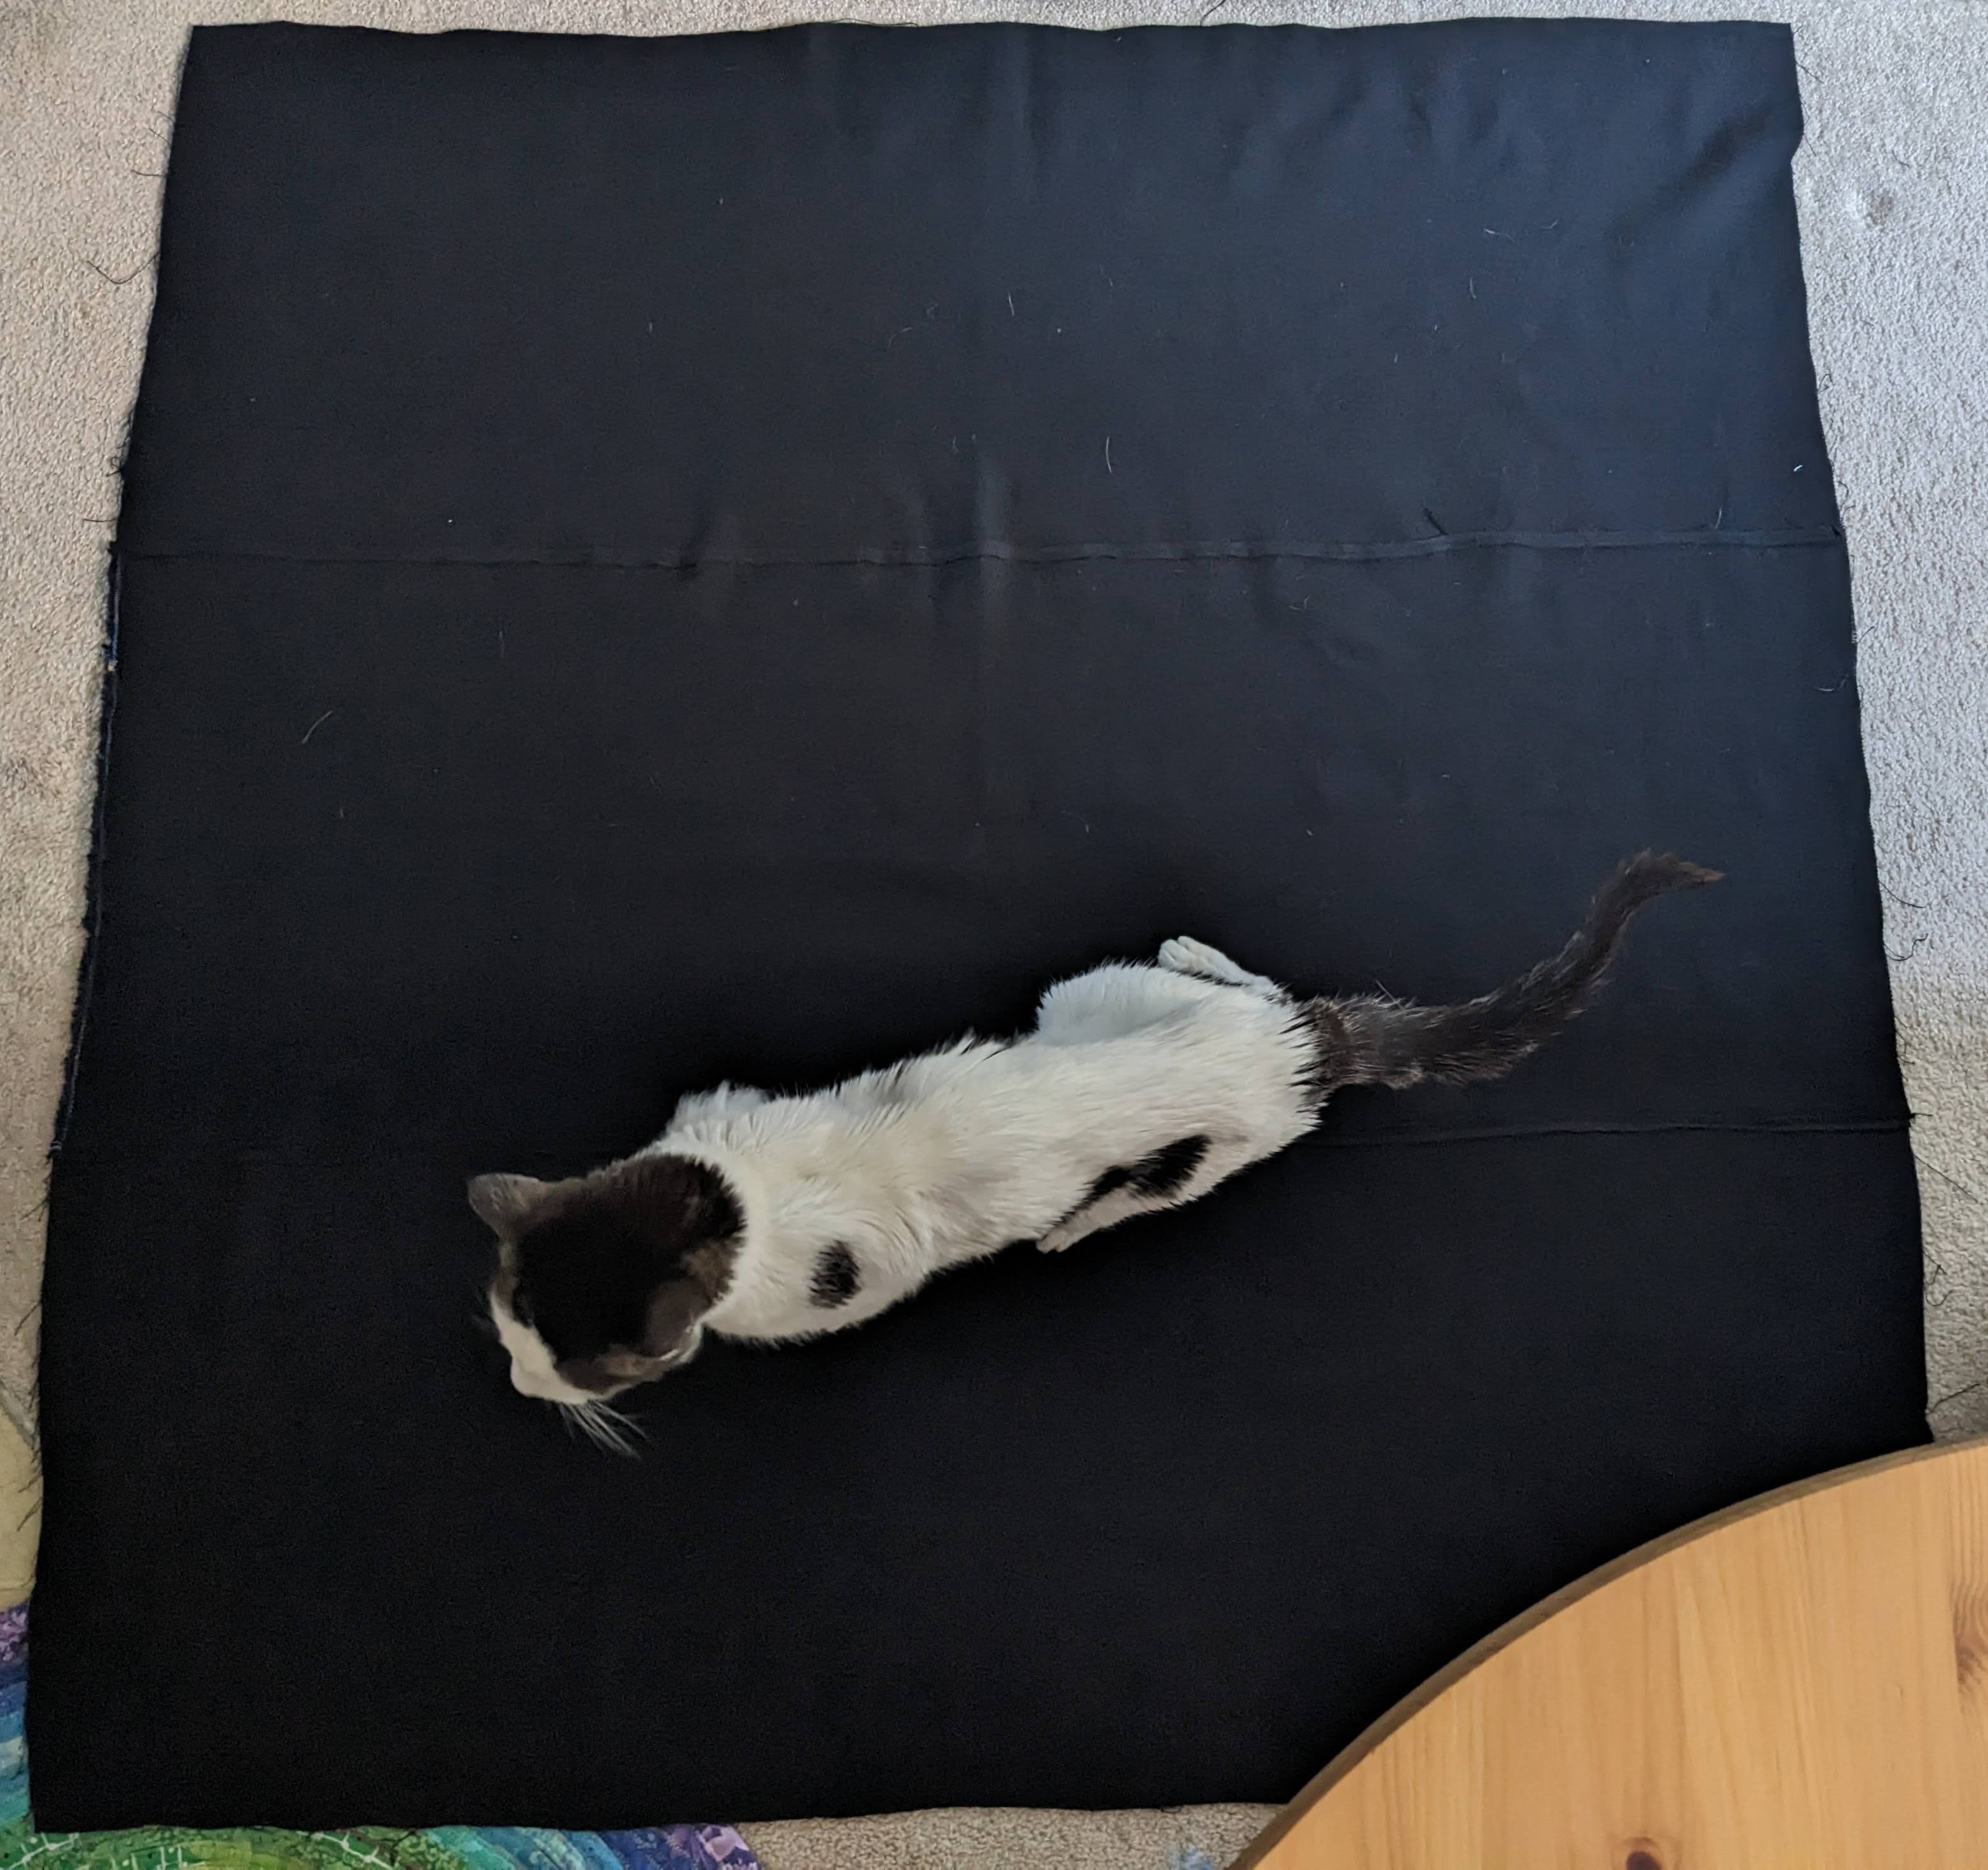
Then I followed my mockup plans and made the final! I accidentally cut out the neckhole from version one, instead of version two, so I had to make some weird pleats around the neckhole on the back. The collar was the part I was most nervous about, but I just took it slow and made a mockup collar to make sure that it fit onto the neck hole.
I ended up using “bias” (read: just strips on the normal grain) tape to seal all the raw edges, including around the sleeves and on the inside side seams. I did this the first time with the sewing machine because I thought it would be faster. But then when I washed it, some of the fabric had not been caught in the tape and came free and slightly unwoven, which I repaired by hand. It probably would have been easier and faster to do all the tape by hand, which I will remember for next time.
I used frog buttons that a friend bought for me in Taiwan (on the front), plus some additional frog buttons from an old shirt (down the side).
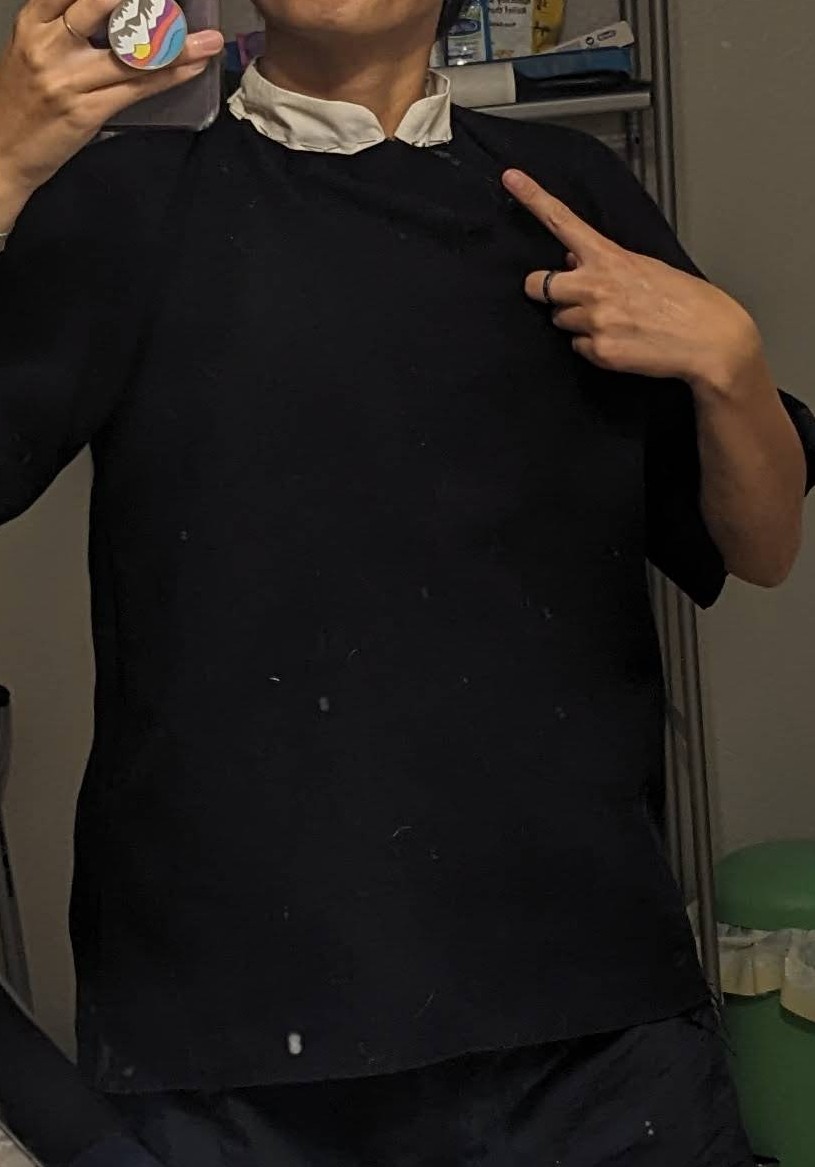
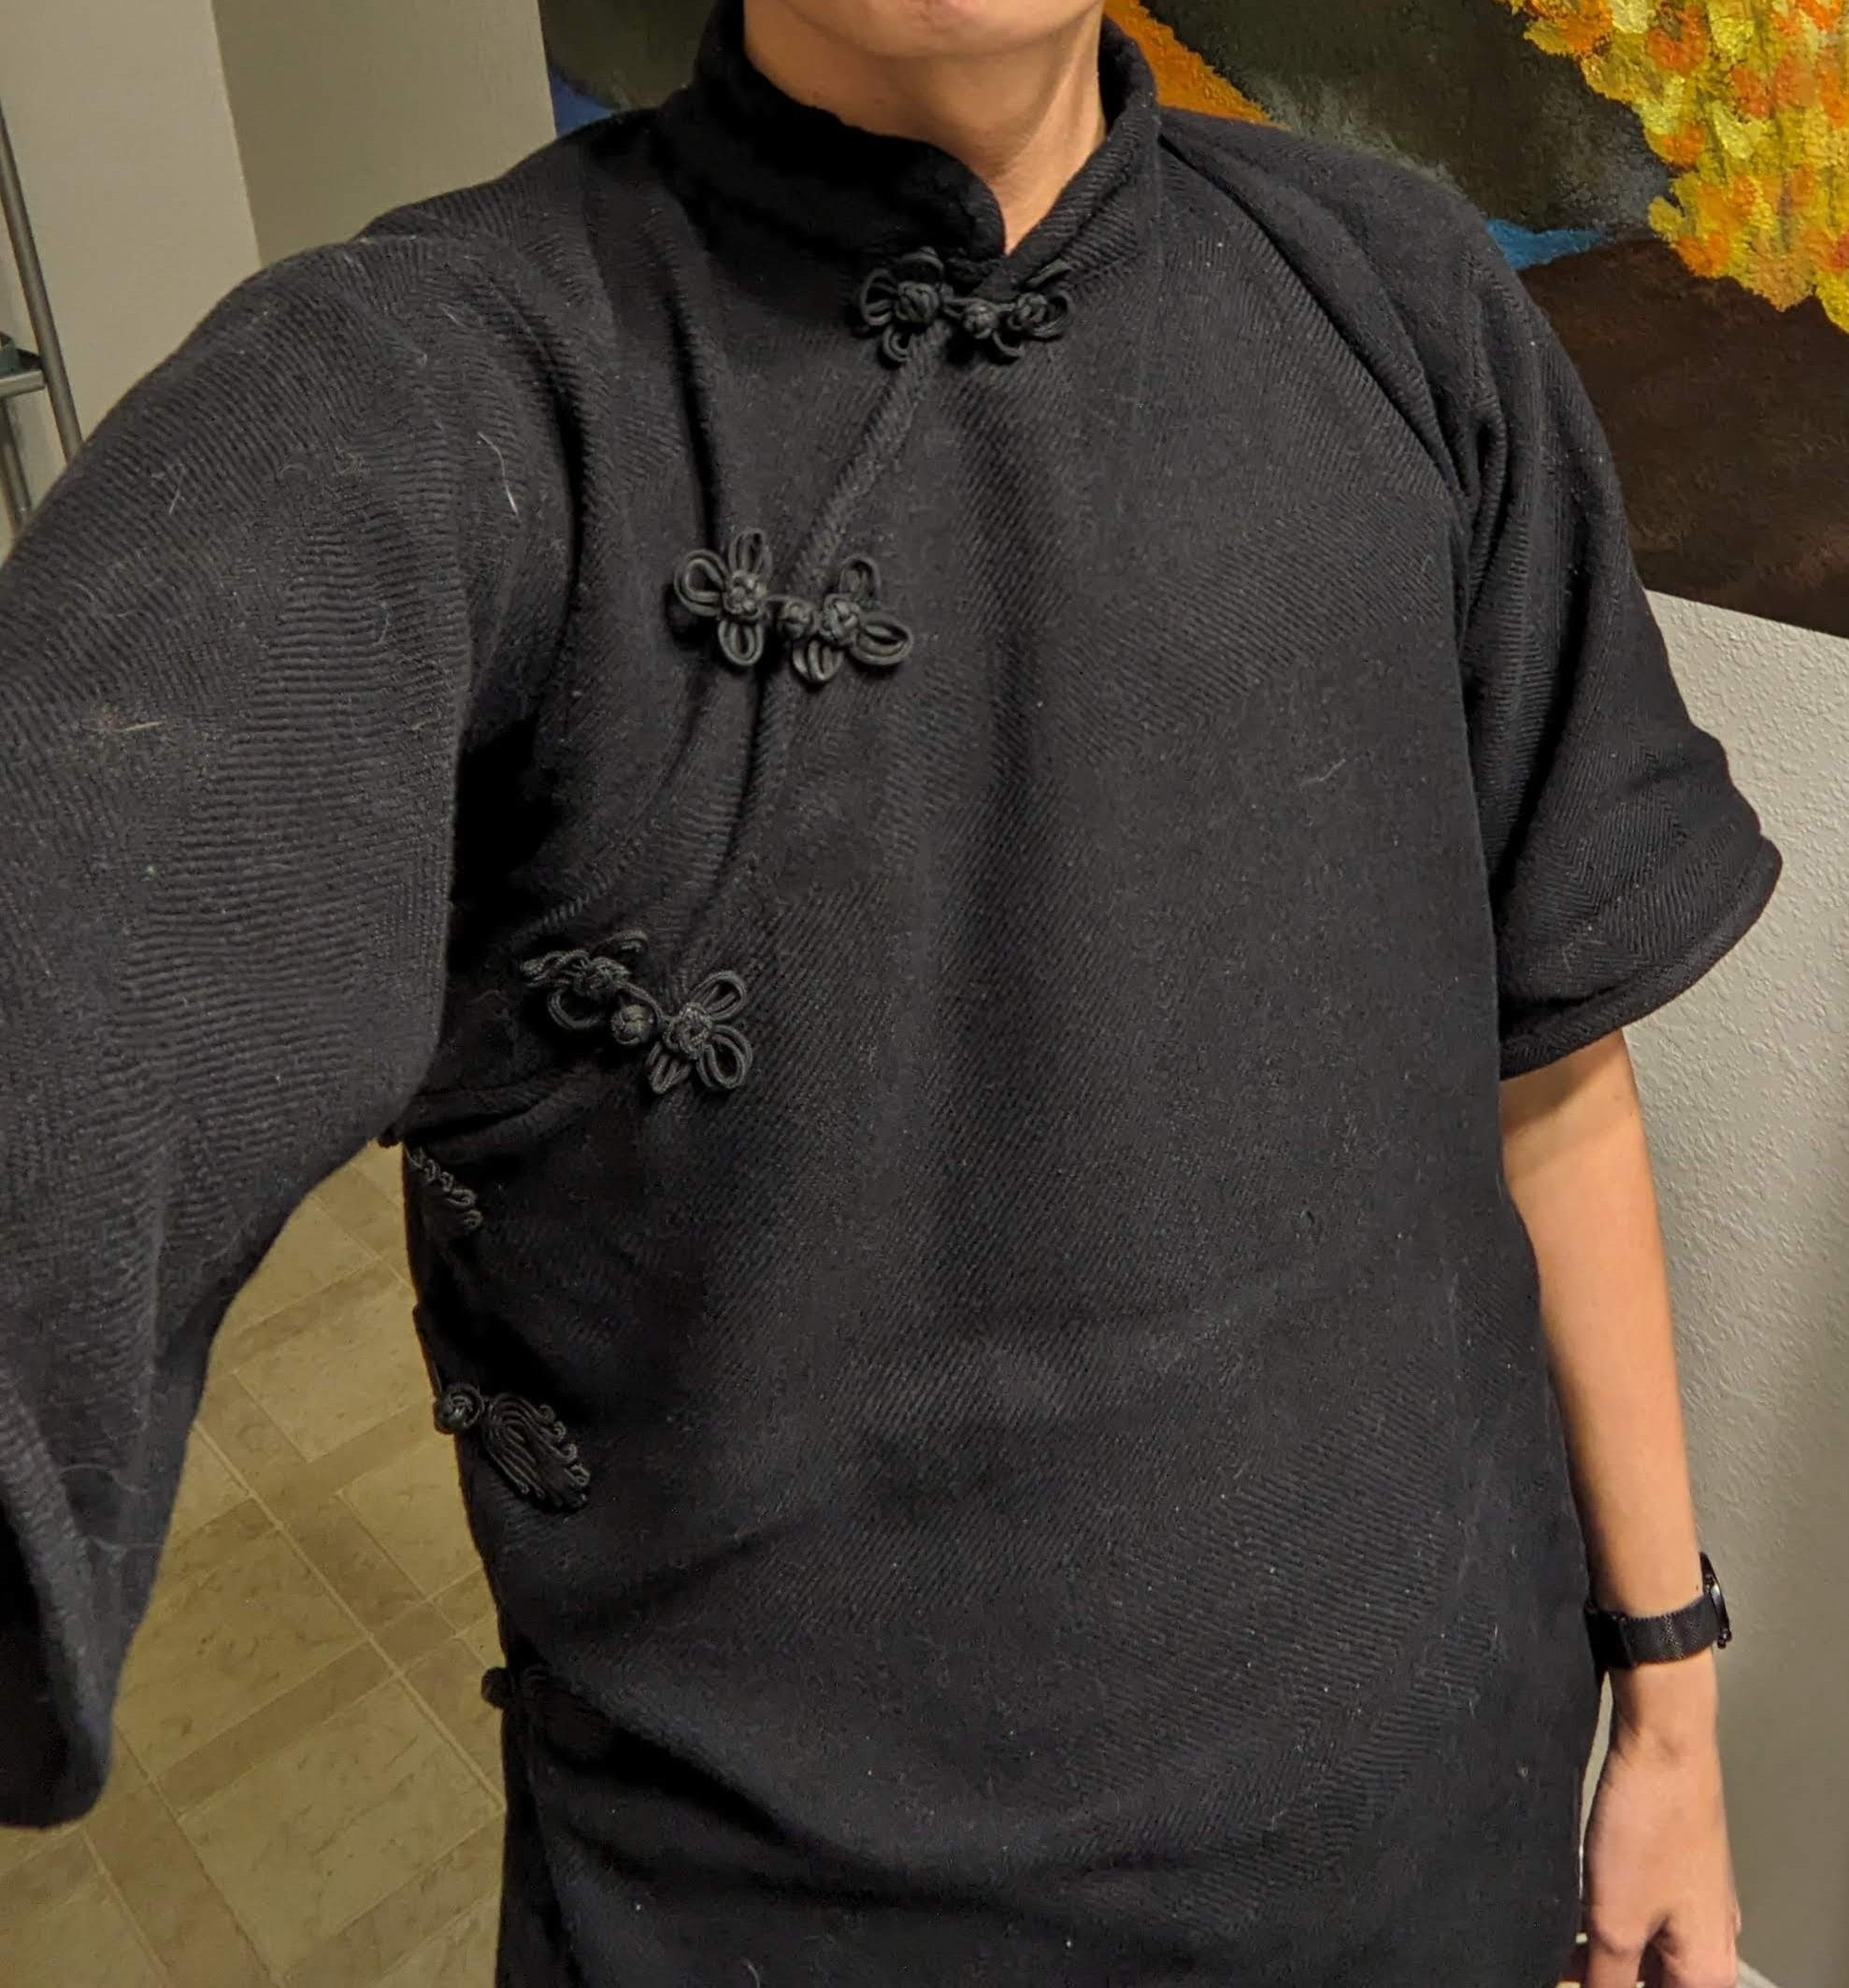
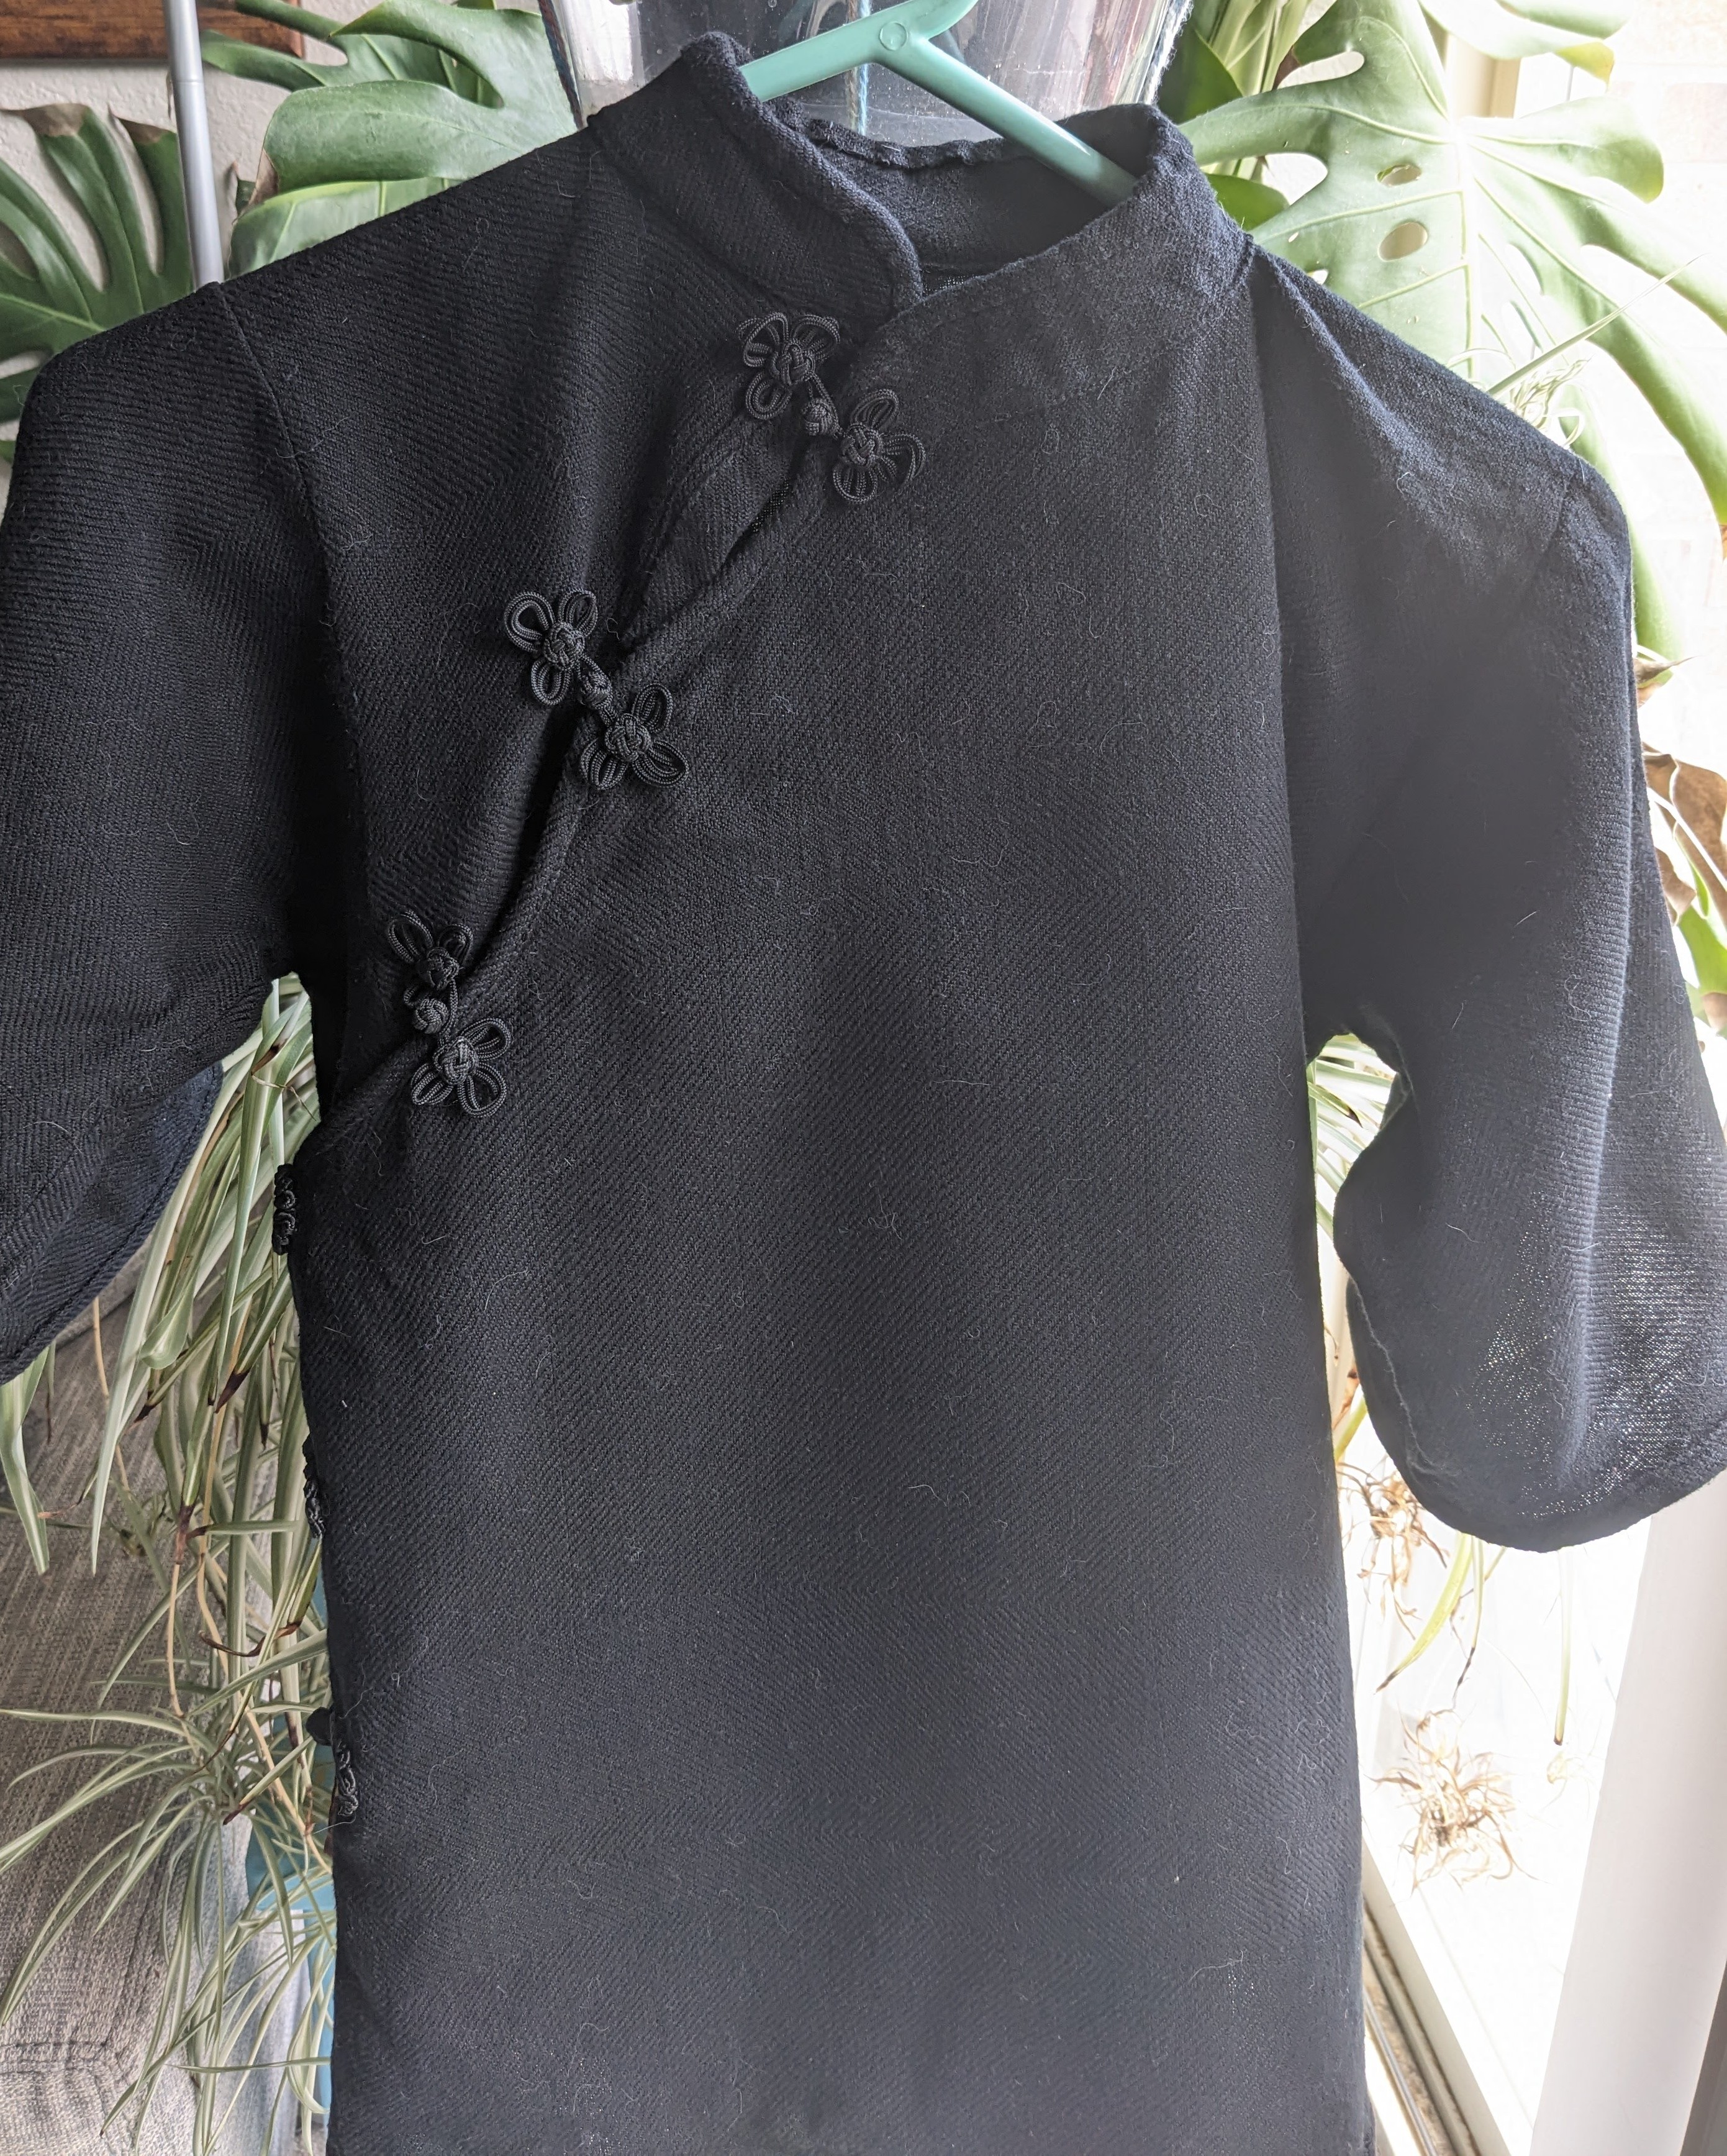
The collar ended up a bit asymmetrical, and I want to address it. One friend said they would lean in an make it even more asymmetrical, and another friend said I could probably add material and make them more even, so we’ll see what I decide. On my second wear, the front overlap wasn’t quite enough when I raised my arms, so I want to add some material so all my skin is covered.
Project completed May 2026.
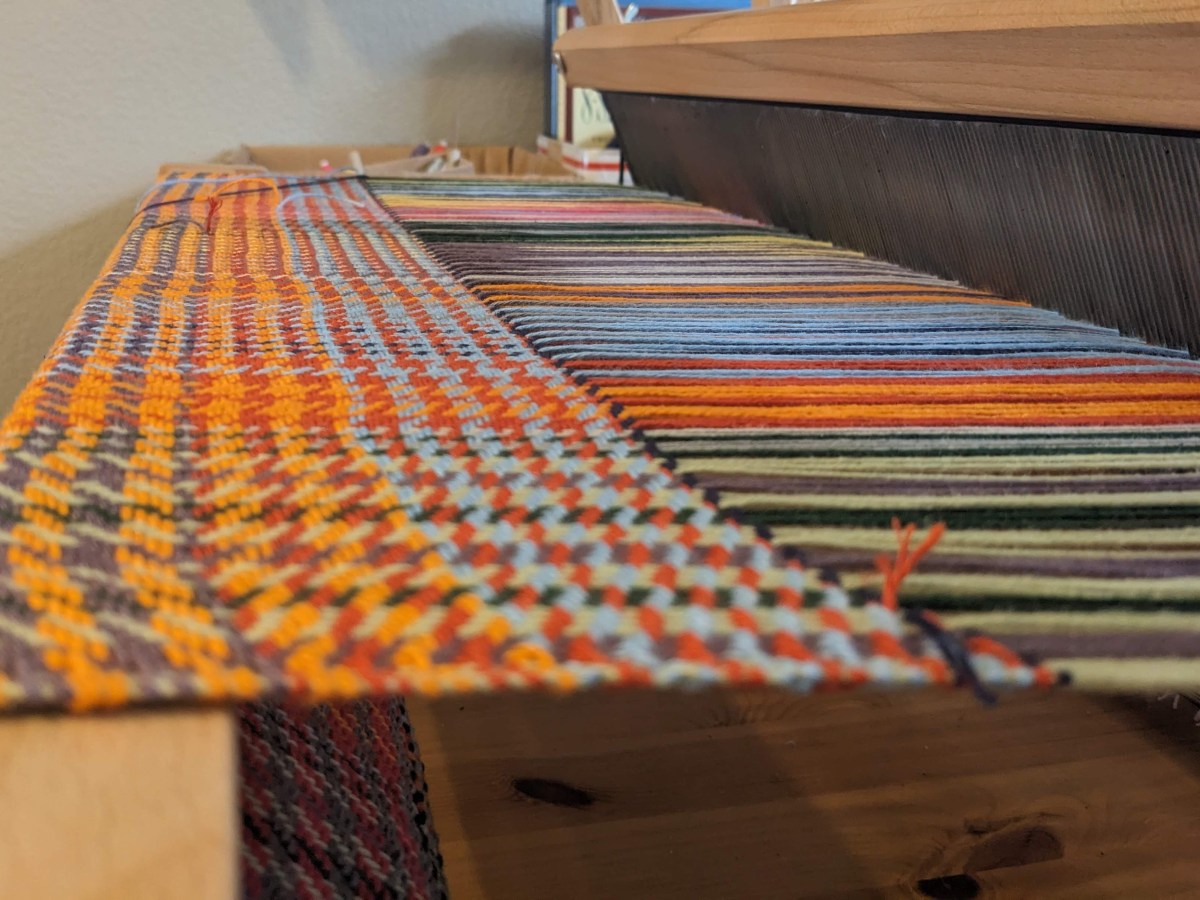
More Twill Towels 🙂
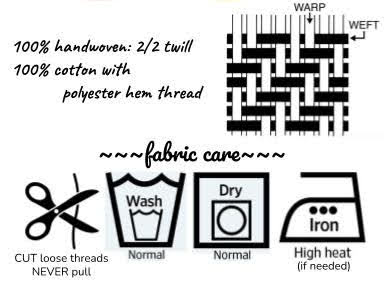
Now that I’ve given all my end-of-year gifts, I can post my work over the past many months! This year I got into weaving and doing dish towels felt approachable and they’re a classic weaver’s project. I’ve posted some that I already worked on here, and then started getting ideas…
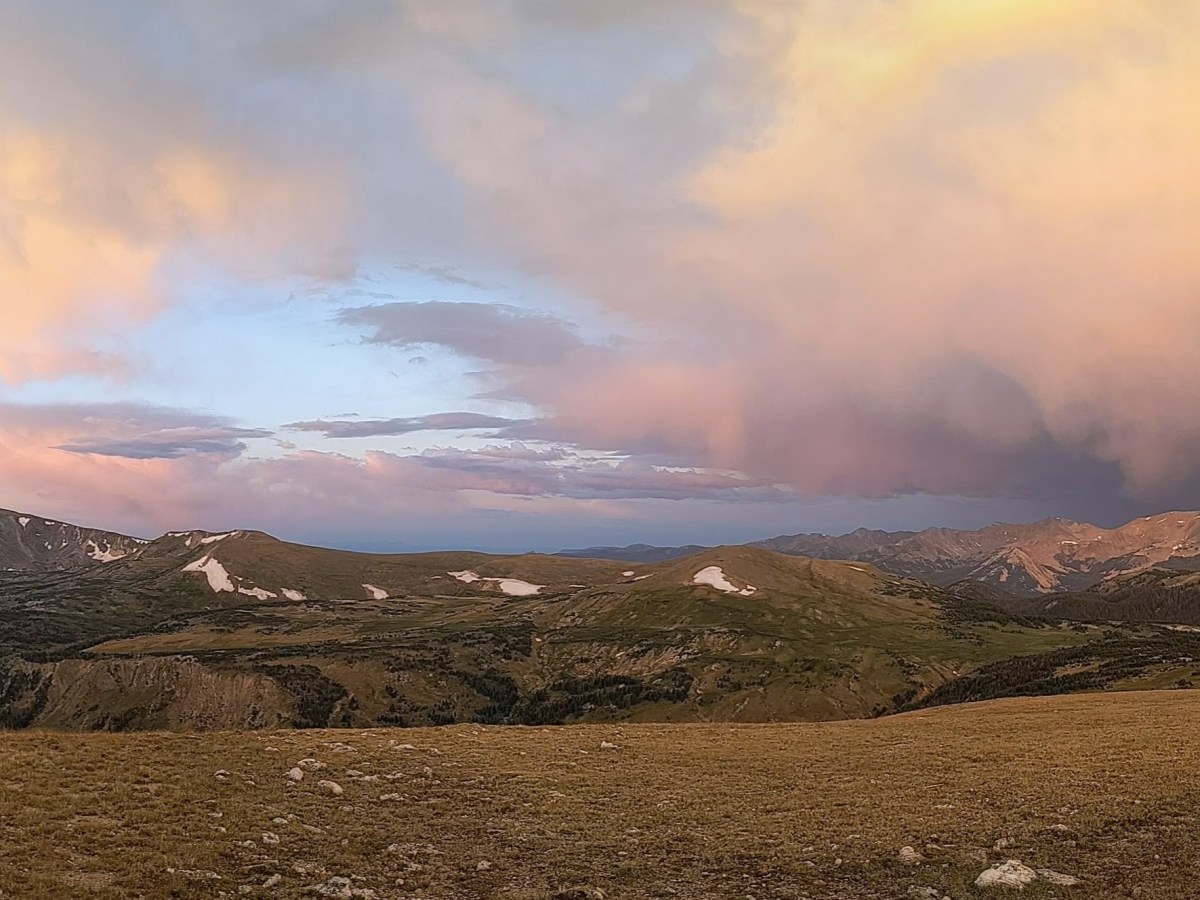
First was to pull colors from nature, pictures I take while out and about. Picking a four or five color palette to work with is NOT a strength of mine, I love chaos too much. I started with a picture I took on vacation in Redwoods National Park last year and one of the sunrise in Rocky Mountain National Park. Conveniently, these two had some shared colors so I went with dark green and brown for the warp, and others for the weft.
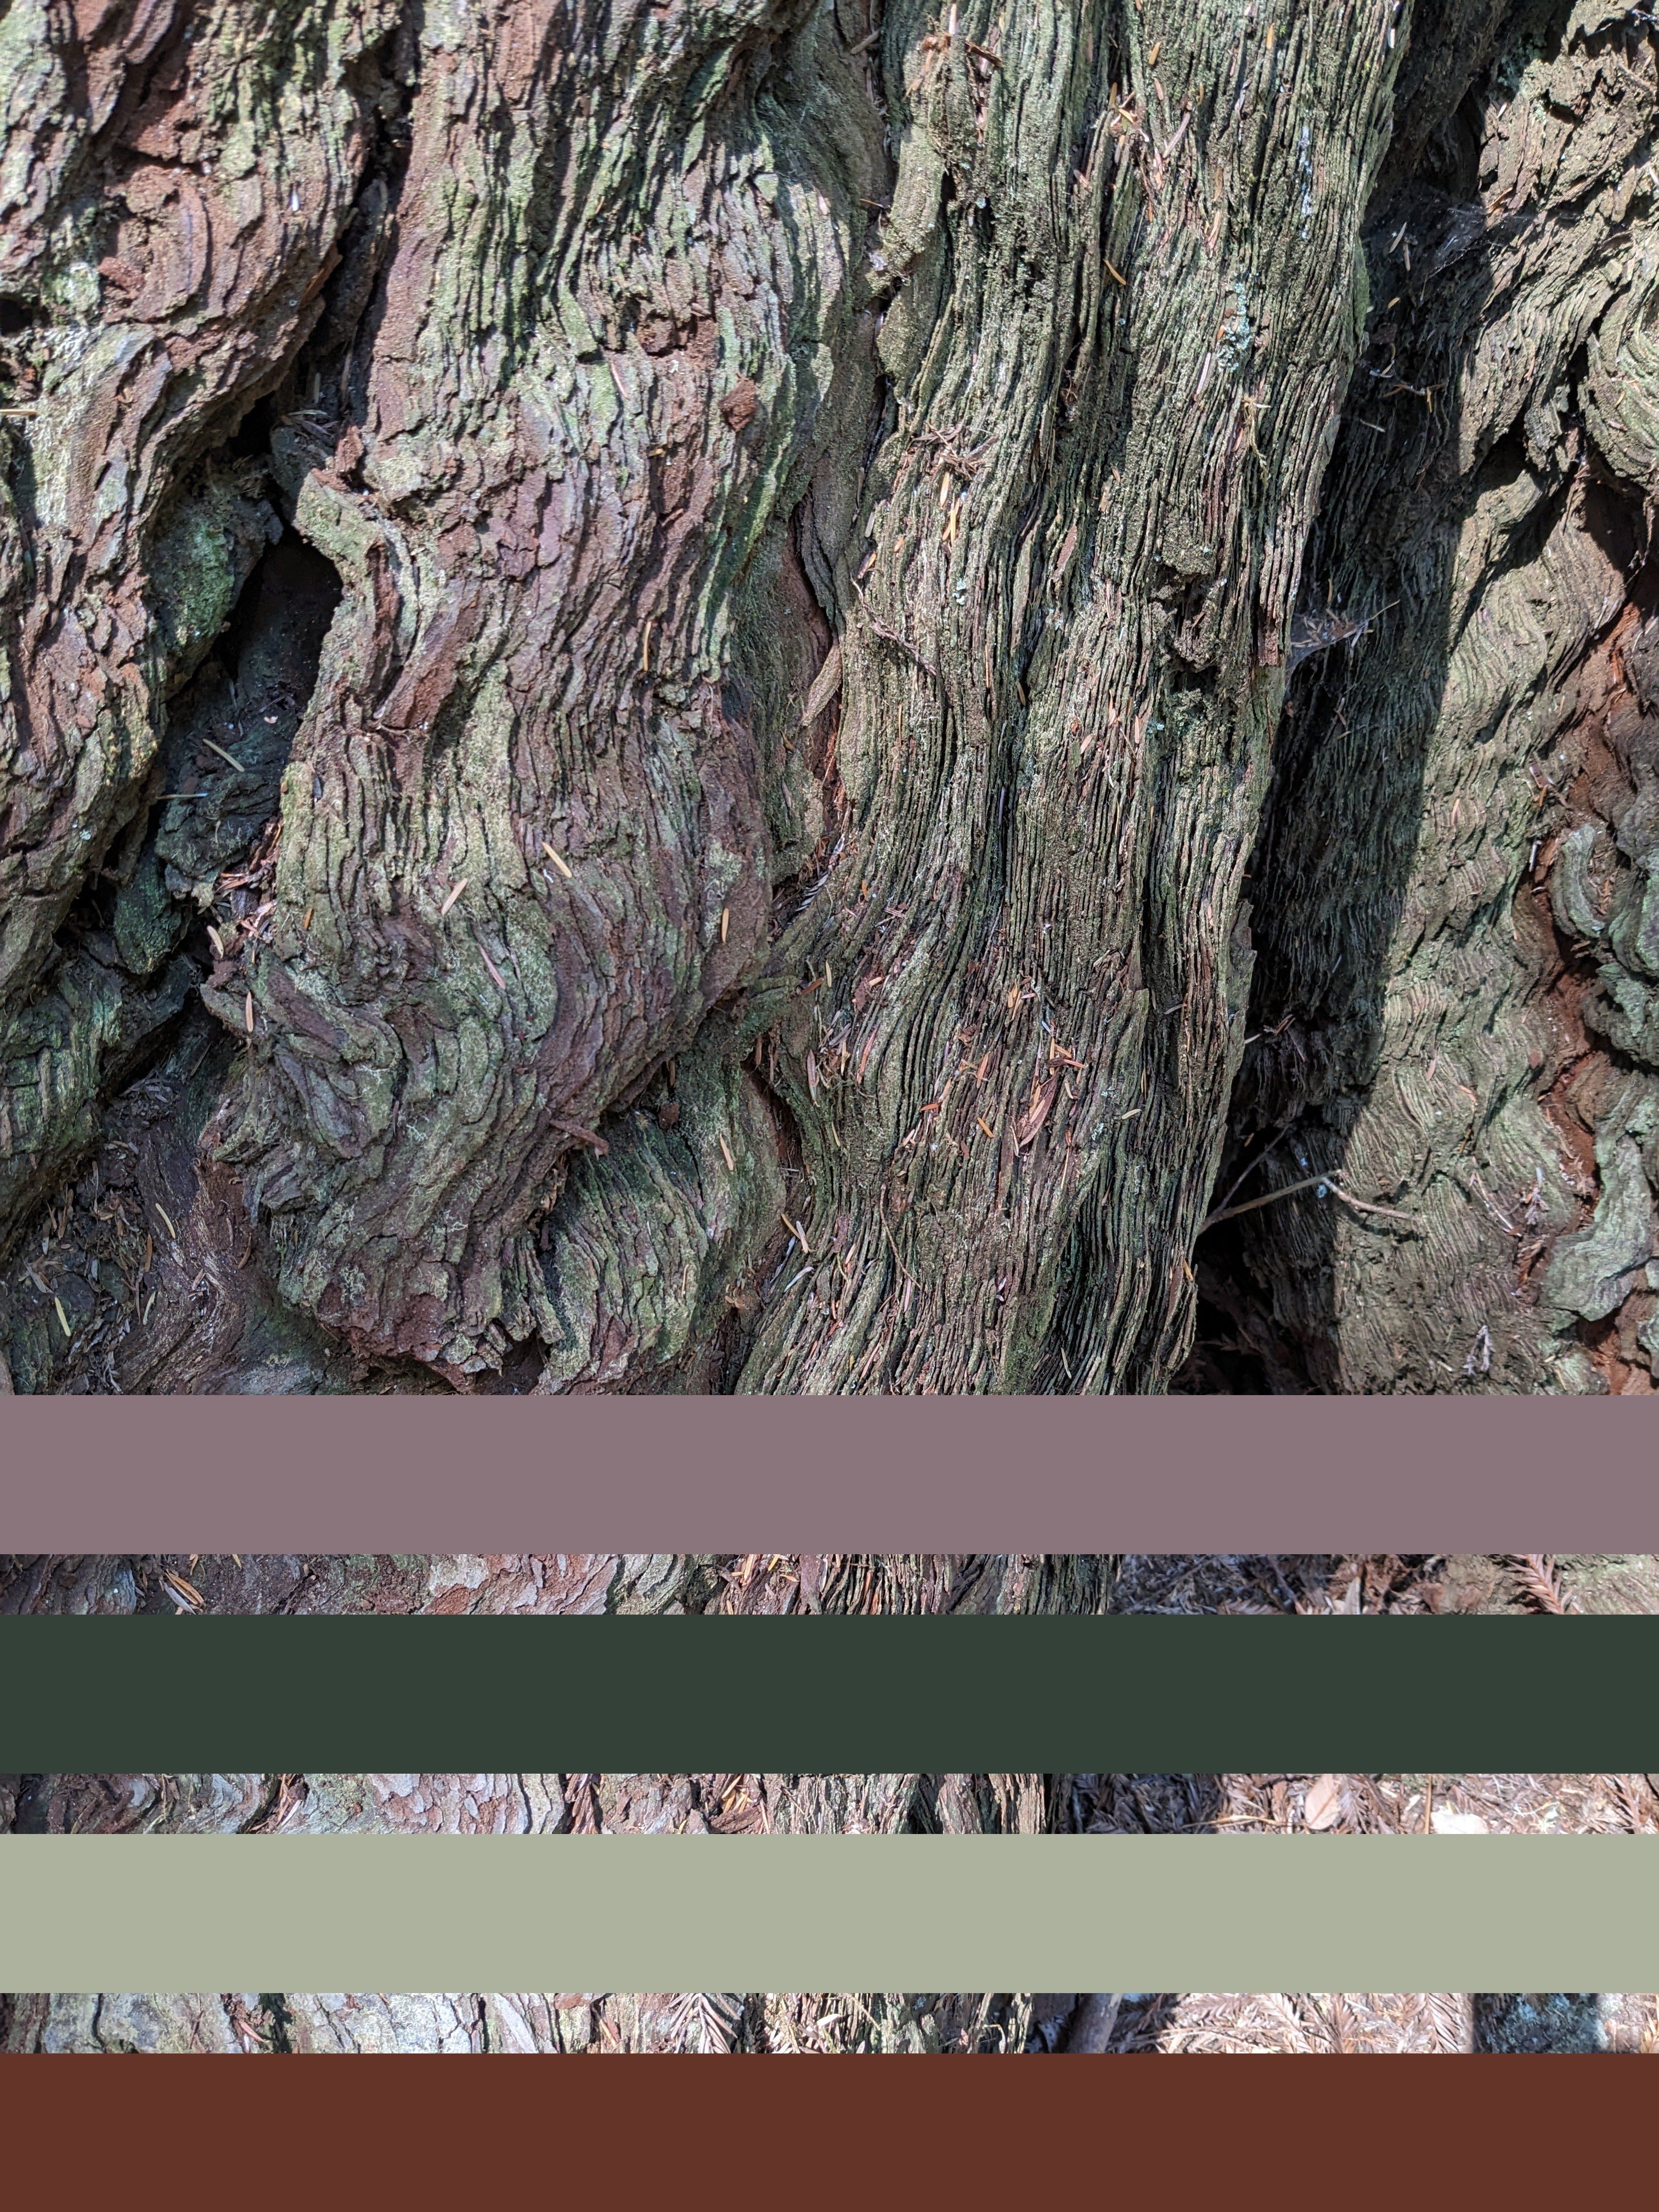
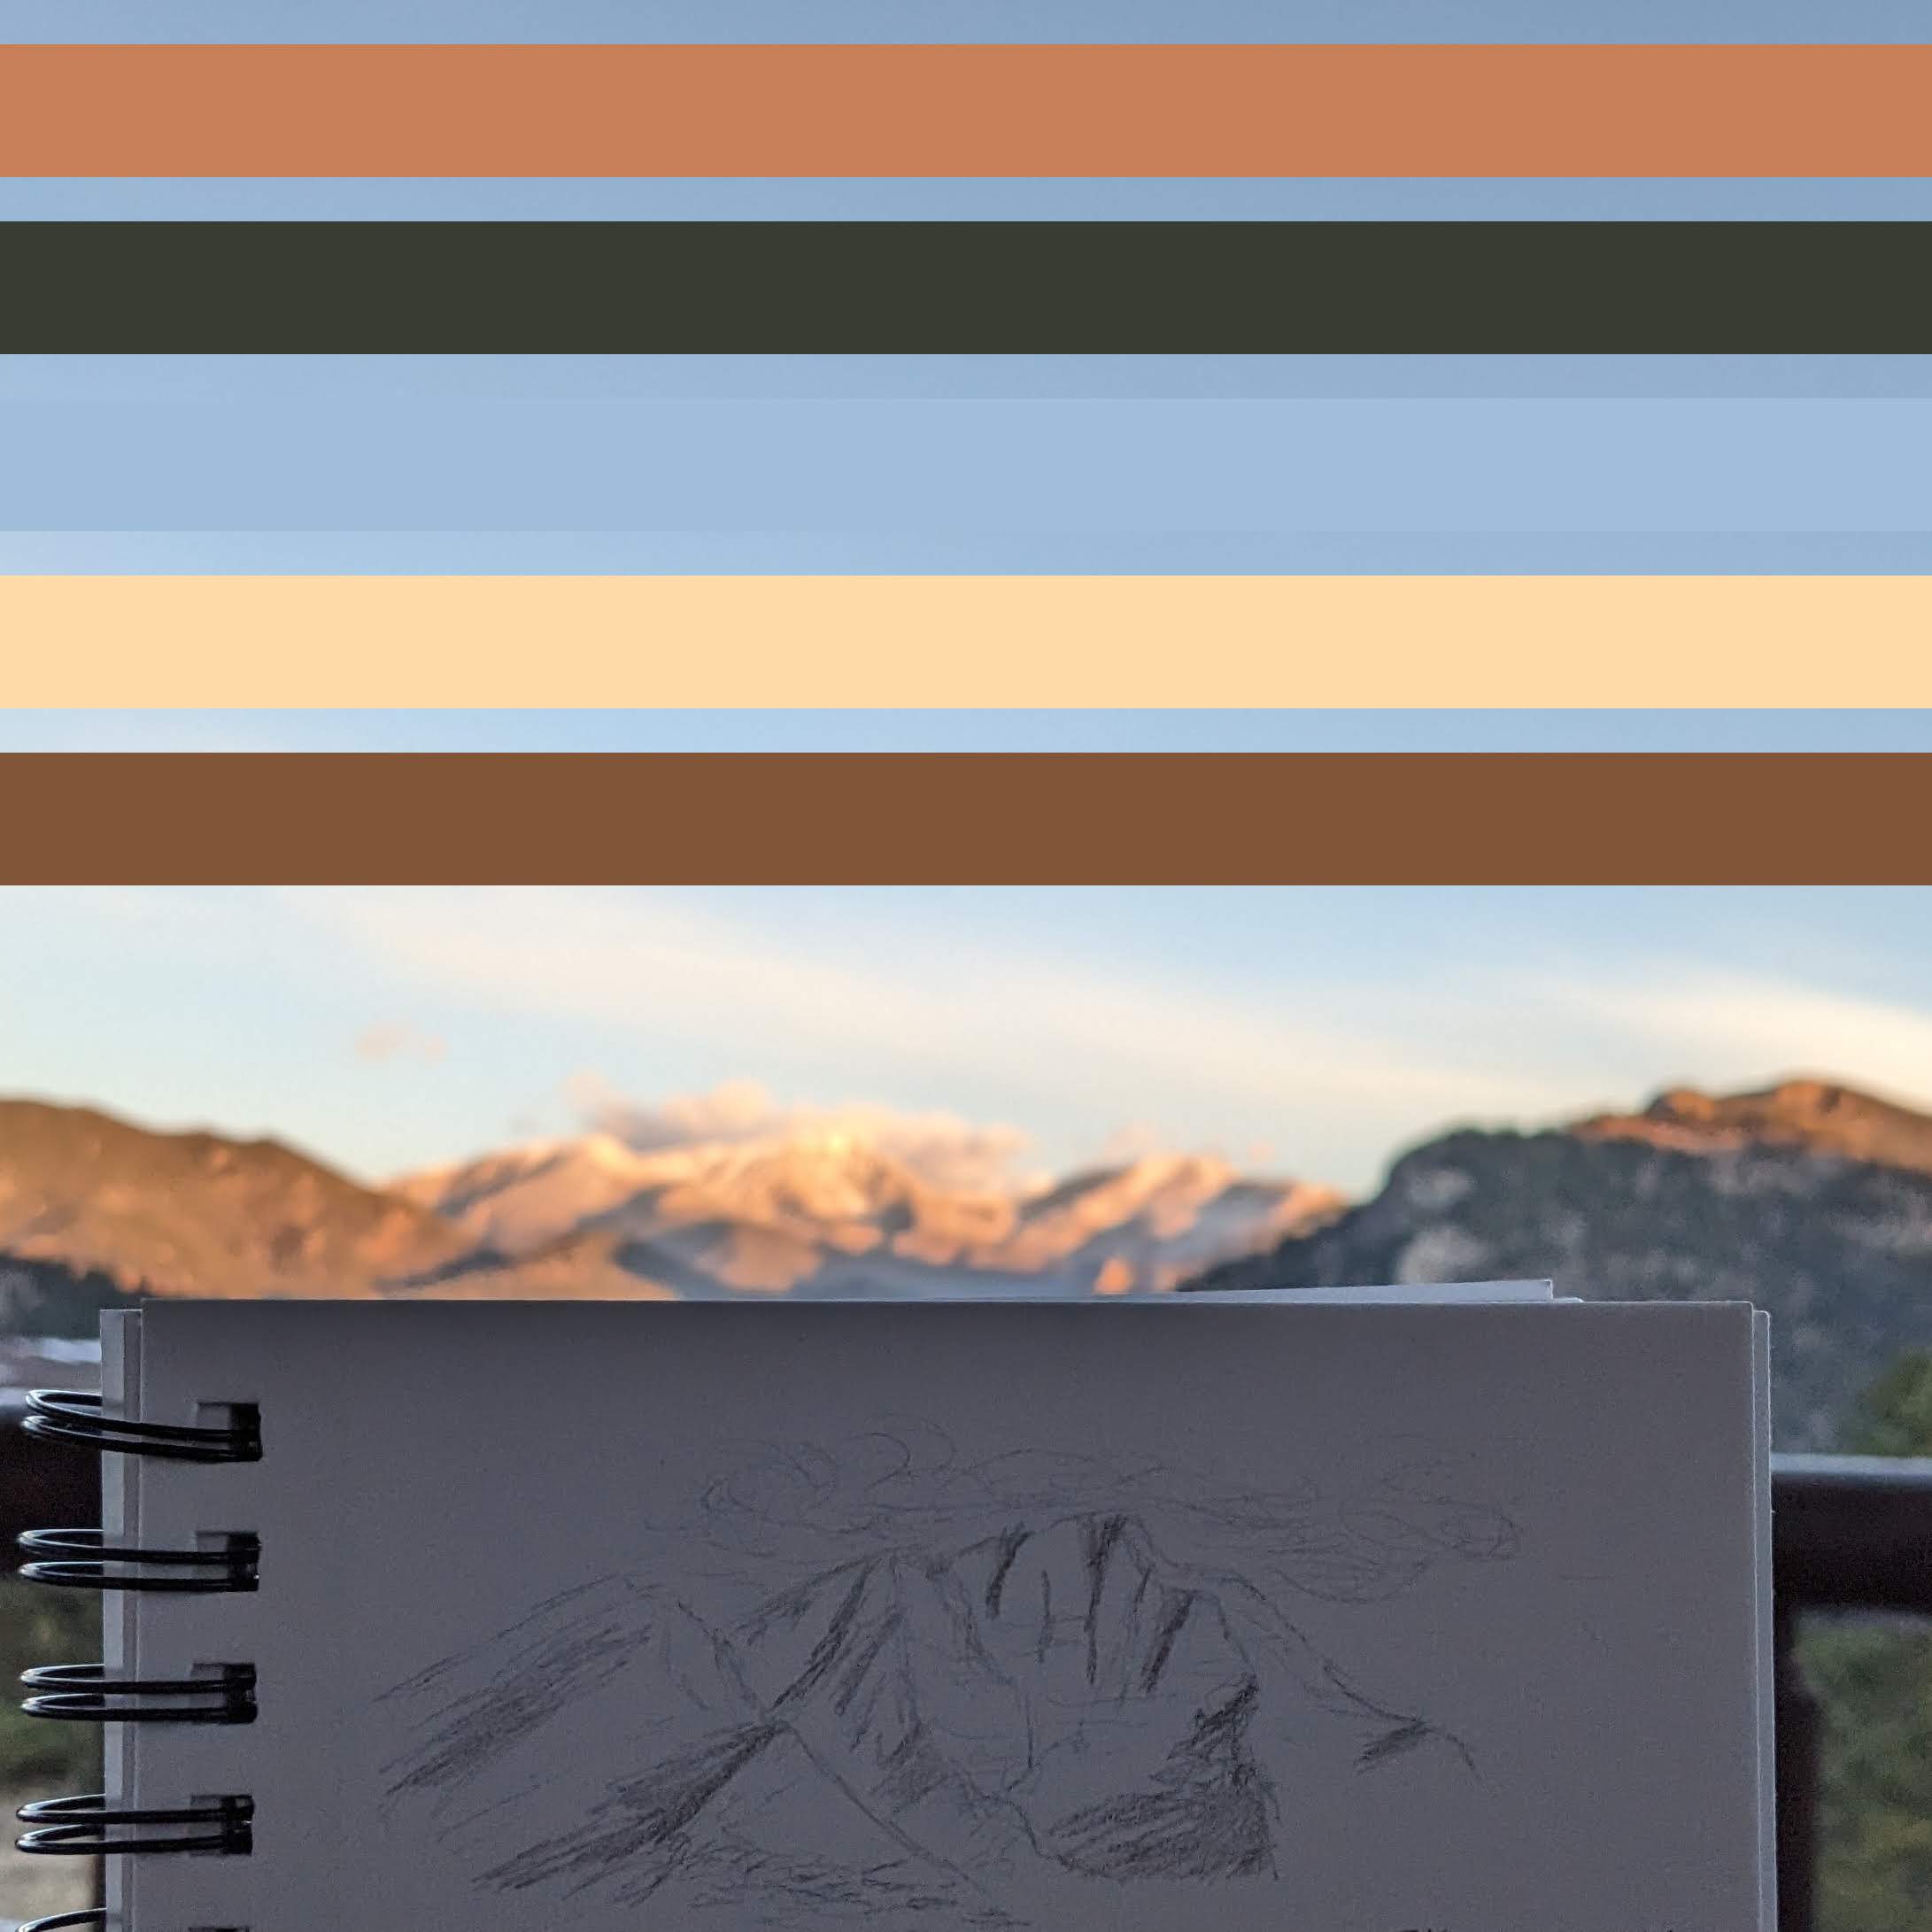
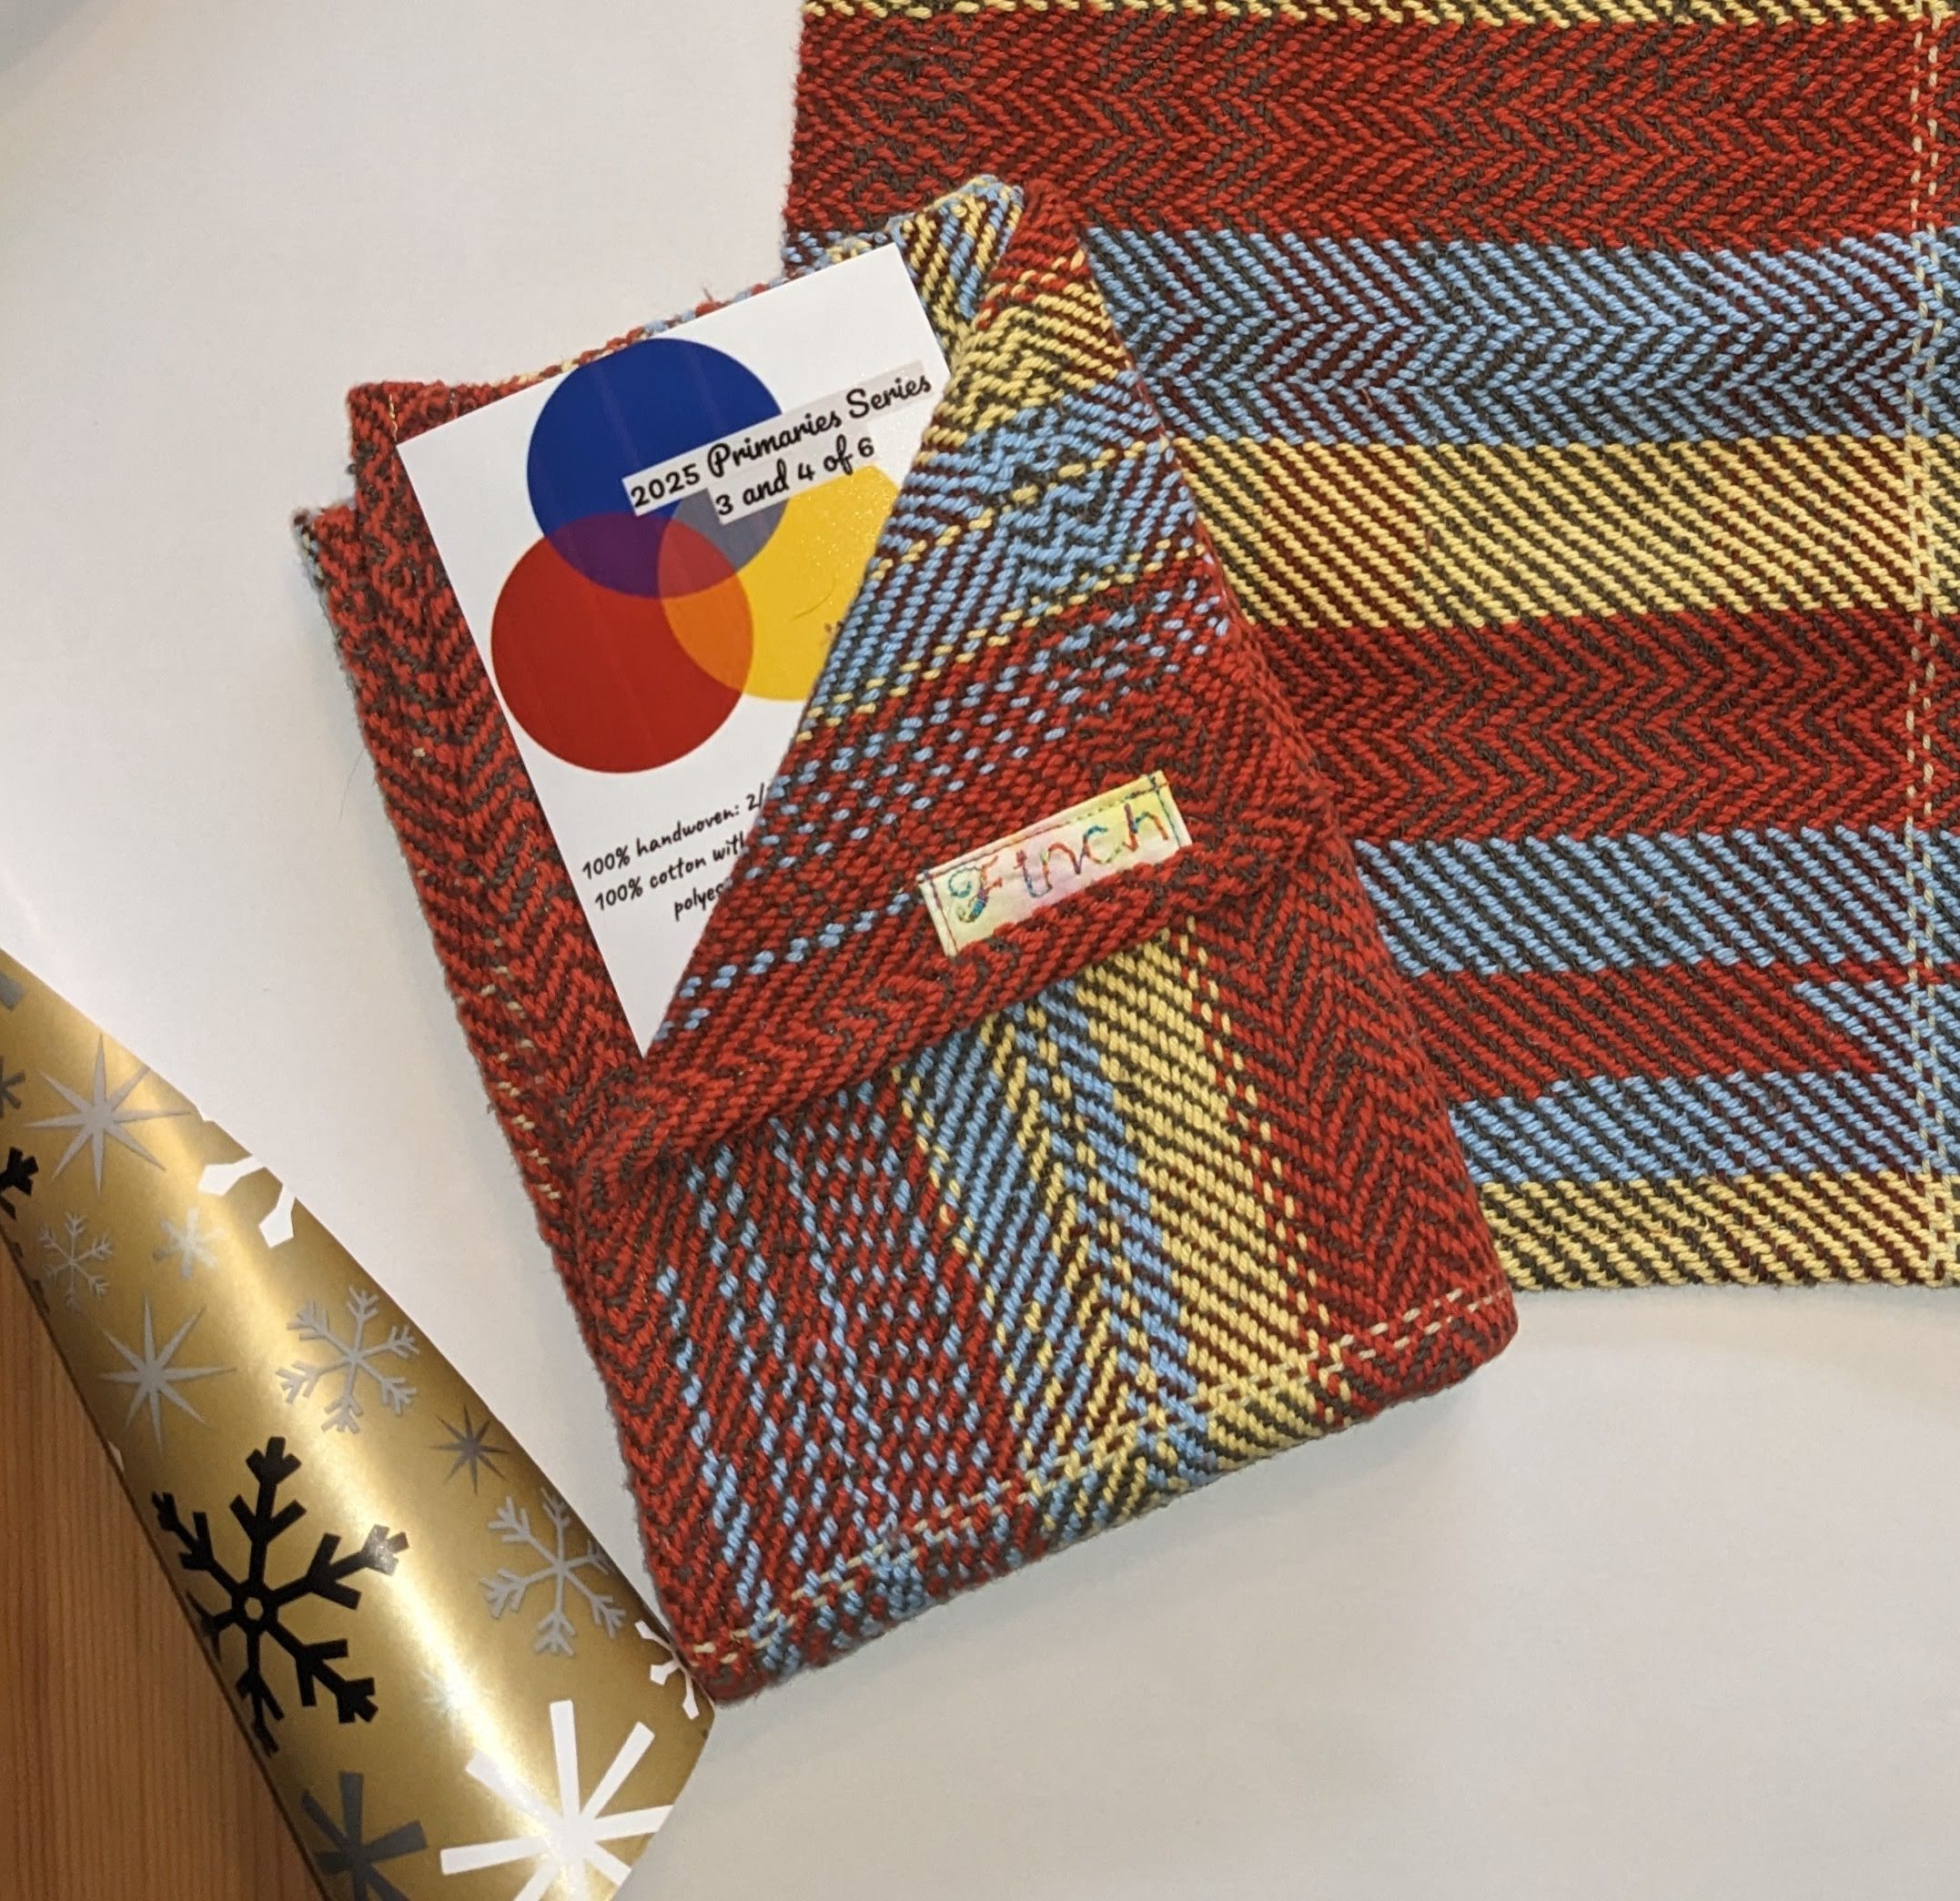
I started with the mountain colors, working in 2/2 twill, changing weft colors on a whim, sometimes using clasped weft to do half-rows of color. It became clear pretty quickly that the colors I chose were not really that representative of my picture inspiration, and more just red, yellow, and blue. But those three colors are still fun to work with. The dark warp just got lost, I’m not sure why it isn’t as present in the final towels, but maybe it just serves to make the weft pop. I renamed these as the “primaries” series, but I still want to make a sunrise series.
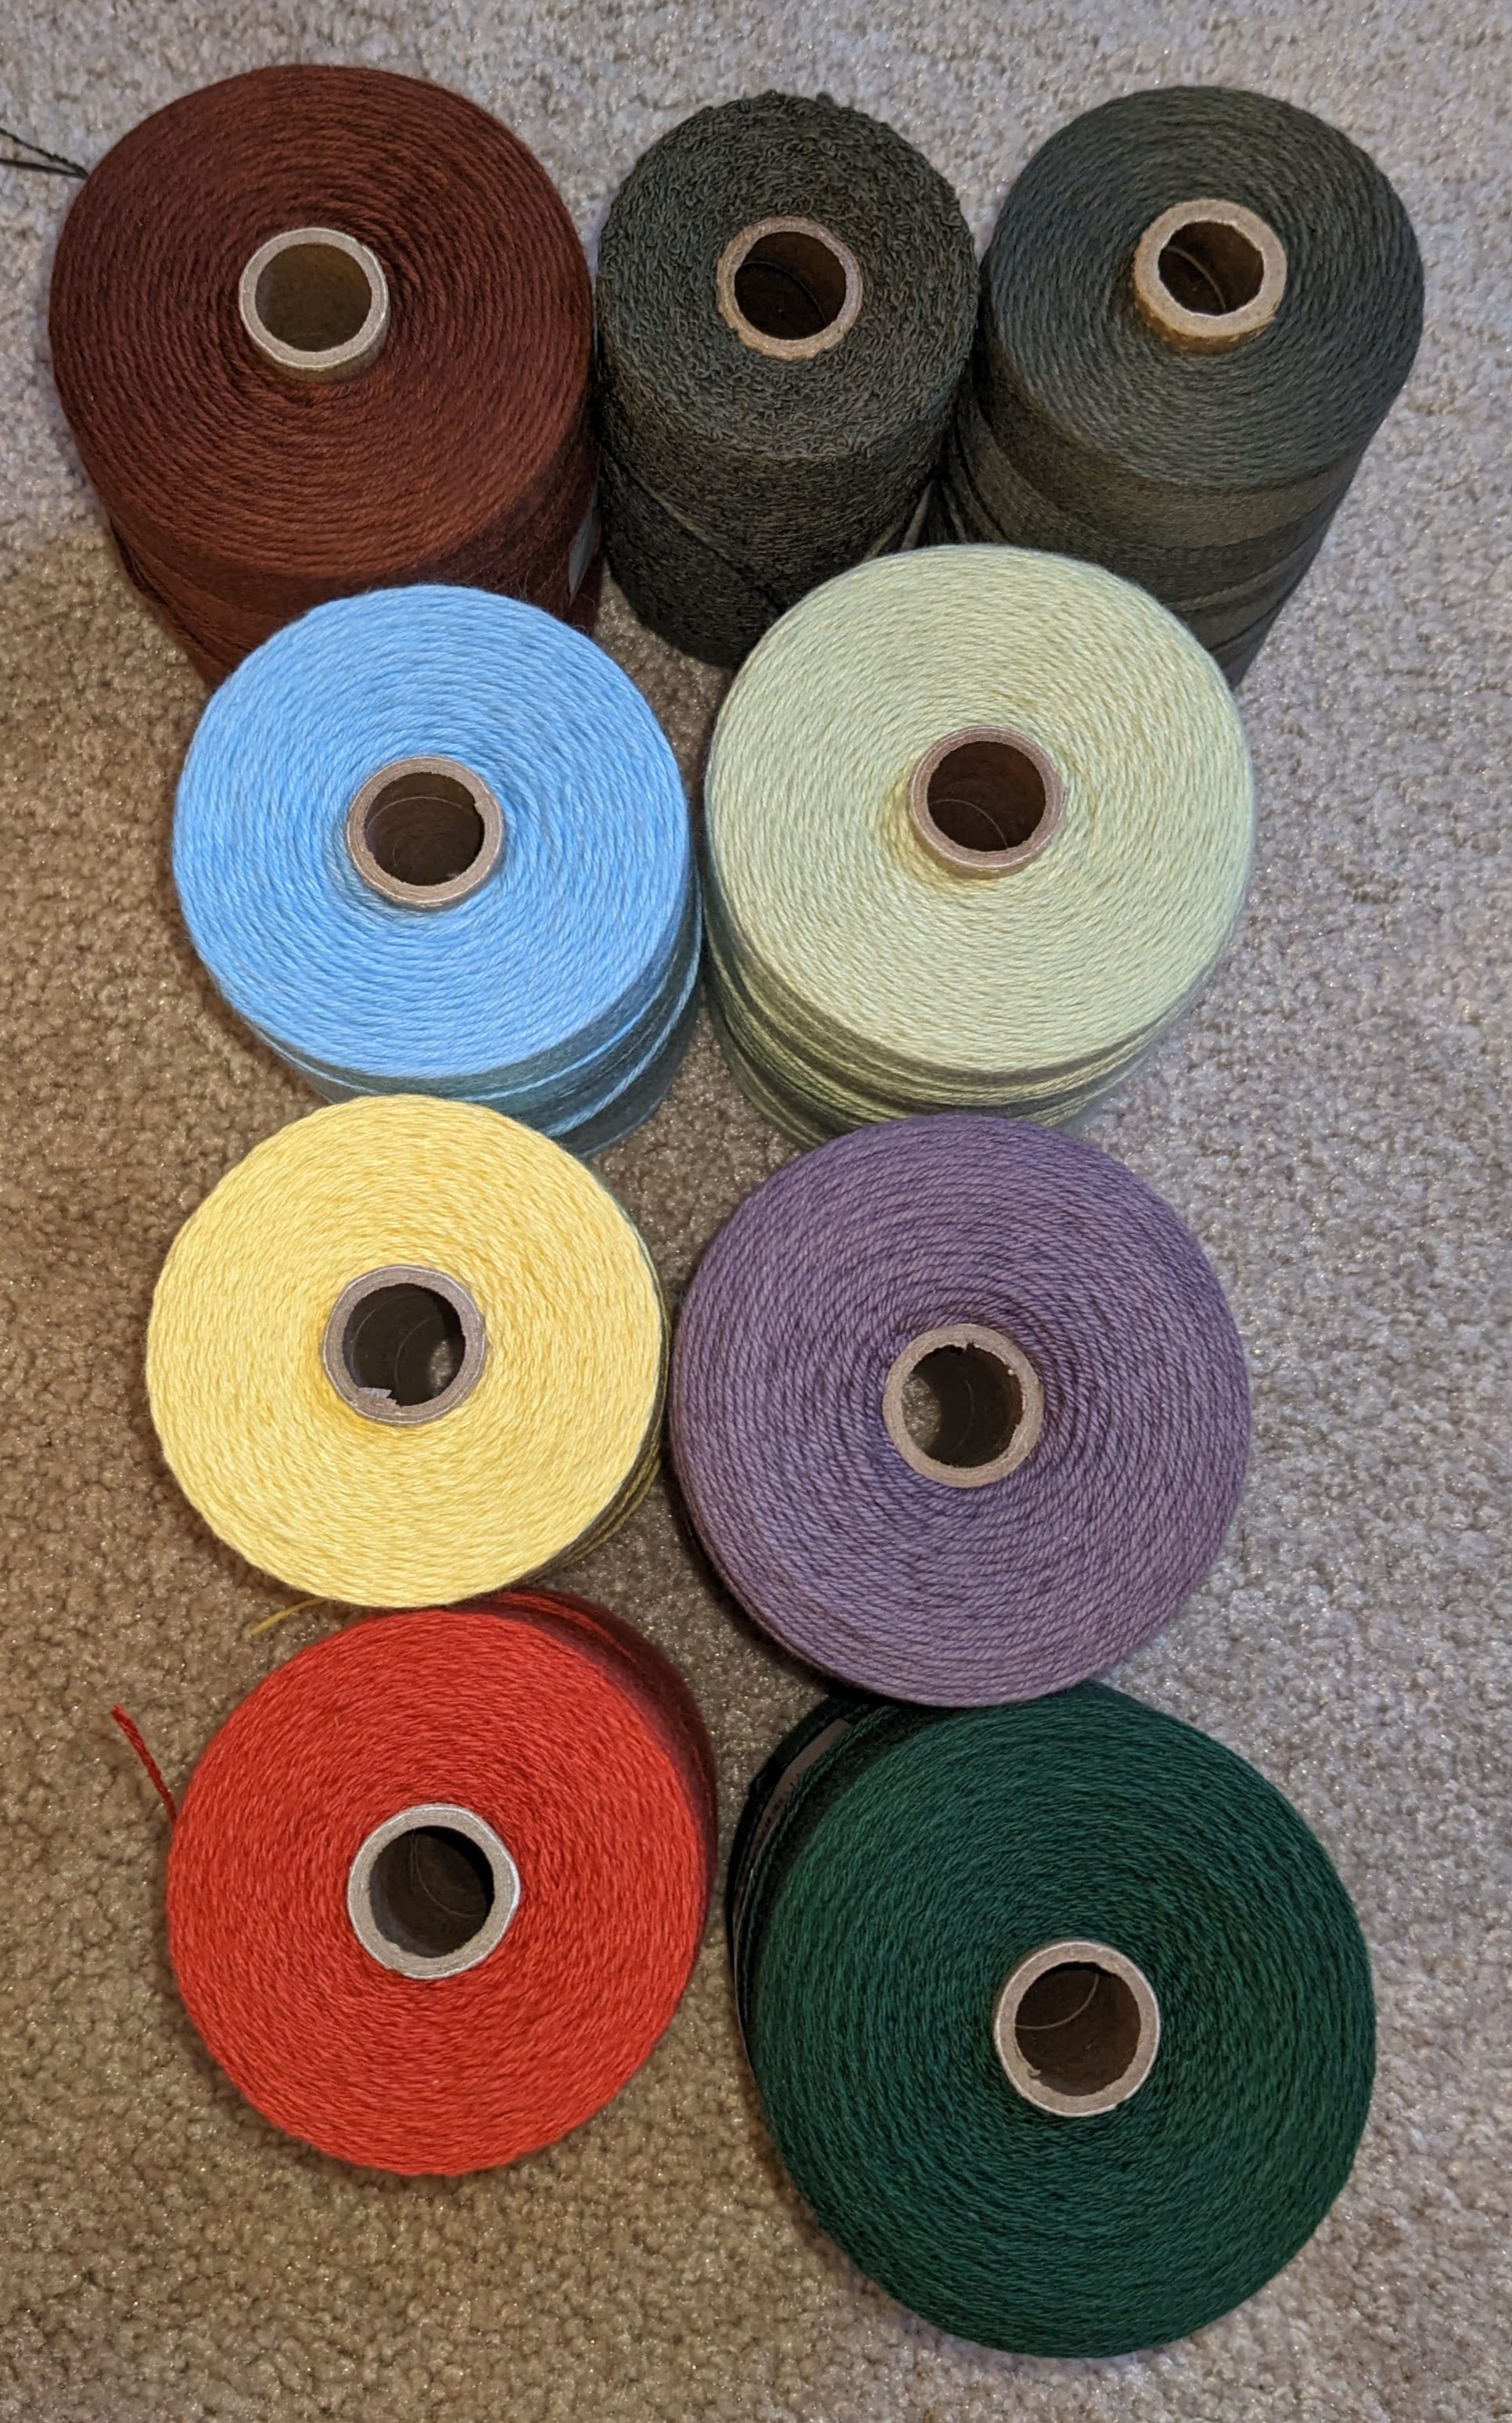
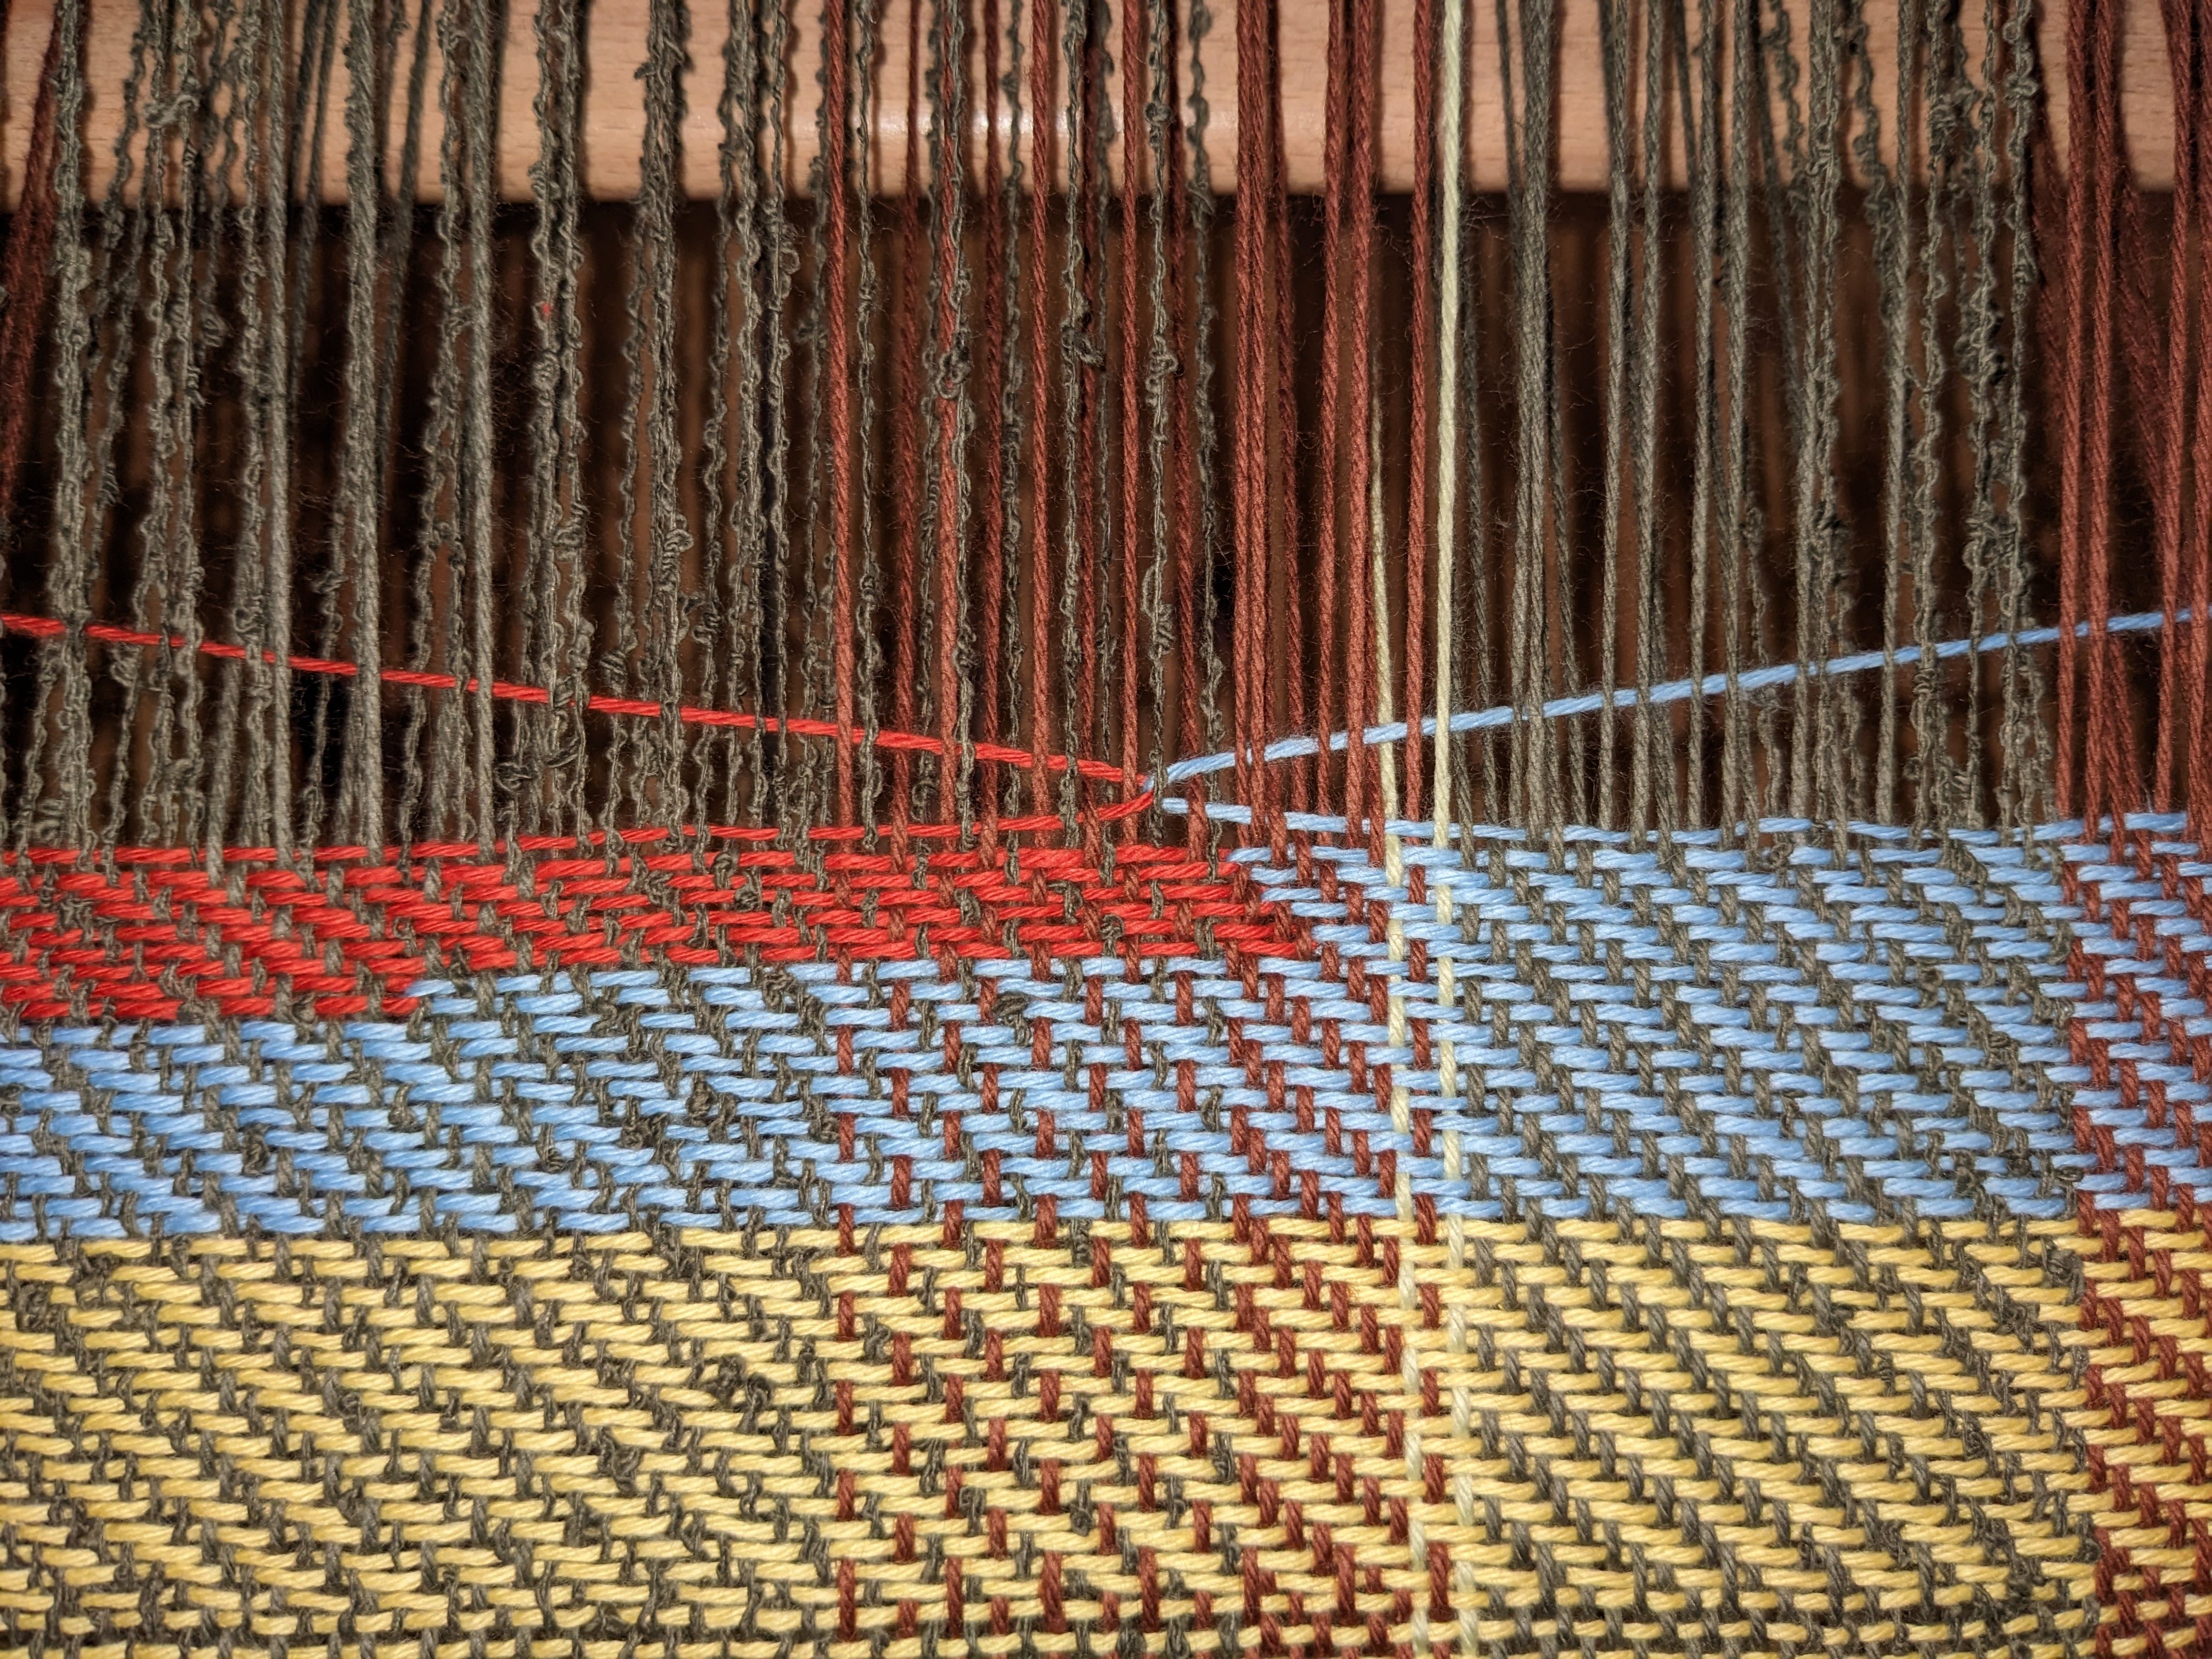
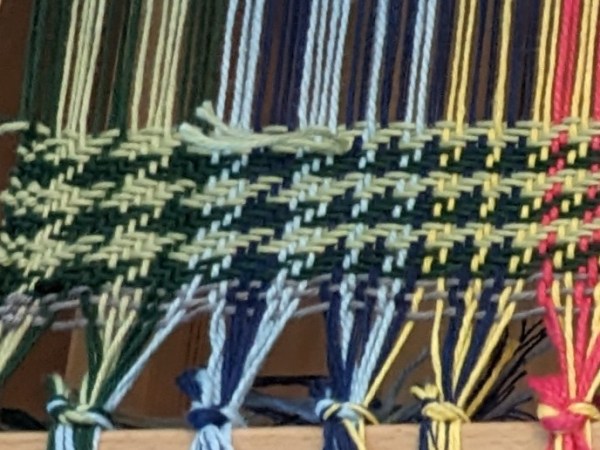
Then I started in on the tree towels – but this was the longest warp I’d wound on, and the tension was pretty wonky, to say the least. In retrospect, I think a couple things happened: the tension wasn’t even as the warp was wound on and I wasn’t putting in dividers often enough, which meant there were more overlapping threads in the middle of the bar, which meant the circumference that the warp was winding onto was not equal across the warp. In other words, the sides of my warp didn’t have enough thread and the center had too much, and it was a whole hassle. I ended up unwinding it and trying again, because my weaving was so uneven and it was frustrating to work with.
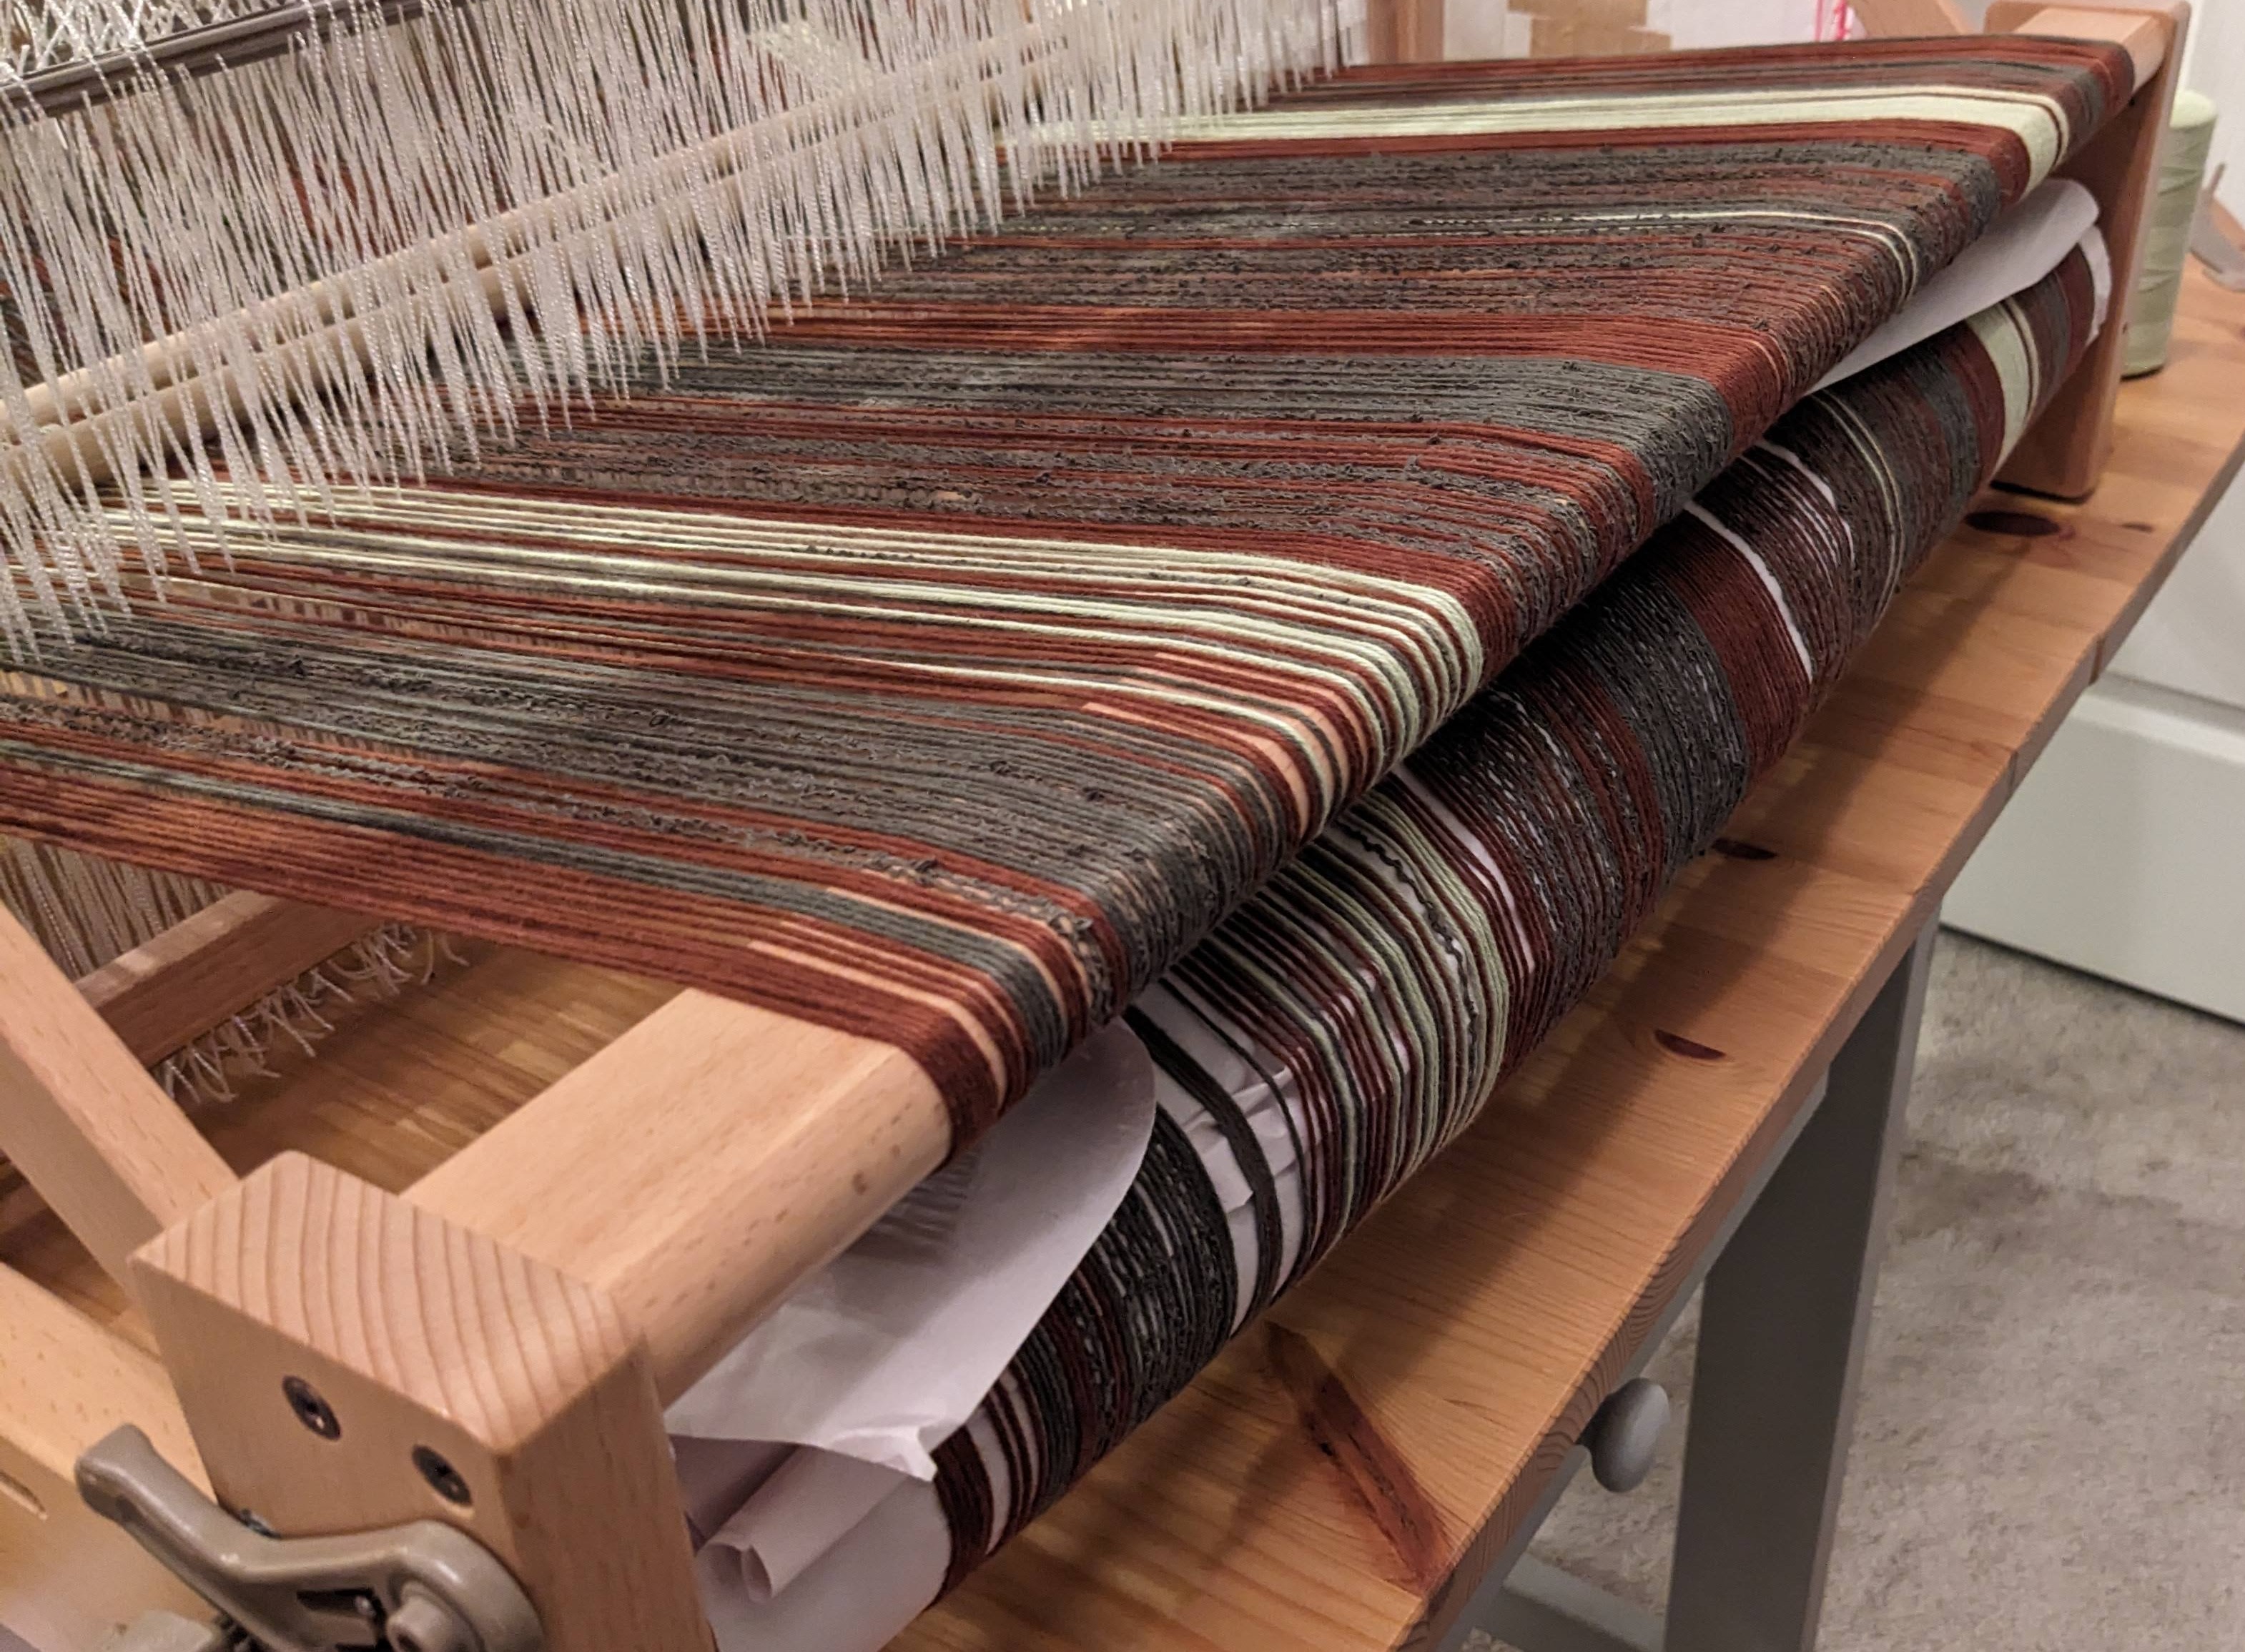
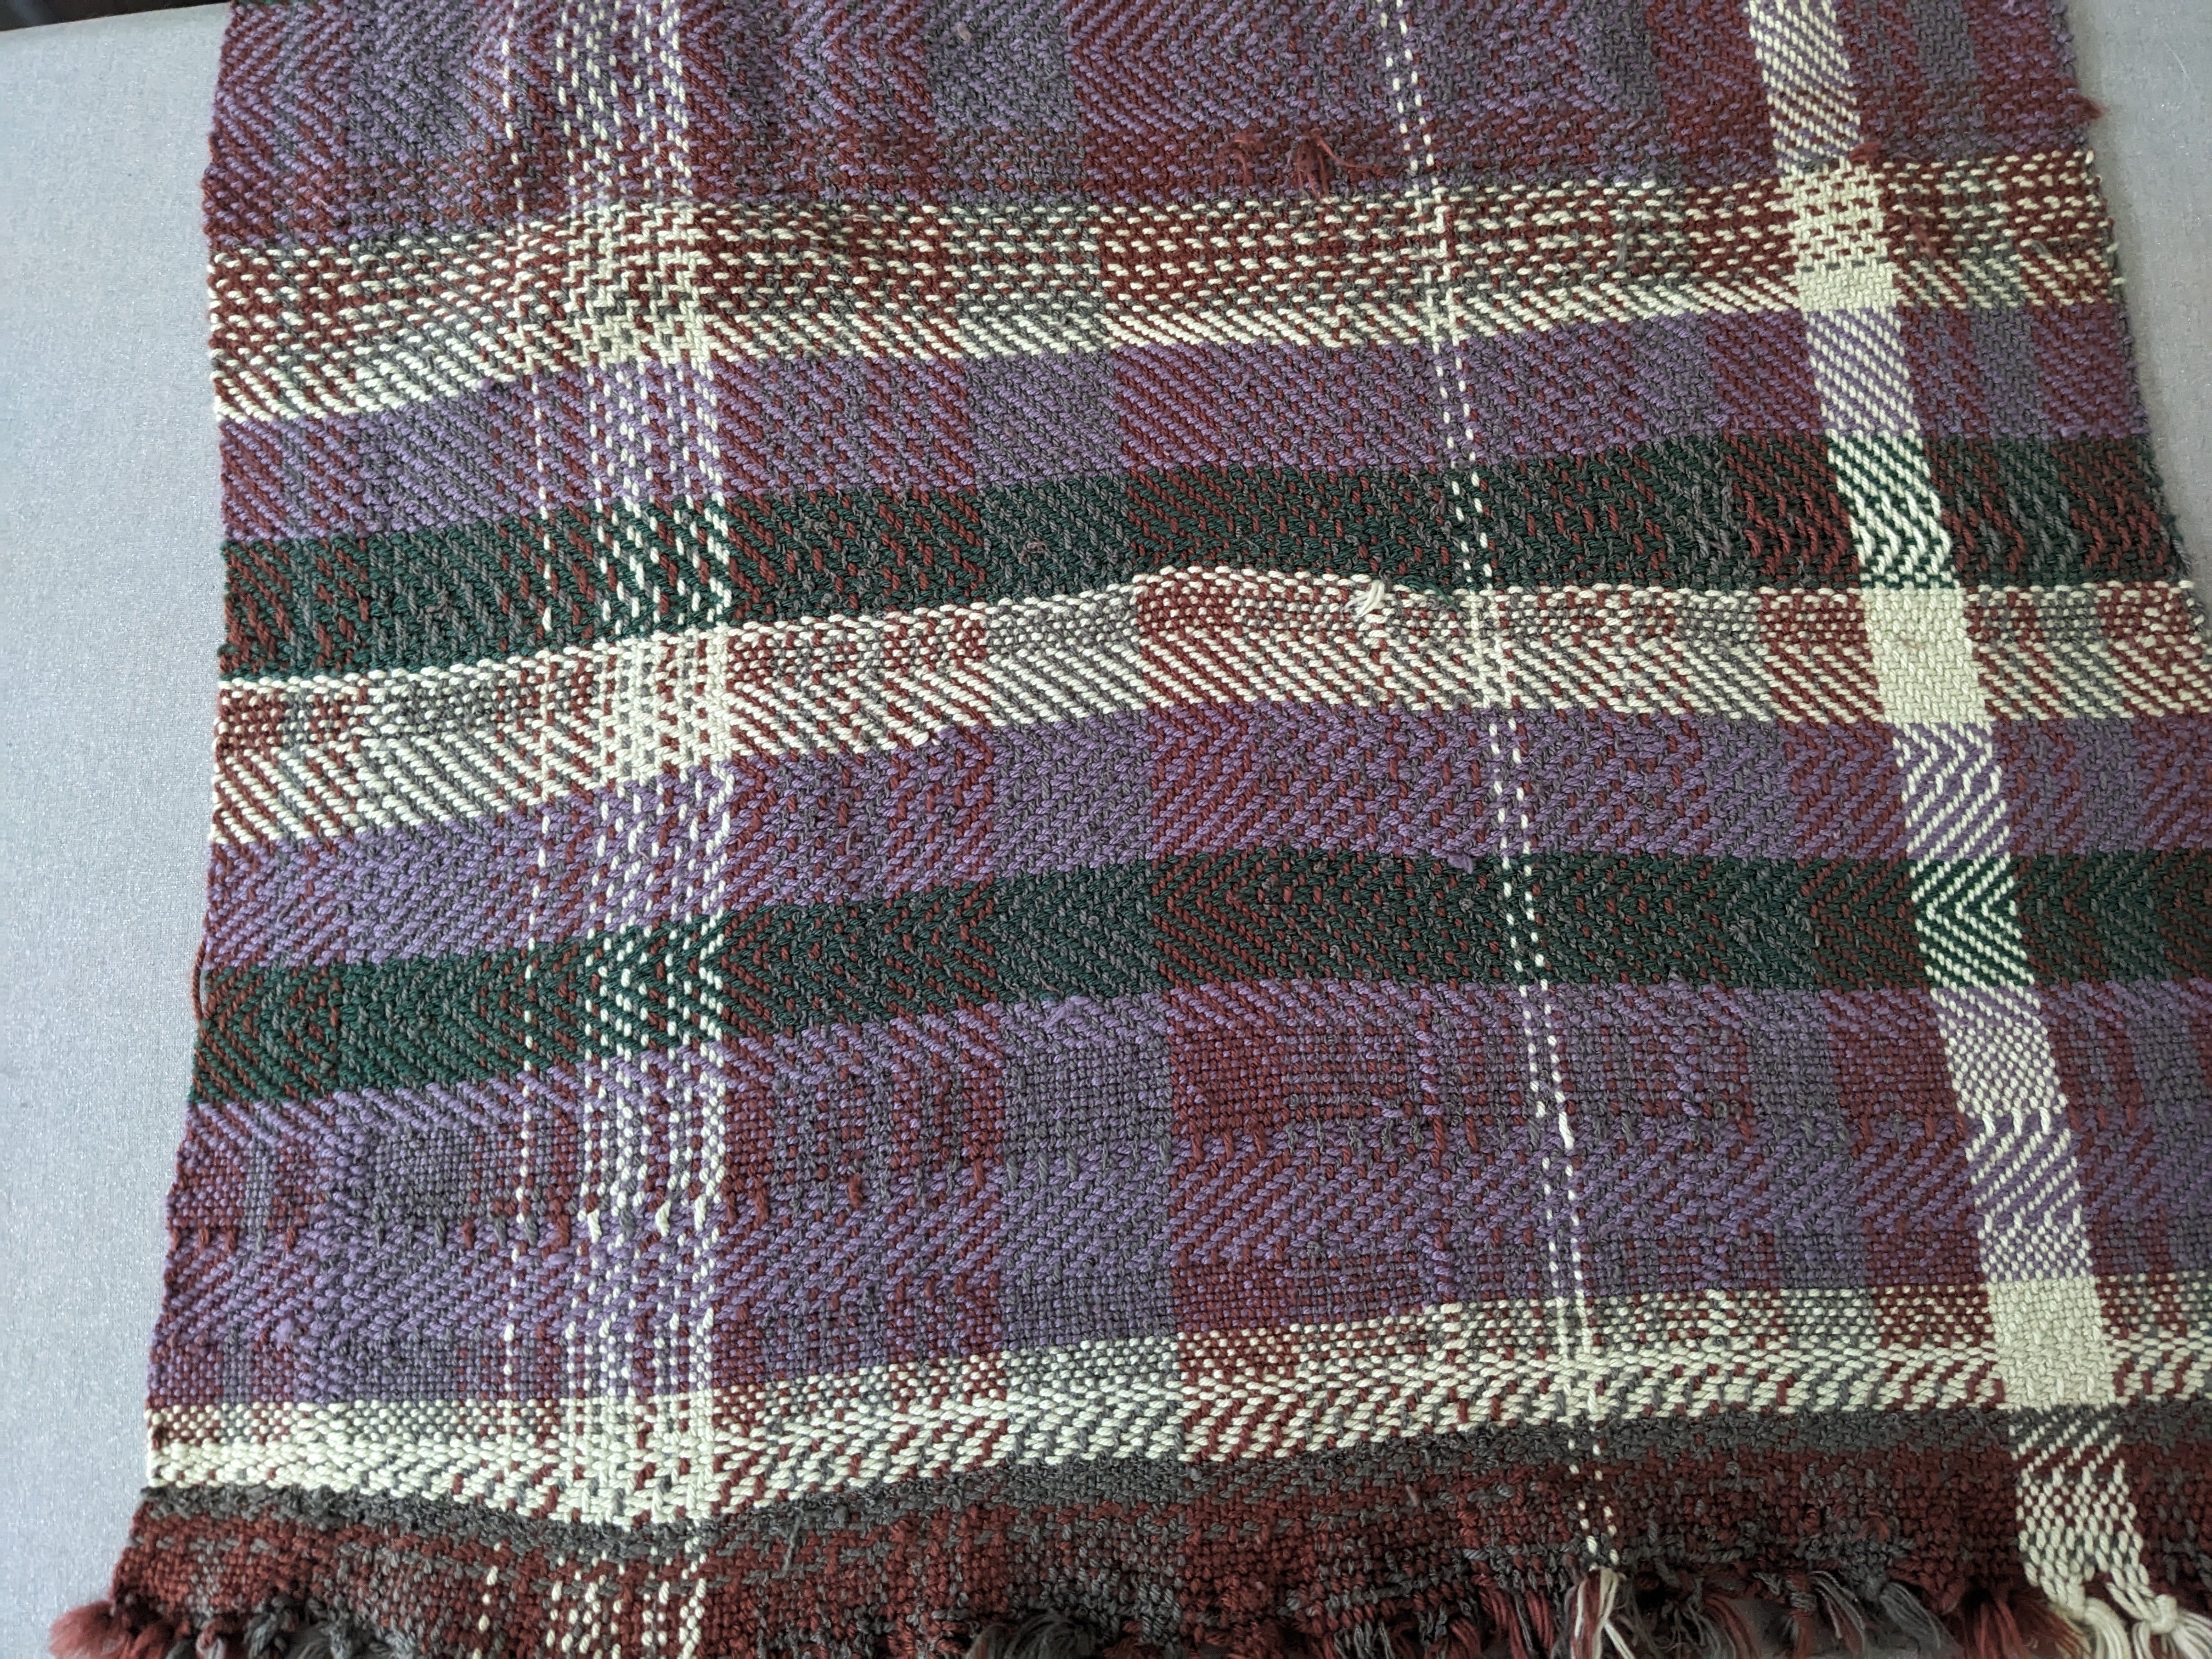
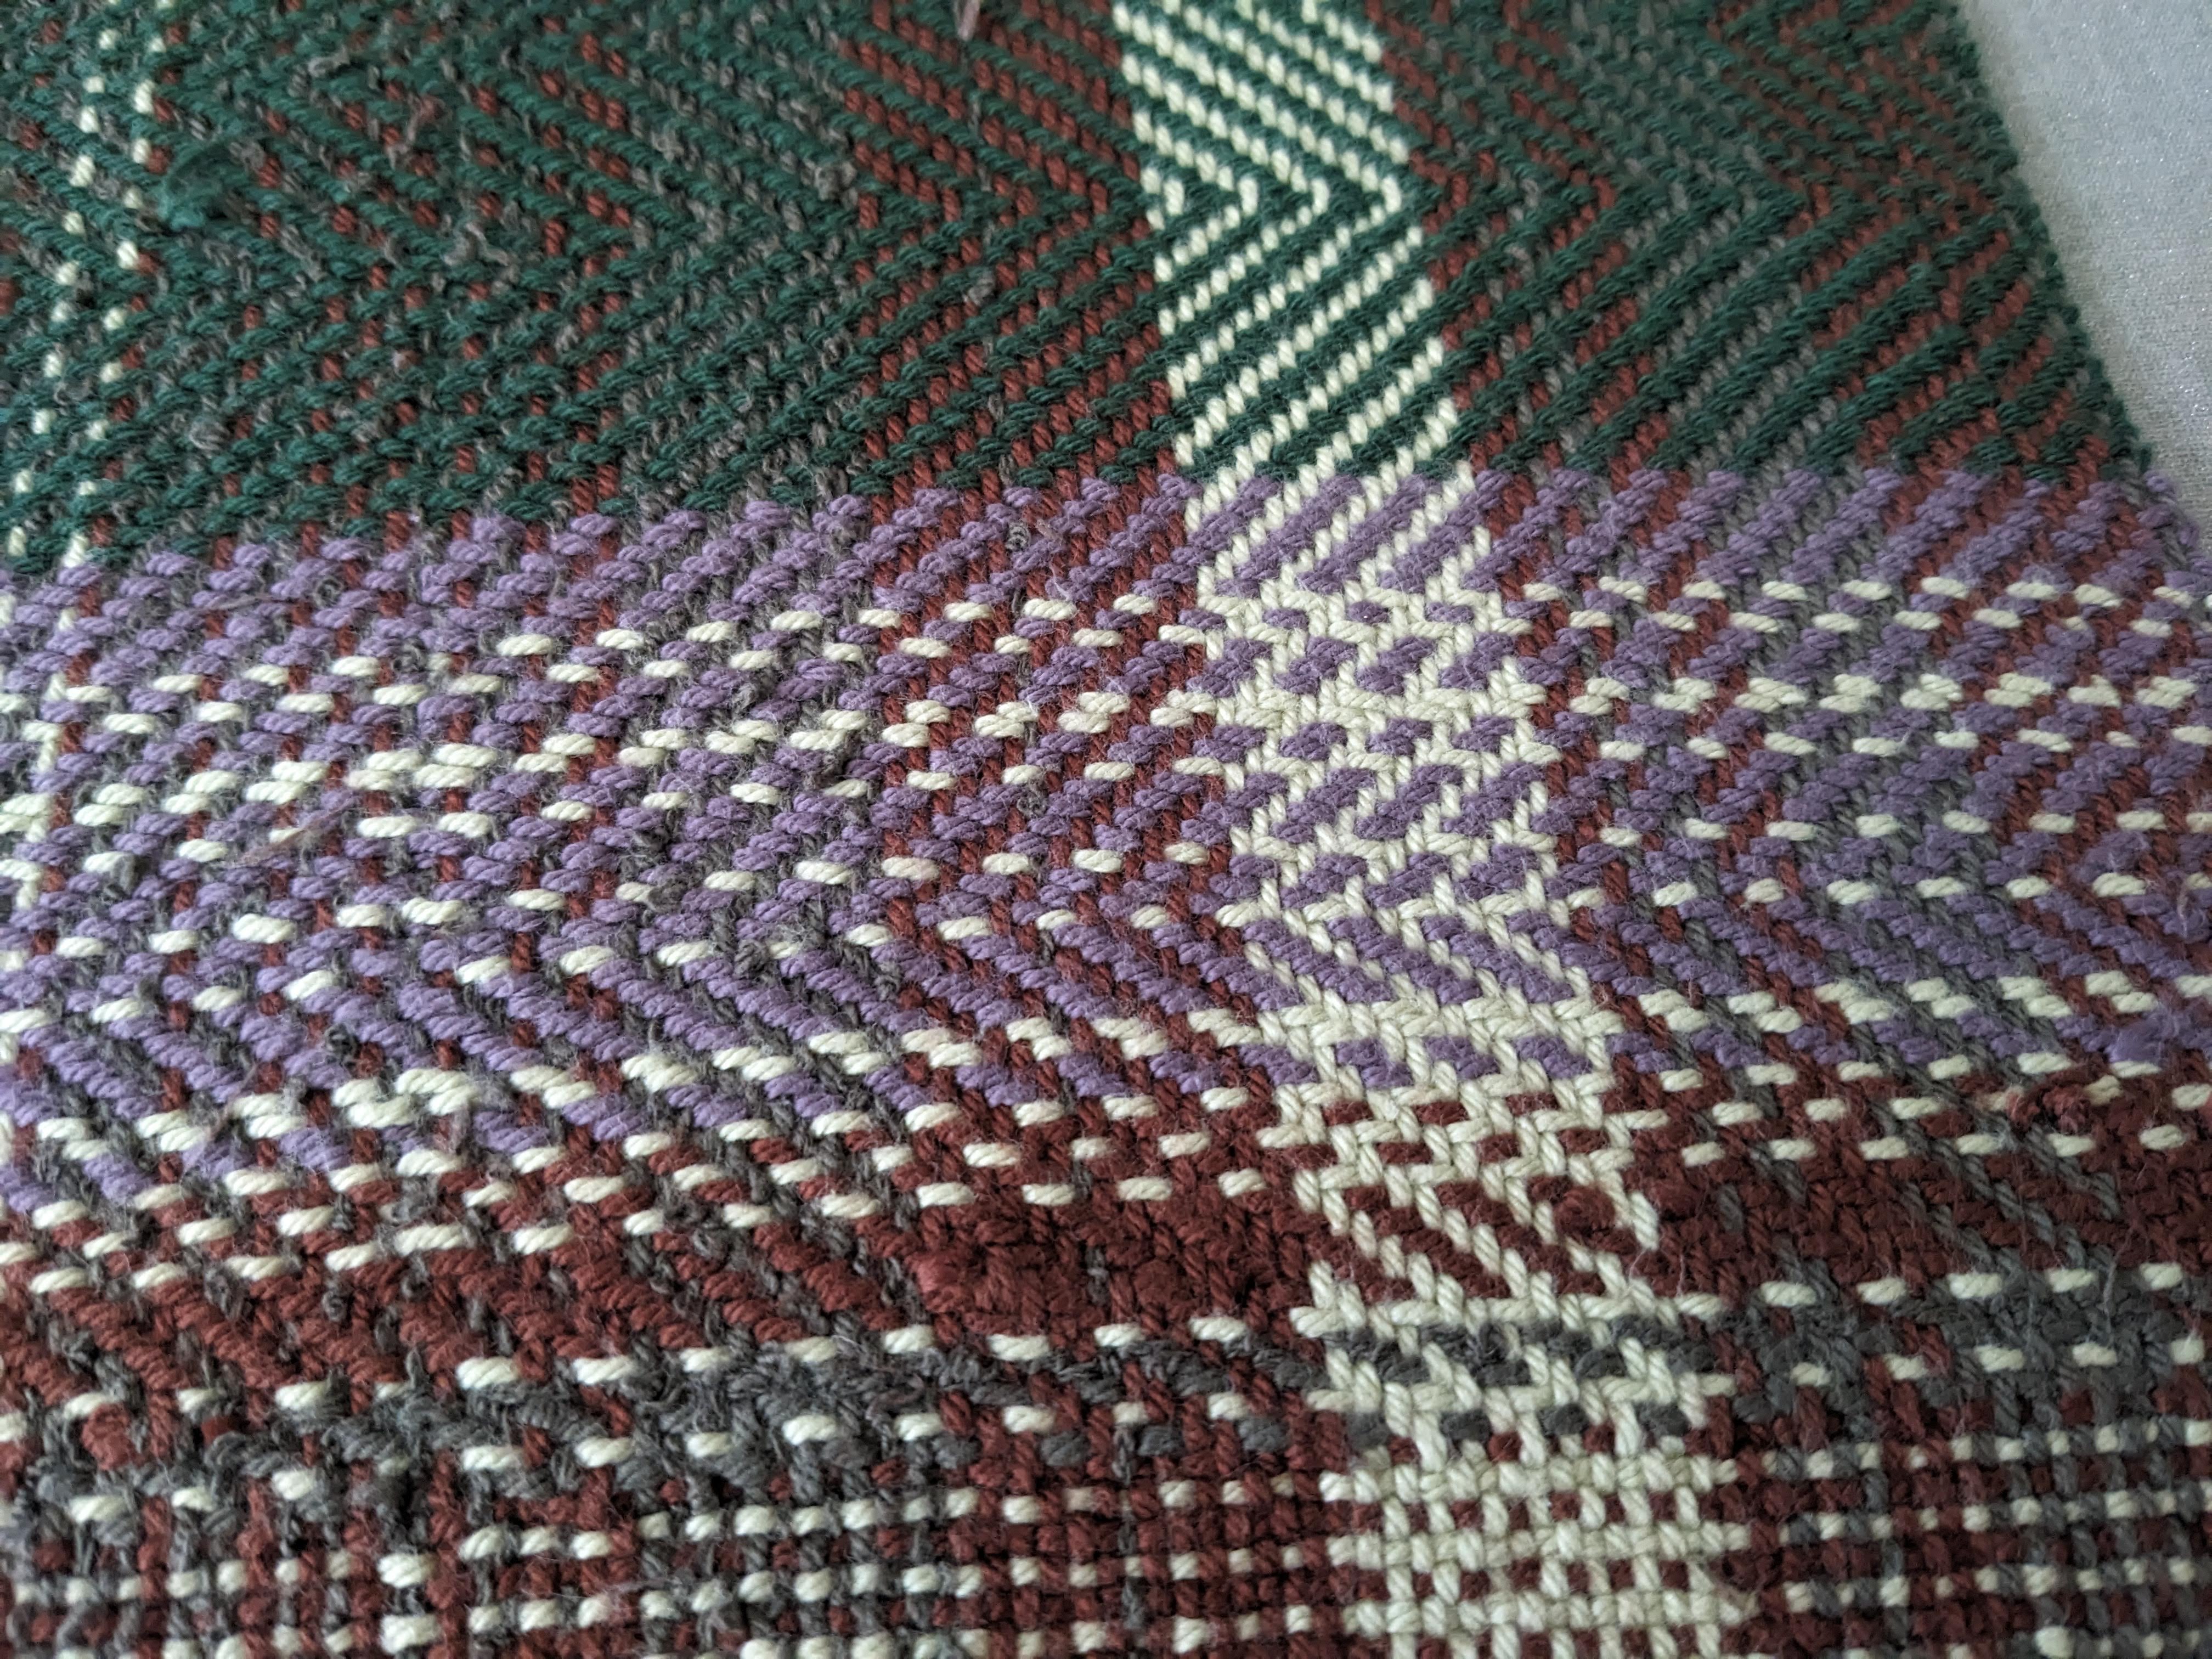
It meant I lost some warp, or length, of my project (yielded 3 towels instead of 6 like the other), but it was worth it for how nicely the towels actually turned out, and the ease of the experience afterward.
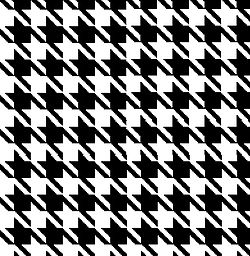
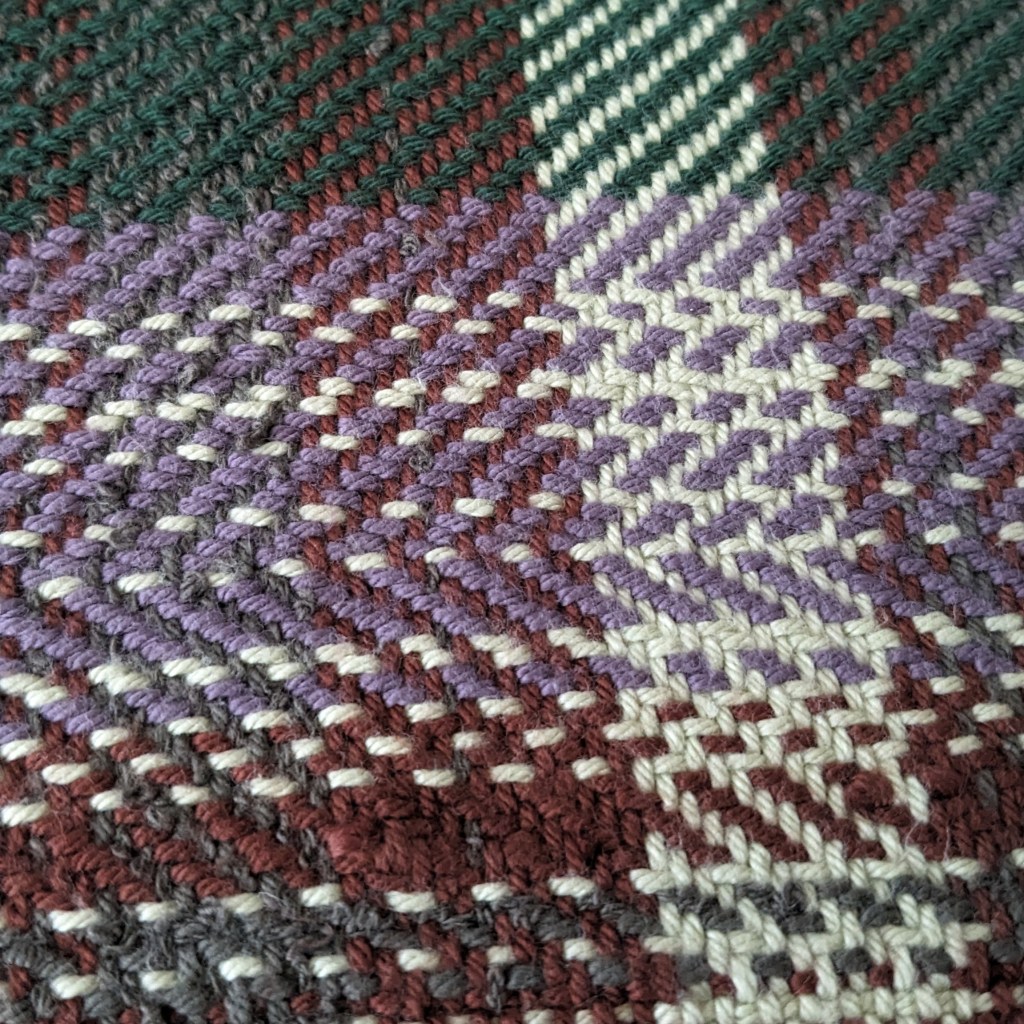
Then I had nice leftovers from lots of projects, so I had to do a scrappy, chaotic set of towels. I wanted to do some sort of “color and weave” pattern, where both the way the colors in the weft and warp are laid out AND the weave structure create a specific look. Most color and weave patterns are using dark and light colors, so I divided up my leftovers into darks and lights and started looking for ideas. I wanted to do a houndstooth pattern, and stuck to a 2/2 twill on four shafts to keep it simple 🙂 these were so fun. I did stripes of four light threads and four dark threads on the warp and the weft, with a few stripes of two just for experimentation’s sake. I used the same light/dark pairs in the weft as I did in the warp, so there are little islands of perfect houndstooth among a sea of kinda-houndstooth.

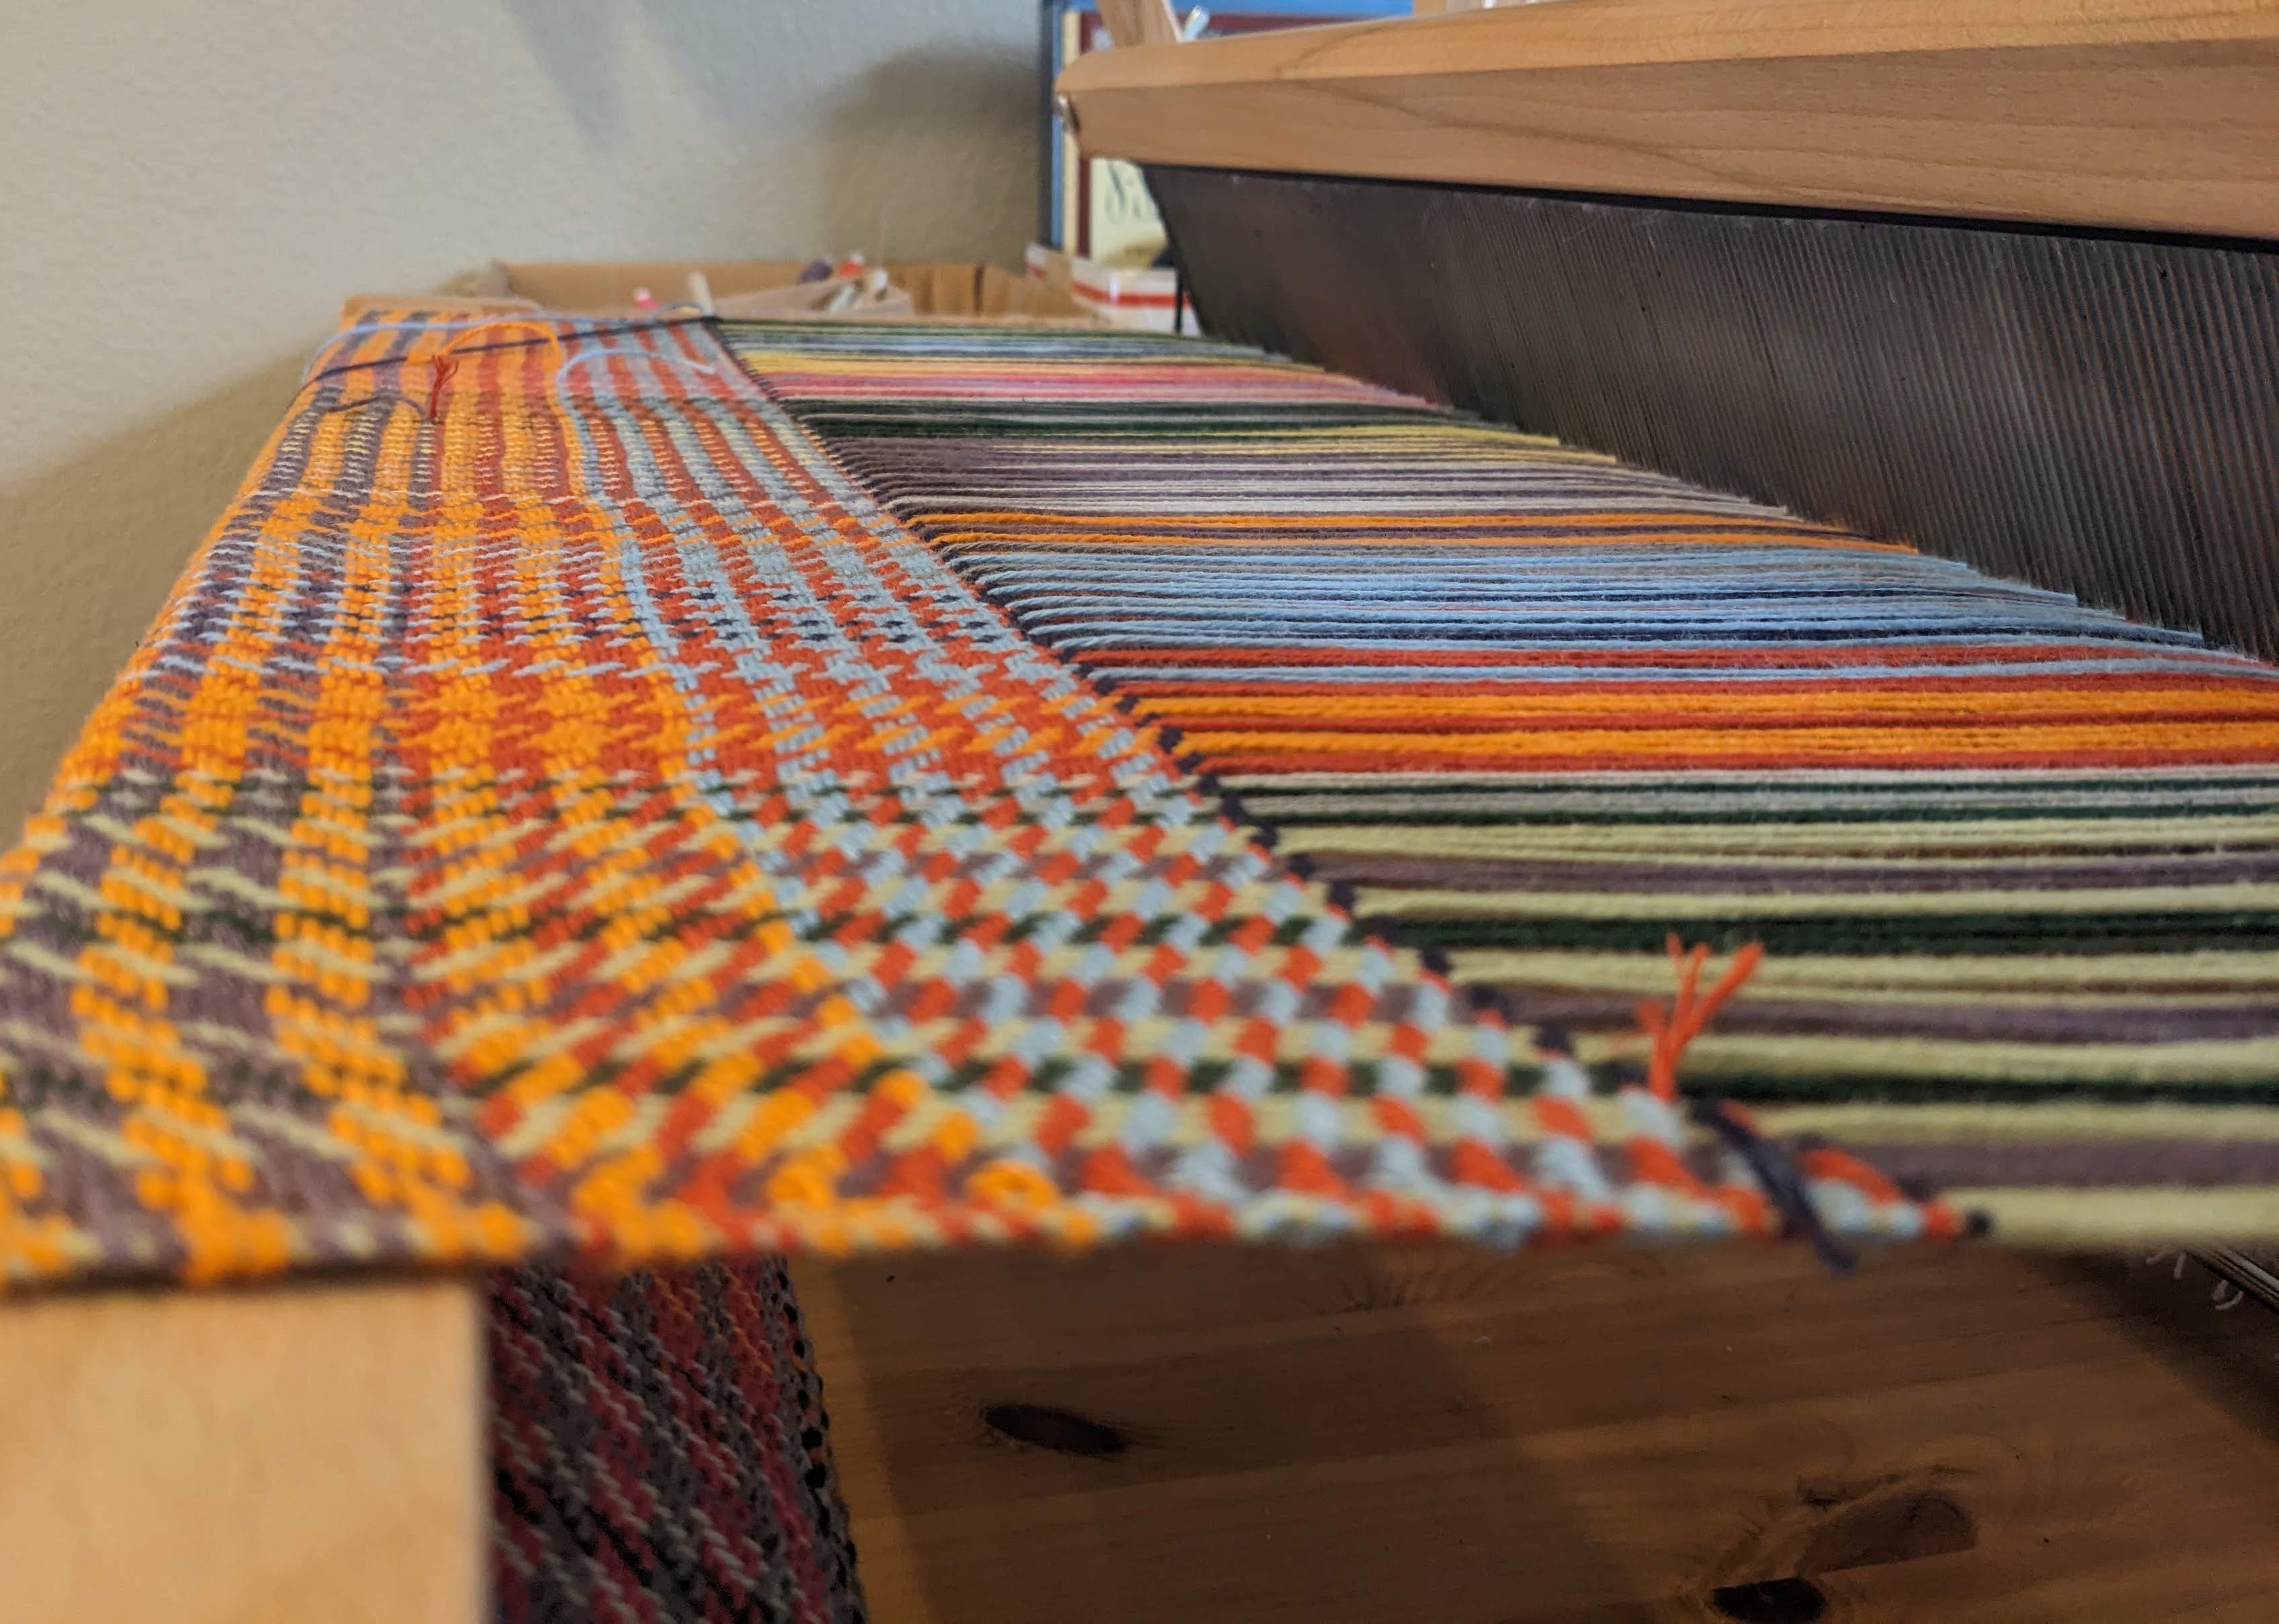
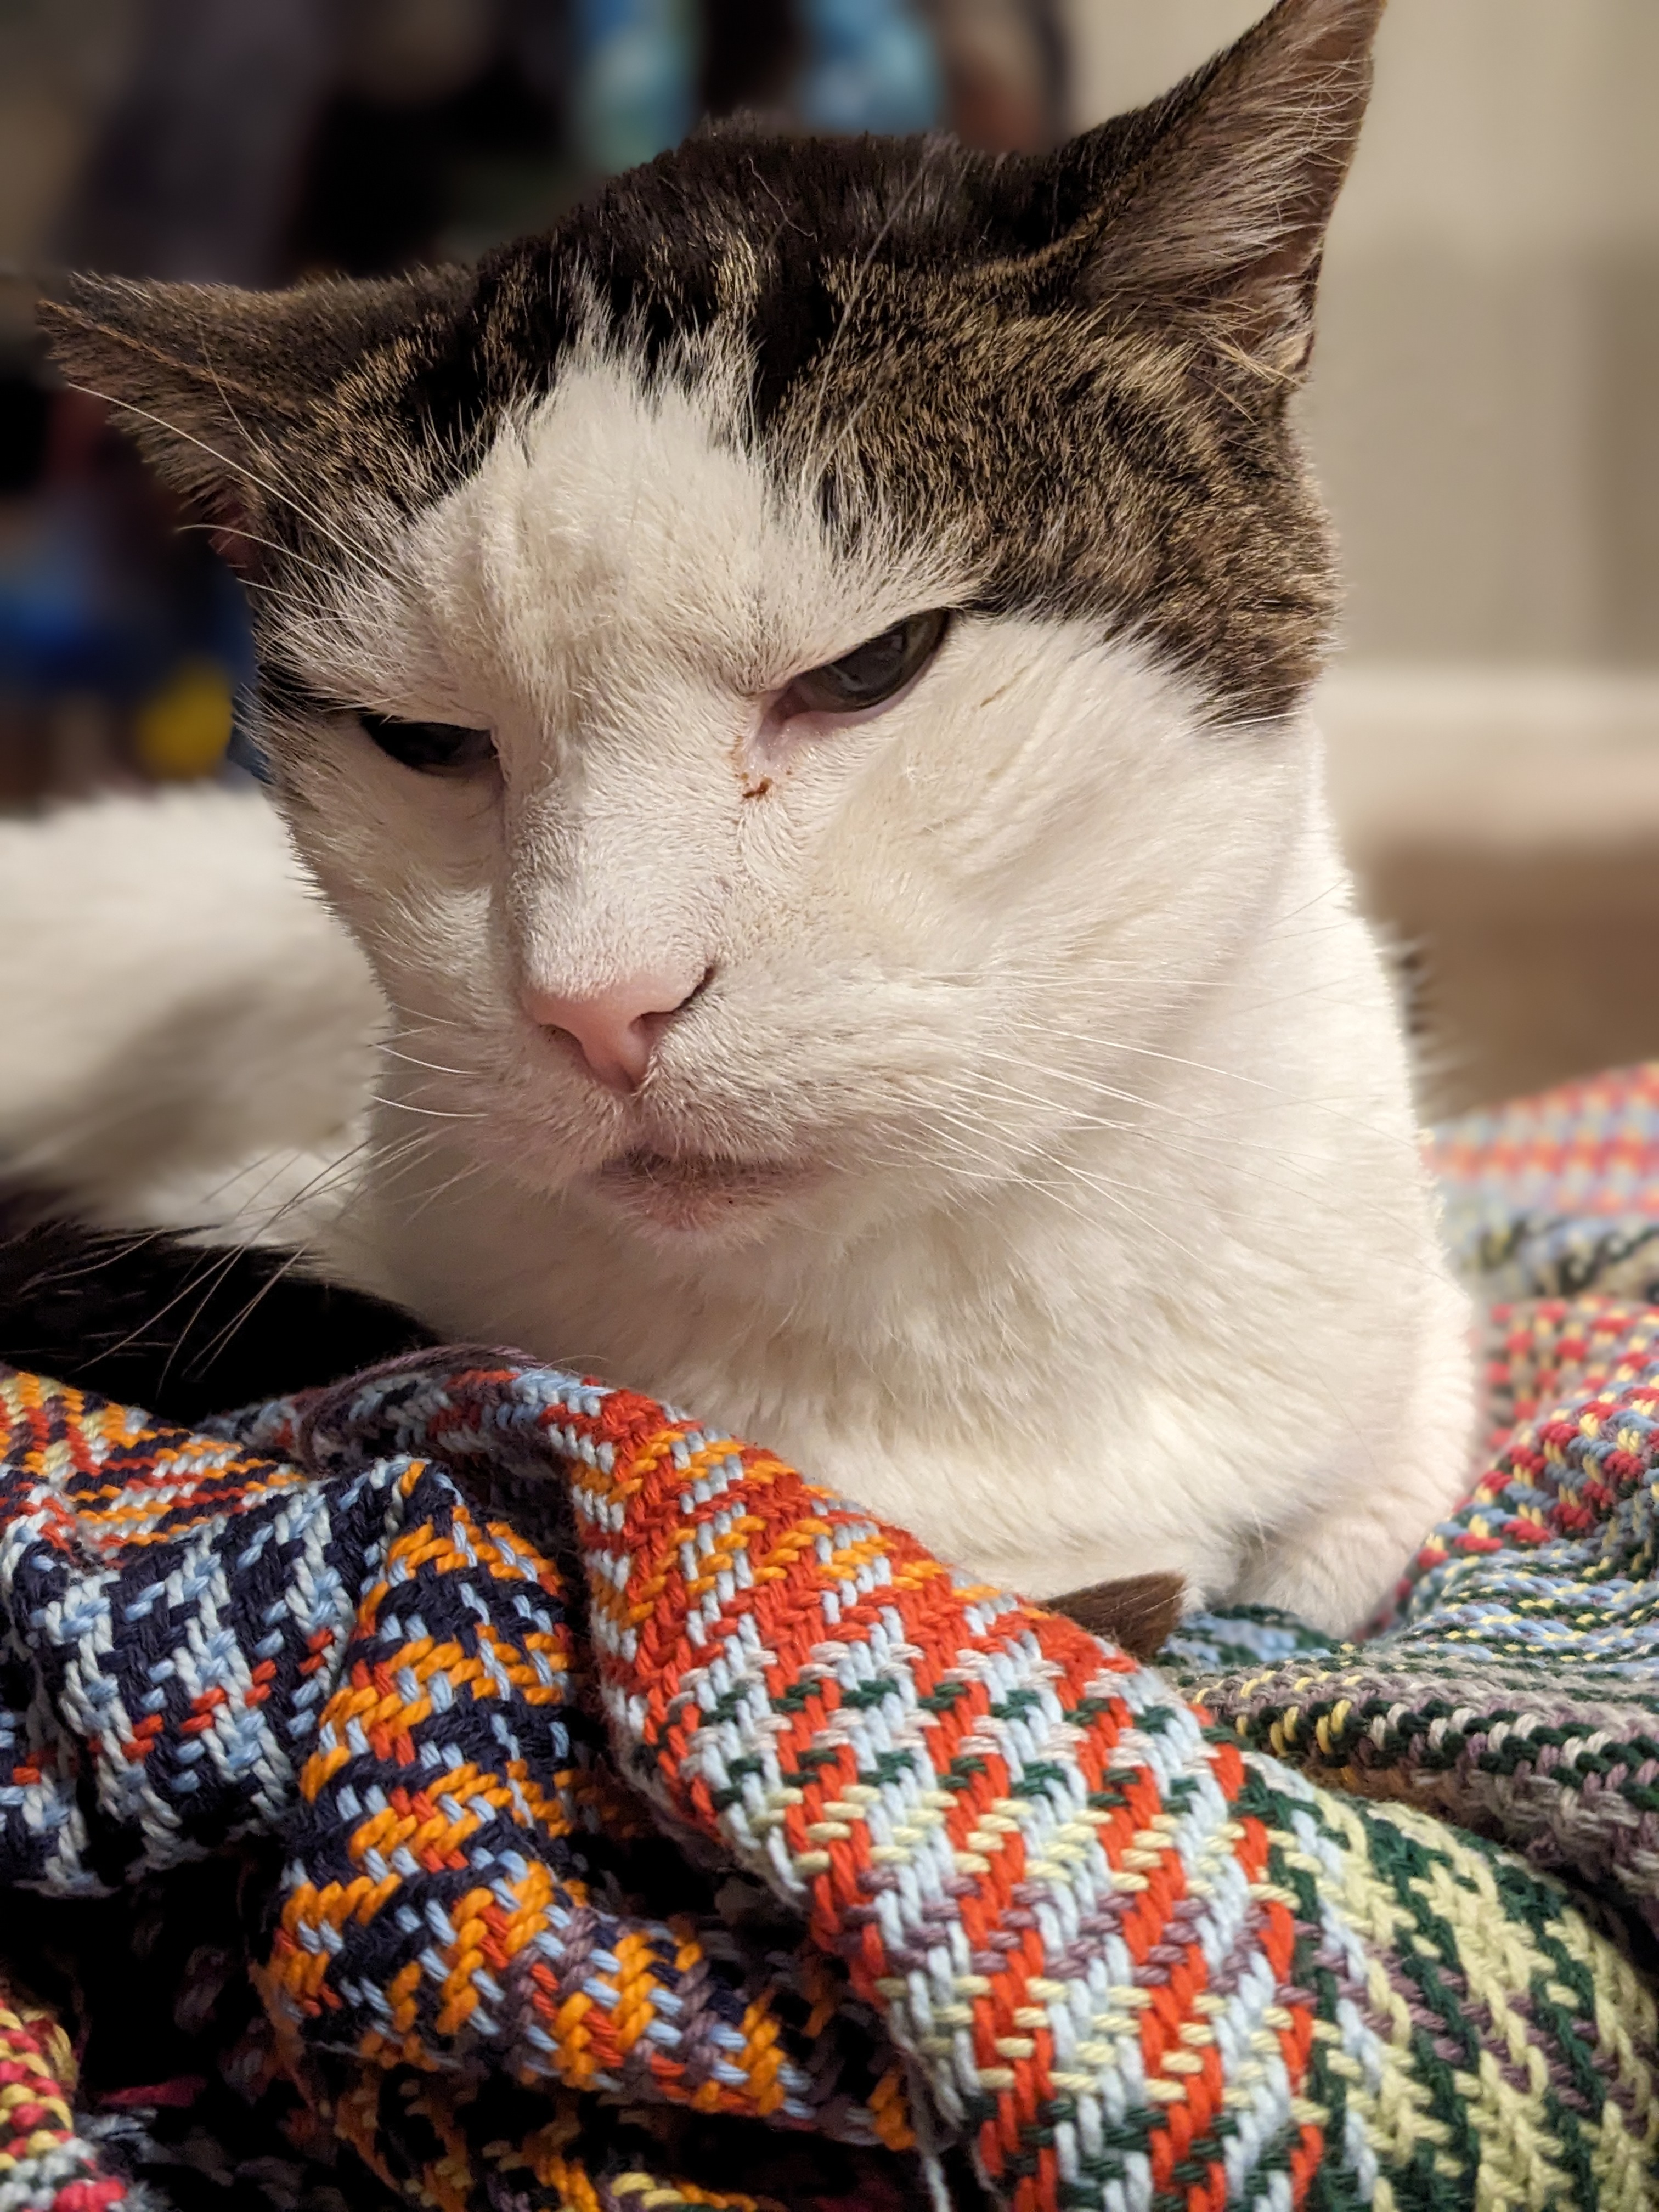
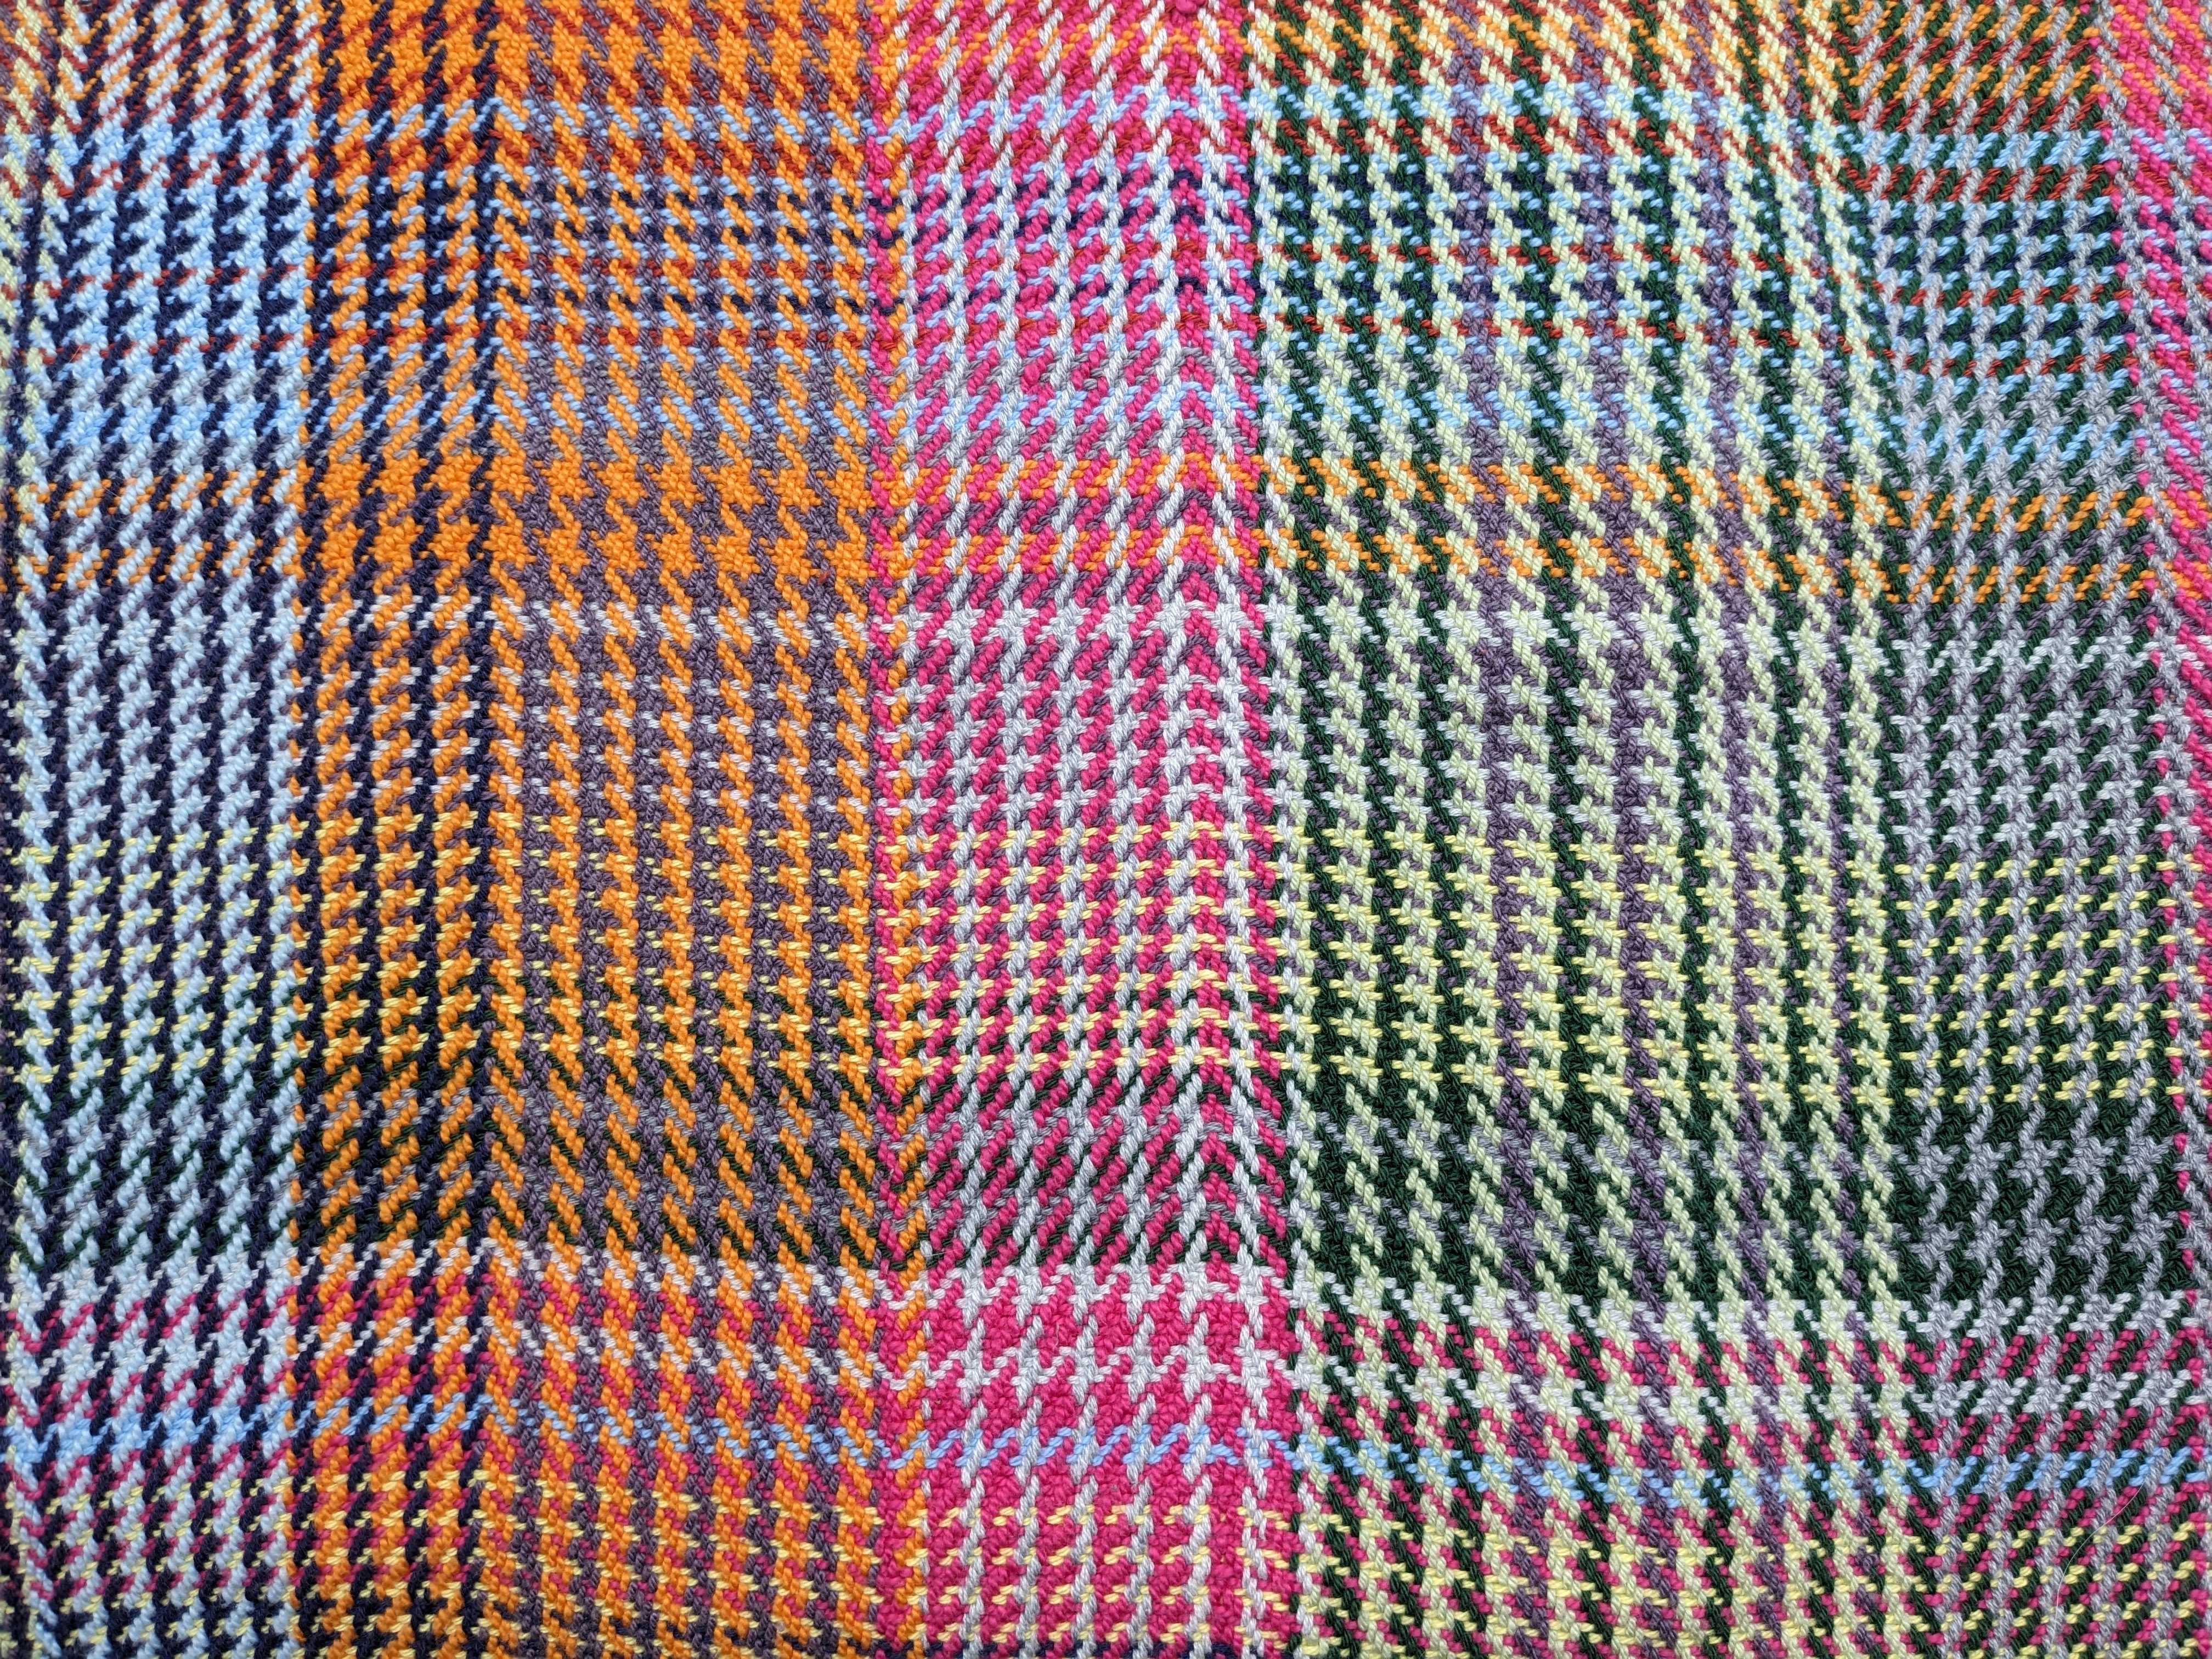
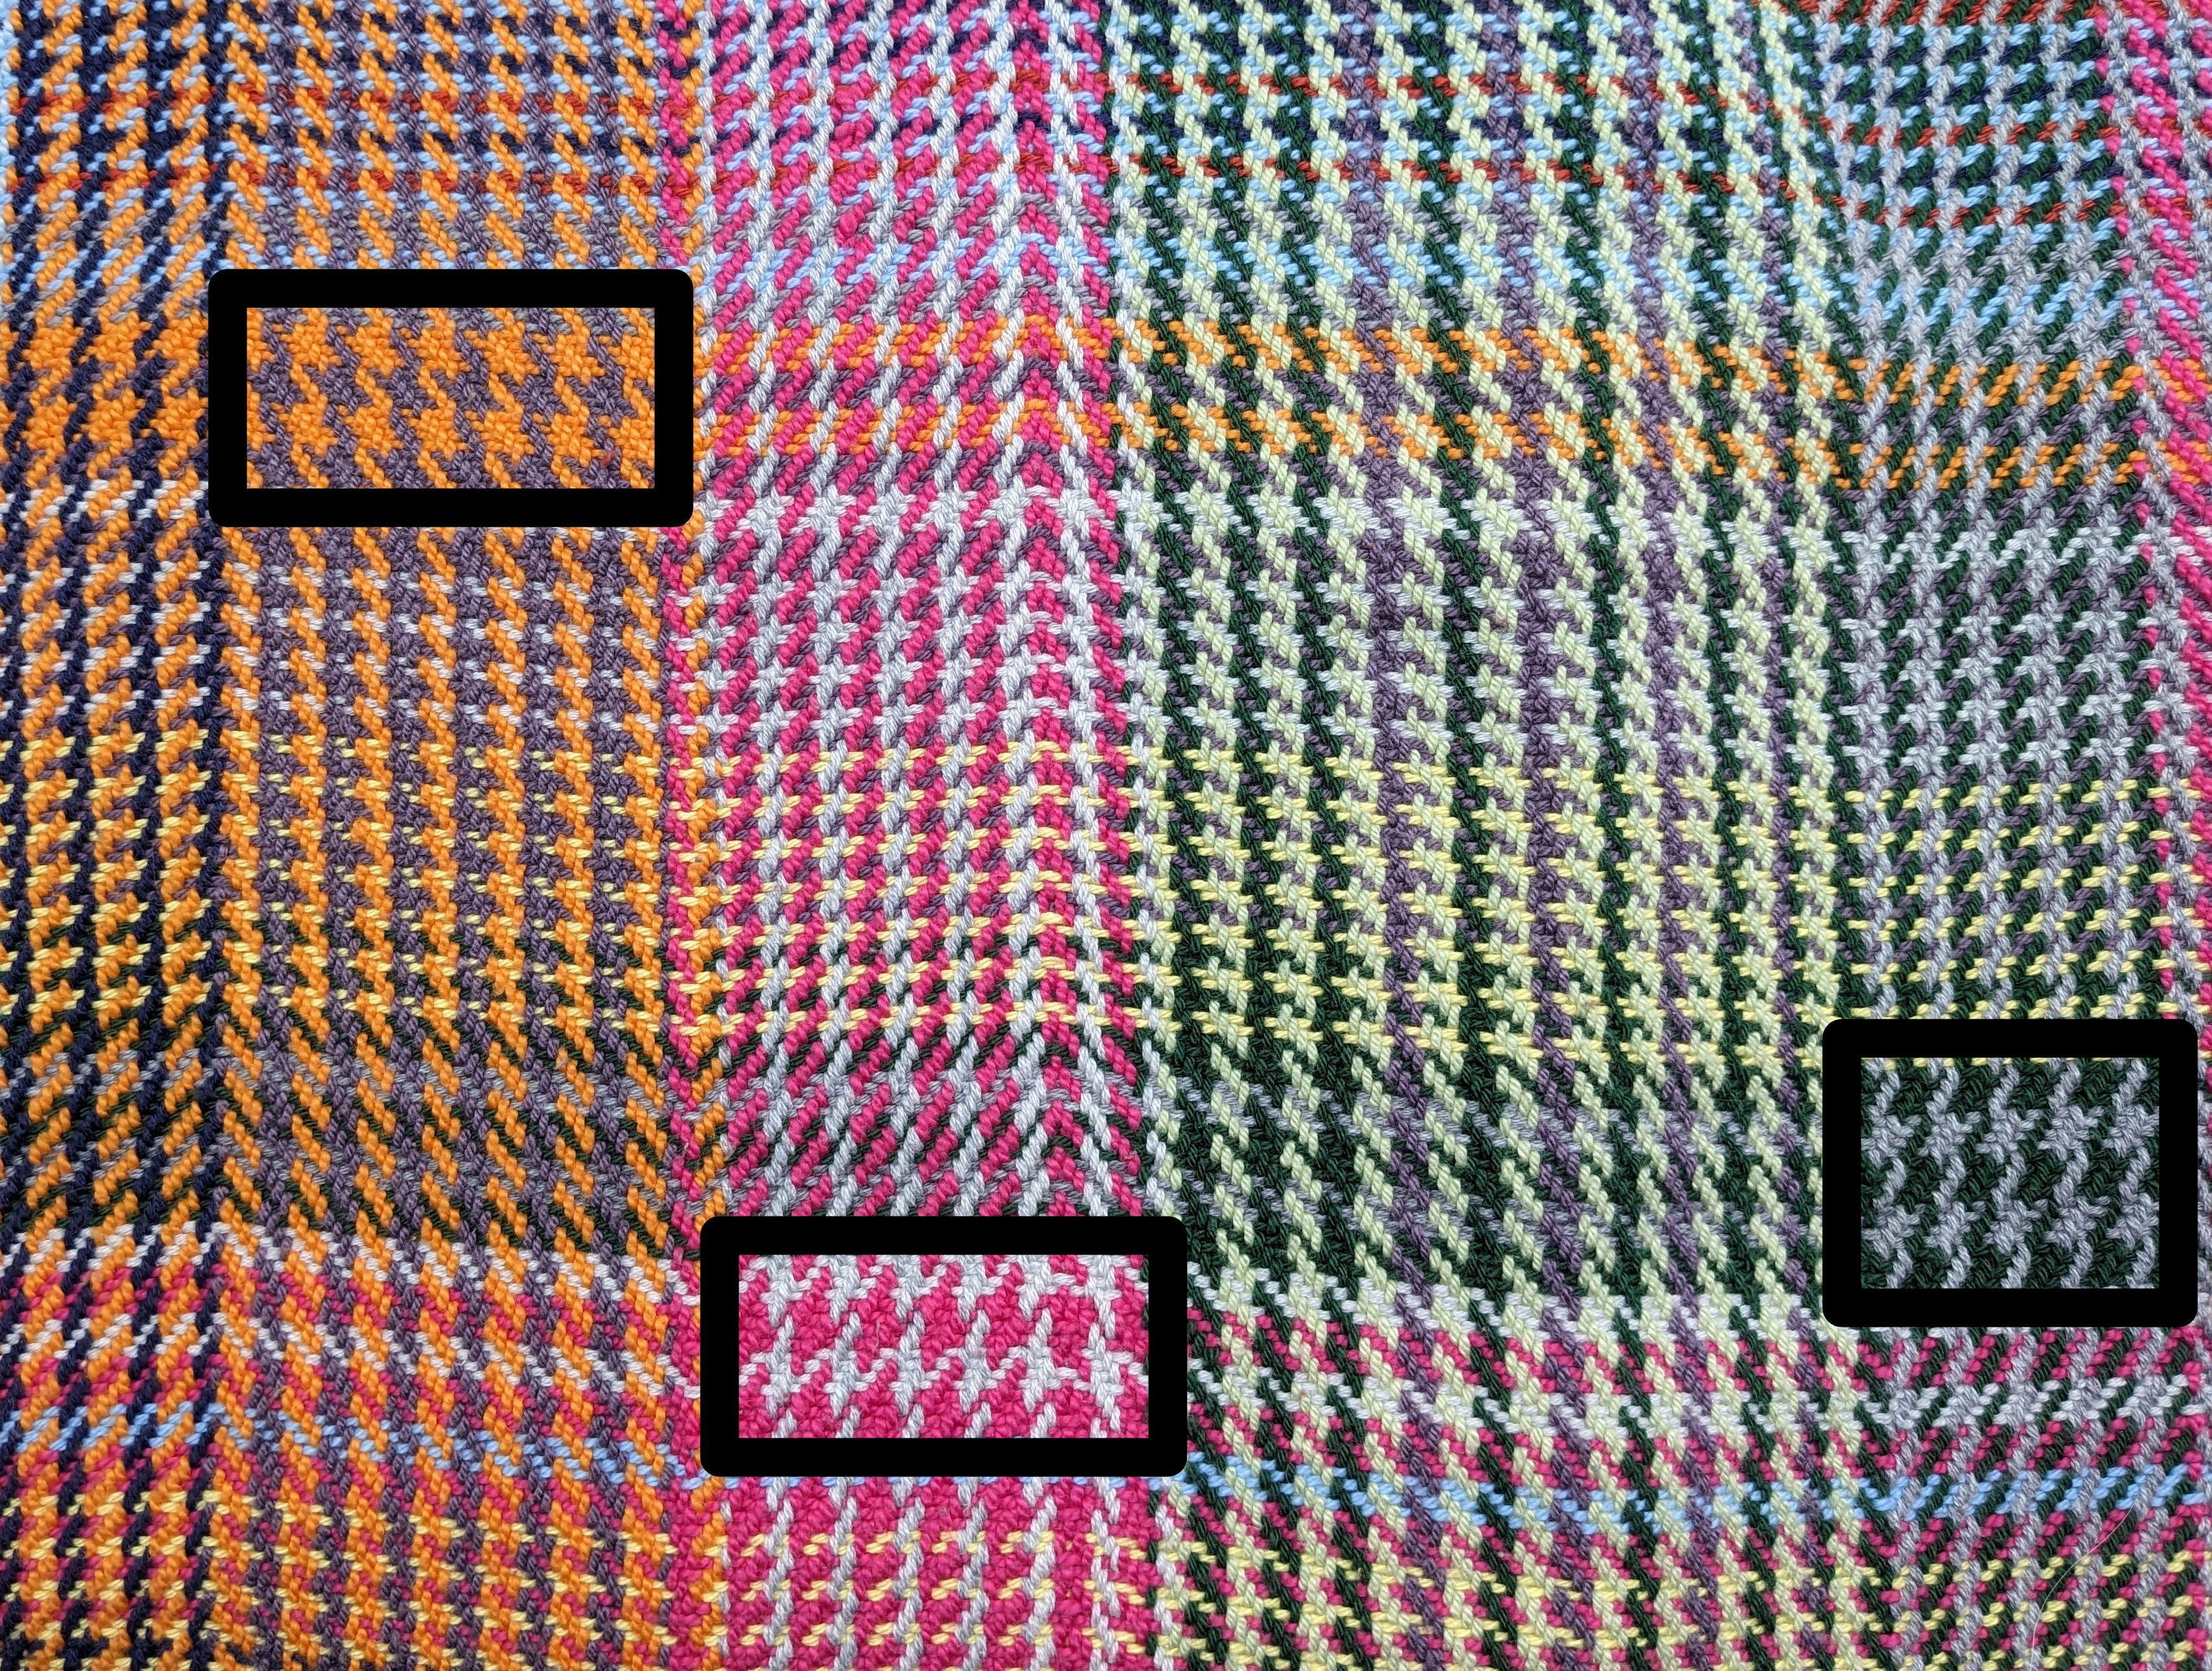
Then, I thought I was done with towels for a moment, but a friend revealed to me she didn’t have any towels and I could not let that stand. I immediately chose colors that went with her apartment decor and a really pretty weave structure I’d been eyeing with no real plan to use. This braided twill (Strickler’s #181) has things in common with a twill, kind of like a point twill, but it creates diamonds that share sides instead of freestanding diamonds. I wanted to do a plaid, because I think stripes are cool and wanted to understand some of the color blending between the three colors I chose. A plaid just uses the same color pattern for the weft as it does for the warp, turned 90 degrees. I figured I’d make the weft stripes whatever width I wanted (or however much yarn I put on my bobbin), but keep the same color order. So I made my warp stripes, wound bobbins of differing lengths for fun, and started weaving. It’s a 10 treadle pattern, so it actually got into my brain and body pretty quickly and I was able to weave this fast. I did do some “2/2 twill” treading just to go even faster, since I was on a time crunch. I yielded 7 towels, so I consider it a win. I really liked the high contrast with the dark purple, but the interaction between the two lighter colors was not as interesting.
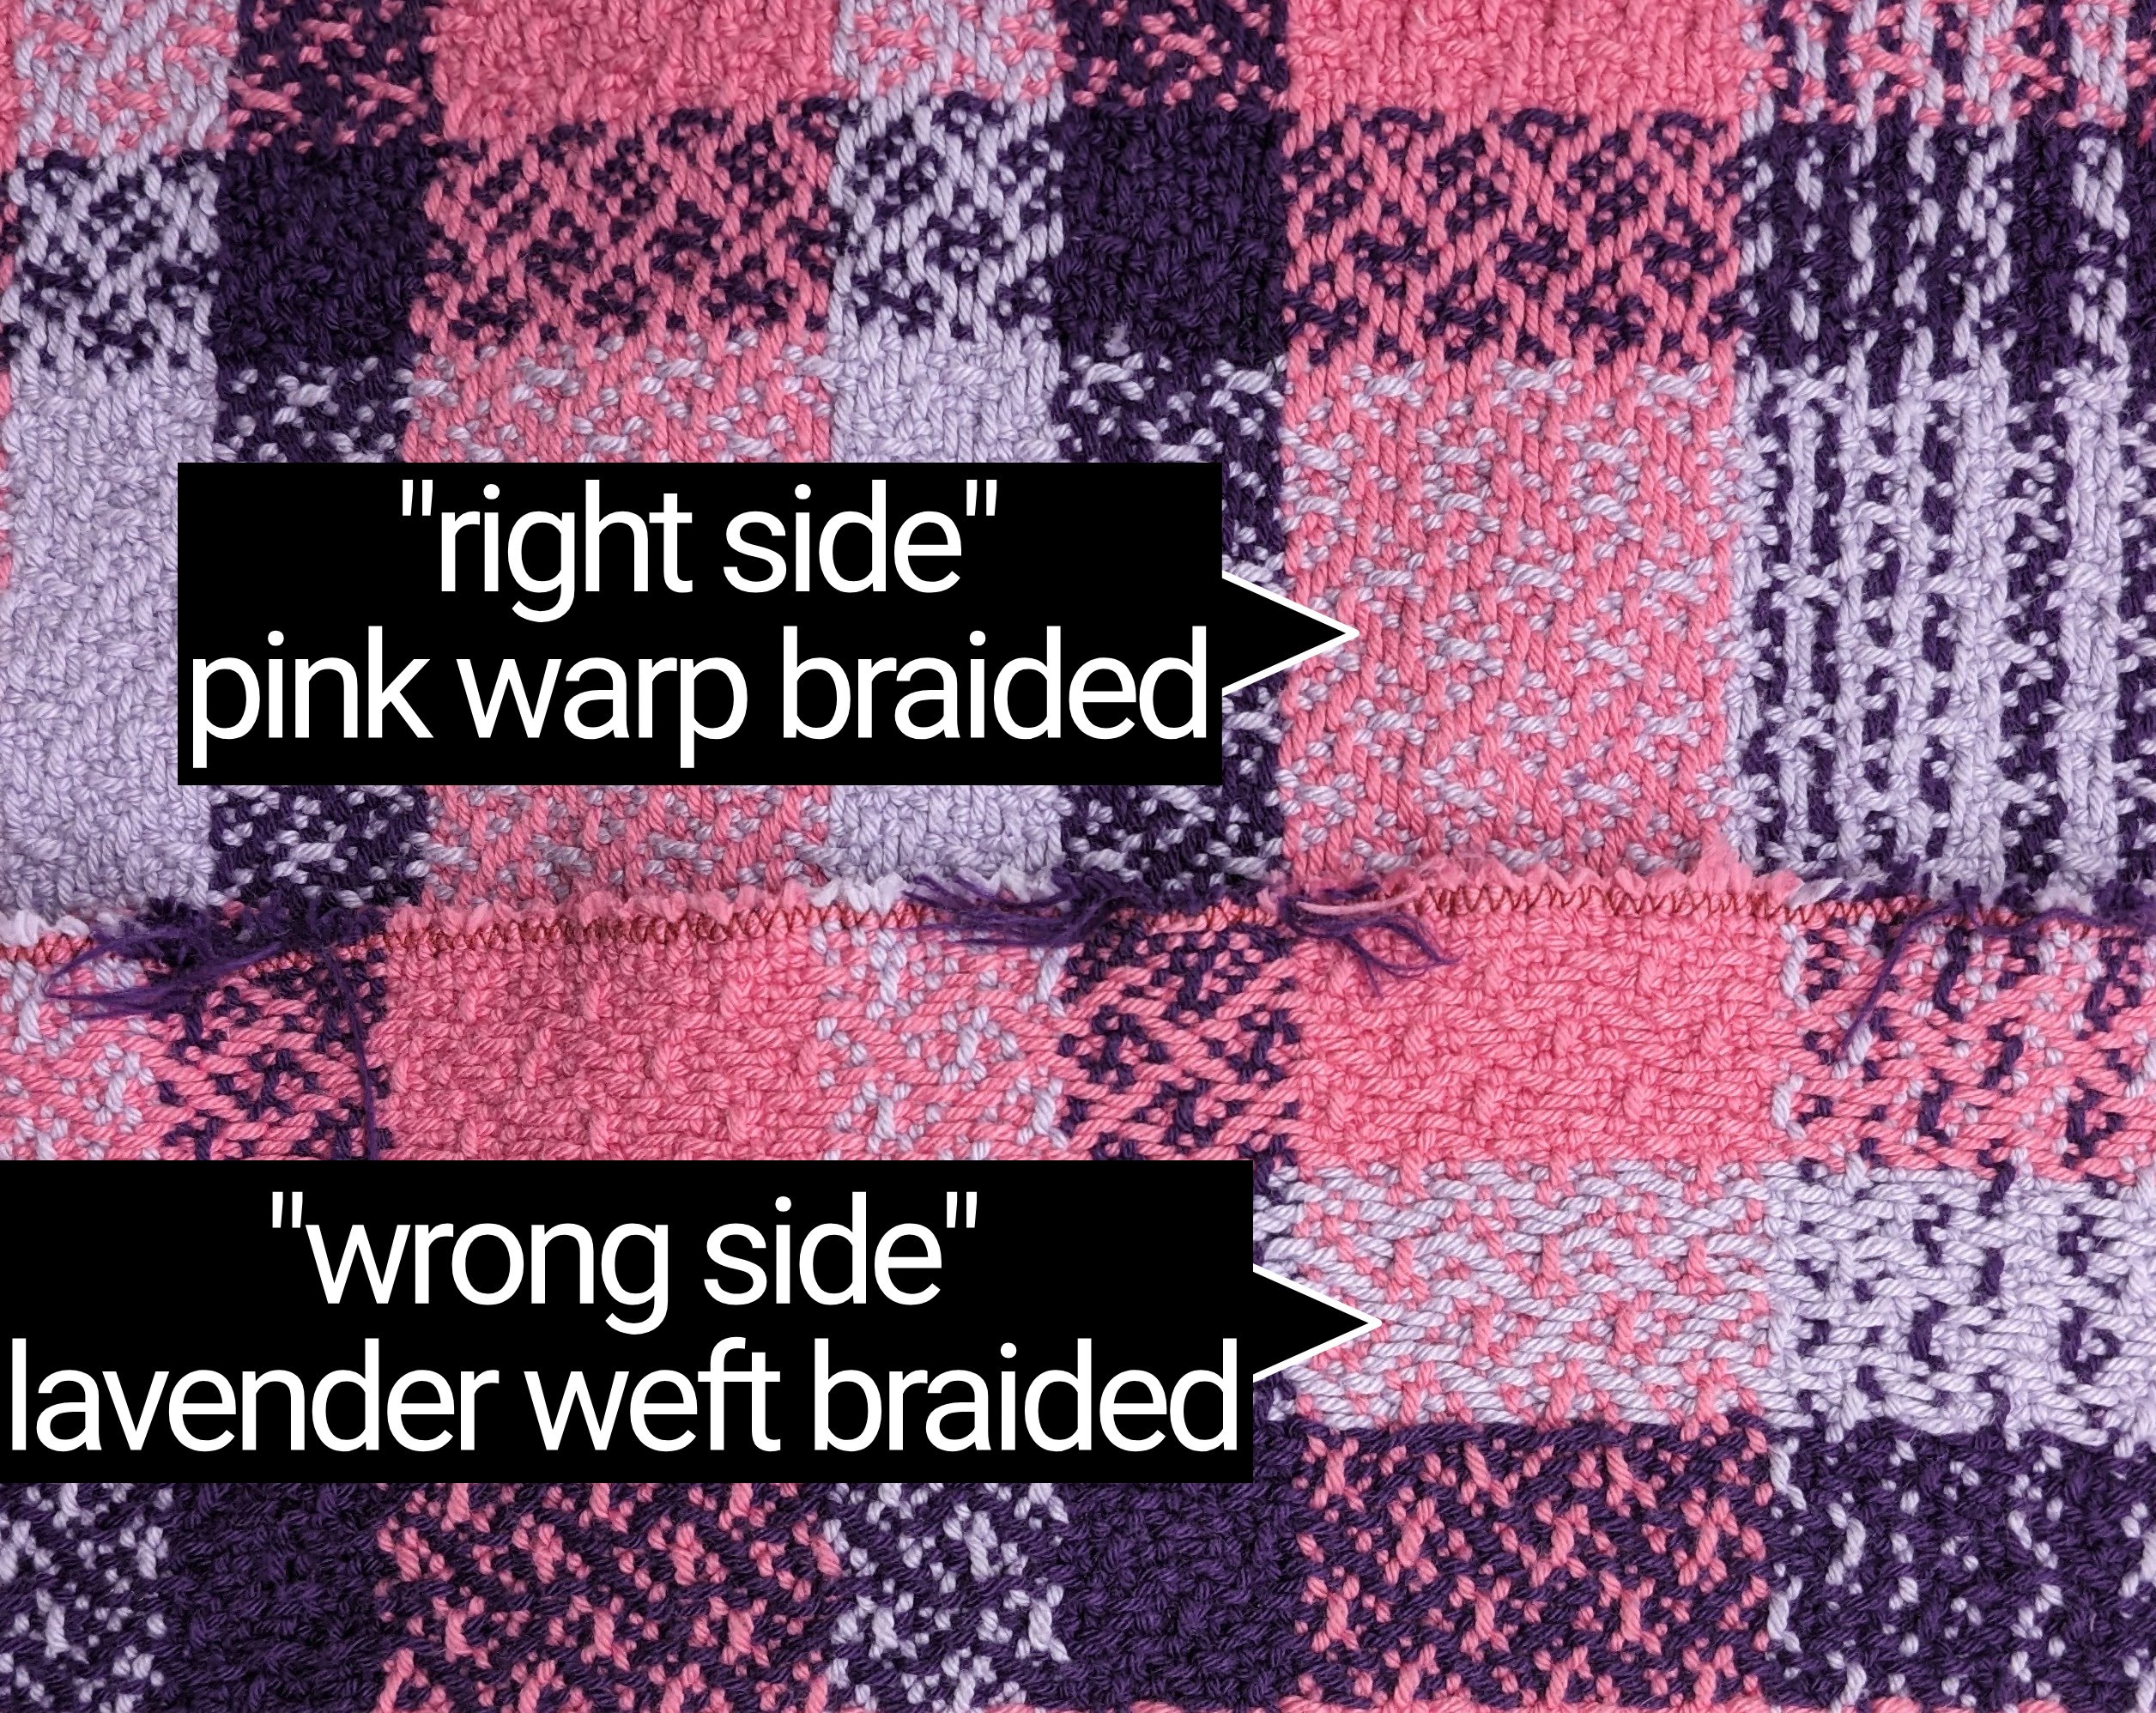
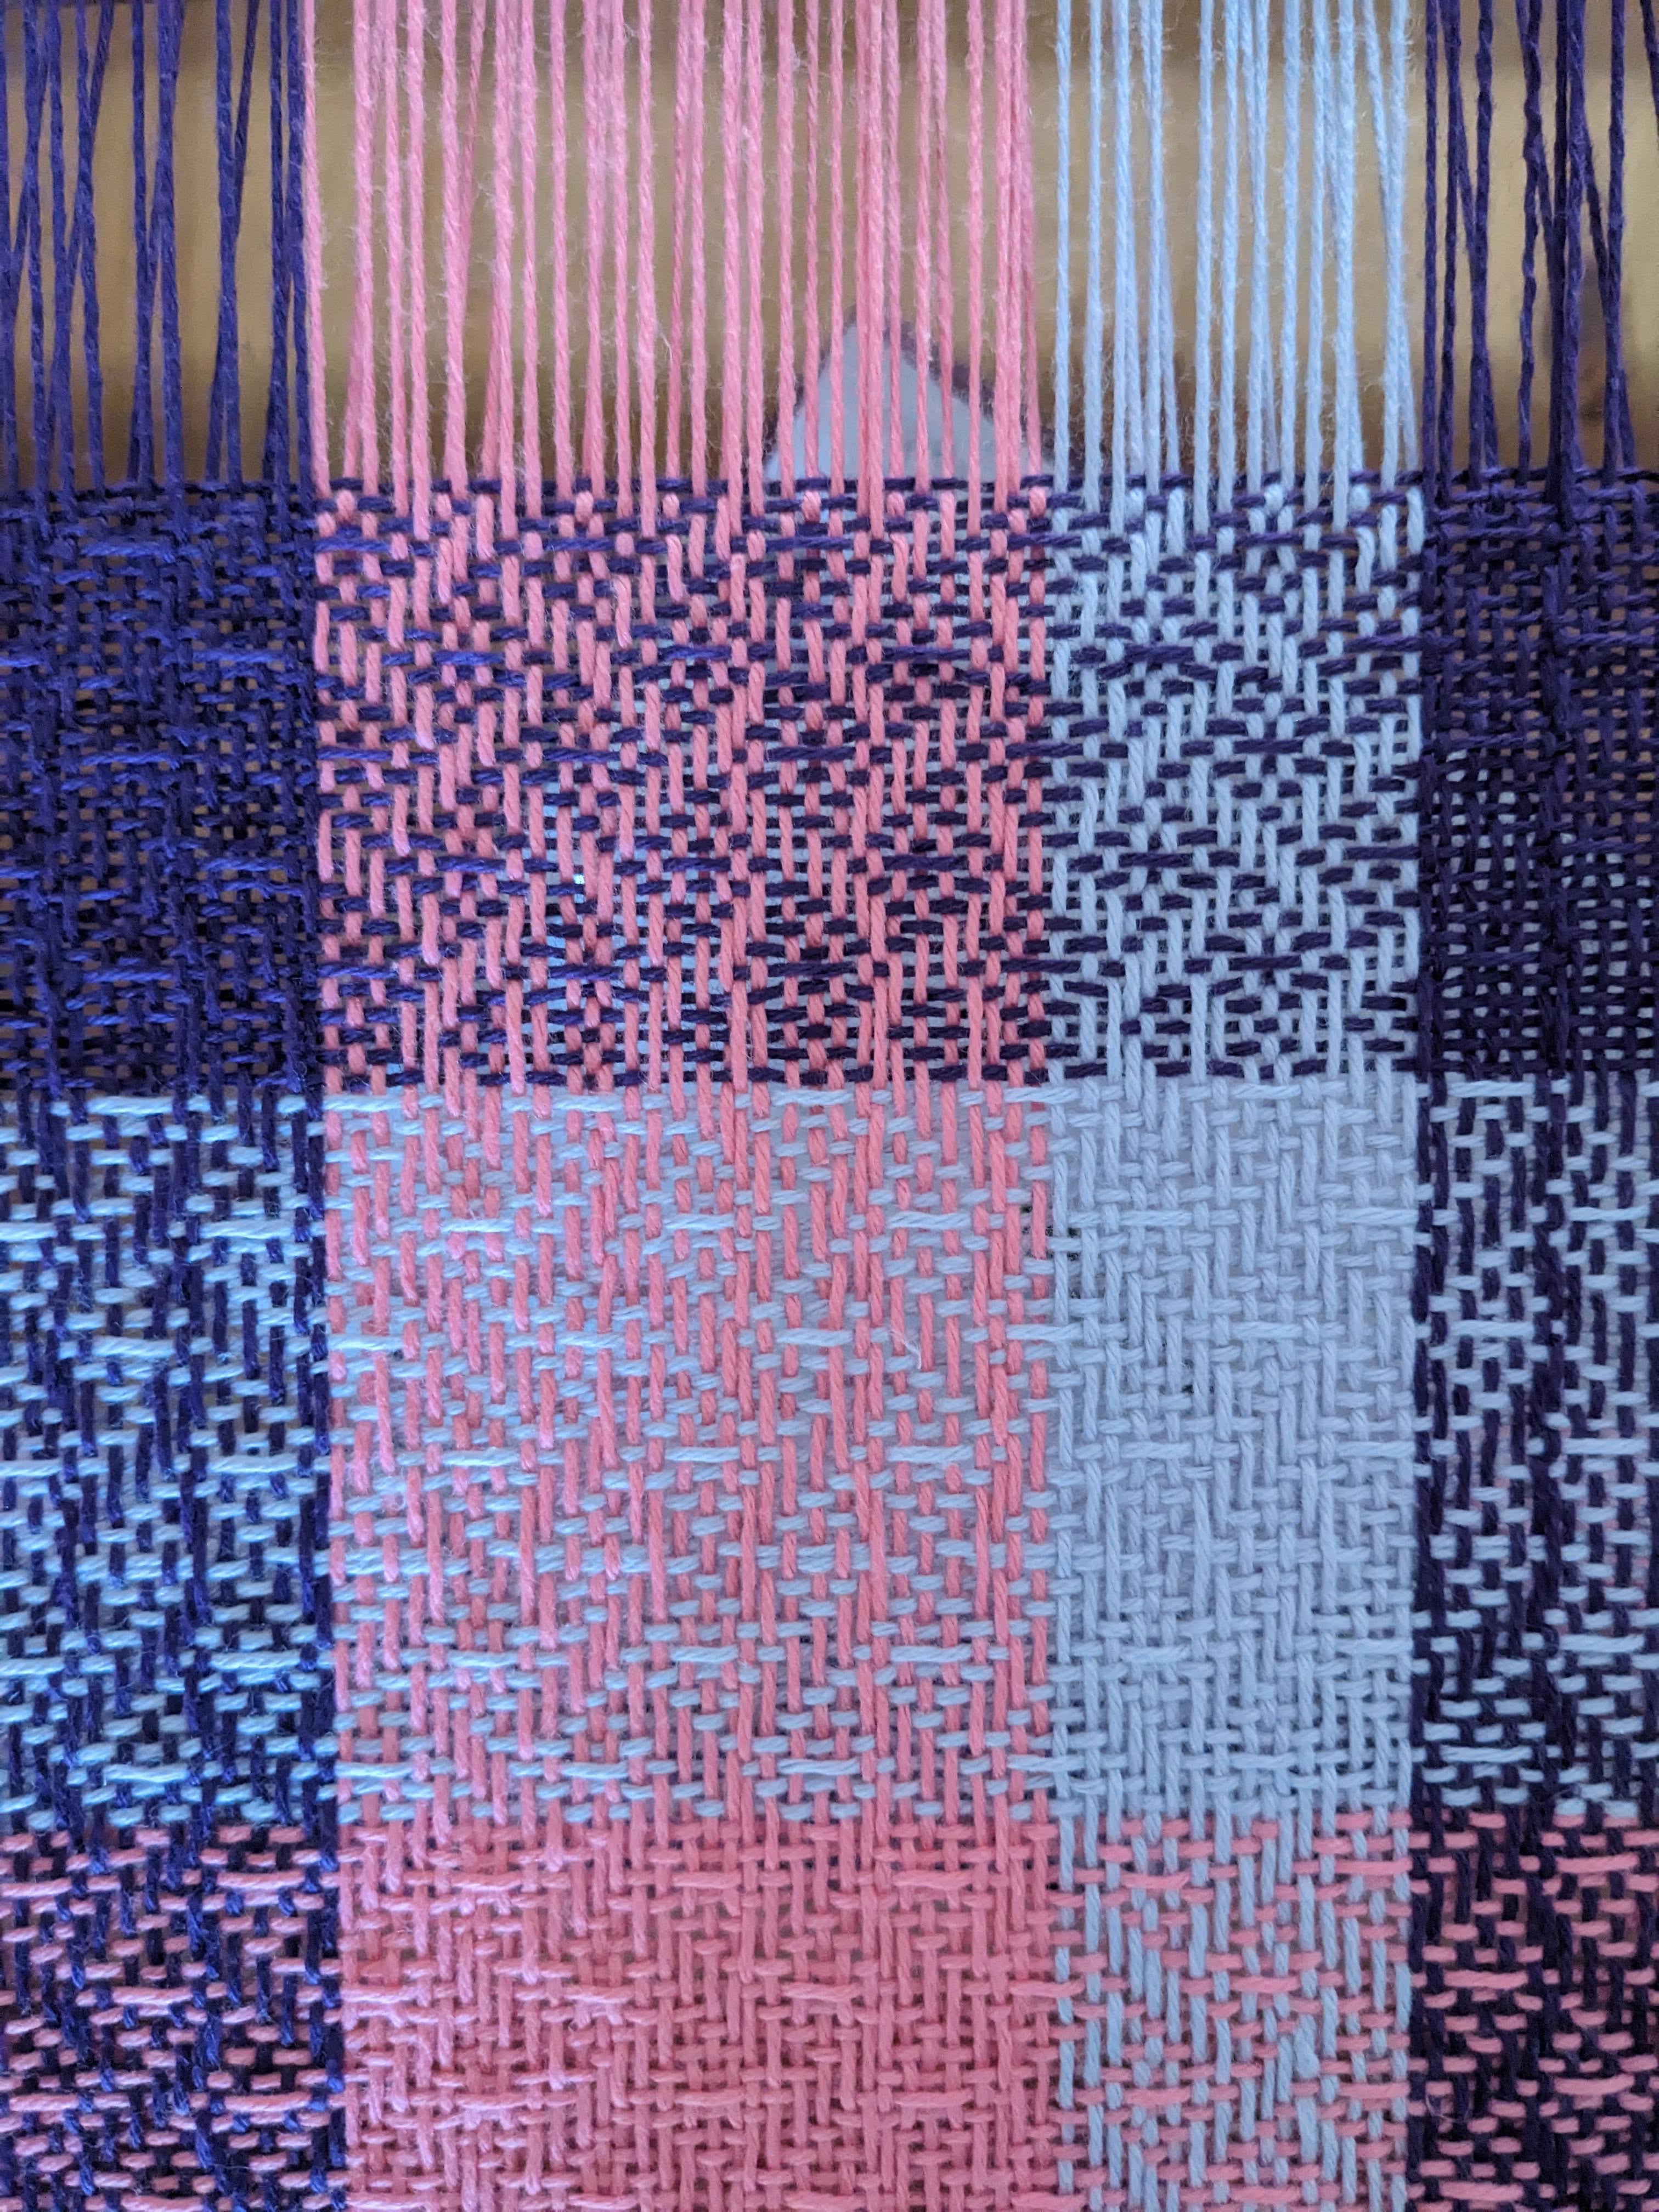
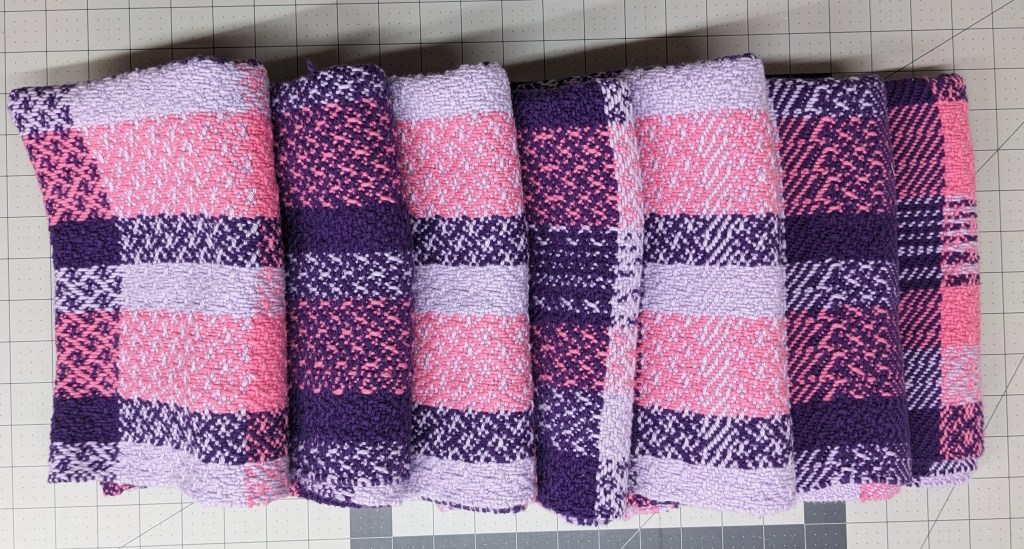
These towels were so fun to make and learn with – I got lots of experience winding on long warps, saw how different colors interact with each other, and tried a new weave structure. I think towels are so low stakes for learning and mistakes. No one cares if they’re a little wonky, or the tension isn’t quite right. I kept the weirdest offcuts for myself, either as napkins or towels, and gifted the rest. I sewed in little tags on all the corners, and I even made little labels to feel extra fancy.
Projects completed December 2025.
Autumn Projects
I’ve mainly been working on New Years gifts recently, so here are some sneak peeks:
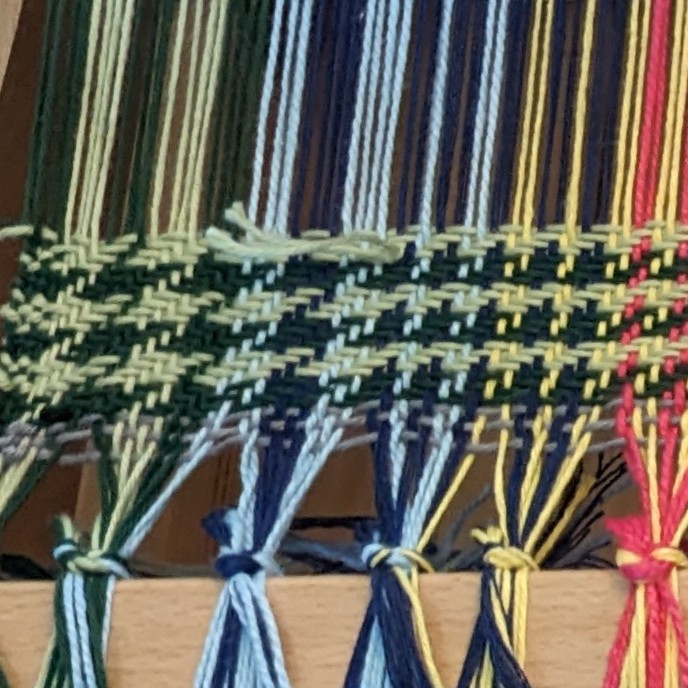
I jumped at the chance to go to the Grand Tetons again with family and did some fun watercolor:
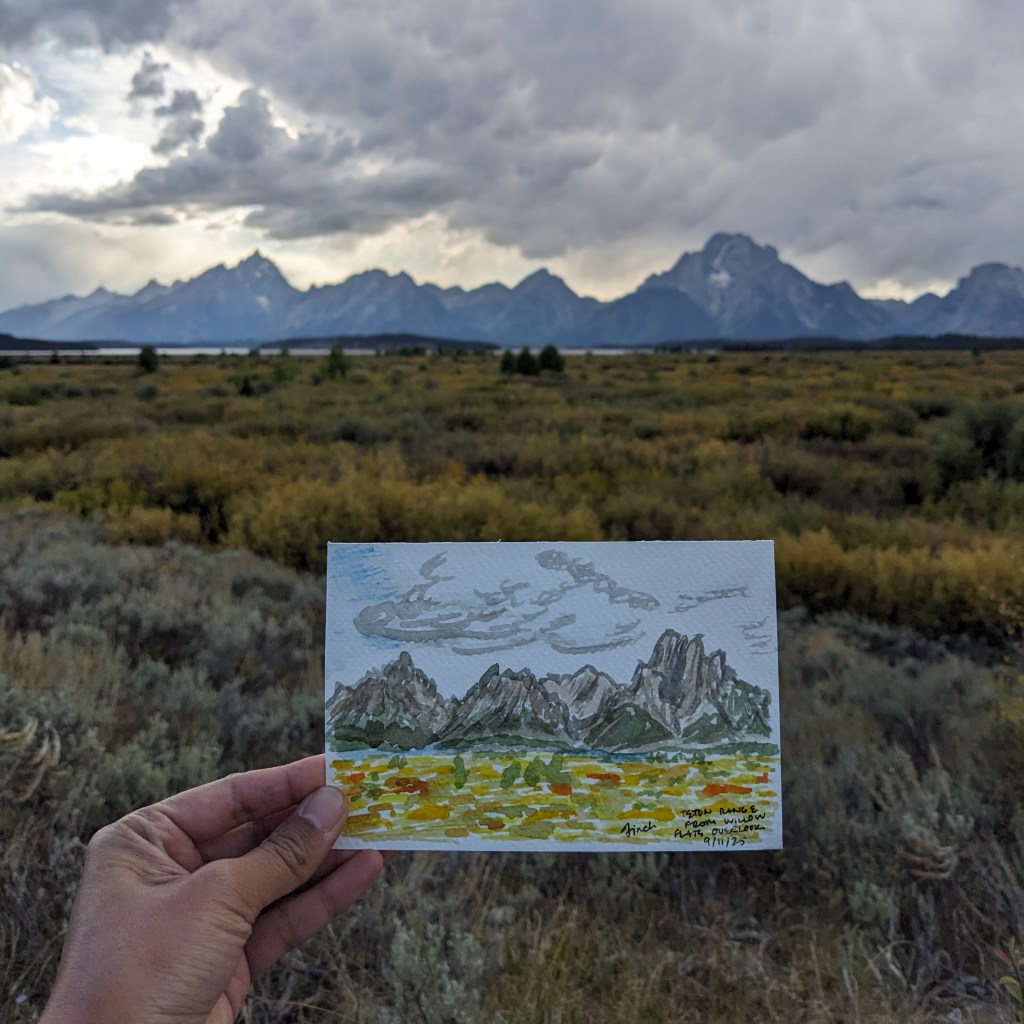
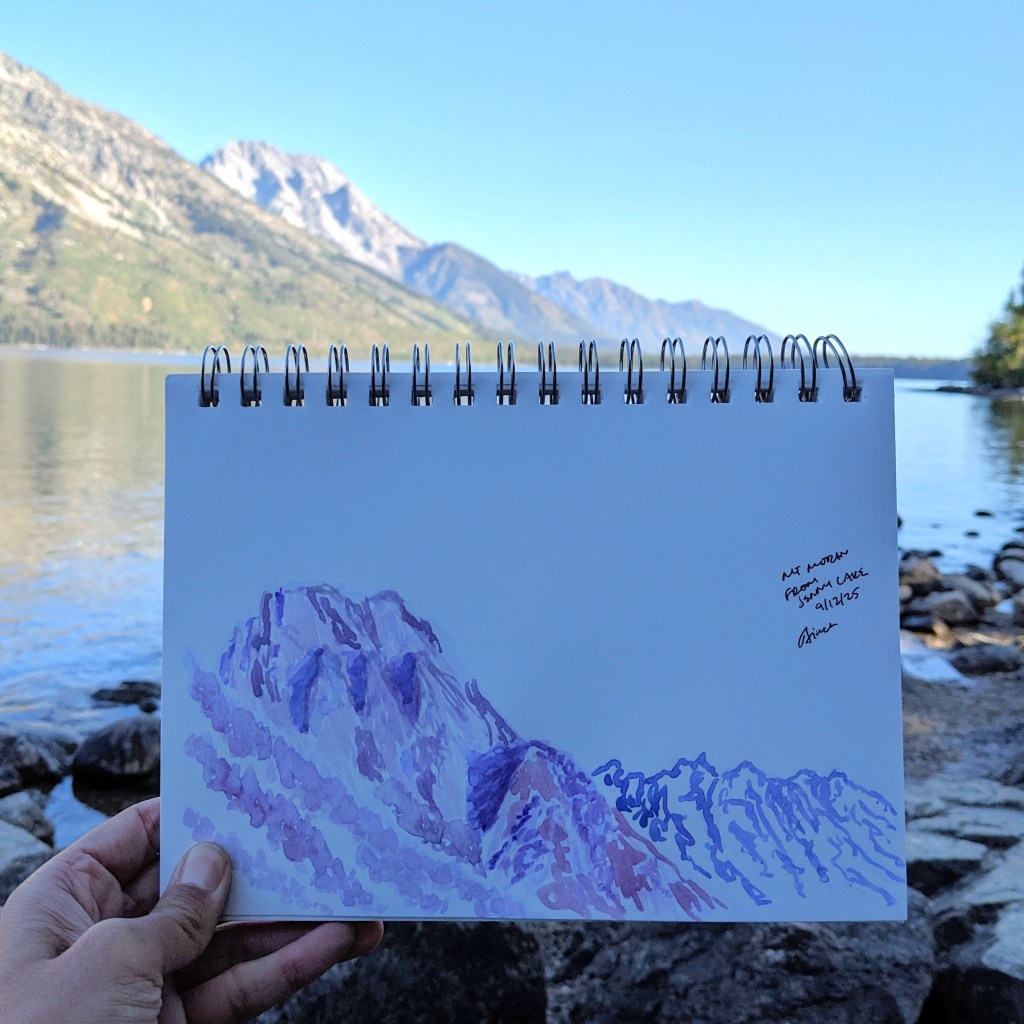
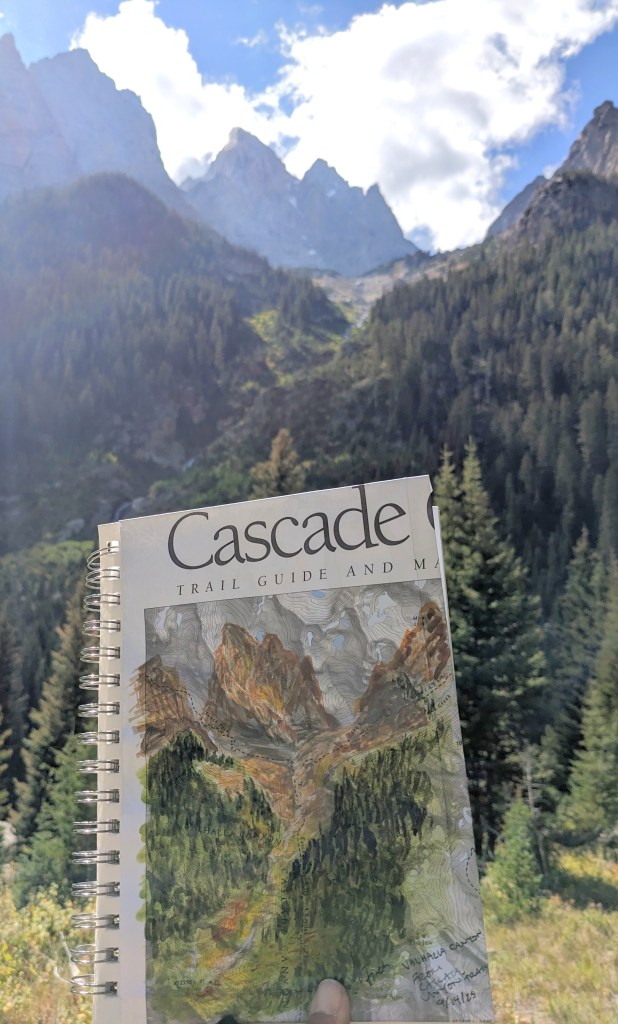
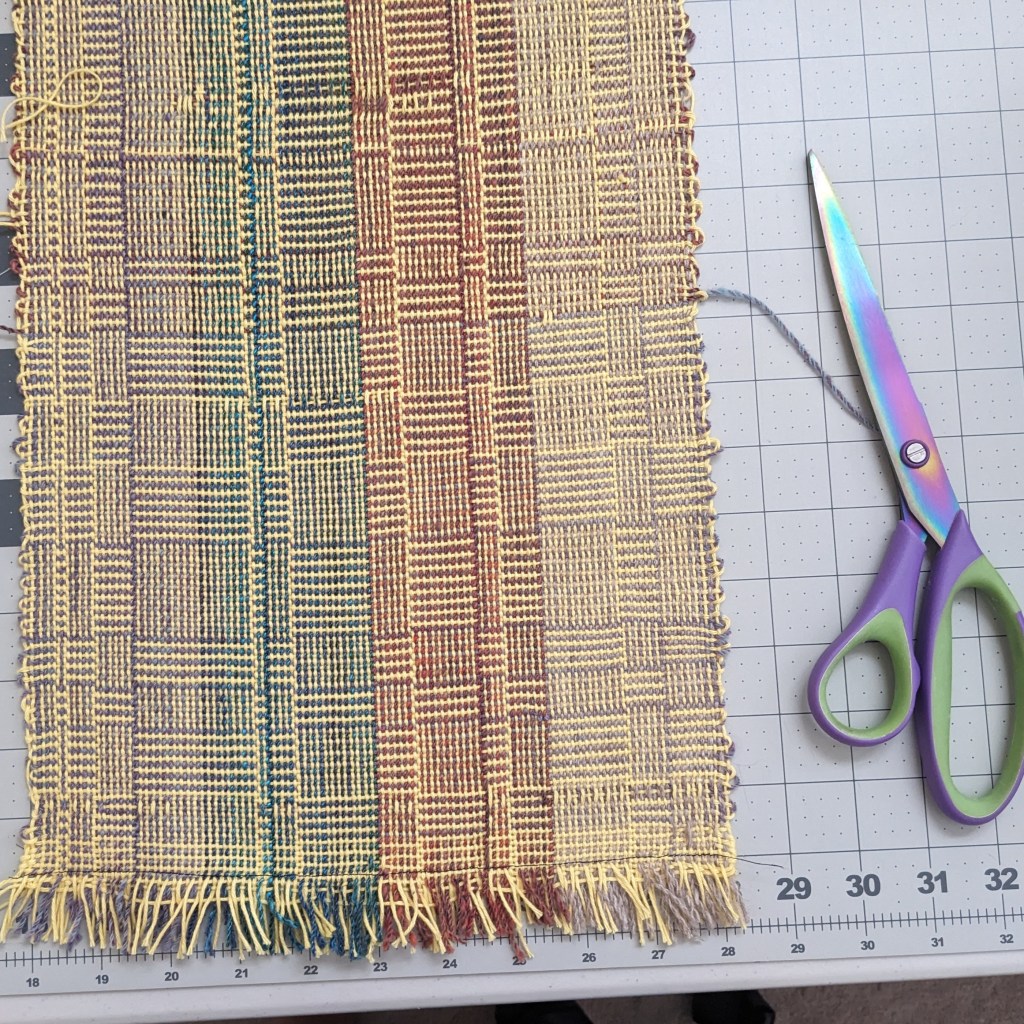
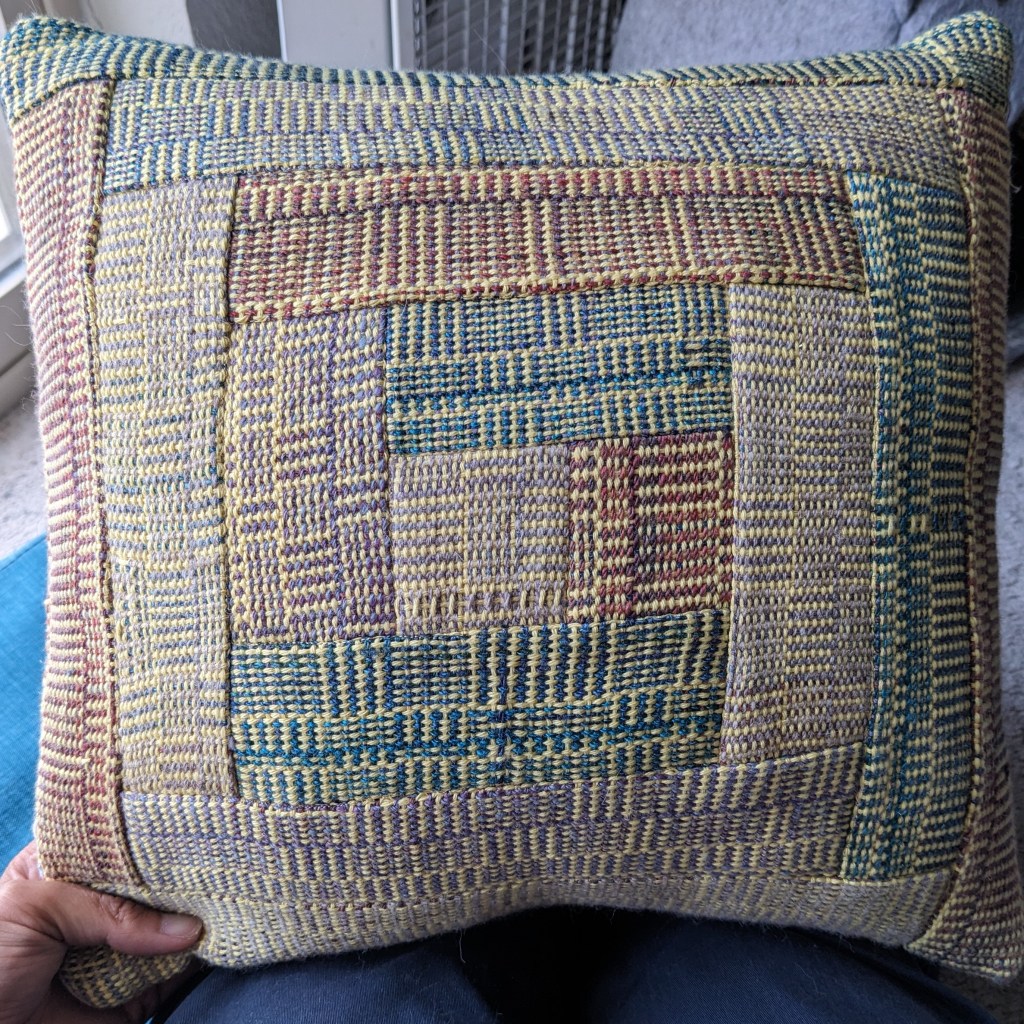
I wove my first “log cabin” pattern using handspun accent yarn and yellow commercial cotton, bravely cut it into strips, and quilted it using the “log cabin” block 🙂 so it’s my log cabin of log cabins pillow now.
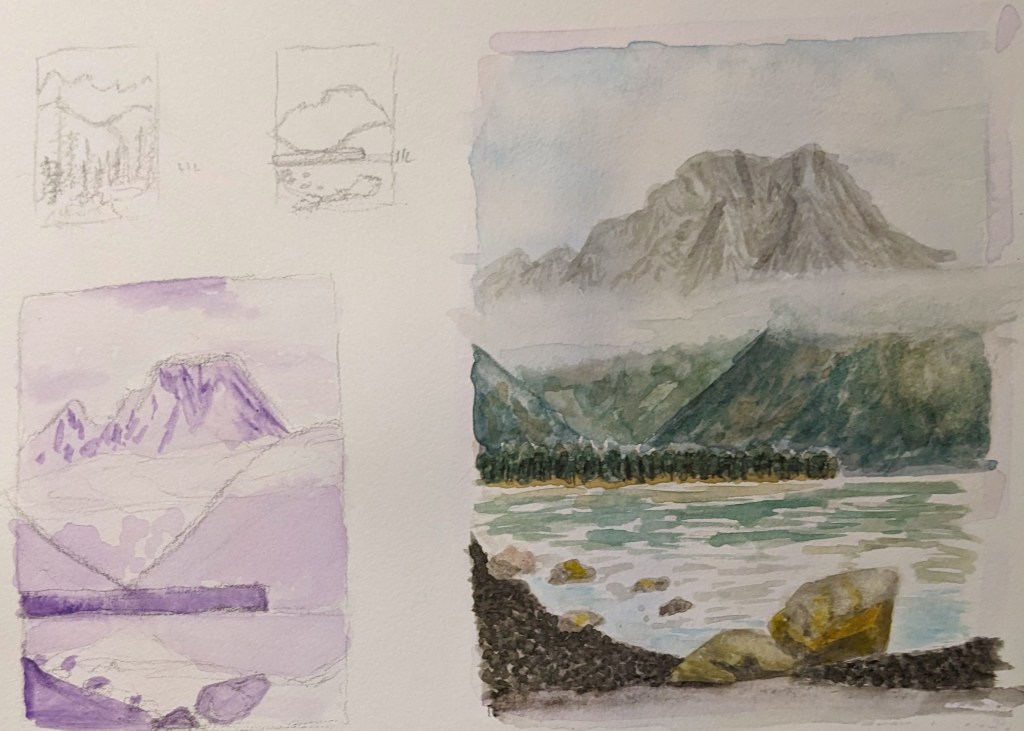
I attended a landscape watercolor class at my local art museum, which was SUPER helpful and taught me a lot of new techniques. I think one of my main takeaways is that planning a piece *does* help, and makes sure you’re capturing the things you find important. This includes planning the contrasts, and where your dark and light colors will be. I have been mainly preoccupied with shadows, but have ignored the contrast between back/mid/foreground, which helps guide the eye across the work as a whole. As I looked back through my field book, I found that I tend to ignore the mid and foregrounds, opting to simply look into the distance and draw the mountains I see. But… adding context adds depth and interest to the piece, so I’m now looking with new considerations in mind 🙂
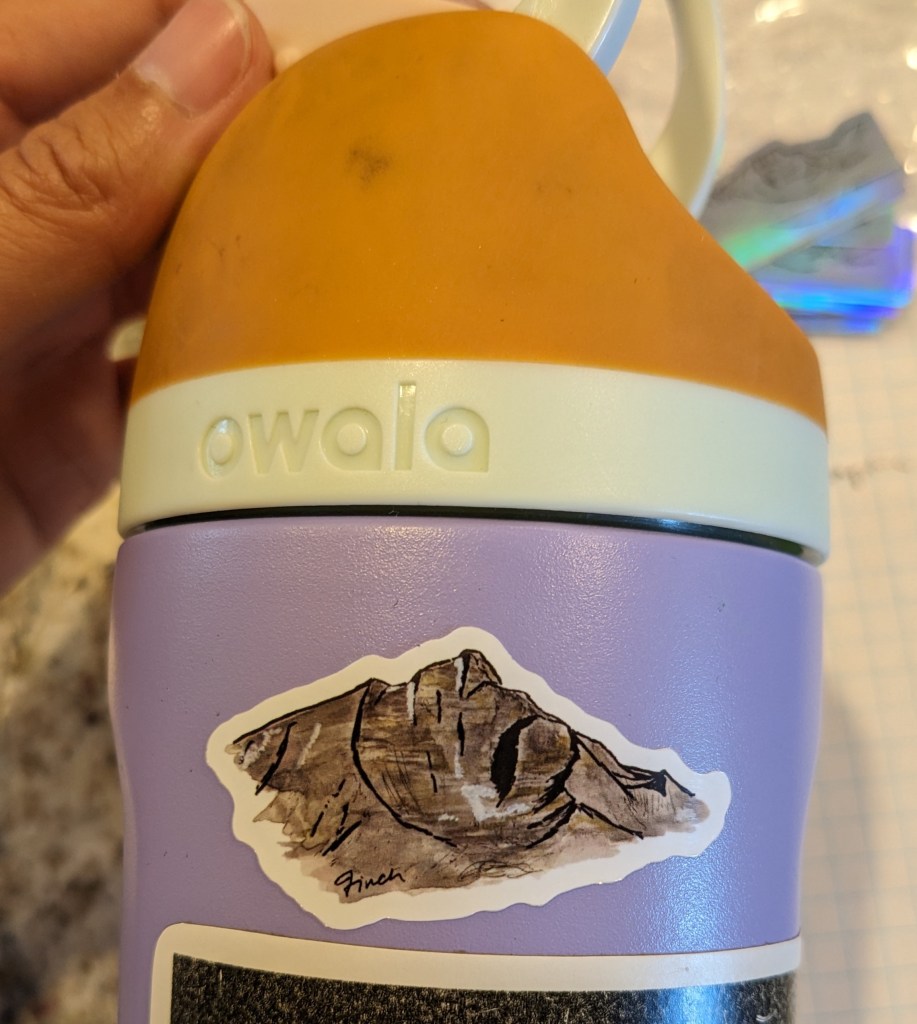
I also made some stickers of my art! Which is so fun!
Colorado River Art Retreat
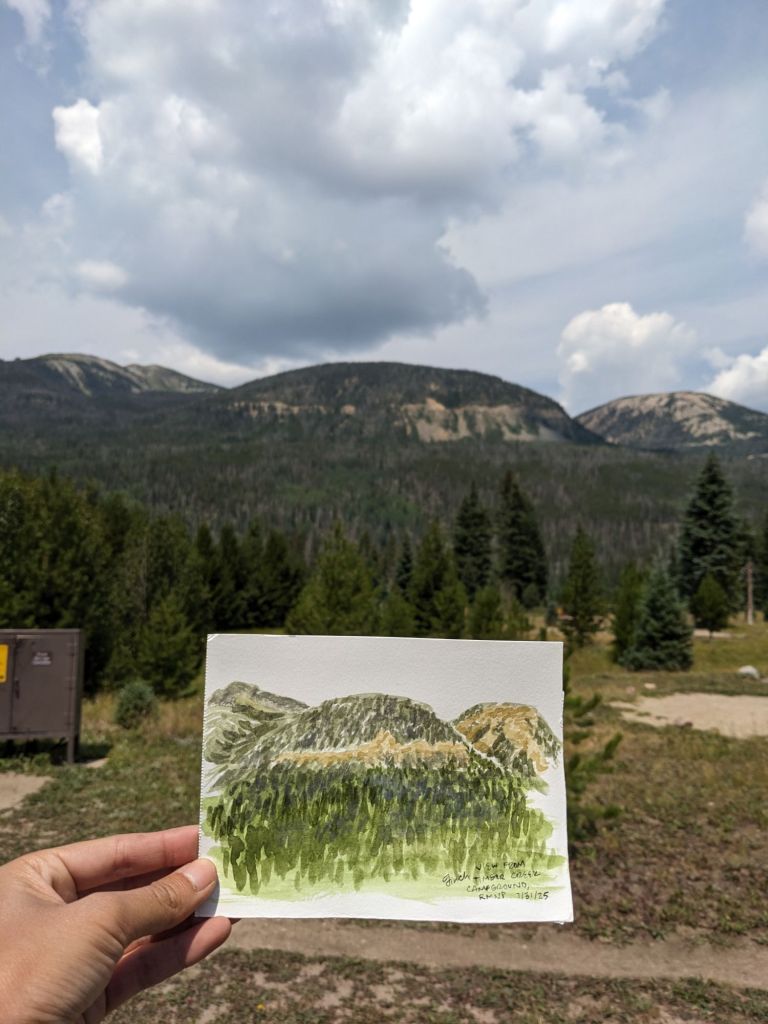
This lil postcard features the Grand Ditch, a water diversion structure that takes water from the tops of the Never Summer Mountains on the *west* side of the Continental Divide and ports it to the Cache la Poudre River, leading to the South Platte River. Part of this trip was dedicated to feeling some civil-engineering-and-climate-change-related feelings about the Colorado River and the development of Colorado. The Grand Ditch and Colorado-Big Thompson project enabled and continue to supply water for agriculture, industry, and municipalities on the *east* side of the Continental Divide, and these diversions have significant impacts on the Colorado River watershed by reducing the flow that would have been there.
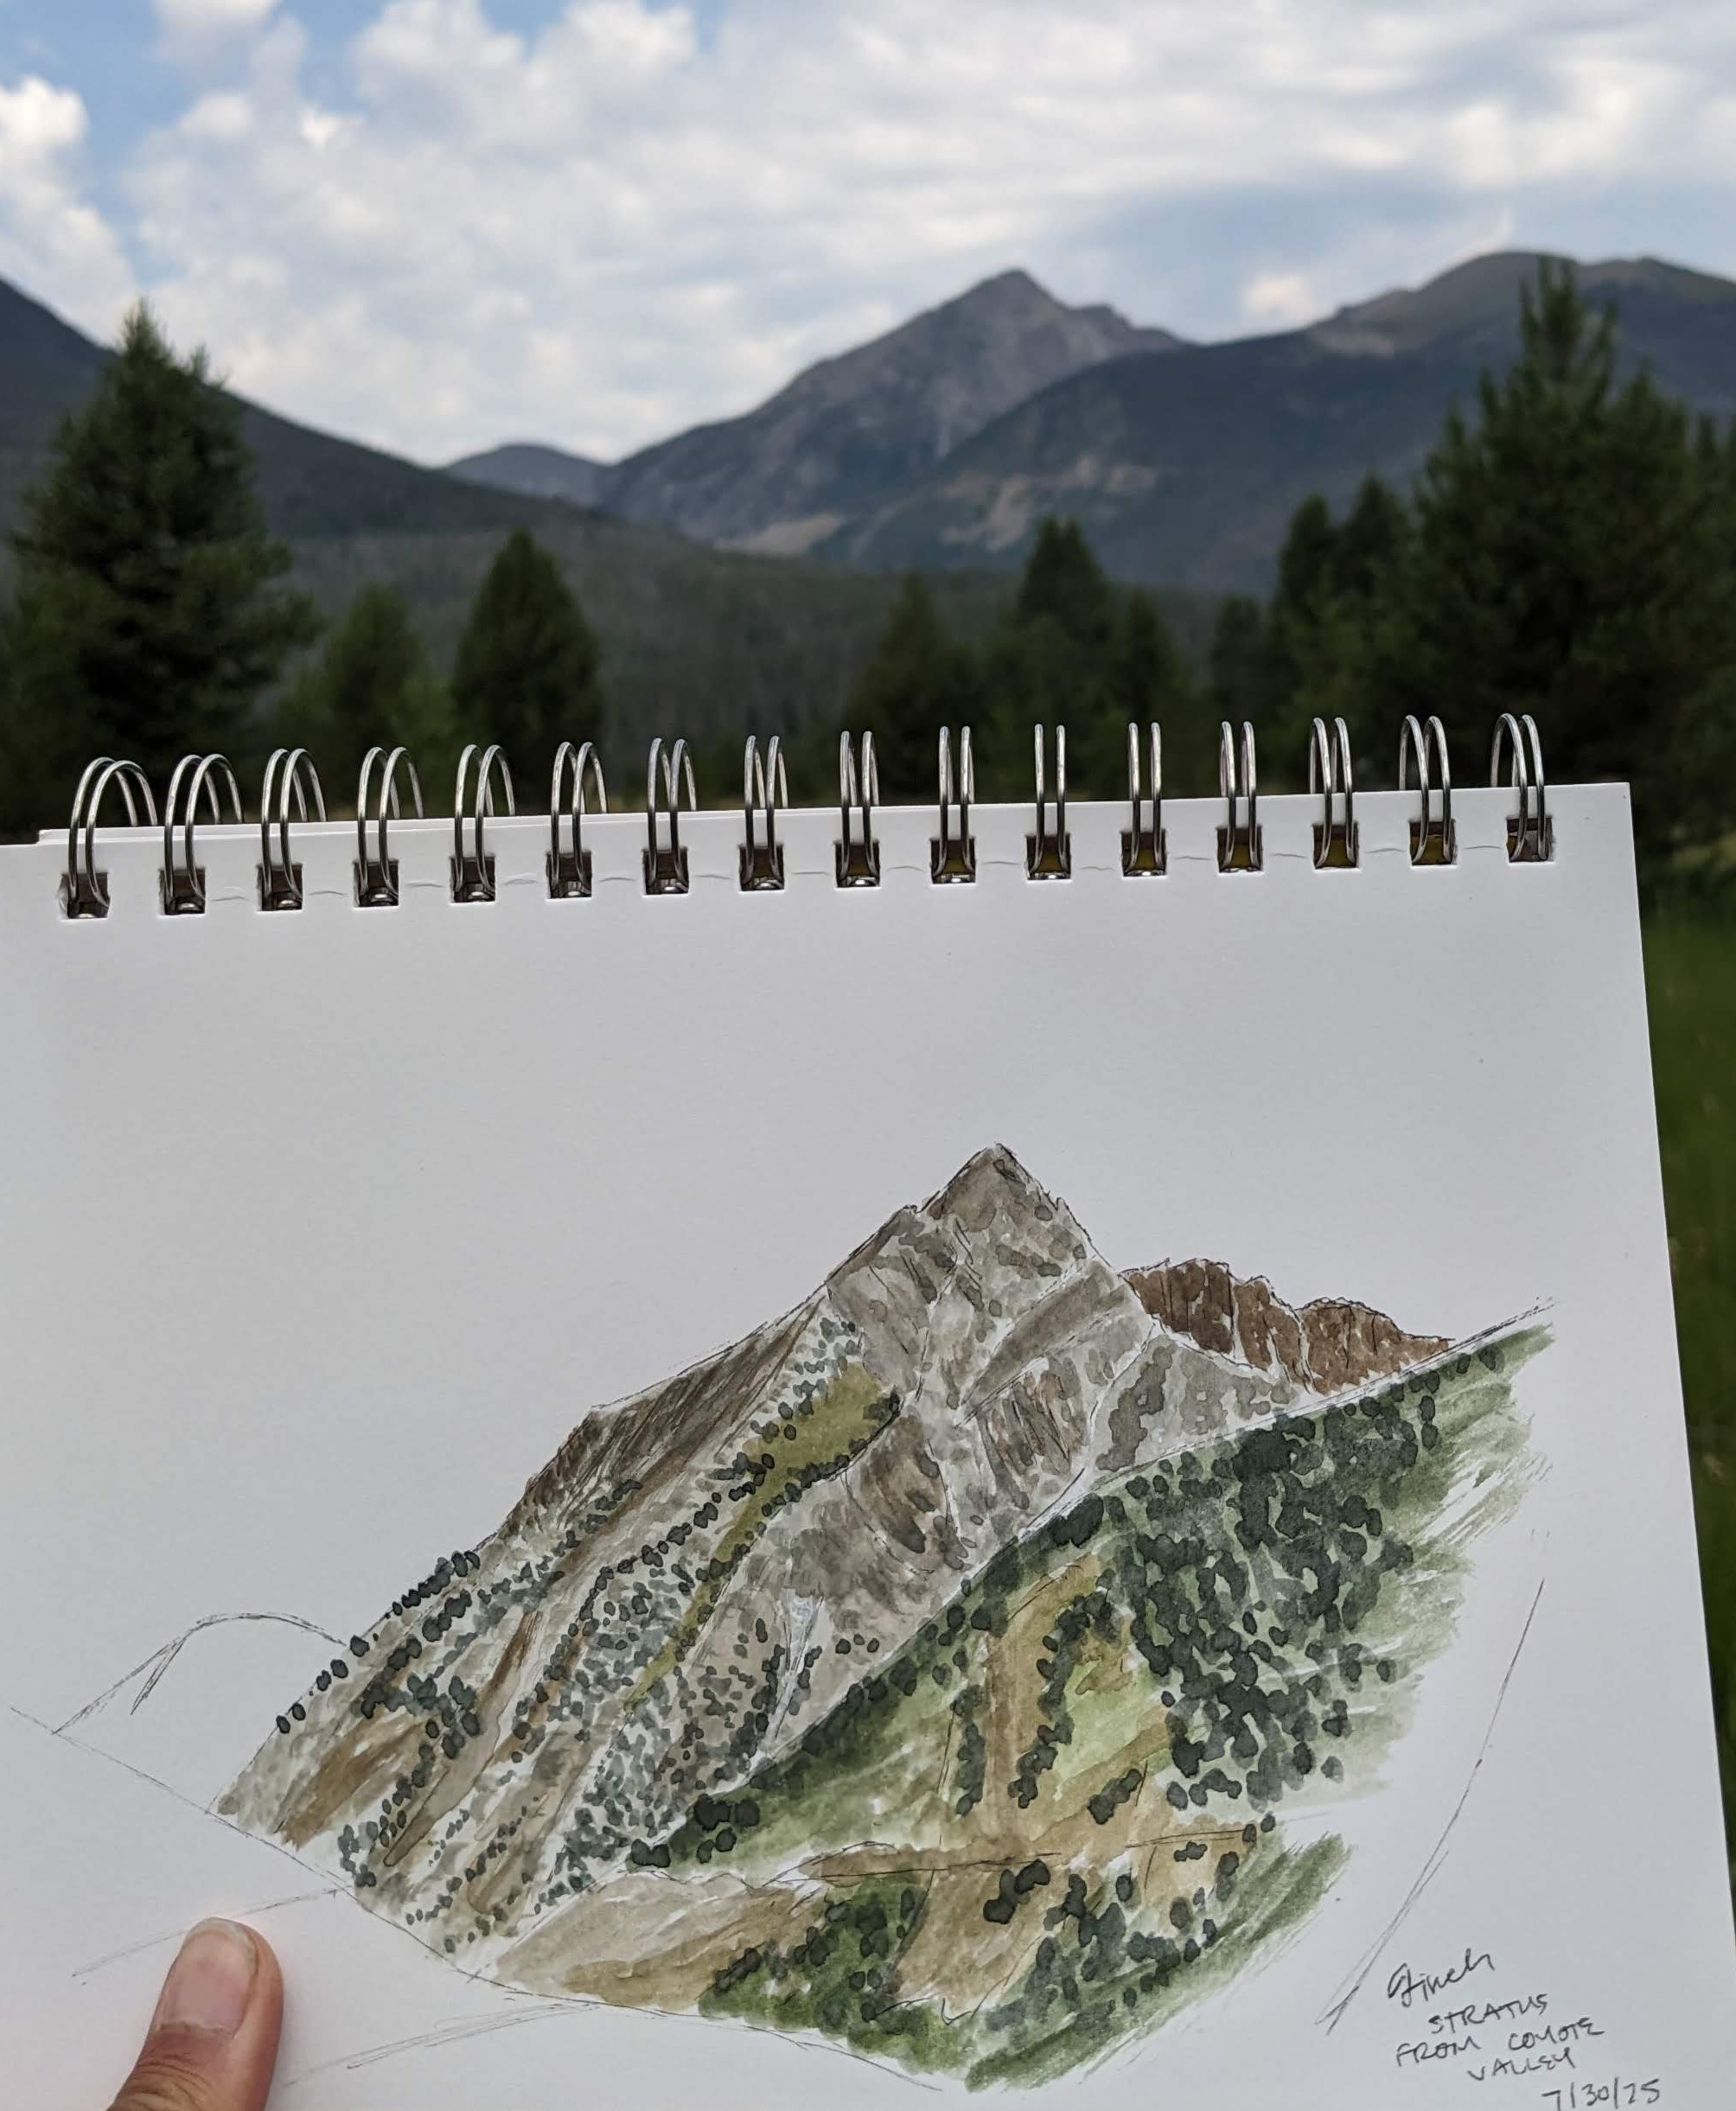
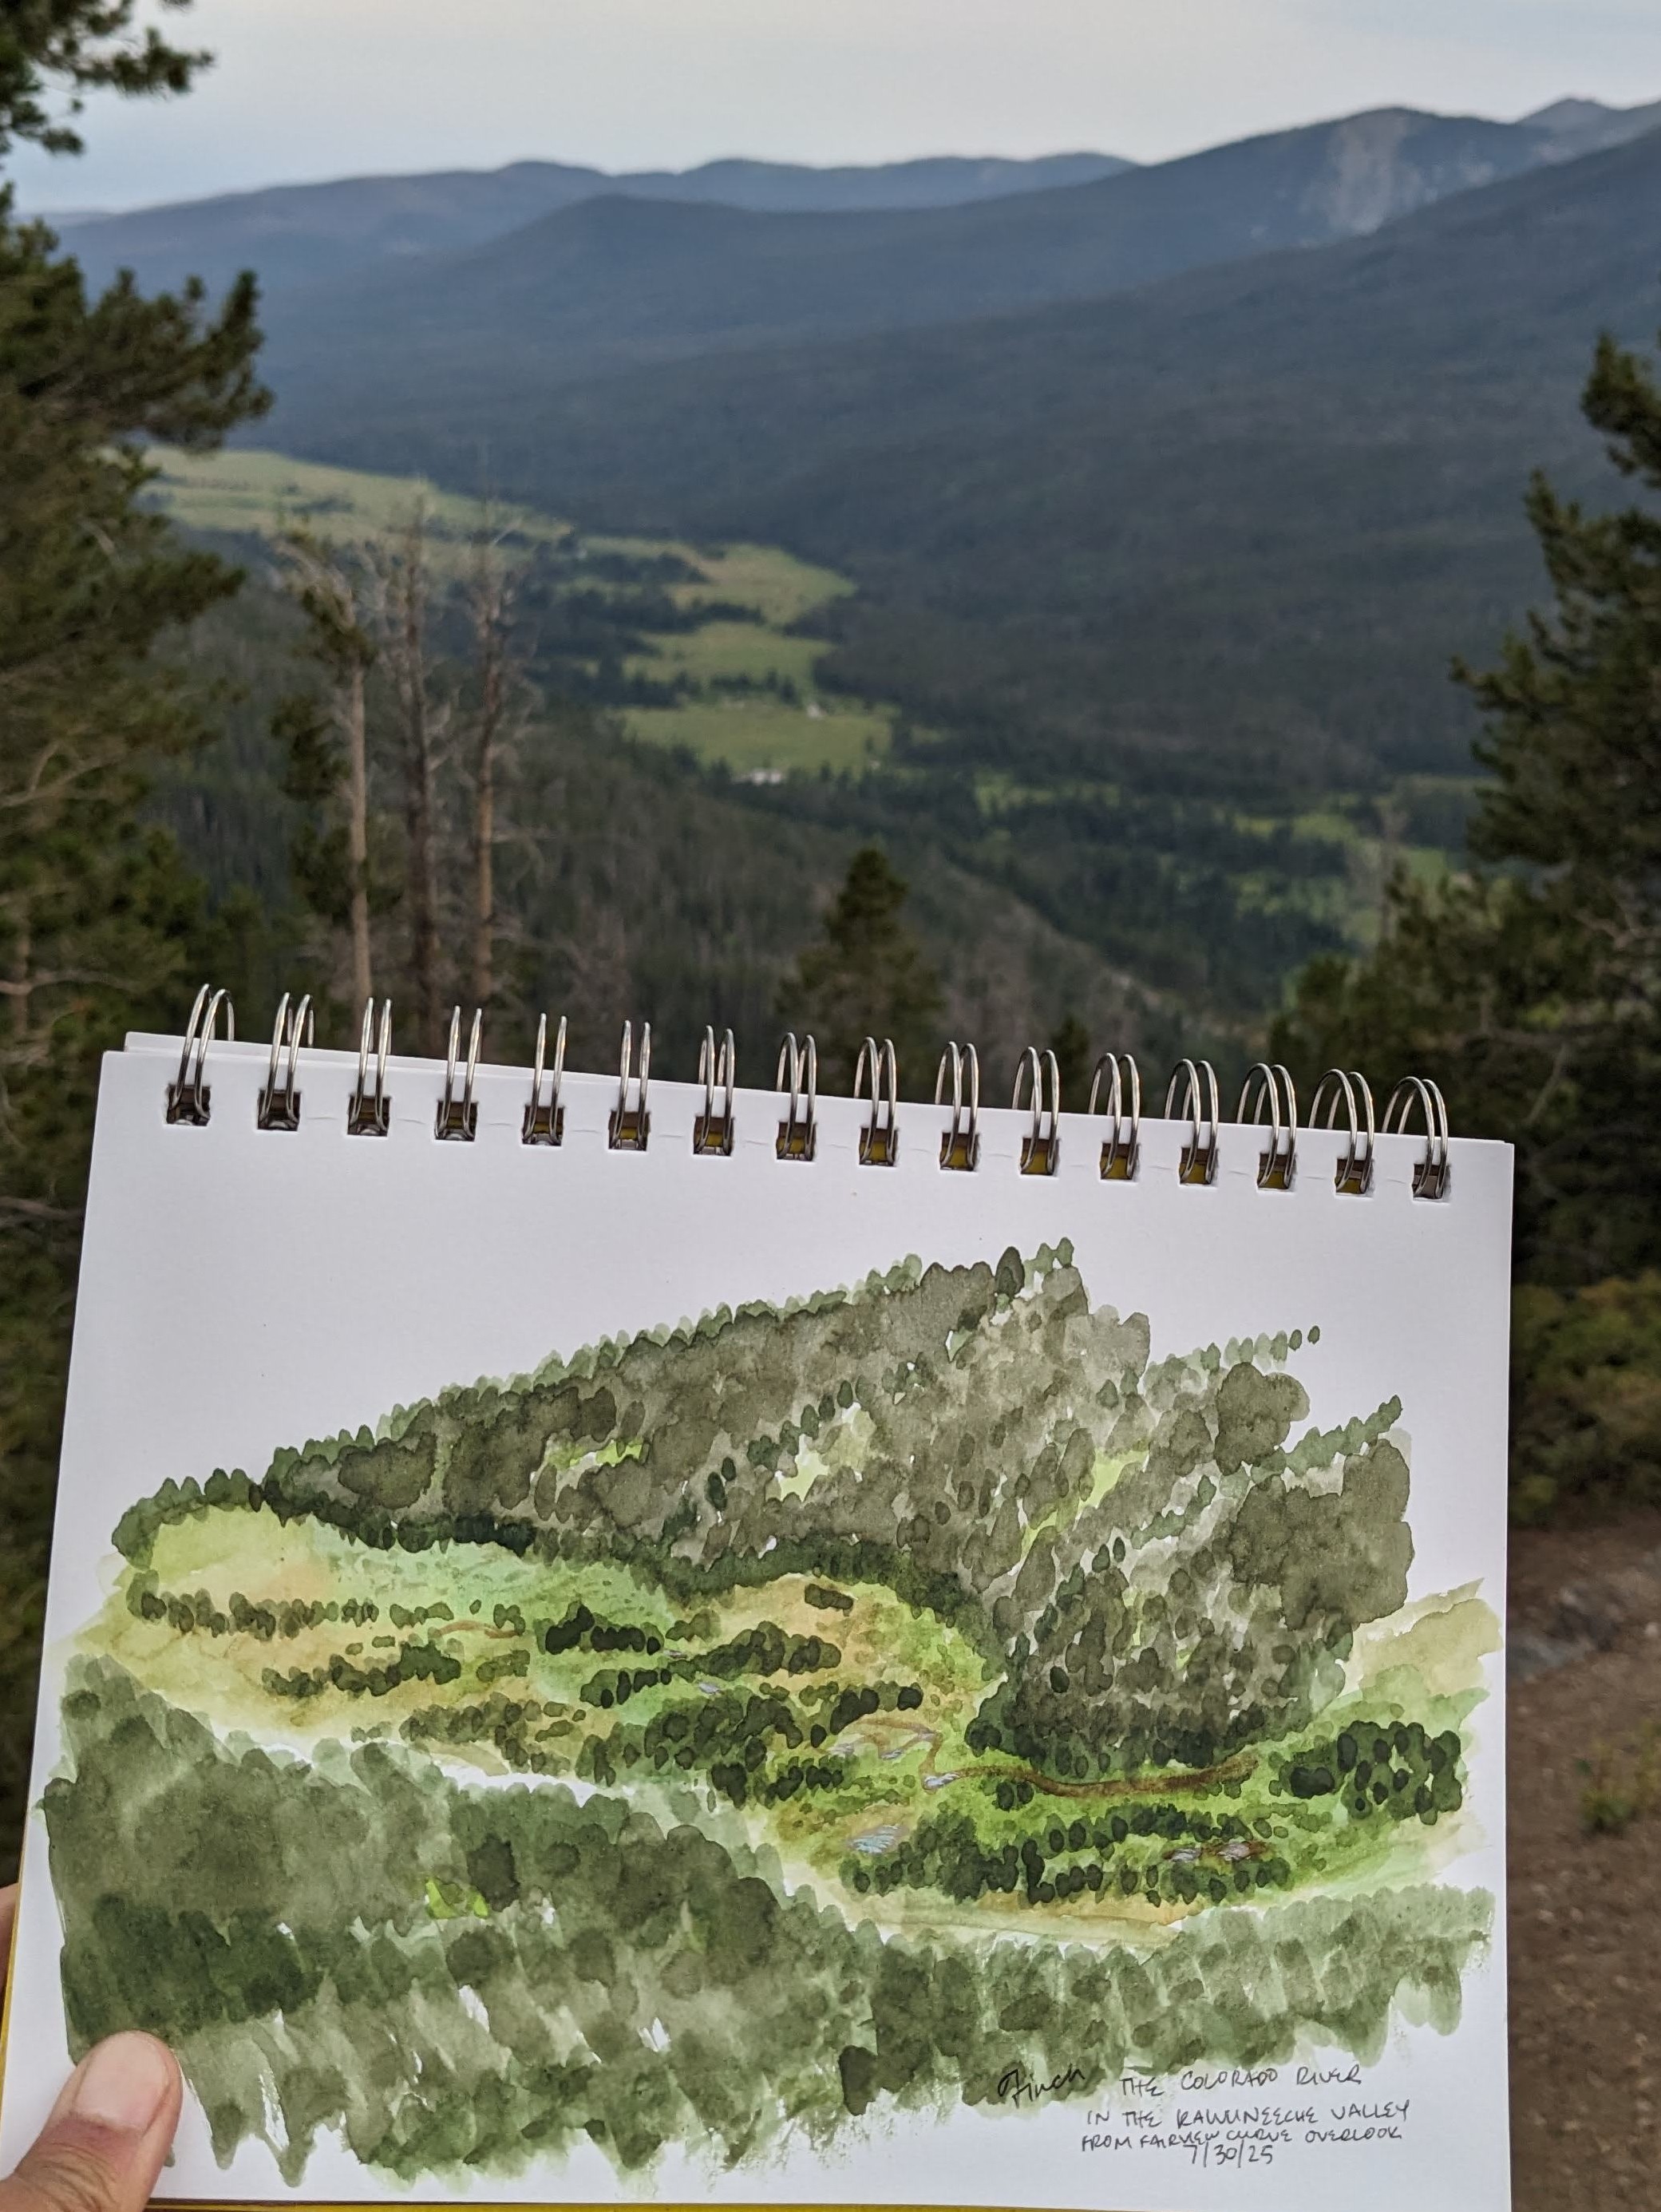
On the left, I did the pen sketch first, and then the watercolor – I kind of like the differences between the paintings I do with pen and without, the pen ones end up more… tiny and detailed? But somehow feel restrained, or constrained? On the right I did a watercolor sketch underneath the color, and it ends up bold, and colorful, and not quite “accurate”, I focus more on color zones instead of lines.


I wanted to do a painting that had less detail and focused on big blocks of color to minimize all the painting of trees (my least favorite and least satisfying step). From the initial marker drawing (top right), it took me 2 minutes to add the pen details, and then 16 minutes to add the watercolor.
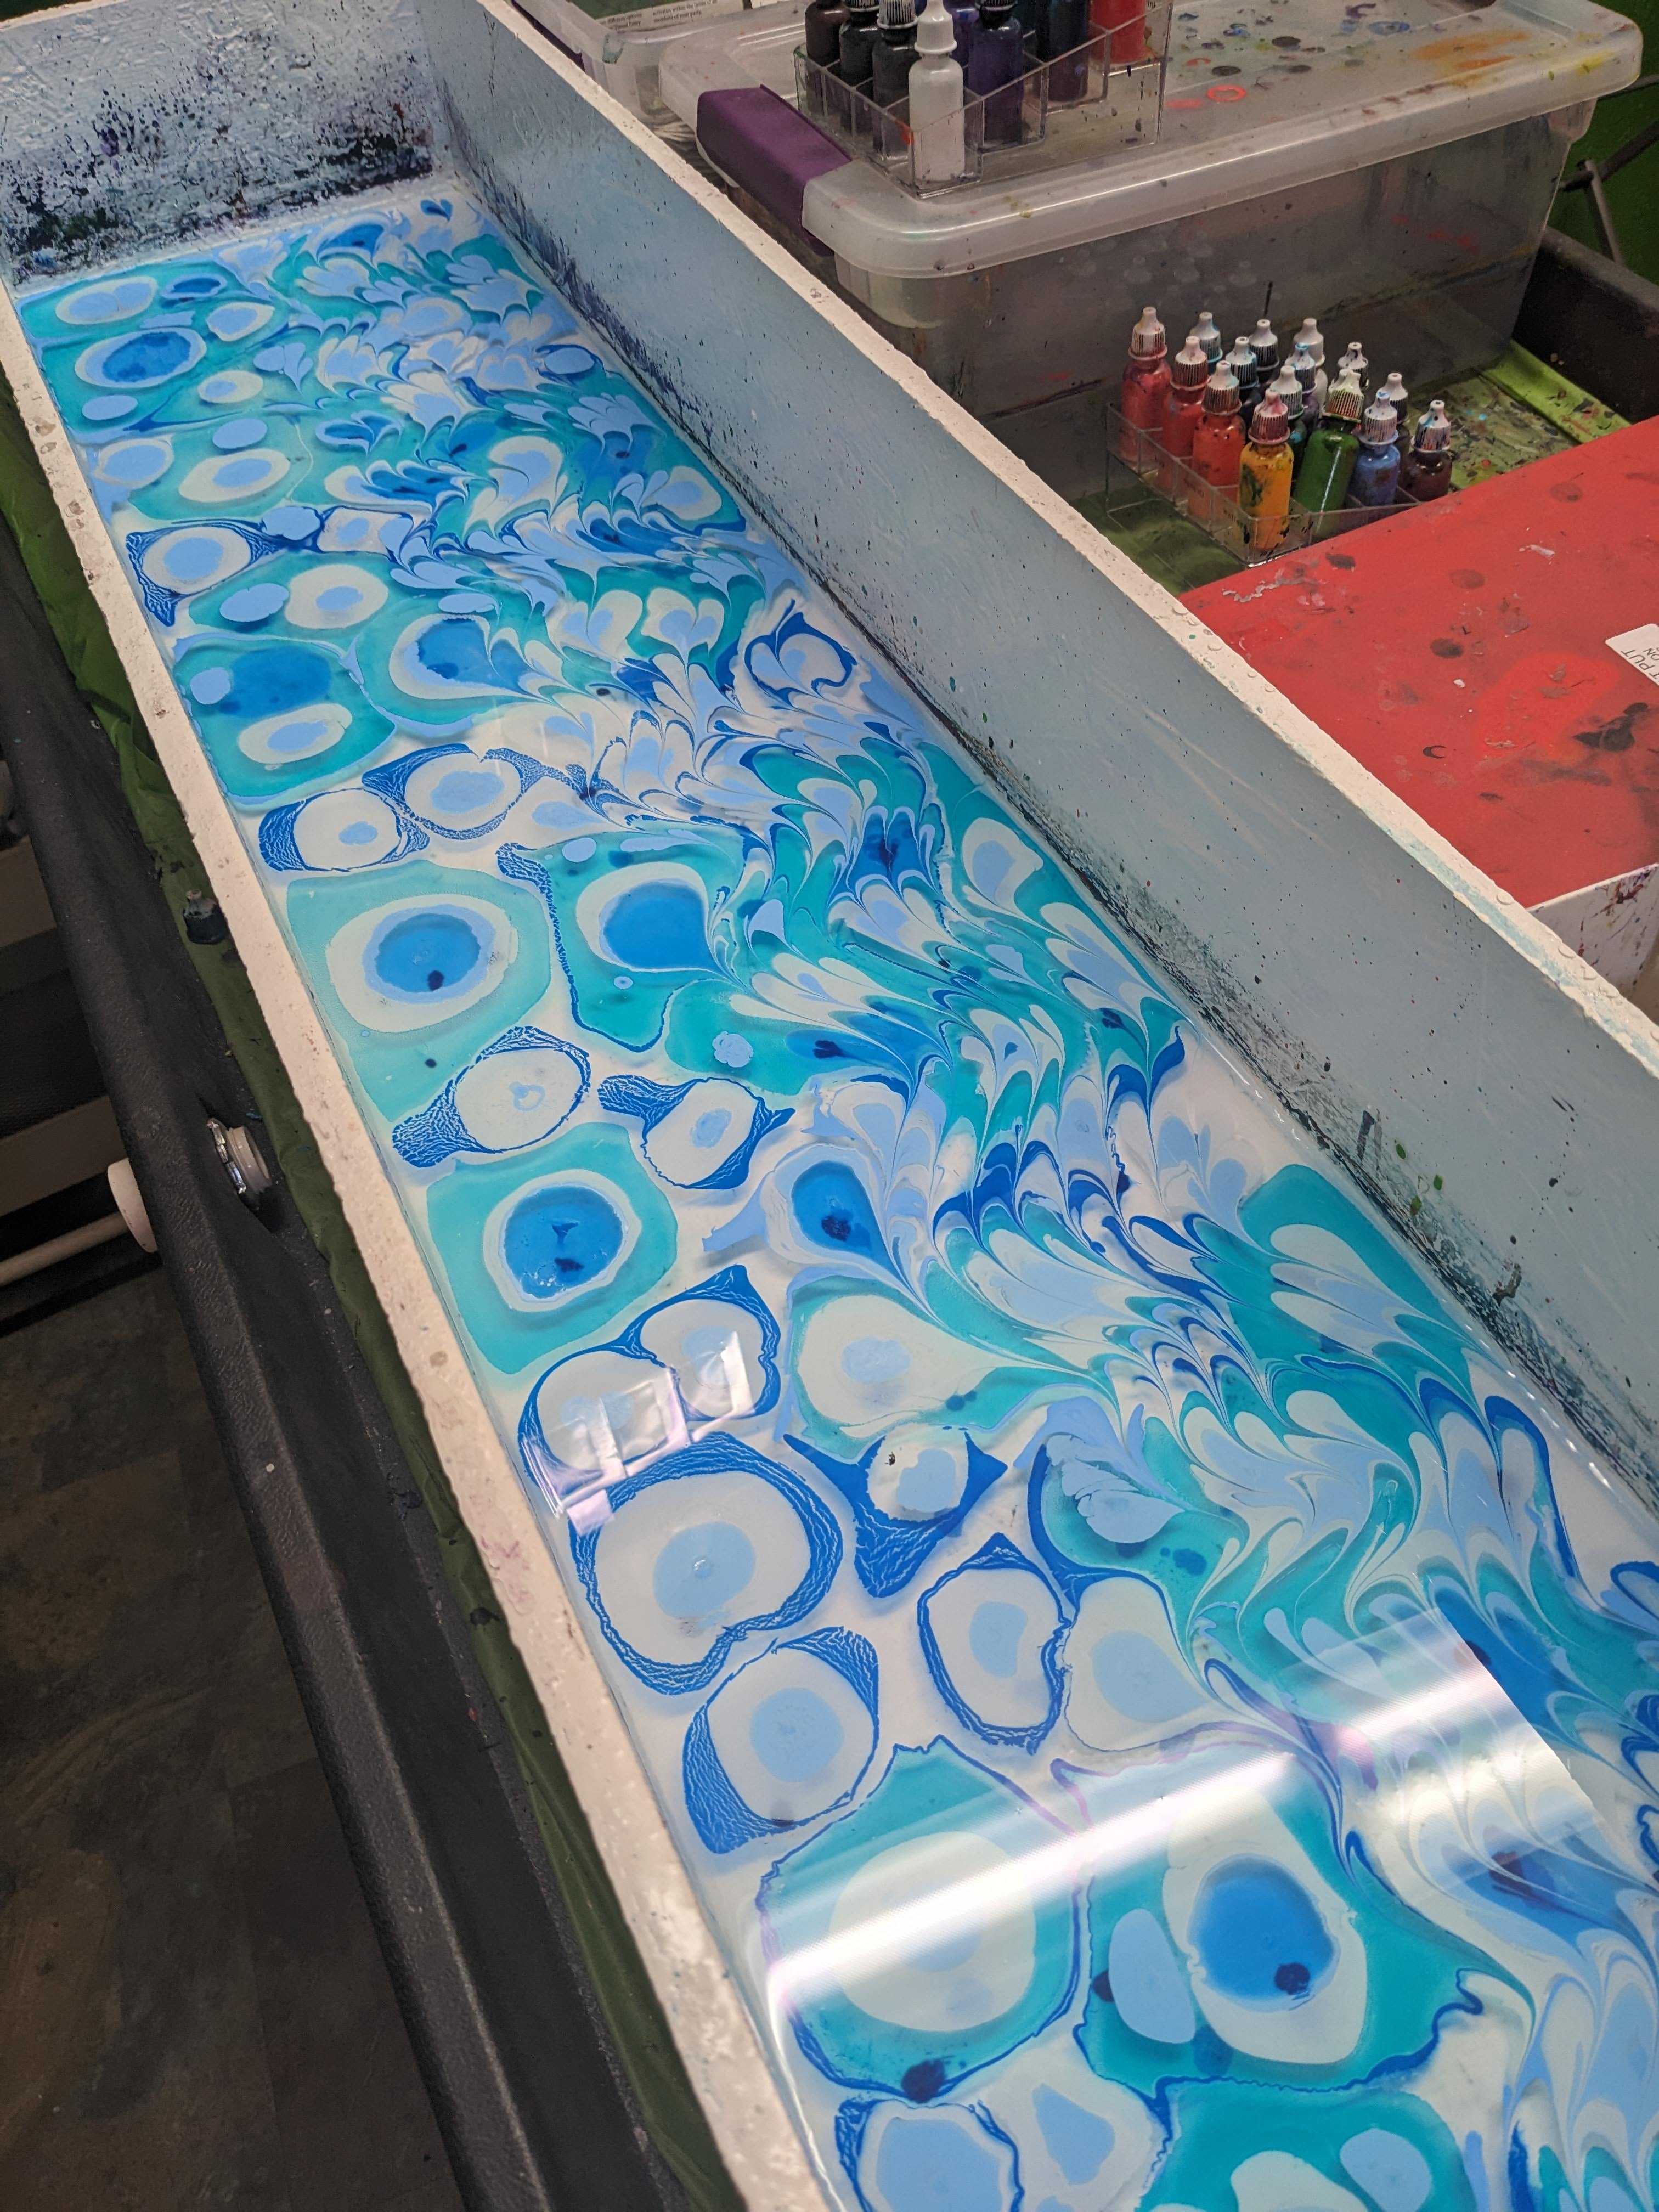
After visiting the quilt store in Grand Lake and picking up some fabric, I decided my trip to Inspired Art Experiences in Estes would be a fabric acquisition trip as well! I chose to do a batik again, silk marbling, and tie dye.
The silk marbling was incredibly meditative and calming, just dropping in the colors and swirling them together. I was going for a “river rocks” type of design and I think I really got it.
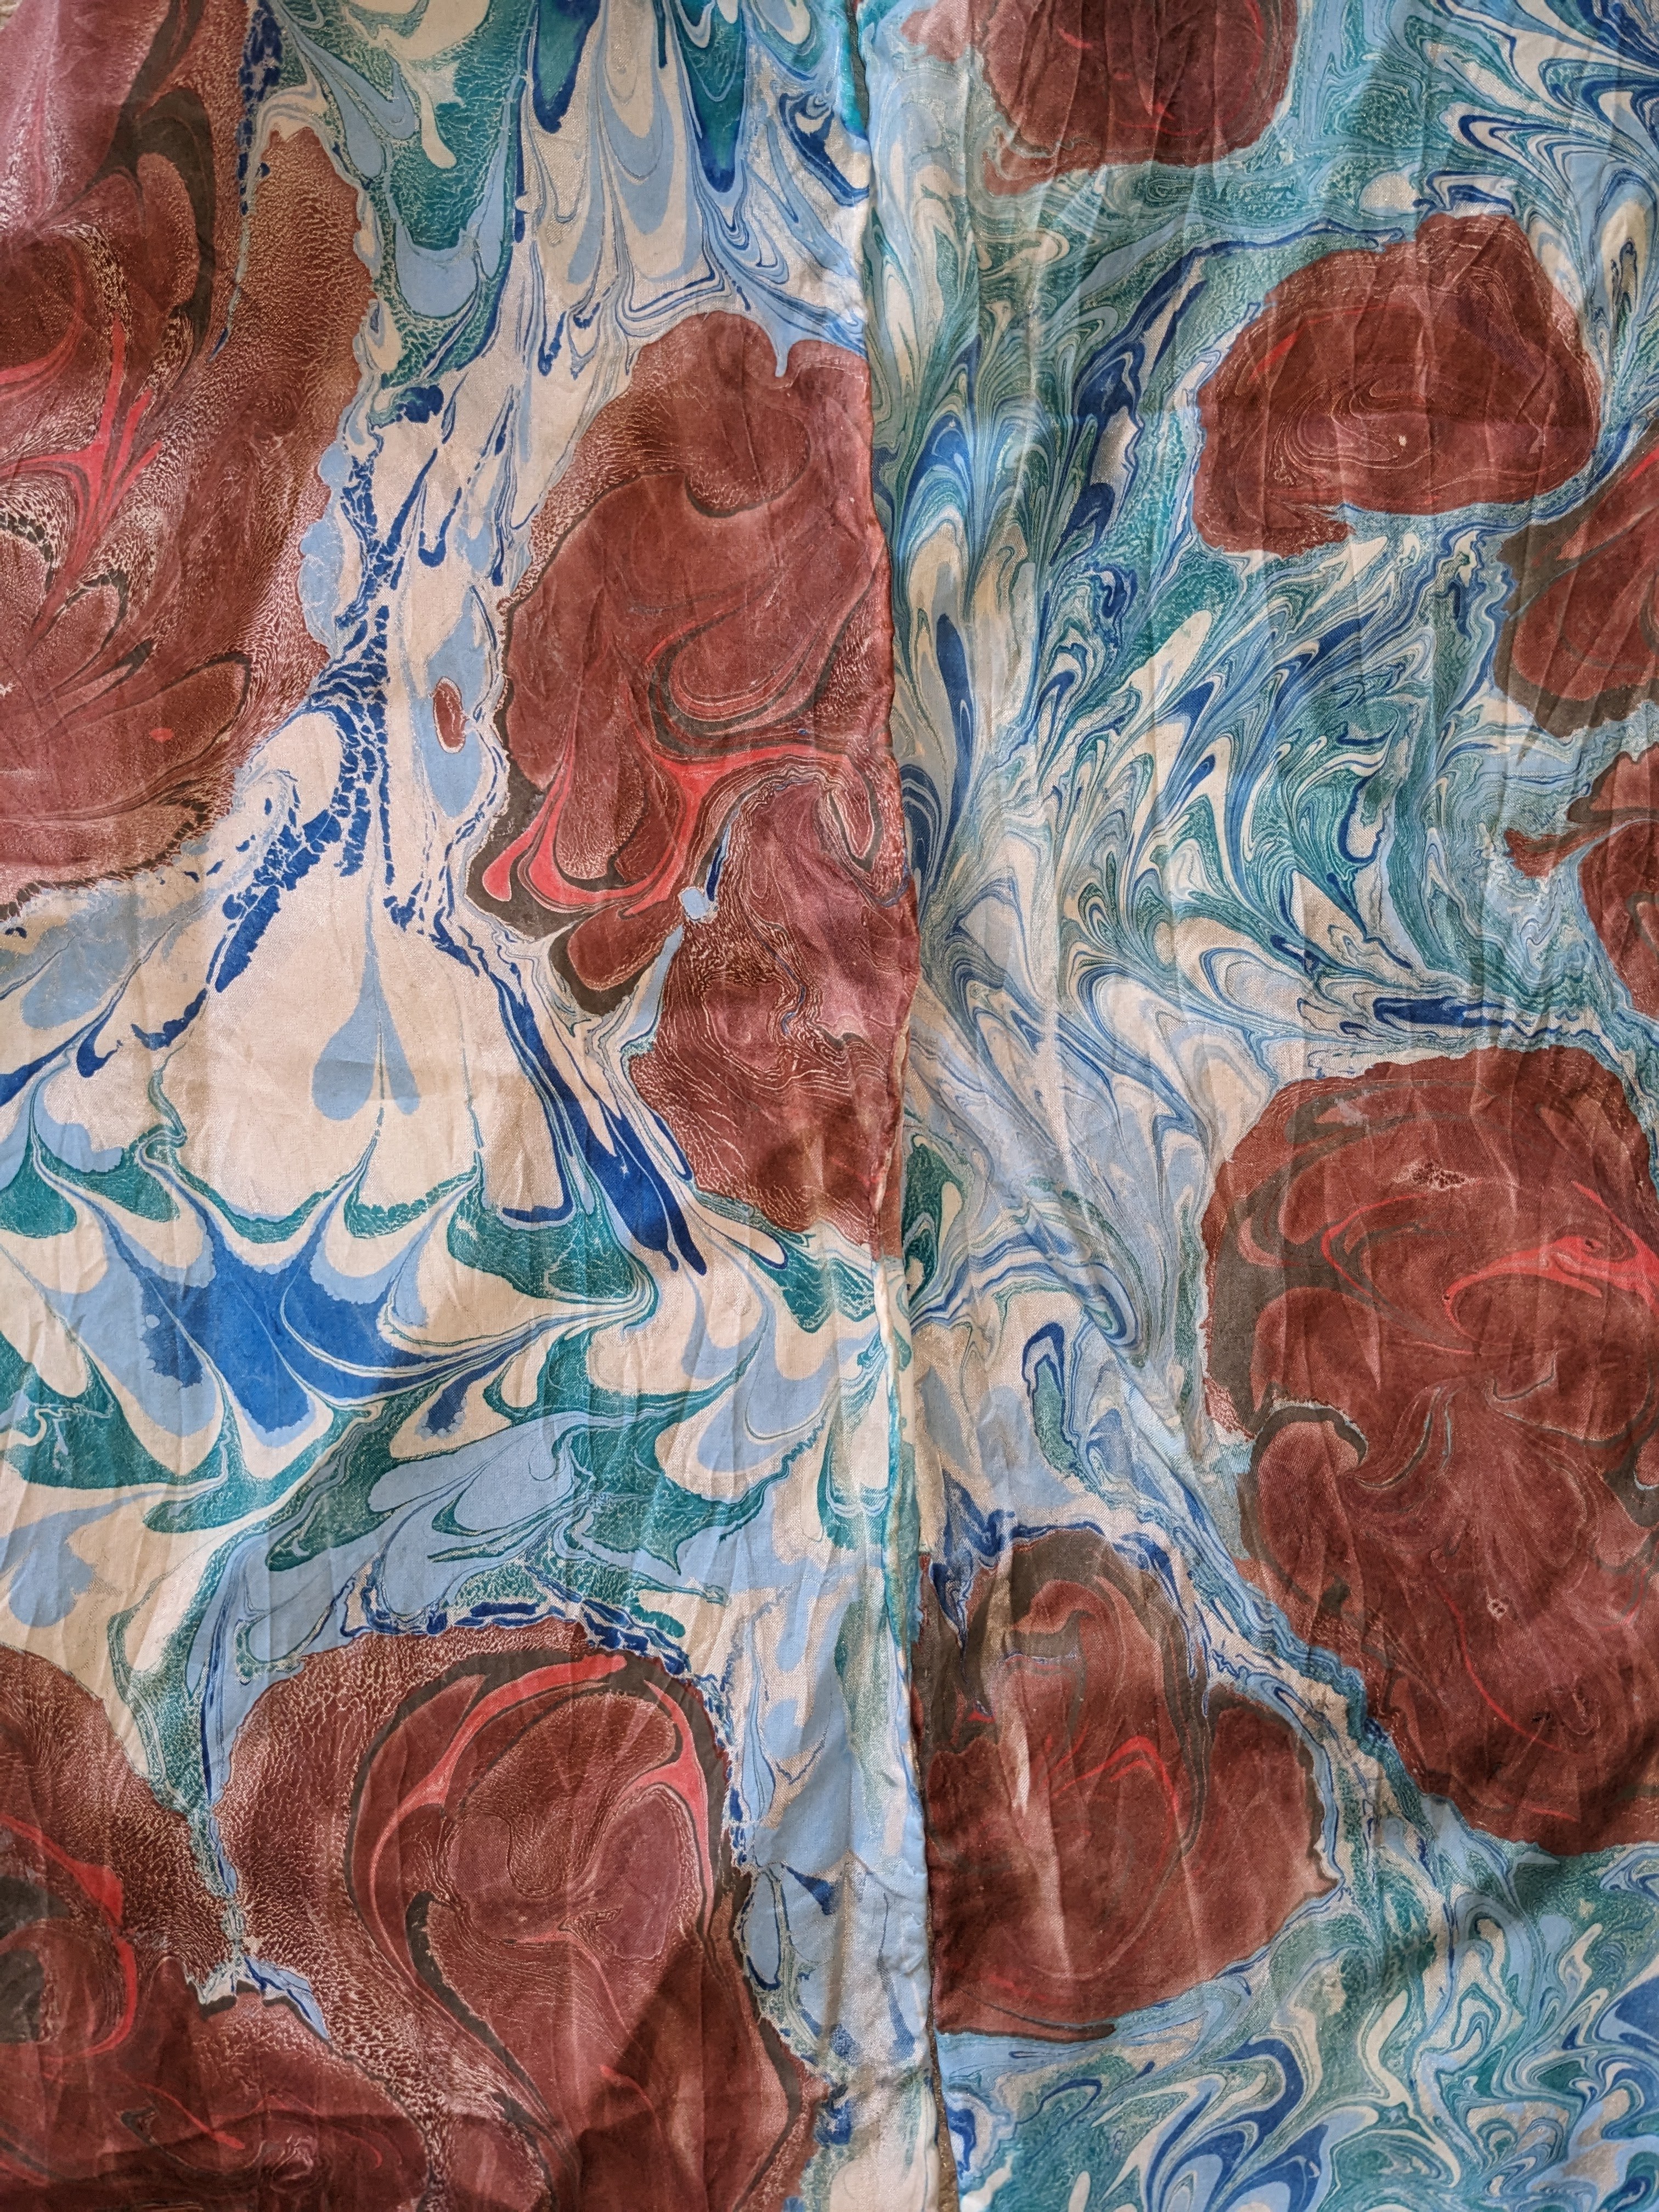
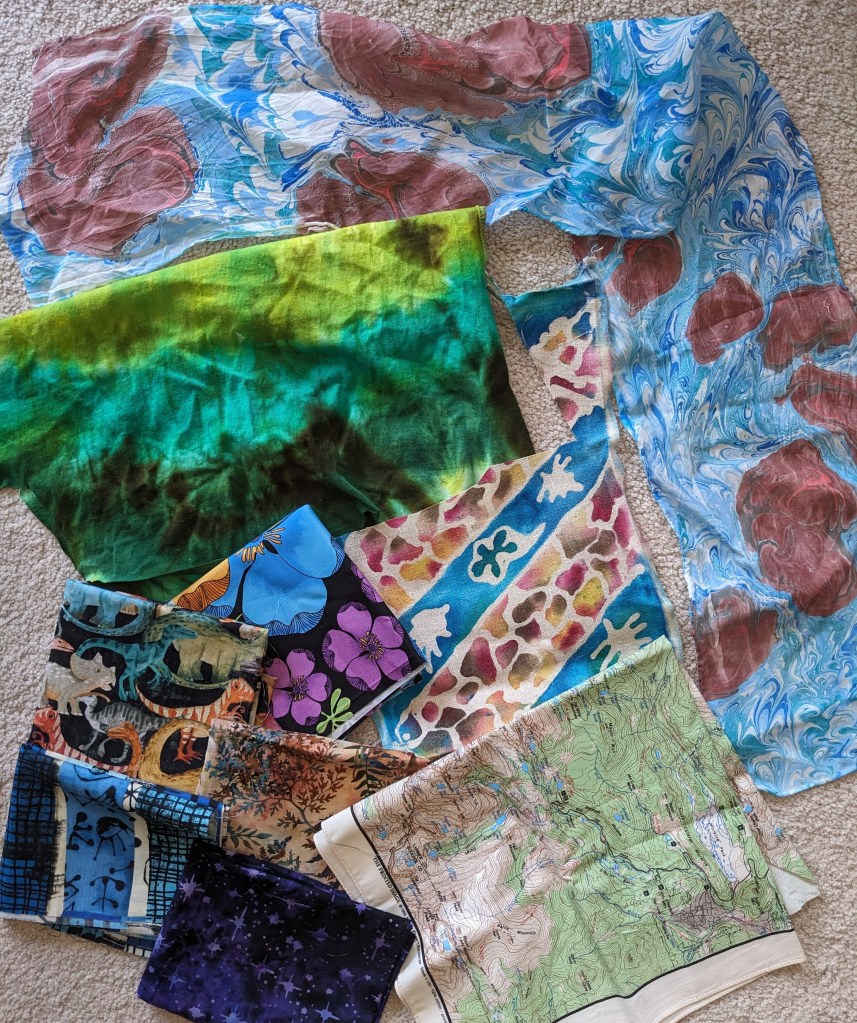
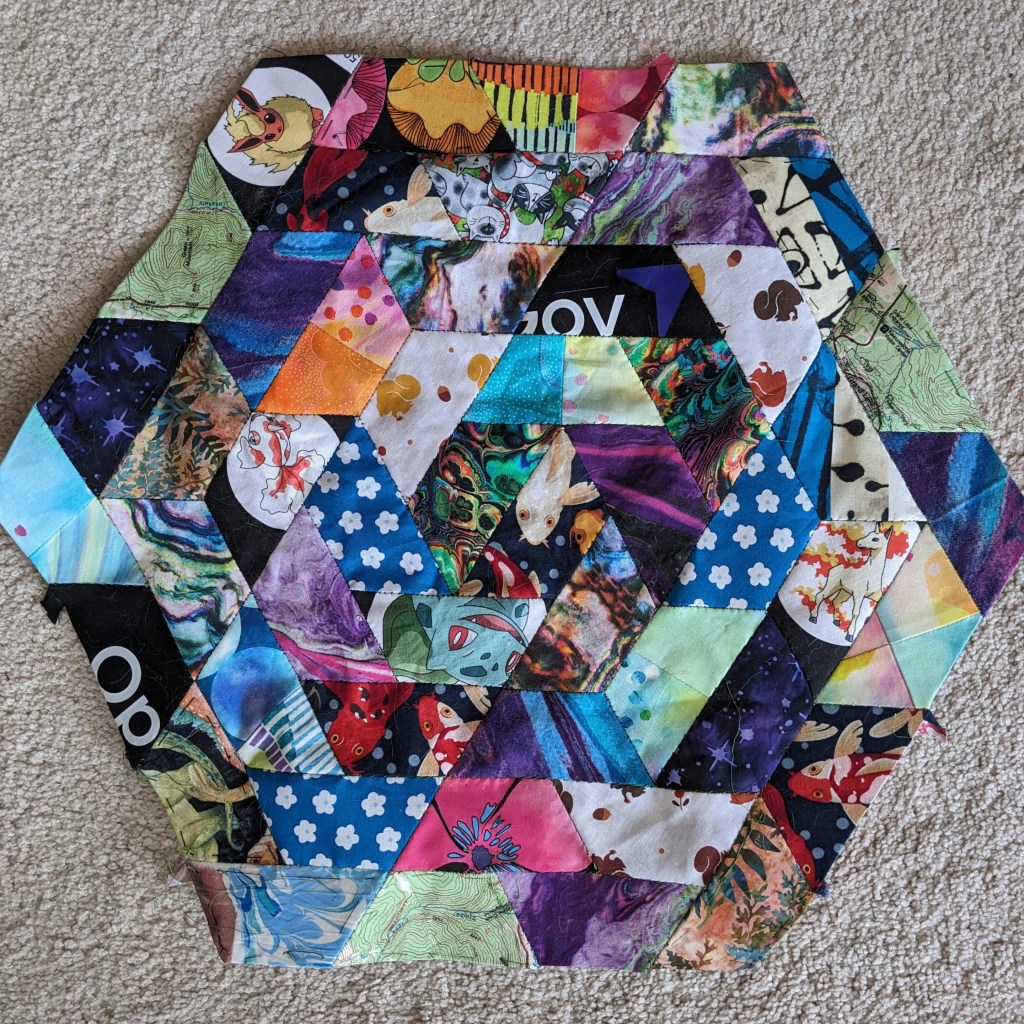
And I added my new fabric into my current project, an English Paper Piecing quilt of trapezoids for my bathroom 🙂 which now, of course, vaguely smells like campfire, but that’ll fade.


This is the painting I went to do, and I hiked a new trail to do it! Adding the color to the sketch from the left took 40 minutes 🙂 And a few people stopped to comment and talk to me, which I usually appreciate as long as they are respectful and treat me like a person instead of content.
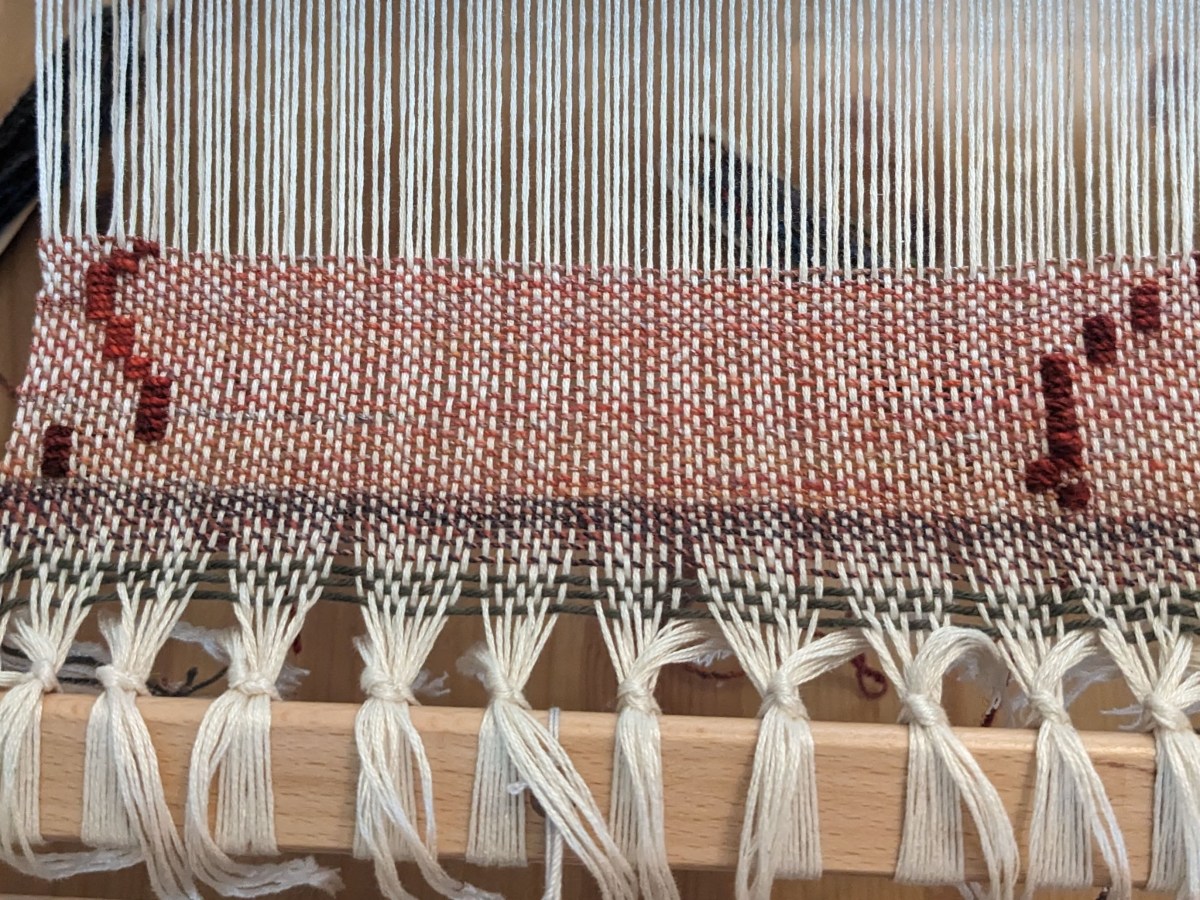
Musical Table Runner
The yarns for this project were inspired by Sky Loom, a Native North American poem set to music by Jean Ford Belmont.
Oh our Mother the Earth, weave for us.
Oh our Father the Sky,
Weave for us a garment of brightness;
May the warp be the white light of morning,
May the weft be the red light of evening,
May the fringes be the falling rain,
May the border be the standing rainbow.
Weave for us, our Mother the Earth,
That we may walk fittingly where birds sing.
Weave, oh our Father the Sky,
That we may walk fittingly where grass is green.
Oh our Mother the Earth, Oh our Father the Sky,
Your children are we, and with tired backs
We bring you gifts,
We bring you the gifts that you love.
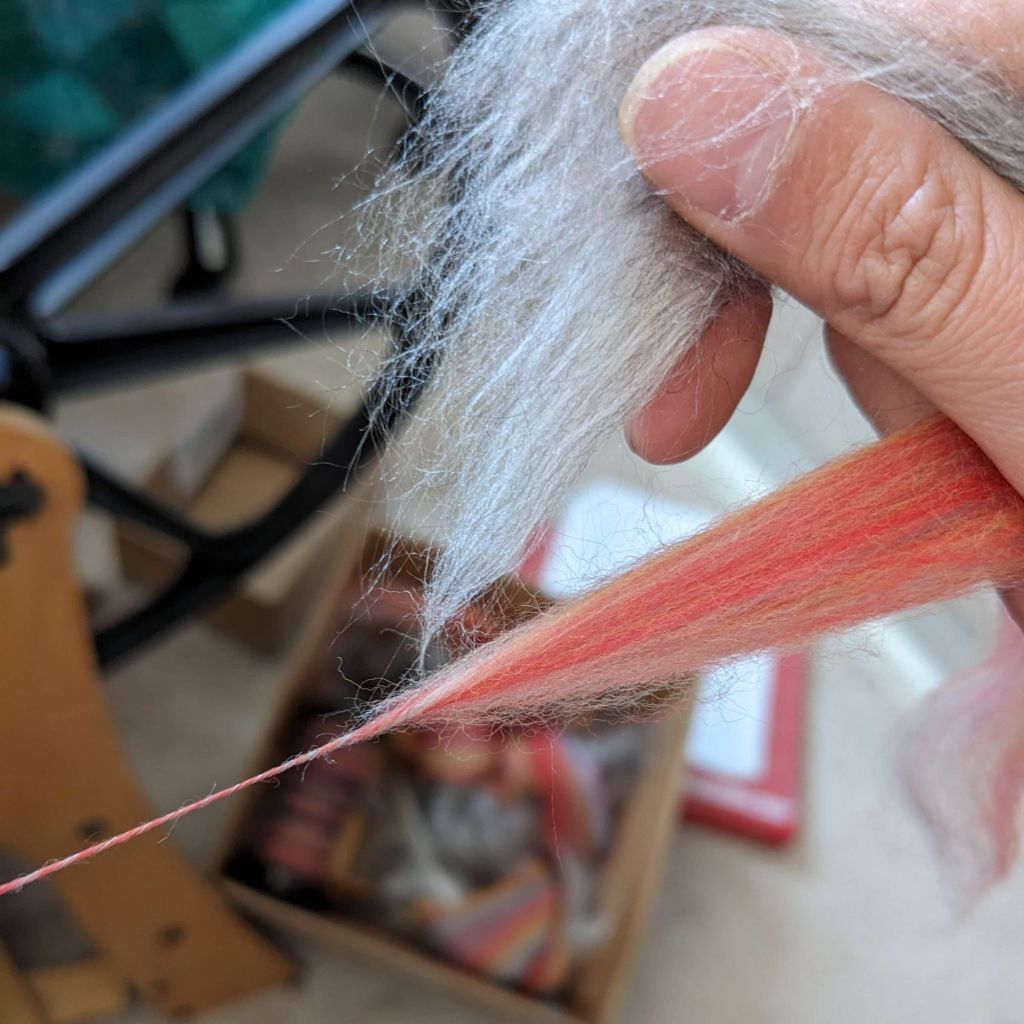
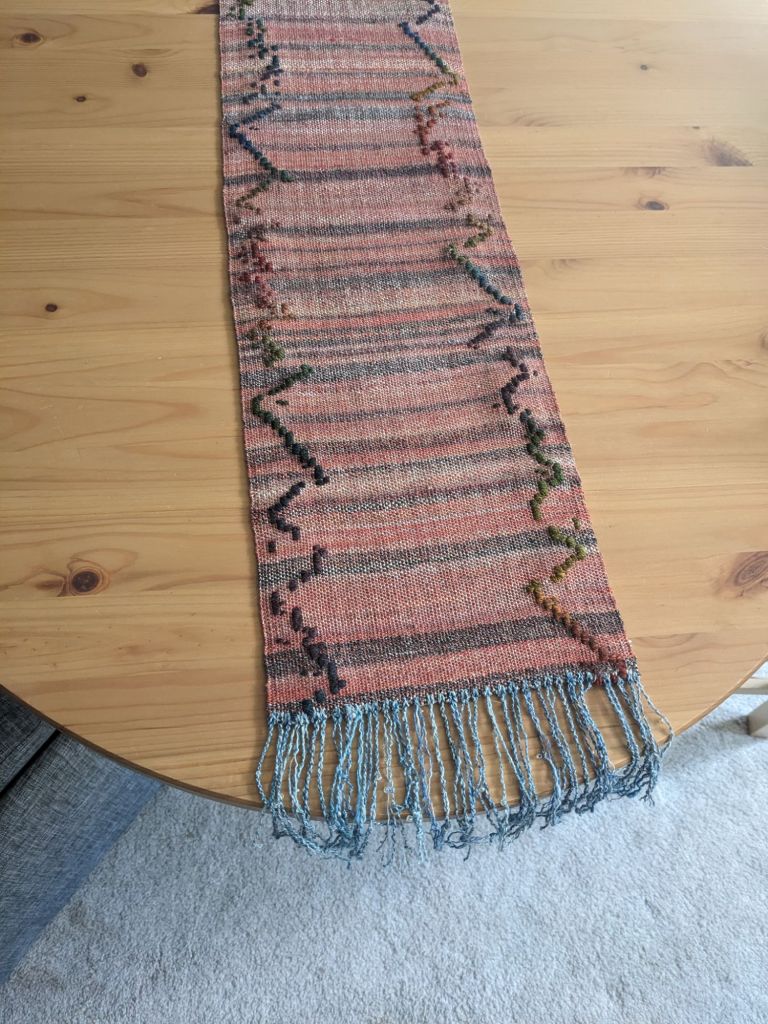
As a new weaver and less-than-fully-confident spinner, I bought commercial mercerized cotton warp for the white light of morning; it is strong and beautifully shiny. All the other yarns in this piece are handspun. 🙂 I used pre-blended and dyed wool and silk for the red light of evening, mixing light and dark gray with the dyed wool to introduce clouds and variation.
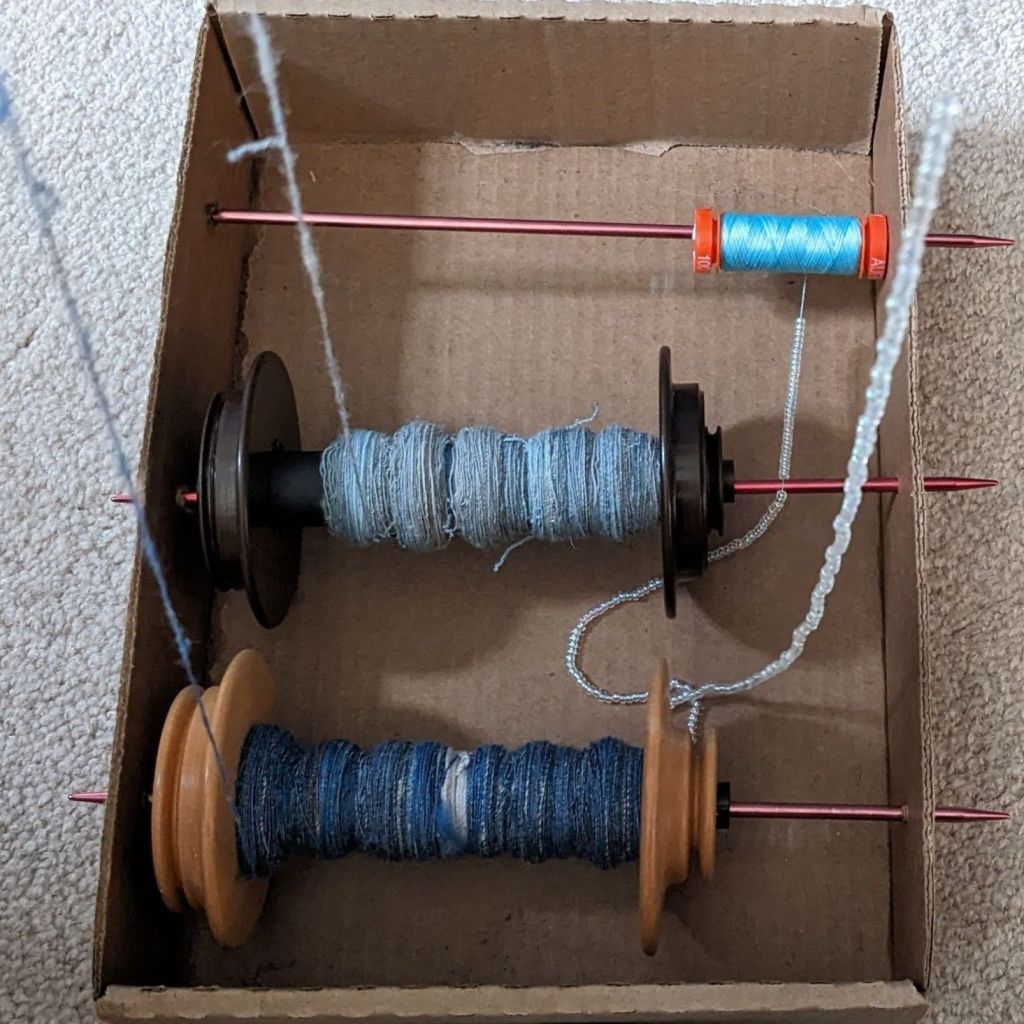
I had some extra gray silk and some random scraps of blue fiber, so I blended those together and spun a light blue and a dark blue ply on my drop spindle. I added a blue thread with shiny clear beads, and plied all three together for the falling rain.
I usually buy fiber online, but I really needed to match the standing rainbow to these other color blends, and I knew that had to happen in person. I went to a local fiber fair and found what I needed at the first booth I went to. 🙂 dark enough to stand out against the red light of evening, bright enough to really be a rainbow. I specifically spun the standing rainbow to be thicker than the red light of evening, so that it would be puffier and stand out as a pattern yarn. I also chatted with some other spinners, who helped me figure out a more ergonomic way to spin at my wheel, which has really improved my experience.
I wanted the pattern border of the standing rainbow to somehow depict the notes in The Road Home. I’ve performed this song multiple times now, and each time it’s a bit different, I have a different conception of home and what it means to me. I know more and more the “beauty of where you belong” and where I find it. I went back and forth a lot about *how* to execute the pattern. I thought about using my 8 shaft loom as a way of depicting the 8 note scale, a 24 to 30 pattern thread section like a patterned band, something with chord progressions… I wanted to have an item that could function like a piece of sheet music, that depicted the way the notes are arrayed on the page, and then in the voice, in pitch and time. Since the border was going to be a fun pattern, I decided on plain weave (over under, under over) for the red light of evening weft to make it easier to weave, visually consistent, and structurally sound.
I struggled with the format for this project for a while, debating what I wanted and how it would need to be executed while I spun all my yarn. Sky Loom is about a garment, but I didn’t want to make a garment in these colors, and I knew it would end up being delicate and/or non-machine washable due to the uneven fiber shrinkage (wool vs cotton) and possible pattern floats (where yarn is free and not woven in). I talked it over with a friend and they suggested a table runner! This was the perfect solution and I was immediately invigorated.
By choosing a table runner, I could have long floats if necessary, since the piece wouldn’t be undergoing much wear and tear. It also defined the dimensions and proportional border width. I decided to be responsible and weave a sample to test out some different techniques and arrangements for the pattern. I quickly realized that weaving a pattern with all the voice parts on the same row was visually overwhelming. I think it might have been easier on the eyes if I had kept going and the ratio of the width to length was different… But I switched to doing one part at a time. Also, most of the parts have at least some undulation up and down their range, so it actually looks more like a standing rainbow, or wiggling rainbow, as it were. The bass part, the lowest voice part in the choir, has the most clear up/down pattern, so I alternated it with the other voice parts that are less visually clear to have more continuity. I used a weft inlay that wraps around two warp threads; the position of the inlay represents the pitch, and each row is an eighth note in the piece. So, looking from the side of the table runner, with a starting pitch, one could use the border as a depiction of what to sing.
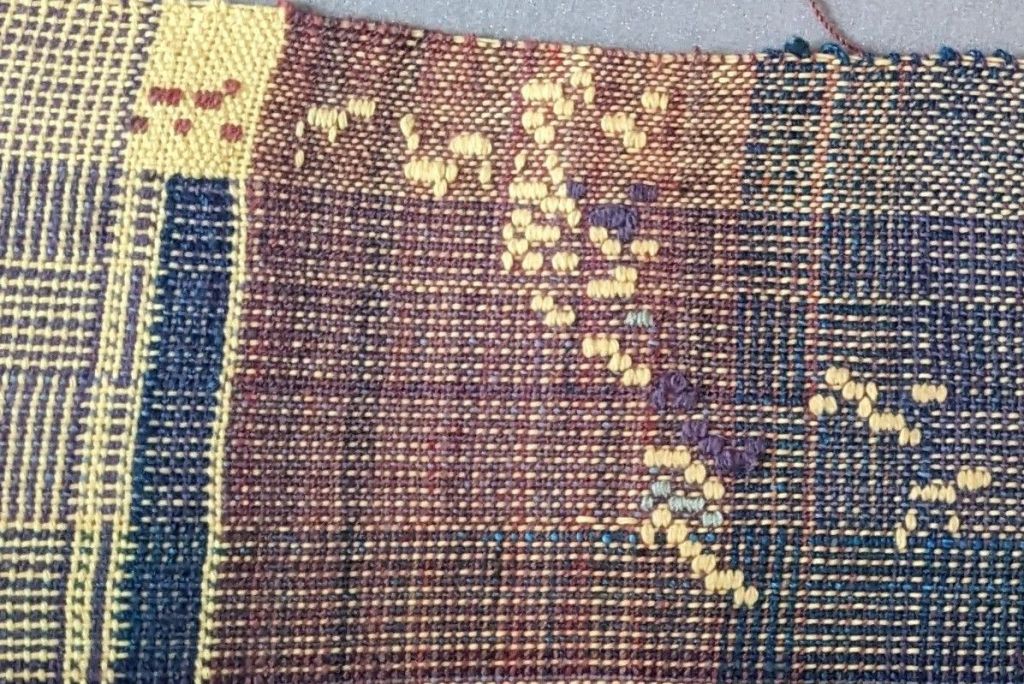
From weaving the sample, I knew I needed a special “paper pattern holder” to help me keep track of what line I was weaving – the third verse was 122 rows of non-repeating pattern. I used some scrap binder dividers that were translucent and cut and folded them so that I could see 2 rows at a time through a little window. The translucent quality let me verify what I’d just woven if I needed.

I was able to weave it much faster than I thought! Each verse, the 122 rows, took a little less than an hour – here’s a 1.5 minute video weaving a few rows. I used up all the weft I spun, though I did have to cut the finished piece down to size so I suppose I had extra weft. As always, weaving in all the ends from the rainbow and the cut ends of the warp was super annoying, but necessary. The finishing touch was the falling rain fringe, which I attached using cow hitch knots. I twisted some of them into tassels, left some loose as individual strands, and un-plied some so the fiber would expand and fluff out 🙂
Project completed June 2025.
Crochet Bog Sweater
I started this project in the spring of 2023 as a way of using up scrap yarn and having a simple, easy hand-project for nights on the couch and zoom calls. I wanted to play with changing colors and having interesting color work while keeping the texture (crochet stitches) constant throughout. I did a simple (half double crochet, slip stitch) pattern and crocheted four panels of approximately the same size.
I think I miscounted the number of stitches when I started the second panel because one panel is ~50 stitches, one is ~42, and I had to make the other two match.
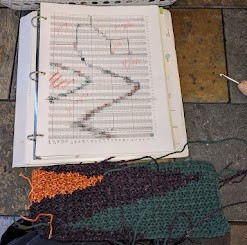
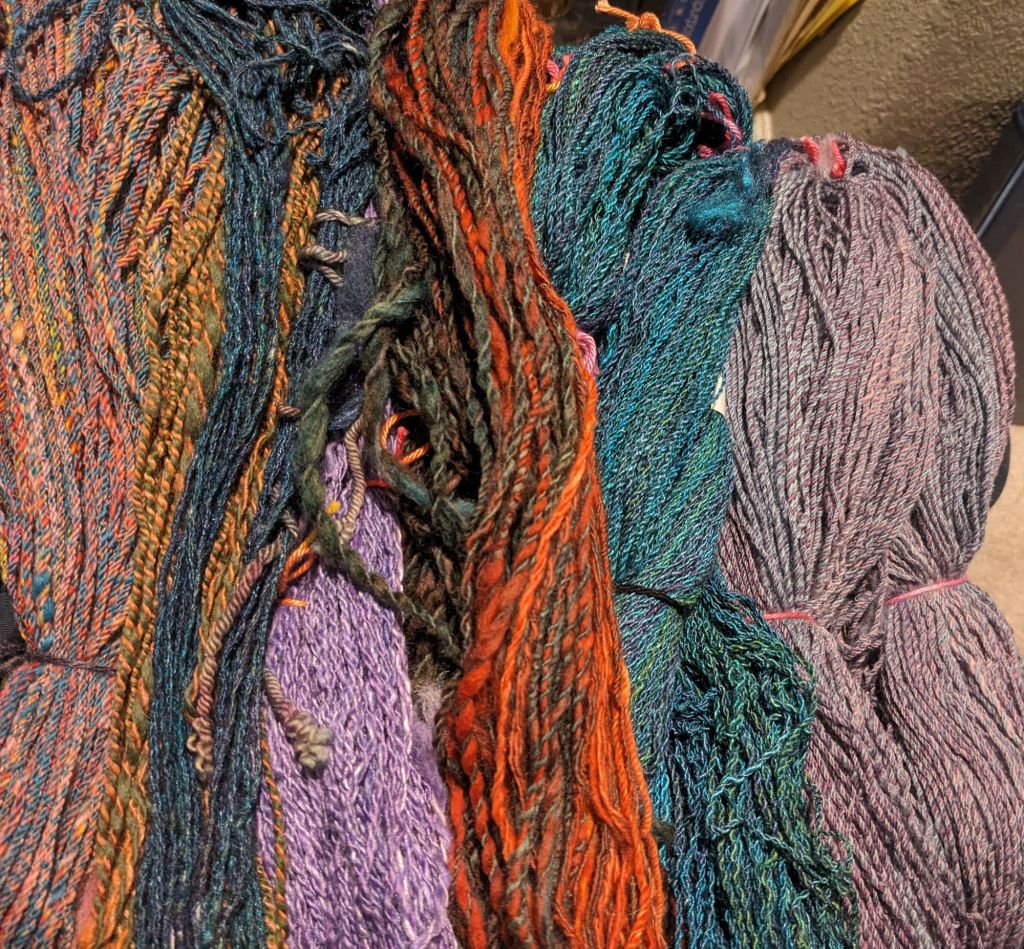
It also served as a great place to put some of my first experiments in hand spinning, and transition into spinning yarn specifically to match the diameter of the commercial yarn so it would fit together well. I like how the final product showcases my first ever handspun (lumpy, bumpy, plied the wrong way) with my most recent handspun (consistent, soft, and so thin I had to double it to match the diameter of the rest of the yarn). I suppose it is a display of my crochet skill over two years and my handspinning skill over one and a half. 🙂
I planned on using these panels in a vertical layout as a long vest, but once I half-assembled it, I realized it was somehow simultaneously too long and too short for what I wanted. So I pivoted to making a bog sweater (see below). I love how big the sleeves are, and they’re kind of a perfect length, somewhere between short and long sleeves. I did have to cut apart one panel to make the opening, which was stressful, but I just went slow and hurriedly crocheted a border around it.
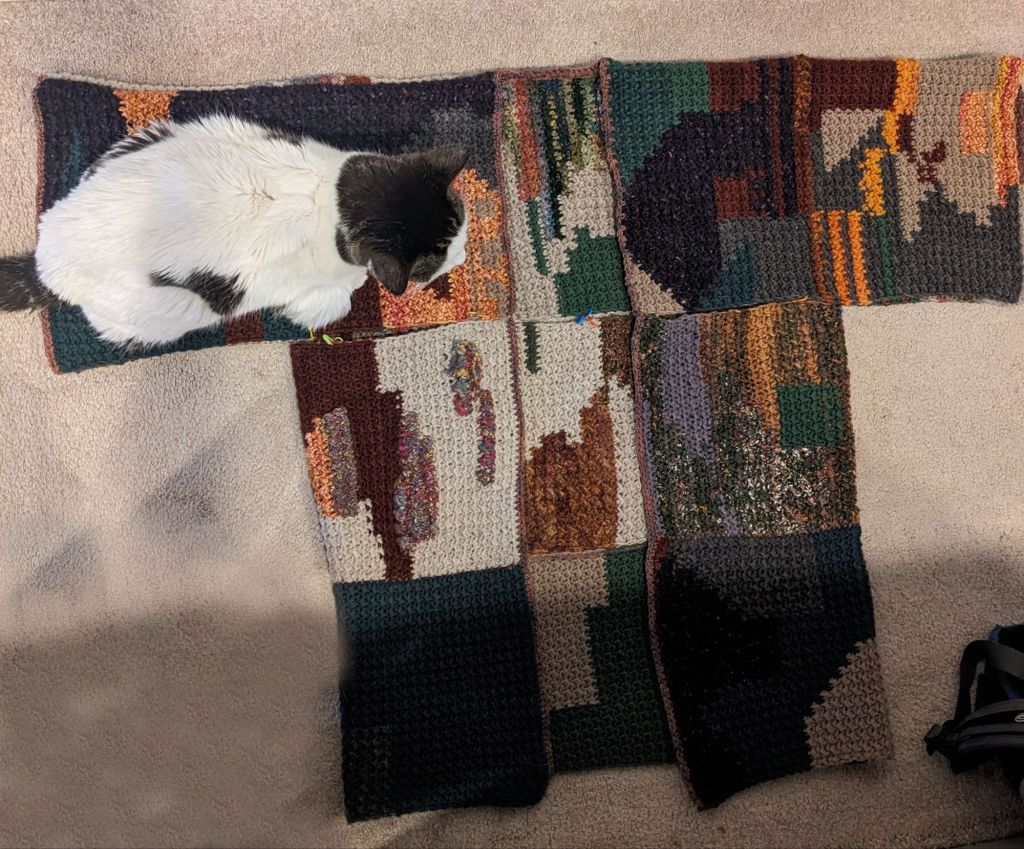
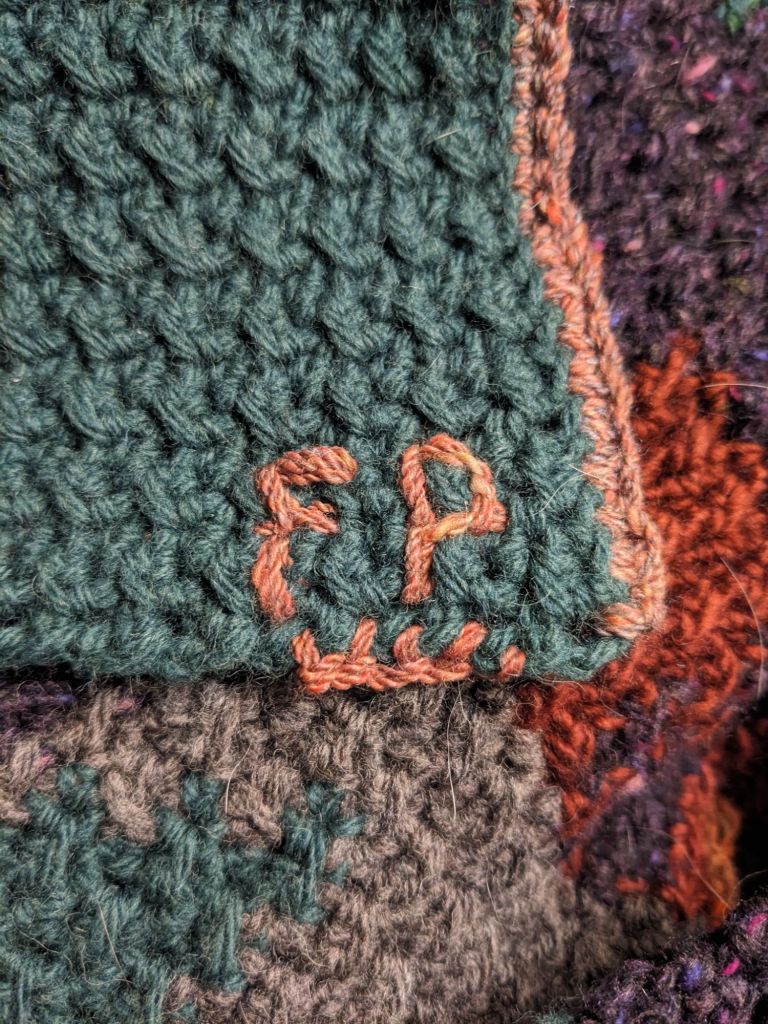
I’m very pleased with my final result, despite it not being my plan. It’s warm, but not hot because of the large, open sleeves. I even signed it, with 5 stitches for 2025.
Project completed April 2025
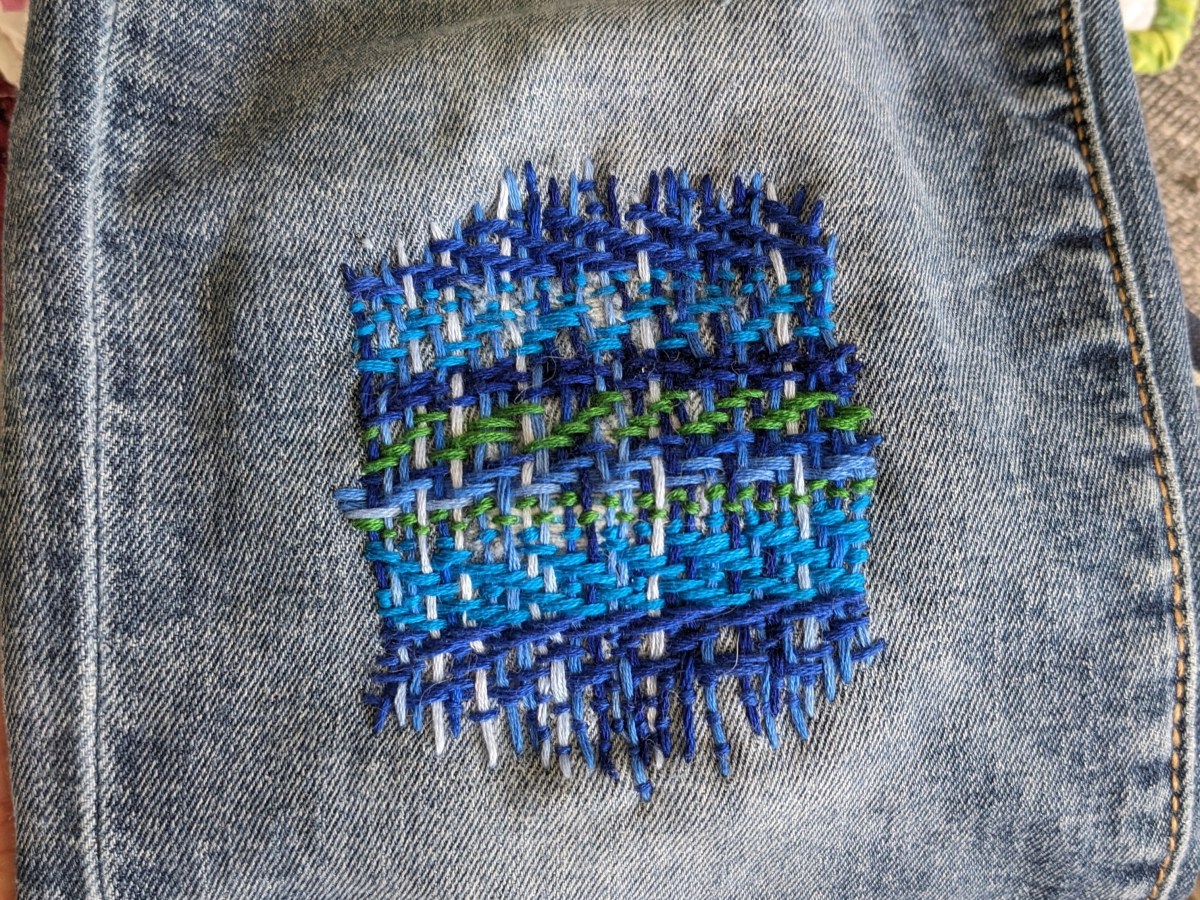
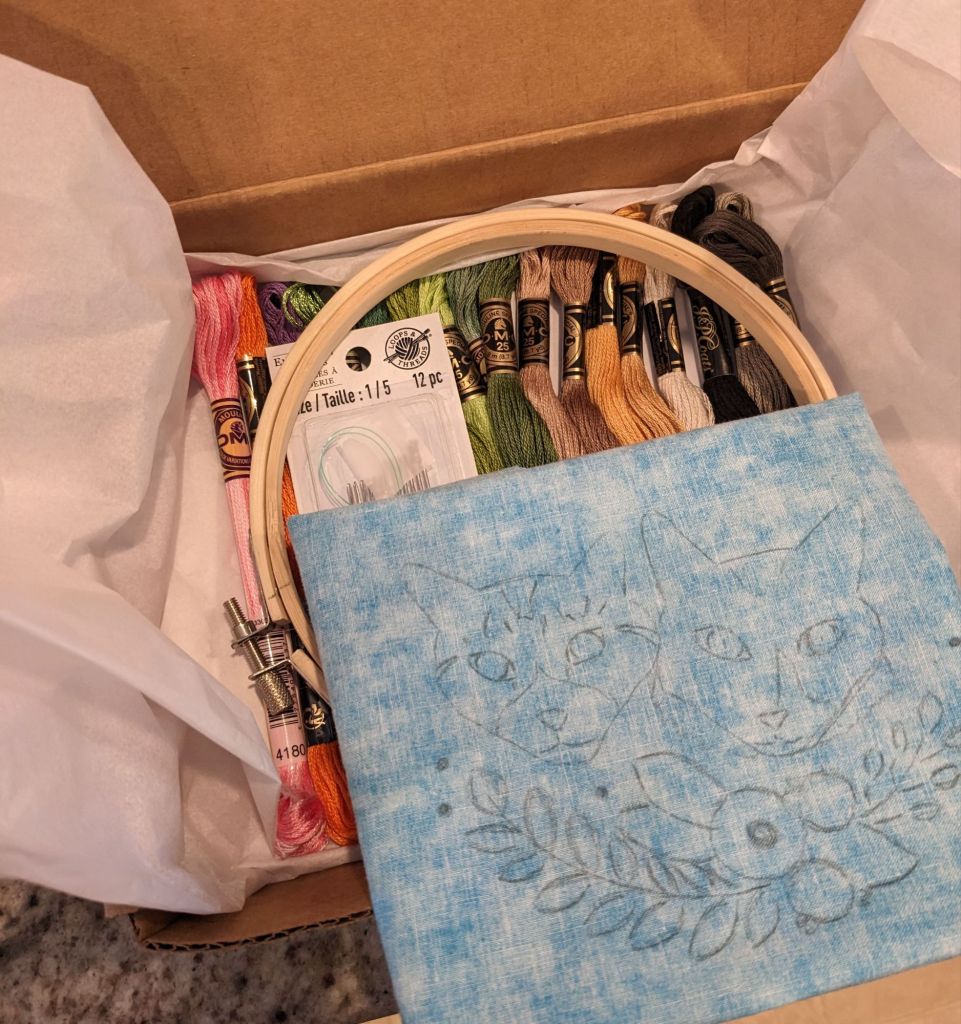
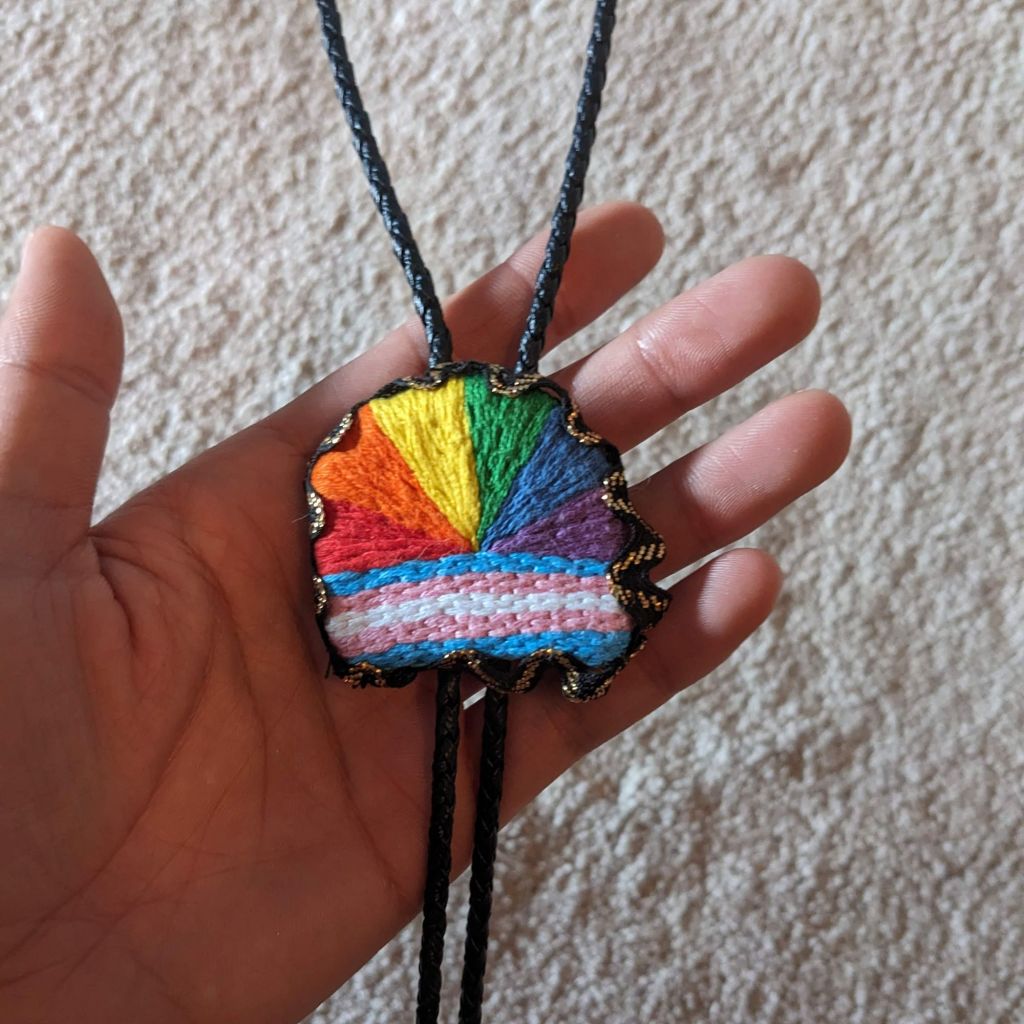
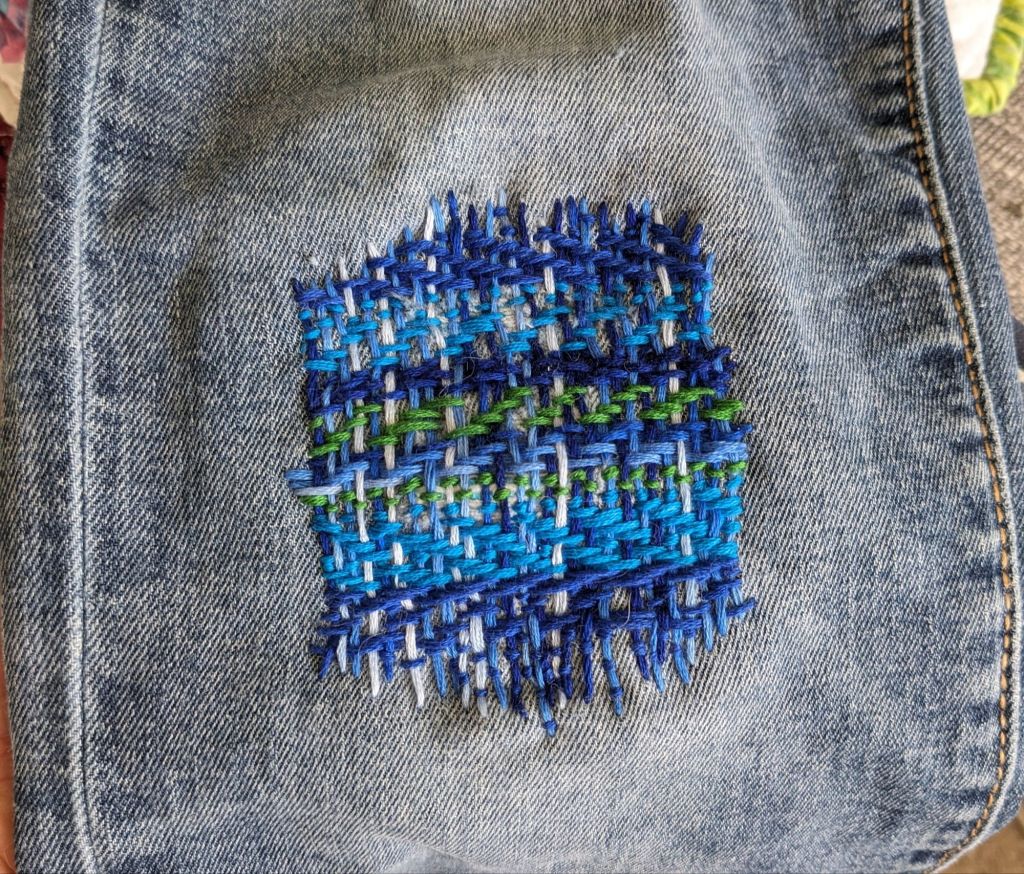
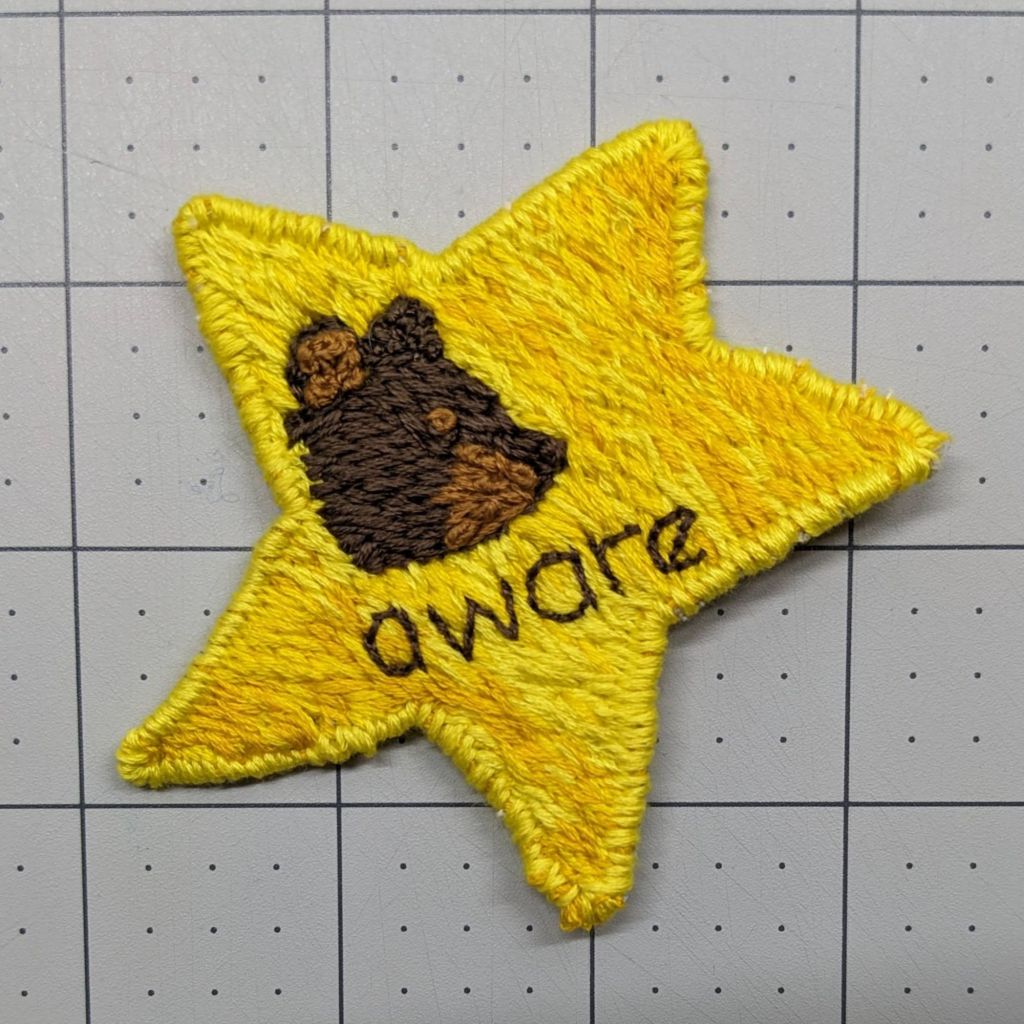
Random Project Dump 🙂
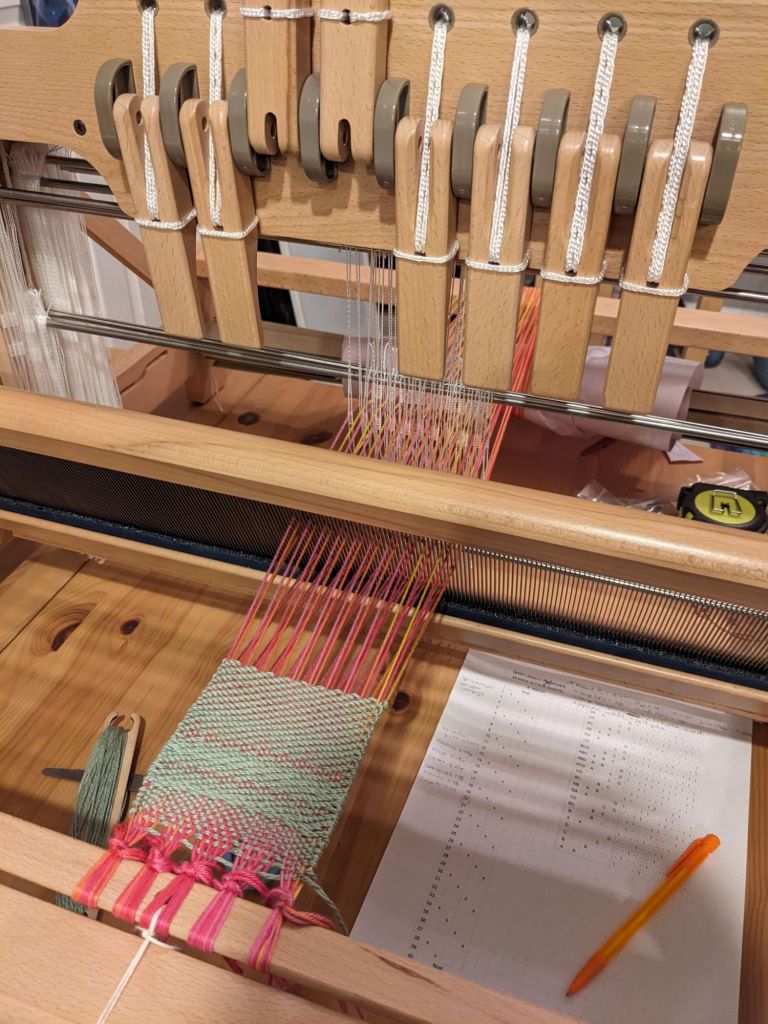
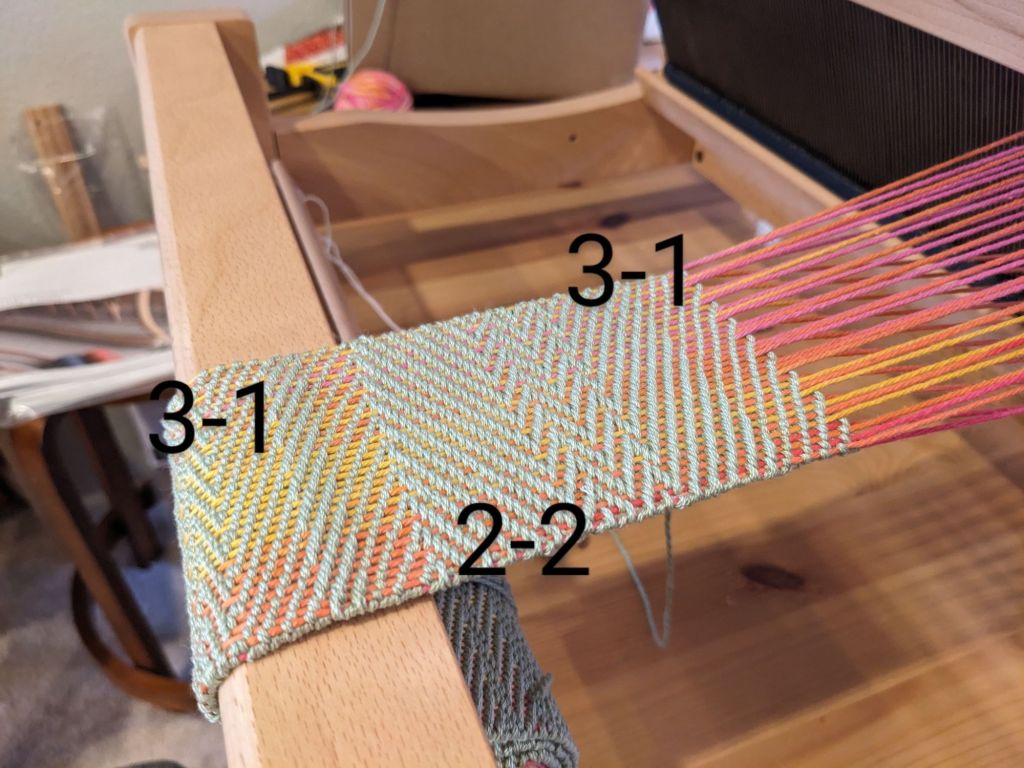
First Overshot Weaving
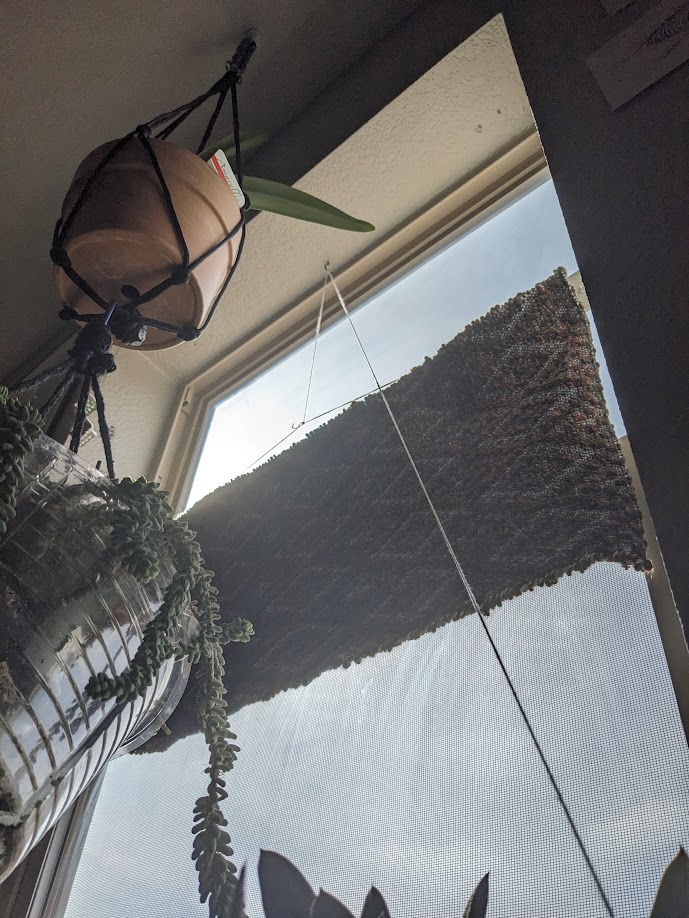
So my desk is under a window, and throughout the day, the sun blinds me. I have a bunch of plants in the window, so I don’t like lowering the entire window shade. I’ve been balancing an umbrella on my windowsill plants and computer monitor… But I needed something better.
I decided to weave a panel that could move up and down so I could block the sun as it moves across the window. I have been wanting to understand more about overshot weaving, which has two different wefts and makes really interesting blocky patterns. Since this was going to be a small piece, I figured it was a great time to learn an overshot pattern from Strickler’s book.
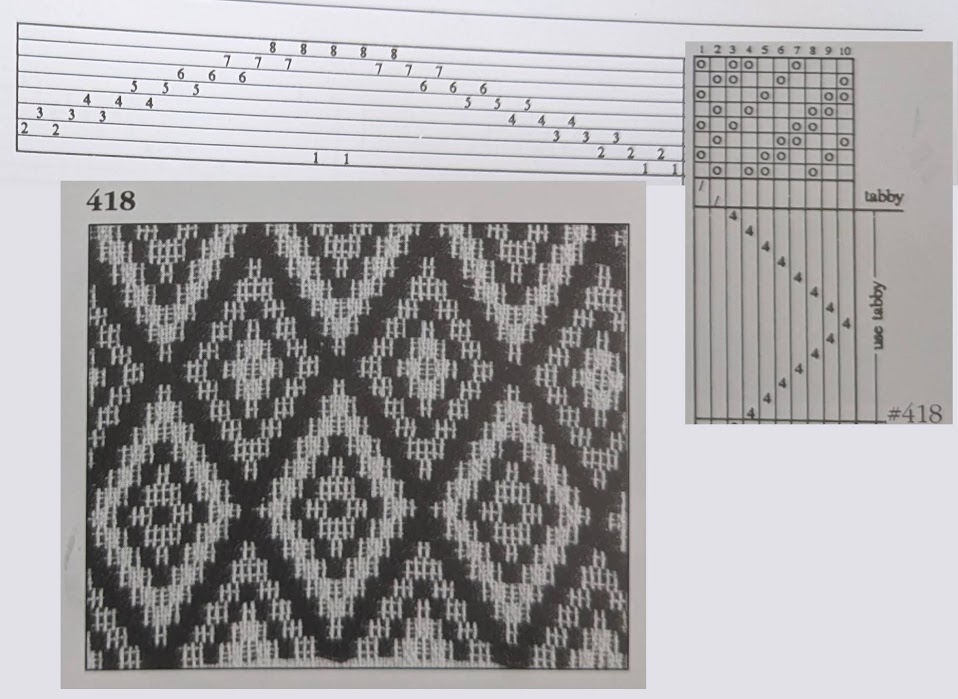
Overshot is a type of weave structure where you raise adjacent threads to create weft floats (long horizontal lines). And you do the same weft floats multiple times in a row, which creates “blocks” of color. Since you can’t do the same floats back to back, a plain “over under” (tabby) weft pick is put between them to secure the threads.
I chose #418 by Ardis Dobrovolny, and “eight-block point repeat twill”, because it’s clearly an overshot version of twill diamonds, which I already love and know about. I had a theoretical understanding of overshot, but didn’t quite understand how the threading diagrams created the pattern I could see – so using a familiar diamond twill helped me compare and contrast overshot with what I already knew.
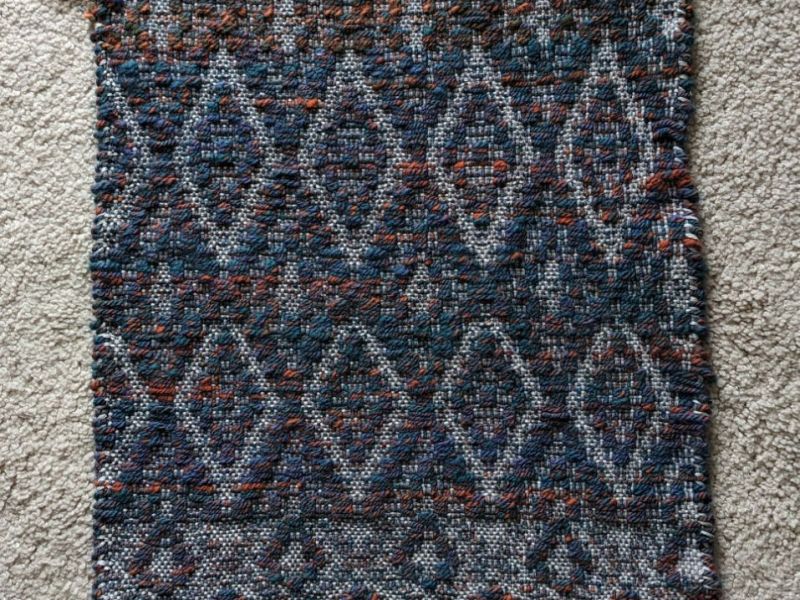
Despite having the pattern, I did some improvising on the order of the sheds and the number of picks on the same shed. I even did a few rows of the inverse sheds, where the threads meant to be raised are lowered.
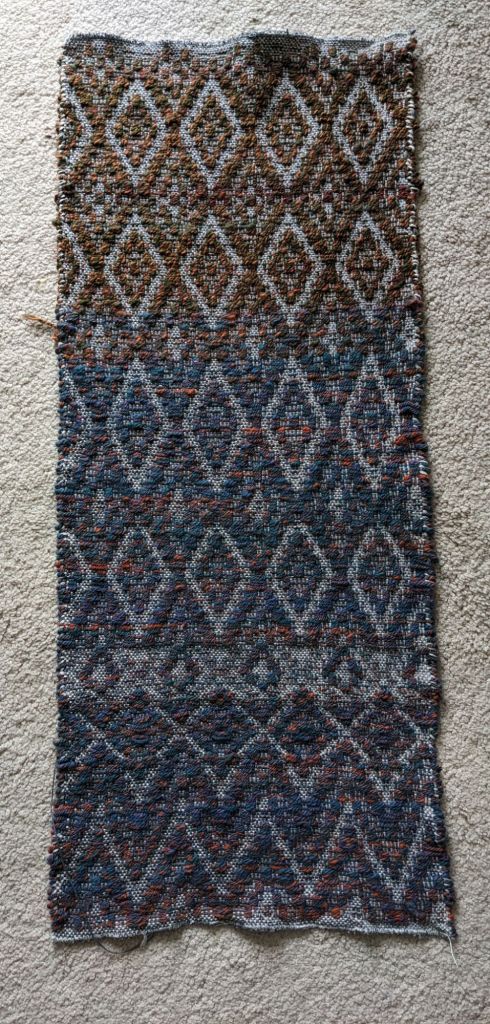
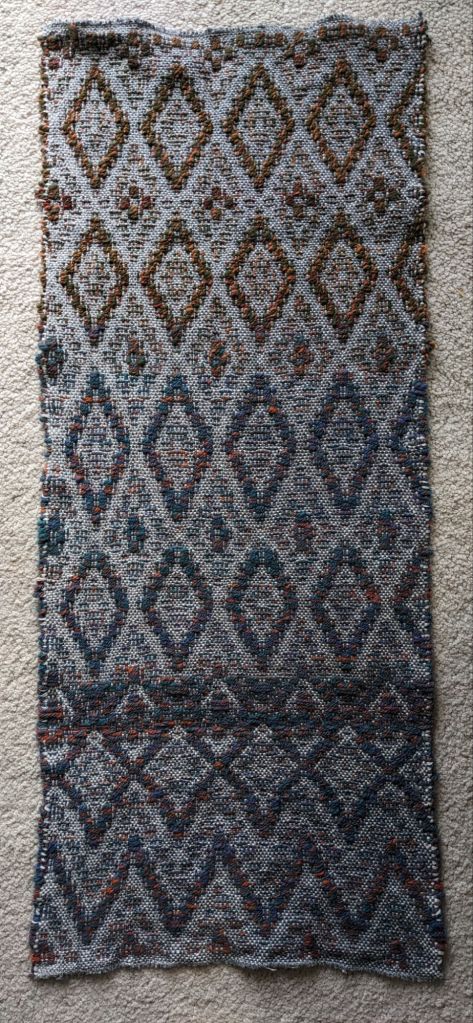
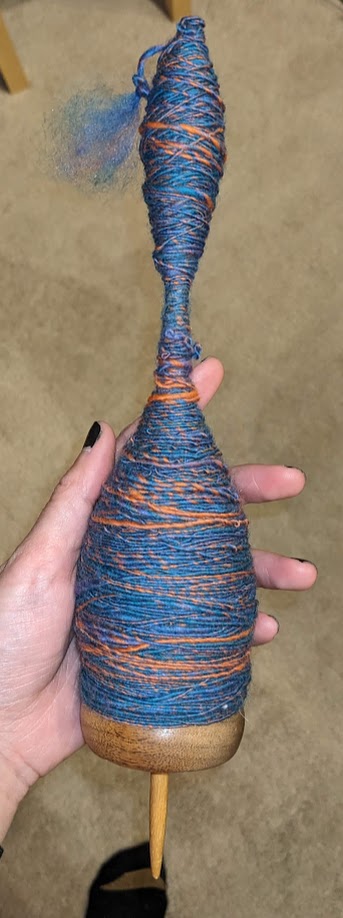
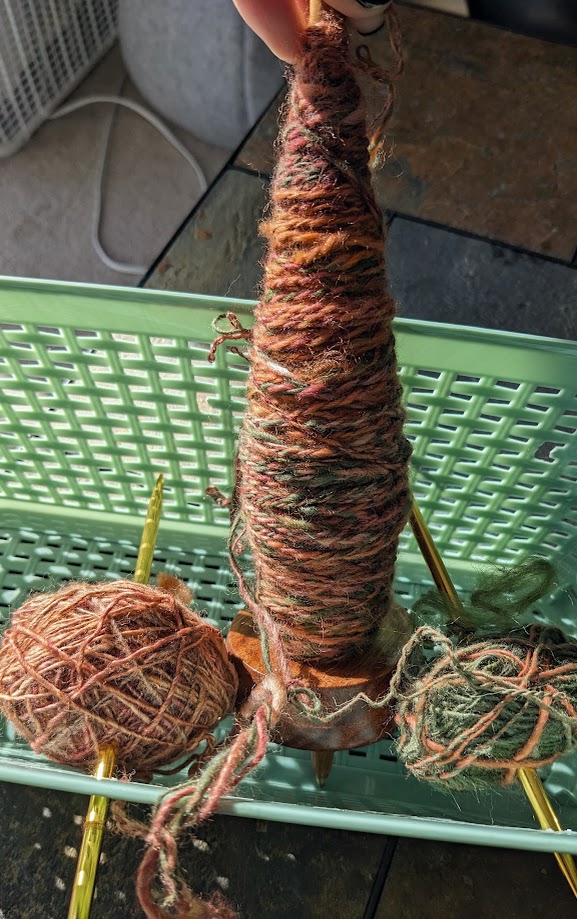
This was also my first time weaving with my own handspun!! I originally tried a different handspun but it didn’t have enough color contrast with the background warp and weft, so I pivoted to this fun blue and orange wool yarn 🙂 I spun this on my bottom whorl drop spindle. Then I ran out of that yarn and added some wool “Autumn”, which I spun on my supported spindle. I used commercial cotton yarn for the warp and tabby weft.
Then I had to do some yardstick-and-hot-glue engineering, and installed it in my window 🙂
Project completed March 2025.
Rest Quilt
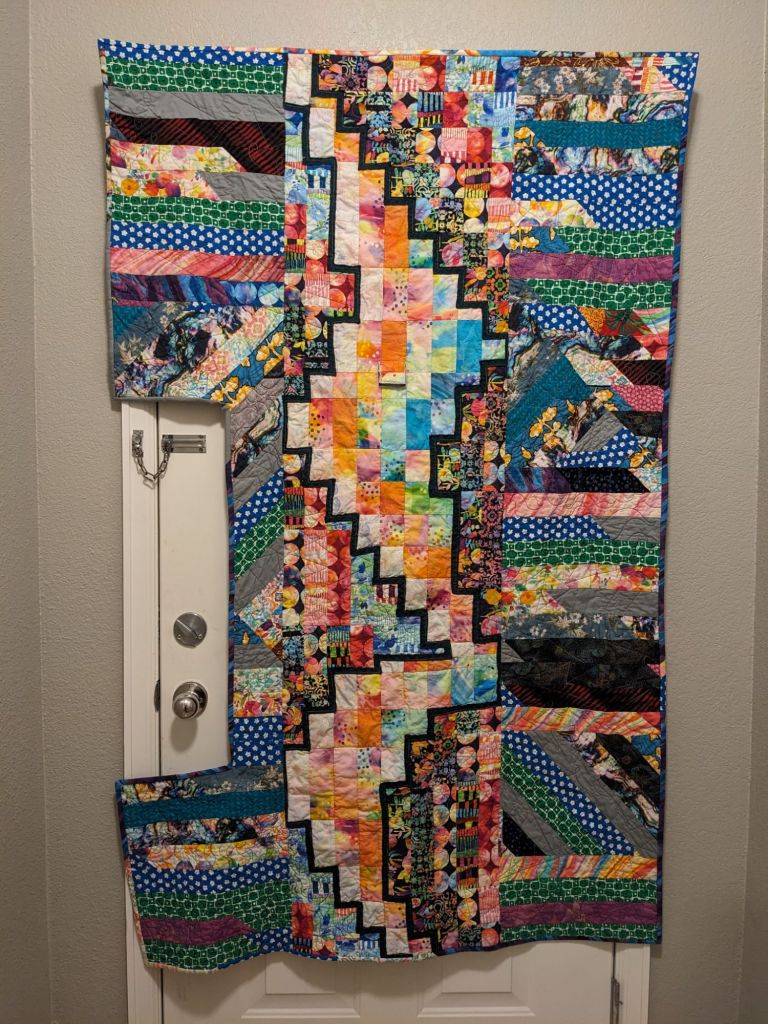
My front door is not completely airtight. I tried getting some foam strips to put inside the doorframe, but then I couldn’t close the door. I thought about, and started, a crochet tube that I could hang on the hinges to block the most air from getting in…
But in the end, I decided a quilt that could cover most of the frame/door gap would be the most effective, most fun, and most aesthetically pleasing. I had a jelly roll from Moda Fabrics and decided to do a bargello-ish quilt. I wanted to depict a quarter rest, since I am a musician and I want my home to be a place of rest. A place between all the noise and chaos and effort-giving to rest, restore, relax.
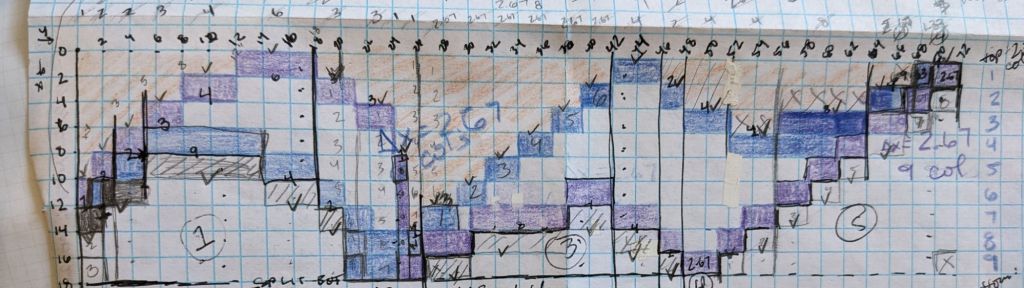
I sketched out the shape on graph paper and determined the widths of the strip sets. I used two “leading edges”, one for the left side of the rest (white) and one for the left side of the background that bounds the rest (dark flowers). I used lighter and less busy prints for inside the rest, and the darker and busy prints for the background.
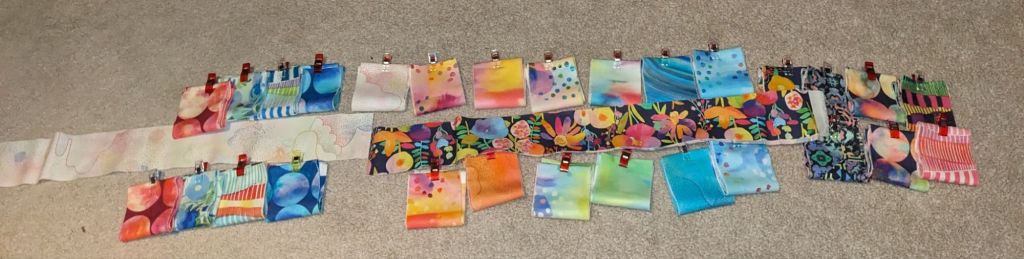
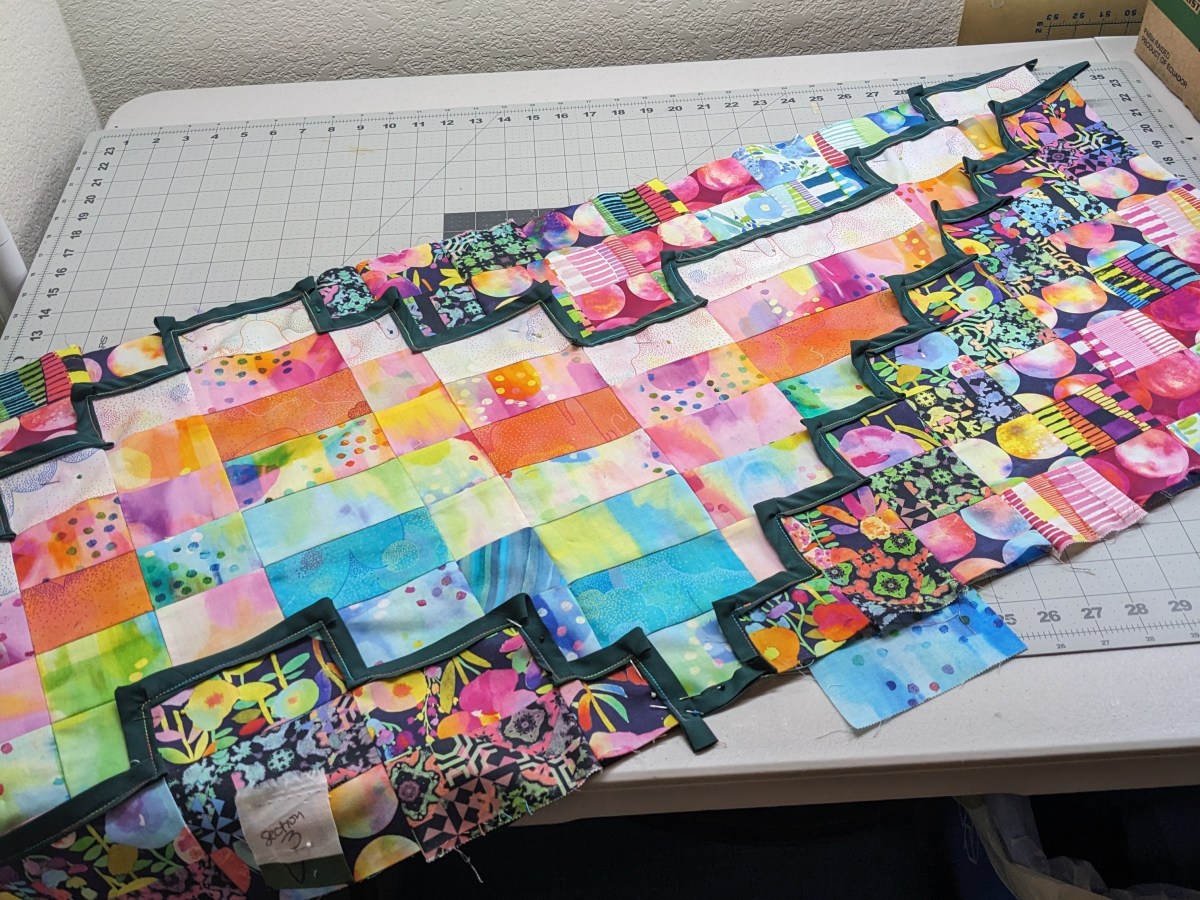
As with a normal bargello, I assembled the strip sets and then cut them to the corresponding widths. The jelly roll didn’t have duplicates of all the fabrics, so I alternated the ones that didn’t have exact matches. Then I pressed the seams to alternate, and sewed the strip sets back together.
After some consideration, especially using a black and white filter on my camera, I decided the edges of the rest needed a tiny border to really make it stand out. I attached a strip of dark green as if it was bias tape, sealing the raw edges of the strip sets inside. Then I appliqued the background onto the right side of the rest, ripped off the unneeded background, and appliqued the rest into the extra background.
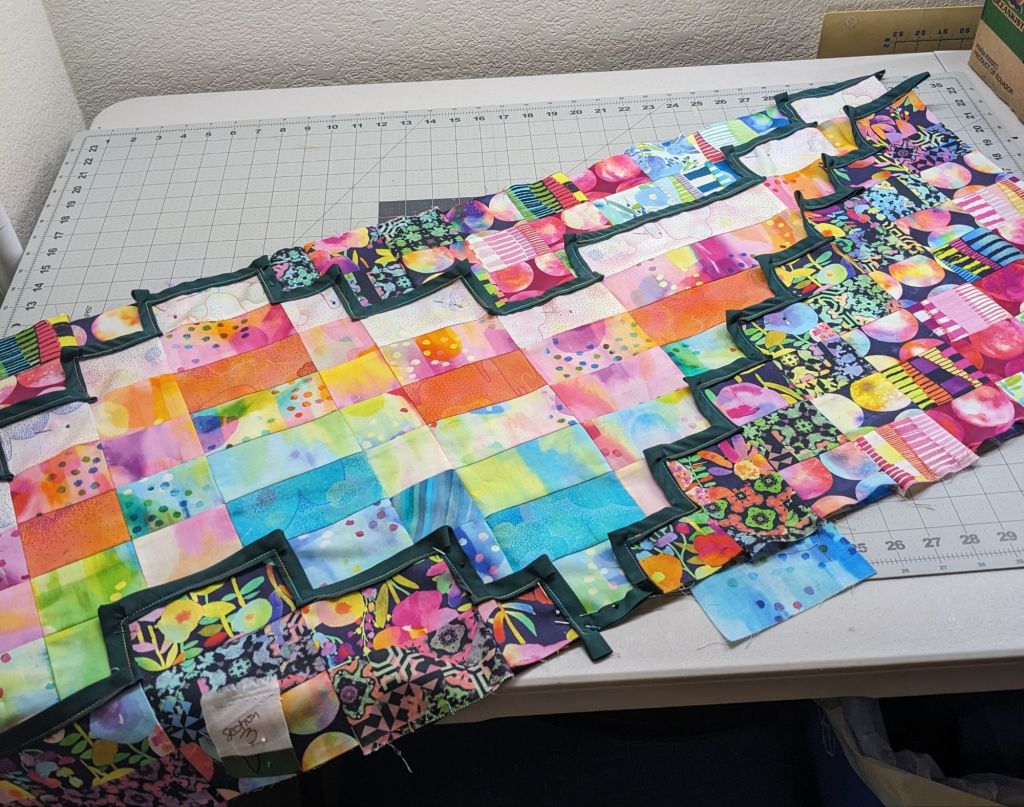
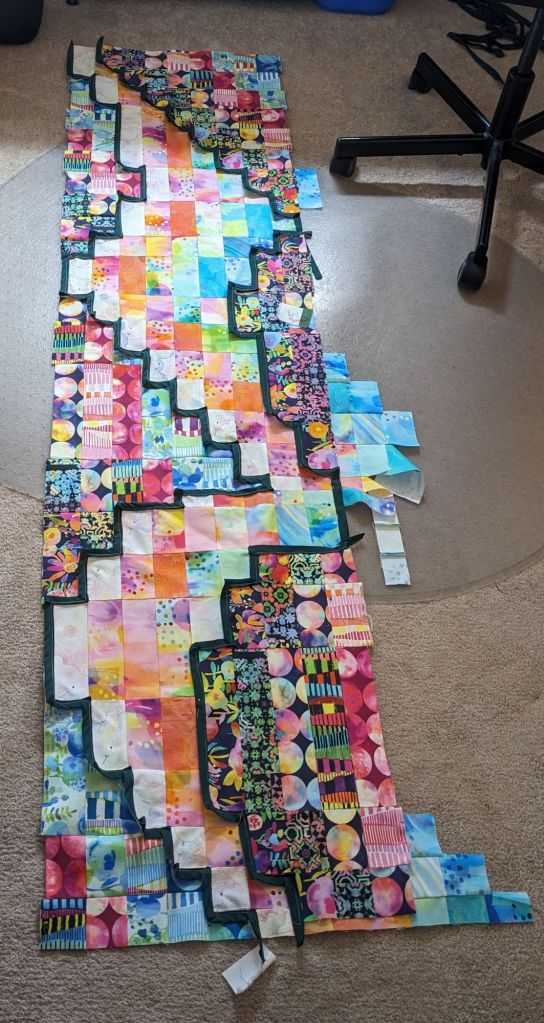
So that was the rest part, the middle part, done. I still needed two sides to make the quilt large enough. I cut a bunch of 2.5″ strips out of scraps and did a “jelly roll race” type of construction to make a big panel of stripes. Seeing as this area was meant to be busy and chaotic, I cut the panel and re-sewed it together on an angle a couple times. Then I split the panel in two for the two sides, and sewed them onto the middle rest panel.
Then it was time to quilt! I did my most confident free motion motifs: loops, “toothpaste”, and abstract geometric, and switched thread throughout. I liked just doing some freeform, unstructured quilting and filling the space with whatever I wanted. For the rest, I did free motion stitch in the ditch because I needed to change angles often and didn’t want to deal with moving the whole quilt 90 degrees every few inches.
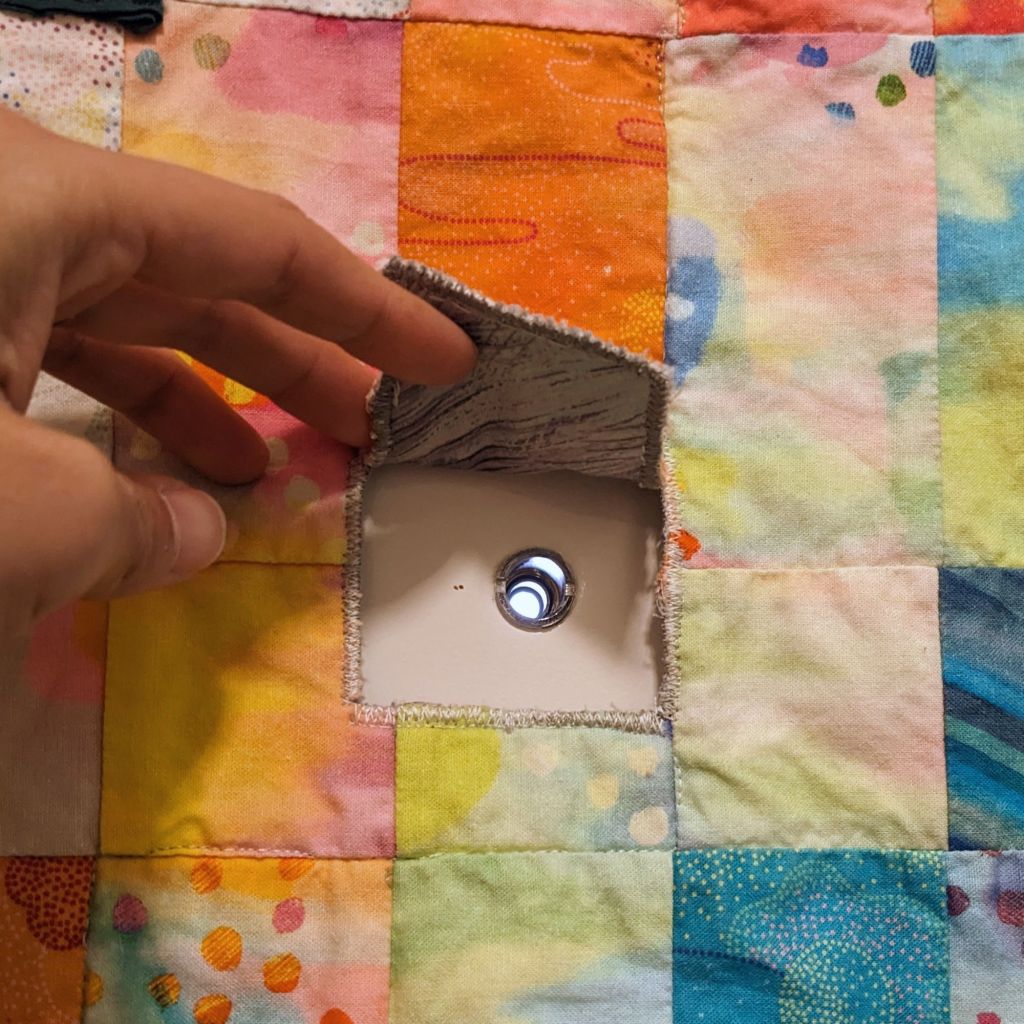
I had to do two nerve wracking cutouts – one for the door handle and chain, and another for the peephole. I measured multiple times and then bravely cut once. 🙂
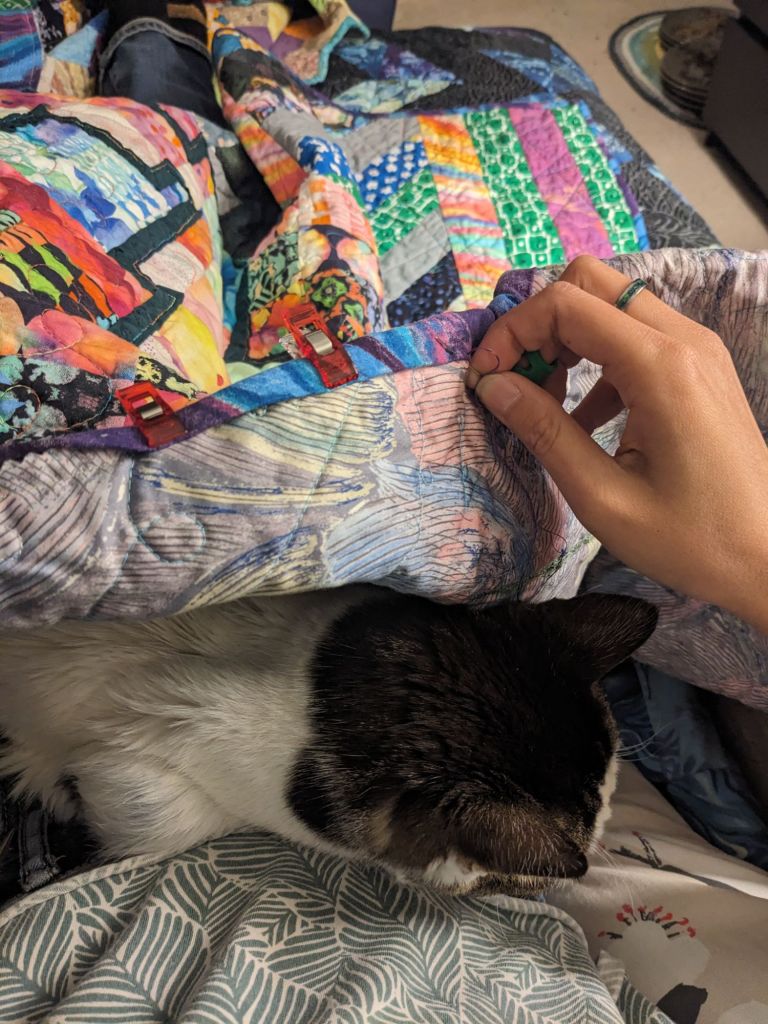
To affix the quilt to the door, I made a little frame out of wooden yardsticks (my quilt hanging devices of choice) and screwed it into the door. I used fabric loops to hang the quilt on the frame. And thus, it was done, ready for the tail end of this winter and many winters to come.
Project completed March 2025.
Something went wrong. Please refresh the page and/or try again.
Get new blog posts emailed to you:
Blog Archive:
- October 2026
- June 2026
- January 2026
- November 2025
- August 2025
- July 2025
- June 2025
- April 2025
- March 2025
- February 2025
- January 2025
- October 2024
- September 2024
- December 2023
- October 2023
- September 2023
- June 2023
- September 2022
- February 2022
- January 2022
- October 2021
- May 2021
- March 2021
- February 2021
- January 2021
- December 2020
- October 2020
- August 2020
- February 2020
- January 2020
- December 2019
- November 2019
- October 2019
- September 2019
- August 2019

